Bucket list item: appear on The Quilt Show with Alex Anderson and Ricky Tims: CHECK! Here’s the link to watch if you are a member. If you couldn’t tell, I’m giddy!
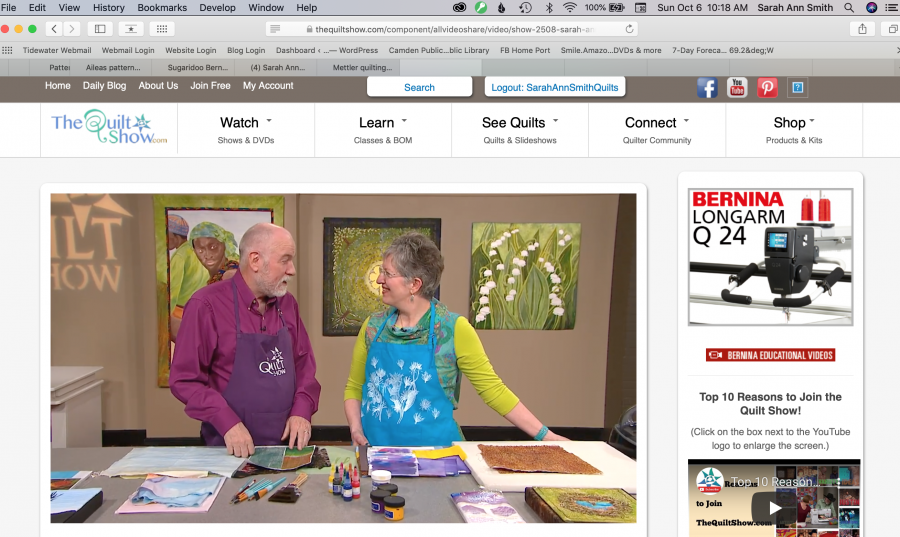
Just took this screen shot as I’m watching my first of two “doing” segments on The Quilt Show….I’m over the moon!
To watch the show, you usually need to be a member of The Quilt Show community, which is an online “TV” show and so much more. Next Sunday, for one week from October 13-20, 2019, or thereabouts, the episode will be FREE to anyone with the code. I’ll post here on my blog, Facebook and Instagram. I might even post my first tweet (Shudder!)…. so stay tuned.
For those who aren’t TQS members, you can see the preview now, at this link.
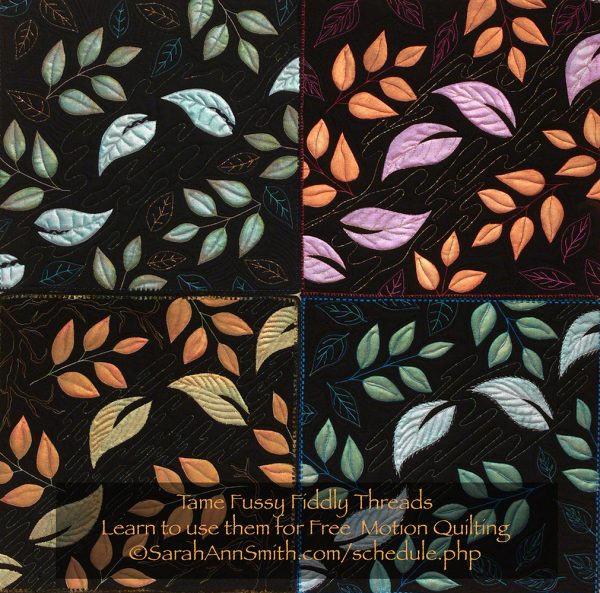
I am so grateful for this opportunity, so excited, and hope some of you can join me in my classes at International Quilt Festival 2019 in Houston (there are still a few spaces in my Friday class, Tame Fussy Fiddly Threads which includes painting and learning to handle those glitzy threads that really aren’t hard to use once you learn how from me, and my Saturday class on Hawaiian Style appliqué…did you know I love it?)
WOOT! Check an item off the Bucket List!!! I will be on The Quilt Show (TQS) with Ricky Tims and Alex Anderson as of October 6th! The promo video went live last night, and you can see it right here! Members of TQS will be able to see the show starting the 6th, but for non-members, there is ONE week where you will be able to view it for FREE from October 13-20, 2019. Of course I’ll post this again, but here is the link to use–remember, the link won’t work to view the show until the 13th. I share my quilts, my crazy “previous life,” and using paints and other tricks on my art quilts. And to those of you who are new to my website, please use the sign ups in the right sidebar to subscribe to the blog and/or to my newsletter. Thanks and enjoy!
To say that I am delighted is an understatement! Here are some photos from taping in April. My show is #2508, so click this link to take you directly to that show. Remember you do have to be a member of The Quilt Show to view it unless you are watching during the one week it is free to all.
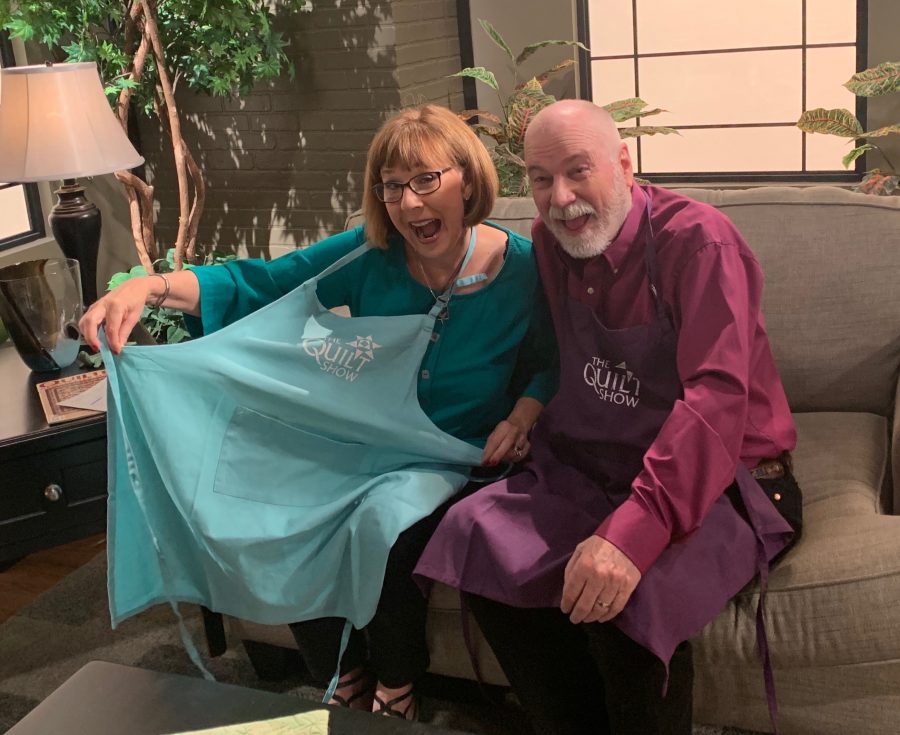
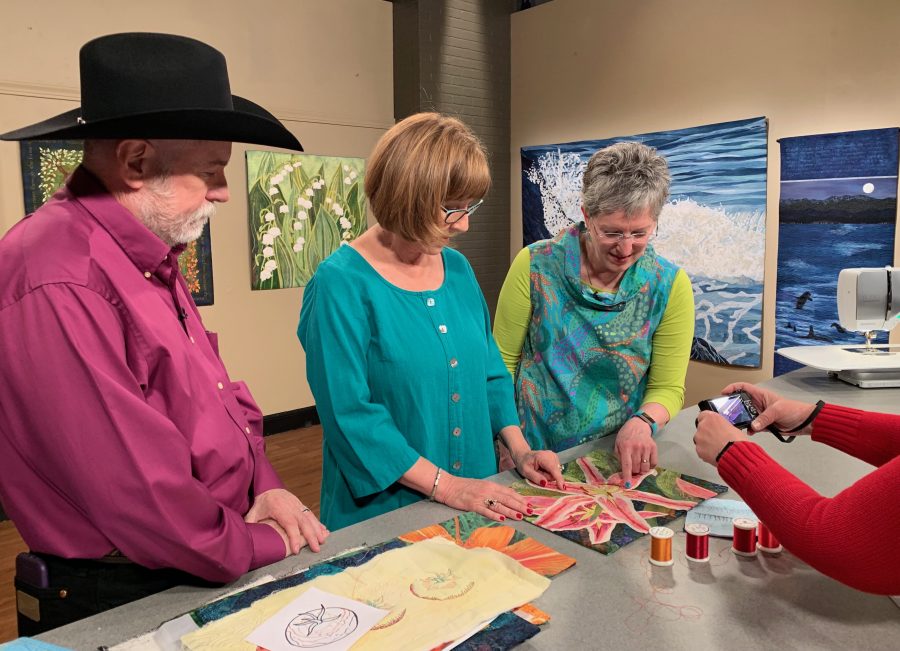
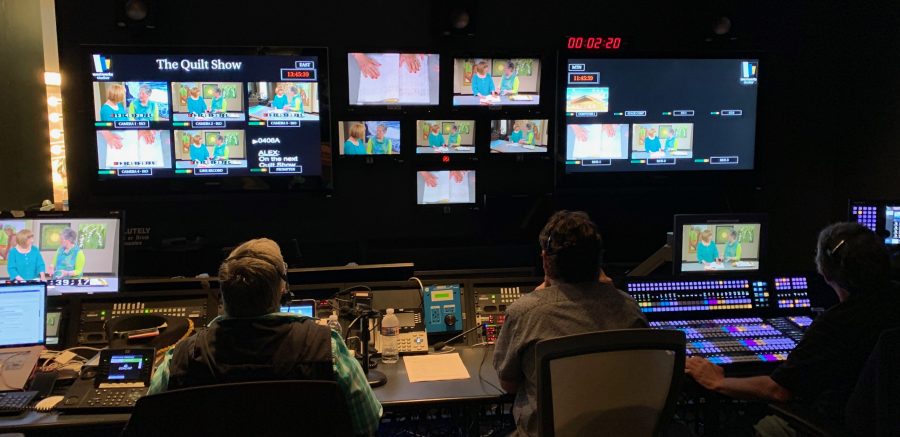
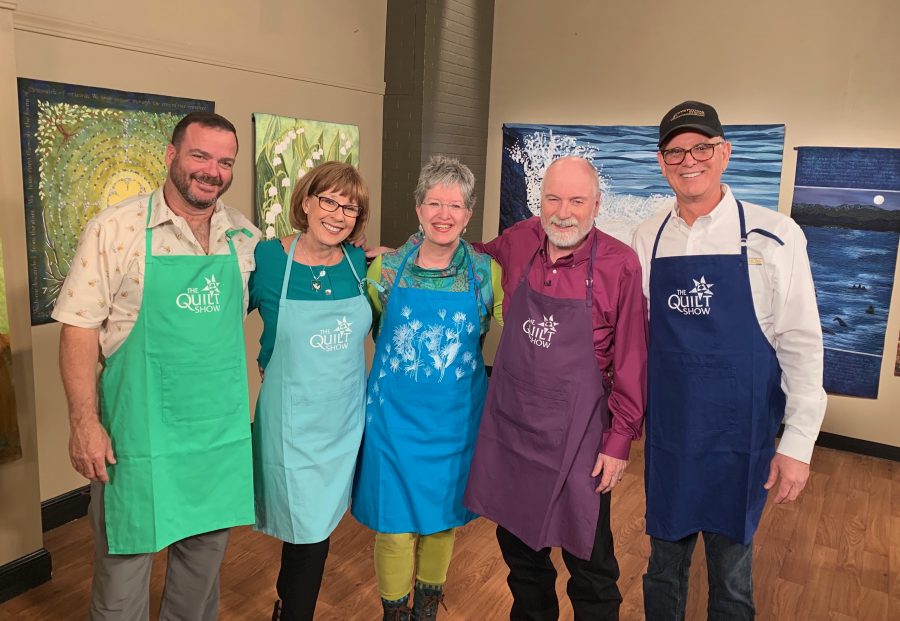
I surprised Ricky and Alex (and Justin and John) with special TQS Logo aprons for use on the set, made with thermofax screens I did up special for them. And yes, I gave them the screens, too! Thanks to Producers Shelly Heesacker and Lilo Bowman for helping me pull off this surprise. Thanks to Adele Merrell for this and the other shots …. they are perfectamundo!On the set with Alex Anderson and Ricky Tims (and Mary Kay’s hands LOL) going over my next segment — this is where I explain how I thread color my work. Seeing the production room was so cool…it was so professional…look at all those displays, about six people working at desks, with headsets to communicate with the crew on the set about positioning lights, cameras and whatnot. And here I am with the four principals, with aprons in their favorite colors. Left to right Justin Schults, Alex Anderson, me, Ricky Tims, and John Anderson.
The Quilt Show likes to say that Alex Anderson and Ricky Tims bring you the friendliest interactive online community for quilters worldwide. Join today to learn, share create, connect and watch Alex and Ricky in brand new episodes of The Quilt Show! As you saw in the promo video, I joined on Day One when TQS launched many years ago. I am so glad to now be a part of the TQS family–THANK YOU!
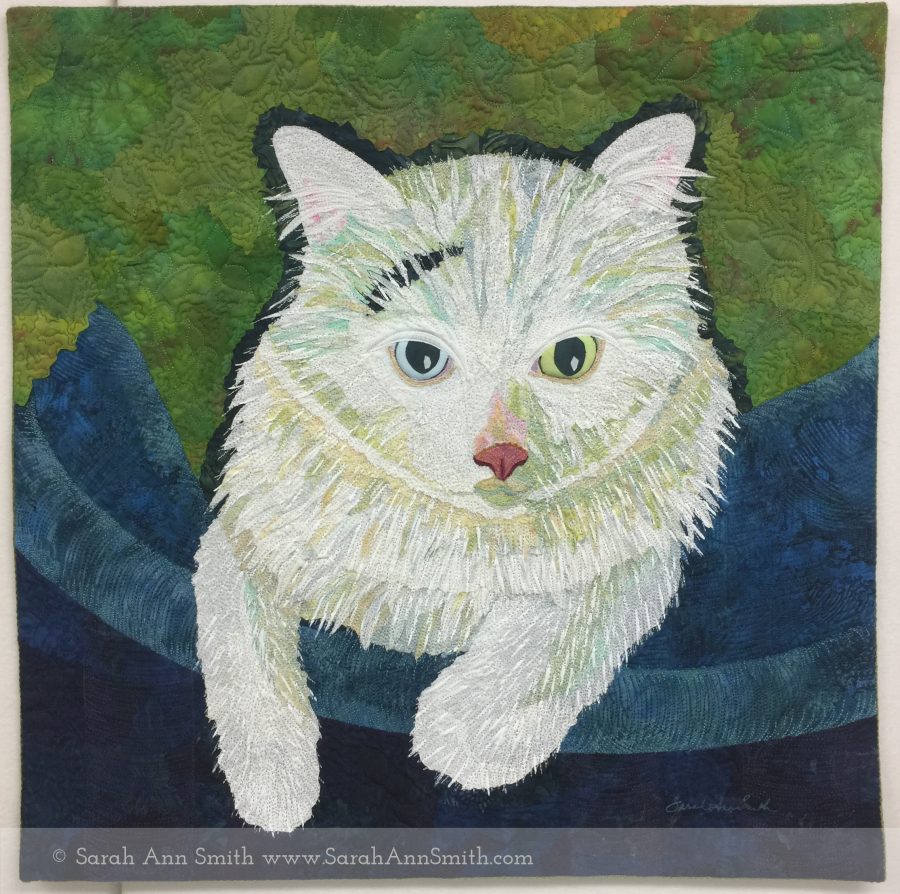
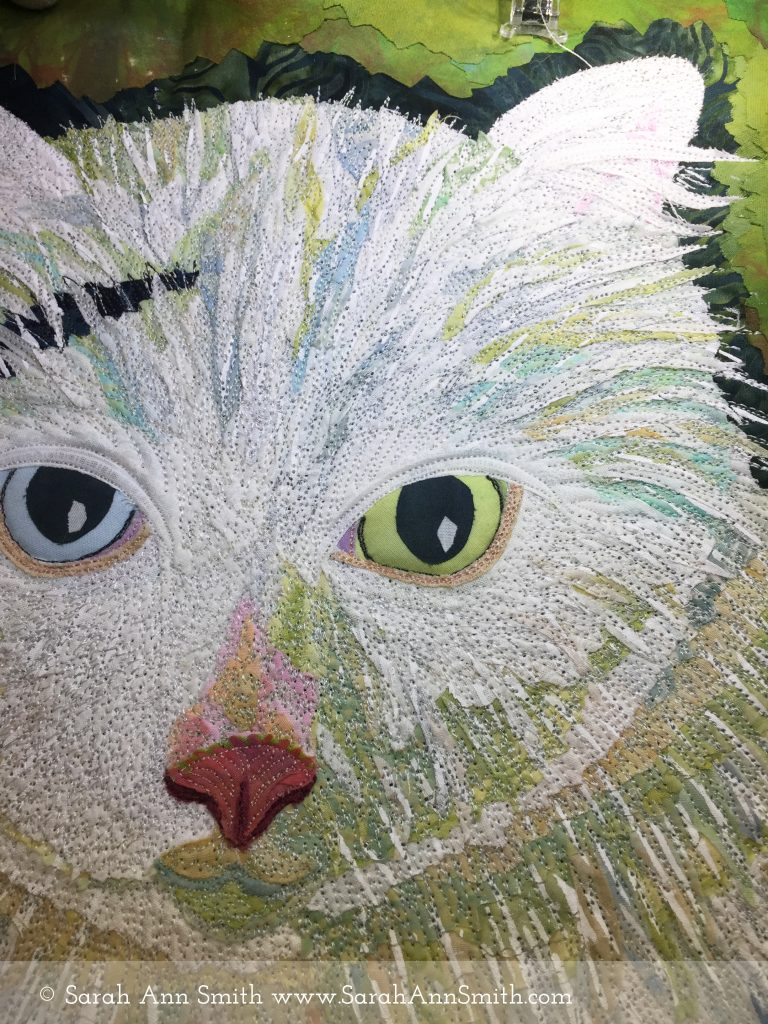
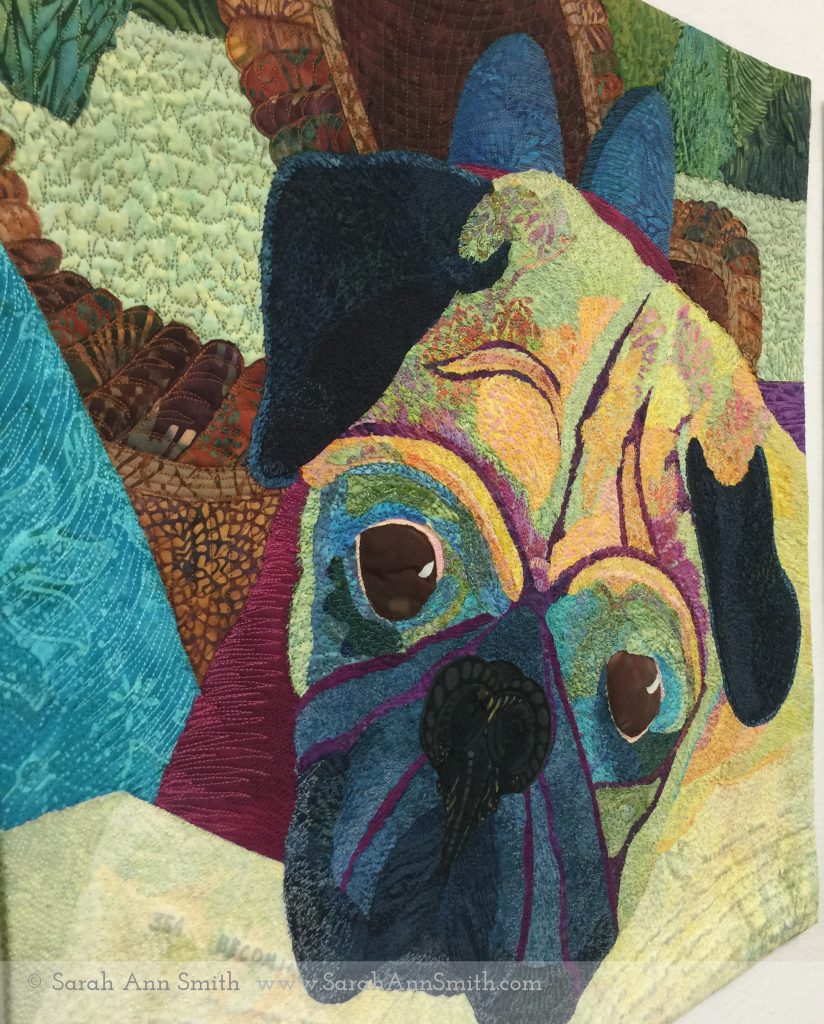
Boo’s portrait is the third part of this trio of quilts. I had considered doing a self portrait, Sarah and her muses, with the selfie for my local Coastal Quilters challenge due next May. But then hubby, who has never ever asked me to make an art quilt, said when he saw the ones of Yoda and Widgeon, “you should make one of Boo, too.” Boo, you see, is his Very Special Cat. So I did that instead. Much nicer than a selfie! And it turns out the portrait challenge doesn’t have to be a selfie, and can be a critter–way better!
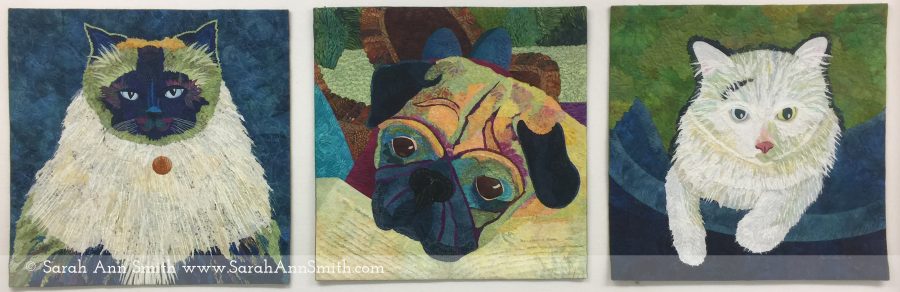
Just to remind you, here are the three portraits in this series on La Familia Smith (furry edition). Each is a 20″ square and they are debuting at the Janome Institute this week! I made them in thanks for over 15 years as part of their Janome Artisan program. I love their machines and would say all the good things I do even if I weren’t affiliated and paid full MSRP!
I prepared blurbs for Janome to use for each of the quilts, in the “voice” of each of the critters. Here is Boo’s:
Boo, J. D.
“Emperor Yoda! Hah! What does he know? And why do they call me the Juvenile Delinquent? Can’t they see that I am going to be KING of this realm? I am young, I am strong, I speak, I jump, I am growing into being the largest and strongest in the realm, not like that tub of lard who is rightfully dubbed His Immensitude. Stay away from my kibble, tubbo. The humans love my chirpy voice and sleek, silky fur! Now I will deign to let my human pet me and feed me my favorite wet food and pet me more. All others, including the ostensible Chief Minion, be forwarned: you are subject to attack!” (Boo is a 10-month old Turkish Van. I am the ostensible Chief Minion.)
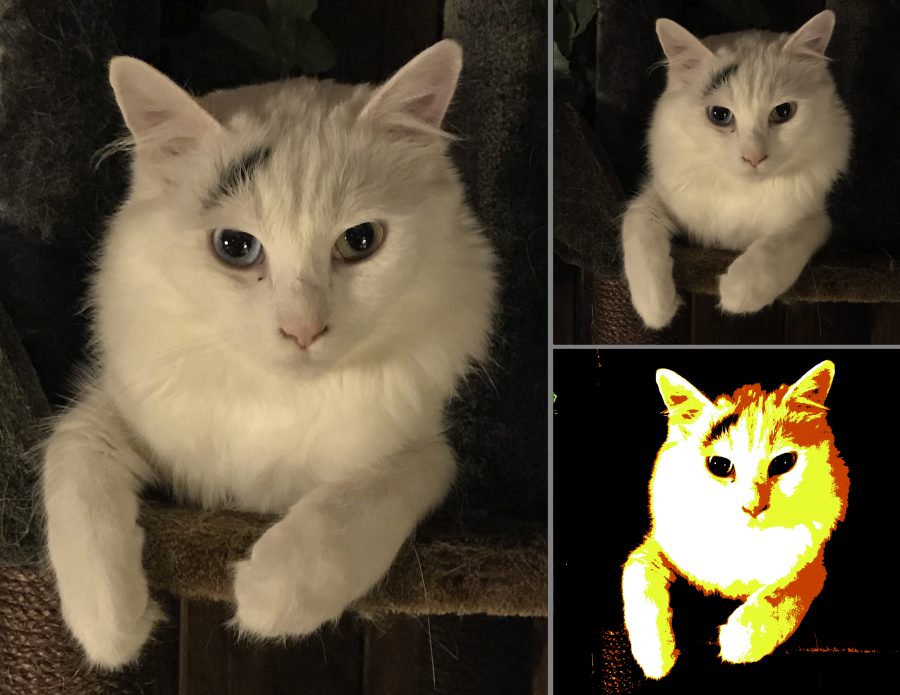
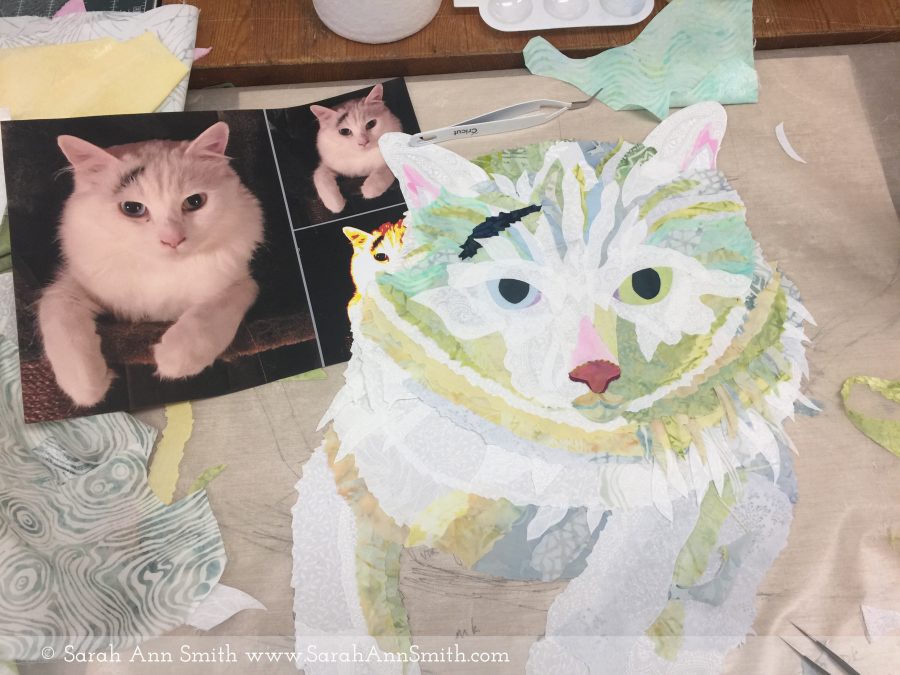
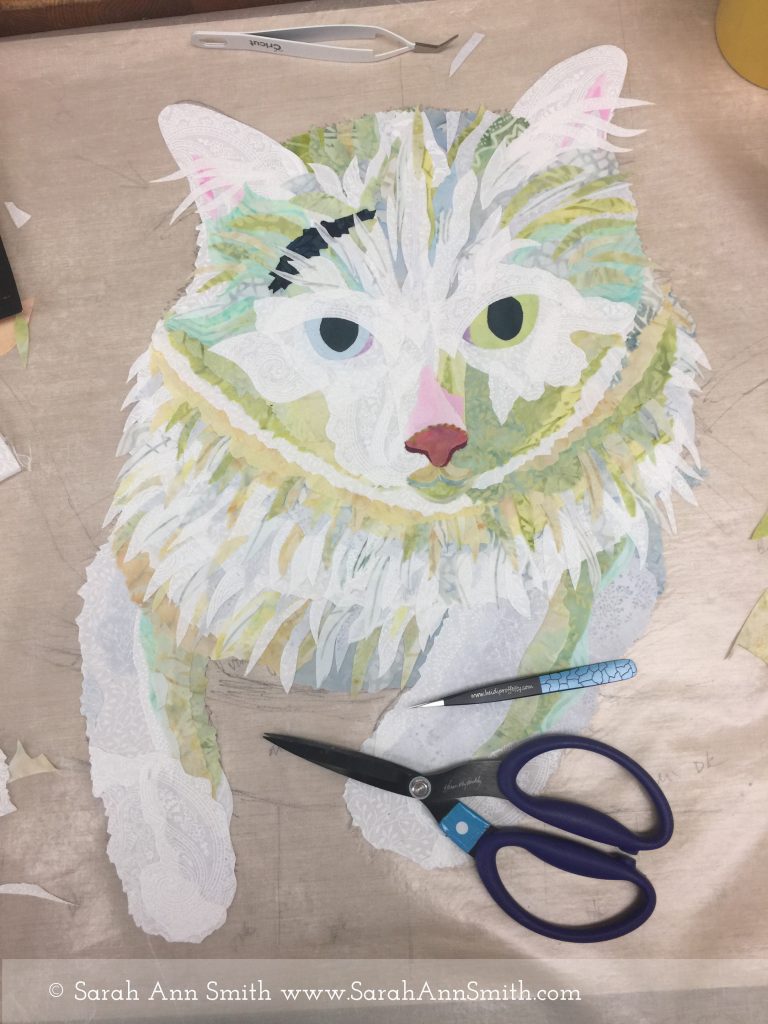
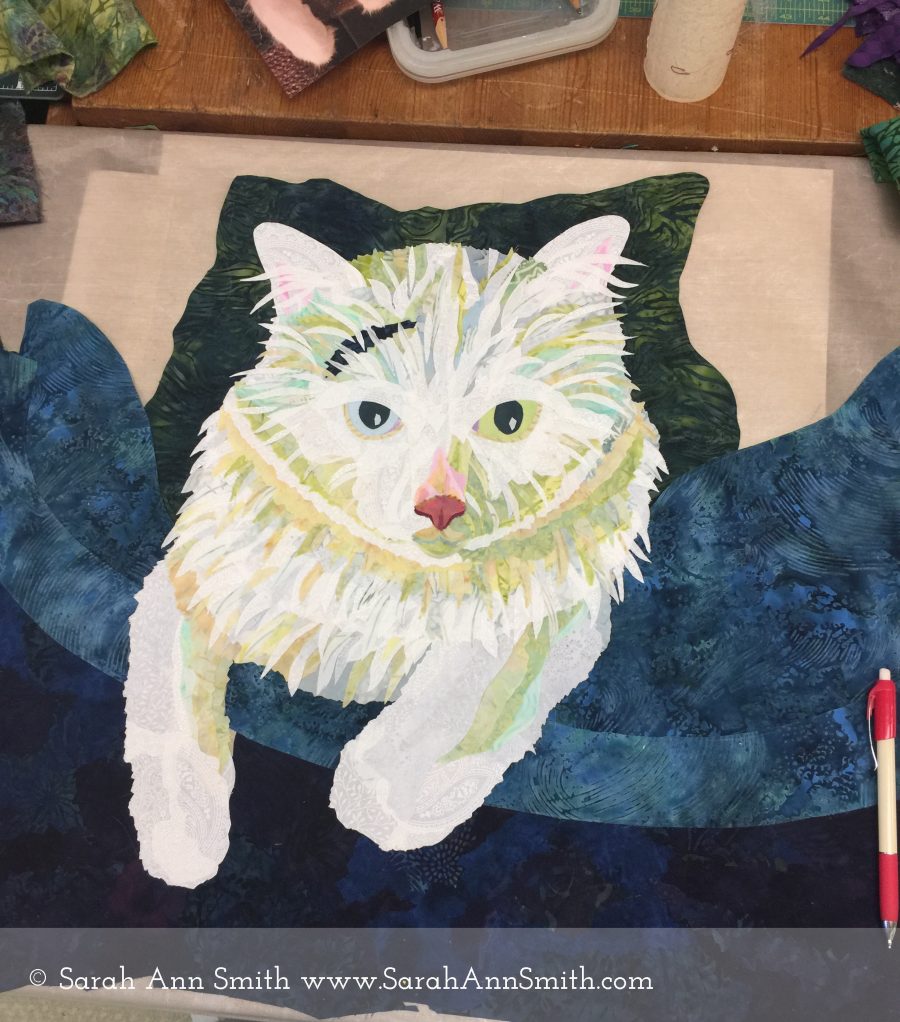
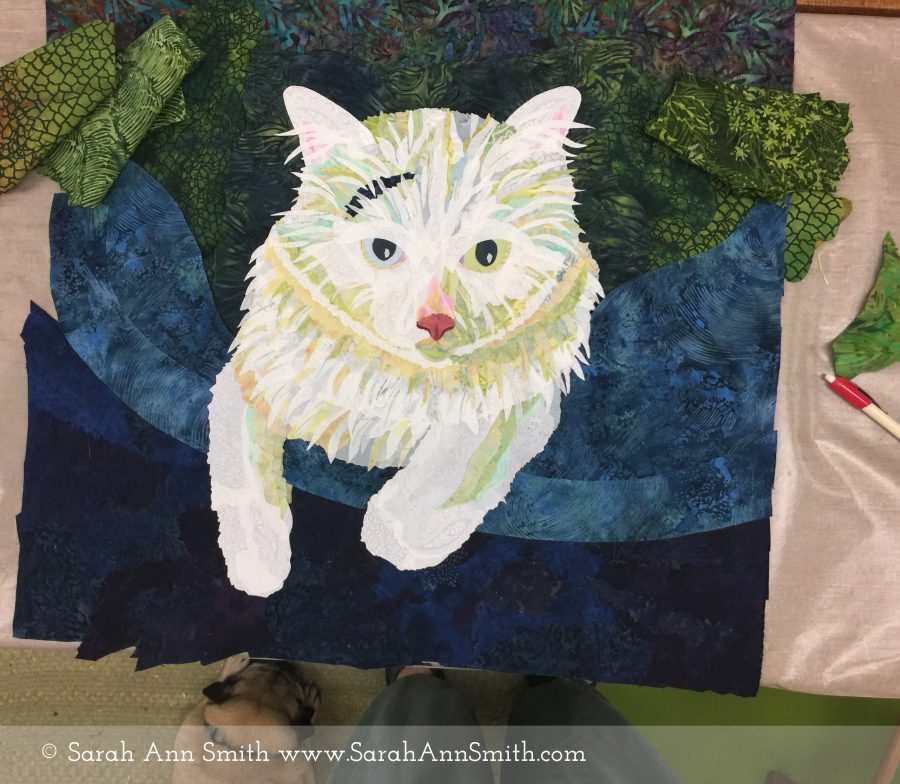
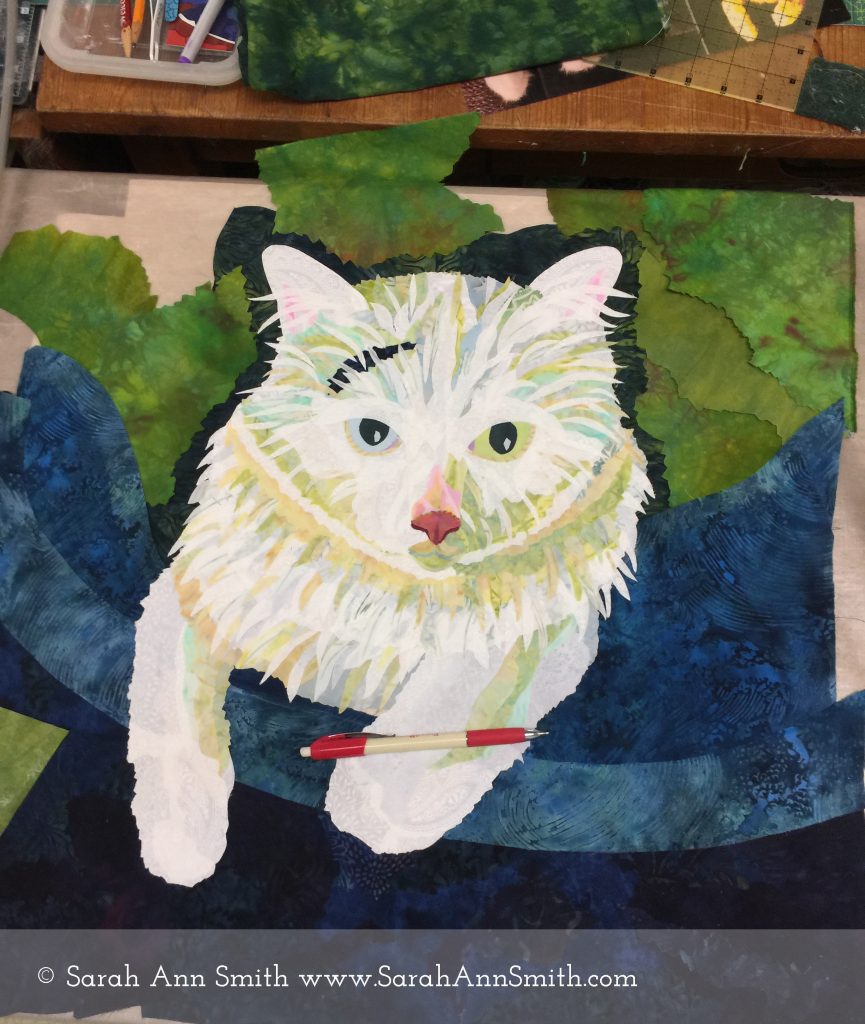
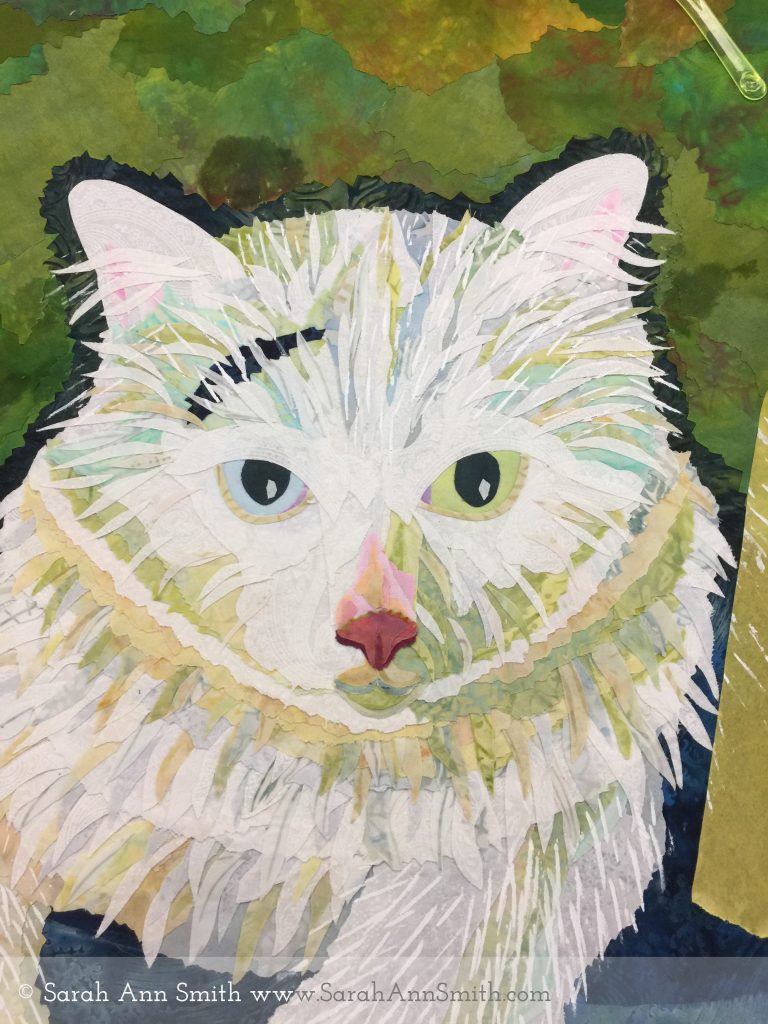
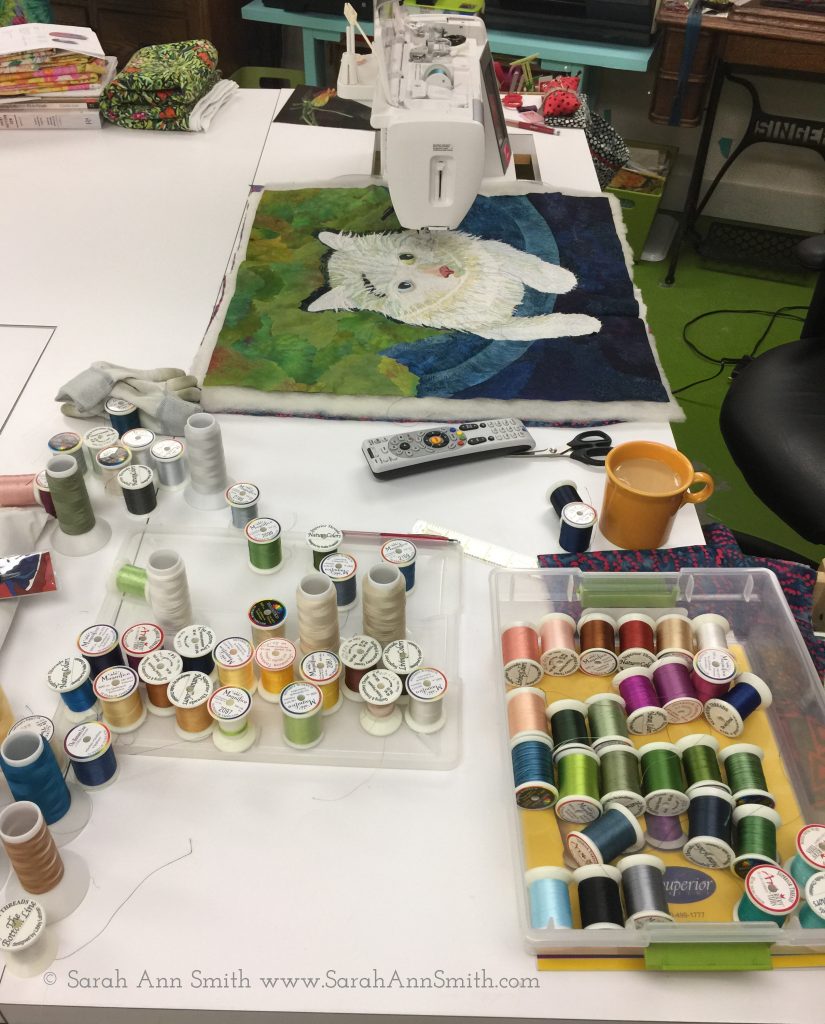
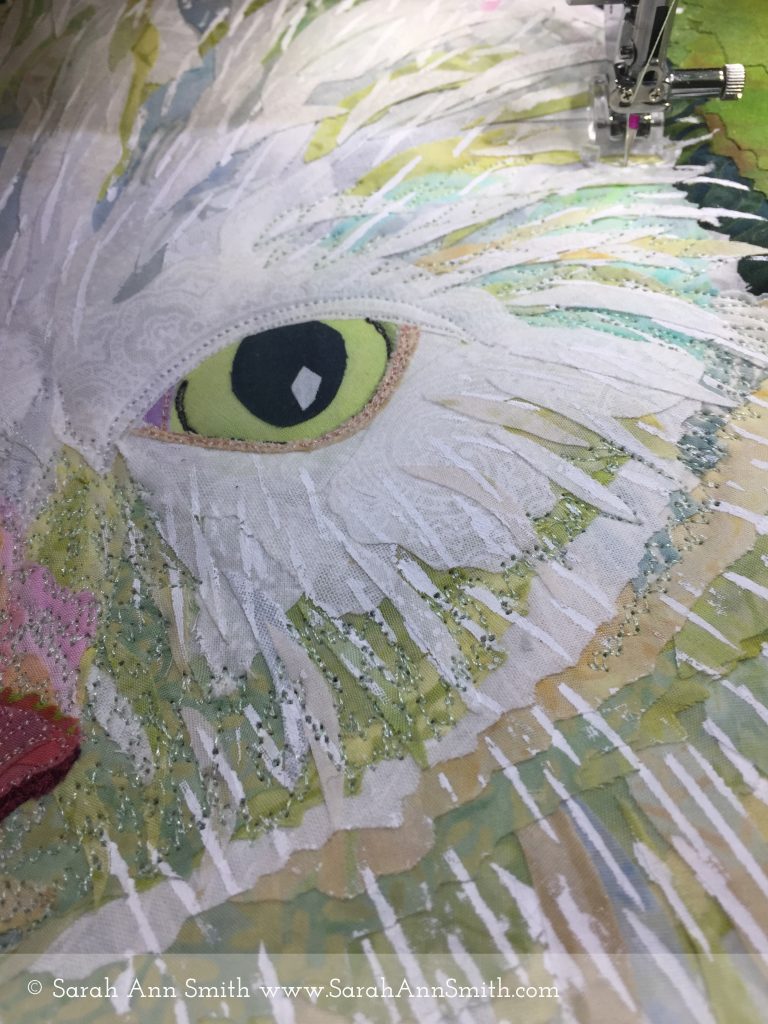
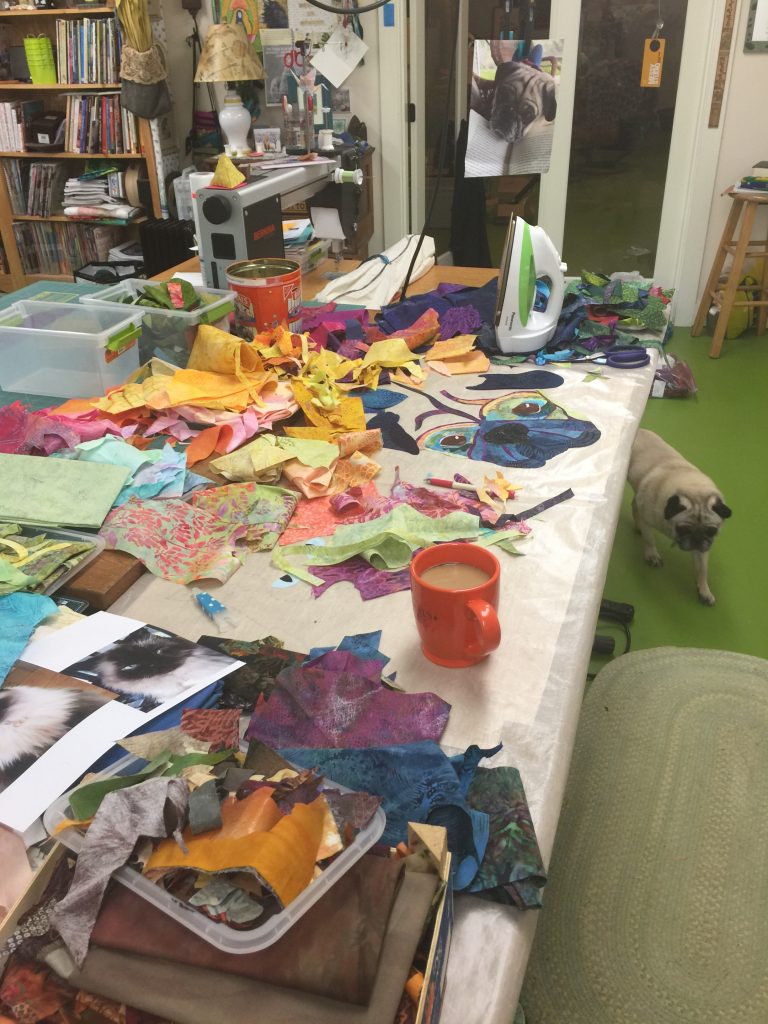
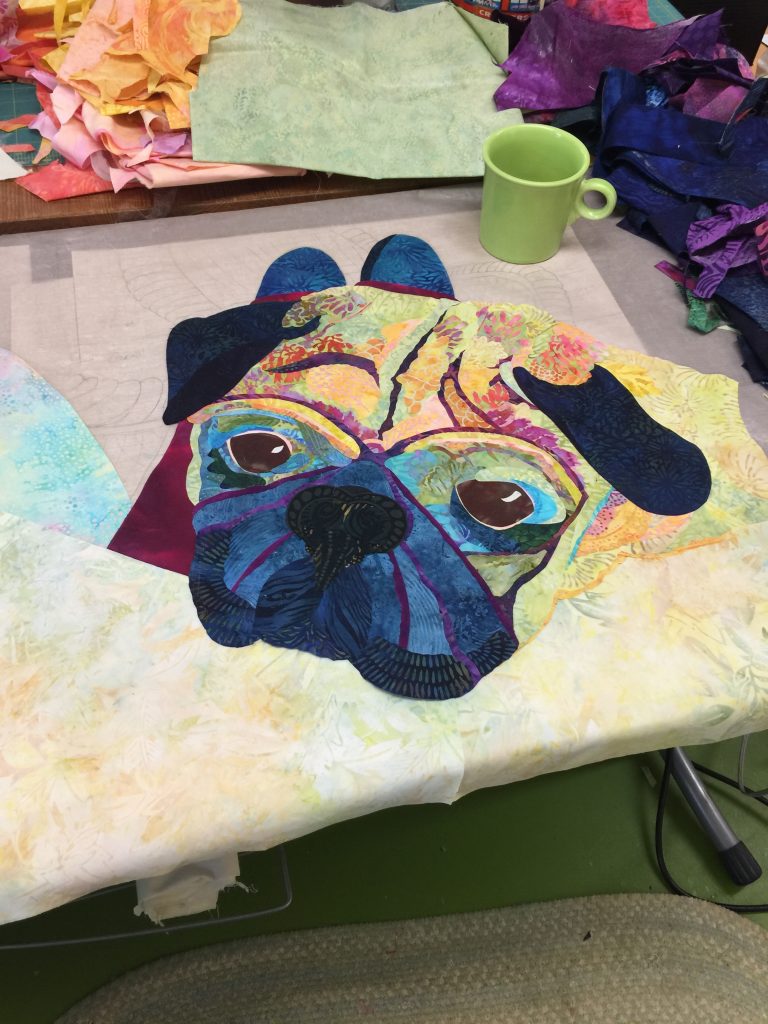
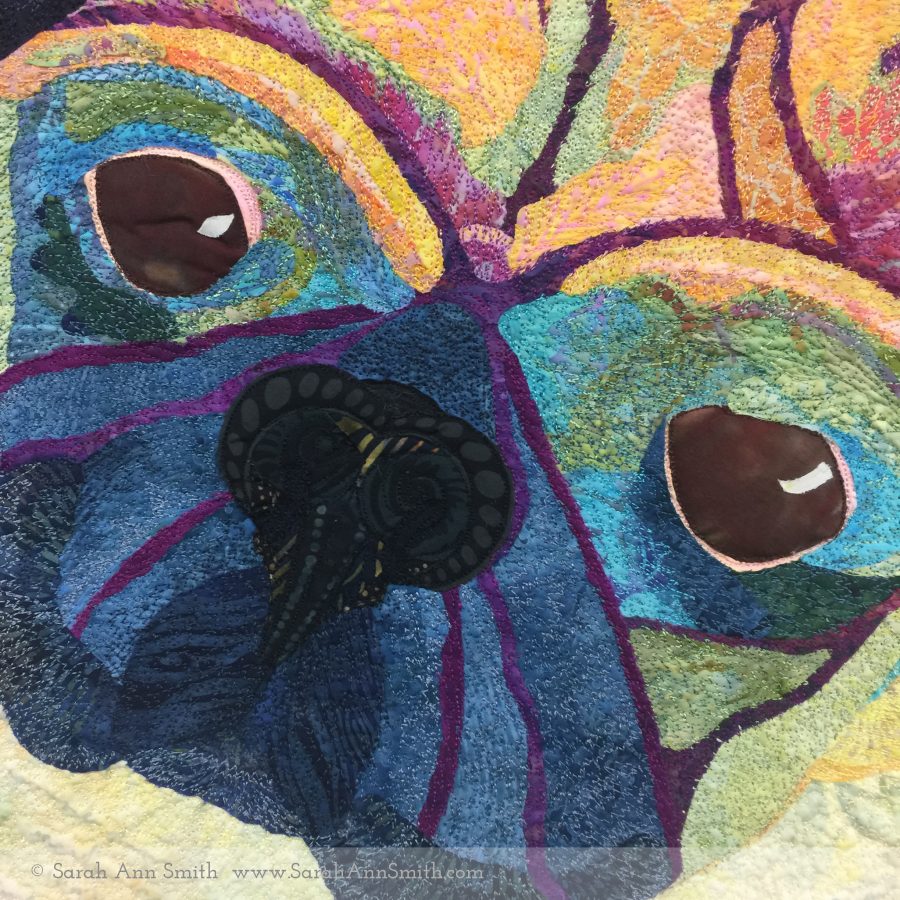
When I start a new project, I look usually at photos I have taken as “reference” photos. This time, hubby Paul’s photo was a better shape to fit into a square than what I had, plus Boo loves to sit with his paws hanging over the edge of stuff. I rarely use Photoshop any more to identify areas of light and dark, but I was curious to see what it would do. Meh. I like making the decisions as they are more nuanced than someone else’s software.Step 1 is working on the collage with my reference images close by. I use Mistyfuse (my preferred fusible by far) and prefuse all my fabric, then cut the shapes I need, usually freehand but sometimes with other techniques that I share in my workshops. At this point the base layers just looks blotchy and blobby. It gets better.Once the base layer is down, I start adding slivers of fur. Notice two of my favorite tools (and I’m not affiliated, just a fan-girl): Karen Kay Buckley’s purple-handled micro-serrated scissors (here) and Heidi Profetty’s awesomely pointy tweezers (here). The tweezers are new to my process and SO much easier than my old way of fingers, pins, skewer etc. Much easier and more accurate to place than to nudge! I like them so much I sell them in my workshops.To tie the three quilts together, I took out all the fabric I would use for all three quilts at the start of the first one. The blue ocean-like batik plays a major role in all three: in Widgeon’s face, the background for Yoda, and here as the “bed” in Boo’s cat tree in the living room, and the other fabrics repeat. I liked the dark green in the background to pop Boo’s silhouette, but it was too much and boring as the entire top of the quilt, so I trimmed to have a “halo” of dark (no, that is not a commentary on the cat’s personality LOL!).I selected assorted greens from my stash of prefused fabrics. I just didn’t like the way these looked–made the whole piece too heavy and dark for a rambunctious kitten.So the dark greens, other than the “halo,” went away and my much-loved yellow greens (mostly my hand dyes in this set) came in. The next step, as with Yoda, was adding paint via thermofax screens to refine the fur. Did I mention (another gratuitous self promotion here) that I’ll be teaching a 3-day workshop August 5-7, 2020, at ProChemical and Dye in Fall River, Massachusetts, on using paint on cloth? Sign ups open on October 2nd and I’d love to have you join me. Here’s the link to the Workshops at ProChem–details on the 2020 workshops will post on or about September 3rd. Anyway…. you can see the difference between the right where I have screened to the left where I haven’t, also up on the upper vs. lower parts of his face. I used a temporary mask of painter’s tape to avoid getting paint on parts of the background.Final phase: quilt it to death! This is the Janome 9450–I began on the 6500 when the Horizon series debuted back in 2003 and every time I think they couldn’t possibly make the machine better, yet they do. This is pretty much my PERFECT MACHINE! I pick more threads than I think I will need for a project. Since I was doing three quilts at once, that was a lot of thread. Luckily, the most labor intensive one was Widgeon because of so many different colors. The quilting on Yoda (a beige cat with some dark) and on Boo (a white cat with just a tiny bit of black on him) was easier in some ways, though finding six shades varying from white to cream was interesting….ended up using a very very pale green for example, which reads as a mostly white/gray for the under layer. Then the stitching begins! Here I’m putting in the first of three layers of thread used in each area. I teach a workshop on this, too (Thread-Coloring the Garden, but the process is the same for flowers, pets, people, landscapes, etc.). I really love this new open-toe free-motion quilting foot. It was designed for free-motion zigzagging, but it is awesome visibility. I’m not sure but I may possibly like it as well (or even better? is that possible?) than my all-time favorite thin metal open circle foot. In this photo, I’m up to about the third layer of threads. Compare how it looks to the previous photo. Also, I do minimal stitching on eyes!An angled shot always shows up the quilting best. I used the same leaf/vine motif on this that I used in the background of Yoda’s quilt to tie things together.
So that’s my process and all three of the quilts. To read the blogpost about Yoda’s quilt: His Immensitude Yoda, Emperor of Minions and all He Surveys, click here for Yoda . To read the blogpost about Widgeon’s quilt: I Love, Therefore I Am, click here for Widgeon. Thanks for coming along on my summer quilting extravaganza!
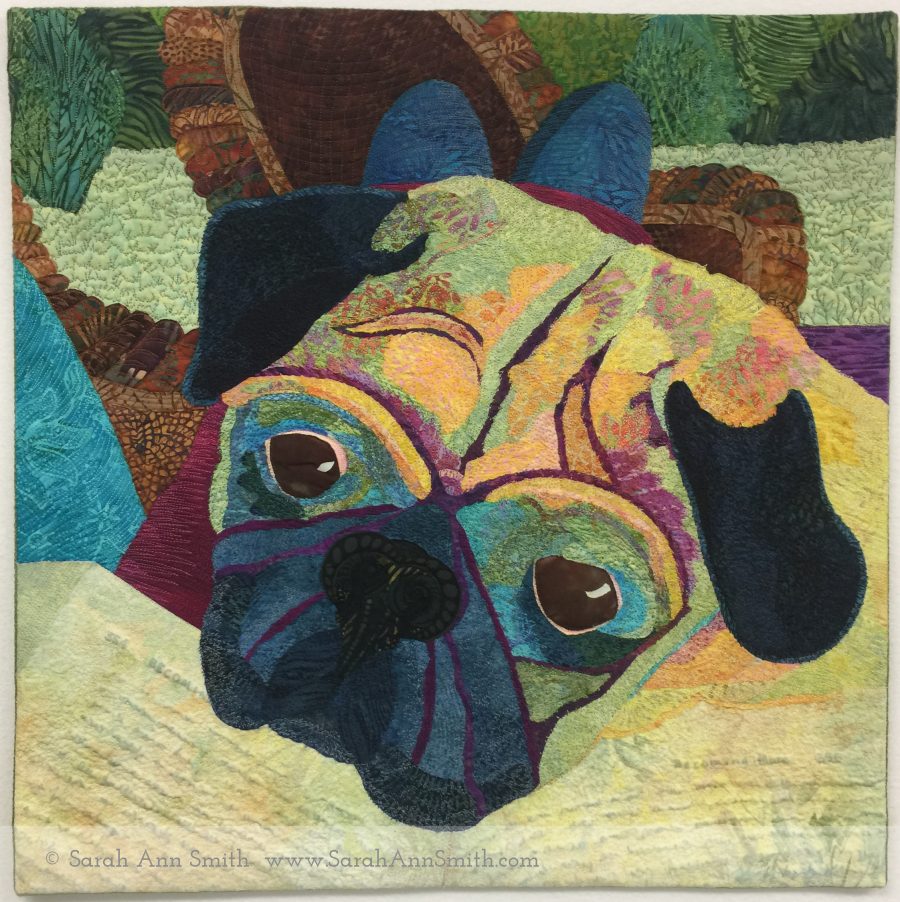
“I Love, Therefore I Am” is the perfect title for this quilt of our beloved pug, Pigwidgeon.
Earlier this summer I made three quilts for Janome America to share at the upcoming dealer conference in Florida this week. Janome has generously sponsored me with a machine and included me in their Artisan program for over 15 years!!!! THANK YOU (yes I’m shouting)! I was delighted to make these in appreciation. Here is the blurb I wrote to go with Widgeon’s quilt.
I Love, Therefore I Am
“Yoda, the love of my life, tells me that Mom has done a good job on my portrait. Mom and I were sitting on the porch in late Spring even though it wasn’t quite yet warm enough, so I snuggled under the blanket and kept her company (and warm) one afternoon. I don’t see or hear very well any more, but Yoda tells me the picture shows how much I love everyone in the whole universe, especially him, my boy, Mom, the rest of my family, and well, the whole world.” (Pigwidgeon is a 12 year-old industrial-sized pug.)
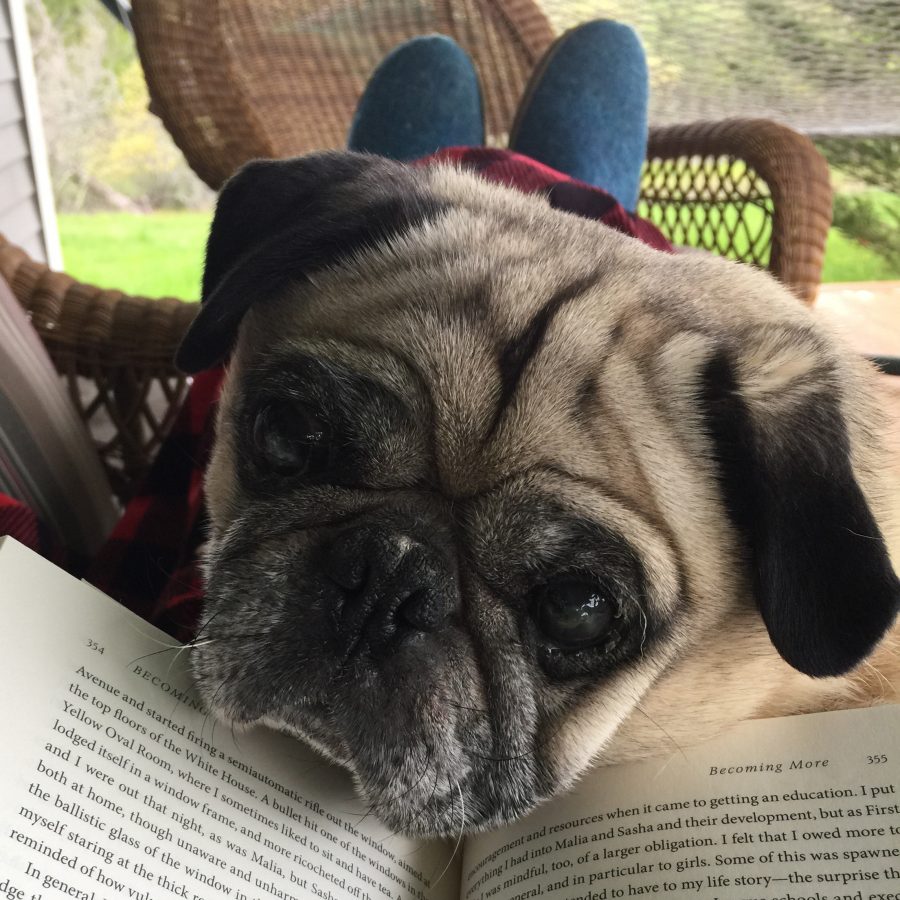
My Facebook friends know Widgeon because of my dog walkies posts and other photos. My friend Rachel Parris commented on this photo that it was the best one I had ever taken of him, and the idea for the quilt was born! Often I end up working too much during summer and don’t get my “Porch Time” to relax, read, and enjoy life in Maine. So this year I started early, in our long, late, cold Spring, wrapped up in warm fuzzy clothes with a two-layer fleece blanket on my lap and the dog snuggled underneath.
This post will be mostly photos and captions (because we all know photos are better). They show the sequence of how I work, and towards the bottom if you keep going you’ll be rewarded with a mini-tutorial on couched and faced edges. And yes (gratuitous self promotion here) I TEACH classes on how to do this –my Bindings and Facings and Piping, Oh MY! class, and also my collage and thread coloring process: Collage the Garden and Thread-Coloring the Garden–just click the link. Have students (and contract) will travel (hint hint).
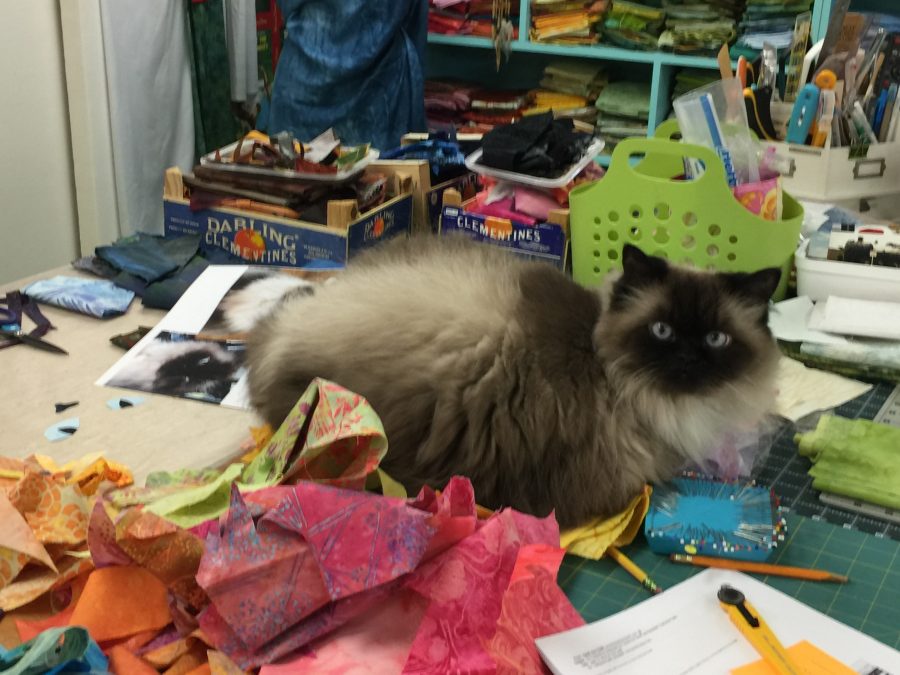
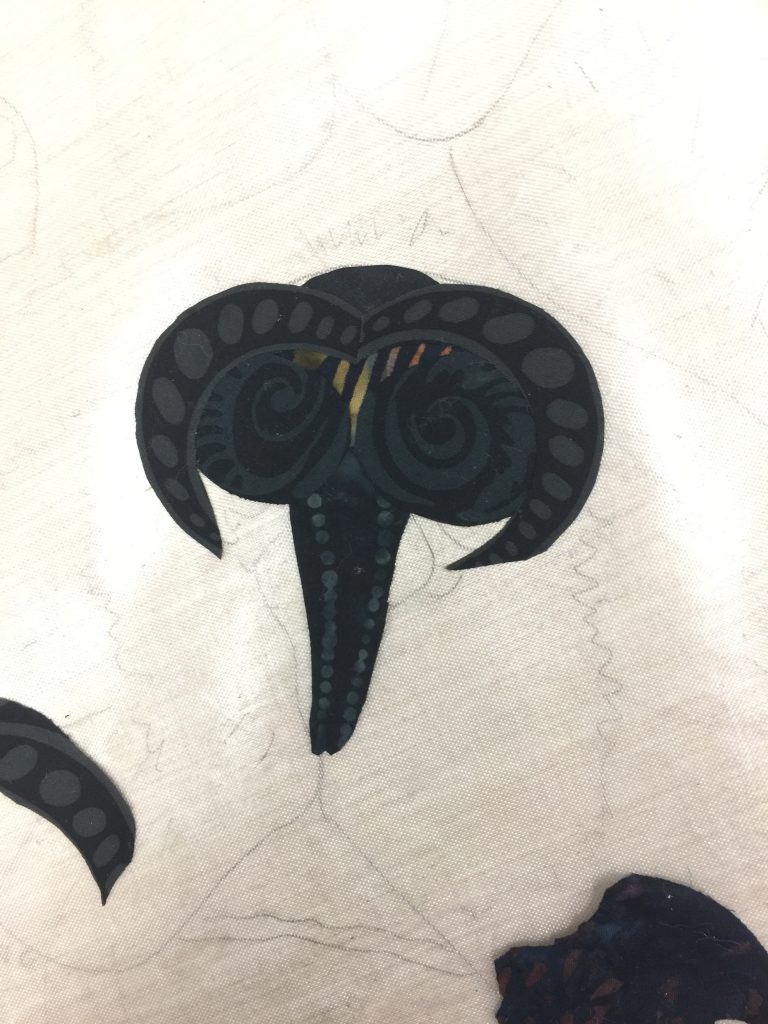
As you can see, the work area ends up just a bit messy! I tend to sort prefused (Mistyfuse ROCKS! It changed my life!) fabrics by color and value, then start working. The heaps are the “sorted” stuff (ha!). Widgeon is coming to lay down right under my feet so I can trip over him. He likes to stay close to his beloveds.Sometimes Yoda supervises…..Folks say “Oh that’s the perfect fabric for the nose.” Sorta. This is seven pieces of fabric, and that’s about half of the fifteen or so tiny bits that eventually created his nose. You can see the sketch under the non-stick mat (check out Goddess Sheets at Mistyfuse.com). Here I’m looking at what to use for the background. I used pale yellow (on which I used a pale gray pen) for the book in my lap. The pale aqua for the pillow on the left got changed for a darker value.
Now it’s time for that mini tutorial on couching yarn for quilts with facings.
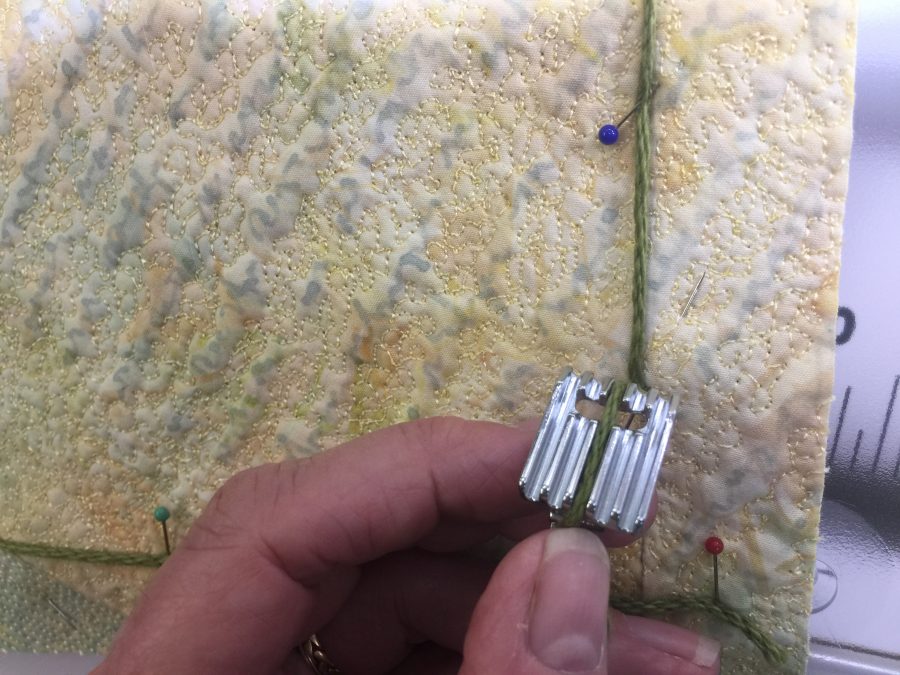
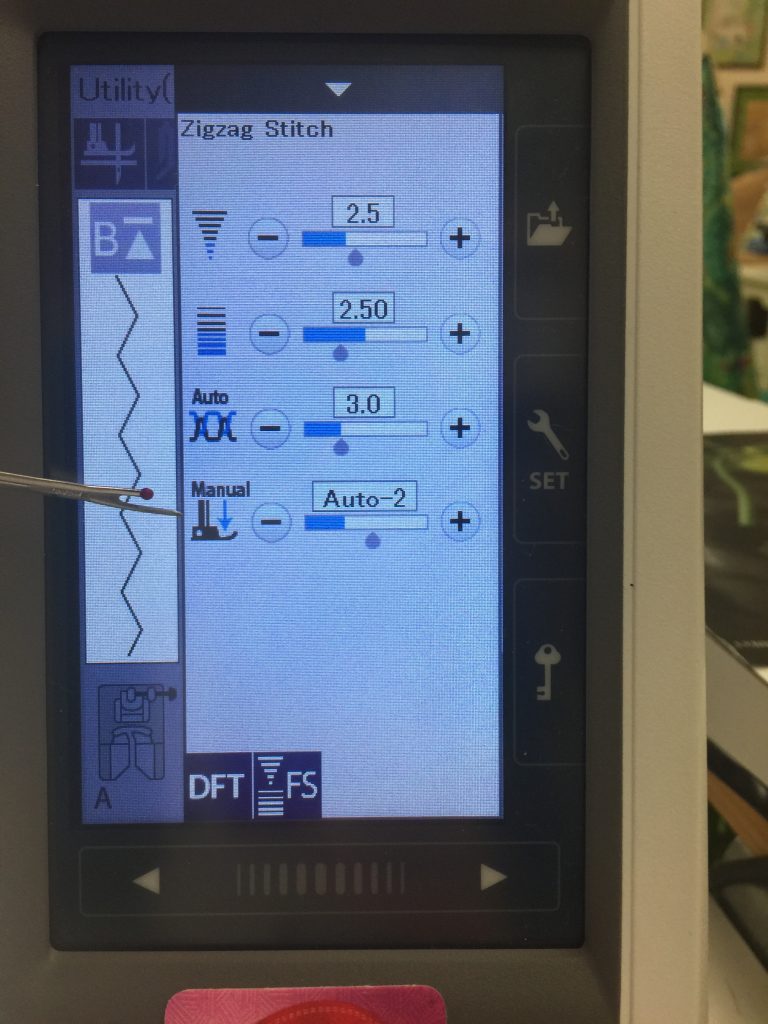
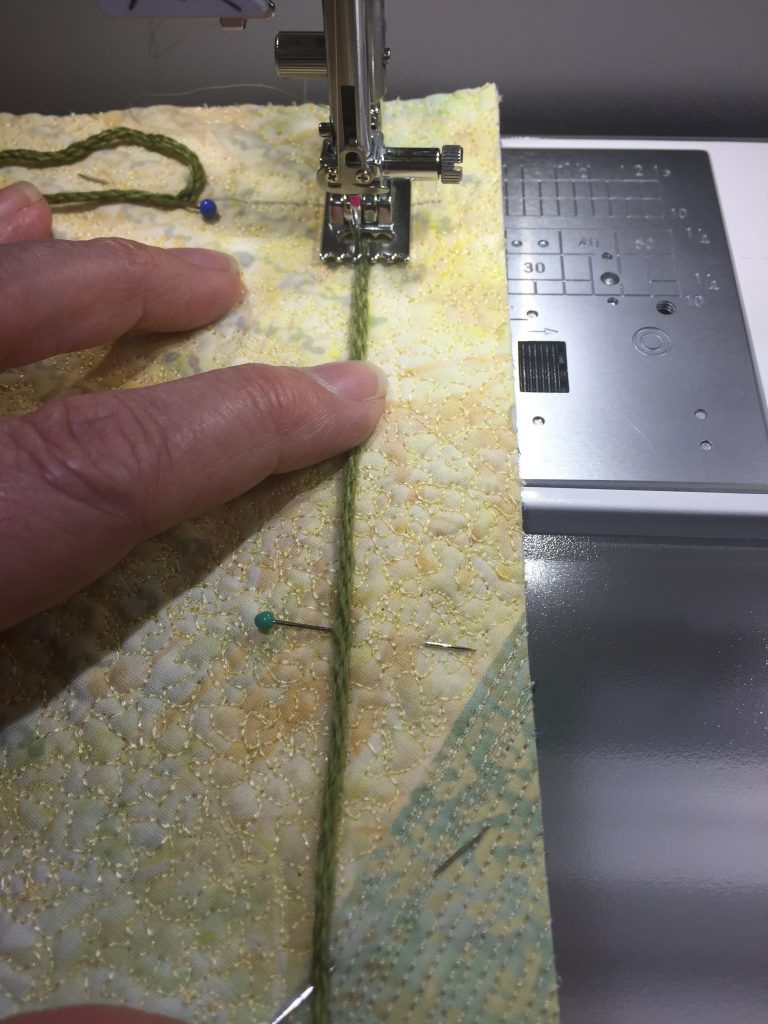
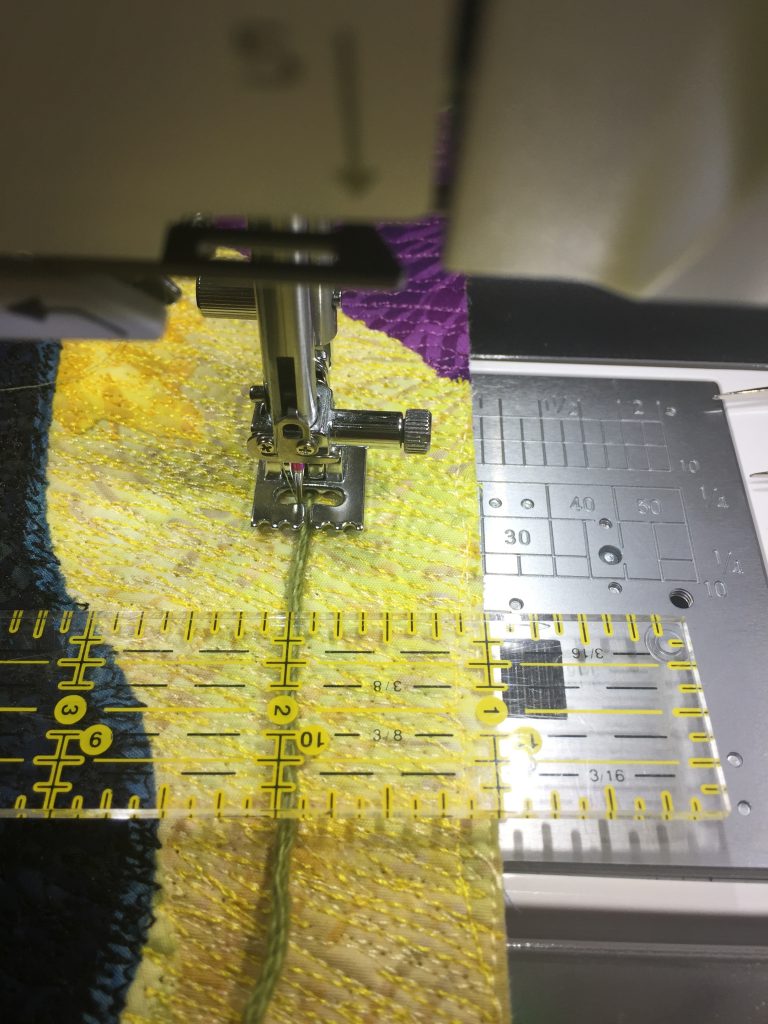
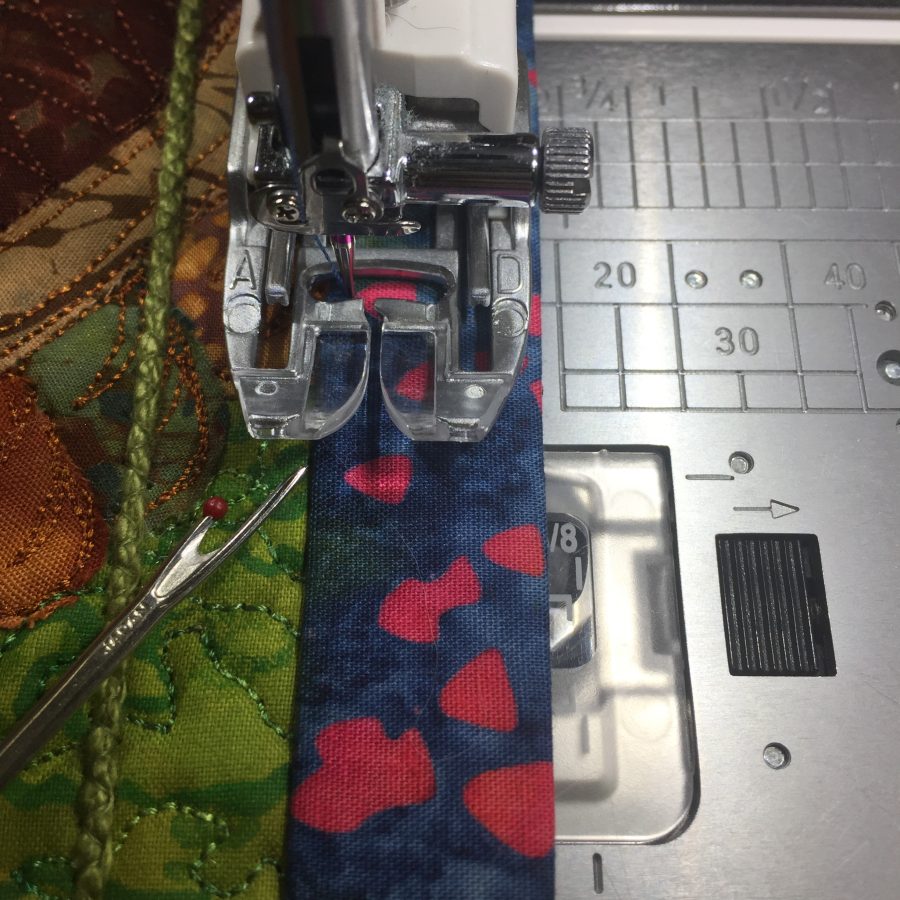
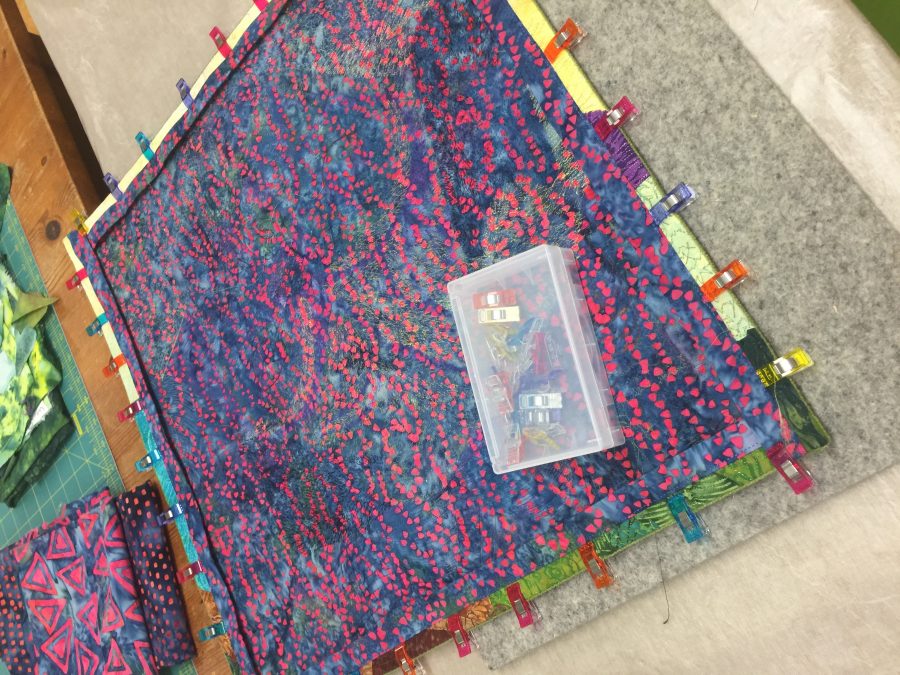
Most of the time, my quilts have facings, and some of the time they *also* have yarn couched on the edges. This makes the edges more crisp and makes it WAY easier to turn the edges in a perfect straight line (provided the yarn is sewn ON in a perfect straight line). This is what the bottom of the pin tuck foot looks like. Mine is a five-groove. There are other sizes (seven I think, and maybe three), which I prefer to the usual “couching” foot because I can fit the yarn to the groove that will best control placement. See how the yarn fills the groove…not too big, not too little, but just right. I used 2.5 stitch width and length, then reduced the presser foot pressure (how much it pushes down on what is going under the needle) to couch the yarn that ends up on the edge of the quilt.You can see the yarn is in the center groove of the 5-groove pin tuck foot. It is the perfect sized groove for the cotton yarn I favor for sharp edges on quilts with facings. I always used to chalk-mark where I wanted the yarn to go and then hold it in place with pins and my finger. But even then it would sometimes wobble, requiring picking out the stitching and fixing. Then I discovered a much better way on this quilt! Drum Roll! Sound the Trumpets! A Better Way!!!! Using a ruler, Janome’s pin tuck foot, and a narrow open zigzag makes couching yarn on what will be the edge of the quilt easy! It worked best for me if I let the ruler hang over the edge and use the 1″ line. If I used the end of the ruler it was actually harder to see if it was perfectly aligned with the trimmed edge. And yeah, lookit all that threadwork!Gotta love Janome’s great presser feet and plate markings, which make it possible to create a perfect facing. In my class I explain some of the extra stuff I do that makes my facings behave so well. Wonder Clips by Clover. Buy them. Buy a whole lot of them. SO MUCH BETTER than being skewered by pins. If you buy the big set from Clover, they come in a well made reusable box.I Love, Therefore I am. A view of the quilting from an angle which shows the stitching better.And a close up of the Beloved.
To see Yoda’s quilt, go to this post. Next, I’ll share Boo’s. He is the Usurper. The Delinquent. Chirpy.
WOOT! The International Quilt Festival Houston catalog is starting to ship and online registration–yes, ONLINE, with instant knowing if you got into the class, goes live in July (I’ll post when it does). If you’d like to take a workshop with me, now’s your chance because I’m teaching a ton of my favorite workshops. For more detail on any of these classes, please visit the Classes/workshops page of my website and scroll down to the individual class–you’ll find a supply list PDF and sometimes links to blogposts about previous workshops sharing student work. Here’s the list including class numbers:
To look at MY classes, head to the link for all classes and search by day or by name. The classes are listed in numerical order: #100 series are on Monday, #200 on Tuesday and so on, with the exception that Friday is #500, Friday EVENING is #600, and then Saturday is #700. That way you can find what classes are available on the day(s) you are at Festival.
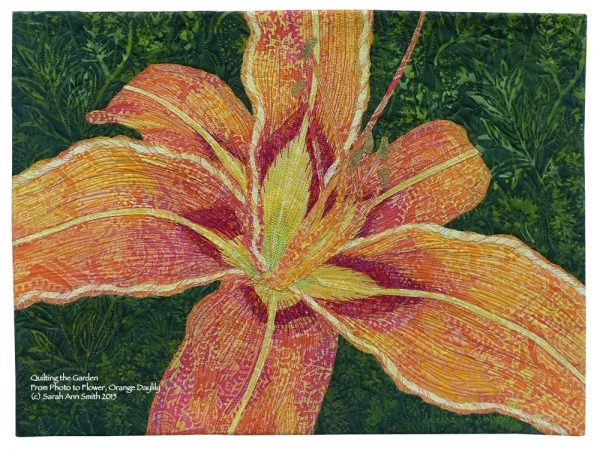
Collage the Garden workshop: Inspired by a wild tiger lily on the roadside in Maine–learn to create a fused collage by creating your own pattern (several ways to the same goal), then create a top to finish at home
I’m thrilled that Quilts Inc. booked both days of my Quilting the Garden workshops! On Tuesday, learn my Collage the Garden process for creating fused quilts. You’ll learn how to create a working plan/pattern from photos and fuse an 11×14 collaged quilt of a flower, but the process can be applied to anything including people, animals, landscapes, you name it.
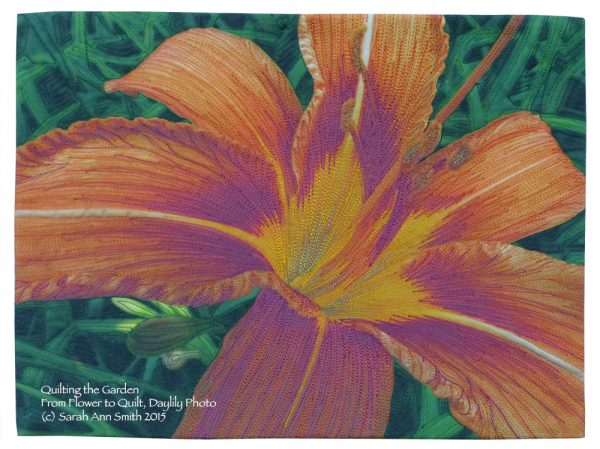
Thread Coloring the Garden is on Wednesday: enjoy an easy prep with this kitted class where you learn how to add depth, dimension and detail to your art quilts.
On Wednesday, Thread Coloring the Garden is all about the machine quilting and learning how I select and use thread to color and bring the quilt top to live To eliminate the stress of worrying about messing up that gorgeous top you’ve worked so hard to create, we work with a photo of a day lily printed on cloth (class has a kit [fee] with flower, thread, etc.) so that you gain confidence learning the quilting before you tackle your own masterpiece.
At the Machine Quilting Forum I’ll talk about using metallic, holographic, heavy and other so-called (not-so) fussy threads. If you’d like to take the full workshop, you CAN–on Friday (keep reading!)
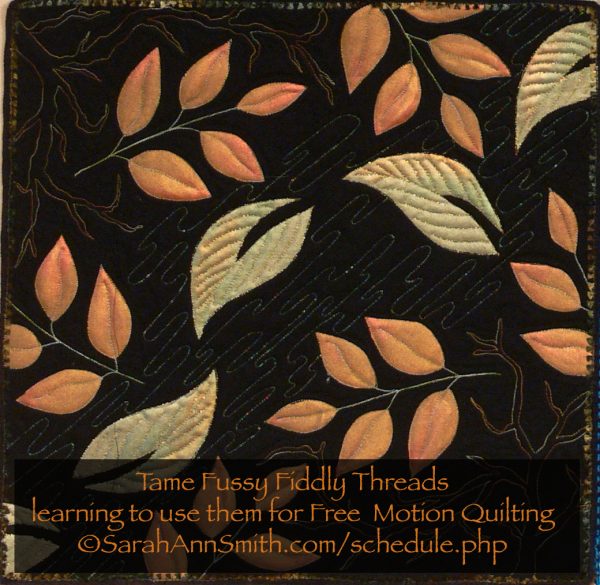
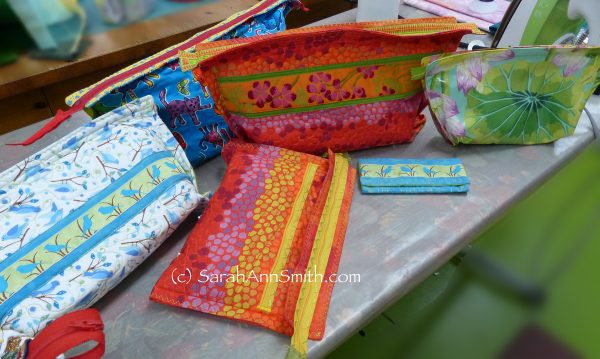
Thursday is a busy day. In the Morning I’ll be presenting at the Machine Quilting Forum, where I’ll share some of my current work and share some tricks for working with what some folks think are fussy fiddly threads but really aren’t so fussy or fiddly!. In the afternoon, it’s a TOTALLY FUN half day class making my patented Easy-Peasy Inside-Out Bag–they’re like potato chips, you can’t stop with just one!
Easy-Peasy Inside-Out Bag workshop with Sarah Ann Smith: Once you learn the basic process, these are easy to adapt into card carryers and book or sketchbook covers! Friday it is the full workshop for Tame Fussy Fiddly Threads. You’ll need black fabric and batting, the paint, supplies and decorative threads are supplied.
Friday Evening I’ll be part of the Date Night Sampler, where I’ll show using paint on cloth to work smarter, not harder! And if you’d like an immersive paint on cloth workshop with me, stay tuned–good news for a 3-day class in August 2020…will be able to share in September.
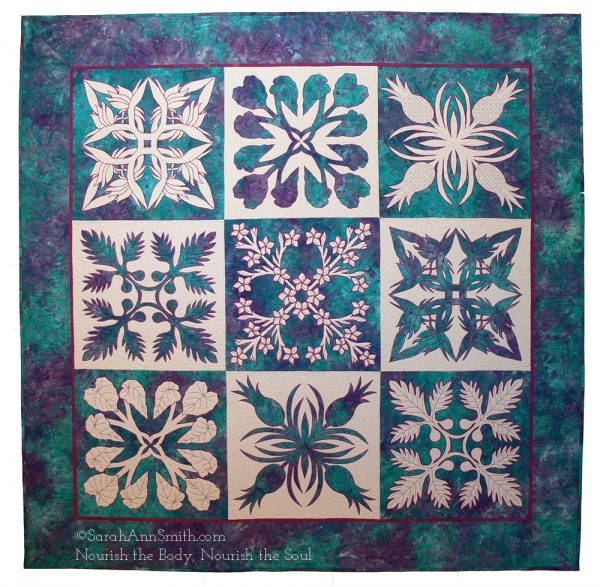
Saturday you can learn my approach to Hawaiian style Applique by Machine: we use my freezer paper technique for creating TWO fused blocks to appliqué by machine. You will try a small block to get the hang of it, then start on your 18″ block.
Hawaiian Style Applique by Machine is on for my final teaching day. Though I am known for my art quilting, I love ALL types of quilting, and my love for Hawaiian style quilts launched my career in quilting, and I love it to this day. Come for a day of fun and learning!
I hope to see you in Houston, especially in my classes! I might even still be coherent (?) by Saturday evening, though I think a Margarita may be on the menu once the teaching is complete!