My video about my online and in person teaching debuted this evening at Global Quilt Connection, an amazing resource that allows you to meet the teachers. I hope you’ll enjoy it and think of having me teach for you, online and in person. There are five sessions, and the day following each of the five, ALL of the presentations are available to view at your convenience. Find the links here.
Full details on my workshops are available here, and a sample contract with price info is there too.
I am in awe of the teachers who presented tonight at Global Quilt Connection. I’m thrilled that so many teachers have moved online because now *I* can take classes that have heretofore not been available to me. Hope you enjoy my video! Do write if you are interested… I can customize classes, break a full day into to half-day sessions and more.
As I was setting up for my next online teaching gig, I thought it would be fun to share what it’s like totally upending your workspace to get ready to teach. Have fun watching this video. The sound varies (probably moved the phone farther away then closer), so with apologies, just adjust the volume as it goes along!
I’m thrilled to share that I will be teaching online again in mid August, and for the first time ever you can take my most popular class, Collage the Garden, LIVE ONLINE! Sign ups are open NOW and are here. One of the best things is you will be home, so you can get whatever it is you wish you had brought to class, because you are at home and sewing on your machine!
I’ll be offering: Wednesday, August 12, 2020: Collage the Garden: From Photo to Flower (6 hours) from 10-4 Eastern daylight (there will be a lunch break) Thursday, August 13, 2020: Mastering Metallics (3 hours) from 2-5 Eastern daylight. Kit is optional. Saturday, August 15, 2020: Easy-Peasy Inside-Out Bags and spin off projects from 2-5 Eastern daylight.
You can find complete class descriptions and PDF supply lists on my Workshops page (classes are listed in alphabetical order). When available, there are also hotlines to blogposts so you can see previous student work. If you have ANY questions, please don’t hesitate to write to me! I’ve done a recap of each of the workshops below as well.
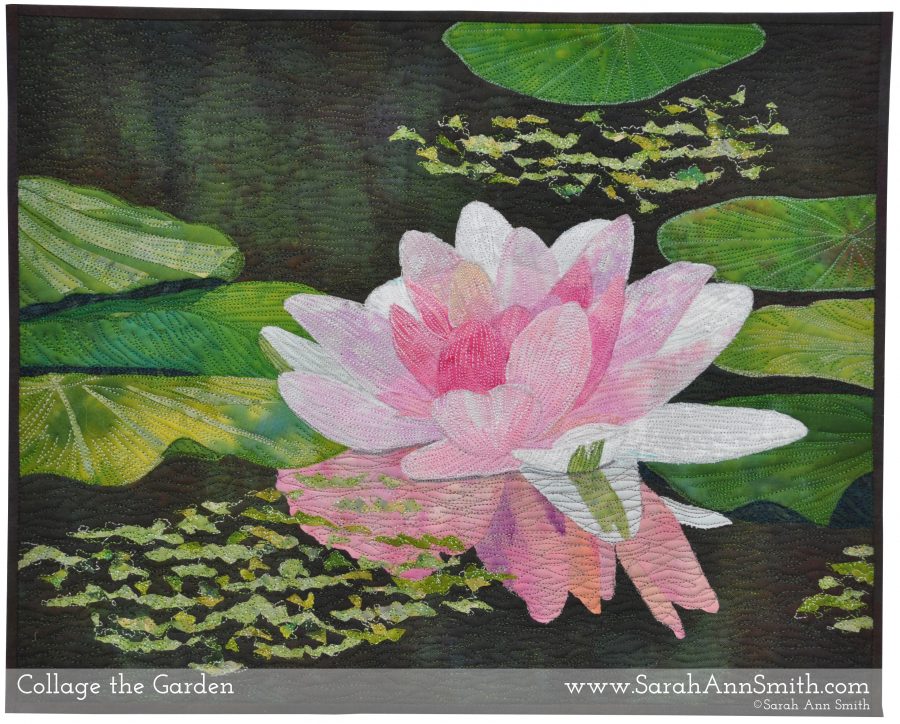
The two images are this orange lily which grows wild along the roadsides in Maine this time of year and the following small quilt.Pink water lily
Collage the Garden is all about my process. I teach you how to interpret a photo in class, then you will know how to use YOUR photos to create your own original artwork. We talk about selecting a good image, selecting fabric, fusing, tricks for working with cloth and, time permitting, introduce how to quilt (this is a who second follow-on workshop).
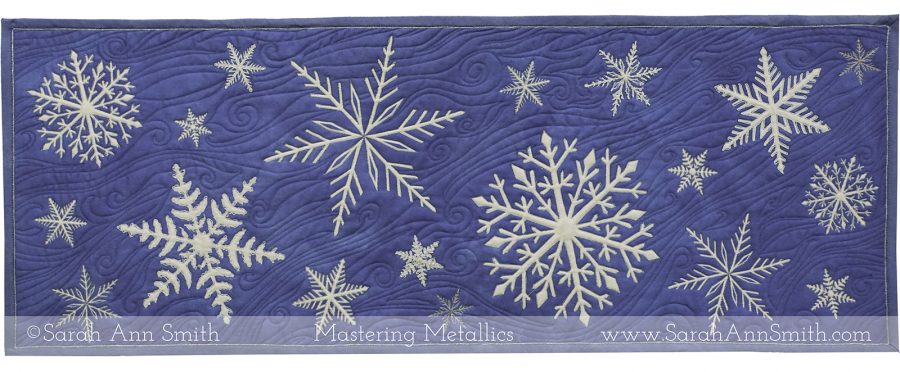
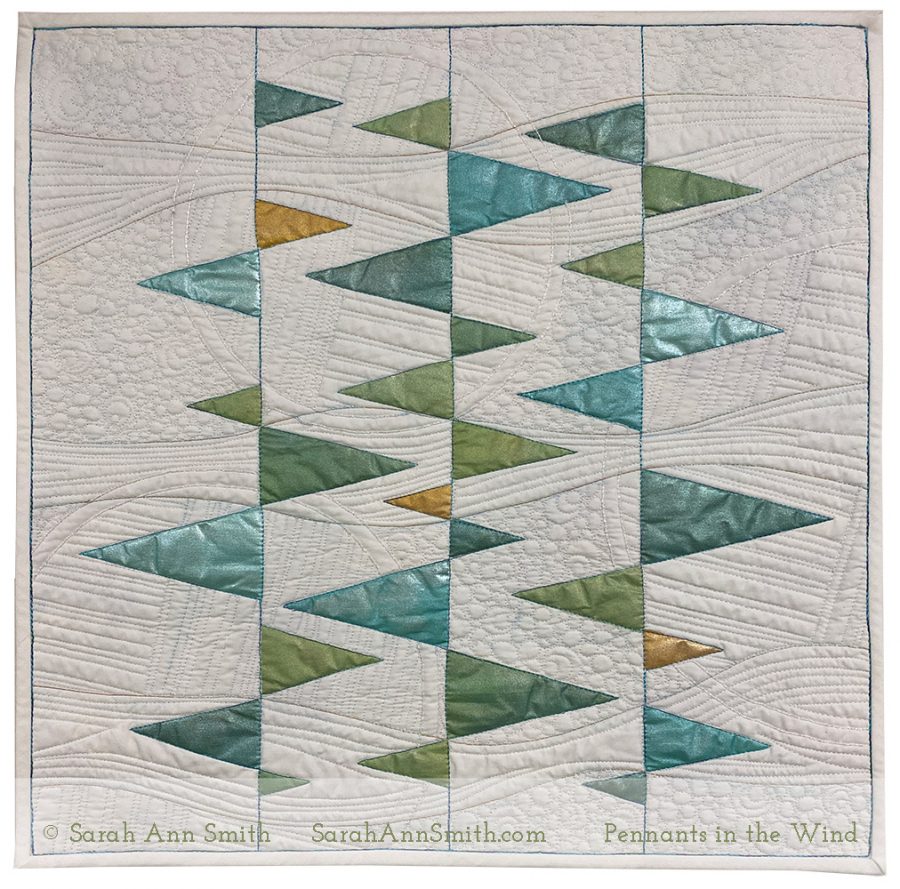
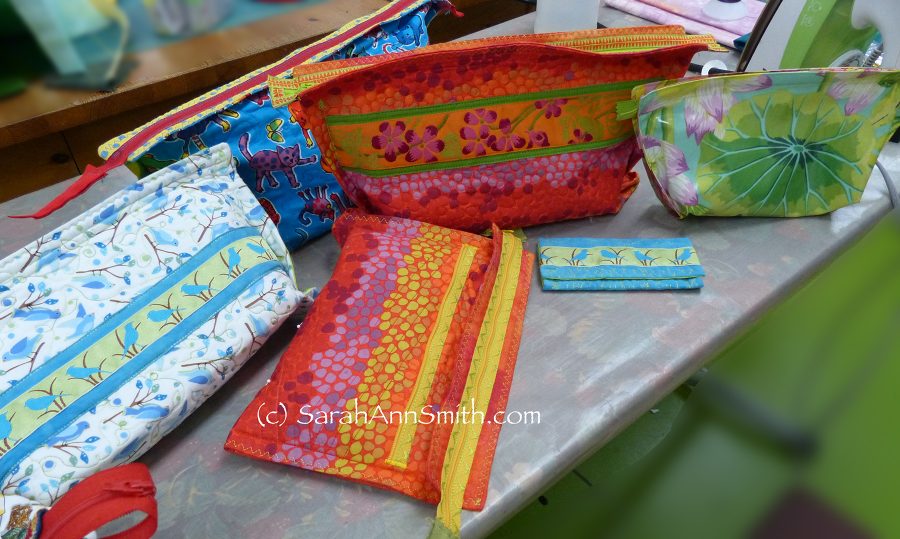
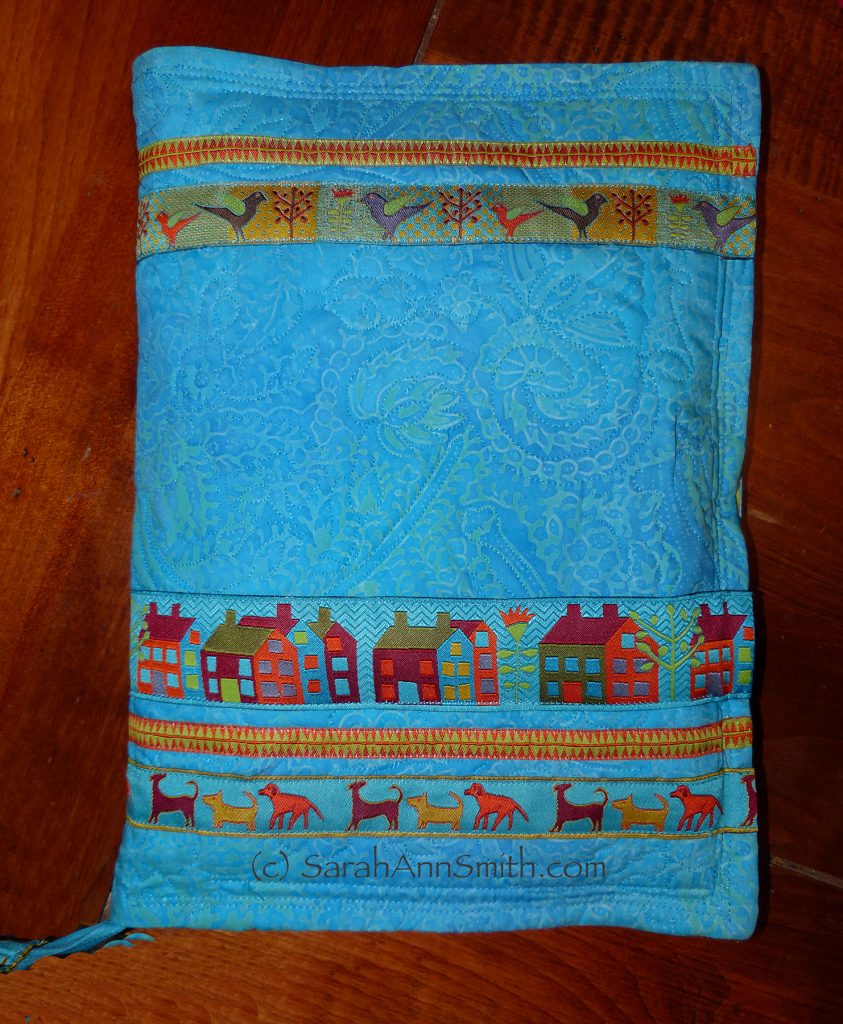
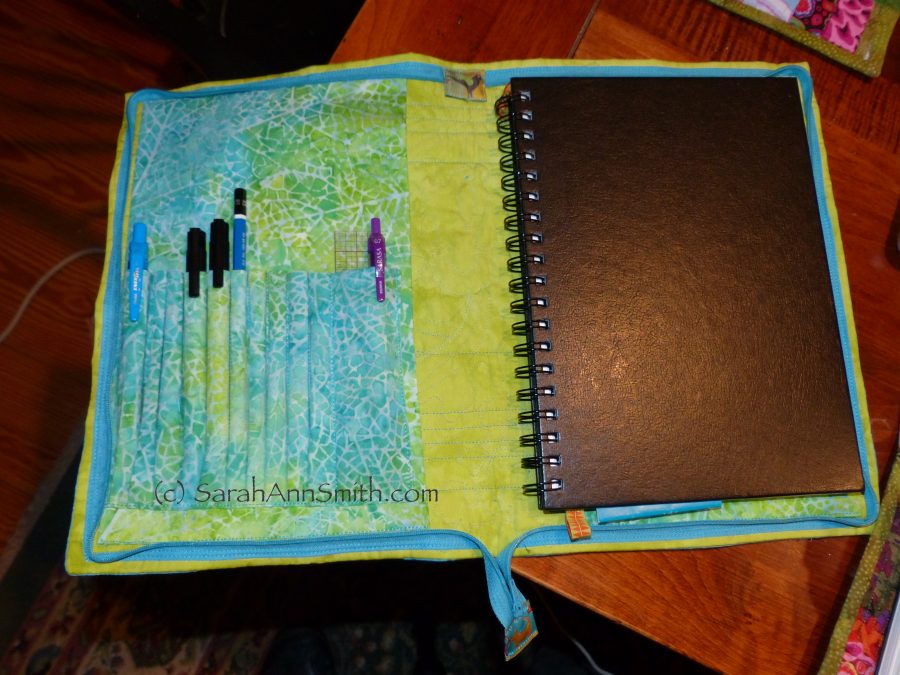
Mastering Metallics half day workshop will teach students to use metallic in both the needle and the bobbin. The workshop will debut at the Mancuso Online QuiltFest in August!, and is the half-day version of my Tame Fussy Fiddly Threads class. A kit with my original snowflake fabric, a 12×42 strip to make a table runner (custom printed at Spoonflower) and 2/3 yard coordinating blue for backing and binding is available when you sign up–only 15 kits available. BUT you don’t have to do this exact project if you prefer to do your own thing. (PS–if I have leftover kits they will be for sale on my website after August 15, or I’m making placemats to match my table runner!)Pennants in the wind is a new class sample. You can paint as I did, piece a similar sample (I’m thinking of doing a landscape…same idea, rotate 90 degrees, with one line of trees), or use solid or semi-solid and draw shapes and quilting zones on your cloth to practice and learn.Easy Peasy Inside Out bags is one of my favorite classes to teach…in a half day in person class students go home with a nearly-finished bag or even one or two finished bags depending on their experience. These are SO FAST and easy, and there are a ton of variations.I’ve used this notebook cover for years and just love it!You can customize many ways, and you’ll LOVE my rick for perfect pockets for pens and pencils. I’m going to make myself a double-pointed knitting needle holder using this process between now and the workshop. You can adapt the techniques to all sorts of goodies!
I’d love to have you in one of my workshops at the Mancuso Online Quiltfest here. If something you want to take isn’t offered, let me know what and I’d be happy to schedule an online class offered directly from me later in the year.
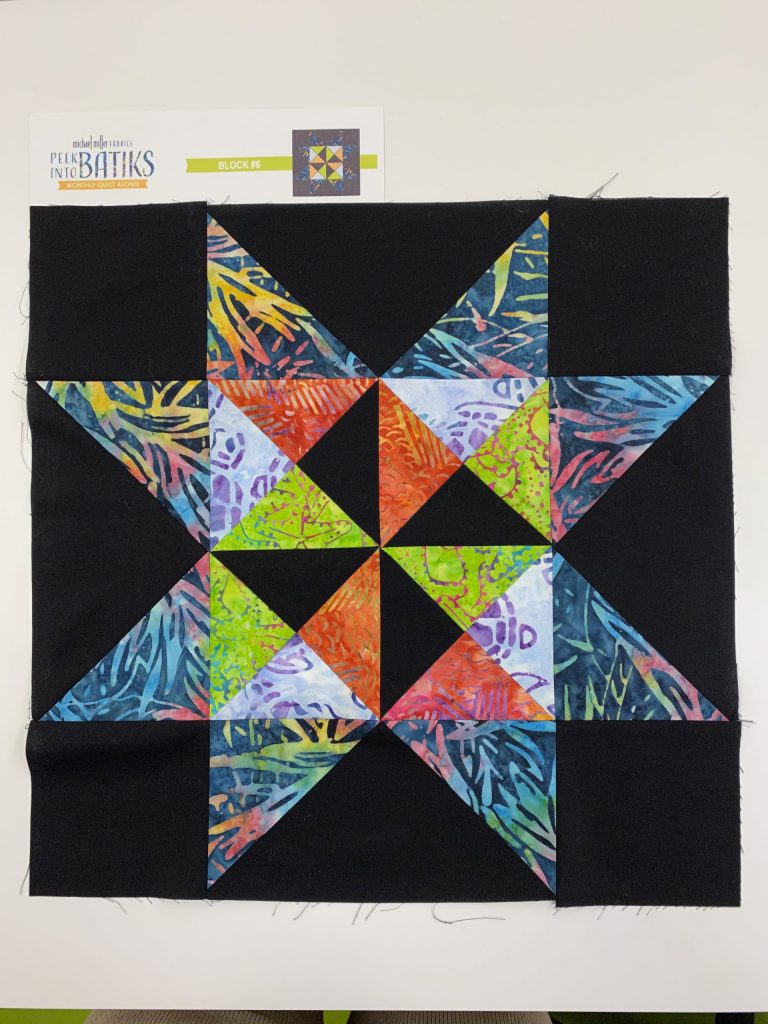
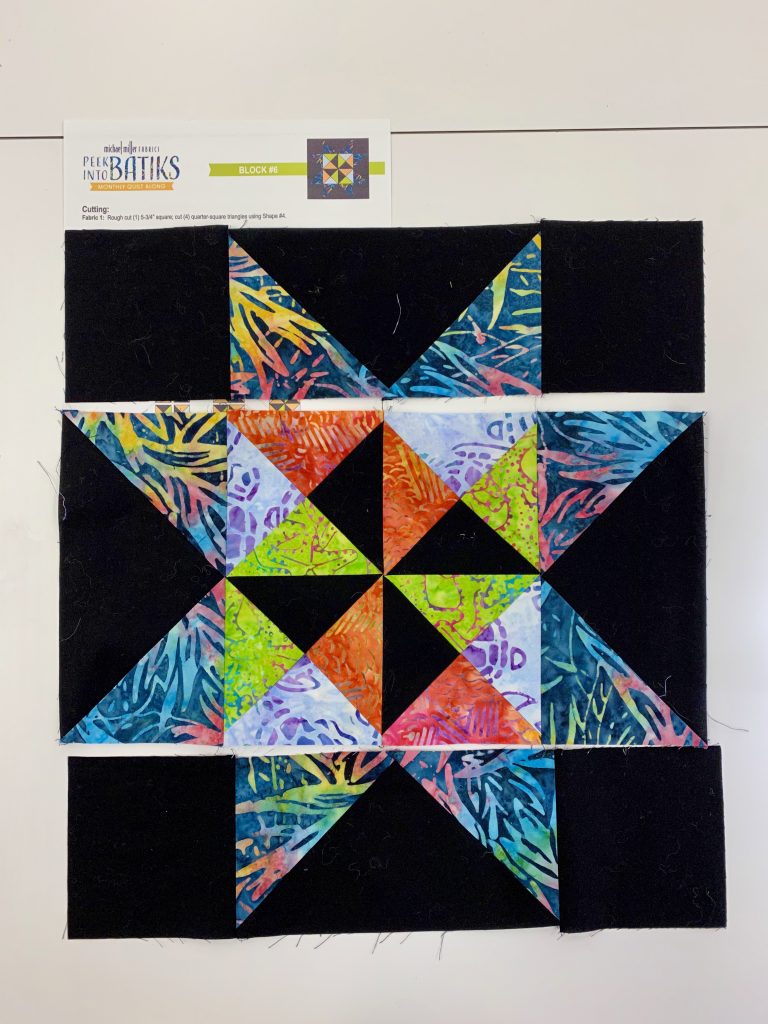
Earlier in the year I shared that Michael Miller Fabrics is doing a Block of the Month called Peek Into Batiks. It all began here. That post has links to each month as the new block goes live. Well, June is my turn! I’ve got still photos and (gasp) a video! And, drum roll here is the link to the JUNE Pattern and instructions.
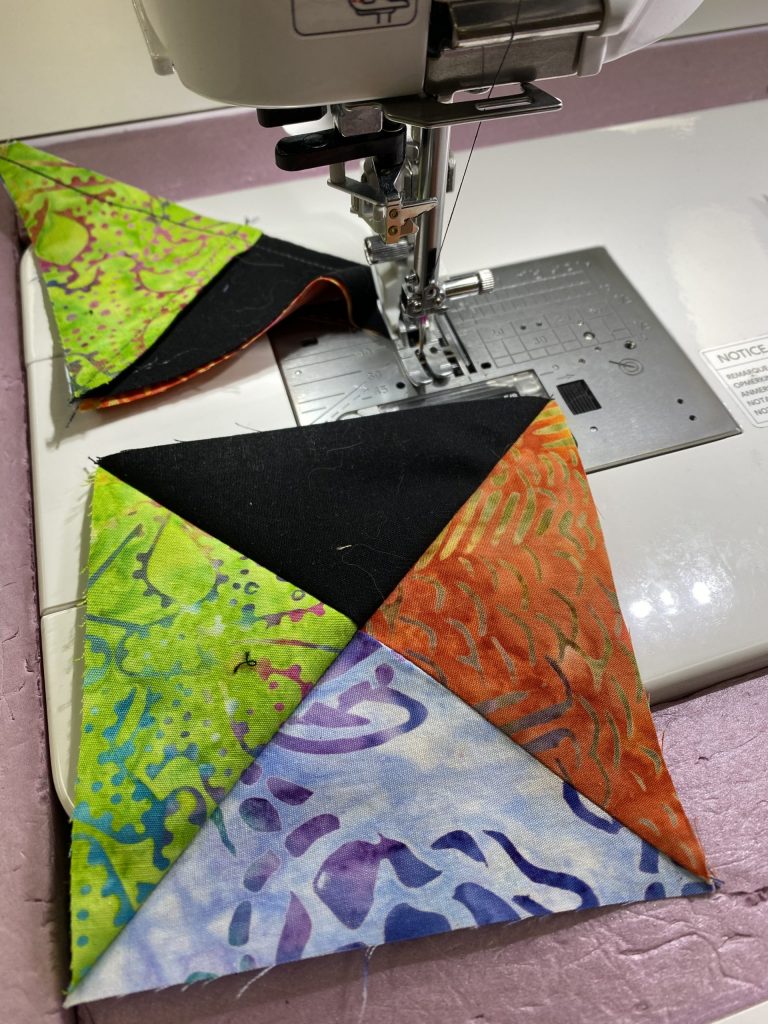
Here’s the finished block! Read on for step by step instructions.
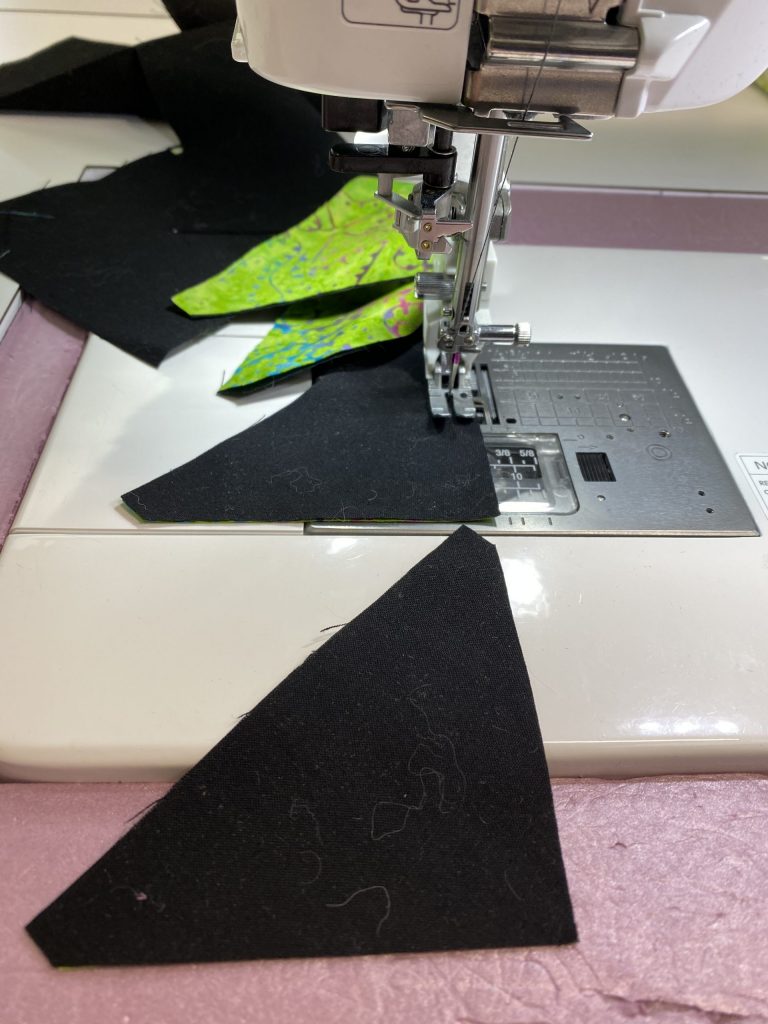
First, of course, you need to cut your fabrics. I used a hybrid method using the AccuQuiltGo! for everything except the large black triangles on the border. First, let me show you how fast it went cutting the components on my AccuQuiltGO! in this video. The video isn’t perfect–I’m improving in my editing skills. I need to mark what is within camera view though! Next video will be even better…I’m learning! When I was playing, it stopped a couple times so just click play again to continue–keep an eye on where the progress bar is. Dunno what’s up with that…another learning curve LOL!
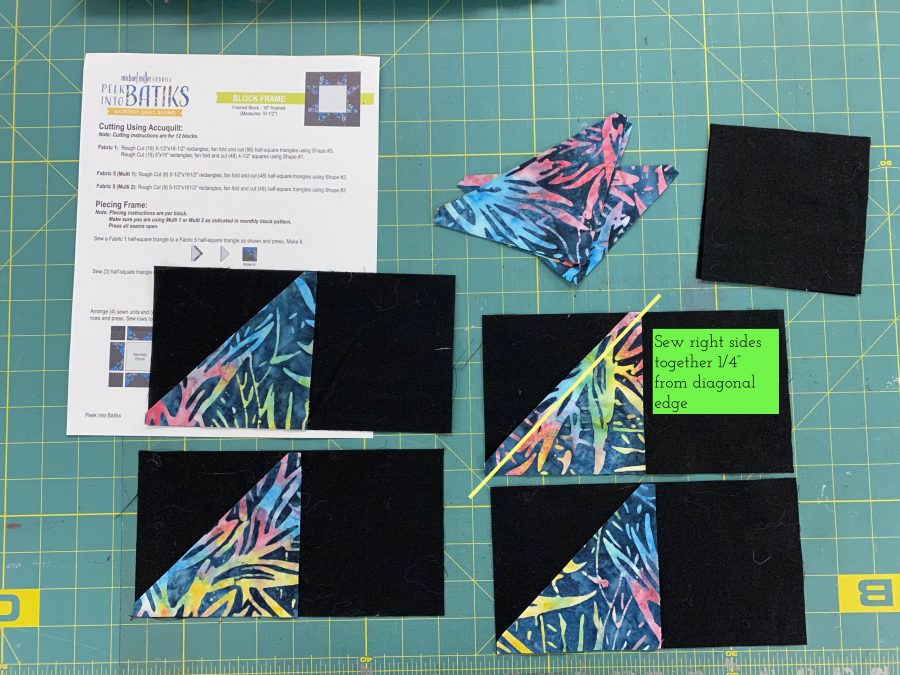
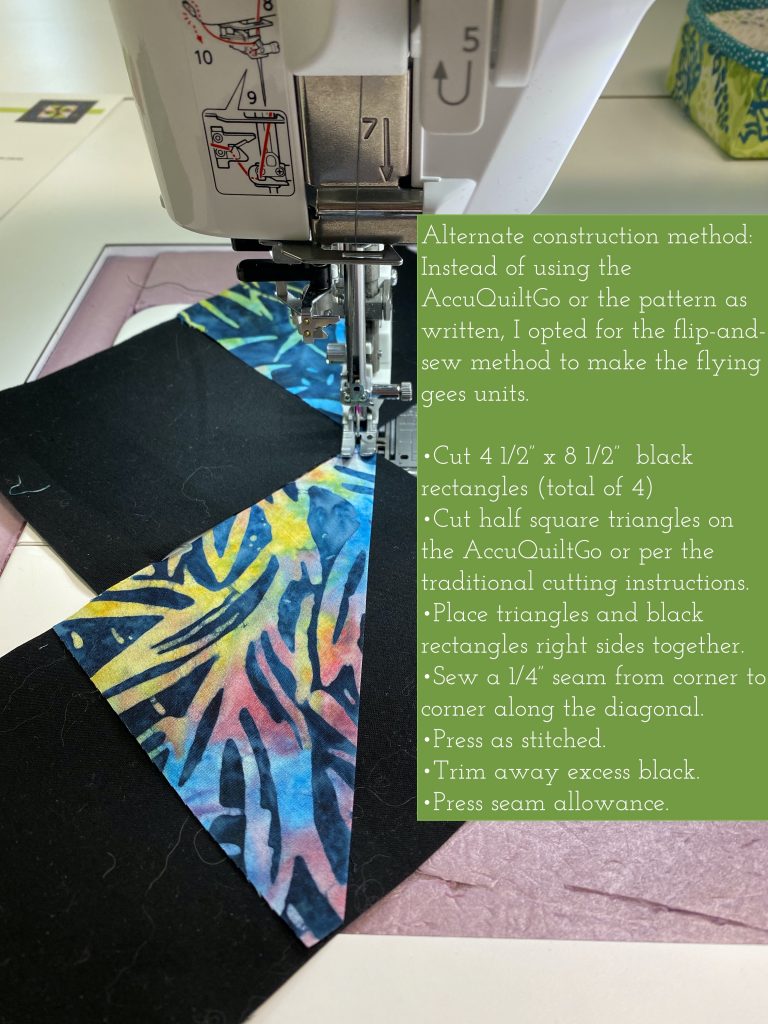
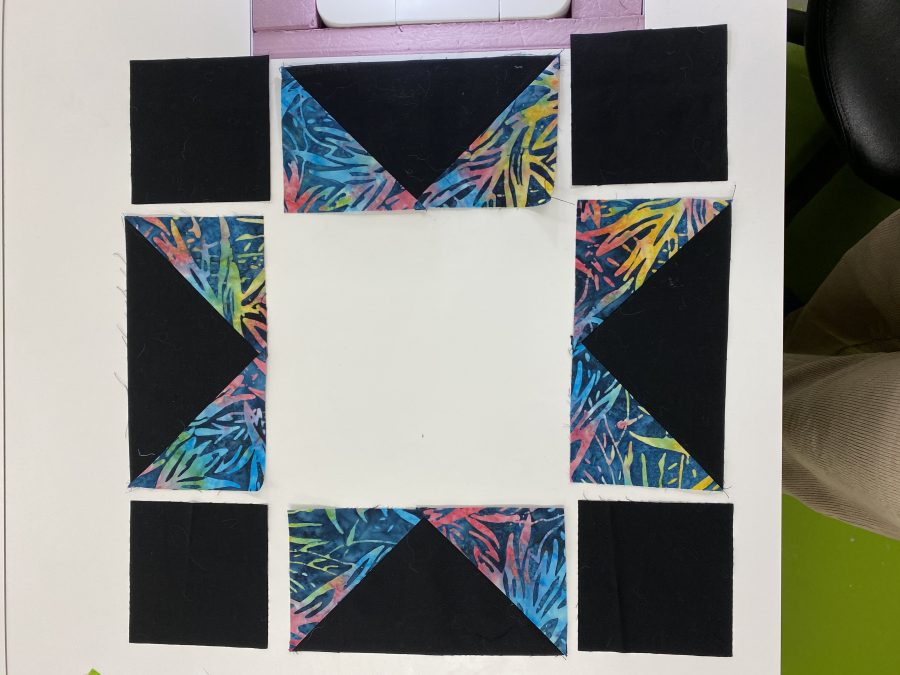
Wasn’t that amazing? Wait until you see the Winding Ways quilt I have in progress for later this year! For now, let’s stick to Peek Into Batiks! This step is where I veer from the instructions (of course, it’s me… who follows instructions EVER completely? Not me…) In the interest of fewer seams, I chose to use the flip-and-sew method for the Flying Geese Units.
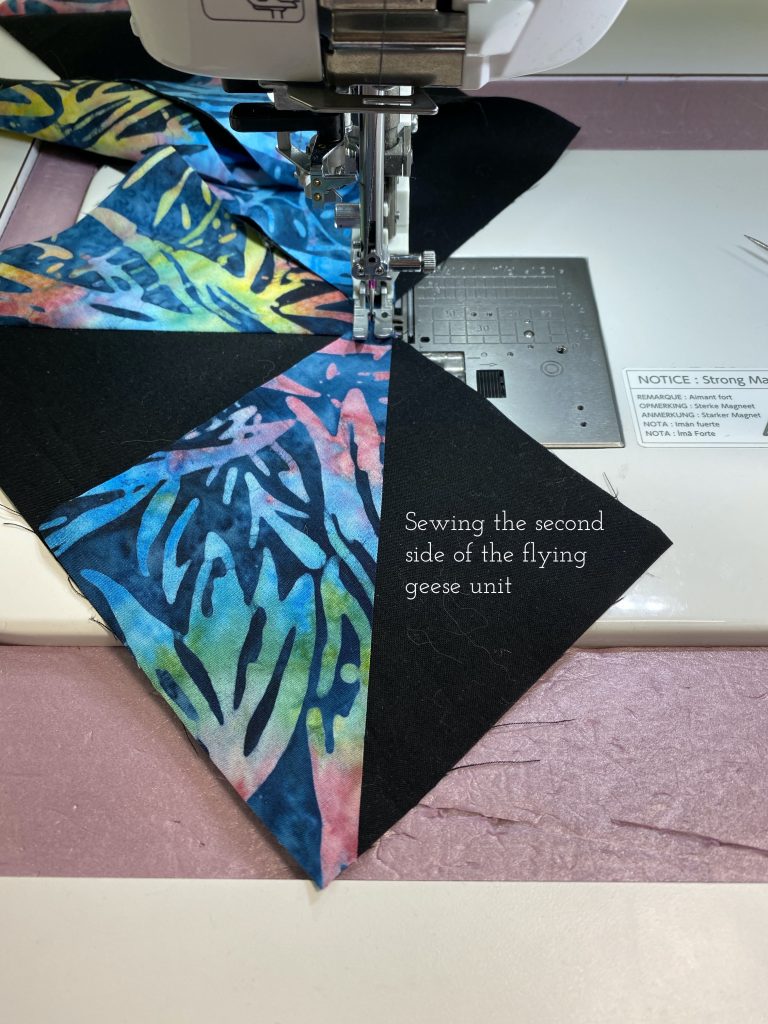
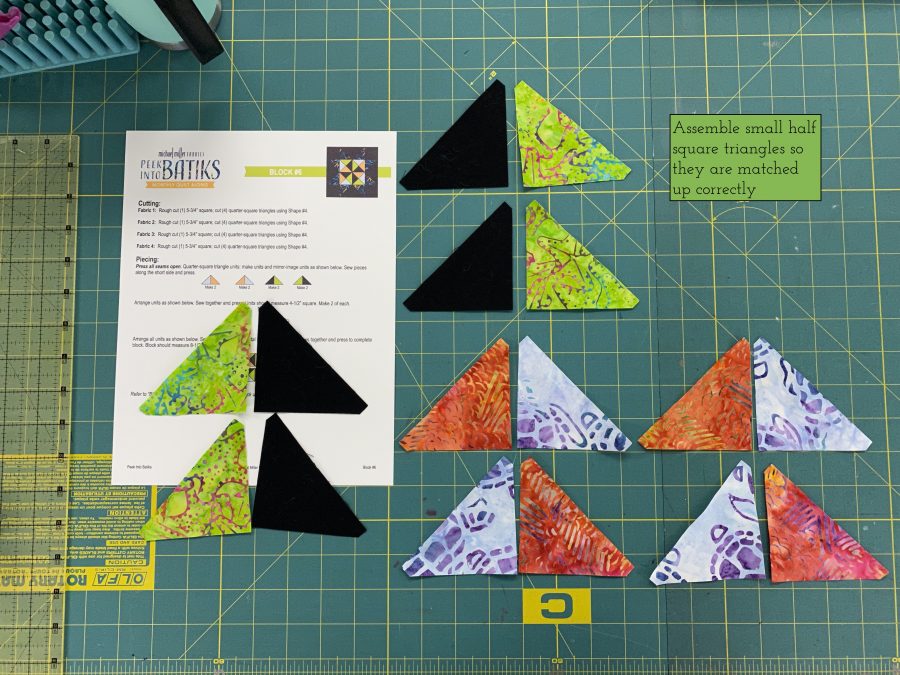
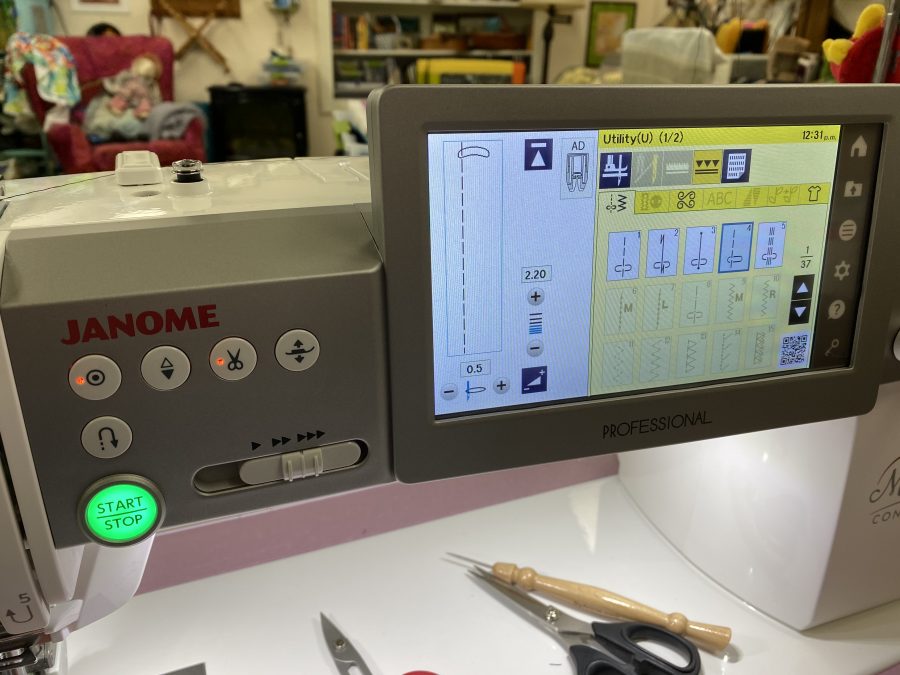
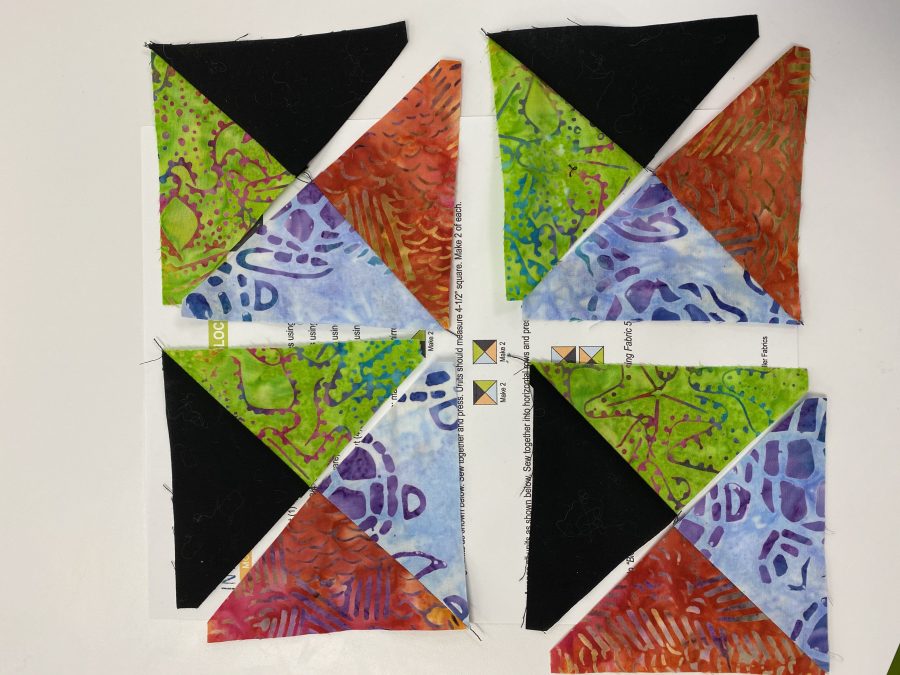
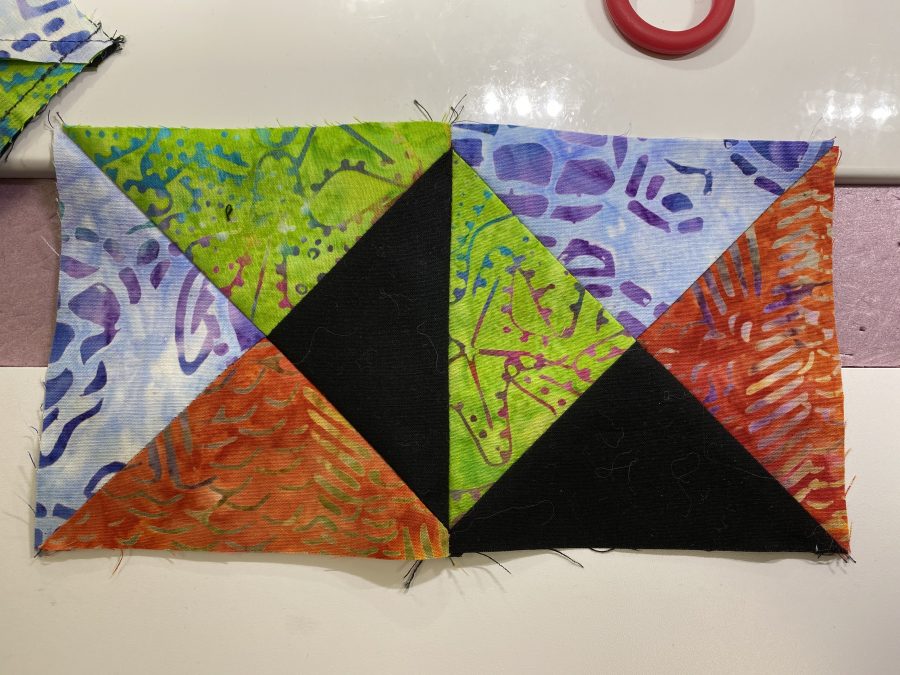
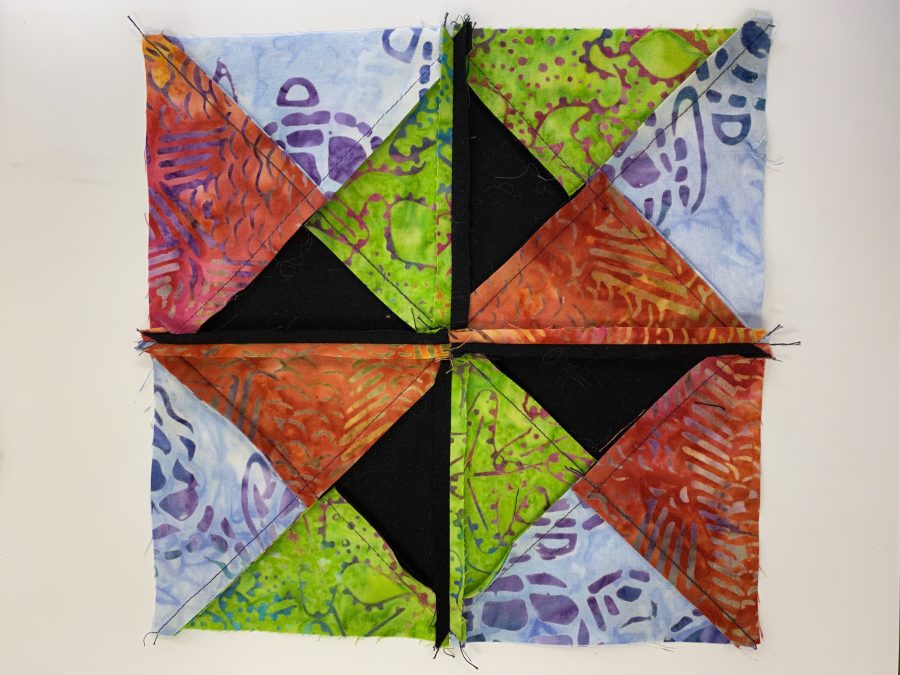
I’ve set out the large rectangles and half square triangles to make the frame for the block.Then I chain pieced the first side of the large Flying Geese.For the second side of the Flying Geese, same process, just make sure you get the triangles doing in the correct direction. Sew, trim, press.And the actual sewing bit…In the interest of not ripping out seams, it really helps to lay these out so you have theirs organized correctly.Next up, piecing the quarter-squares for the center. First, sew two triangles together. The Janome M7 Continental lets me piece SO accurately. Between the M7 and AccuQuilt, even *I* can be precise! I paired up the two-triangle units to make sure I didn’t mix them up while sewing.Then, sewing the pairs together. Using the M7’s HP foot and throat plate meant PERFECT piecing. See next pic!And two of the quarter-squares sewn together. I can’t believe I pieced that perfectly!Here’s the back of the block. Notice that some seams are pressed to one side, but the main seams joining the four squares are pressed open. This helped keep everything nice and tidy and perfect on the front.Once the center unit was ready, I set up the “frame” for the block.I sewed the sections together in three rows. Notice the only imperfection is down where *I* used rotary cutting…sigh……..Here’s the finished block again!
Remember, go here or HERE for all the links to the six blocks so far and to check in for the rest of the year. The finished quilt is beautiful!
As I transition to holding online classes to supplement live and in person classes, I needed an overhead view of my work table. The traditional way to do this (outside of a fancy filming studio) is with a “C-stand” that is sturdy/heavy, stands on the floor next to your work table and has a boom arm that extends over the table. Then you hang the camera/iPad/iPhone from the boom arm. Cue COVID delays in shipping. I tried the one I could get in time for this week’s Perfect Bindings class at the first ever Mancuso online shows. The accessories didn’t fit the boom arm. Back they went!
Cue: Mama’s brainstorming, Mama and son’s (Joshua) creativity, and Joshua’s awesome tools (Band saw! drill! Random bits and bobs) and construction experience and help, and a stand using leftover stuff and $5 in supplies.
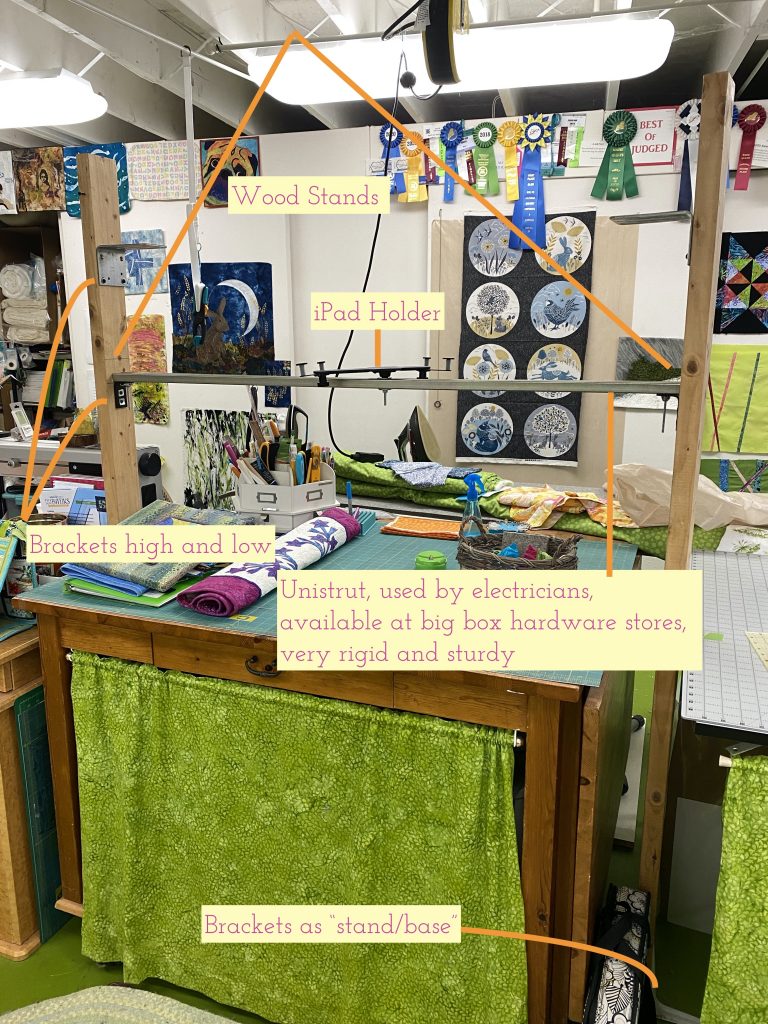
A DIY overhead camera stand
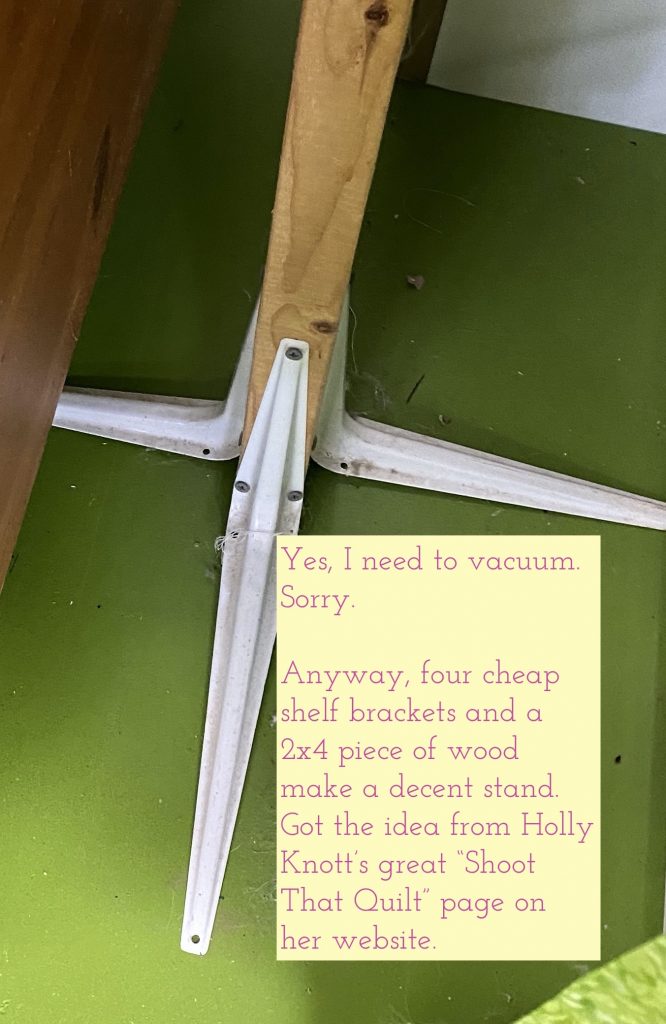
The wooden “light stands” were built based on information from Holly Knott’s wonderful “Shoot That Quilt” section on her website about taking great photos yourself of your quilts to enter in shows and magazines: two pieces of 2×4 lumber and four cheap shelf brackets for each stand.
Ignore the dust, cat hair, pug hair and thread. Please. Sorry. Here’s the link to Holly’s useful webpage on quilt photography.
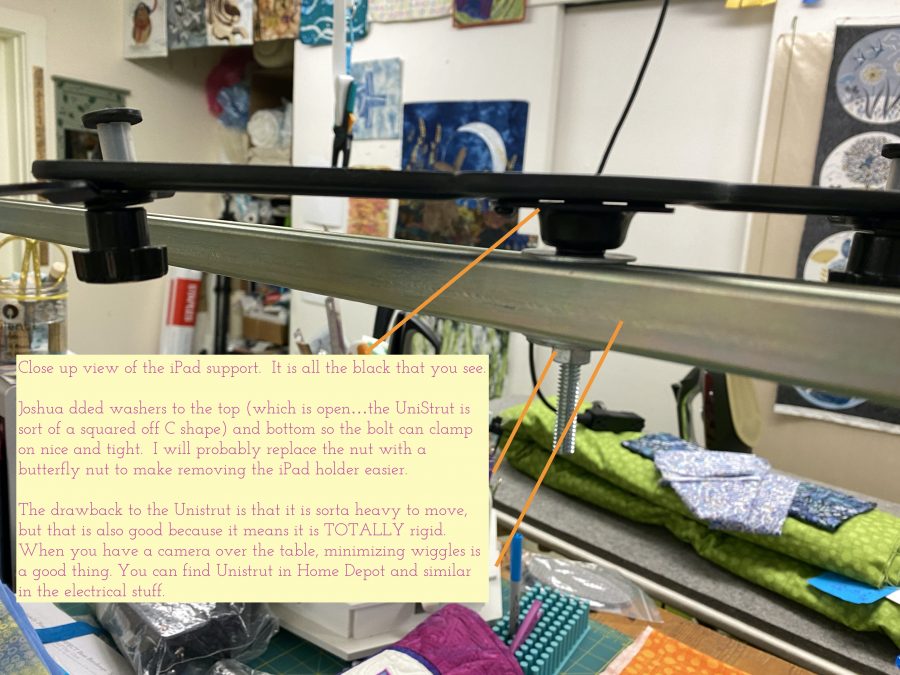
Joshua, our older son, did some electrical work for Mom and Dad (us) a while back, and introduced us to something called Unistrut. Link here. It is a bit heavy, which is why I looked at C-stands to begin with, but that is also its virtue: it is totally rigid. Rigid helps keep your camera (in my case my iPad) stable.
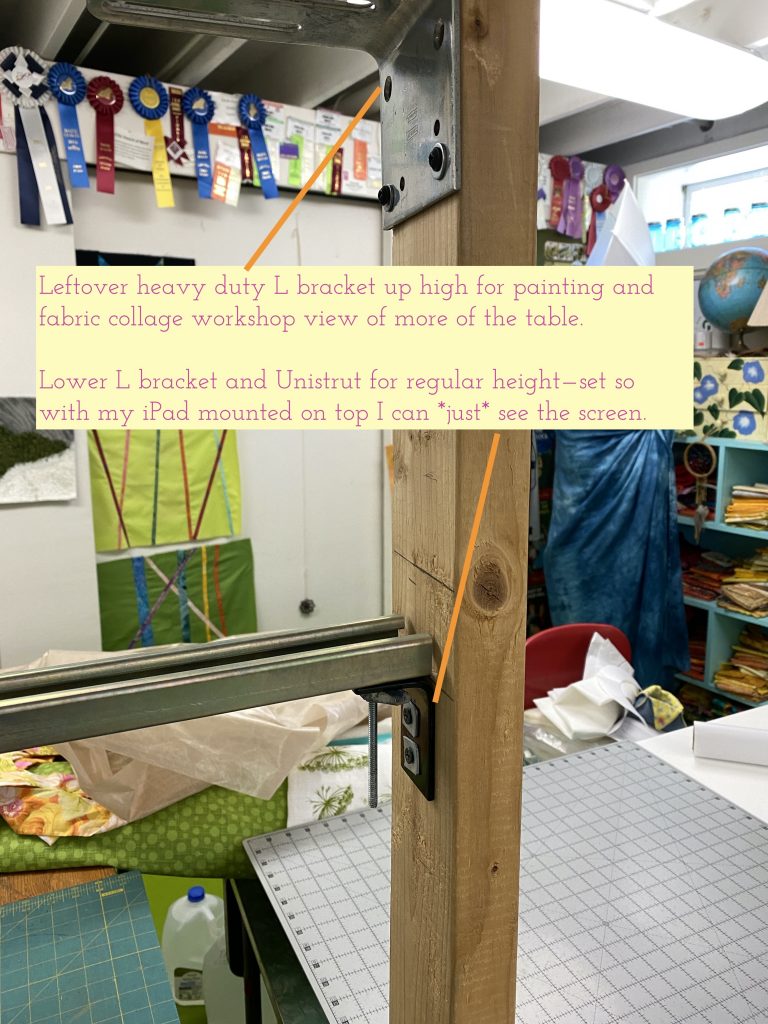
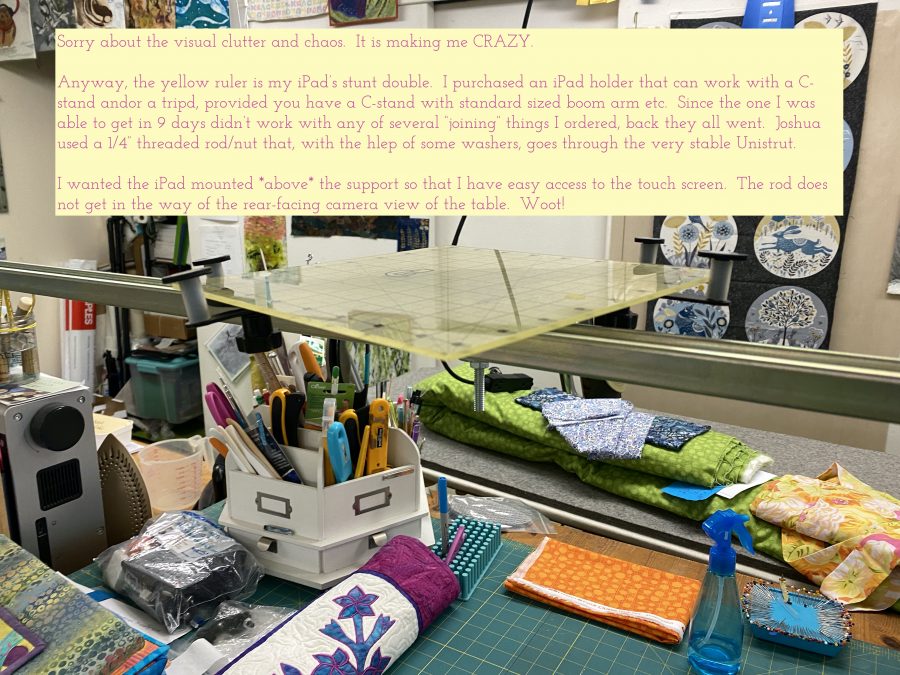
The upper brackets were from something else that was modified. Knew they’d be handy! I bought two small black brackets with one hole on each side. Joshua said I needed two holes to prevent the small L brackets from wobbling, so using his awesome power tools (tool envy!), he just drilled an extra hole. He cut the Unistrut in about 8 seconds with his band saw. It would have taken me the better part of an hour with a manual hacksaw! The length is the width of my table plus an extra inch or so to help maneuver the stand into place.The ruler is serving as my iPad’s stunt double because I was too lazy to run upstairs and get the iPad while taking photos. Can you tell from the clutter how chaotic it has been? I CAN’T WAIT to have a MASSIVE TIDY ATTACK! I wanted the iPad above the bar for added stability and so I could have full access to the screen while teaching live online workshops. A close up view of the stand attaching to the unistrut. Here’s a link to the iPad holder on Amazon. It isn’t the most rigid thing and the little grip thingies that hold the iPad in place aren’t huge, so that’s another reason to have the iPad on top supported by the cross bar and not just those four little pads.
SO if you are wondering what your teachers does to get ready for you, this is just one small but vital component. If you are going to TEACH online, I hope this helps you–please feel free to ask questions! MASSIVELY HUGE thanks to Lyric Kinard for her help on so many things on the technical side over the years, and to Lee Chappell who gave us newbie online teachers for the Mancuso show a studio tour by Zoom to share with us how she set things up. And THANK YOU to my wonderful, creative son who comes home and always wants to do some sort of “fix up” something for his mom and dad. Joshua, you ROCK!