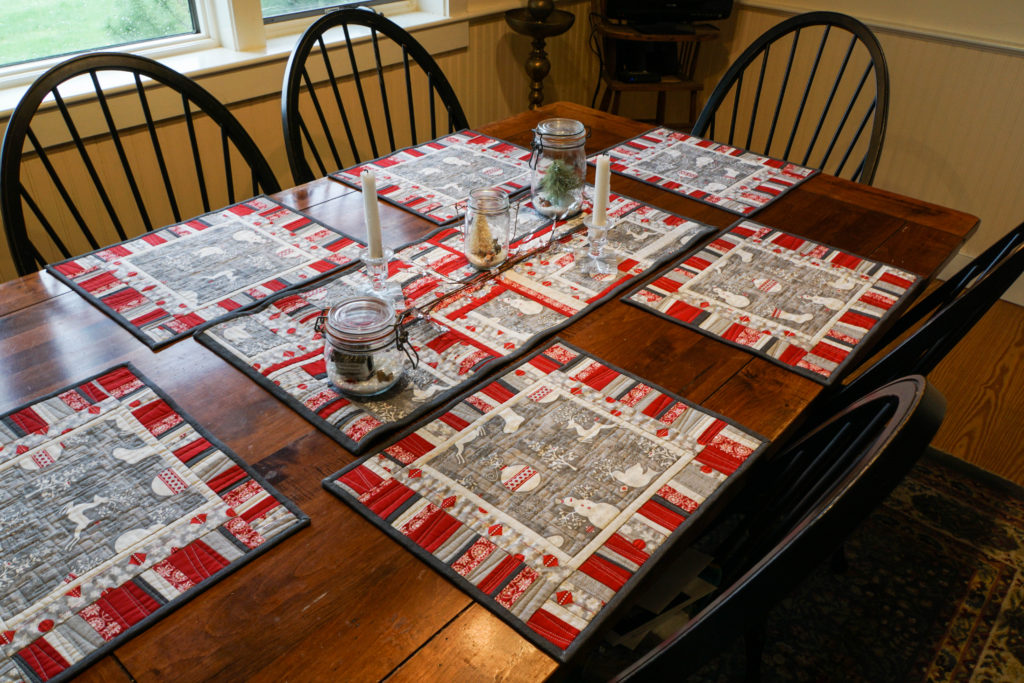
Modern Winter Placemats and TableRunner
Last December at our local Coastal Quilters Christmas/Holiday meeting, we had a little game where you each bring a giftie, and end up with a different giftie. I ended up with a lovely set of fat quarters in very “Quilt Modern” colors: the red, white and gray winter themed ones. I decided to add some new winter placemats and table runner made from the theme fabric using improvisational piecing. You can find the pattern at Janome America’s blog, here.
Modern Winter placemats and table runner.
I added the solid red and dark gray fabrics. I will advise you: MEASURE YOUR TABLE FIRST. I made the placemats first, rather oversized. I had two of them bound. Then I discovered they were too big, had to pick off the binding, cut them down (the instructions on the Janome site are for my final size), and re-do. Erk.
Depending on the fabric you select as a feature fabric for the centers, you can adjust the size of the inner borders (or omit them entirely). I had just a half yard of the feature print, so I needed to use smaller cuts and build them out. If you buy a little more, then you can omit the inner border and strips.
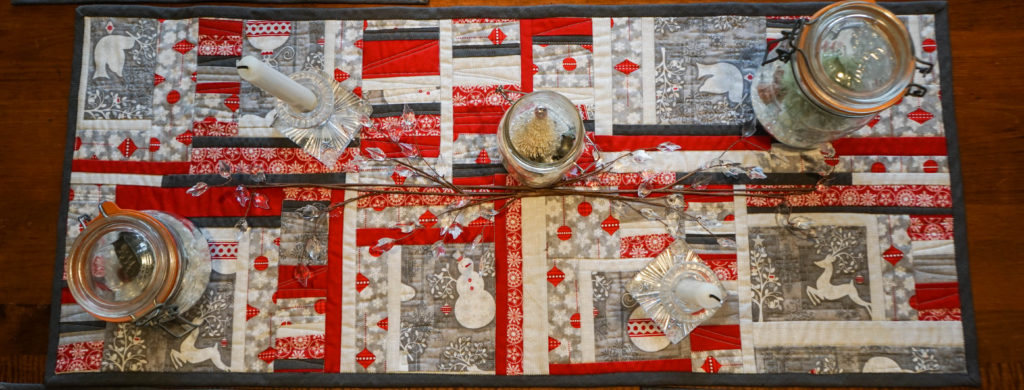
An overhead view of the table runner; I used the few remaining bits of the feature print and built them out with strips, then fit them together. Can you say “liberal use of partial seams?”
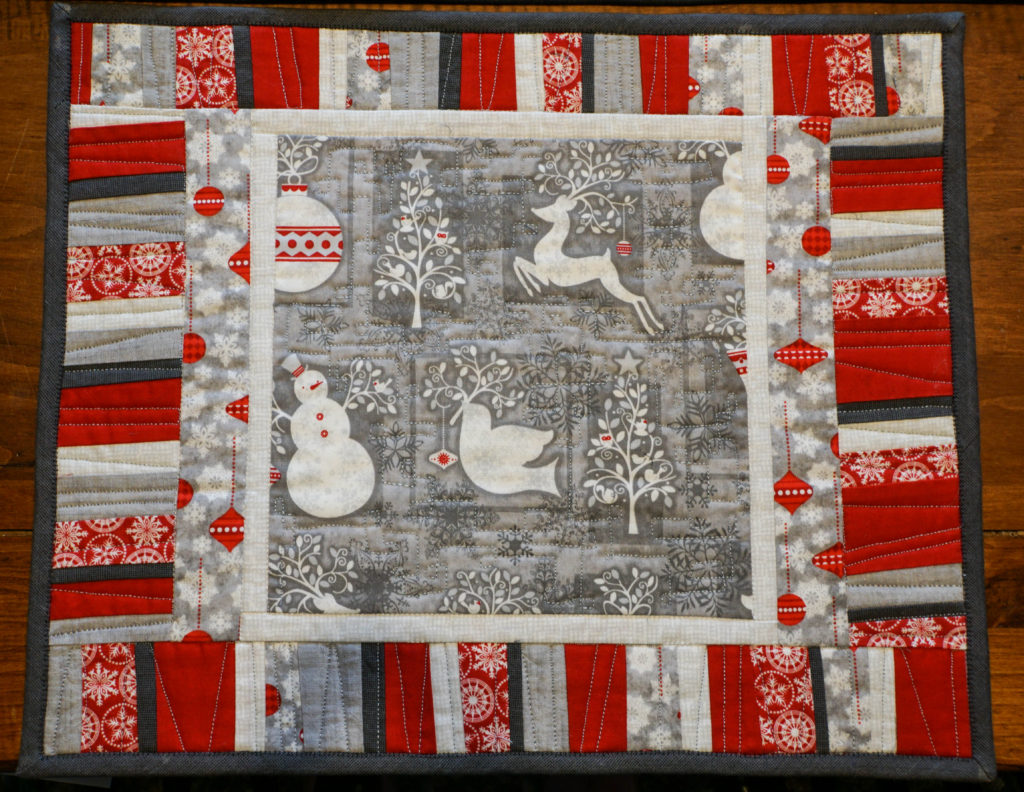
Overhead view of placemat
My favorite way to do bindings is by machine. My secret: glue stick! I only use the glue stick on things that will be washed (probably often), so I wouldn’t do this on a high-end art quilt, but for a baby or bed quilt or table linens? You betcha!
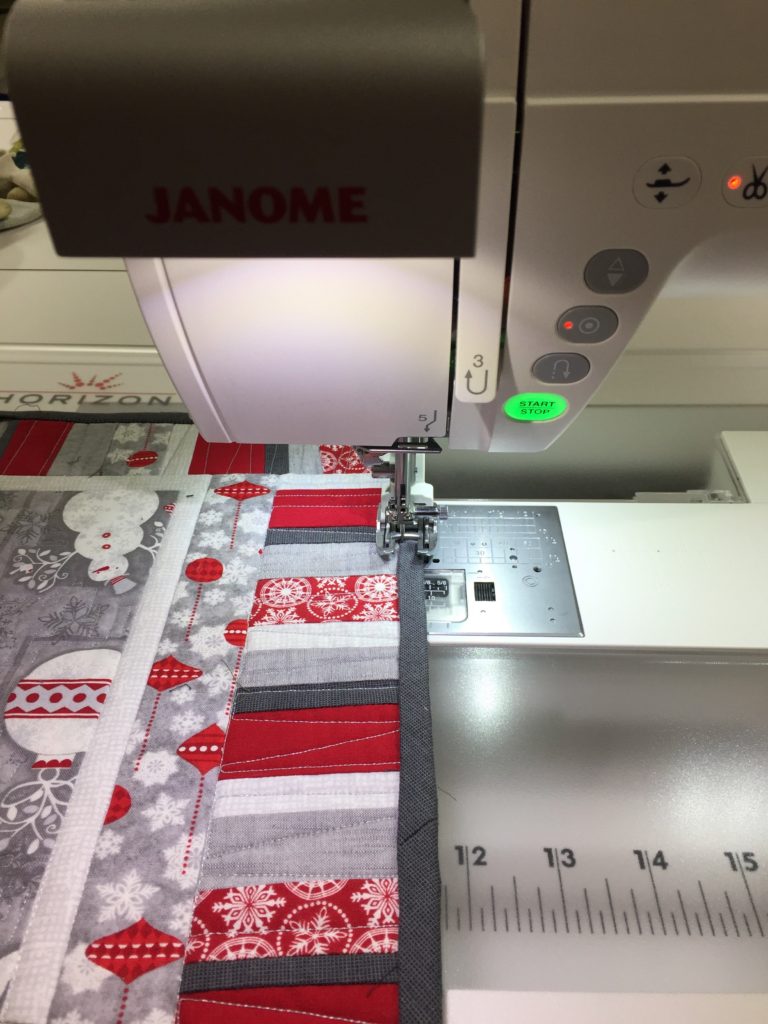
Stitching down the bindings on the Janome 9400. Love that pull-out light! I sew the binding to the back, wrap it to the front, then at the ironing board use glue stick on the seam allowance. I press the binding down and it stays put–no pins! no bumps! no wiggling out of place!
I used a blanket stitch, with the straight part in the “ditch” (just to the left of the dark gray binding), and the “zig” going onto the binding.
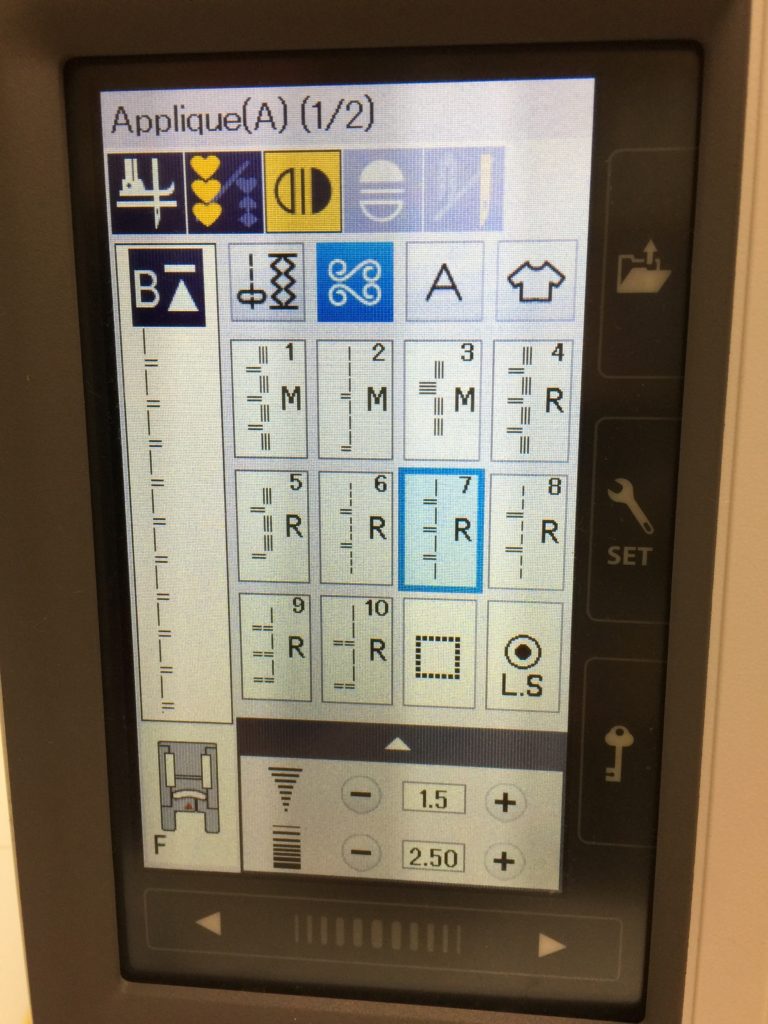
I used this stitch to finish the bindings, and used the mirror image button (above in yellow) so that the swing of the stitch goes to the right of the straight line (see the stitch as displayed at the left of the screen).
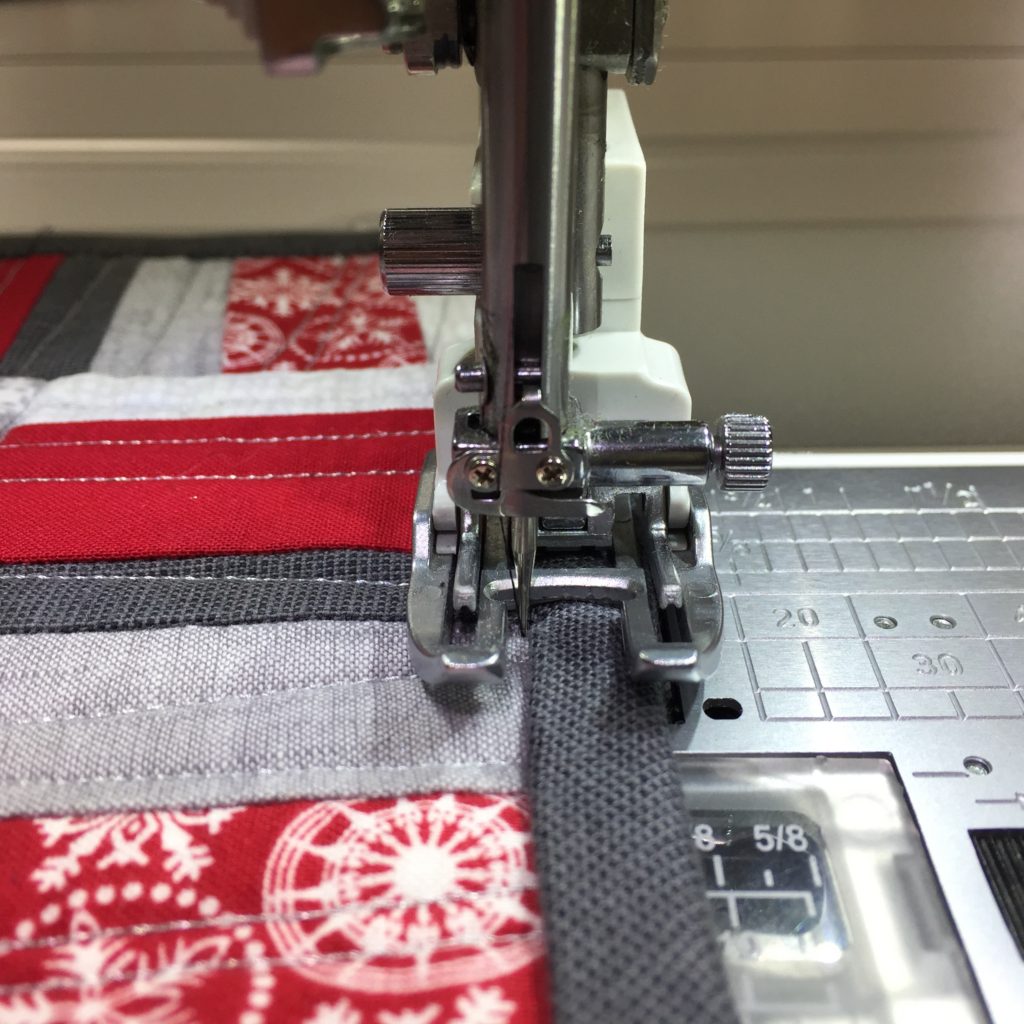
A closer view. The needle just barely misses the binding when going straight, then swings over onto the binding to hold it in place.
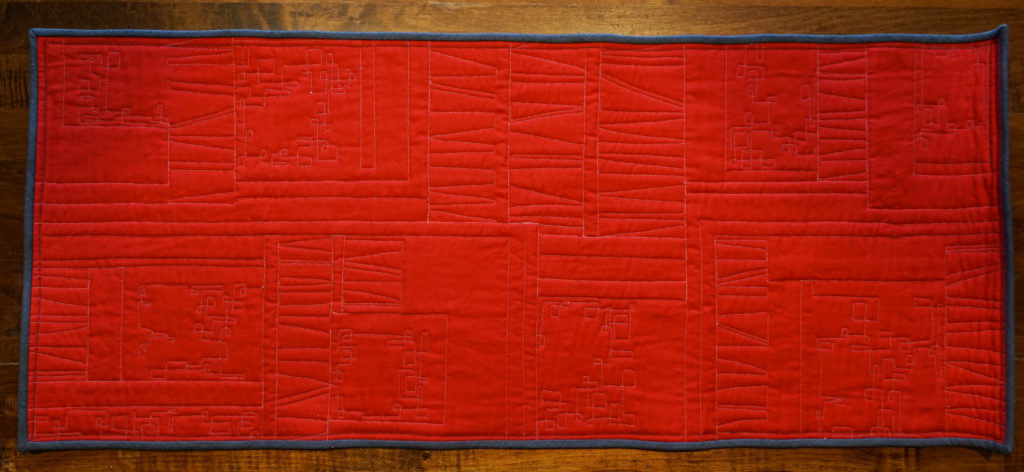
Back view of my quilting. I used a FMQ ruler (thicker than a cutting ruler) with the QO foot (this is not necessarily recommended, you really should use a proper “Ruler Foot” but I was extra careful) to do the straight line quilting across the strip sets, then used a squared off loop in the background of the feature fabric bits.
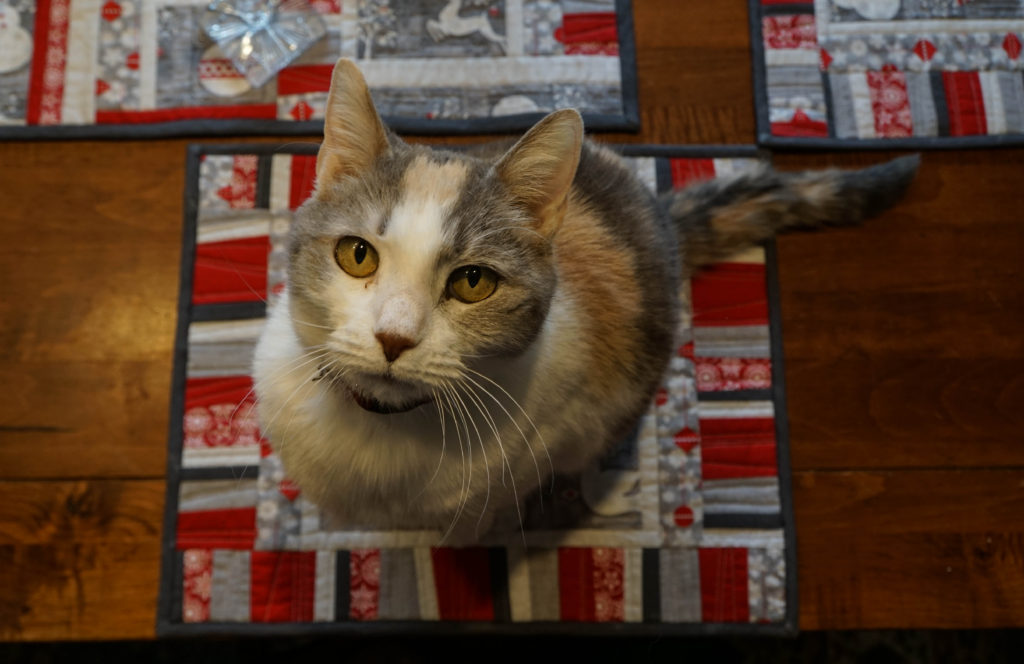
It must be good: it has passed the cat-sitting-on-it seal of approval!
December 7th, 2016 at 7:24 am
Great project! LOVE the fabrics!
December 7th, 2016 at 12:57 pm
The last “seal of approval” photo makes me giggle.
Whenever I design a table runner, it seems to “run” off the table too.
Lovin’ the end product.
From cold and snowy WA state,
December 7th, 2016 at 7:32 pm
Lovely! Especially the Cat approval! Mine “Usually” stay off out table; maybe because we have it covered with so much stuff?!
December 7th, 2016 at 11:00 pm
Super fun, and a great tutorial! Loved the Cat Approval too.
December 8th, 2016 at 9:33 am
Thanks all! The cat has always been the ultimate test of quilt worthy-ness!