She makes clothes, too!
It has been a while, but I have gotten back to making clothes over the past year or two. I began life as a garment sewer, but abandoned that when I discovered quilting. Now that I am getting older, I find that I don’t always like the generic stuff available and have begun sewing clothing again. Sometimes, I find the PERFECT top though, and can’t find it again. That leads to making your own patterns.
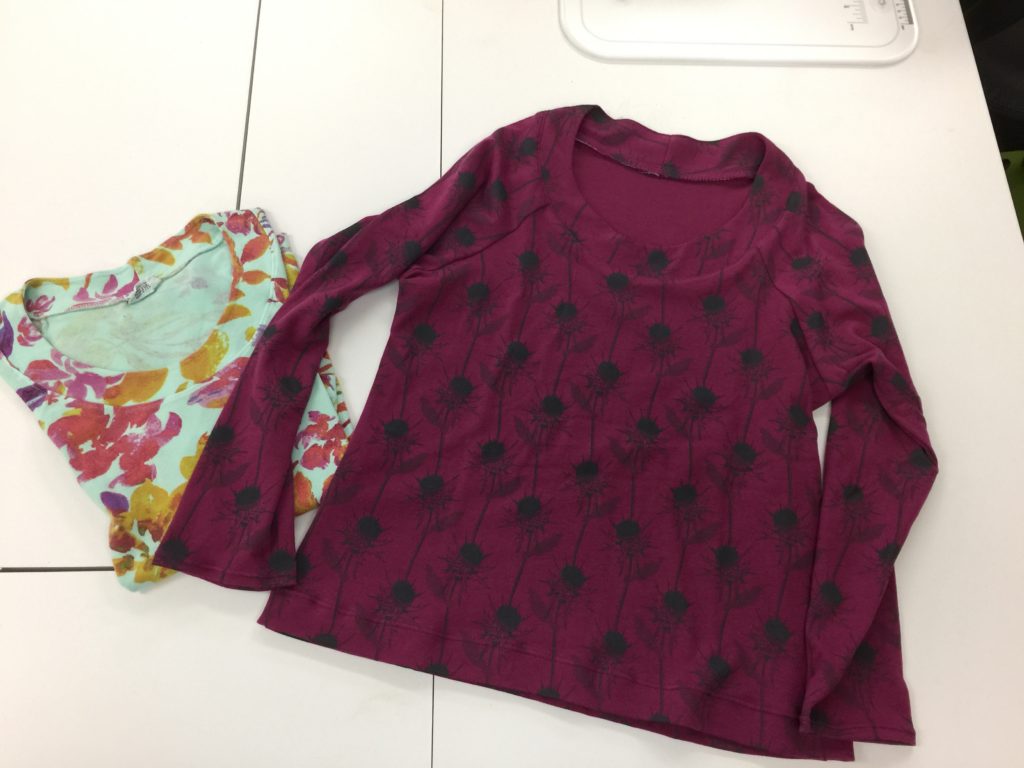
Success! I actually made a KNIT garment. The original shirt (purchased) is on the left. After making the pattern from that shirt, I made the plum one on the right.
The aqua shirt on the left, from Habitat, is a favorite. It is also getting old and tatty. I found the plum knit (Anna Maria Horner) at Alewives Fabrics a couple years ago made up in a dress. They had 1/2 yard more than needed for the dress, so I bought all of it. But I decided rather than make a summer dress, I would make a top and leggings or two tops out of it, since it seemed more autumn-y to me. The fabric is long since sold out, but Alewives has a great selection and does mail orders!
I took some cheap paper (a roll of medical exam table paper bought from my doctor about six years ago and the roll is still not near done) to make tracings of the original shirt pieces (which involves some creative pulling and pinning to get things like the sleeves outlined) to make a pattern. I smoothed out the lines, lengthened the sleeves from 3/4 to full length for winter, and cut out my fabrics. For my shirt, I used a lightweight fusible interfacing for the neckline, but mine turned out a bit stiffer, so maybe next time I’ll try a LOT of starch and no interfacing.
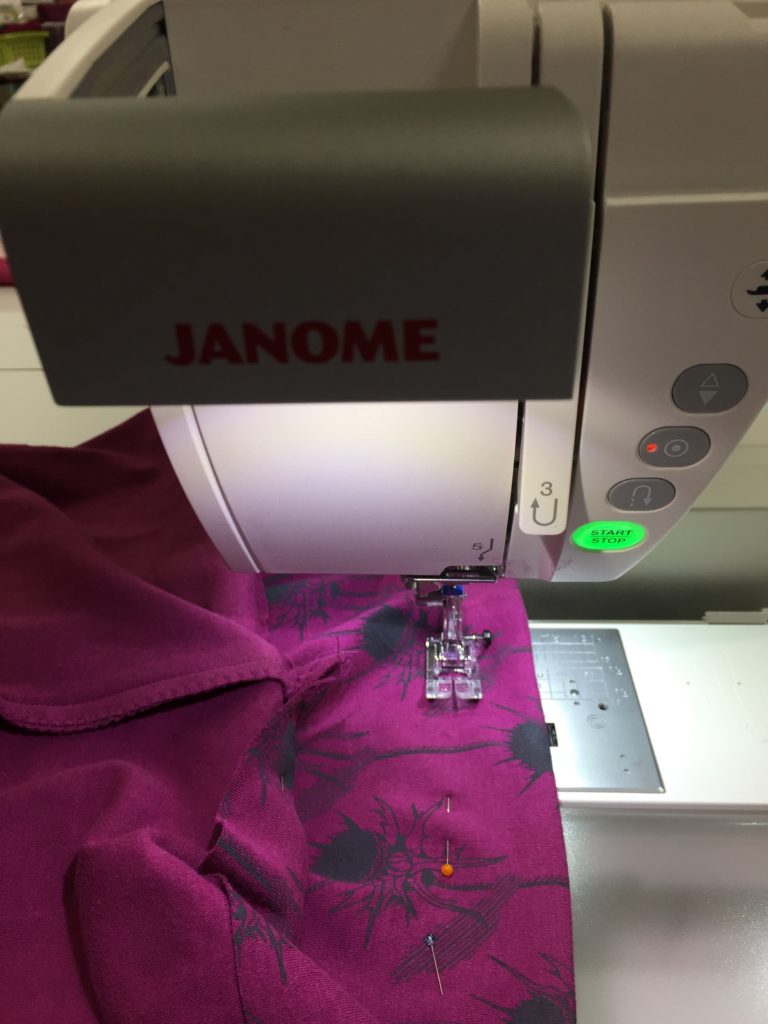
When sewing knits, you want to use a stitch that has some stretch in it and a BALLPOINT or Jersey needle–this keeps it from cutting holes in the knit fabric. You can use a straight stretch stitch that is standard on even the most basic machines…it looks like three vertical lines next to each other, stitch 5 in the photo below.
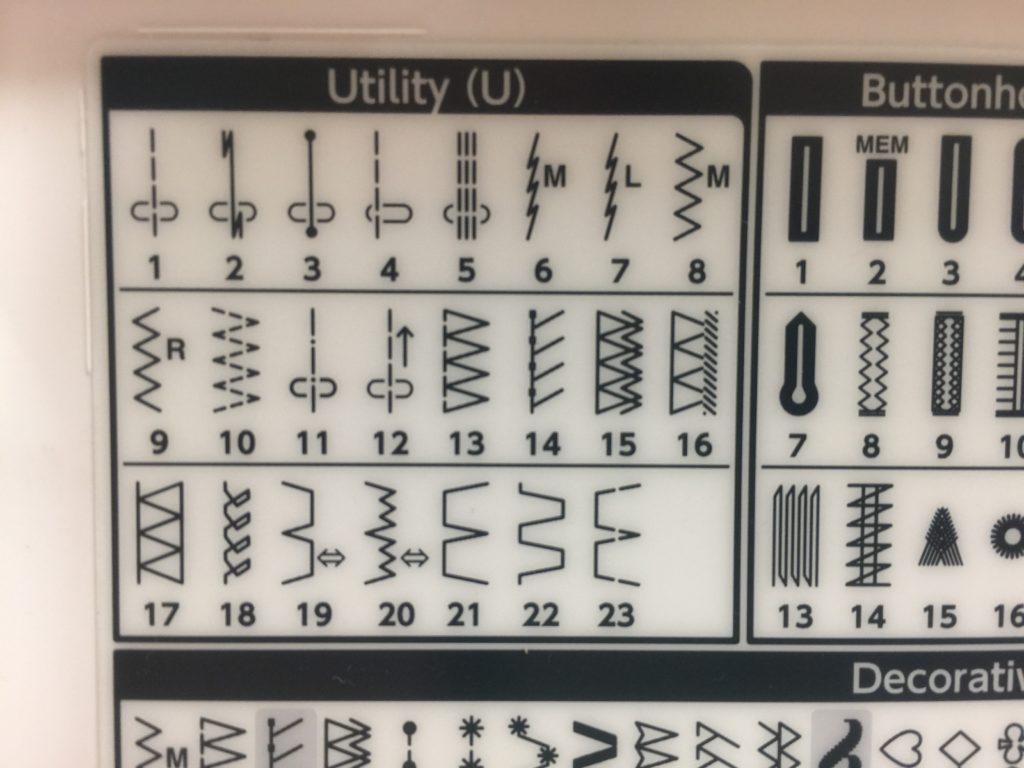
Utility stitches on the Janome 9400. Most of these stitches are available on even the most basic machines–the only ones you might not find are 6, 7, 12 (reverse), and 18.
A few thousand years ago, I took some sewing on polar fleece classes, and in those learned to use a zigzag for stretchy side seams on garments, so that is what I used for this top.
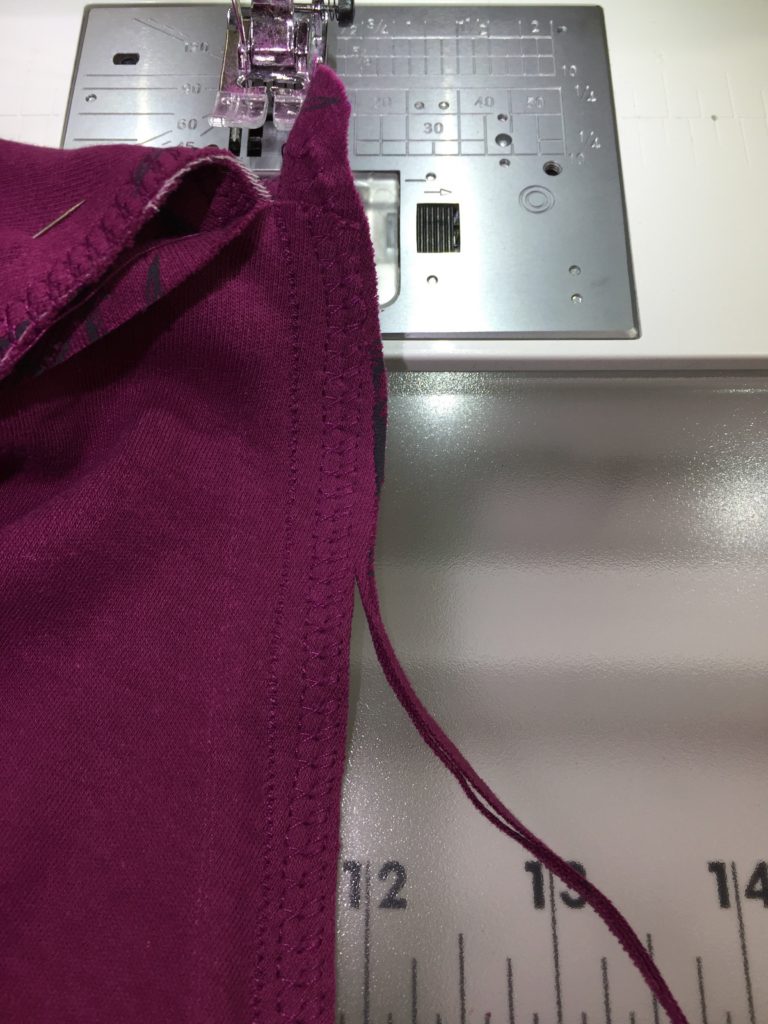
This photo shows that I used stitch 6, which I think of as a lightning zigzag, for the seam, and Stitch 18 for an “overcast” stitch before trimming away the excess on the edges. I like a nicely finished garment! One could also use stitches 10 or any in the 13-23 range for an overcast if you don’t have something like 18 on your machine.
To hem my top, I used a Ballpoint Twin needle (i think mine is a wider separation between the needles, nearly 1/4″). When sewing on knits, always use a ballpoint so the tip doesn’t cut the threads in the knit fabric. I wound some thread onto an extra bobbin and placed it on the second spindle. Then you thread the machine holding both threads as if they were one. After passing through the last thread guide (photo below), hand thread (don’t use the automatic needle threader as it won’t go to the correct spots) the needles.
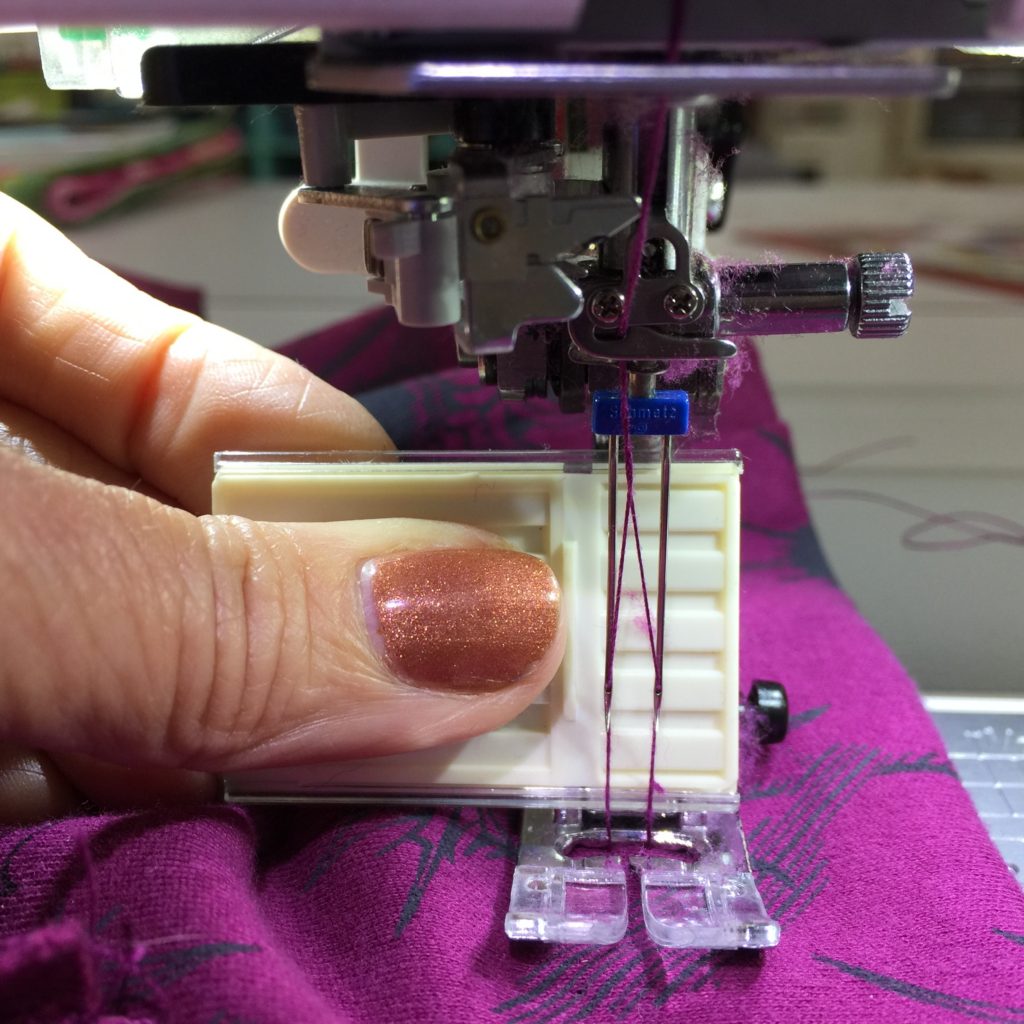
Twin needles make a lovely stitch. The bobbin thread forms a zigzag, which makes the seam stretchy (which means the stitches won’t pop and break when you stretch the hem).
Sewing the hem. I am using a line on the throat place as a guide to create a hem that is about an inch deep. After stitching, trim away excess fabric above the stitching.
I’m fairly pleased with my top. I’d do the interfacing slightly differently next time (and yes, there will be a next time–the neckline on this top is flattering on me and comfortable), but the Janome 9400 performed flawlessly. WOOT!
December 10th, 2016 at 10:15 am
Hey Sarah Ann,
I am with you on the available clothing to mature women! Like nothing.. I sewed my own clothes for oodles of years, have thought about it recently, just for some fabrics that I really like.. Your article is really informative and motivating! Holiday blessings! Susan
December 10th, 2016 at 10:53 am
I hadn’t made clothing in decades, either, and started again recently, with clothes for my granddaughter. I discovered a pattern paper at Clementine in Rockland that’s like a light interfacing–very strong, you can see through it, and it’s reusable. It’s 45″ wide, if you need something wider. Not terribly expensive; around $2.50 a yard, if I remember correctly.
December 10th, 2016 at 11:01 am
Wow, thank you for the tutorial. I have always stayed away from sewing knits, but with your instructions, I think I can do it. I too started out as a garment maker after being a Barbie doll clothes designer. Thanks, Susan!
December 10th, 2016 at 6:31 pm
Yep, I’ve heard of that. Sometimes called Swedish Tracing Paper. There’s also one with red dots. Great stuff! I’ll see about getting some next time I’m in Rockland.
December 10th, 2016 at 6:32 pm
A few more tidbits: don’t forget to pre-shrink the fabric! Knits stretch, so depending on the fit you want, the pattern might appear too small, but in fact just right. Using a shirt with a fit you like as a guide helps a lot. Narrow zigzag. And honestly, a class doesn’t hurt. I took one on fleece about 25 years ago (actually, longer) when we lived in DC. Still using that info. May take another on Craftsy!
December 10th, 2016 at 6:33 pm
It’s better than it used to be, but sometimes I just find something I really like. I’m also gonna take (I think) a class on Craftsy that has you buy some knit yardage and re-work t-shirts into something that is actually attractive, not a shapeless tube/box!
December 10th, 2016 at 8:17 pm
Thanks for a great tutorial. Like you I used to make my own clothes sometime way back when in the last century…
Now,I’m hankering after clothes that fit my petite, mature, frame and have lusted after some of the fabulous knit fabrics I see online.
Recently I was using a minky-like fleece for the back of a quilt and decided on the #6 stitch for joining the seam after making some test samples – I was very pleased with the result!
I was nervous about leaving the knit edges unstitched so finished them off with the triple-stitch zig-zag (#10 in your photo)
I’m thinking perhaps I should practice with my left over fleece scraps and make myself a cozy bed-jacket to start with!
December 12th, 2016 at 2:00 am
My apologies. I can’t find your direct email address. You might enjoy this pattern company. I’ve come to the conclusion she is “Hot” patterns is because she is in Florida. A little chilly for this time of year in our latitude.
HotPatterns.com
December 19th, 2016 at 4:43 pm
Great Job!
December 19th, 2016 at 9:15 pm
Wow! How did I miss this?! LOVE that fabric….
Well done!
December 20th, 2016 at 10:46 am
I know…I needed 3+ yards to make the dress I originally thought to make. They had 4 so I bought it all. Then changed my mind and made this top and hopefully some leggings this coming winter! Thank you dear one!