Marking the quilt top, part 1 (no-mark)
So how do I mark my quilt tops? As LITTLE as possible! Marking ranks right up there in the fun index with basting and ripping out stitches. Ick! However, sometimes it is necessary.
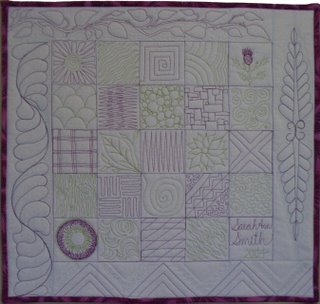
I have developed a “vocabulary” of stitches that I use a lot that for the most part need little or no marking … some are common, some are just mine (and now shared with everyone who has taken my class or reads this post!), some are combinations gleaned from various machine quilters. My intro to machine quilting class sampler has a lot of them:
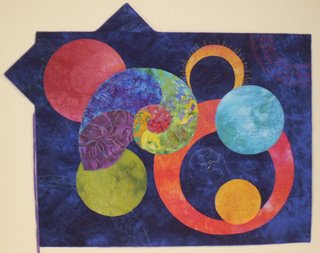
And I used a lot of these stitch patterns (and got good photos and they show well) in my first “Circular Paradox” quilt (there are a couple more in this series in my brain…maybe they’ll escape into the cloth this summer?):
For these patterns, I don’t mark at all, I just “go for it.” I look at the space available, where I want to end my stitching (so I can move on to the next area) and think how I will fill it, because I don’t want to “mop myself into a corner.” In circular paradox, I used the shapes of the fused applique pieces to define the areas:
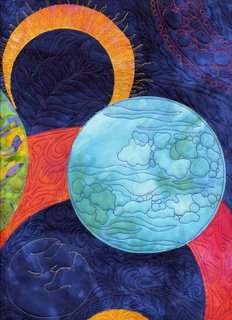
Sometimes, I will want to add “echo” shapes. In this photo,  you can see an arc in the top right done in a variegated red thread. I used a plastic circular template and my Chaco Liner chalk marking tool (made by Clover–here’s a link—this is at Hancock’s of Paducah..these are widely available, and your local quilt store can order them easily from their wholesaler). I prefer white or blue; the yellow sometimes can be tricky to get out. The chalk left by these tools dusts off easily, which means they are good for something you will quilt immediately. They don’t work at all for fiddly details or marks you need to stay put (more on that kind of marking in the next post…this series of posts keeps growing).
I will mark out an area or shape, then quilt it free-form, as I did here (even the “straight”–not quite–markings are done free-motion).
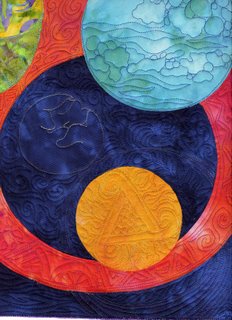
Other times, I will mark out an area like the mama and baby rabbit inside the coral/fuschia circle or the triskele (a Celtic image associated with woman) in the golden yellow “planet”. The mama and baby rabbit are from a wooden two-piece puzzle I bought in Japan (if you stick around until I post Marking the quilt, Part 4, you’ll see the puzzle). I simply laid the piece on the top, outlined it, and quilted.
For the triangle shape, I surfed Google Images and my favorite book for inspiration: Decorative Patterns of the Ancient World. I think they re-titled the book, because it is still from Dover (and therefore modestly priced) and available at Amazon. If I can’t find inspiration in this book, I need to go do something else!
And now I need to go to a meeting, so I’ll return and do Part 2 later…which involves fiddly marking!
