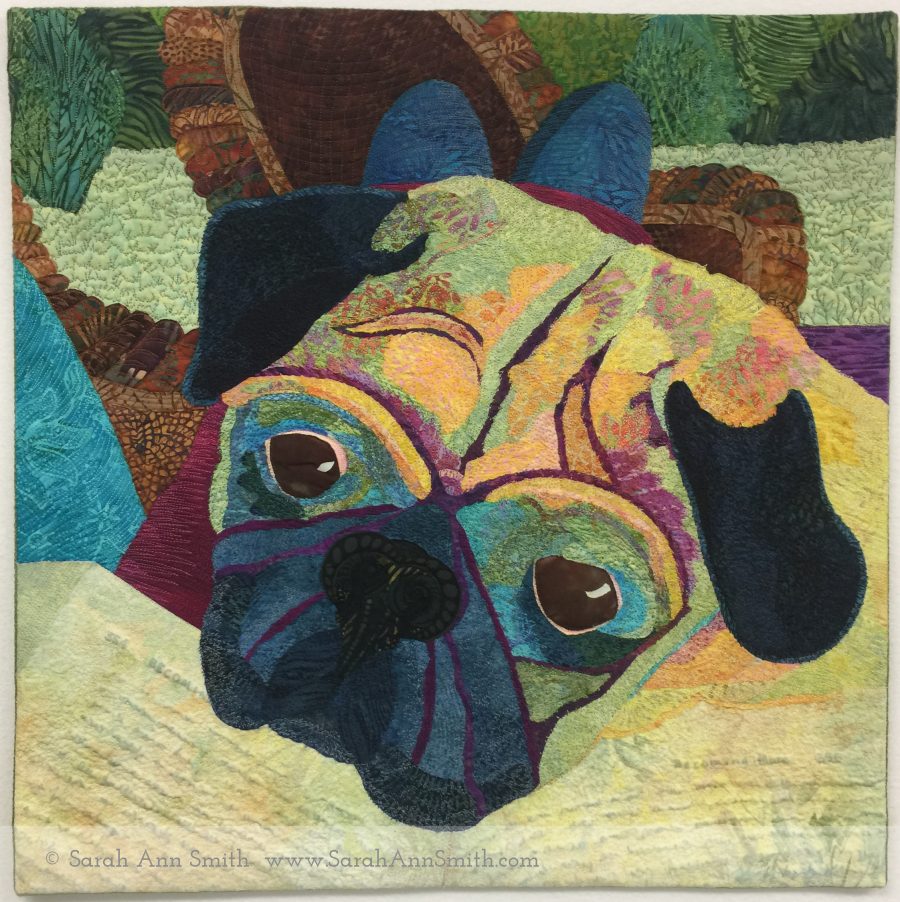
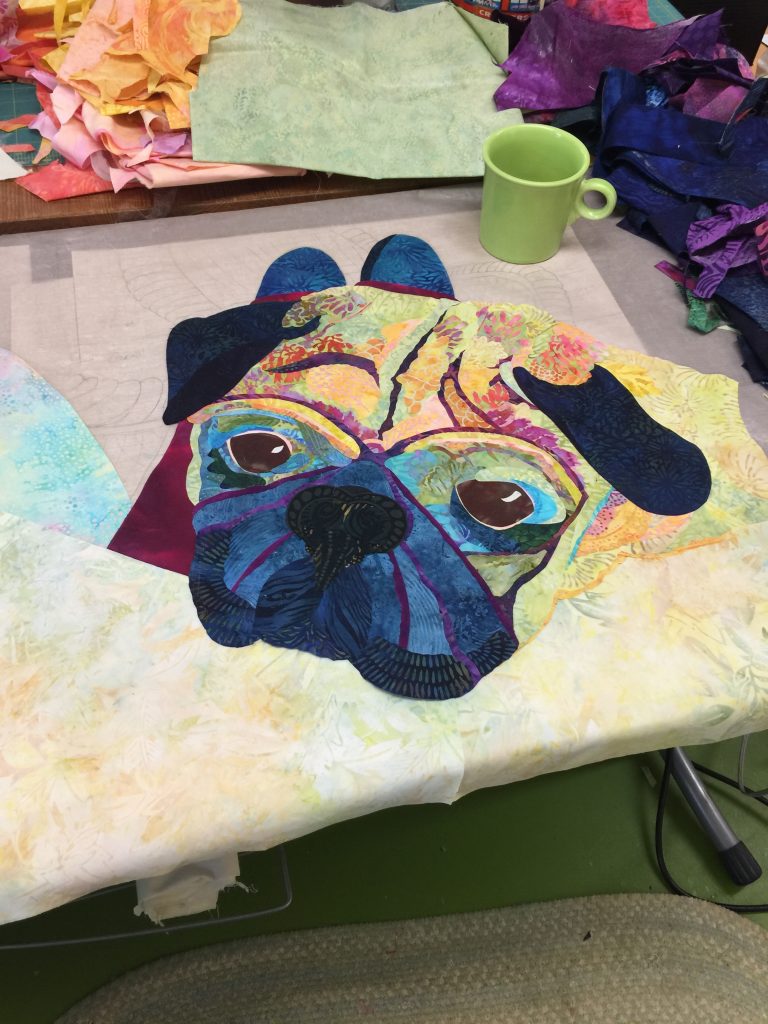
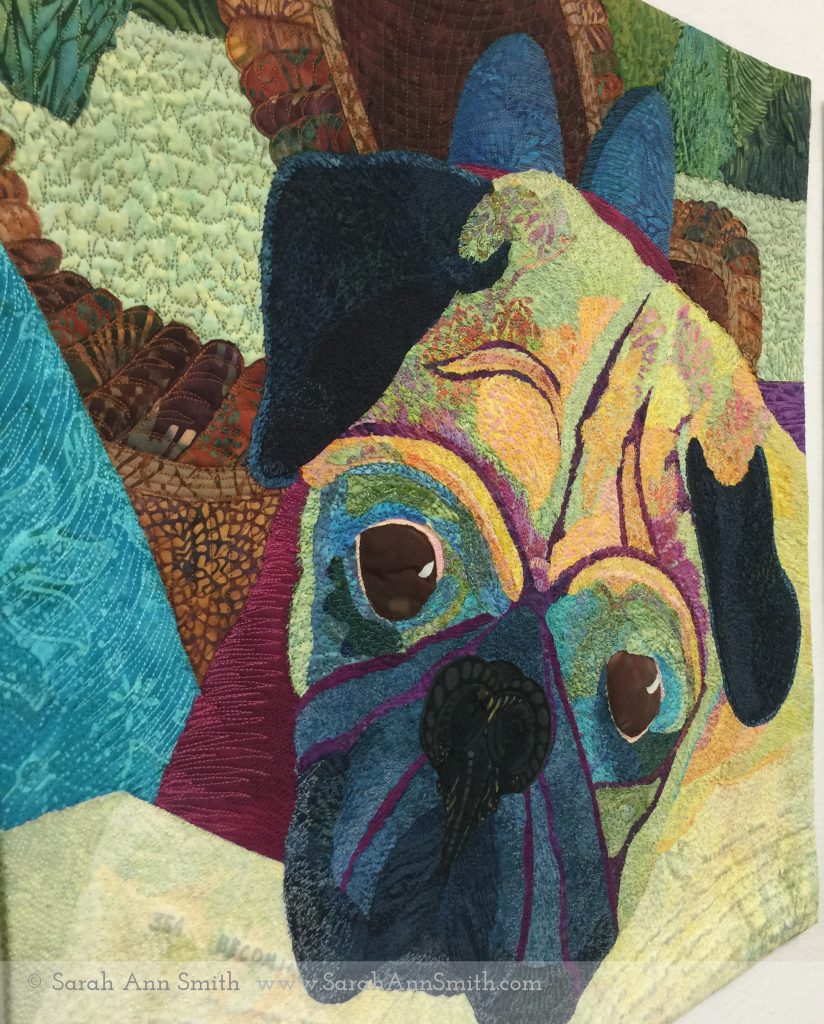
“I Love, Therefore I Am” is the perfect title for this quilt of our beloved pug, Pigwidgeon.
Earlier this summer I made three quilts for Janome America to share at the upcoming dealer conference in Florida this week. Janome has generously sponsored me with a machine and included me in their Artisan program for over 15 years!!!! THANK YOU (yes I’m shouting)! I was delighted to make these in appreciation. Here is the blurb I wrote to go with Widgeon’s quilt.
I Love, Therefore I Am
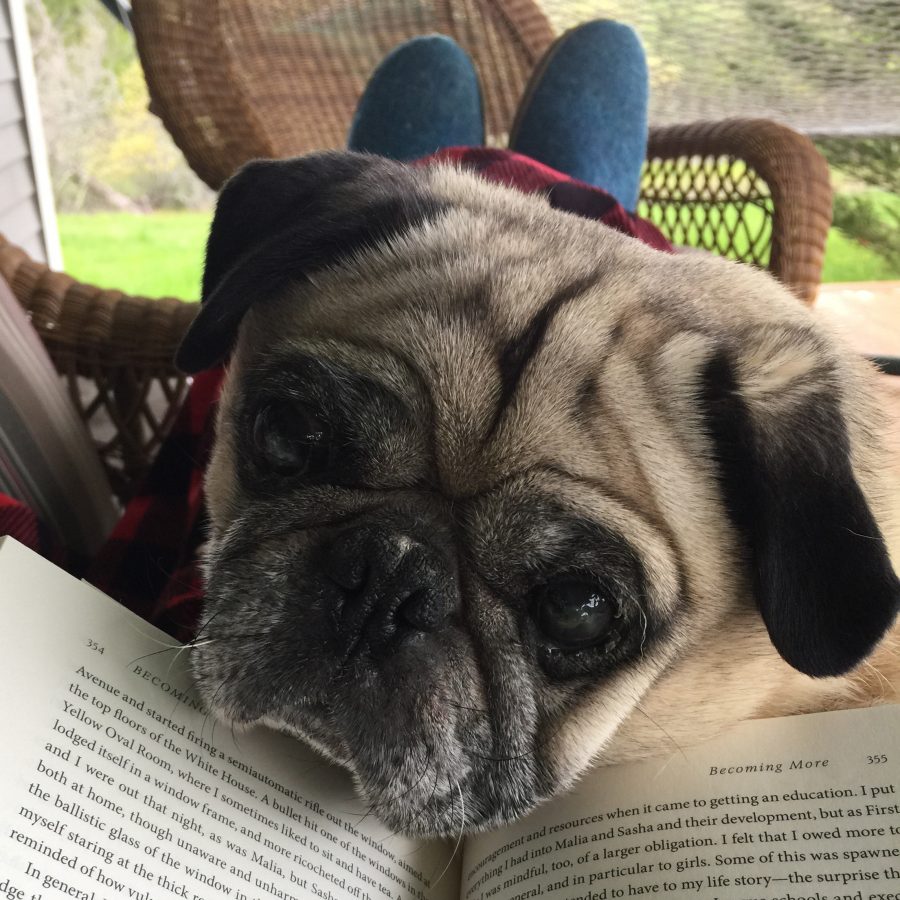
“Yoda, the love of my life, tells me that Mom has done a good job on my portrait. Mom and I were sitting on the porch in late Spring even though it wasn’t quite yet warm enough, so I snuggled under the blanket and kept her company (and warm) one afternoon. I don’t see or hear very well any more, but Yoda tells me the picture shows how much I love everyone in the whole universe, especially him, my boy, Mom, the rest of my family, and well, the whole world.” (Pigwidgeon is a 12 year-old industrial-sized pug.)
My Facebook friends know Widgeon because of my dog walkies posts and other photos. My friend Rachel Parris commented on this photo that it was the best one I had ever taken of him, and the idea for the quilt was born! Often I end up working too much during summer and don’t get my “Porch Time” to relax, read, and enjoy life in Maine. So this year I started early, in our long, late, cold Spring, wrapped up in warm fuzzy clothes with a two-layer fleece blanket on my lap and the dog snuggled underneath.
This post will be mostly photos and captions (because we all know photos are better). They show the sequence of how I work, and towards the bottom if you keep going you’ll be rewarded with a mini-tutorial on couched and faced edges. And yes (gratuitous self promotion here) I TEACH classes on how to do this –my Bindings and Facings and Piping, Oh MY! class, and also my collage and thread coloring process: Collage the Garden and Thread-Coloring the Garden–just click the link. Have students (and contract) will travel (hint hint).
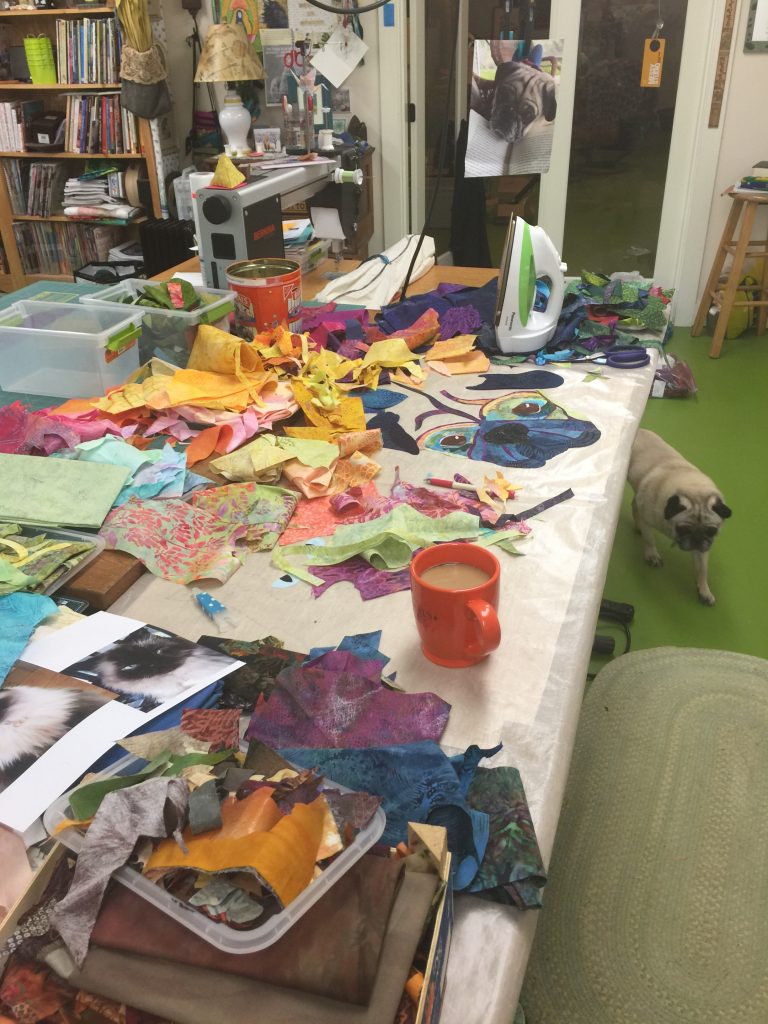
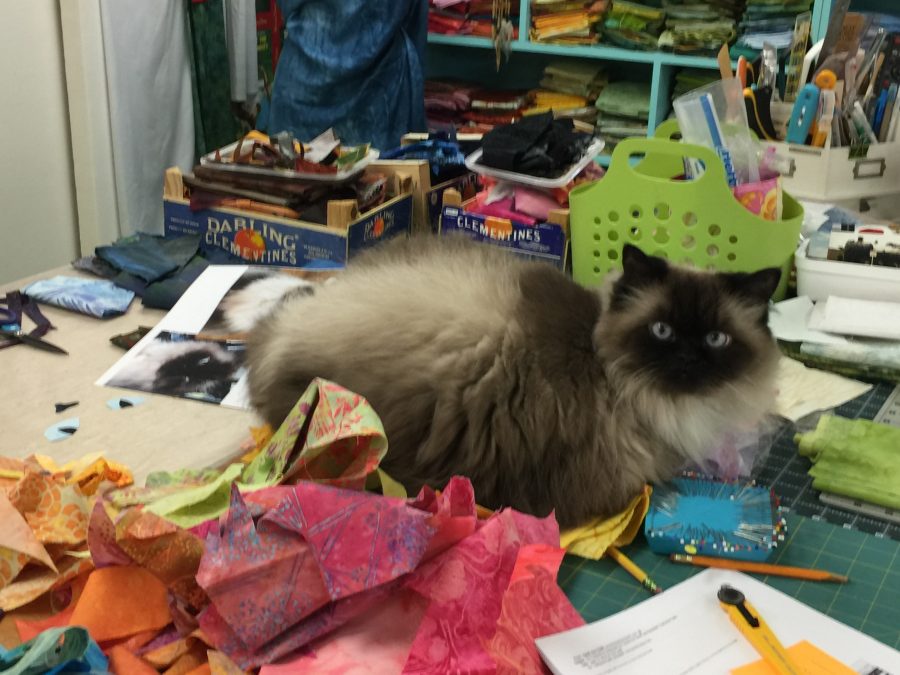
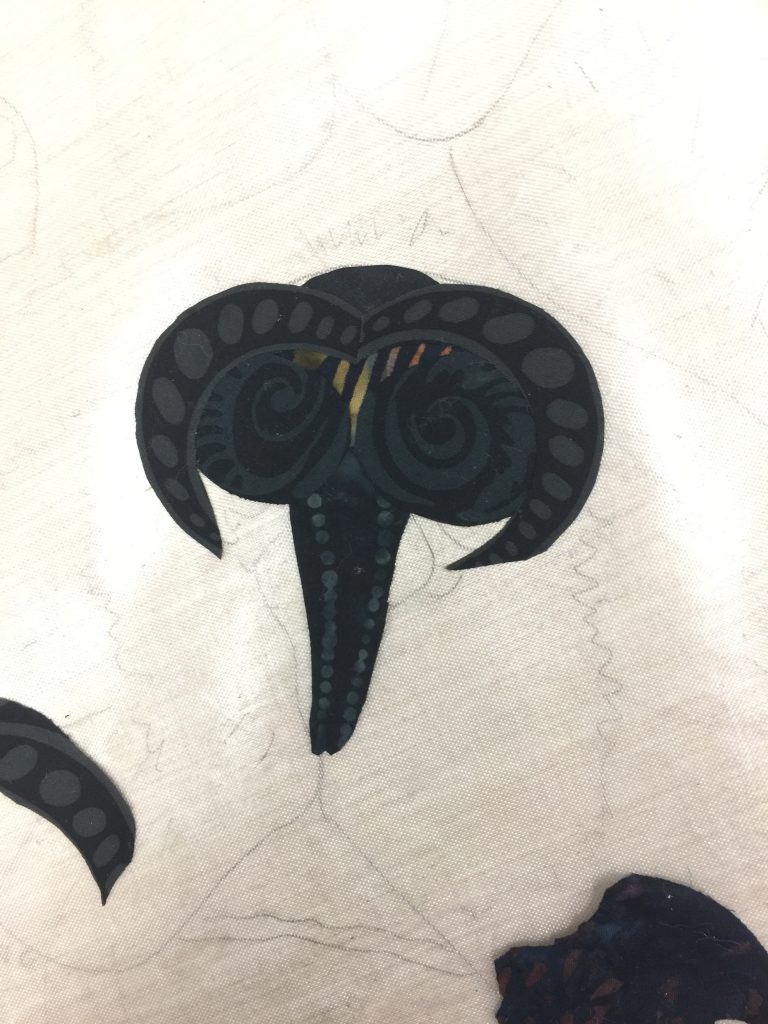
As you can see, the work area ends up just a bit messy! I tend to sort prefused (Mistyfuse ROCKS! It changed my life!) fabrics by color and value, then start working. The heaps are the “sorted” stuff (ha!). Widgeon is coming to lay down right under my feet so I can trip over him. He likes to stay close to his beloveds.Sometimes Yoda supervises…..Folks say “Oh that’s the perfect fabric for the nose.” Sorta. This is seven pieces of fabric, and that’s about half of the fifteen or so tiny bits that eventually created his nose. You can see the sketch under the non-stick mat (check out Goddess Sheets at Mistyfuse.com). Here I’m looking at what to use for the background. I used pale yellow (on which I used a pale gray pen) for the book in my lap. The pale aqua for the pillow on the left got changed for a darker value.
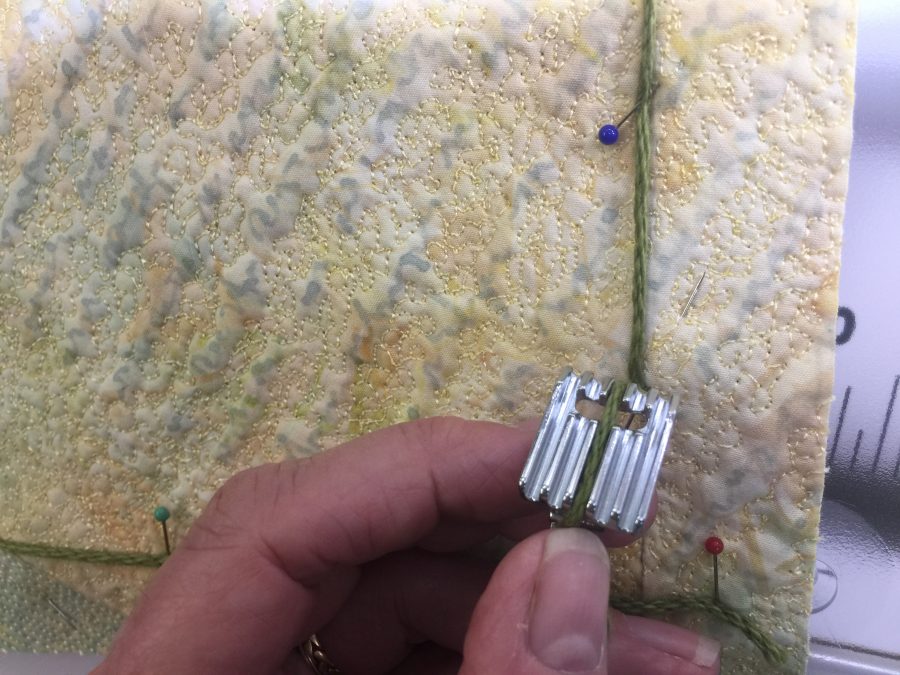
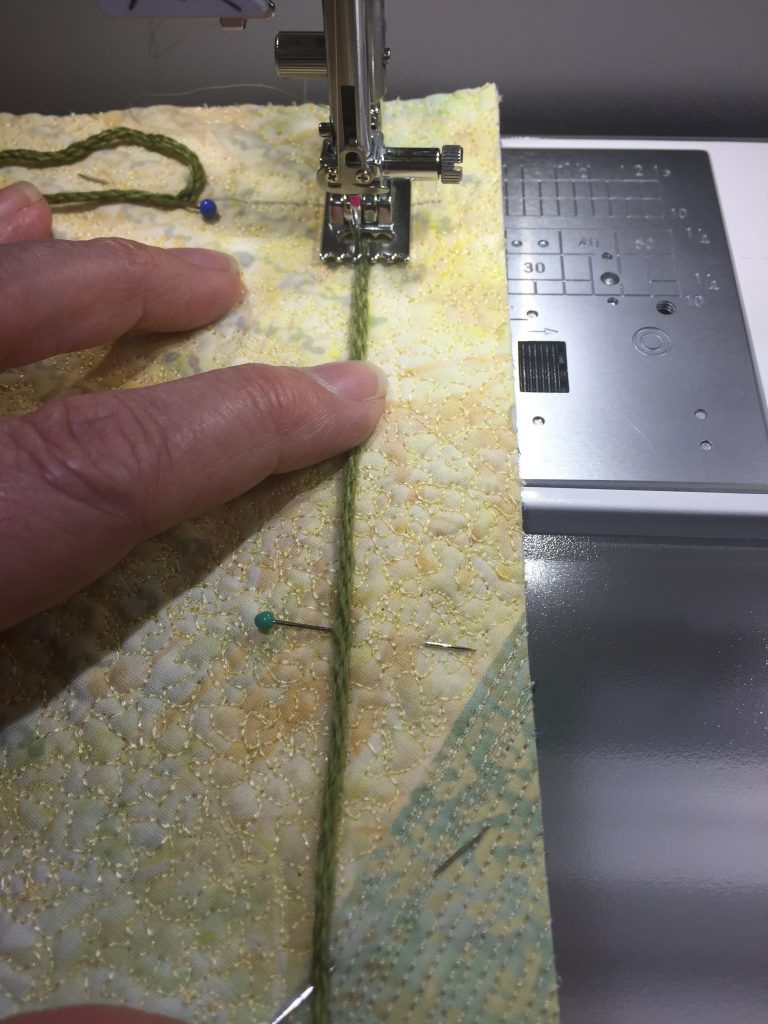
Now it’s time for that mini tutorial on couching yarn for quilts with facings.
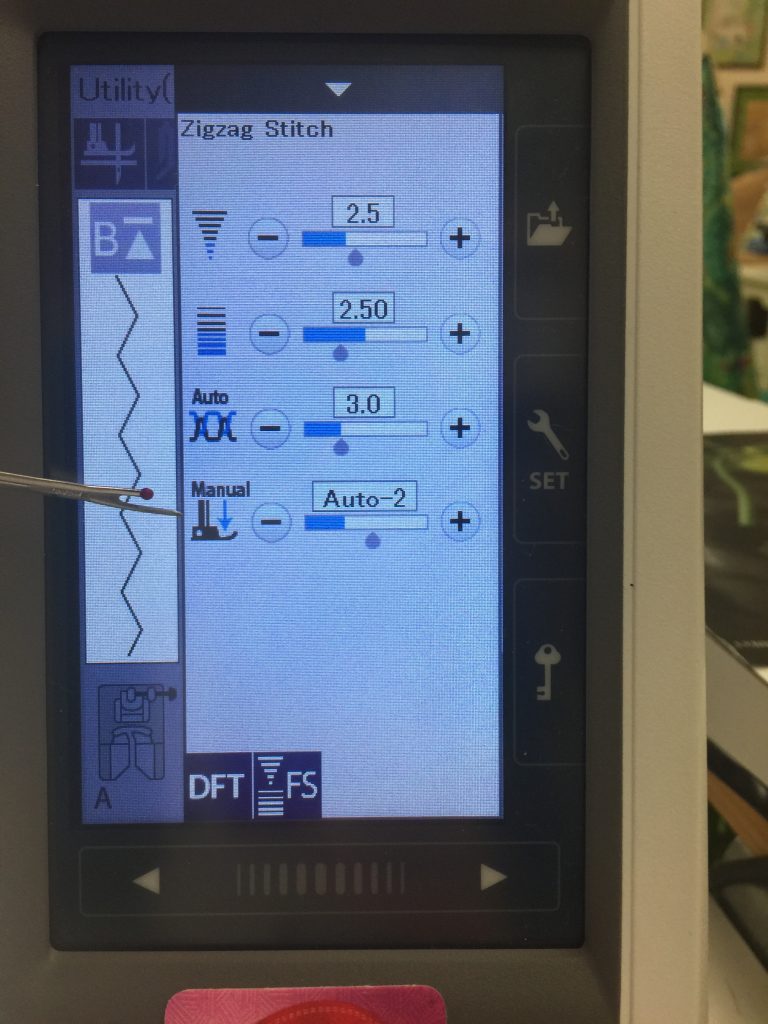
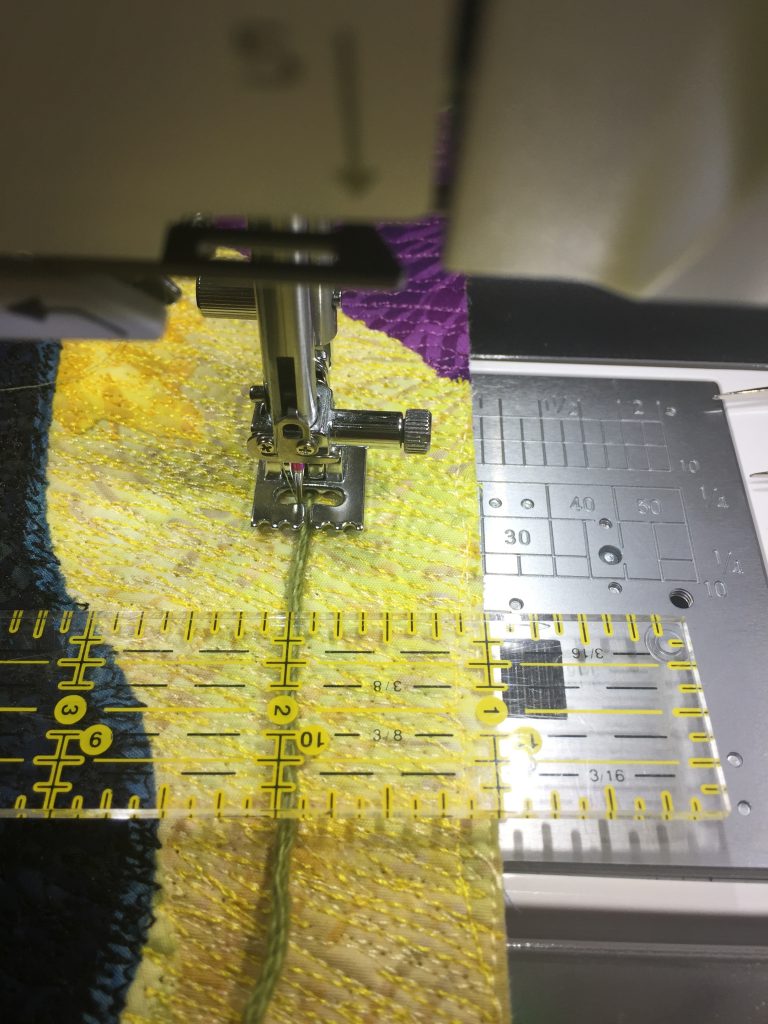
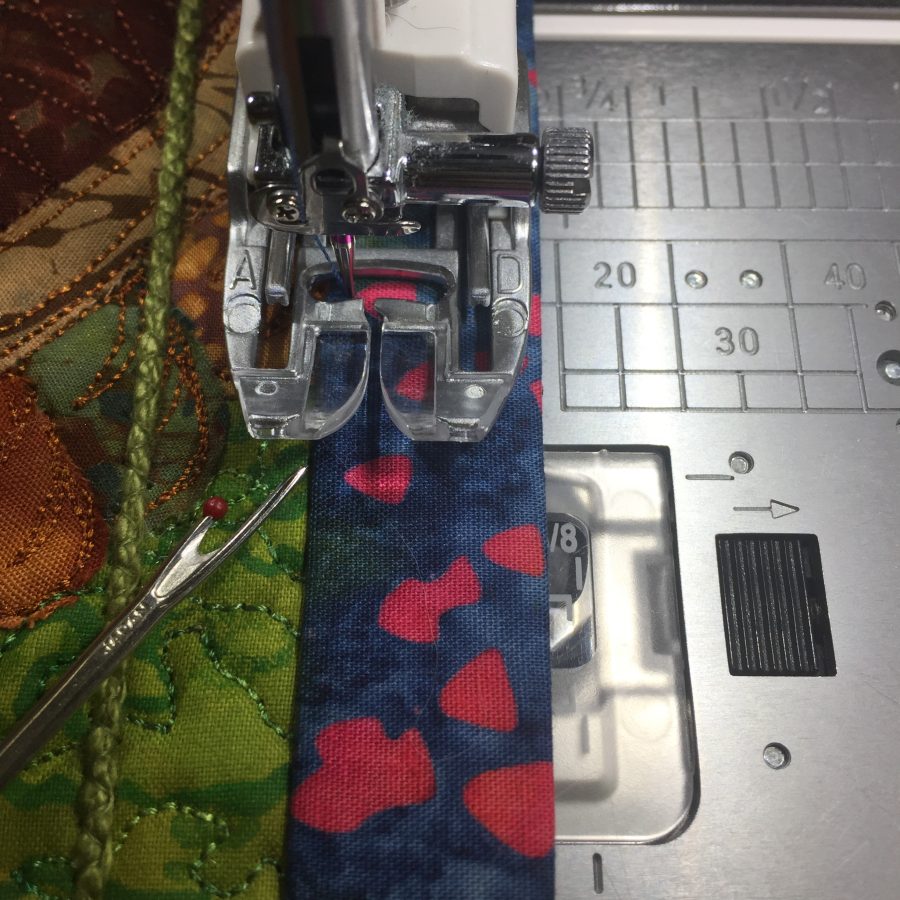
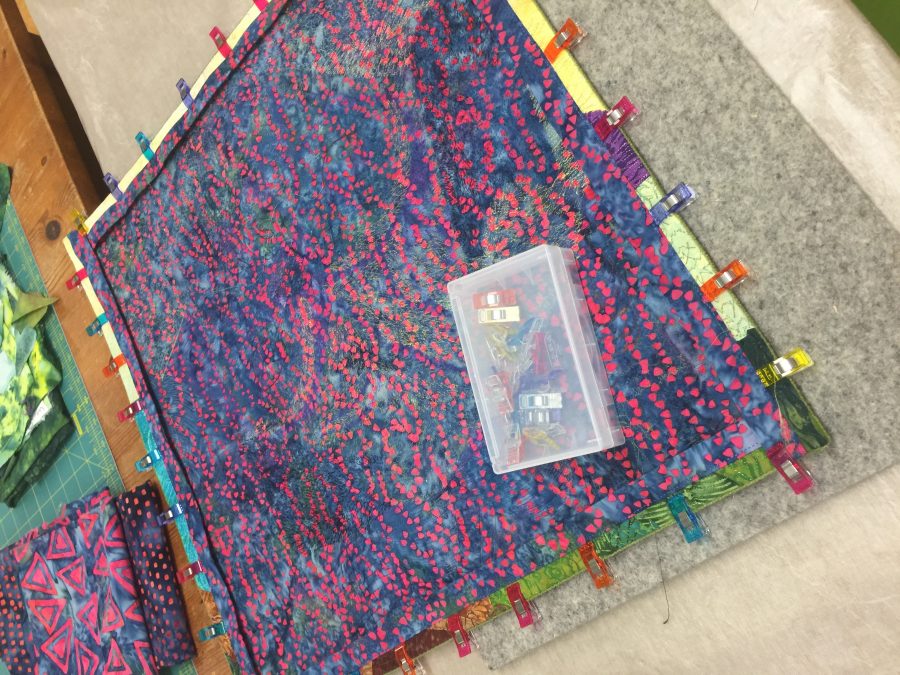
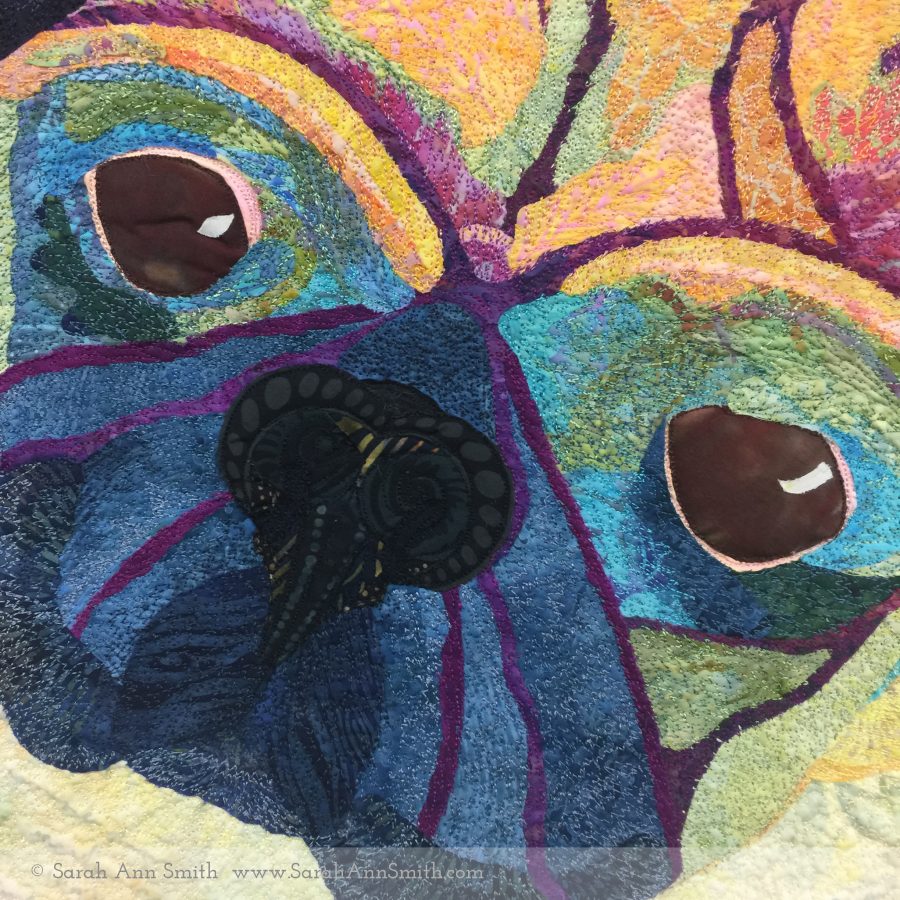
Most of the time, my quilts have facings, and some of the time they *also* have yarn couched on the edges. This makes the edges more crisp and makes it WAY easier to turn the edges in a perfect straight line (provided the yarn is sewn ON in a perfect straight line). This is what the bottom of the pin tuck foot looks like. Mine is a five-groove. There are other sizes (seven I think, and maybe three), which I prefer to the usual “couching” foot because I can fit the yarn to the groove that will best control placement. See how the yarn fills the groove…not too big, not too little, but just right. I used 2.5 stitch width and length, then reduced the presser foot pressure (how much it pushes down on what is going under the needle) to couch the yarn that ends up on the edge of the quilt.You can see the yarn is in the center groove of the 5-groove pin tuck foot. It is the perfect sized groove for the cotton yarn I favor for sharp edges on quilts with facings. I always used to chalk-mark where I wanted the yarn to go and then hold it in place with pins and my finger. But even then it would sometimes wobble, requiring picking out the stitching and fixing. Then I discovered a much better way on this quilt! Drum Roll! Sound the Trumpets! A Better Way!!!! Using a ruler, Janome’s pin tuck foot, and a narrow open zigzag makes couching yarn on what will be the edge of the quilt easy! It worked best for me if I let the ruler hang over the edge and use the 1″ line. If I used the end of the ruler it was actually harder to see if it was perfectly aligned with the trimmed edge. And yeah, lookit all that threadwork!Gotta love Janome’s great presser feet and plate markings, which make it possible to create a perfect facing. In my class I explain some of the extra stuff I do that makes my facings behave so well. Wonder Clips by Clover. Buy them. Buy a whole lot of them. SO MUCH BETTER than being skewered by pins. If you buy the big set from Clover, they come in a well made reusable box.I Love, Therefore I am. A view of the quilting from an angle which shows the stitching better.And a close up of the Beloved.
To see Yoda’s quilt, go to this post. Next, I’ll share Boo’s. He is the Usurper. The Delinquent. Chirpy.
August 20th, 2019 at 12:22 pm
I so love your “process’ posts! your work is so wonderful!!
August 23rd, 2019 at 9:46 am
Thanks so much…I REALLY had fun with these three quilts!