email Youtube

Home
Galleries
Blog
Workshops & Calendar
Store
Resources
About
Contact

Author Archive

Wrestling update: 23-0!

Sunday, March 18th, 2012

Or, Mama gets to brag on her kid!  (You are thereby forewarned LOL!)

Yesterday was the last regular meet of the Middle School Wrestling Season for the Pine Tree Wrestling League (PTWL — which covers about 75-80 percent of Maine).  Next Saturday will be Eastern Regionals, held here in Camden at the High School (16 teams…eeeek!), and the following Saturday will be States in Bath.  To say that Eli has done well in his 8th grade year is an understatement of epic proportions:  he has just finished an UNDEFEATED regular season (and you better believe Mama and Papa are shouting!).
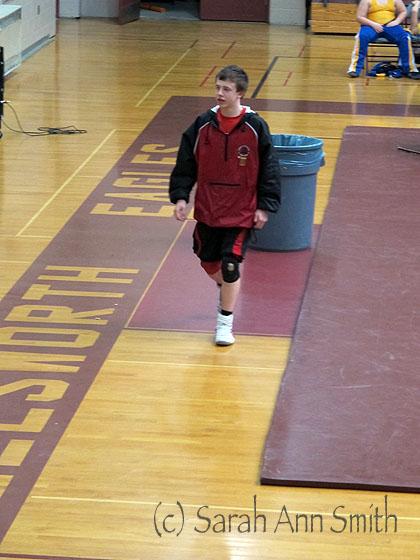
Eli pacing before a match. He sometimes strides purposefully opposite the kid he's about to wrestle as a psych-out maneuver. Wrestling is at least as much a head-game as one of physical strength and skill.

The way it works is the kids (boys and girls) are divided into weight classes that are about 8 pounds apart.  Eli is wrestling 138,meaning he can’t go over 138.  Fortunately, he has had a couple of pounds leeway every week.  The good thing is that the league recognizes that kids grow, so every 2 weeks the weight limit goes up a pound…this coming Saturday if you weigh (for example) 140 or less, you can still wrestle in the 138 pound weight class.  This year in his weight class there has not been a lot of competition…not every school has a wrestler for each of the many weight classes…in fact MOST schools don’t fill all the slots.  But of the 23 scheduled pairings, Eli has wrestled about 13 matches.  The ones he didn’t wrestle he gets a “win by forfeit.”  So that means he “won” those 10 or so.  The ones he DID wrestle he won EVERY SINGLE ONE–two by points, all the others by pinning his opponent, most often in the first period! (There are three periods of two minutes, one minute and one minute.)  AND he had four exhibition matches…ones that don’t count toward the rankings for Regionals.  Two he wrestled a kid from the 131 weight class, two from the 145 weight class.  He won all four!  Amazing…
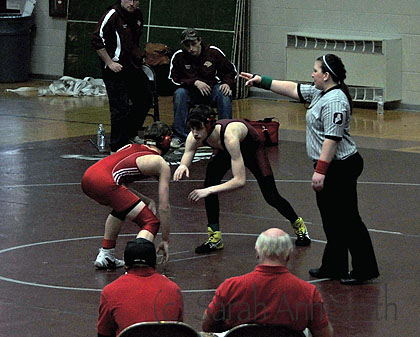
The two boys shake hands, crouch and wait for the ref to blow the whistle. Here she is signaling to the scoring table that she is about to begin.
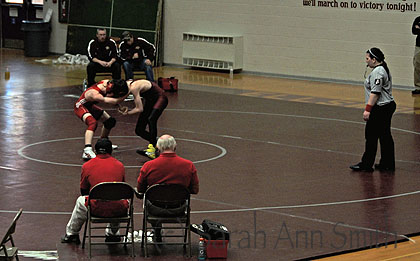
As soon as the whistle blows the two start trying to gain an advantage
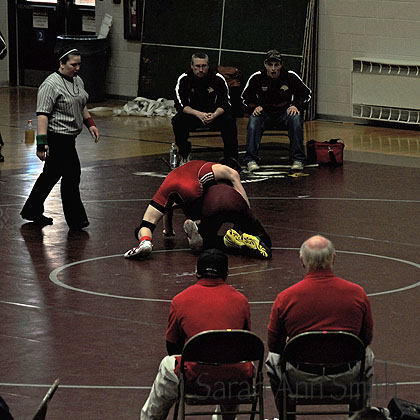
Eli begins to take the other boy down to the mat.
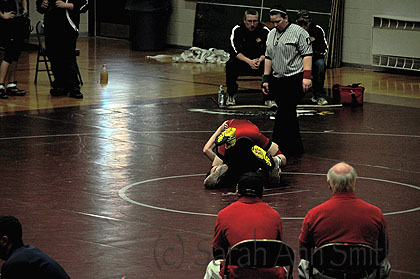
Eli is in red, on top. True Bragg, our coach, and DH Paul, Assistant Coach, are in red with their backs to the camera. The Ellsworth coaches are on the opposite side of the mat behind the ref.
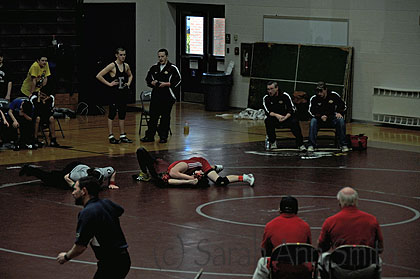
Sat. March 17, 2012 at Ellsworth. It took Eli less than one minute to pin his first match on Saturday, against Ellsworth. Here the ref is checking to see that the Ellsworth boy's shoulders are on the mat for one second before calling Pinned!

Then…drum roll…
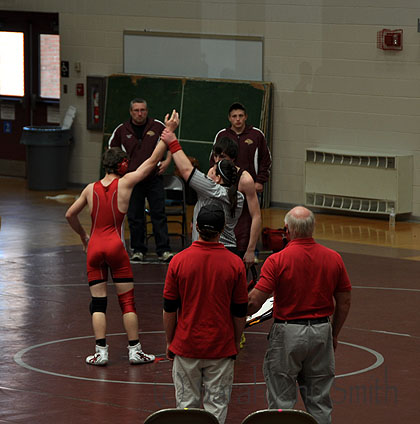
For once I got it on "film"..Arm raised for the win! I took the big heavy camera and set it on "burst" mode. It took about 12 shots but at least one of the was "hand up" for the win!

After the match, the boys shake hands, the ref raises the hand of the winner, then Eli goes to the opposing coaches to shake hands, the other boy comes to shake hands with our coaches, and the next match begins.
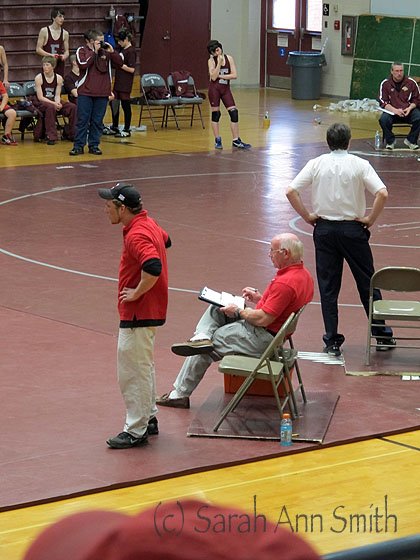
 

This picture of True (left) and Paul (seated) will make every Camden-Rockport parent chuckle... it is SO typical!

Eli also had an exhibition match…as it turns out, against a boy whom he knows from track and with whom he was chatting and having fun.  That kid wrestled at 131 and pretty much knew he was going to get whomped, but he tried gamely anyway.
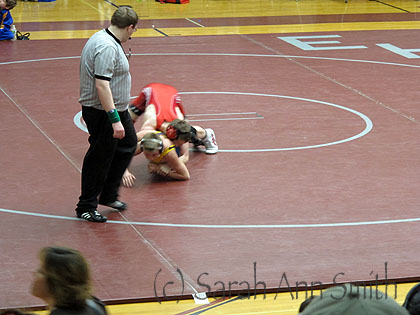
Eli in the process of rolling his opponent (from Belfast) over by turning him with his arm/shoulder.

At one point, his buddy told Eli in a joking voice “gee you stink” …after the match he told Eli he was trying to make Eli laugh and lose his concentration.  Eli said his buddy *almost* succeeded but Eli didn’t give in and kept his concentration, as you can see in the next photo.
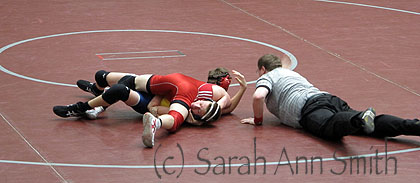
Pinned! Notice the blur to the right of the ref?

That blur to the right of the ref is his hand, as he slaps the mat to indicate that Eli has pinned his opponent.

Next:  Regionals.  As long as Eli stays on his game, which we expect, he has a VERY good chance at repeating as Eastern Regional PTWL Champion.  The most interesting thing that weekend will be to see who wins at 138 in the Western Region.  Eli has three times beat the kid from Bath who is in that region, and that boy’s coach said the only matches he has lost have been to Eli.  IF that boy wins Western Regionals…….. so we are eagerly, nervously, looking forward to the next two Saturdays!   Eli lost States in the last 20 seconds last year, so we’ll see what he can do this year.  No matter the outcome, he has done an outstanding job this year and we are proud!

One more warning:  You may here wild shouting if/when he wins next weekend…stay tuned for more Proud Parent photos….

The sap is rising

Saturday, March 17th, 2012

There are several sure signs of spring in Maine.  Besides the ubiquitous robins, for me the return of the woodpeckers hammering away in the woods near our homes (first in Camden and now in Hope) means spring is truly here:  the bugs are awake, moving, and ready to be turned into supper.  Another is the return of the buzzards, whom I came to love in Camden.  They roosted in trees at the end of our driveway and across the street; they are gregarious, family-oriented, raucous and huge.  I learned after moving to Maine that they too are a sure sign of spring:  they only appear when the rising air currents are warm enough to lift the scent of carrion!

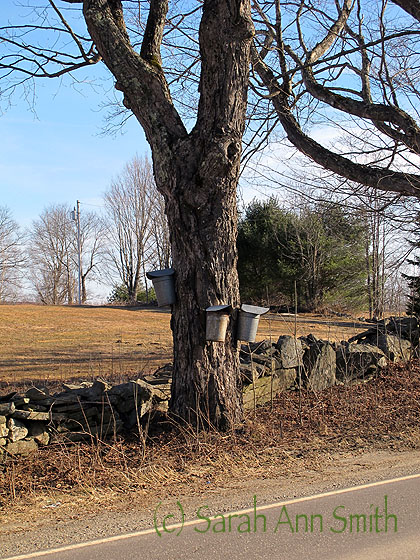
Sap buckets on the maple trees....On route 131 in Searsmont (or thereabouts)

On the more delectable side of things, in late winter you know the hardware store is getting ready for spring with maple syrup taps  (…like a spigot/tube that you hammer into the maple tree…)  that are in a bucket on the counter next to the cash register.  A few weeks later you can be driving along the back roads that criss-cross the state (we have only one highway, I- 95 up and down the center, so everything is a backroad byway to get to anywhere) and see trees sprouting maple sap buckets to catch the dripping rising sap.  Did you know that it takes FORTY (yes, 40) gallons of sap to make ONE gallon of syrup?  And the sap is clear…looks and tastes like sugar water!  One more photo to share:

Join me in the chorus: I LOVE living in Maine! I am finally where I was meant to be!

And tomorrow I’ll do a proud Mama post and share Eli’s wrestling progress…..WOOT!

Rituals #3, Strength and Calm: done!

Thursday, March 15th, 2012

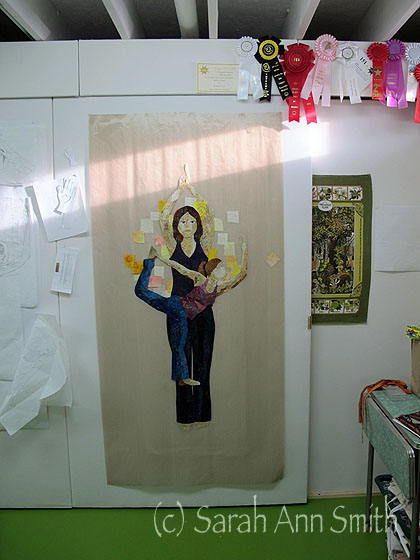
So finally it was time to square up the quilt.  Oh dear.  The standing woman was not standing up straight!!!!!!  And if I didn’t get her straight and centered, then she would look like she was listing sideways when I squared up the edges, where I REALLY needed there to be EXACTLY even background on either side of the woman with her leg up.  So I carefully pried apart the figure (from the waist up) and repositioned her and did some insertion of yellow to fill in the gaps.  Problem solved!  Next, time to fuse the entire top to the batting, baste all of that to the backing and quilt!

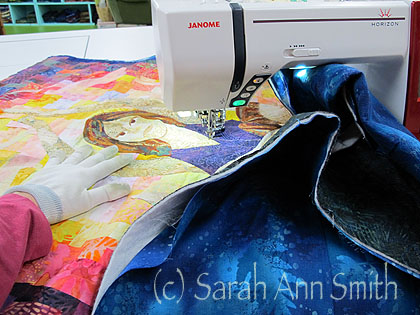
At the machine.... Rubeus Hagrid (aka Janome Horizon 7700!). Decided I needed to use up some of my print fabrics that I no longer use, and had enough of this beautifully colored Fossil Fern for the back.

Here is the entire quilt:

Finished!

A close-up of the two figures at the top in “mermaid” poses:

Notice the pale pink and pale peach women at the top, with arms reaching towards each other

A view of the bottom:

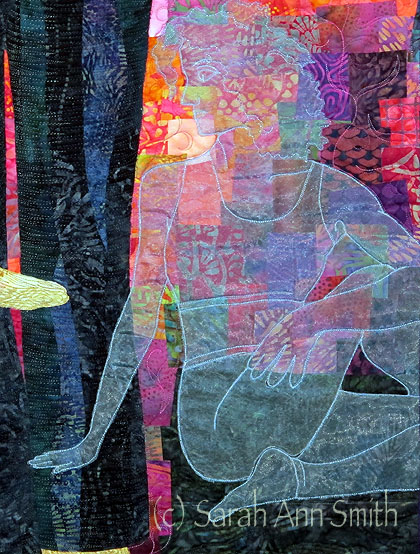
Two figures at the bottom..."warrior" on the left and "pretzel stretch" on the right

And a bit more of the middle:

center--close up. Interestingly I used some No. 100 (same as size 60-wt) silk for the background quilting. The part on the yellow is a variegated yellow, and sure enough Bob Purcell of Superior is right... the variegation doesn't show. I ran out of my 220-yard spool of variegated, and had only a section the size of my hand left to quilt, so used a medium-yellow 60-wt silk from Superior to finish...and even up close I can't find where I switched threads! So I guess I can skip the variegated silk (even tho it is so beautiful on the spool) for the way I use thread.

I hadn’t used silk for background quilting before, but I very much like the way it handles and looks, so when I want the thread to be fine and disappear into the quilt, I think I’ll use the silk.

When I was done, I had intended to put a facing on the quilt, as most of my art quilts are faced.  But I missed that darker edge.  See I quilt so much, I have to make things that are to finish at a specific size at least 2-3 inches larger because I don’t know how much “take-up” or shrinkage there will be from the dense quilting.  And I ended up needing to trim off some of the darker edges, and I missed them.  So I used a traditional bias double-fold binding in a deep purple batik.  Just right!

Now, here’s to hoping it makes it into the exhibit this year!

Recycling bags

Tuesday, March 13th, 2012

When we moved into our house last year we wanted to use the area under the benches in the entry as our recycling zone.  However, the space was too small for small laundry baskets, and too shallow for tall garbage cans, and everything else was really kinda too small.  So I decided I needed to MAKE some totes to take recycled glass,  metal, plastic and paper to the dump.  I really like the overall shape and style of the re-usable bags Hannaford grocers sell, so I used that as my basic idea.  Then I used my two empty birdseed bags and threw myself upon my friends for more; Kathy was in the process of moving and building a new house, so she gave me her entire stash of empty bags and I used them ALL!

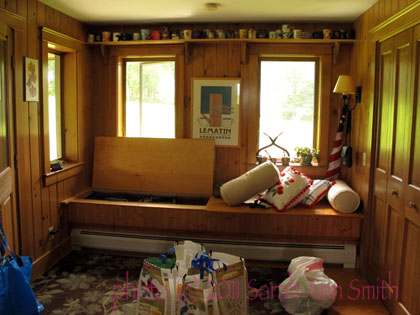
The bench, with the left side up and various stuff on the floor and the right side of the bench making a mess.

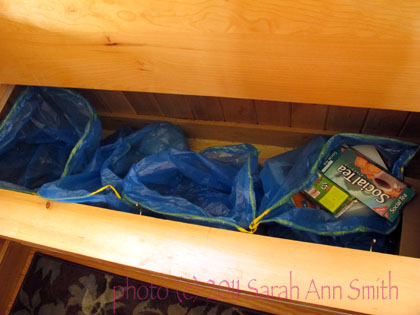
Here is what the inside looked like using large drawstring garbage bags on the hooks I installed:

The bags shlumped and were an utter nuisance, hard to get stuff in without entirely clearning off the bench, etc.

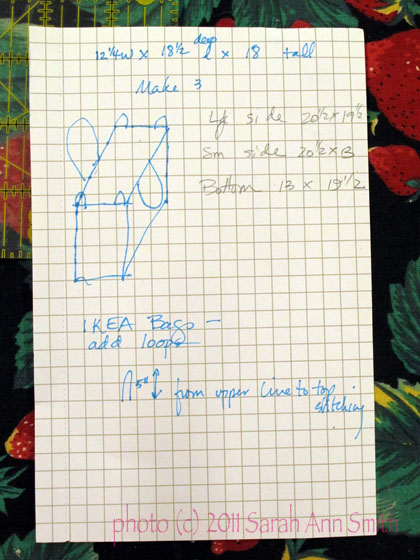
So I sketched out dimensions and plans for bags that would work:

My working sketch...very rudimentary! The IKEA bag is that big blue one they sell for a dollar...use that on the right side of the bench for the voluminous redemption stuff and for the paper, which seems to clone itself at night. In Maine we pay a deposit on soda, Gatorade, wine etc. bottles, and get the nickels back at a redemption center, not the dump so having an extra large bag means we don't have to go as often.

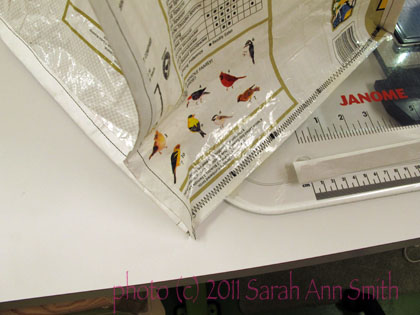
Then, time to sew.  My corners weren’t the neatest.  But I made each large bag from about 1 1/2 birdseed bags, then used recycled tyvek envelopes cut into strips to “bind” the seams:

"taped" seams with strips cut from recycled Tyvek mailing envelopes

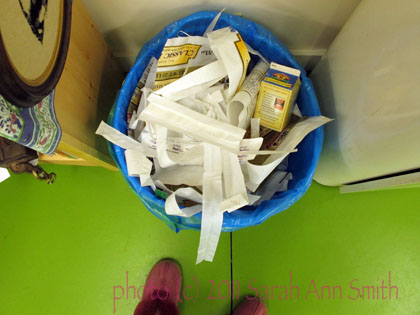
The leftovers...aren't you proud of me? I didn't KEEP all that clutter! It's in the garbage bin in my studio!

DRUM ROLL please:

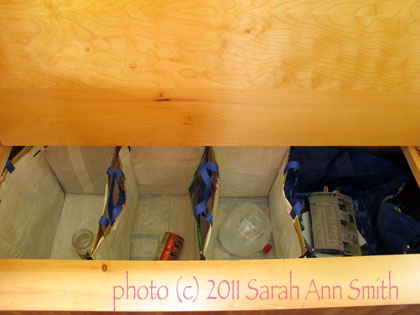
Done and in place! Each bag has blue handles (which in this photo are tucked between the bags), and at the four corners there are small black loops that slide over the hooks so the bags stay upright, open and in place. Left to right: glass, metal, plastic, paper (more or less alphabetical so I can remember what goes where and don't have to open the lid all the way to toss stuff in)

The bags are PERFECT!  The only snag is that they do get rather full, and that overhang on the back of the bench kinda makes it a pain to get the bags out.  So I just remove the least-full bag first and turn the others sideways after removing them from the hooks.  The hooks work well… I bought single hooks from Walmart to be thrifty . Shoulda bought sturdy double hooks from the hardware store, as one of the cheapo hooks has already broken.  Having two-hooks per unit would make it easier to remove just the full  bag, but it still works.

We’ve used these for over half a year now.  They are holding up quite well, and rinse out easily if someone (AHEM, guys!) doesn’t quite rinse out a container before chucking them into the bags.

Hope this might inspire you to make your own recycling center!


Rituals, #2: Strength and Calm

Sunday, March 11th, 2012

Fairly early in the fusing process for Strength and Calm

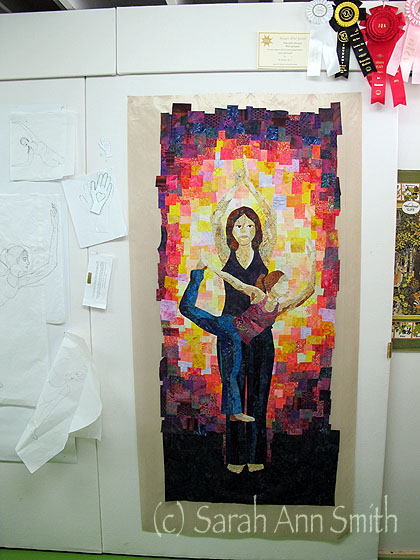
We left off with Strength and Calm at the stage above.  Then I added more, a lot more, of the background.  I was on such a roll that in fact I forgot to take photos until I got to here:

Background almost all fused up, and not yet trimmed--you can see to the left some of the sketches pinned to the wall. You can also see a sliver of light blue added to the standing leg of the smaller figure to help that leg not visually merge into the figure behind.

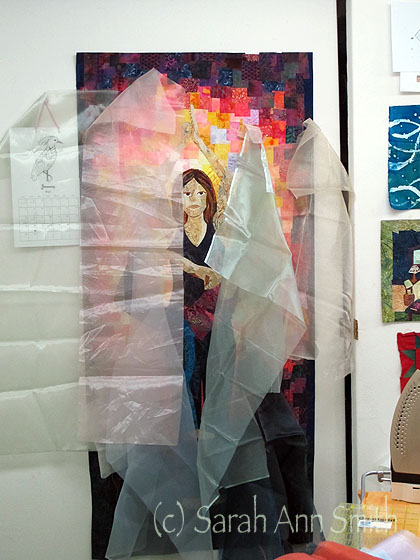
Next step was to decide what to do with the other four figures.  By this point I was certain I did not want to get complicated.  It would be an outline shape of some sort.  I thought solid fabric, like a batik or hand-dyed, would mooosh into the background too much, and simply outline quilting might not stand out enough, and I didn’t want to paint.  So I took out some of my sheer fabrics.  These are the cheap-o prom dress synthetic sheers you can find at places like JoAnn Fabrics, which go on sale right after prom season (making it a good time to stock up).

Test-driving various sheers to see how they would look on the background. I ended up selecting two blues and two peach/pink tones.

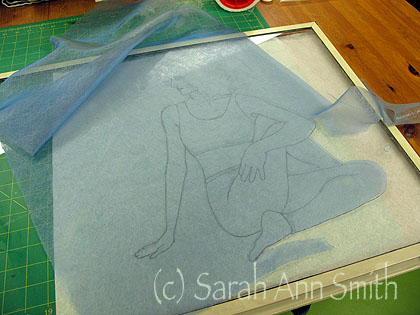
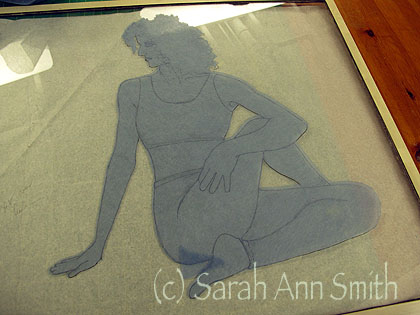
A while back I developed a way to work with pre-fused sheer fabrics using my stencil cutting hot-tool and an old storm window.

First, I place the inked-outline drawing on the table, with the storm window on top. Then I place the pre-fused sheer fabric on top of the window. On this one, I have begun "cutting" with the heat tool by drawing the top along the right side of her legs.

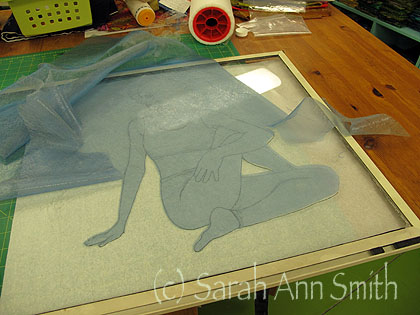
The exact length of time depends on the heat of the stencil cutting tool and the fabric.  If you go too slow, you get a blobby, black nubby icky edge with pock marks.  If you go too fast, you don’t cut-and-sear/seal the edges and have to go back over it, risking the icky edge with pock marks.  And it takes a bit of breath holding and lip-biting and twisting of the mouth to get the cuts done just right.  And wine after.

More cutting done. As you cut/melt the synthetic fabric, the MistyFuse on the back sticks slightly to the glass, making it easier to cut the remaining edges. And notice that red circle at the top of the photo...that's my bolt of MistyFuseUV. Thank you to Iris Karp of MistyFuse.... LOVE it!

Done...with a scrap overlapping at her heel.

Next, I fused these sheer figures to the quilt and stitched them in place with 40-wt polyester thread.  Really liked the simplicity and not my usual quilt-every-inch style.

After I got it partly quilted, I decided I wanted to fuse the sheer down a bit better and melt the MistyFuse to invisibility.  However, I had just entered the studio and turned on the iron and forgot to turn it DOWN to synthetic instead of cotton.  Ooooops. Melting happened.

See where I melted the sheer by just grazing a set-to-cotton iron over it? Grumble.

And a bit of swearing at my own stupidity happened—see I know I need to turn the heat down and go slowly carefully when fusing sheer synthetics.  I wondered if the mess-up was too visible or if I could leave it and asked some friends.  Some said not visible really, leave it.  But I knew I needed to fix it.  So I carefully (with a HUGE holding of breath) took the heat-tool to the quilt (!!!!!) and “cut” the section of lower-body/hip out, cut a new piece of synthetic–thank heavens I had enough!–fused that onto the excised section and re-stitched.  Fortunately, I did well enough it doesn’t show.

Fixed. And if I kept my mouth shut you wouldn't know. I hope!

Thereby proving my saying that the difference between a beginner and an expert is that the expert either doesn’t make the mistakes because they’ve  made them in the past OR they’ve learned how to FIX the mistake so that you can’t see it.  Unless you blog about it for the whole world to see.  Ahem.   Last post in this series will (finally) show the finished quilt!