email Youtube

Home
Galleries
Blog
Workshops & Calendar
Store
Resources
About
Contact

Archive for August, 2008

Dream dyeing studio

Wednesday, August 6th, 2008

A visitor to my website (and I’m guessing also this blog) asked me recently what would be in my ideal wet / dyeing studio….. she has the pleasure of being able to convert a greenhouse to a dye studio….heaven!   Here’s my list… I’d love suggestions from those that have “been there, done that.”  Let me know what worked, what you’d wish you’d done…..

  • An absolute must for me is a sink with hot water!   My dream sink would be deep, but not so deep that I have to stoop to reach the bottom (thereby avoiding aching back).  I would actually love two sinks….one huge and deep for soaking large quantities, another not so deep for easier reach.  A pull-out spray/regular faucet (the kind for sinks) would be good too…..  OK, so what I really want is a restaurant sink with counter with overhead spray hose/nozzle/whatever it is called.
  • A mixing counter with shallow shelves above for holding the dyes and the beakers/mixing paraphernalia.   Needs to have enough space to lay out dye-binders and recipes next to the actual mixing zone.  If it were next to the sink for easy wiping-down that would be a bonus (remember the old integrated drainboards?  that would be ideal!).  And maybe a bulletin board for pinning the current recipe or basic ones up right in front of my nose.
  • Deep shelving nearby for bulky/heavy stuff like Urea and Soda Ash (on the bottom) and buckets/basins.
  • Since I like to paint the fabric, not do LWI “scrunch and dump” dyeing for the most part, a LARGE FLAT surface…. like 4×8 feet!  And maybe something like a carpenter’s “crib”…  places where I could store 4×8 sheets (would need help moving them) stacked horizontally one above another for batching.  Think of those cookie cooling towers in Costco or wherever where you can stack up 20 cookie sheets at a time…. like that but maybe for 4 sheets, not 20, and of course way huger for my purposes! I’d love for the sheets to have a rim (just like a cookie sheet), but that might be hard to finagle.  My friend Lisa Walton of Dyed and Gone to Heaven (who sells her hand dyeds worldwide I might add!) uses pond liner in the back yard, but Sydney, Australia, is a more hospitable climate for outdoor dyeing than Camden, Maine! Still, using the heavy plastic and pinching up the corners (setting it on a table of course) could work well.
  • Washer and dryer in the studio or nearby so as not the require hauling wet, just-batched fabric long distances.
  • Wipe-down-easily walls and floor (well, for me maybe the ceiling too!)
  • A couple places to suspend rods from the ceiling if I want to hang yardage and drip-dye (pour it on and watch it flow down).  A plastic sled or window box makes a good drip catches…line with scrunched fabric and you have a coordinated piece of cloth…
  • LIGHT….lots of good light (shouldn’t be an issue in a greenhouse, except at night)
  • Warmth….I live in Maine, so hope to be able to afford an electric blanket to set over things for batching so I can dye in winter……
  • A small space to write notes, keep my dye-binders and reference books that is far enough away from water to give them a little protection
  • A stool on which to perch, and maybe one of those chef’s mats for when standing to ease the foot-pain!
  • Entertainment…radio, tv, something….and maybe access to the outside.
  • BATHROOM nearby!

What’s on your list?
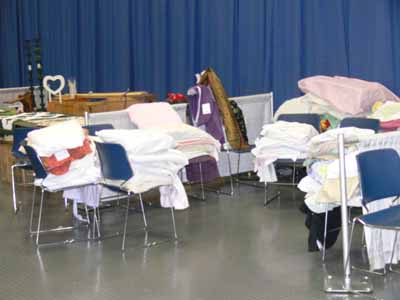
Maine Quilts–before the show opens…

Sunday, August 3rd, 2008

Have you ever wondered what a quilt show looks like before the quilts are hung?  I always had, and two years ago when I first volunteered to help hang the quilts, I got an inkling.  With permission from the powers that be at Maine Quilts, I took some photos during set-up this year for sharing on my blog.  Here,

Quilts in pillowcases

The quilts have arrived.  Since quilts come in from the entire state, there are regional drop-off centers (most often quilt shops) where they are logged in as they arrive.  Entrants must fill out their forms and place their quilts in a pillowcase or cloth bag, then deliver their babies to the drop-off point the Saturday before the show opens.  A volunteer for each drop-off point then drives all the quilts to Augusta where the show is held at the Civic Center.  If, like me, you have “fussy” quilts that need special handling, you may ask for special permission to hand-deliver your quilt on the Wednesday before the show, when the quilts are hung.

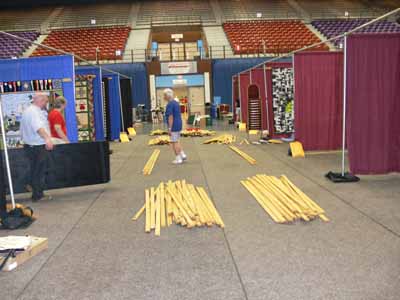
This photo is looking down the center aisle toward the main entrance.  The juried quilts are on the left, the display section is on the right, and special exhibits are either in the first aisle or the last aisle or two (depending on how many special exhibits).  Fortunately, the Civic Center is adding black drapes.  The blue ones aren’t so bad but those faded burgundy..well…bleah! They suck the life out of some quilts…. Anyway, the juried quilts are hung first so they are up and done in time for judging on Thursday (the show previews on Thursday evening and opens for Friday, Saturday and Sunday).

Down the center aisle

Those wood slats are for hanging the quilts.  My dream is that someday the Civic Center will have ALL black drapes, then we can spray paint the used-for-years slats so they disappear against the drapes.  In the meantime, Paula was responsible for one of the best improvements in the hanging process this year, bagging hanging loops in pairs by quilt number–saved a TON of time and frustration.  Nancy Z. is responsible for the other great improvement…for quilts hung one above the other, the lower quilt had loops that were adjustable with toggles (you know those push-clamp-gizzies on the drawcords of parkas?).  This made leveling the quilts a breeze!  Thanks Paula and Nancy!!!!

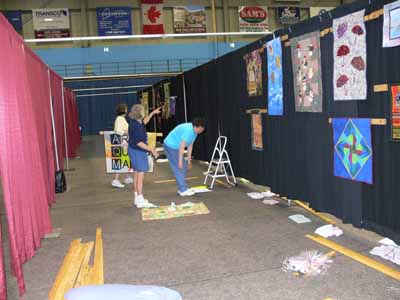
Here’s the aisle that I helped hang, which included the art quilts in the juried section and the special exhibits from the Art Quilts Maine chapter.

Aisle with rods

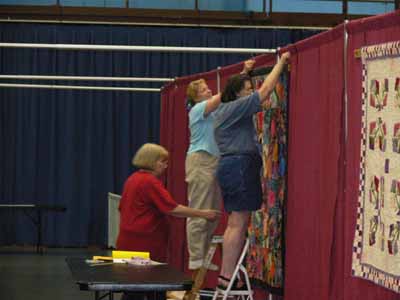
Here are some ladies hanging a large quilt in the Display section…as you can see it takes teamwork to get the quilts up and level.  Someone several years ago designed a spreadsheet that is fantastic…each aisle has a layout of which quilts in order, their width, which size bar is needed, how many inches between the quilts and (another new and appreciated item) a 12 inch wooden ruler to measure the distance between quilts so you don’t reach the end of the row with too much or not enough room!

hanging a large quilt

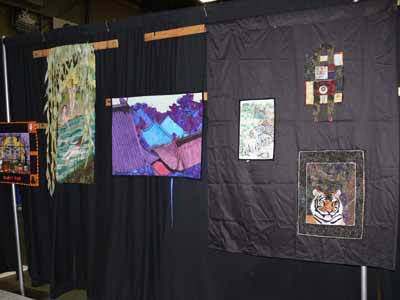
One of the best parts of hanging is getting a sneak peek at the quilts.  I got to hang my own Naiads, and it was in great company.

Art quilts aisle

To the right is Mathea Daunheimer’s Rooflines quilt (which hoooray for her! got juried into Tactile Architecture in Houston at the big International Quilt Festival), plus another of Mathea’s pieces and two tigers from Rana O’Connor.  I’ll show you a close up of Rana’s two tigers in my next post, but wow!   I’m thrilled to have met her a couple years ago; she lives down near Portland and I wish our paths crossed occasionally….for now, just occasional e-mail.

I’ll be back with a post in a couple of days.  Thanks to the wonders of WordPress I can write my blogs BEFORE I head out the door, then they “publish” when I set the date.  That means I’ll have goodies for you while I’m off teaching at the Images quilt show / Lowell (Mass.) Quilt Festival.

Cheers, Sarah