August 22nd, 2005


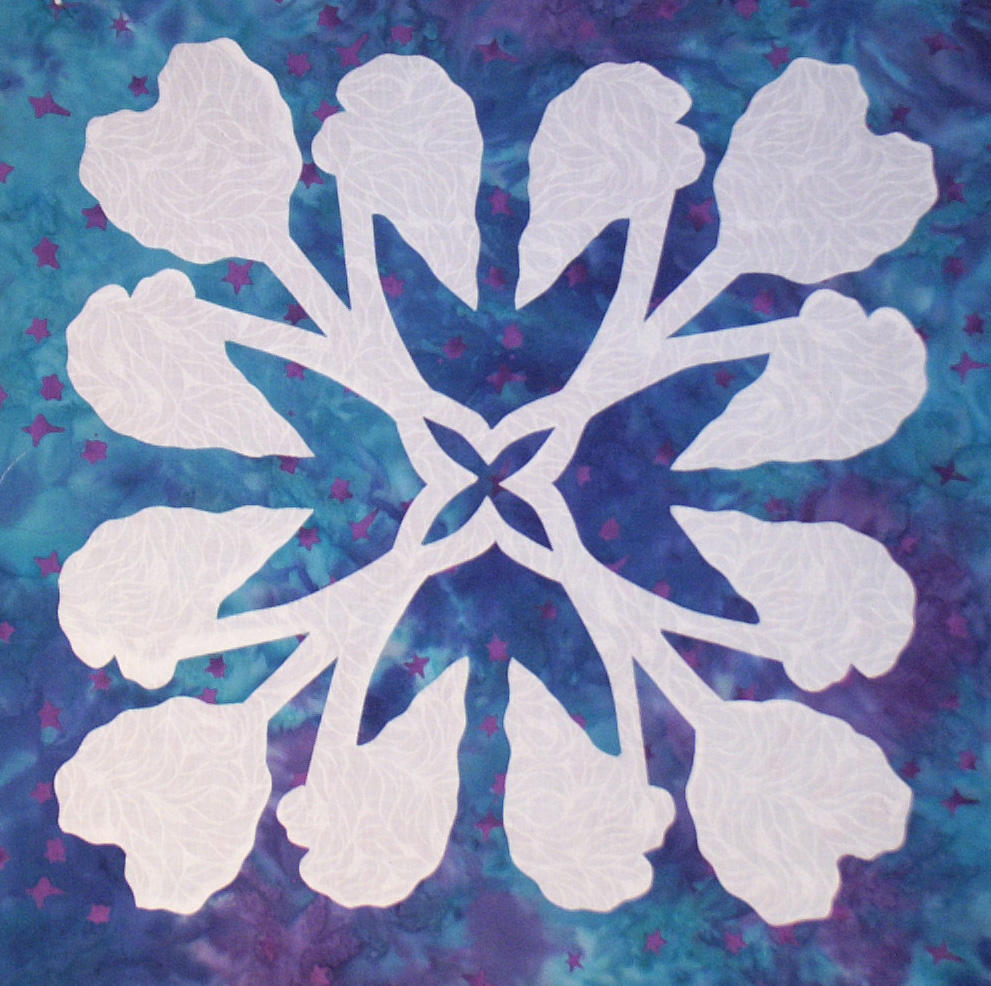
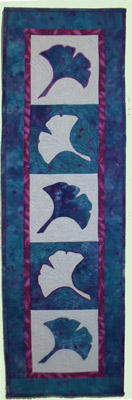
The Blue Gingko on the left will be the design we use to learn three different machine applique techniques, then the Taro leaf design on the right will be one of several designs from which you can choose to learn how to “do” Hawaiian applique…but using my method that doesn’t involve trashing your knuckles trying to cut through eight layers of fabric at once! The Blue Gingko pattern is currently available, and the taro leaf will be part of a 62×62 quilt pattern that I hope to have done by spring (tentatively called Nourish, or Nourish the Body, Nourish the Soul, since it will be either traditional Hawaiian food plants, or beautiful plants the feed the spirit).
Posted in Uncategorized | Comments Off on Hawaiian Quilting
August 22nd, 2005
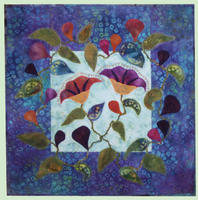
Here’s the project for the December class. You can also buy the pattern from me via my website / by mail: https://www.sarahannsmith.com/patterns.asp
Posted in Uncategorized | Comments Off on Balinese Garden photo
August 22nd, 2005
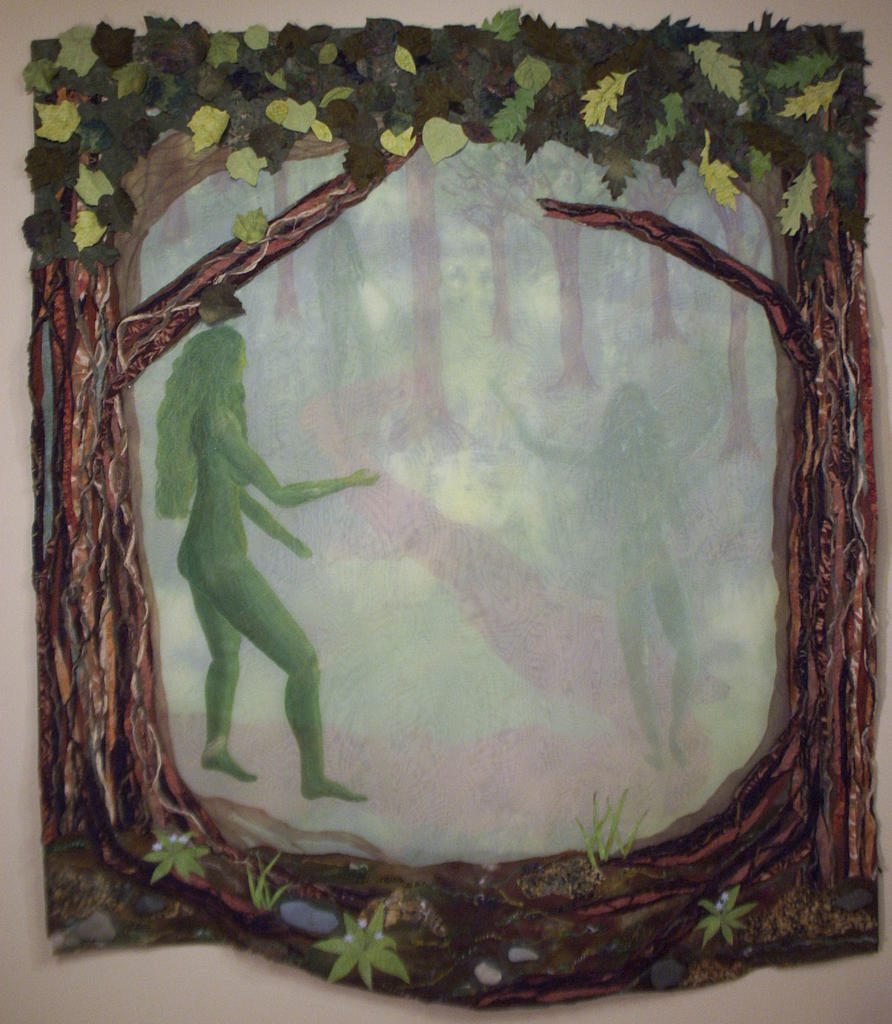
Hi all….a crazy busy day (what else is new), but someone asked the size of tree spirits…big! It is 52 inches wide by 59 inches tall.
I’m hoping to post my upcoming classes later today or tomorrow that I’m teaching….machine quilting (intro, then decorative threads and more), quilting design, Hawaiian applique by machine (but techniques can be used for any sort of applique style), and a couple project classes. At the moment, though, need to feed the kids (it never ends!) and me (ditto).
Thanks to my quilty friends who checked things out and confirmed that they can access the blog, see the pictures and all that! I’ll try to upload a picture of four of us, the Frayed Edges, at our little show earlier this year, and some other fun stuff. In the meantime, enjoy the last lazy (??? never around here) days of summer, for (hallelujah! parents across America are rejoicing) school begins next week. But there may be one more good book before summer ends: Eldest, by Christopher Paolini, is due to hit bookstores tomorrow, and we’ll be there for our reserved copy! It is the sequel to Eragon, and if you haven’t read it yet, DO! It is about a youth and his dragon, a quest, and it’s wonderful. My oldest son, almost 12, has been looking forward to Eldest even more than the 6th Harry Potter (which he finished last night…for the FOURTH time! already!). That should say something!
Off to the kitchen. Cheers, Sarah
Posted in Uncategorized | Comments Off on One more thing….
August 21st, 2005

After painting the third, larger tree spirit on the left, I began to construct the tree trunks on the right and left. I pieced strips of various of my brown-ish hand-dyed fabrics, then fused strips of commercial fabrics in bark-like (I hope) shapes to the base layer. I stitched together three lengths of yarn with a multi-step zigzag several times…using dark-dark-medium, then dark-medium-medium, and eventually medium-medium-light-raffia. These new “strands” of yarn I couched to the surface for added texture.
The bottom meadow area is all stitched on a length of hand-dyed that didn’t turn out at all the way I wanted, but was just perfect for here. I had gone for a hike on nearby Mt. Battie (you must remember that East Coast US mountians are very old, and therefore not very tall at all) just before summer solstice, and the starflowers were in bloom, so of course they immediately jumped onto the quilt, along with some flat rocks I picked up on that hike. Used a layer of tulle and (shudder) no presser foot to free-motion quilt the tulle over the rocks to hold them in place, then trimmed away the excess tulle.
To finish the piece, I layered some green batik across the top and quilted leaf shapes to hold all the many layers together. I fused various greens onto various other green base fabrics, stitched leaf veins and cut out leaf shapes. These leaves were then stitched to the green batik down the central vein in the leaf, but left 3-d-ish.
I had really wanted to do a piece where the three layers were attached to a board and hang from it separated by an inch or so from each other so that any breeze or air-movement created by walking by the quilt would cause the upper sheer layers to shift and ripple in the breeze, but realized the quilt would then never make it into any shows….no way to mount the piece. So for this one I sewed all layers together under the leaf canopy, and will add a hanging sleeve to the back.
SO, that’s the long version of “how did she do that?” Hope you like…..
Cheers, Sarah
Posted in Uncategorized | Comments Off on The Top Layer of Tree Spirits 2
August 21st, 2005

OK…I think that worked! Now….for the middle layer of TS2 (aka Tree Spirits 2 etc.)…. I did one painted panel, and decided it would be the “practice” layer and re-did it! This layer is sheer synthetic fabric, originally white. I painted the two tree spirits on it as well as the tree trunks using a diluted mix of Golden Acrylic Paint mixed with textile medium and water.
I had to use a slightly thicker mix to outline the figures, which I let dry so that it would act as a resist for the thinner paint mix I used to fill in. I really wanted the effect of the finished piece to be that of looking into a hazy forest…not being able to see clearly what’s in the distance. The whole surface was then painted with a very thin wash of warm yellow paint with a few rays of pale green…think of the “angel escalators” when sunrays pierce the clouds. I added a bit of batting wrapped with batik and quilted it to finish the raw edges.
Posted in Uncategorized | Comments Off on The Middle Layer