Printing with Leaves
A while back, I blogged about preserving leaves with glycerin and freezing for later printing (as in during winter when there are no leaves on the trees), here. I was fortunate to be able to demonstrate leaf printing at Open Studios, part of the Make It University section of the International Quilt Festival in Houston, on Wednesday evening. I’d like to share here what I did, and include some written directions for those who were able to stop by my table and who surf in to my blog.
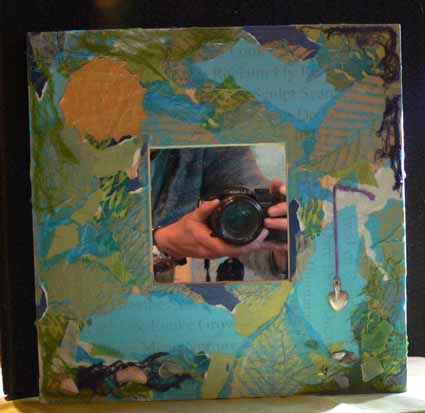
Since the MIU is about mixed media, I decided I had best do something mixed media, even though that is SO not me…. When Deborah flew up to Maine and we all got together (see the post here), Hannah gave us all Ikea mirrors–the cool square ones with the wide wooden frames. I decided I’d do a mixed media thing, since that is what Hannah loves, and do some leaf printing on paper as well as cloth. I then used some papers from a journal kit Deborah made and gave us all one Christmas, then added a milagro Kate brought back from a trip to the southwest a couple of years ago. Finally, I asked Kathy for some of her dyed cheesecloth–I wanted to add something that was from each of the five of us. The result is above! I LOVE IT!
Late note: after writing this post but before taking the picture, I remembered the sea glass and shells we collected this summer with Hannah down at a beach / cove not too far from her house. I decided to add some to the bottom of the mirror and love the addition (I used K6000 glue…the stuff that I think could hold up a roof). I also like the reflection of my camera and hands!
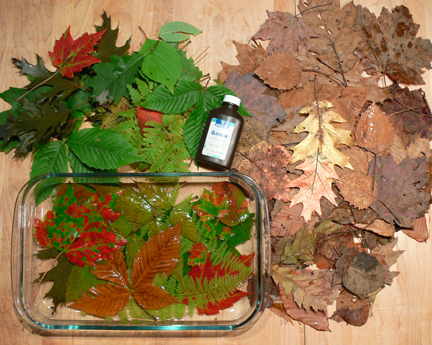
Here is what the leaves look like soaking in glycerin… I use about a one part glycerin to four parts water solution, but I’m really slapdash about it… I pour the glycerin into the lasagna pan, add enough water that I’ll fit all the leaves. If the water feels watery and not slippery like glycerin, I add more of the latter. Very scientific. Ahem. The green leaves are fresh; the brown ones were collected brown about 4 years ago…they’ve been in the freezer all this time and still work for printing!
To do your own leaf printing, first you need your supplies:
• Textile paints
• Fabric or paper for printing
• Sponge roller
• Soft rubber brayer
• 8×10 glass, edges taped or plastic page protector as a palette
• Sponge paintbrush
• Leaves, clean and dry
• Paper towels, parchment or other paper
• Plastic to cover surface
• Lightly padded surface/worktable
The last time I dyed fabric, I used paper towels to mop up some of the mess. They were so lovely I couldn’t toss them. Then it occured to me to use them in my leaf printing and get a two-fer!
How-to:
• Squeeze or pour paint onto glass
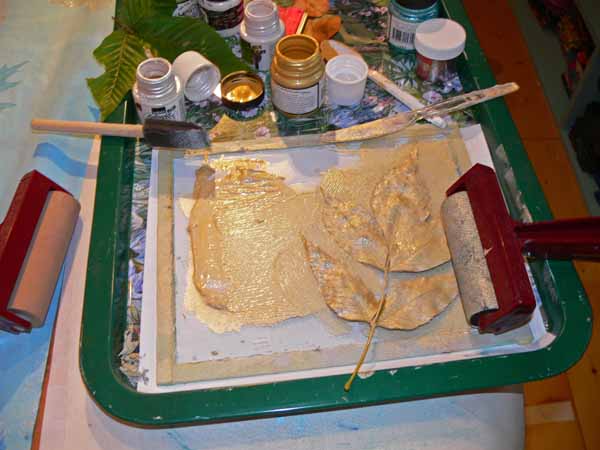
• Roll sponge roller to create an even coating
• Place leaf bottom-side-up on clean / dry plastic and coat with paint; use sponge roller or paintbrush (as you can see, I didn’t do that…I just squished everything onto the glass)
• Lift leaf and place paint-side-down onto cloth or paper
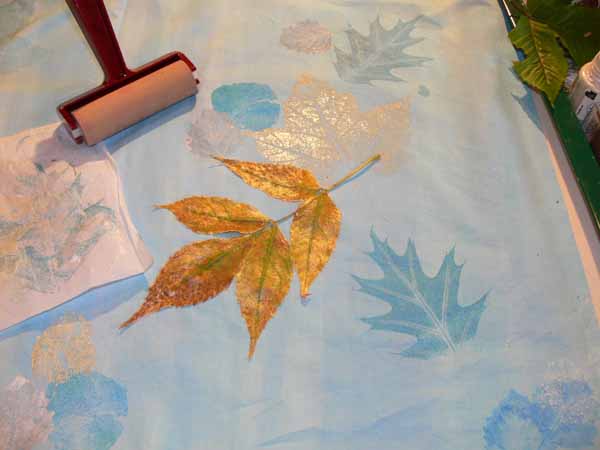
• Cover with parchment or other paper–I used the dye-soaked paper towels!
• Roll over leaf with soft rubber brayer (seen at left in photo above) OR press with hands
• Remove cover sheet and carefully lift up leaf (the gold thing is the leaf with paint on it)
• Allow paint to dry and heat-set or cure according to paint manufacturer’s instructionsThe amount of pressure applied with a roller versus your hands differs. A brayer will produce a finer, lighter print. If the contrast between paint and cloth/paper is too subtle, add more paint or try pressing the leaf onto the surface with your hands.
Hope you like! Thanks to Barbara Delaney and Pokey Bolton at Quilting Arts for the opportunity to participate in Open Studios, and to Cate Prato for inviting me to submit some ideas for the Embellishments newsletter. Click here to sign up for the free newsletter.
November 2nd, 2008 at 5:07 pm
These are lovely and if you cover your leaf with washable glue or flour paste you can make a leaf resist. Then spray dye the fabric and you have delicate leaf shapes in the original fabric colour.l Very quick to do!
November 8th, 2008 at 11:24 am
Great tute! I’ve scheduled a link to this post to go live on my blog later this morning (Central USA time). I hope it brings you a few extra clicks.
Denise
http://needlework.craftgossip.com
November 8th, 2008 at 12:34 pm
[…] Sarah Ann Smith of Art and Quilting in Camden blog is sharing a technique for leaf-printing fabric. It’s easy, and it produces gorgeous fall-themed material for your fabric-based projects. See Sarah’s tute. […]
October 15th, 2011 at 2:45 pm
Applique Designs…
[…]Art and Quilting in Camden » Blog Archive » Printing with Leaves[…]…