Quilting the Egg
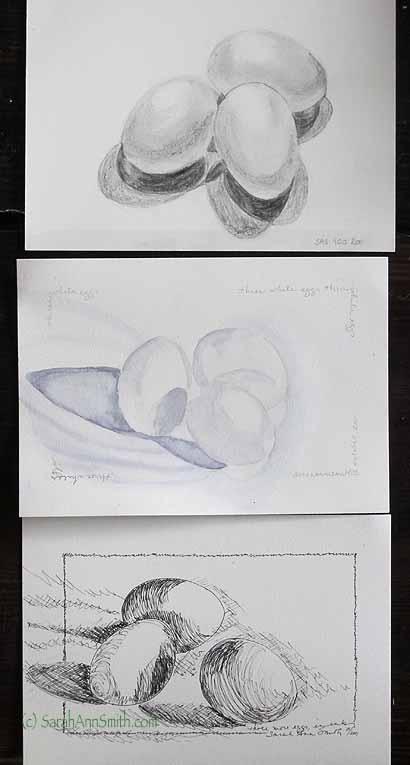
A few years ago, one of our younger son’s karate teachers told me about a drawing exercise he learned from Jaime Wyeth (!!!!). Place a white egg on a piece of white paper and then draw it. By eliminating all color, the exercise helps you REALLY focus on where the shadows are, reflected light, shape. So last year about this time, I tried it in my sketchbook. First I used pencil, but then wondered what it would be like in watercolors (over which I do not have expert control, ahem), pen, and so on. I tried the pen because before the advent of photography, pictures in newspapers and books were often engravings, rendered by using lines, dots, cross-hatching to create light, dark, shading and shape. Finally (duh, Sarah) it occurred to me that the same exercise would be well applied to thread and cloth.
- And a note: by the time you get to the end of this post (which is long…sorry!), I can just hear many of you saying “I could NEVER draw like that.” Well, neither could I when I began. I’ve learned, and so can you, you just need to try. I’ve learned to teach myself drawing, learned to SEE. I recommend Betty Edwards’ The New Drawing on the Right Side of the Brain very highly.
A whole lot of our thread-coloring, quilting with thread, thread-sketching–whatever you want to call it, is achieved the same way artists used pen and ink in the days of yore. You use the direction of the stitching to create a contour, like on a hiker’s contour map of the terrain. And you can use different colors or use the same color applied more densely to create variations in value–the range of color from light to dark.
When I started playing around, of course I didn’t want to muck up the expensive watercolor paper, so I did a few test-sketches on copy paper:
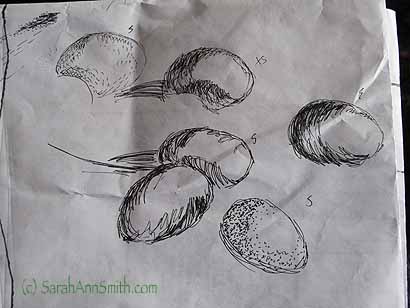
Practicing directions and types of line to create shading for the eggs. The S and XS are reminders about the size tip on the pen I used, a Pitt permanent black ink similar to the Pigma Microns. I have found that my Pigma pens just dry out too quickly, and that the Pitt pens work as well on cloth and seem to last longer for me.
Then I tried by drawing in pencil first. In this photo, I’ve included the eggs on white paper in the background and my ink sketch in the foreground:
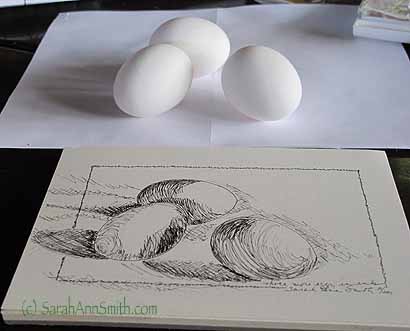
The eggs and the ink drawing, which I did to simulate on paper what I might do in cloth. This sketch was done relatively quickly, so I’m pleased that it gives a decent rendition without taking eons to do it. If you look carefully at the egg on the right, look at the left side. There is a triangular wedge of shadow BUT at the bottom, *under* the edge of the egg, it actually becomes a brighter / lighter gray from light being reflected and bounced up off the white paper! Whooda thunk it? And just in front of the tip of that egg…notice that glow of white *under* the egg? It’s amazing what you can see when you really start LOOKING at something!
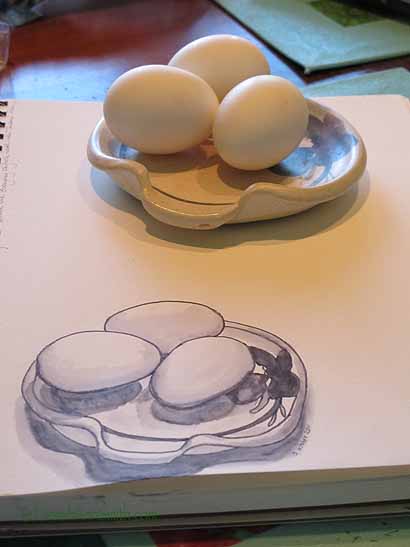
Next, a comparison using three different media:
Then this year I signed up to teach at Friday Sampler in Houston; think of this as speed dating for quilters! About 20 teachers are in a ginormous room at the Houston convention center, each with their own Station (one or two tables). The teacher does brief (5-10 minute) presentations…same one over and over. The students/participants can come into the room and move from station to station at will to see what each teacher has to offer. I’ll be talking about Thread-Coloring, so I thought it would be the ideal time to do up some new samples to teach how to see light and dark, light and shade.
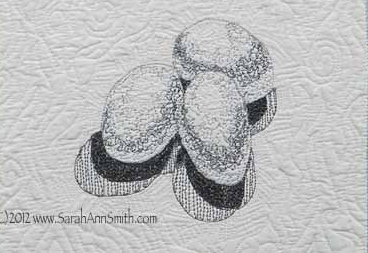
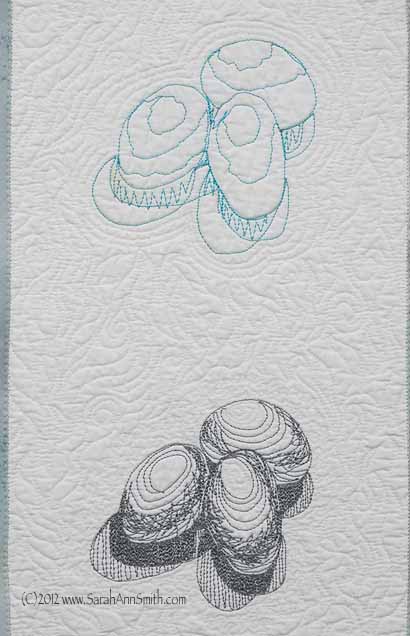
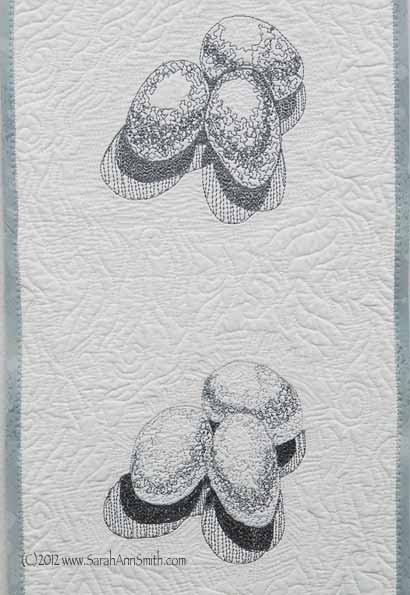
This sample shows the lines I drew in blue pen (quilted in a similar blue since over time those blue pens can fade out with humidity!), followed by three variations in quilting them. The top two quilted ones are stitched with ONE color of gray thread (the new Magnifico poly from Superior Threads, and it is magnifico!). The bottom set of eggs is quilted with white and three shades of gray (light, medium, dark). You’ll notice two sets of cast shadows…that is because there was light coming from two directions: the electric light and the window.

All four versions in thread: the blue is to represent the markings I put on the quilt. The second set of eggs is quilted with cross-hatching of sorts using one color of gray thread. The third set of eggs is quilted with a scribble using one color of gray thread, and the bottom/fourth set of eggs is quilted with the same scribble but using three shades of gray. For all three of the quilted sets I kept the way I stitched the shadows consistent to make comparisons easier.
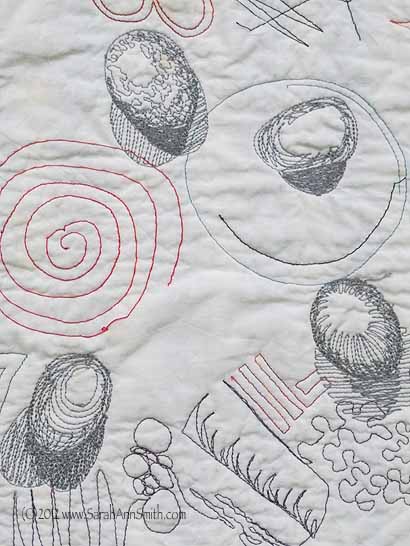
Just as I did with my paper sketches, I did some practice runs on an old warm-up quilting sandwich:
I’m not thrilled with the cross-hatch stitching I did on the final sample…those ovals on the top just don’t do it for me. I would not use this quilting on an actual art quilt…that’s the benefit of test-driving quilt designs on scraps and samples. I really liked the way the scribble versions turned out, though! Here are some close-up photos so you can see better:

November 2nd, 2012 at 12:27 pm
You did a wonderful job on the eggs! It truly is a lesson in value and the effects of line When doing a project like this.
Puts a whole new perspective on things!
November 3rd, 2012 at 8:43 am
I ALWAYS learn something from your blog. You are amazingly talented! I’m going to give this exercise a try.
November 3rd, 2012 at 10:55 am
Wonderful work Sarah. Sorry I missed seeing you in Houston – I was there for Market and left on Tuesday.
I have a favour to ask….can you tell me what the date is that we can book the Hilton for Market/Festival next year. I didn’t stay there this time and forgot to go over and get the info!
Thanks!!
Daphne
November 5th, 2012 at 1:59 am
Beautifully done SB!
I might just have to try this out. What a great idea! Thanks, as always, for sharing this!