Karoda’s comment and Leaf Sampler Stitched
 I finished the stitching on the leaf sampler yesterday, and hope to quilt it today. In the meantime I took some photos. But, to begin with giving credit where credit is due, I got this idea from Jane Sassaman. She brought a 16-leaf sampler (and drat it all, it was so wonderful I couldn’t think of anything else subject wise that would work as well for a class sample, but at least I made two leaf shapes, both my own, and used my own colors and stitches without reference to hers!) to a class, then I later discovered that a few of her leaves are in her book, the Quilted Garden, on page 121.
Karoda mentioned that she could use a class in the decorative stitches….so I sent her this reply:
 I’m actually thinking of a book proposal…who knows, maybe in 2 years I’ll have a book on it LOL!
Then use stabilizer (I used freezer paper, but on some of the more openwork stitches you get paper left underneath), and go to town with all your various threads. For a class sample, I don’t mind the paper but for a “real” piece, I’d probably use a tear-away or a washable (the papery kind, not the see-through, which is kinda grabby when on the bottom of the fabric).
Just fuse up 9 or 16 samples, and try different combinations. 16 may be a bit much / boring, but a nice “nine-patch” will give you an idea how dramatically different stitches and thread can make a leaf (or whatever) look….
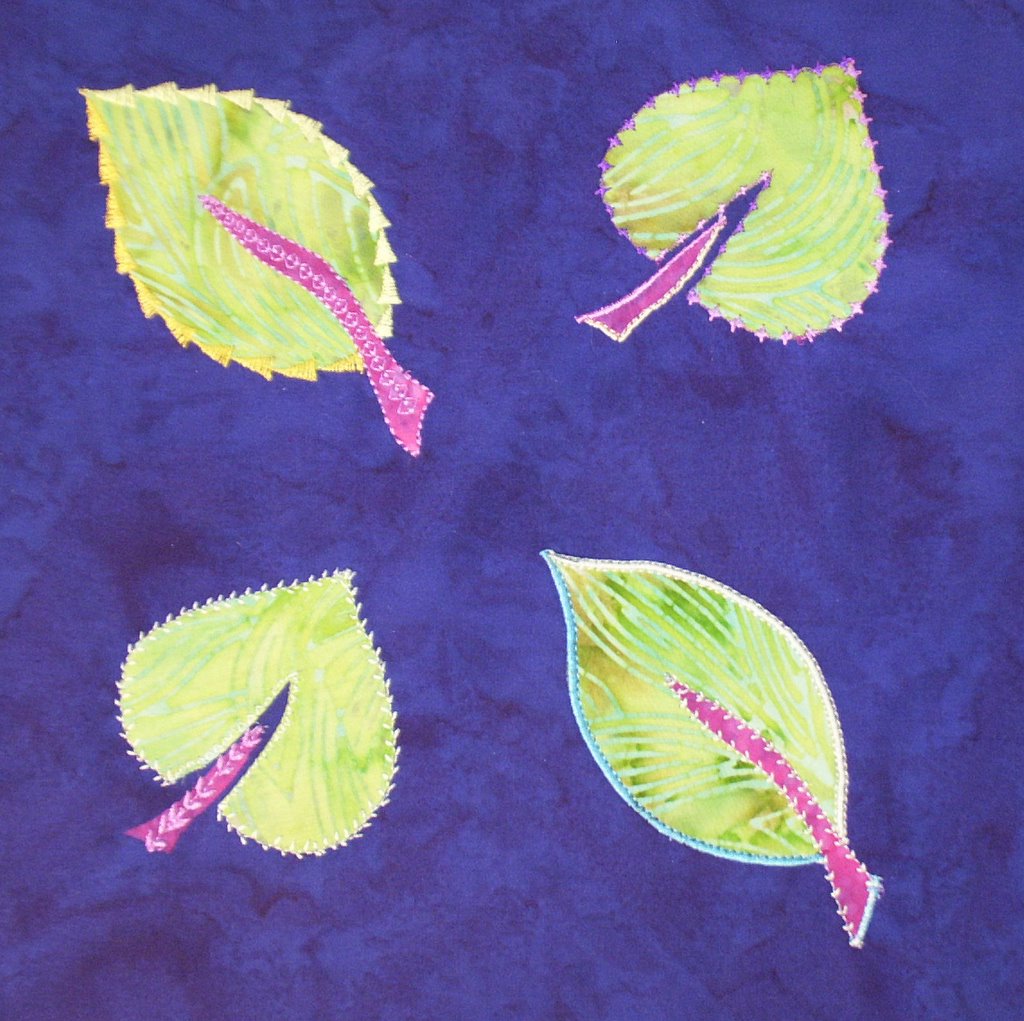
Here are some close-ups of a few of the leaves.  I don’t necessarily like all the options I did, but I wanted to illustrate how different the leaves can look depending on the stitch and thread color chosen—heck, I only used Superior Threads 40-wt. trilobal polyester (the Highlights, Rainbows, and Hollis Chatelain lines) threads. Imagine if I’d added cotton, matte poly, metallic…etc!