More lino-cutting
Heads up! Dijanne is beginning a new lino-cutting class on March 8th! To sign up, visit her blog and contact her by clicking here.
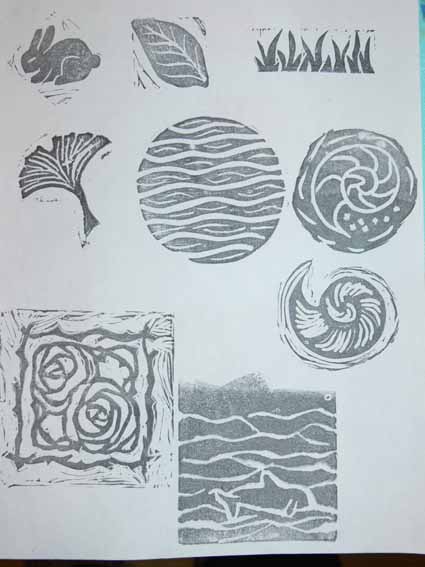
I’ve been trying to work on my online lino-cutting class with Dijanne Cevaal during the Olympics and breaks from working on that quilt I can’t tell you about yet. I’ve been having FUN! One of the exercises was to cut a monogram / initial. As part of that, I decided to print up some stamps I had carved in the past and share with the class, so thought I’d share them here, too. The older stamps are all done in either Speedy-Cut (a somewhat soft, rubbery material, or a generic version of same), an art eraser (the grass) or the cuts-like-a-hot-knife-in-butter MasterCarve (the bunny and leaf in the top row are on opposite sides of the same block). The sheet below is an 8 1/2 by 11 inch (about A4 size paper) piece of paper. The rose block is about 3 1/2 inches square, the bunny maybe 1 1/4 inches across (printed on point).
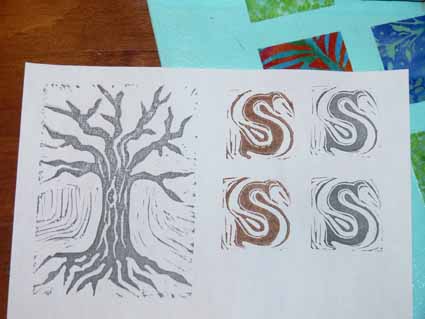
Here are the carvings for class (the “S”) and an older tree of life design printed onto paper with textile paint (brown) or stamp pad ink (black):
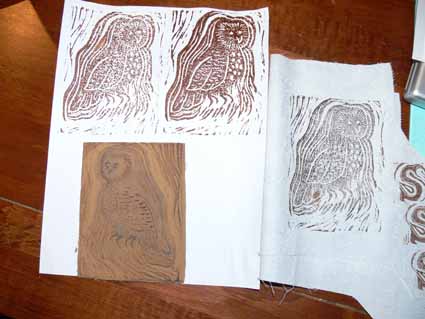
I also did an owl in Dick Blick (online purveyor of art supplies) Wonder Cut, a type of linoleum. It is about 1/4″ thick, and feels like tightly compressed sawdust. It is harder to cut than the rubbery stuff, but easier than the Golden cut or battleship gray linoleum. Since I have (I think) incipient arthritis and other issues with my hands, I used that first:
I didn’t really like the three echo lines to the left of the owl, so I subsequently removed them. I’ll share prints made with the revised version a few blogposts down the line…..The lino cut is at the bottom, the paint on paper prints at the top, and paint on cloth to the right (along with a few attempts with the “S”). I need to get a better print on cloth… I think I figured out the trick. It is called buy MORE paint supplies, the kind suitable for lino-printing! More on that later, too….. you get the same exploring and learning curve I had!
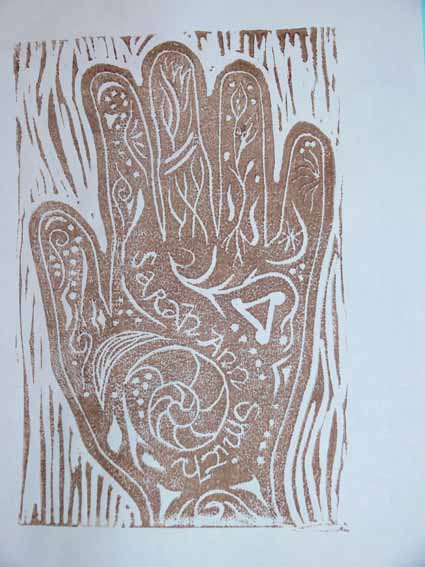
Last, a stamp I made a while ago to use on labels. It is large… 5 1/5 by 8 inches (half a sheet of paper). I traced my hand then drew inside it, then carved the whole shebang into the soft-cut rubber. I had thought I would need to make this into a Thermofax screen for screenprinting, as I was not having luck getting such a large surface colored up with textile paint and printed before the paint began to dry. However, with my buy-more-stuff discovery, maybe I don’t. Hmmm….I’ll have to go try the new stuff with this stamp….hmmmm……
Anyway, hope you like my total collection of stamps, which will be growing! I like the lino-cutting!


March 7th, 2010 at 3:46 pm
I love your hand stamp! I love all the various motifs on it. Thanks for sharing, I don’t think I’ve got the strength left in my hands for carving on anything very hard, so I’ll stick to the nice soft rubber stamps.
March 8th, 2010 at 2:31 am
You look as though you are now hooked too! The course is great!
Hugz
March 11th, 2010 at 10:54 am
WAY COOL!!!!!
I have tried this a bit and it is fun to see the final product.
Oh No you are motivating me to pull it all out again…welcome to the suck zone:)
March 21st, 2010 at 6:36 am
[…] my earlier post about the owl, I mentioned that I didn’t care for the heaviness of the lines to the […]