email Youtube

Home
Galleries
Blog
Workshops & Calendar
Store
Resources
About
Contact

Archive for the ‘Classes I’ve taken’ Category

Plaid Top Tutorial: Lesson 2-Make a muslin, fitting and sleeves

Tuesday, February 21st, 2023
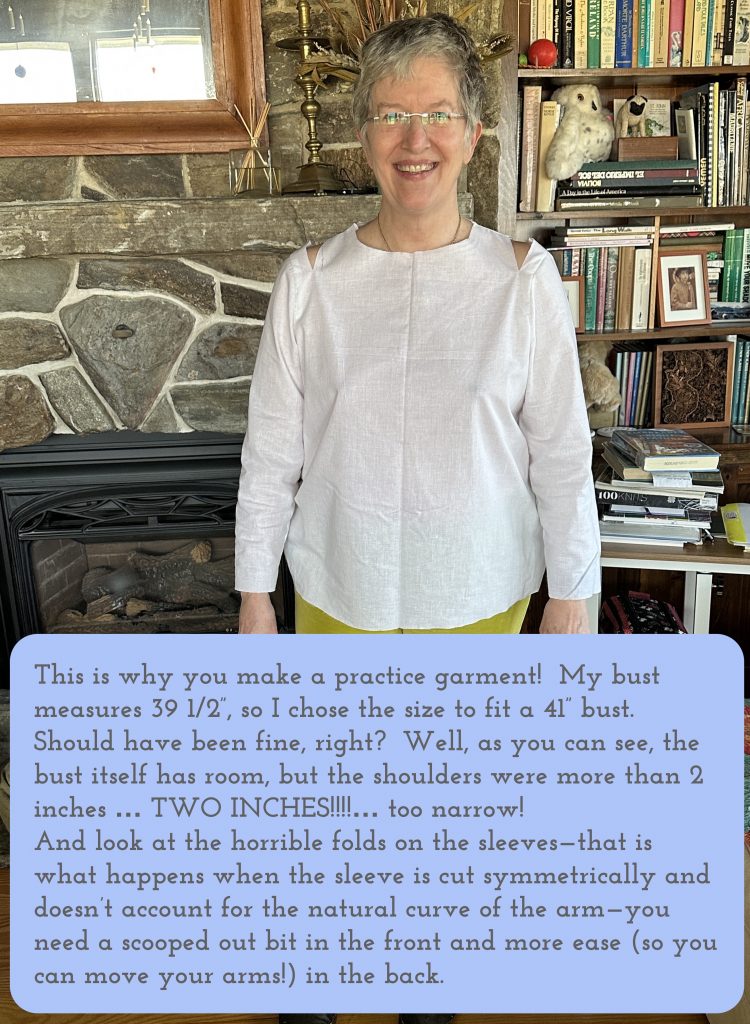
At the end of Lesson 1, I was showing you how far off the fitting is in this pattern when applied to my body: broad shoulders, small bust.

Please note:  I am affiliated with Janome as a Janome Artisan and am compensated.  However, my reviews are honest and I would say what I say whether affiliated or not.  I’ve also chosen to be affiliated with Janome since 2003 (!!!) because their machines are so good and they are so responsive to the interests and needs of their customers.

There’s a LOT of detail in this post, but if you read through you’ll learn why it’s a joy and a wonder when you can find a pattern that works for your body.  And once you make any necessary changes, it is fairly easy to use that pattern and make variations on the theme.  Somewhere down below I mention taking a WONDERFUL, highly-recommended, can’t say enough good tings about Garment Makers Question Time with Philippa Naylor.  I have been sewing over 55 years.  Others in the class have never made a garment. Yet we ALL are learning and getting good results!    You start out easy with a shift dress, move to a skirt, on up to rain jackets and fancy stuff!   I got sidetracked with life last year but can’t wait to get back to it.  Her work experience in the garment industry long before she became a quilter is golden.

It’s kinda like prepping a house to paint it–you have to do the yucky sanding and spackling and priming or the paint job won’t turn out well now matter how good the paint and painter.  This is the prep work part of a successful garment!
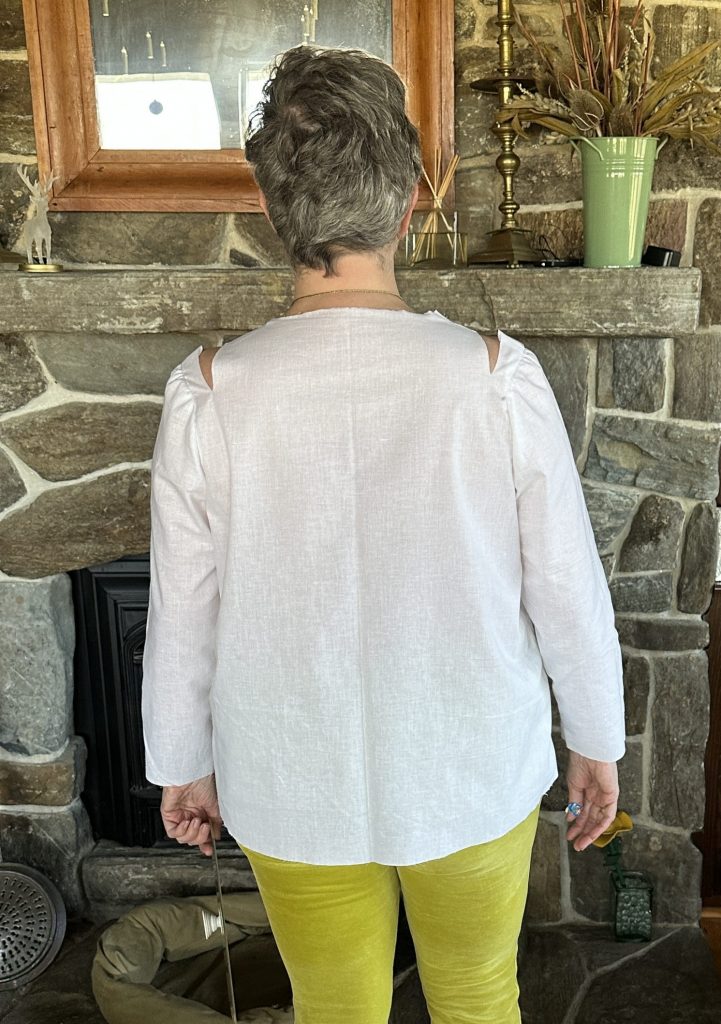
View from the back..see those pull lines across the upper back, that means even with the slices it is still too tight! Part of the problem is that the pattern sleeve pieces are cut without a front/back to the sleeve cap.
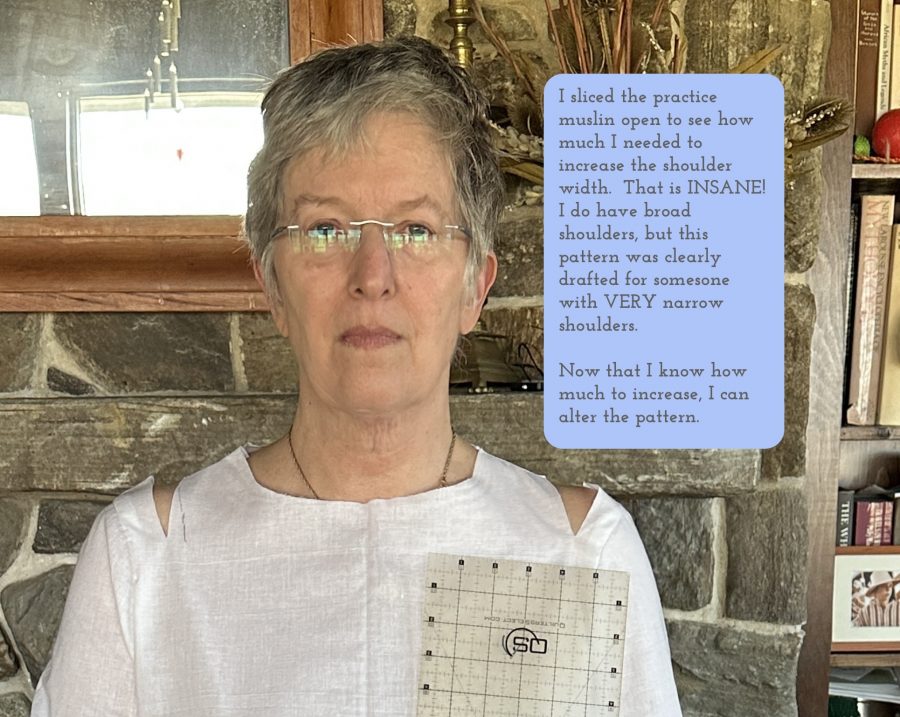
A close up of the top…holding a ruler to show how much I need to alter the pattern to make it anywhere near fitting properly. There are many books and videos and workshops to learn how to do this, but the one that finally made it click and work for me was GMQT.  Your mileage may vary, you may grasp the concepts well from some of the tried-and-true books from the 80s even.  But this is how I finally “got it.”
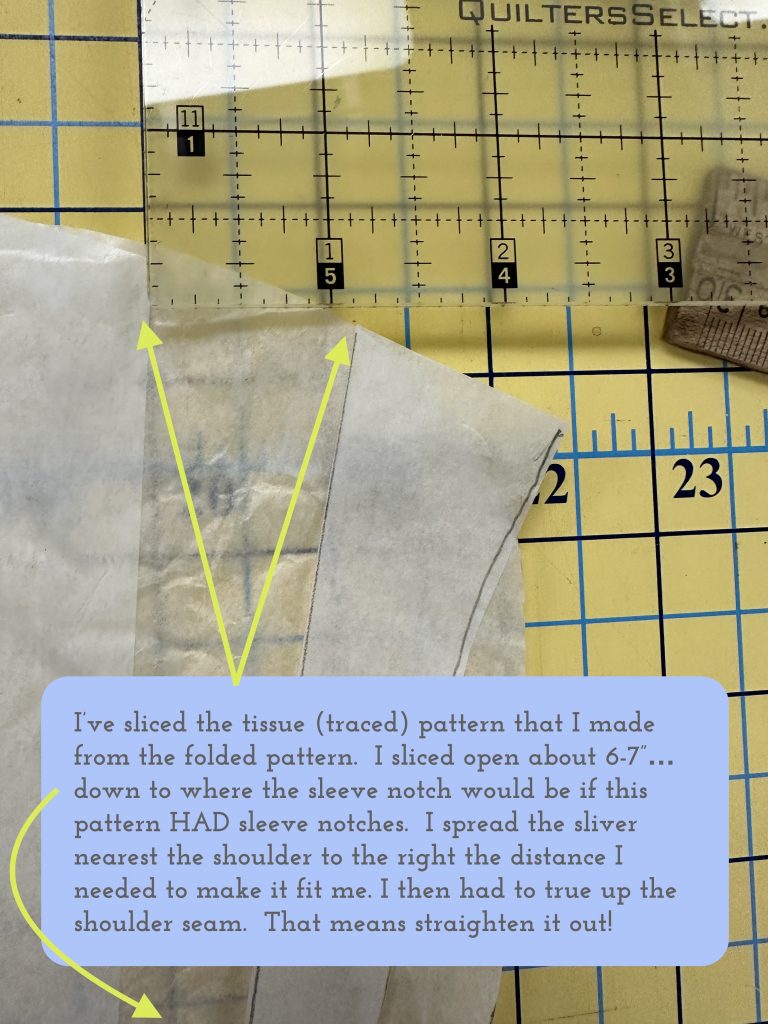
There are MANY resources, from books to youtube to online and in person classes to learn about fitting. A year ago I signed up for Philippa Naylor’s Garment Makers’ Question Time, a 12-month series of classes for a price that is modest, especially considering the vast amount of knowledge and content. I HIGHLY RECOMMEND THIS WORKSHOP GMQT.co.UK (not affiliated, just a happy student). Finally, after making clothes for more than 50 years, I feel confident in making alterations. The caption on the photo explains what I did to make it fit.
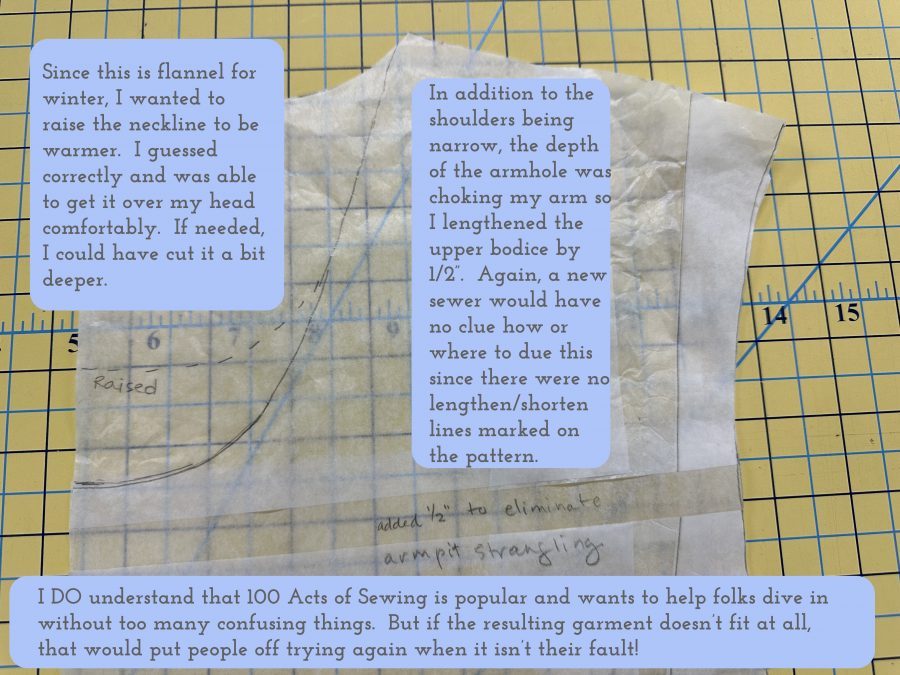
The upper bodice area was also too short…not enough room for my arms to move, so I lengthened by 1/2″. You can see the pencil notes… I made the cut perpendicular to the center front, spread the pieces and inserted more paper. I guesstimated where to make this change since the pattern itself does not include the standard lengthen/shorten here markings. I also raised the neckline since this is a winter top and Maine is cold!

I knew that the sleeve pattern was a problem as soon as I saw that it was cut symmetrically.  If you look at a human body from the side, the arm curves to the front.  A sleeve needs to do the same, not hang like a plumb line from the shoulder point.  The fact that the pattern piece was symmetrical (cut on the fold) meant it could never fit properly. I knew I could modify a sleeve pattern piece from another pattern if the length of the seams matched closely enough to make it work.

I used a technique I learned in GMQT.co.UK that is called “walking the seam.”  You measure the length of the SEAM line, not the edge of the pattern piece on, in this case, the armhole opening and the top of the sleeve.  Luckily, my pattern piece from a different garment was within 1/4″.
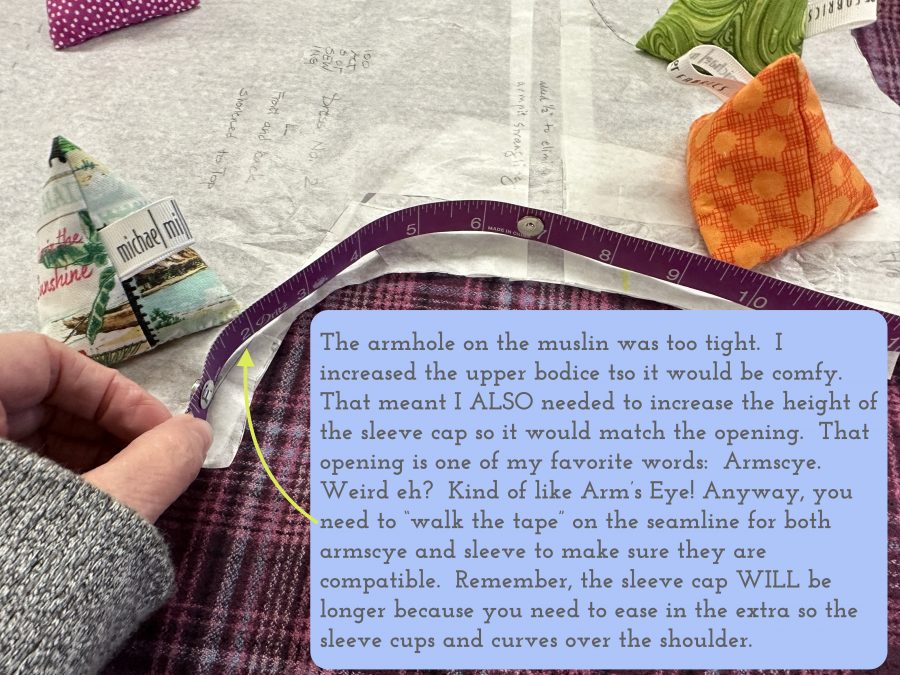
To “walk the seam” you set your tape measure on its edge, and measure along what will be the seamline.  After adding in the extra 1/2″ length (you can see the taped insert in the photo above), that changed the side seam length, which meant I needed to make sure the front side seam matched the back side seam (easily done since it is just a straight line).  See next photo.  PS–if you want to make pattern weights like mine, my free tutorial is here.
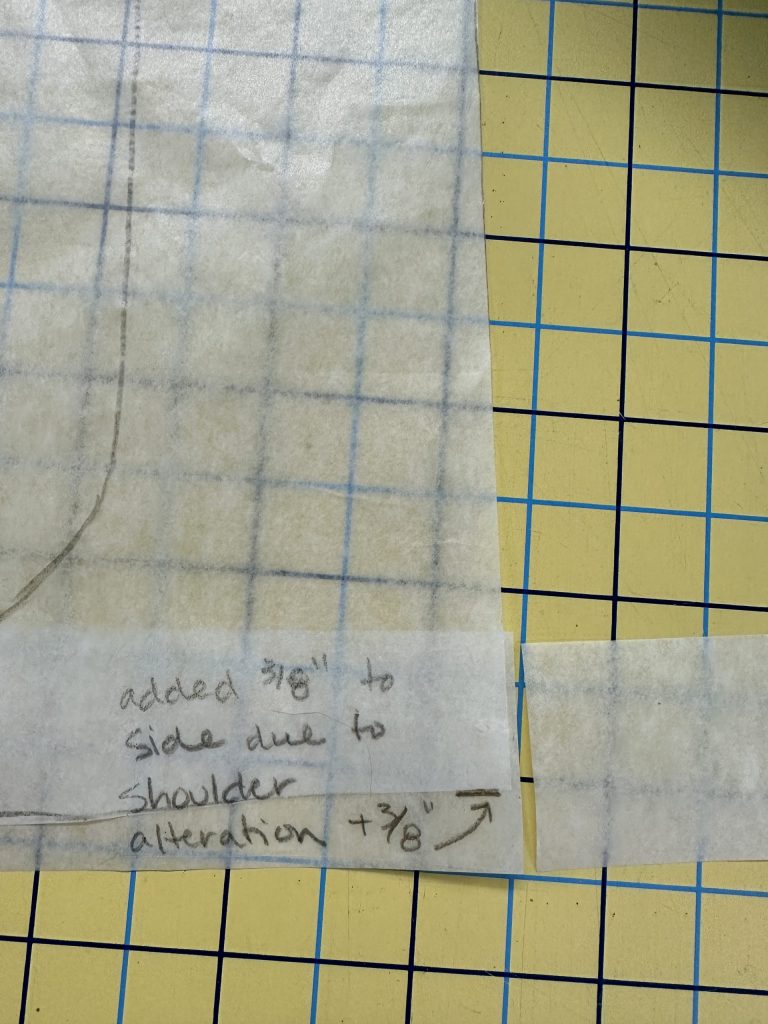
 

This is the bottom front of the garment. Because of the changes to fix the narrow shoulders and shallow armpit, it altered the side seam, so I had to lengthen the side seam so the front and back side seams would be the same length.

I looked in my collection of patterns–yes, I have patterns going back to the 1970s!–and found one with a sleeve I thought would work. It did!
In the next photo you will see notches and dots.  These are standard in the pattern industry.  One notch on a sleeve usually means the front of the sleeve, two notches is the back side of the sleeve.  Dots are used for various purposes.  Sometimes they show where to run gathers from one spot to the next.  Other times they indicate where you match up the shoulder seam.  That means you can distribute the easing/gathering on the sleeve cap so the sleeve actually FITS and runs around the body in a way that allows you to move your arm.  Sorry–but I was just SO frustrated with this pattern.  It is, sadly, destined to make new sewers think they can’t do anything right, when the error lies in the pattern!
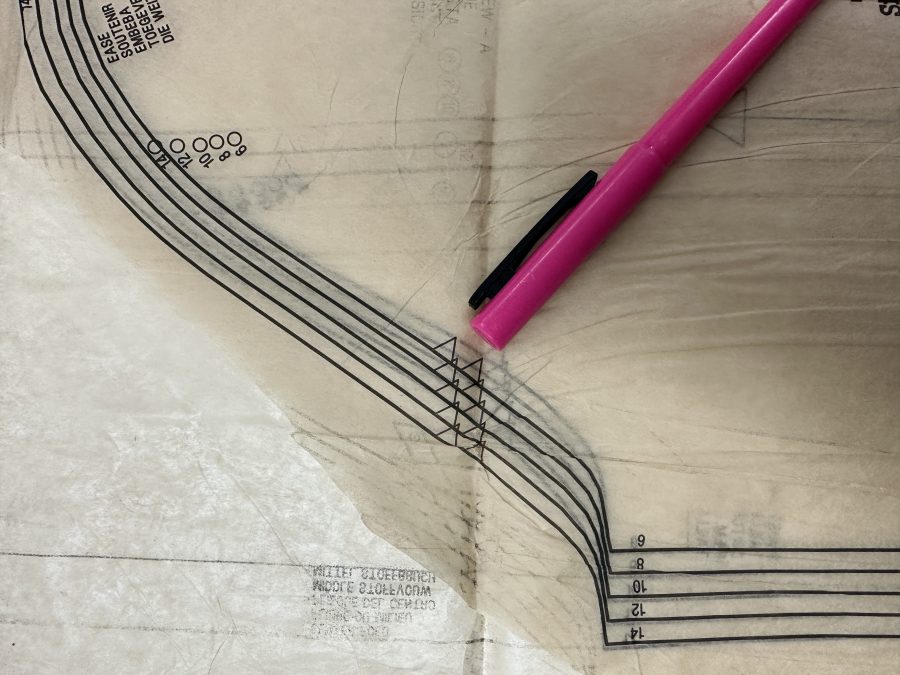
Notches, dots and lengthen/shorten lines actually make it EASIER for a newbie to figure out what goes where. Eliminating those marks does not help!
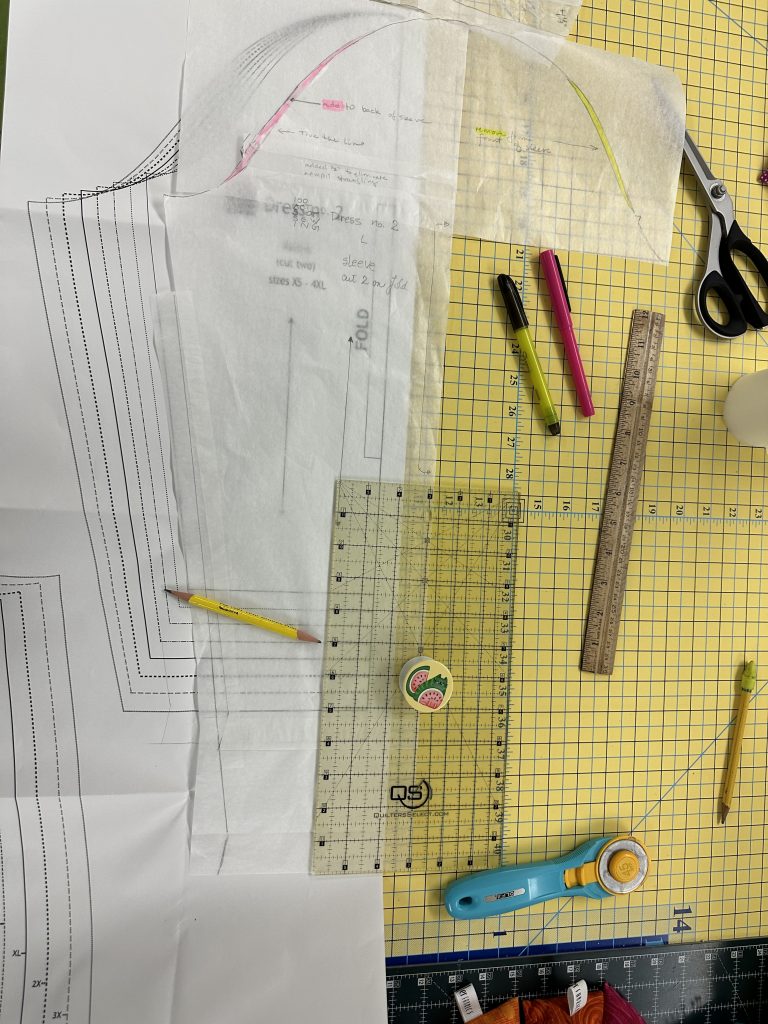
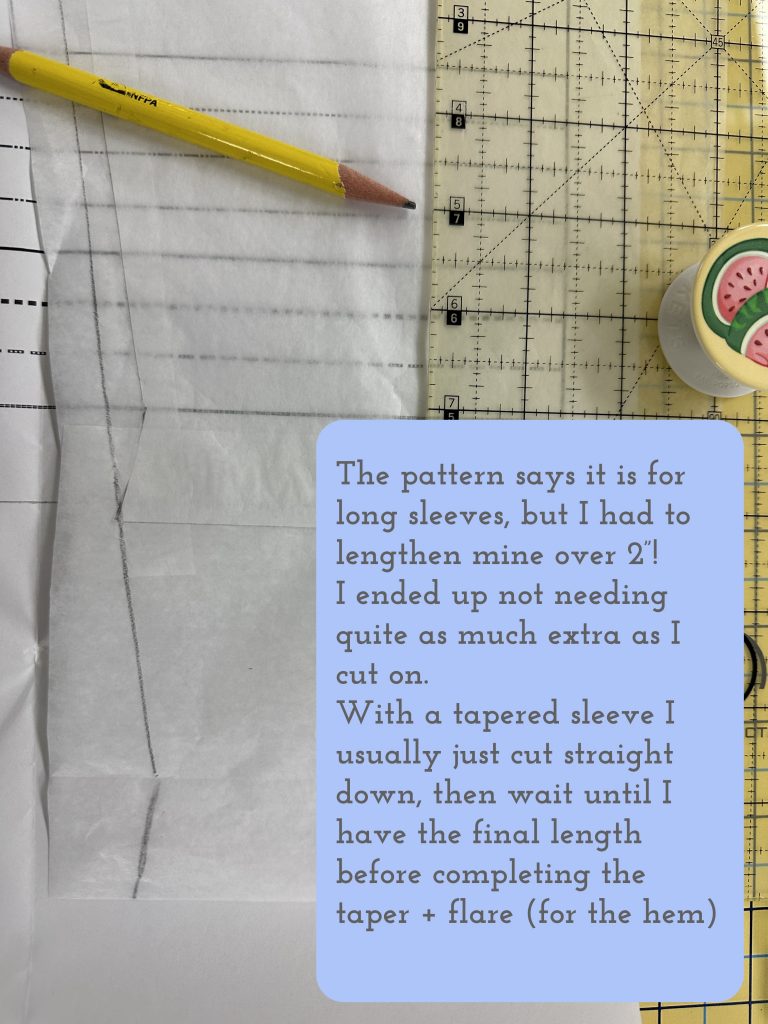
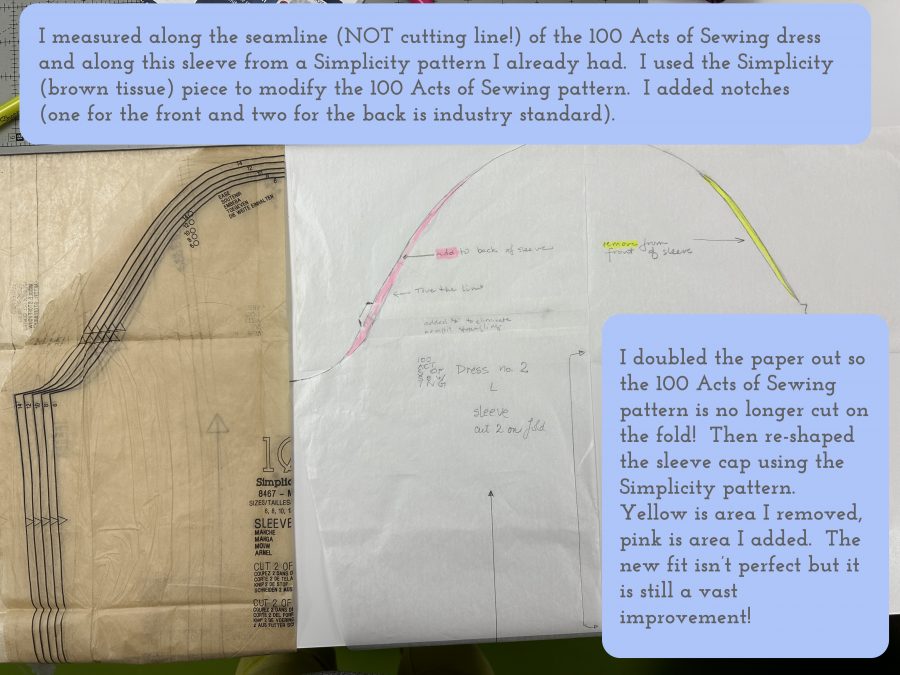
I have cut a sleeve pattern that merges the 100 Acts of Sewing pattern and the Simplicity sleeve pattern. I removed (yellow) from the sleeve cap to eliminate the bubble in the front of the sleeve and added (pink) to add room to move your arms forward. The sleeves on the pattern are described as long, but doesn’t specify if that is halfway down the forearm, 3/4 and/or bracelet length, or full length. I needed to add more, but not quite as much as pictured here.

Flare at the hem, you ask?  Why yes…if your sleeve angles out (or pants leg) and gets wider as it goes up, you need to have a hem that does the same.  Once you have figured out the correct spot to hem, fold the fabric up on the hemline and trim to match the angle of the seam.

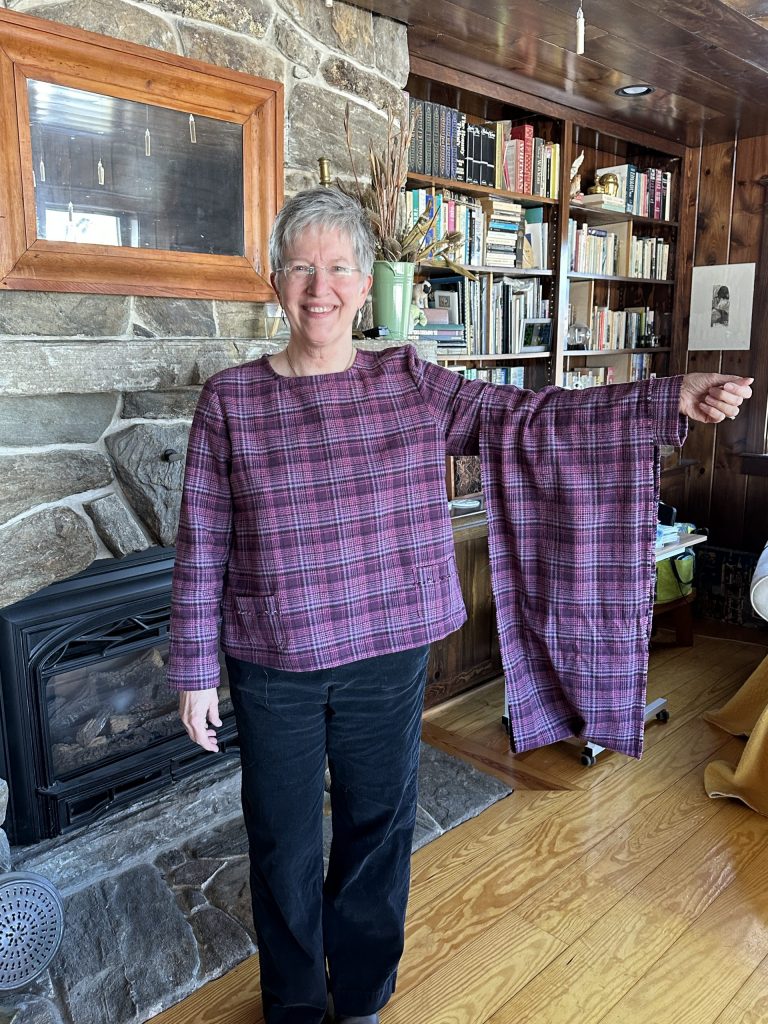
PHEW.  So…that’s a lot.  Thanks for reading this far–so you get another shot of the finished top, with the infinity scarf on my arm so you can see the top better. Next up:  seam finishes, with a couple short videos!

I had just enough leftover that I was able to make myself an infinity scarf to keep my neck warm.

Here are the links to all the posts in this series of lessons, techniques that can be applied to virtually any garment and many home dec projects.   Let me know what you’d like to learn and see here on the blog.  Cheers and thanks, Sarah

Lesson 1:   Choosing a Pattern and Starting Tips

Lesson 2:   Making a Muslin, Fitting and Sleeves

Lesson 3:   Matching Plaids, Cutting out Your Garment Pieces

Lesson 4:  Overcast Seams, just like Serged Seams

Lesson 5:   French Seams

Lesson 6:  Lapped and Flat-felled Seams

Lesson 7:  Hong Kong Finish for Seams

Lesson 8:  Lined Patch Pocket Tutorial

Lesson 9:  Hems and Scarf

Anthea Blouse in Sky Blue Linen

Thursday, October 6th, 2022

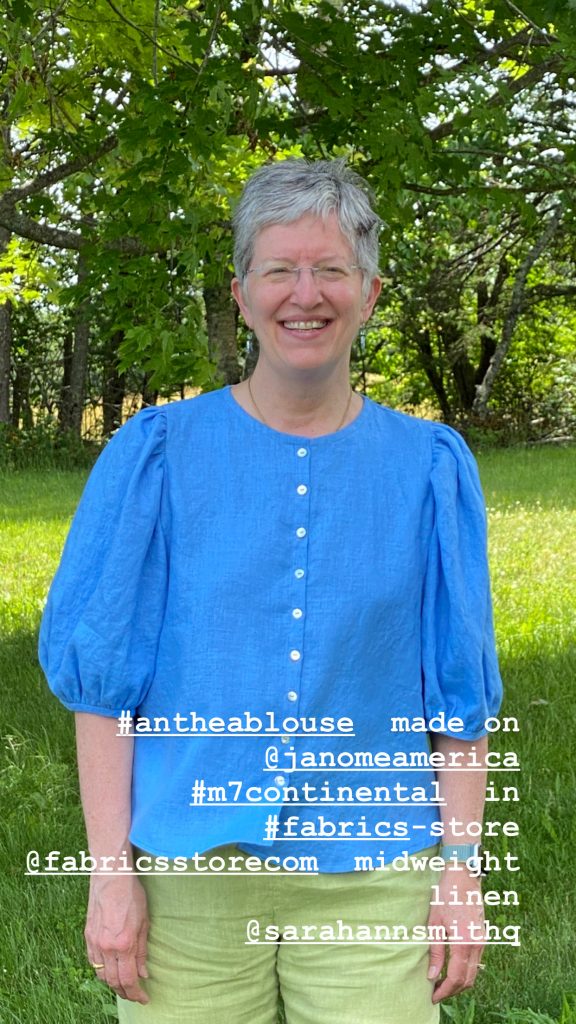
While visiting my favorite local shop, Fiddlehead Artisan Supply, one of the young women working there had on her version of this blouse. Asked the pattern name–Anthea by Anna Allen–went home and ordered it! The colors I’m wearing are Maine Summer and it is so flattering to many body types and comfortable.

Today’s blogpost takes you through making an entire blouse, which presser feet I use on my Janome (I’m a brand ambassador and compensated, but I’d say all this good stuff anyway…they rock!) m7Continental, why and offer tips and tricks for garment construction. Pretty much all Janome machines have or have available these presser feet with the possible exception of the automatic buttonhole, which many but not all of the Janome models have. Comment and let me know what more you’d like to know and what you’d like me to feature on the blog! I’m scaling back travel teaching and hope to have more time for this sort of thing.

The first thing to do is sew your side and shoulder seams. I opted for French seams for a clean, no-fraying finish. With a 5/8″ seam allowance, I sewed with the WRONG sides together at 3/8.” First press the seam as stitched (flat), then trim to a scant 1/4″ and press the seam allowance open.
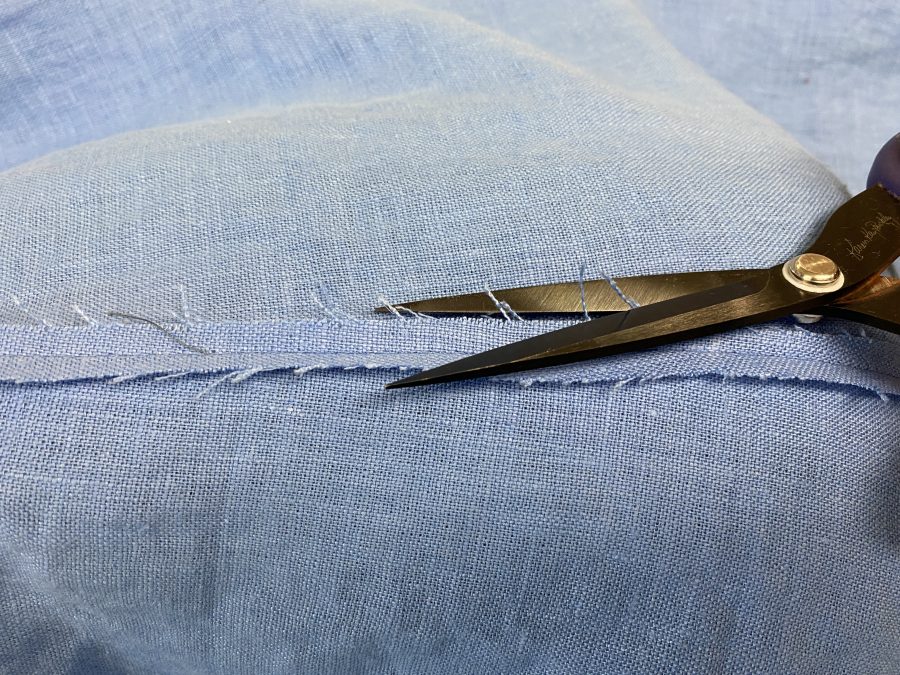
Be sure to trim off the whiskers–you won’t be able to coax them inside the enclosing seam and trimming them later.is a headache.
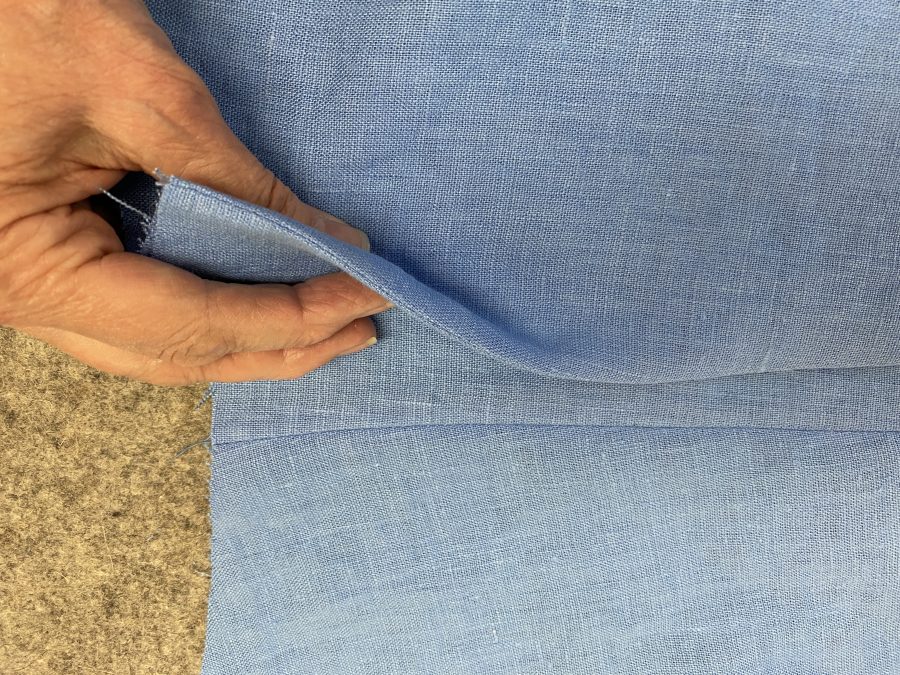
This shows me holding the fabric with right sides together; the fabric is folded EXACTLY on the first line of stitching. You then sew 1/4″ away to enclose all the raw edges.
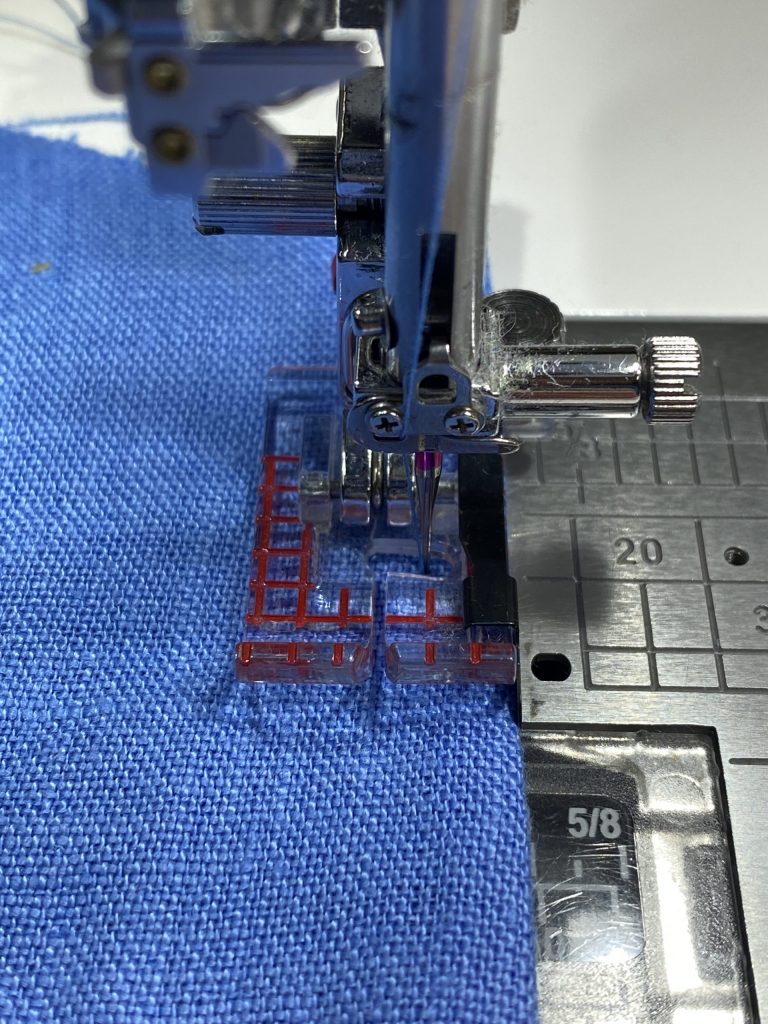
Sew the second part of the French Seam at 1/4″. If you’ve trimmed any stray threads/whiskers, you’ll have a beautiful clean seam. Press to one side (for my blouse I pressed to the back). Notice that the edge of the fabric/seam is on the 3/8″ line but the needle is moved right of center to be at the 1/4″ seamline.
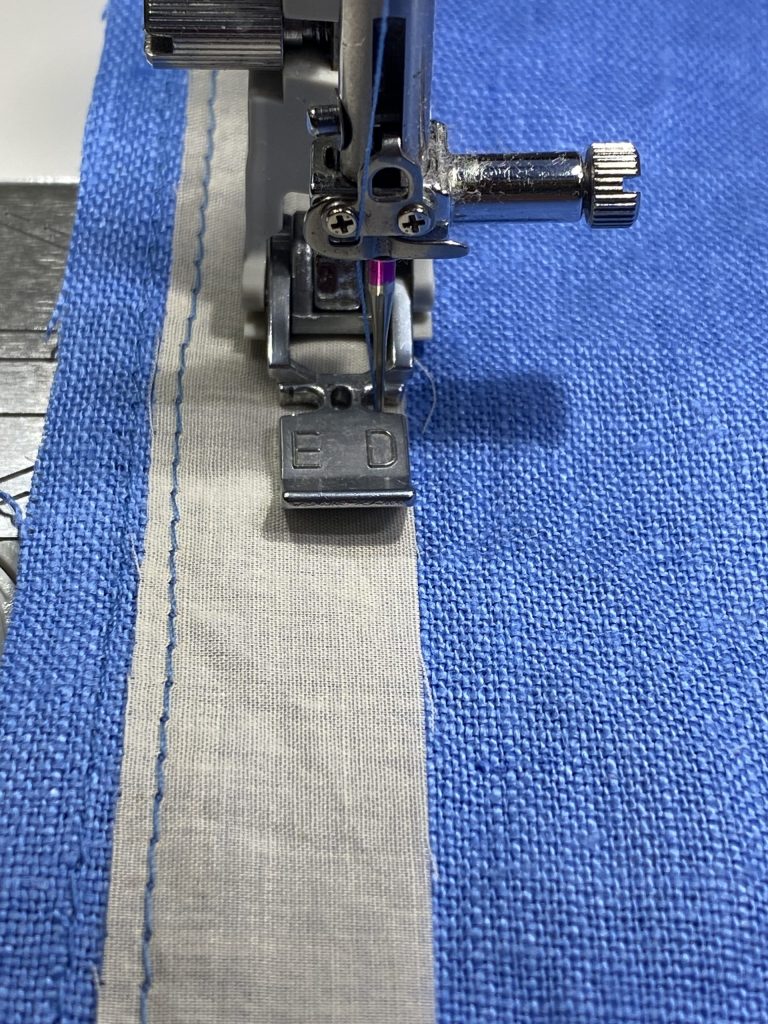
Next, I am stabilizing the button band by using cotton voile (preshrunk) as my interfacing. Unlike the polyesters or fusible we are used to using, it provides strength without bulk and retains a soft, fluid hand to the garment. I sewed the edges in place (so the strip won’t wiggle and wad up during use). The zipper foot is one of my favorite ways to get a perfect, consistent edge: set the side of the foot on the edge of the interfacing and move the needle toward the center. Be sure it won’t hit the foot but also doesn’t ride on the very outer edge of the interfacing and chew it up. ON the left you can see stay stitching.
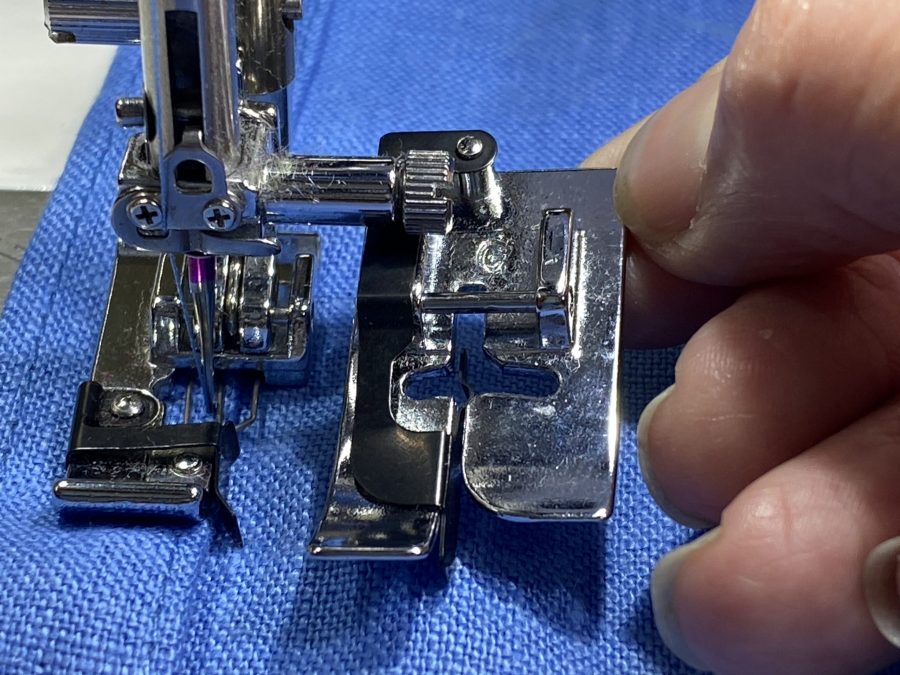
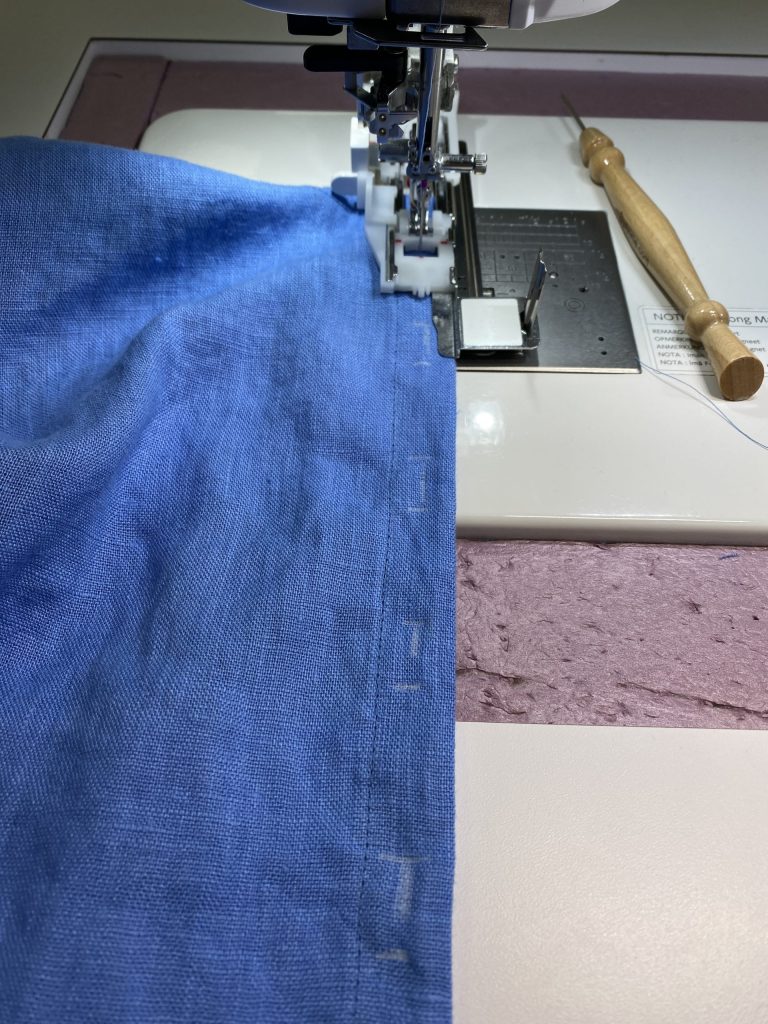
I’ve folded the cut-on button band to the inside and am now stitching it to the front. When I have a “lip” or folded edge and want to edge stitch, I use either the edge stitching foot (on the right, which I think of as the Ice Skate with the metal guide in the center) or the over cast foot (on the left, in use). Using a straight stitch, place the foot so the blade is snug against the fold and move the needle to make a nice, narrow topstitch. Be sure the needle won’t hit the wires in the presser foot by hand-walking the needle for one or two stitches.
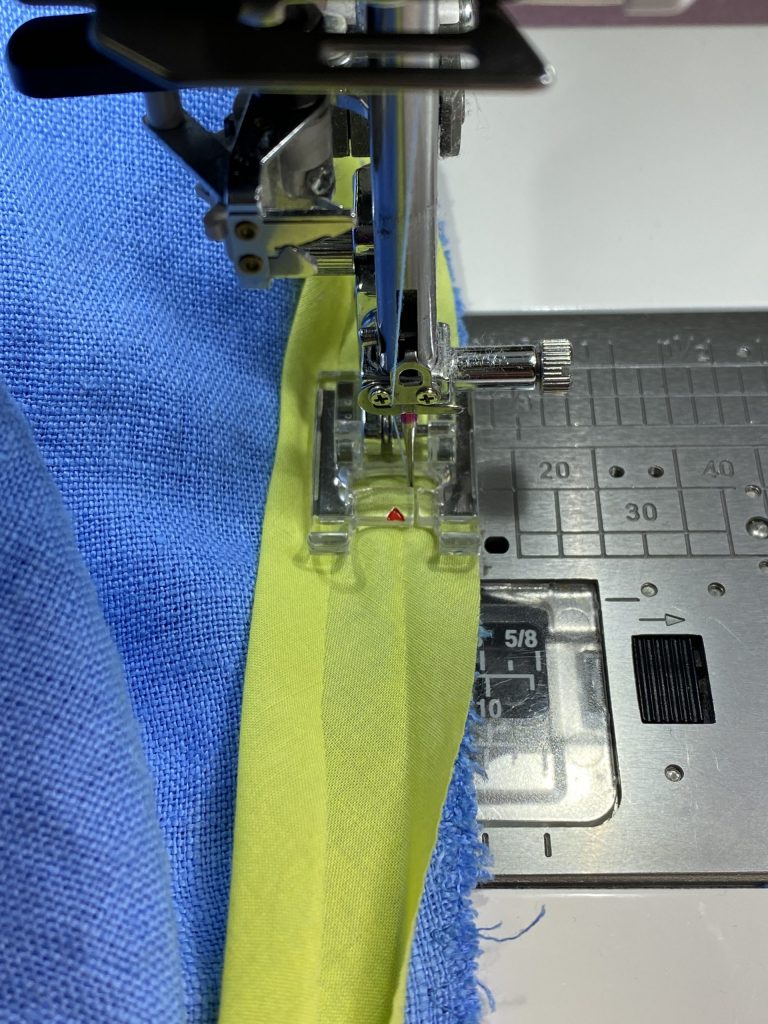
Next up: applying a bias binding to enclose the seam and act as a facing on the neckline. Here I’m using what may be my favorite presser foot, the F2 appliqué foot. The wide open toes and clear visibility help me sew more carefully and precisely. This photo applies to both facing the neckline and covering the edges of the set-in sleeve seam.
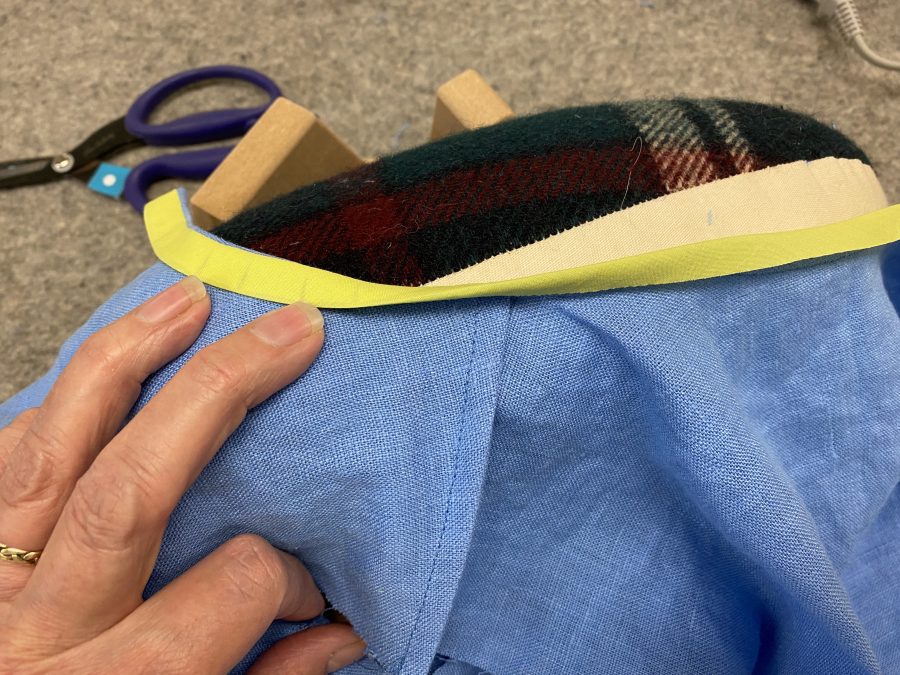
Buying a GOOD quality tailor’s ham and base to hold it has been one of the best, most useful purchases of the year. After 50 years of using my mother’s horrid old ham, I’m ready to sew! Here I’m pressing the bias in place on the neckline. You can see the narrow French seam on the shoulder in the center of the photo. As I press, I am easing the bias so that it lays nice and flat. I used my seam gauge to make sure the depth is even, then edge-stitch all the way around the neck.
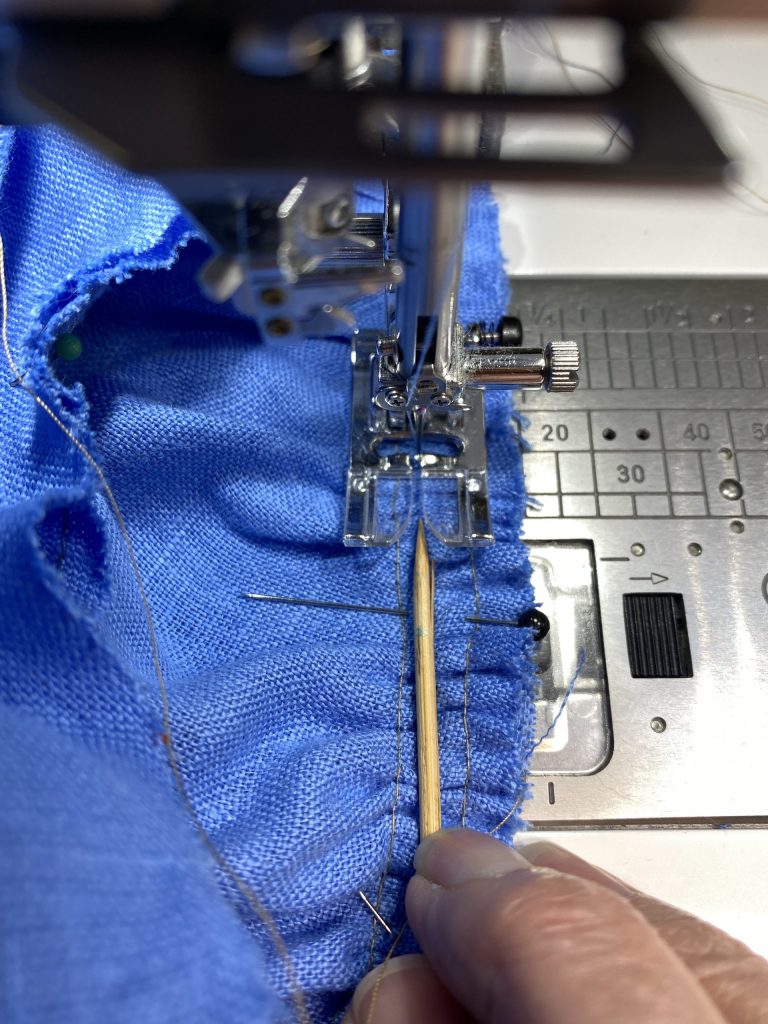
Once the body is complete (except for the hem), it is time to start the sleeves. Although I have sewn garments for almost (GULP) 60 years–yes I started very young–I’ve been taking an outstanding online course with Philippa Naylor, Garment Makers Question Time. The price is phenomenal for the amount of instruction you get each of the 12 months. More projects coming up! Anyway, I learned to set the gathering stitches at 1/2″ and 3/4″ and sew down the middle at 5/8″. Philippa’s way works better: sew your gathering stitches one thread into the seam allowance from the final seam line and 1/4″ closer to the raw edge. Gather, distribute the gathering appropriately, and then sew the seam just barely to the left of the left-side gathering stitch. I like using a thin bamboo skewer to coax and ease the gathers as I stitch. Again, I love that open visibility foot!

Here is a link to Philippa’s Garment Makers Question Time home page. Highly recommended!

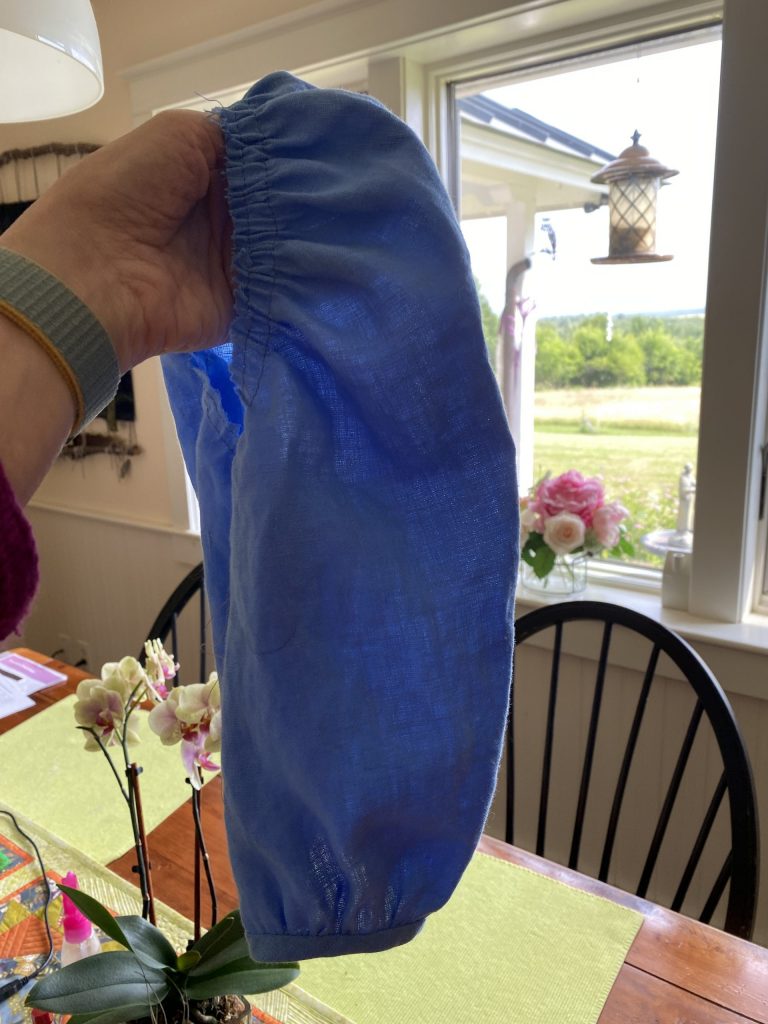
Here is the sleeve with the seam sewn and gathers gathered. I was a tad leery that the shoulders would be too narrow, but I did the right thing and made a toile (practice garment) out of cheap cheap cheap white fabric, and the sleeve seam is indeed set in from the shoulder point–this helps the gathers get that nice rounded puff! For the hem, at the top of the next photo, I sewed a linen bias strip to the right side, turned to the inside, and hand-sewed it into place.
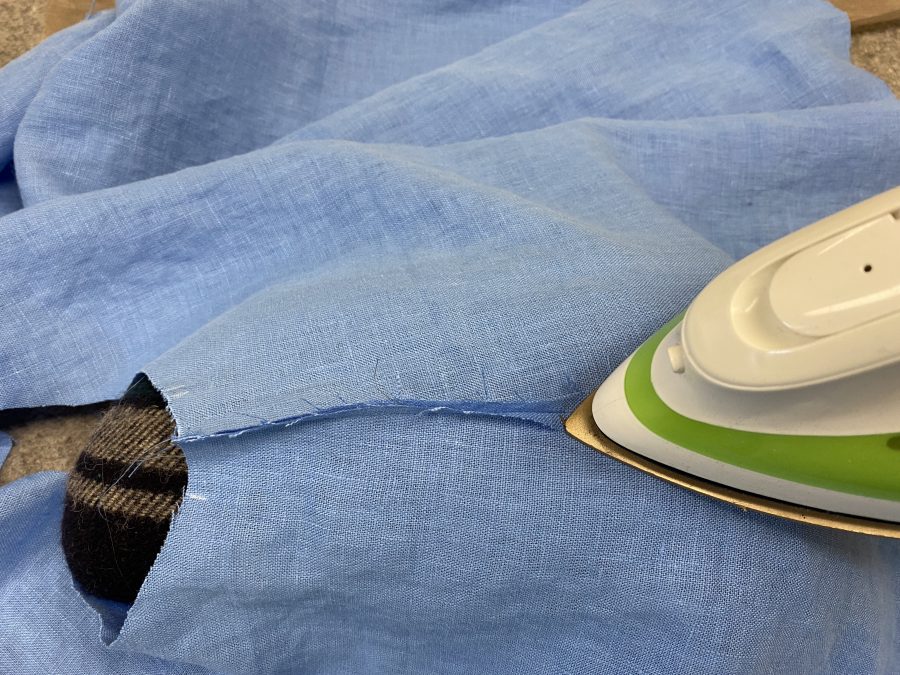
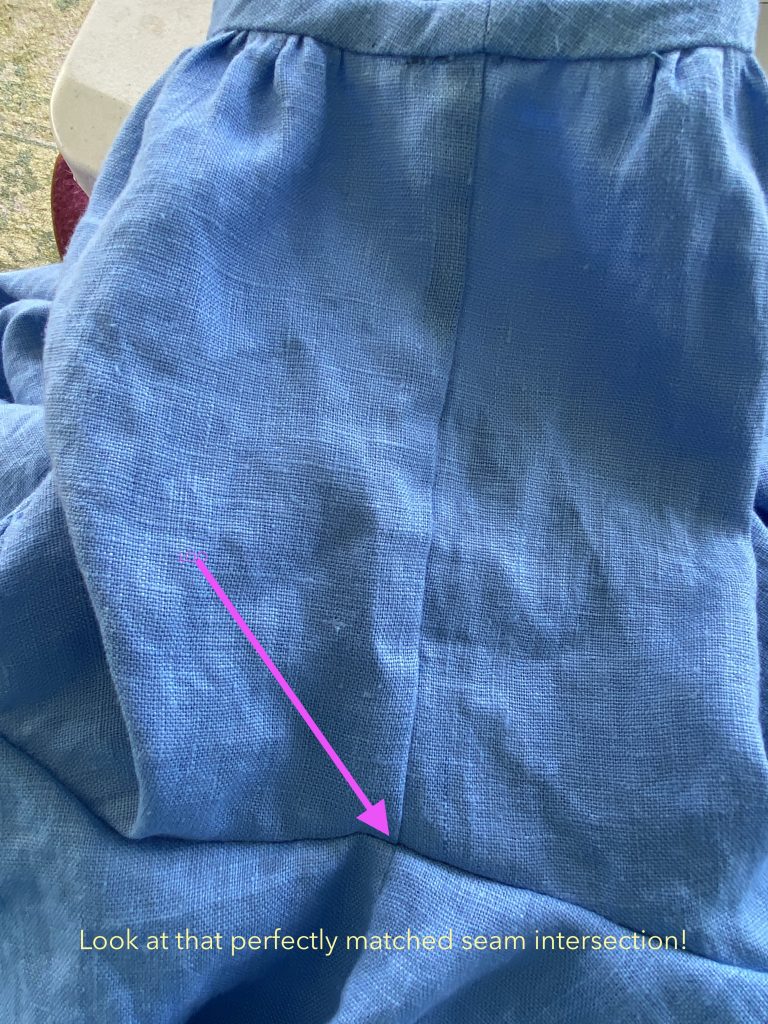
LOOKIT that perfect match! On the first try no less! Once the sleeves are sewn to the bodice, you’ll need to finish the raw edges. The gathers in the sleeves make it too thick for a French Seam, so I chose to use I used a bias edge finish similar to a single-fold bias binding on a quilt. On the neck, the bias was entirely folded to the inside of the garment. Here, you stitch the bias strip of fabric–a lightweight cotton lawn in lime green–to the seam, wrap it around the raw edges, then stitch in the ditch to secure it. I also managed a perfect join on the bias for the “cuff.” Note that the pattern has a wide opening for the bottom of the sleeve–way too wide for the size of my arms. I gathered it up more, making sure it still moved smoothly over/around the elbow, and just made mine narrower.
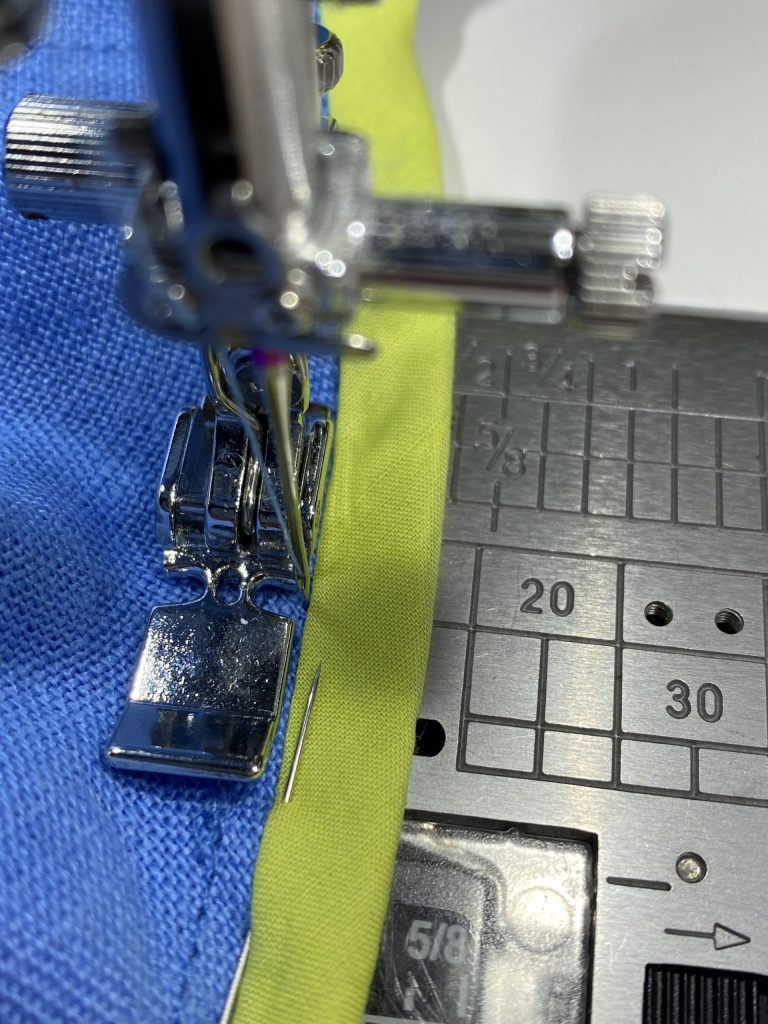
Covering up the raw edges where the sleeve joins the body. Again I’m using the zipper foot. For the way my eyes and brain work, I get the needle closest to the edge of the bias using the zipper foot and moving the needle as far right as it goes. Keep a hawk eye on your stitching because it is all too easy to wander and veer onto the bias.
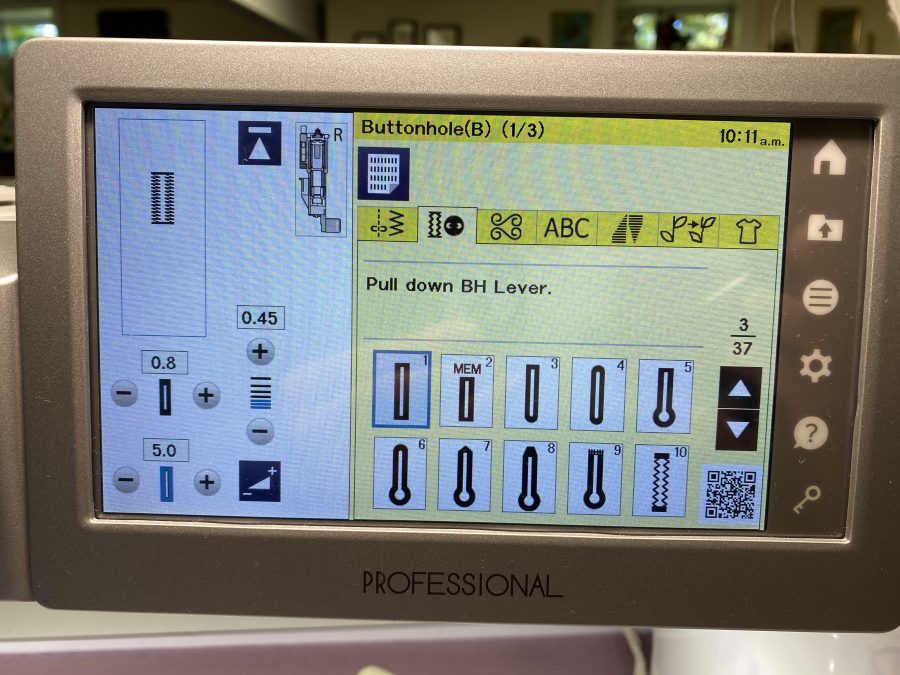
Janome’s automatic buttonhole foot (available on select models including the 9450 and M7) is amazing. You set the button into the back and it picks the perfect size. You can fine tune it if the button is thick or thin. ALWAYS to a test-stitch on a scrap (using the same interfacing and number of layers). You can see I have carefully marked the center of the button holes plus the start and stop lines. The Janome foot has a metal base plate that keeps everything flat and feeding perfectly. Here’s a video of it in action!
You can subscribe to my YouTube channel by clicking on the YouTube link (bottom left) and then following the subscribe button on that site, I don’t post often, but there are some useful videos there. Or just click here to go to my YouTube home page.
This is the setting I used.
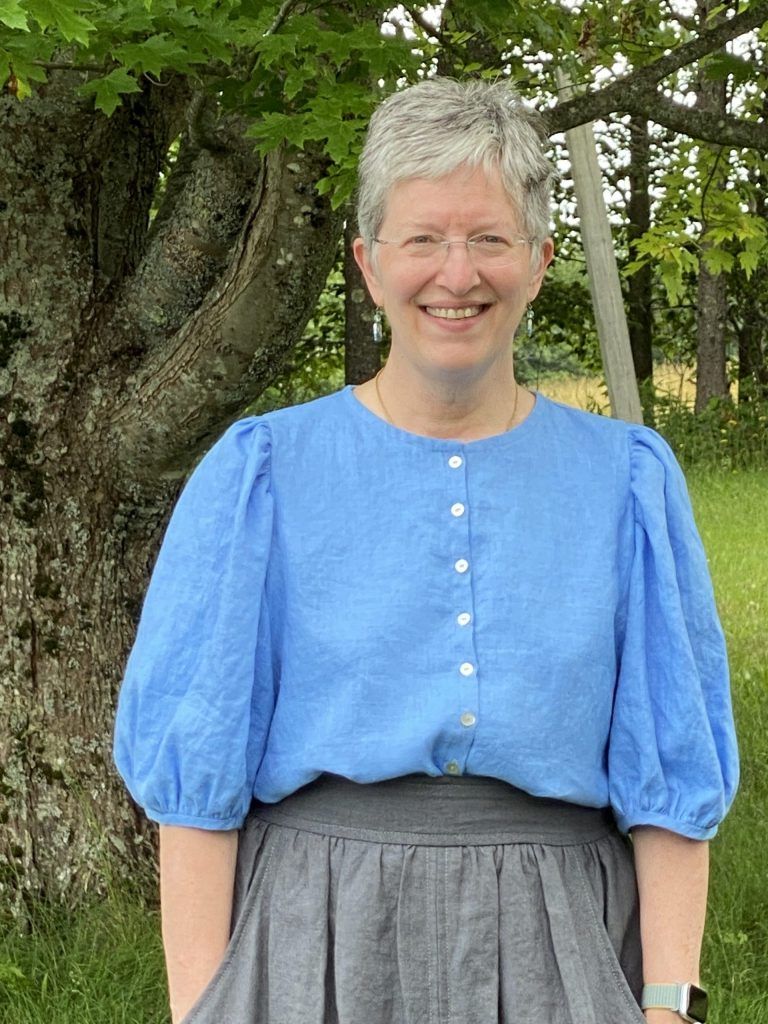
Worn tucked in with a linen skirt in gray. Blouse fabric is the IL-19 5.3 oz linen from Fabrics-store.com. Skirt linen is the Driftwood Linen from Fiddlehead Artisan Supply near me in Belfast, Maine; I bought the Brumby skirt pattern there, too. Yes, they do online / mail order!
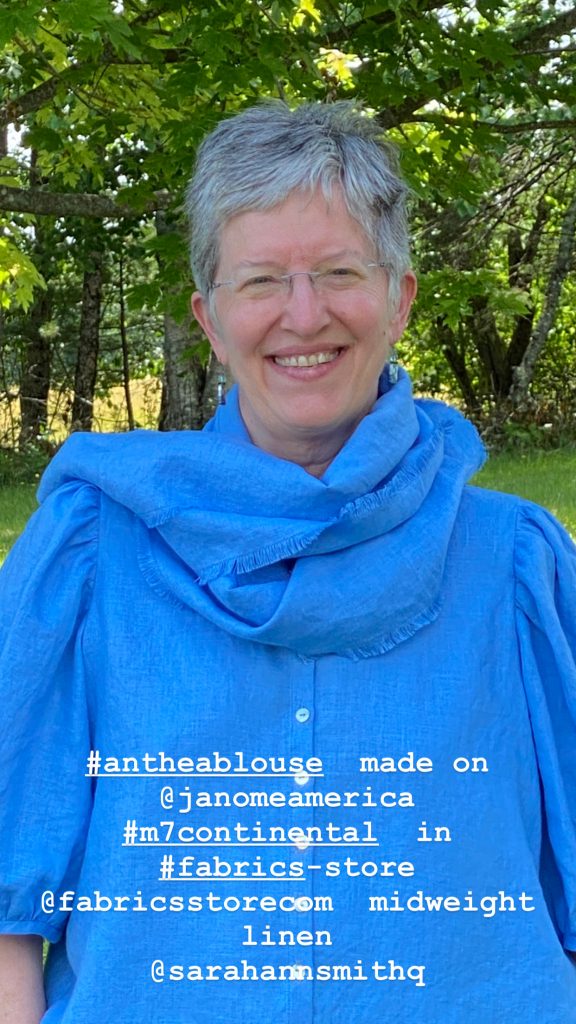
I had some leftover linen, so I made a scarf, too. I sewed a narrow zigzag on all four sides, then carefully frayed the edges. Here’s the link to the pattern again: Anthea by Anna Allen.
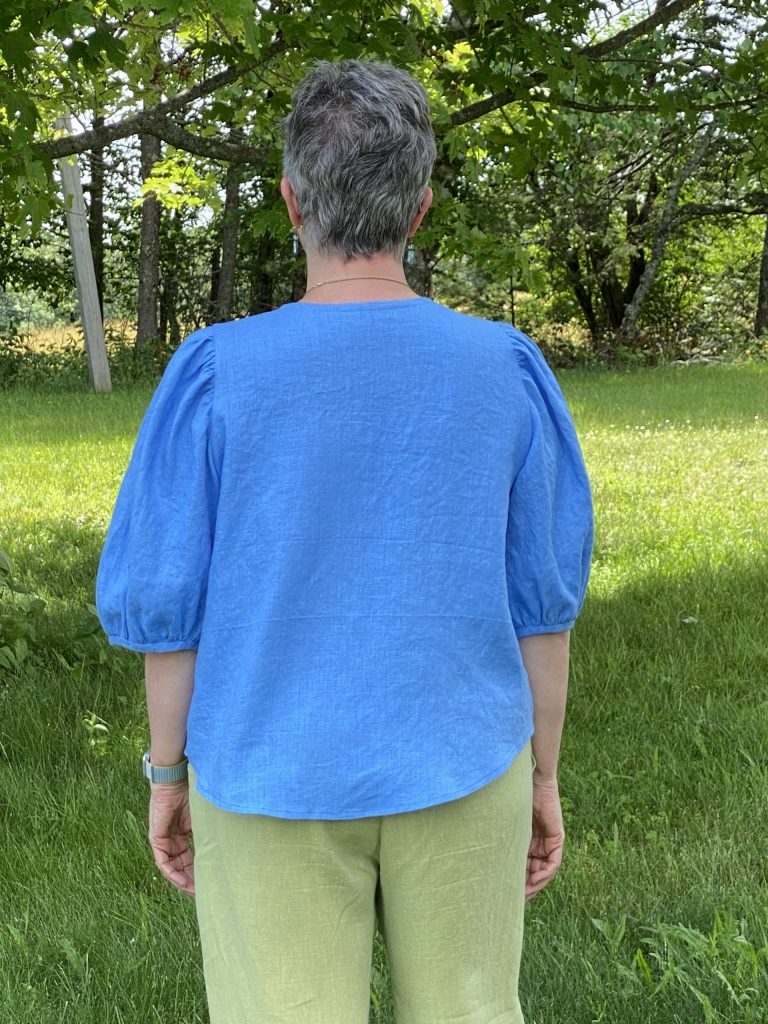
You can also wear the blouse out–it has a narrow 1/2″ hem.
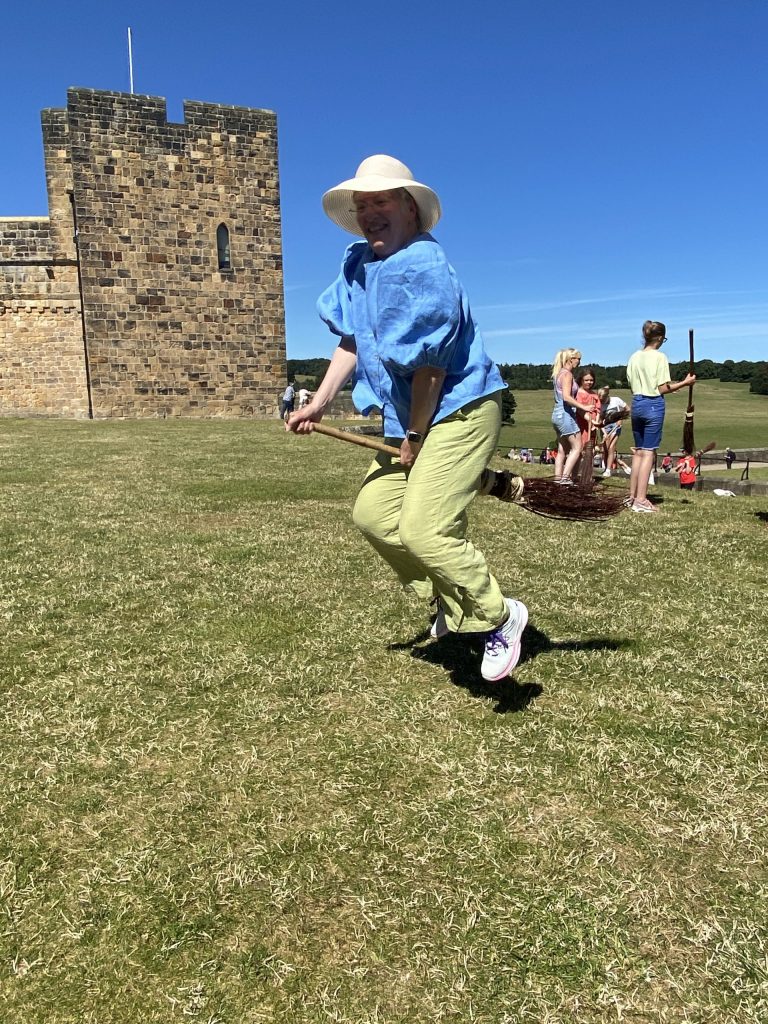
You can even wear it to Broomstick Riding Lessons (at Alnwick Castle this summer)! Funnest photo and time ever!
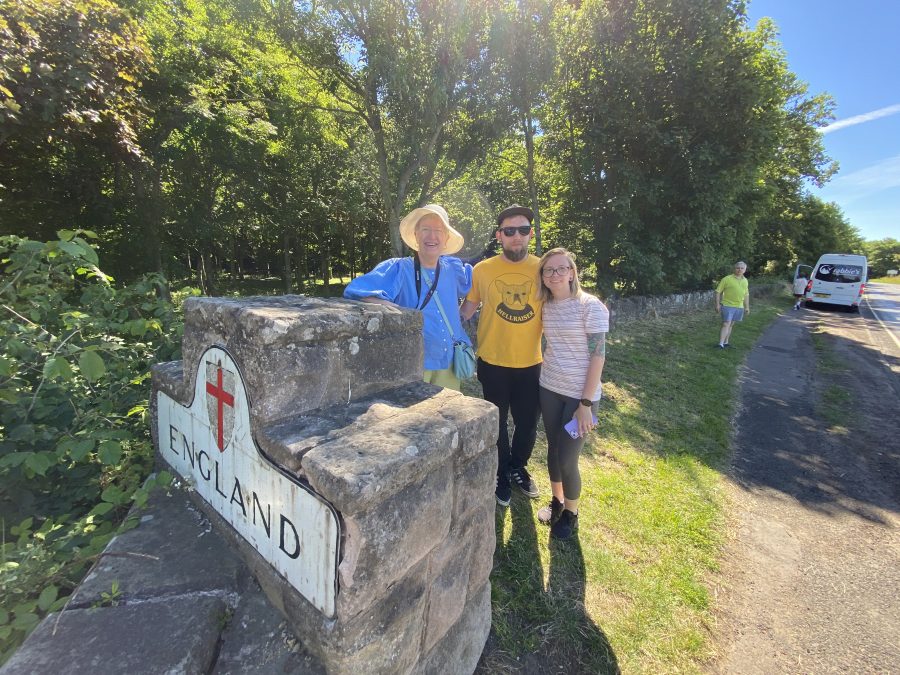
And you can also wear it after you have walked from Scotland to England—all the way across a 100 foot long bridge! With my oldest son and DIL on a trip of a lifetime.

Well I can’t believe it has been half a year since I blogged… that tells you how crazy busy this summer has been. All good stuff, but all at once. I am looking forward to being HOME for three straight months once I return from Houston / International Quilt Festival where I’ll be teaching again. I will try my best to be back before the end of the year…like maybe even in a month?

Photo Challenge, early April

Wednesday, April 3rd, 2019
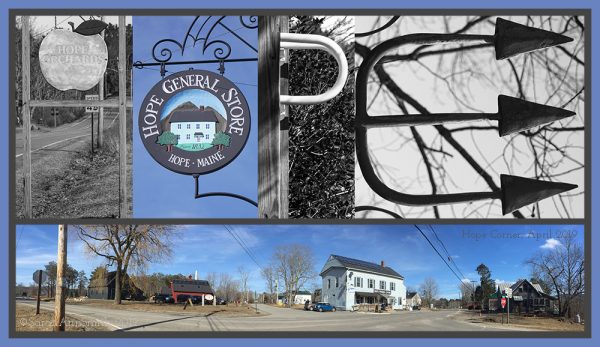
In 72 hours I’ll be in The Quilt Show studio, prepping to tape on Saturday. That meant do this week’s photo for my weekly photo challenge/critique group quick! My first thought was found letters, so I took a quick jaunt two miles to Hope Corner, the seat of town government (it’s ok to giggle). In the panorama, you can see the road to my house on the left, the Pinchbeck’s home, bagpipe business (Pinchbeck Pipes) and Sweetland Center (school, events)–black and red buildings, Hope General Store (big gray building in the center) which has been in pretty much continuous operation since 1832, the Town Office (tan building mostly obscured by the General Store), on the right barely spy out a red barn for Hope Orchards (you-pick mostly), and Benjamin Leavitt’s metalworks. I have often said a town in Maine is where two roads interset and there are at least two buildings. We have more than two!

The caption sums it up–I’ve been BUSY, so I am actually looking forward to sitting in an airport and on a plane! I’m also really excited about the opportunity of being on The Quilt Show. I’ve got samples and step-outs prepped: when you demo something you have to make a zillion versions of it, one for each stage of the process since there isn’t time to do the work while being filmed. I’ve even thought to the week after when I have a teaching job in Portland and another the following week in Massachusetts. I’ve got about five big events this year, and three of them are between April 4 and 18! Sheesh!
But I’m happy excited, the income from teaching will pay for the cost of the trip to Colorado–airfare, hotel, Uber to and from here and there, seeing some internet friends, meals, and shipping two boxes. Since I live in Maine and take Cape Air from here to Boston, we are limited to just ONE full-size suitcase per passenger. There are only 9 seats plus the pilot’s on the plane, and cargo is in the nose cone, small carry-on items go in the wings of the plane, and there is a netted area behind the last seat. That meant an expensive FedEx of long/large quilts and a flat rate box of goodies to give to the audience. But I’m READY! I’ll share pics on Facebook and Instagram and blog when I’m home and have had a brief collapse LOL!

Cross Pollination

Saturday, February 2nd, 2019

Sometimes you need to do something else. You totally love your main “thing” (in my case it is clearly art quilting), but you need a break. And sometimes, that makes your main “thing” even better. I’ve learned over the years that good design is good design, whether it is landscape, interiors, architecture, photography, painting, sculpture, apparel, the principles are the same. So I have taken online classes in drawing and photography and been enriched.

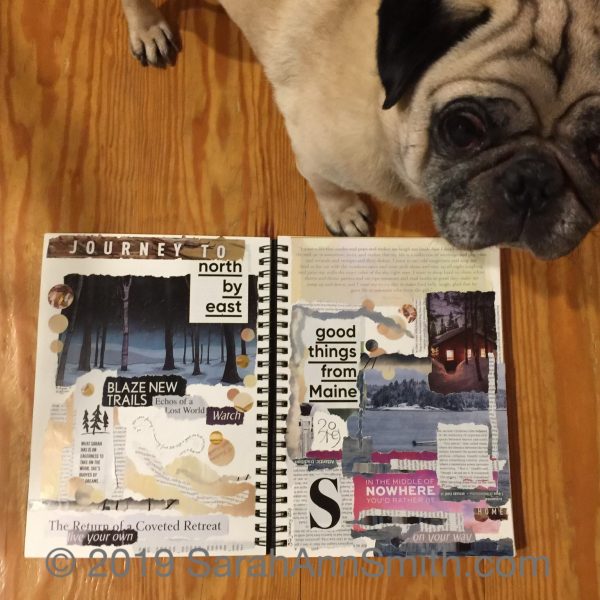
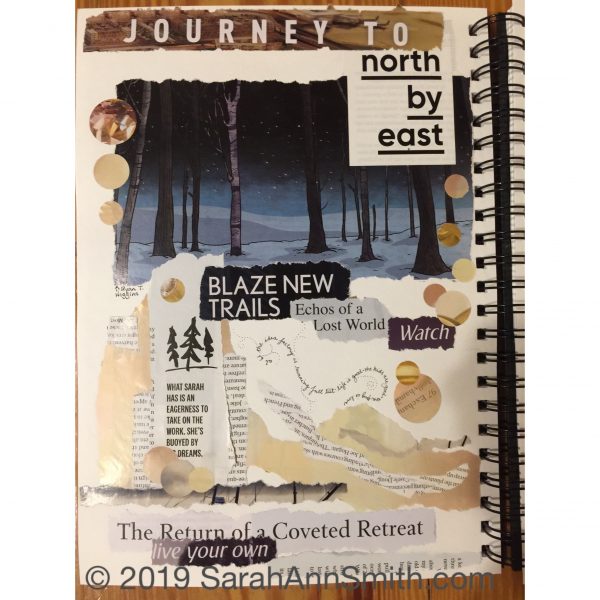
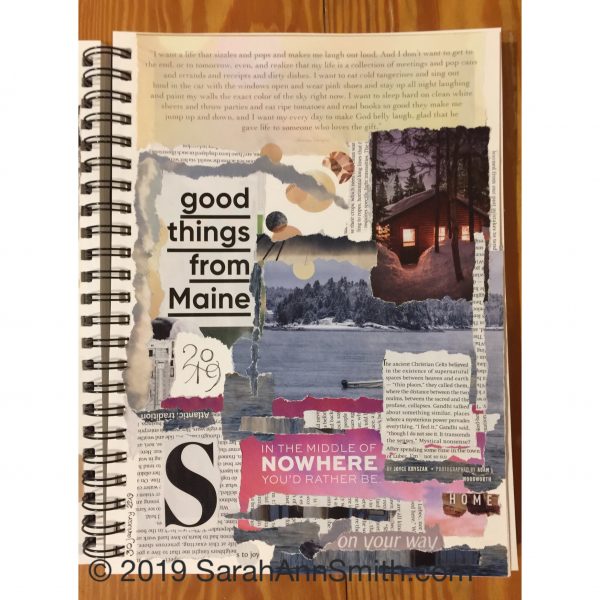
At least ten years ago, I sat down between Christmas and New Year’s desperate to do something creative. The boys were still pretty young so time was scarce. I grabbed a pile of magazines and started tearing out words and pictures and glued them into my sketchbook. That has become an annual tradition…at least most years. This year Widgeon decided he needed to see if the collage passed inspection. Happily, it merited a wag.

I don’t know if I’ve done it every single year, and some years — like this one — it was done in (late) January instead. But I like reading what words have called me to use them and seeing where my head was in a given moment.

This year, I made sure to add information about whose artwork or photo. As with most years, a lot of my fodder comes from Down East magazine. North by East is a monthly column, and in December they featured work by Ryan T Higgins, a Maine Children’s book author. I must now go to the Library and see what they have of his. I was also stunned to see the “Sarah” quote, obviously about another Sarah. I covered up the “big” before dreams, but otherwise I really liked it.
This page got pretty dense…but I liked the quote at the top (from an ad for something). I also liked the bit on the pink, but it was too much pink, so I covered it up. Using blocks of text upside down or sideways works. And I LOVE torn edges…LOVE LOVE LOVE…that exposed white framing the image or words. I also dug out my circle punches. Have some circles and a few squares.

I’ve also taken a number of outstanding art classes from Val Webb over the years, ranging from birds to children to faeries to animals, using pencil, ink, watercolor, colored pencil…I learn so much, both about materials and tools but more importantly about SEEING. Observing. I’ll never want to be a colored pencil artist, but taking birds in colored pencil with Val taught me about patience and layering. I found I now do that with dyes, with paints on cloth, with thread, in my art quilts. And this year I also took a brilliant course at Sketchbook Skool, Watercolor. I always want more watercolor!

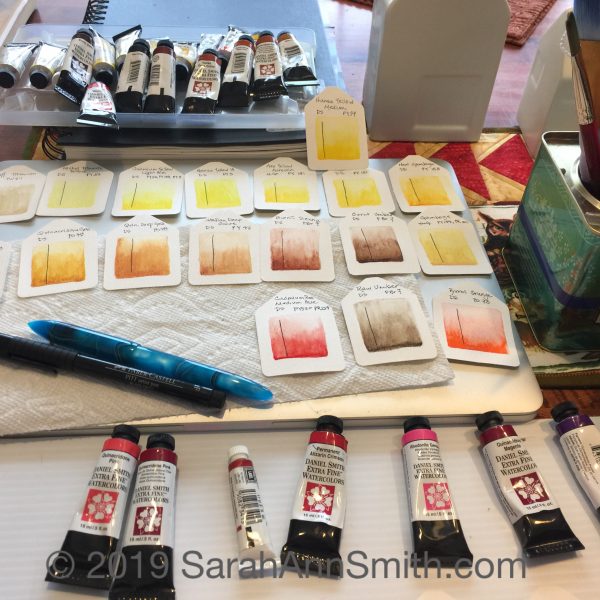
Over the past 8 years or so I have learned about the difference between student grade and artist pigments, that using quality paper makes all the difference in the world, and using pure pigments and mixing your own (just like dyeing fabric!). I decided I needed to get a bit organized and SEE the actual colors painted out from each tube. I had bought some icky (Bienfang) cheap watercolor paper that I will never use for a finished anything, not even a class practice piece. So got out my “tag” punch and did a paint out of every tube I have. Then ordered two more tubes! In search of the perfect pink…..and replacing one teeny tiny tube that is almost done. Each tag has the name, code for the manufacturer, and the universal pigment code (PV 42 for example is Permanent Violet 42). Yes, you can go wwwwwaaaaayyyyyy down the rabbit hole with this stuff!
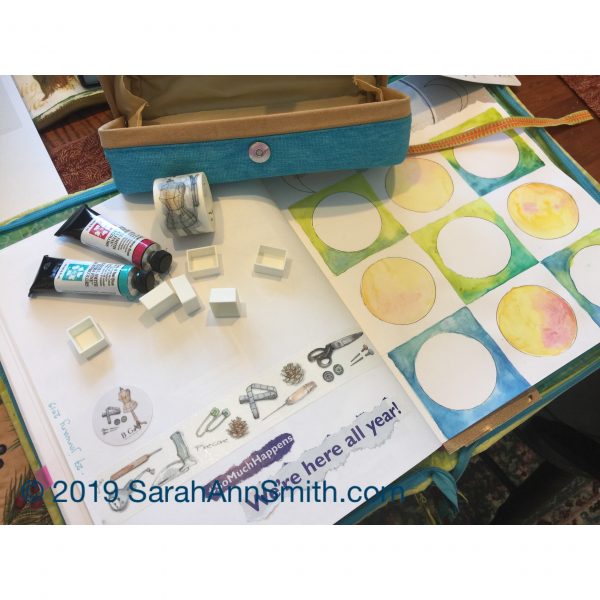
A good mail and watercolor day. Turns out quilting templates and rulers have lots of uses, of course we all know that! I saw the clamshell cases at Jetpens.com and couldn’t resist. When I went to order, I discovered I had left that awesome washi tape in my cart, so it had to come to me also. And then there are those two tubes of watercolor and some empty half pans. That’s another thing I learned: make your OWN palettes with your favorite colors, use magnetic tape that sticks to the bottom of the pan, put inside a palette or metal tin. And then I used my quilting rulers and circles to mark a grid in my notebook/sketchbook.

I used to have both my to-do-etc notebook and a sketchbook. I never had the one I wanted handy. So I said to heck with the cost, and bought a GOOD sketchbook and use that as my “everything” journal. I write lists, take notes at SAQA (Studio Art Quilt Associates) meetings, suss out ideas for quilts, and sometimes even sketch or paint in it! Now I will start filling in the circles with words, quotes, ideas, images/sketches, may fill the white backgrounds with ink textures…we shall see!

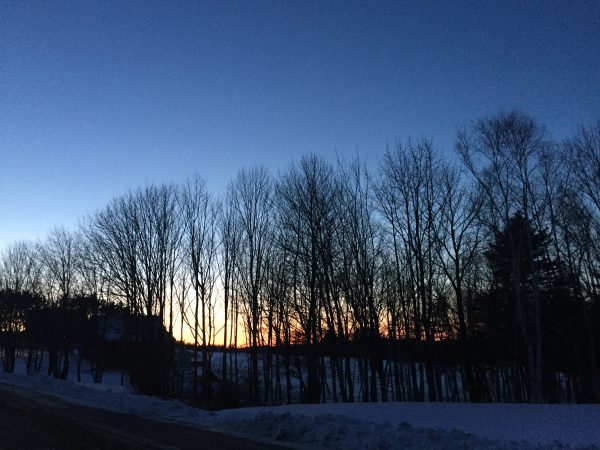
So that’s what I’ve been doing…along with quilting. What about you? And here’s an end of the day/blogpost dog walks photo from yesterday:

Sunset from the bottom of our driveway.

Why I love vultures!

Monday, October 22nd, 2018

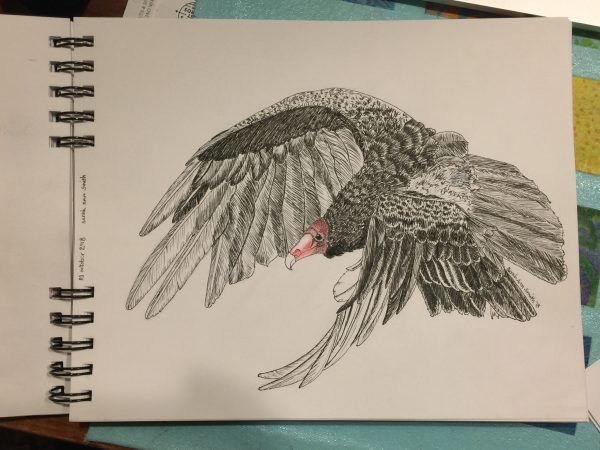
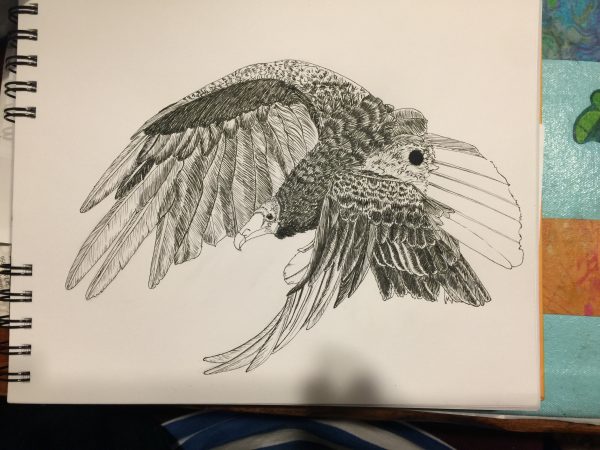
The Vulture is Landing!

When we lived in Camden, I learned to love vultures.  At some point in March, they would arrive, heralding spring.   Eventually I learned that they ride the thermals, which carry the scent of supper up to them.  If it isn’t warm enough, not enough scent.   So that means when they arrive, winter is indeed ENDING.   Also, they are FUNNY–they may be a bit on the ugly side, but gosh they are just comical.  They are gregarious, live in tight family groups (the ones that roosted at the end of our driveway numbered around 30!), are large, squabble like most families, and when you hear them flap in the pitch dark when you are walking the dog late at night they sound REALLY REALLY BIG!  But they are just under-appreciated (anyone else ever felt that way?).

So for this weeks Journey Through the Natural Year lesson–well ok, the lesson from two weeks ago, I’m behind–I decided to NOT do the pileated woodpecker teacher Val Webb selected and see if I could do a passable job on something else dark with a red head, my much-adored funny vultures.  I’m rather pleased–I can now see a couple small areas where I didn’t get it quite right:  beak a tad too long, curve on the upper wing needs a couple of bends in it, but I am really pleased.  Well, I was until the blotch.

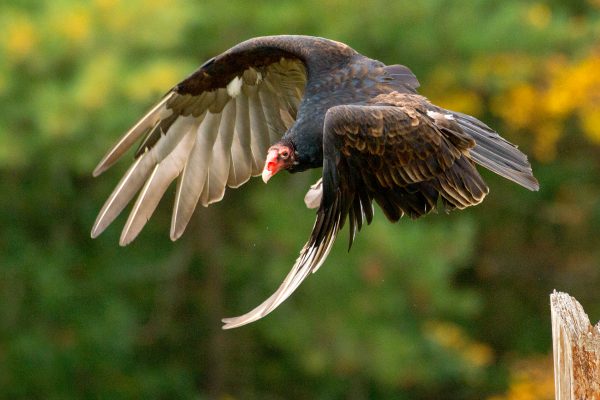
I used this photo, which is part of the WikiCommons meaning I can use it as long as I give credit–Thanks Peter K. Burian! https://commons.wikimedia.org/wiki/File:Eastern_Turkey_Vulture_in_flight,_Canada.jpg#/media/File:Eastern_Turkey_Vulture_in_flight,_Canada.jpg
turkey vulture By Peter K Burian – Own work, CC BY-SA 4.0, https://commons.wikimedia.org/w/index.php?curid=63275338

Here is the sequence…and the remedy to the blotch:

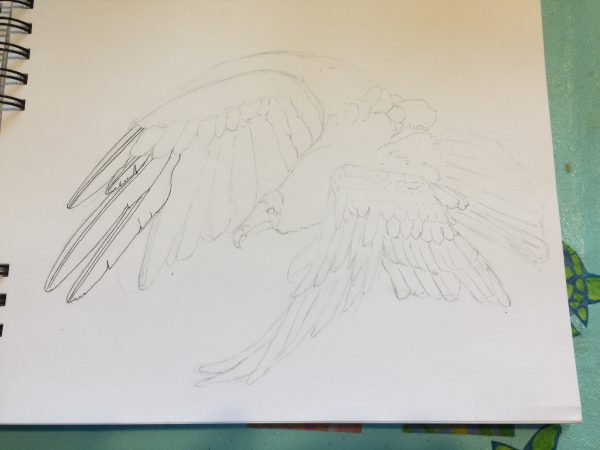
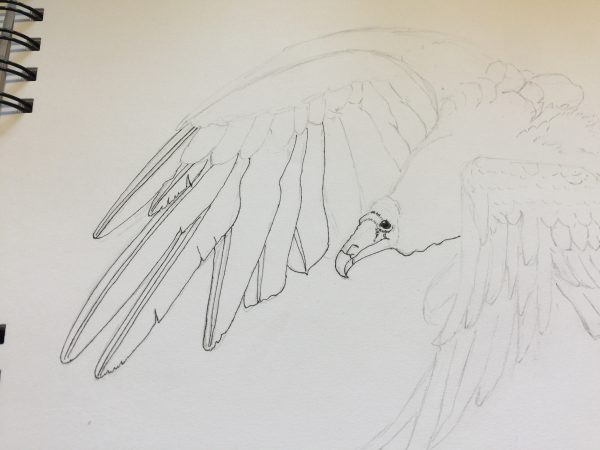
Step one: pencil things in. I am sketching in a Daler-Rowney dry media sketchbook that has paper that I really dislike. It is good for pencil and not a whole lot more!

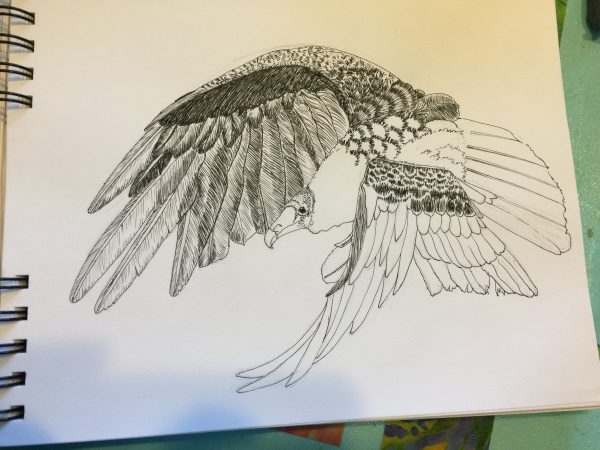
Getting the face and eye in helps so much. I used a crow quill dip pen and deAtramentis Archive Black Ink.

Progress. You kinda get lost in the feathers, but I’m pretty pleased with the shadowing through the long wing tips and the value changes.

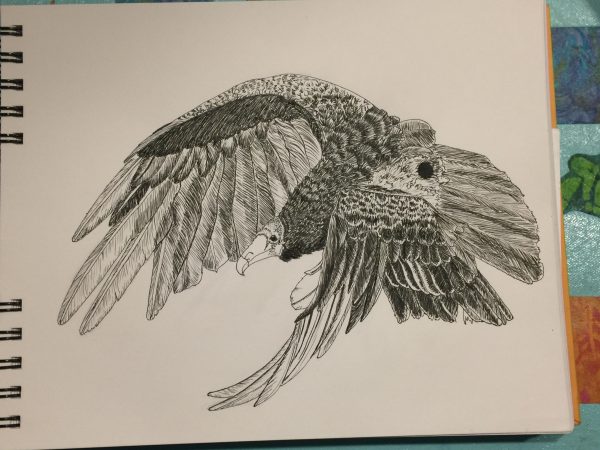
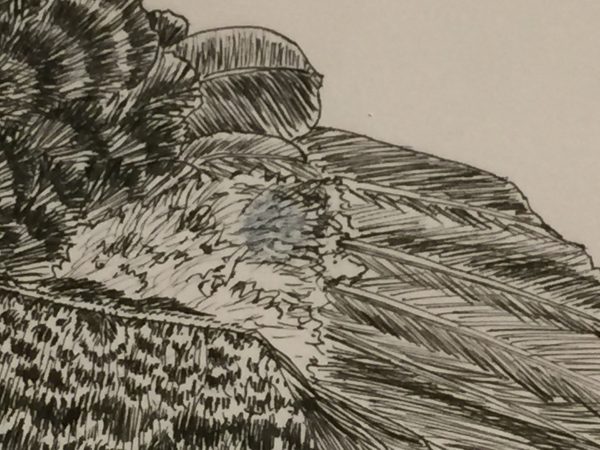
Then karma smacked me upside the face: BLOT. After 4+ hours of work, a BLOT. And with this miserable paper NO chance of scraping etc. I was so proud of what I’d managed to do. But I kept going. And asked sketching friends and teacher Val Webb for possible solutions.

SOB!   I got lots of good suggestions, and (gee imagine that) had pretty much all of the suggested art supplies.  The only thing I didn’t try was Val’s suggestion to use gel medium to glue down a piece of paper over the blotch, because this paper is so awful I knew it would have been futile.

Finished, with blot.

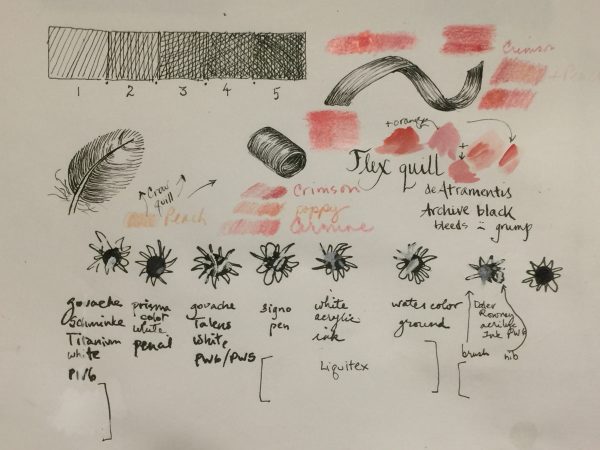
Being an impatient sort and loving my Signo Uniball white pen, I added some of that and it helped…a LOT.  That and other suggestions I received were

  • Gouache (tried both Talens white and Schminke Titanium White, the Schminke worked better)
  • Prismacolor white pencil (too weak)
  • Signo pen (worked perhaps best, but is tricky to manage as it is a rollerball and sometimes leaves a track or blank space in the center of a line)
  • Watercolor ground
  • Acrylic ink in white–had both Liquitex and Daler Rowney; applied with both dip pen and brush

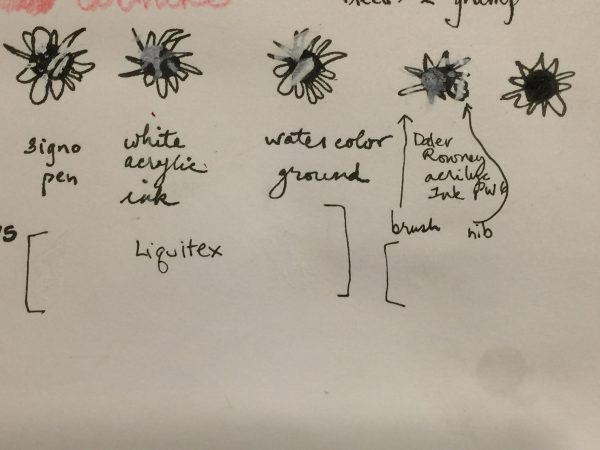
My test-drive page. The colors are from watercolor–this paper precluded using it–and colored pencil. I ended up using a combination of the Carmine and Crimson and a colorless blender.

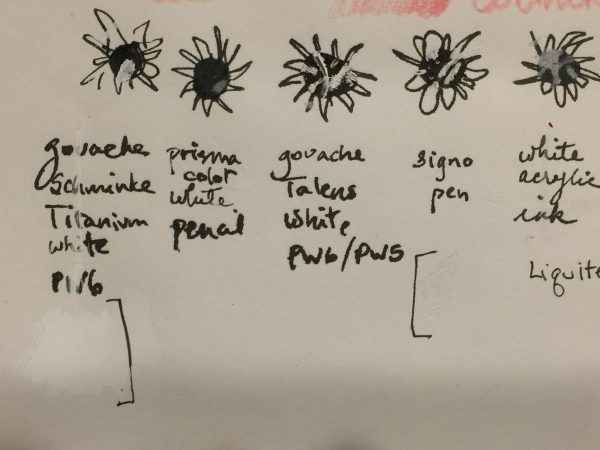
The left side, close up. I made a blot of ink, then some squiggles to approximate where I blotched on the vulture.

The right side. Definitely like the way the Signo pen worked, and also the Daler Rowney FW acrylic ink…look at the right side where I dotted it on with a dip pen. The one on the far right is my untouched for comparison.

Observations:

–Both the white gouaches and the Daniel Smith watercolor ground looked yellower than the bright white paper when wet, but when dry that tint disappeared.  In fact, the Schminke titanium, which seemed to work the best of the two, is even brighter white than the paper–a tiny drop of something to match the color of the paper would make it work.

–The Signo pen worked best, but you kinda need to add it in dots because the pen itself can “railroad” meaning you get edges of white and not much in the center due to the rollerball tip.  However, a couple coats worked well.

–The Daler Rowney FW acrylic ink worked better than the Liquitex Ink! .  It took a couple coats, but it could be a viable option.

I’d like to try a controlled test of my favorites, the Signo pen, Schminke Titanium White gouache, and the Daler Rowney FW white acrylic ink, on a few watercolor papers to see how it looks AND what happens if you then ink or watercolor OVER the “fix.”

Here’s the offending splotch after touch up with both Signo and the Acrylic Ink in white:

The splotch is visible on close inspection, but really I’m delighted with the result.

And once again, here’s the final result–not bad at all!   I’ve always said that the difference between a beginner and the advanced/pro is knowing how to fix your mistakes.  I’m moving out of beginner range!

The Vulture is Landing!