email Youtube

Home
Galleries
Blog
Workshops & Calendar
Store
Resources
About
Contact

Archive for the ‘Patterns’ Category

Baby blankets and burp cloths!

Sunday, September 13th, 2026

Yippeee!  Since my last post here we learned we are to be first-time grandparents this autumn!  That means I’ve been sewing and knitting like a crazy lady (which of course I proudly am). These projects are so fast and easy:  two rectangles, sew together, turn, topstitch, done!   The link to the free PDF is at the end, before the last two photos.

First, here’s a quick 2 minute overview of the entire project!  I used Time-Lapse photography and a few stills so there is no audio;  it is also stored on my itty bitty YouTube channel .  I hope you enjoy and make MANY!  Frankly, a grown-up version of one of these would make a perfect summer porch throw now that I think about it!

So here’s that video.  Scroll down for still photos and explanatory text.

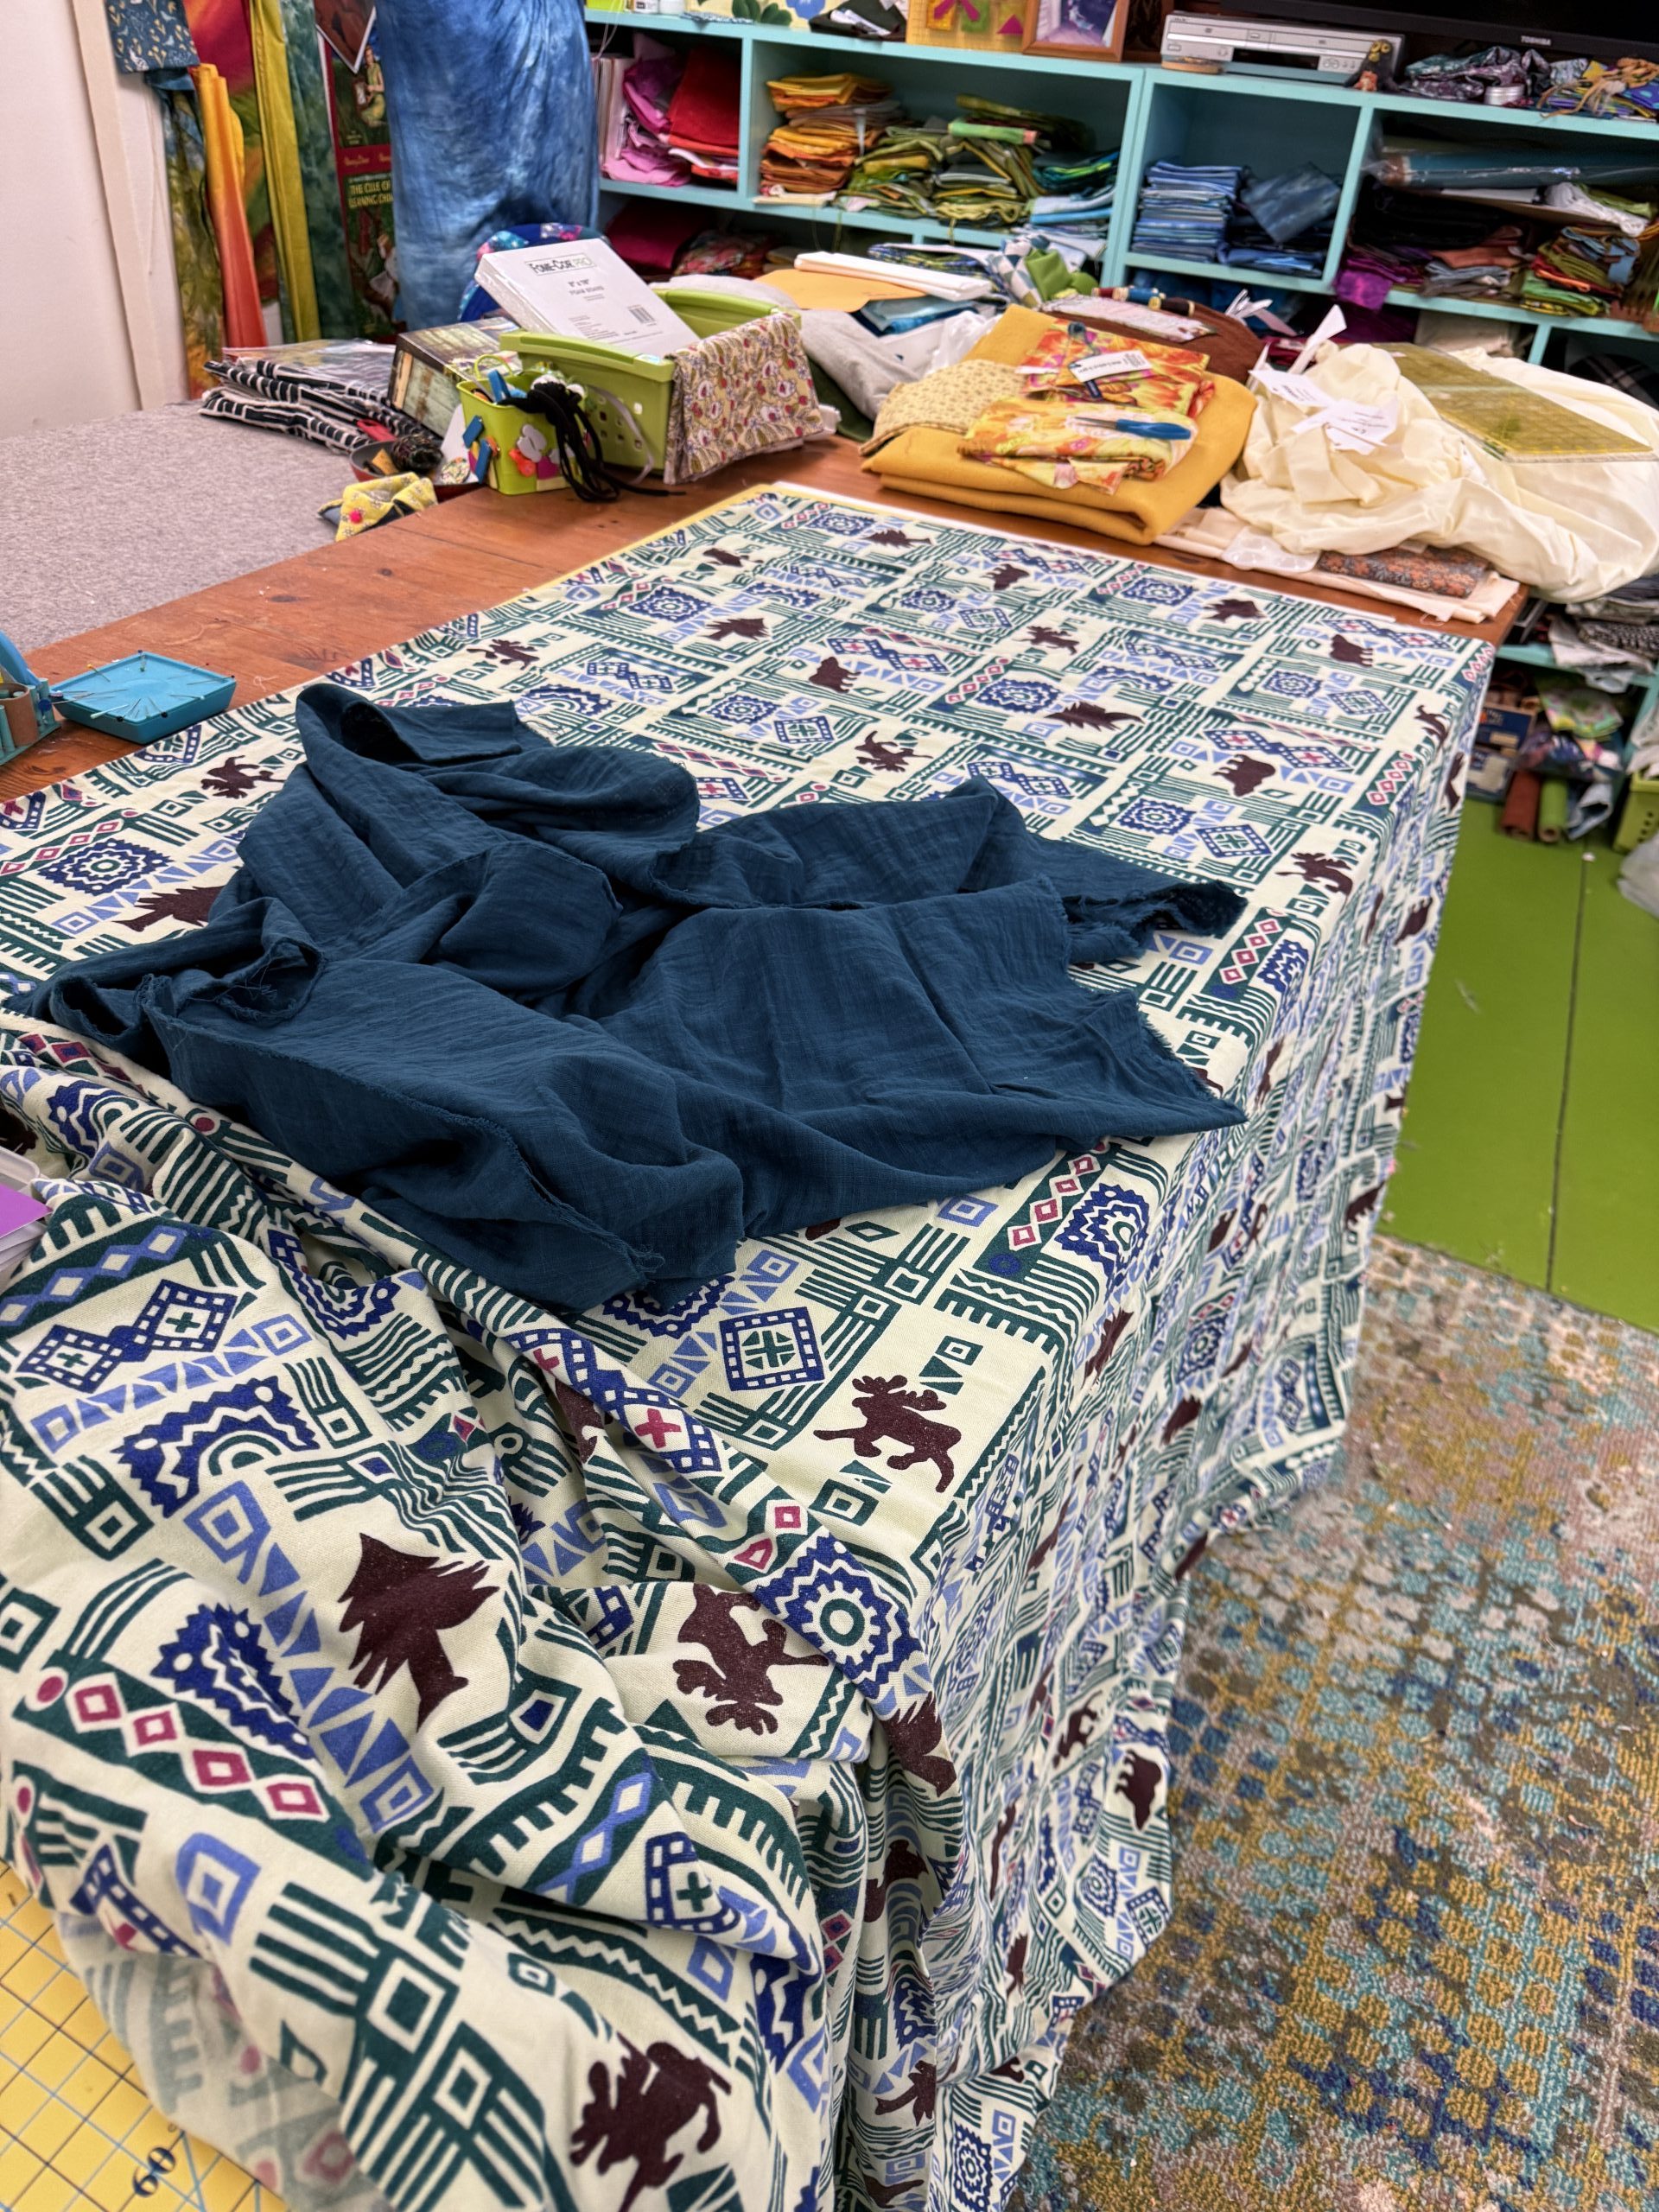
Step 1:  cut both layers the same size.  For the blanket, try 36 x 42 (or width of fabric)—this “landscape” size  is best for non-directional prints.  Or go for a square:  36 or 40/42” works well and accommodates directional designs.

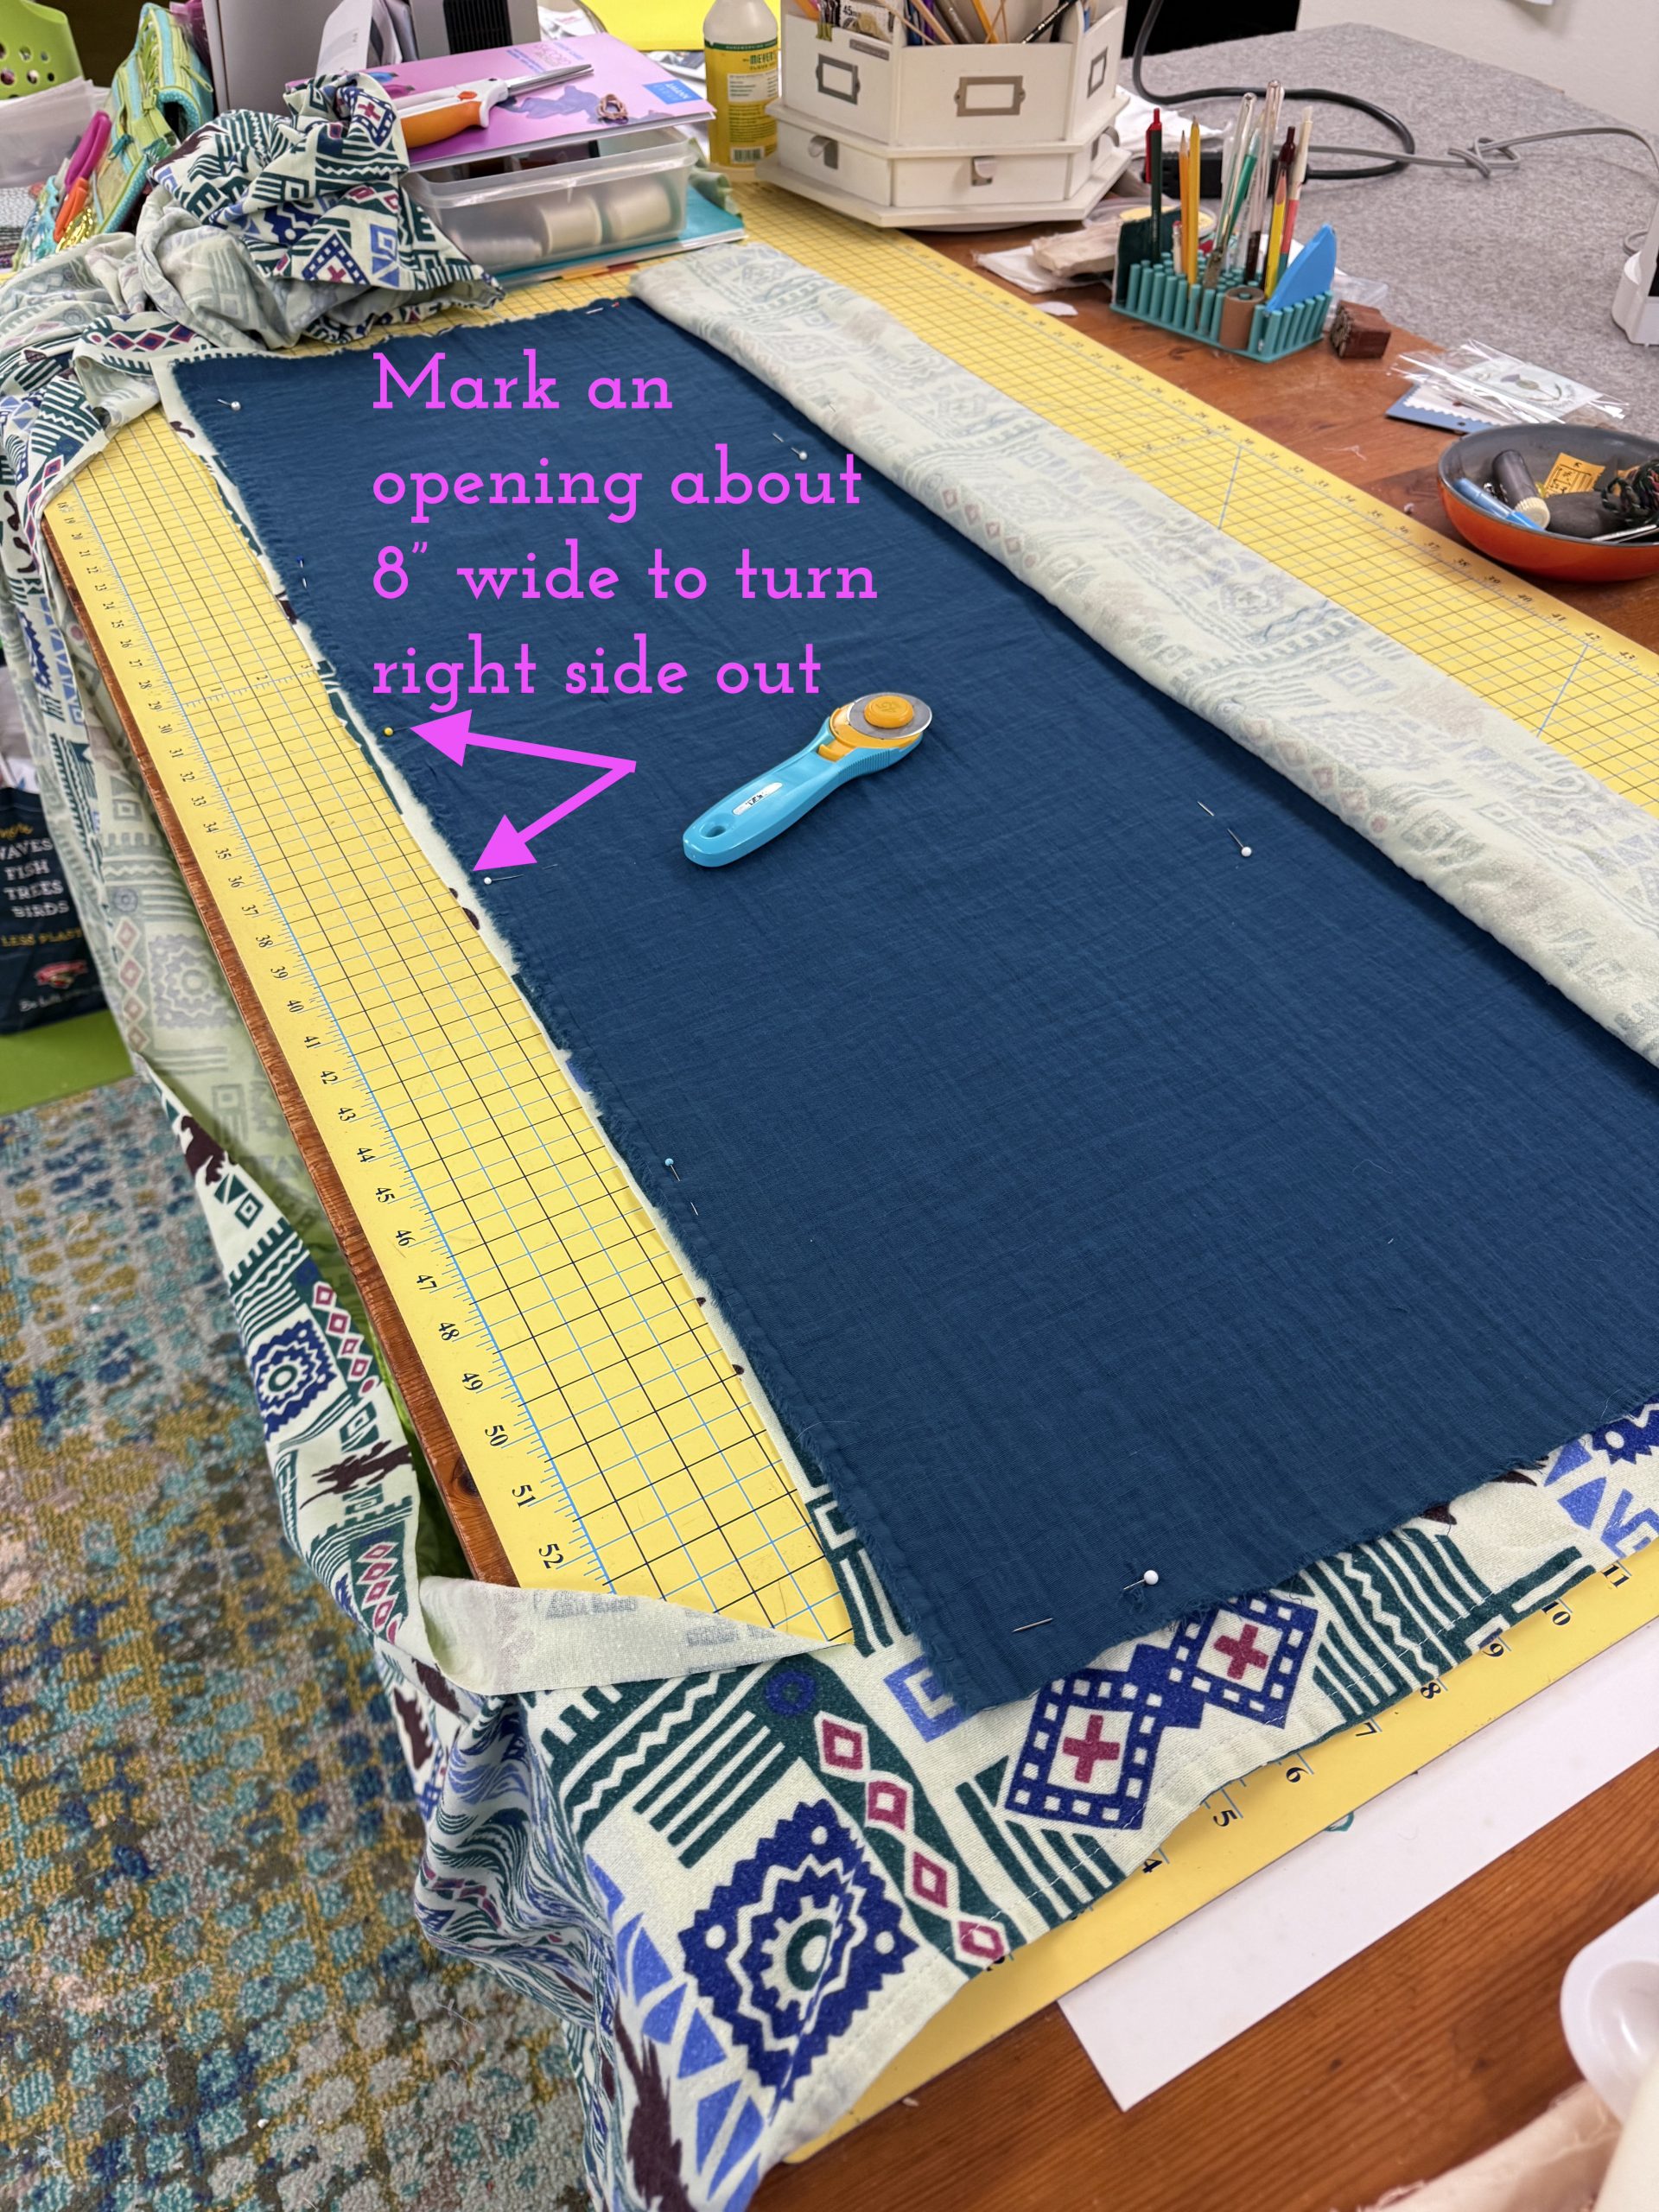
Keep everything smooth and flat as you pin. Leave an opening large enough to fit your hand and some fabric when you turn it right side out.

First thing is to smooth out your fabric. Both flannel (the print) and double-gauze (the blue) tend to wiggle and ripple. I used the squared up blue fabric to “measure” out how much to cut off the sheet (and discovered how off-grain the sheet was cut!).

Step 2:   Pin together making sure the fabric is flat / no ripples (flannel does that, so smooth out from the center and pin.  In the center of one side mark a section about 8” long; this is where you will turn the blanket right side out.  I rough-cut the sheet / flannel so it was a bit bigger than the blue; I trimmed the excess away after sewing the layers together.
Keep everything smooth and flat as you pin. Leave an opening large enough to fit your hand and some fabric when you turn it right side out.

Keep everything smooth and flat as you pin. Leave an opening large enough to fit your hand and some fabric when you turn it right side out.

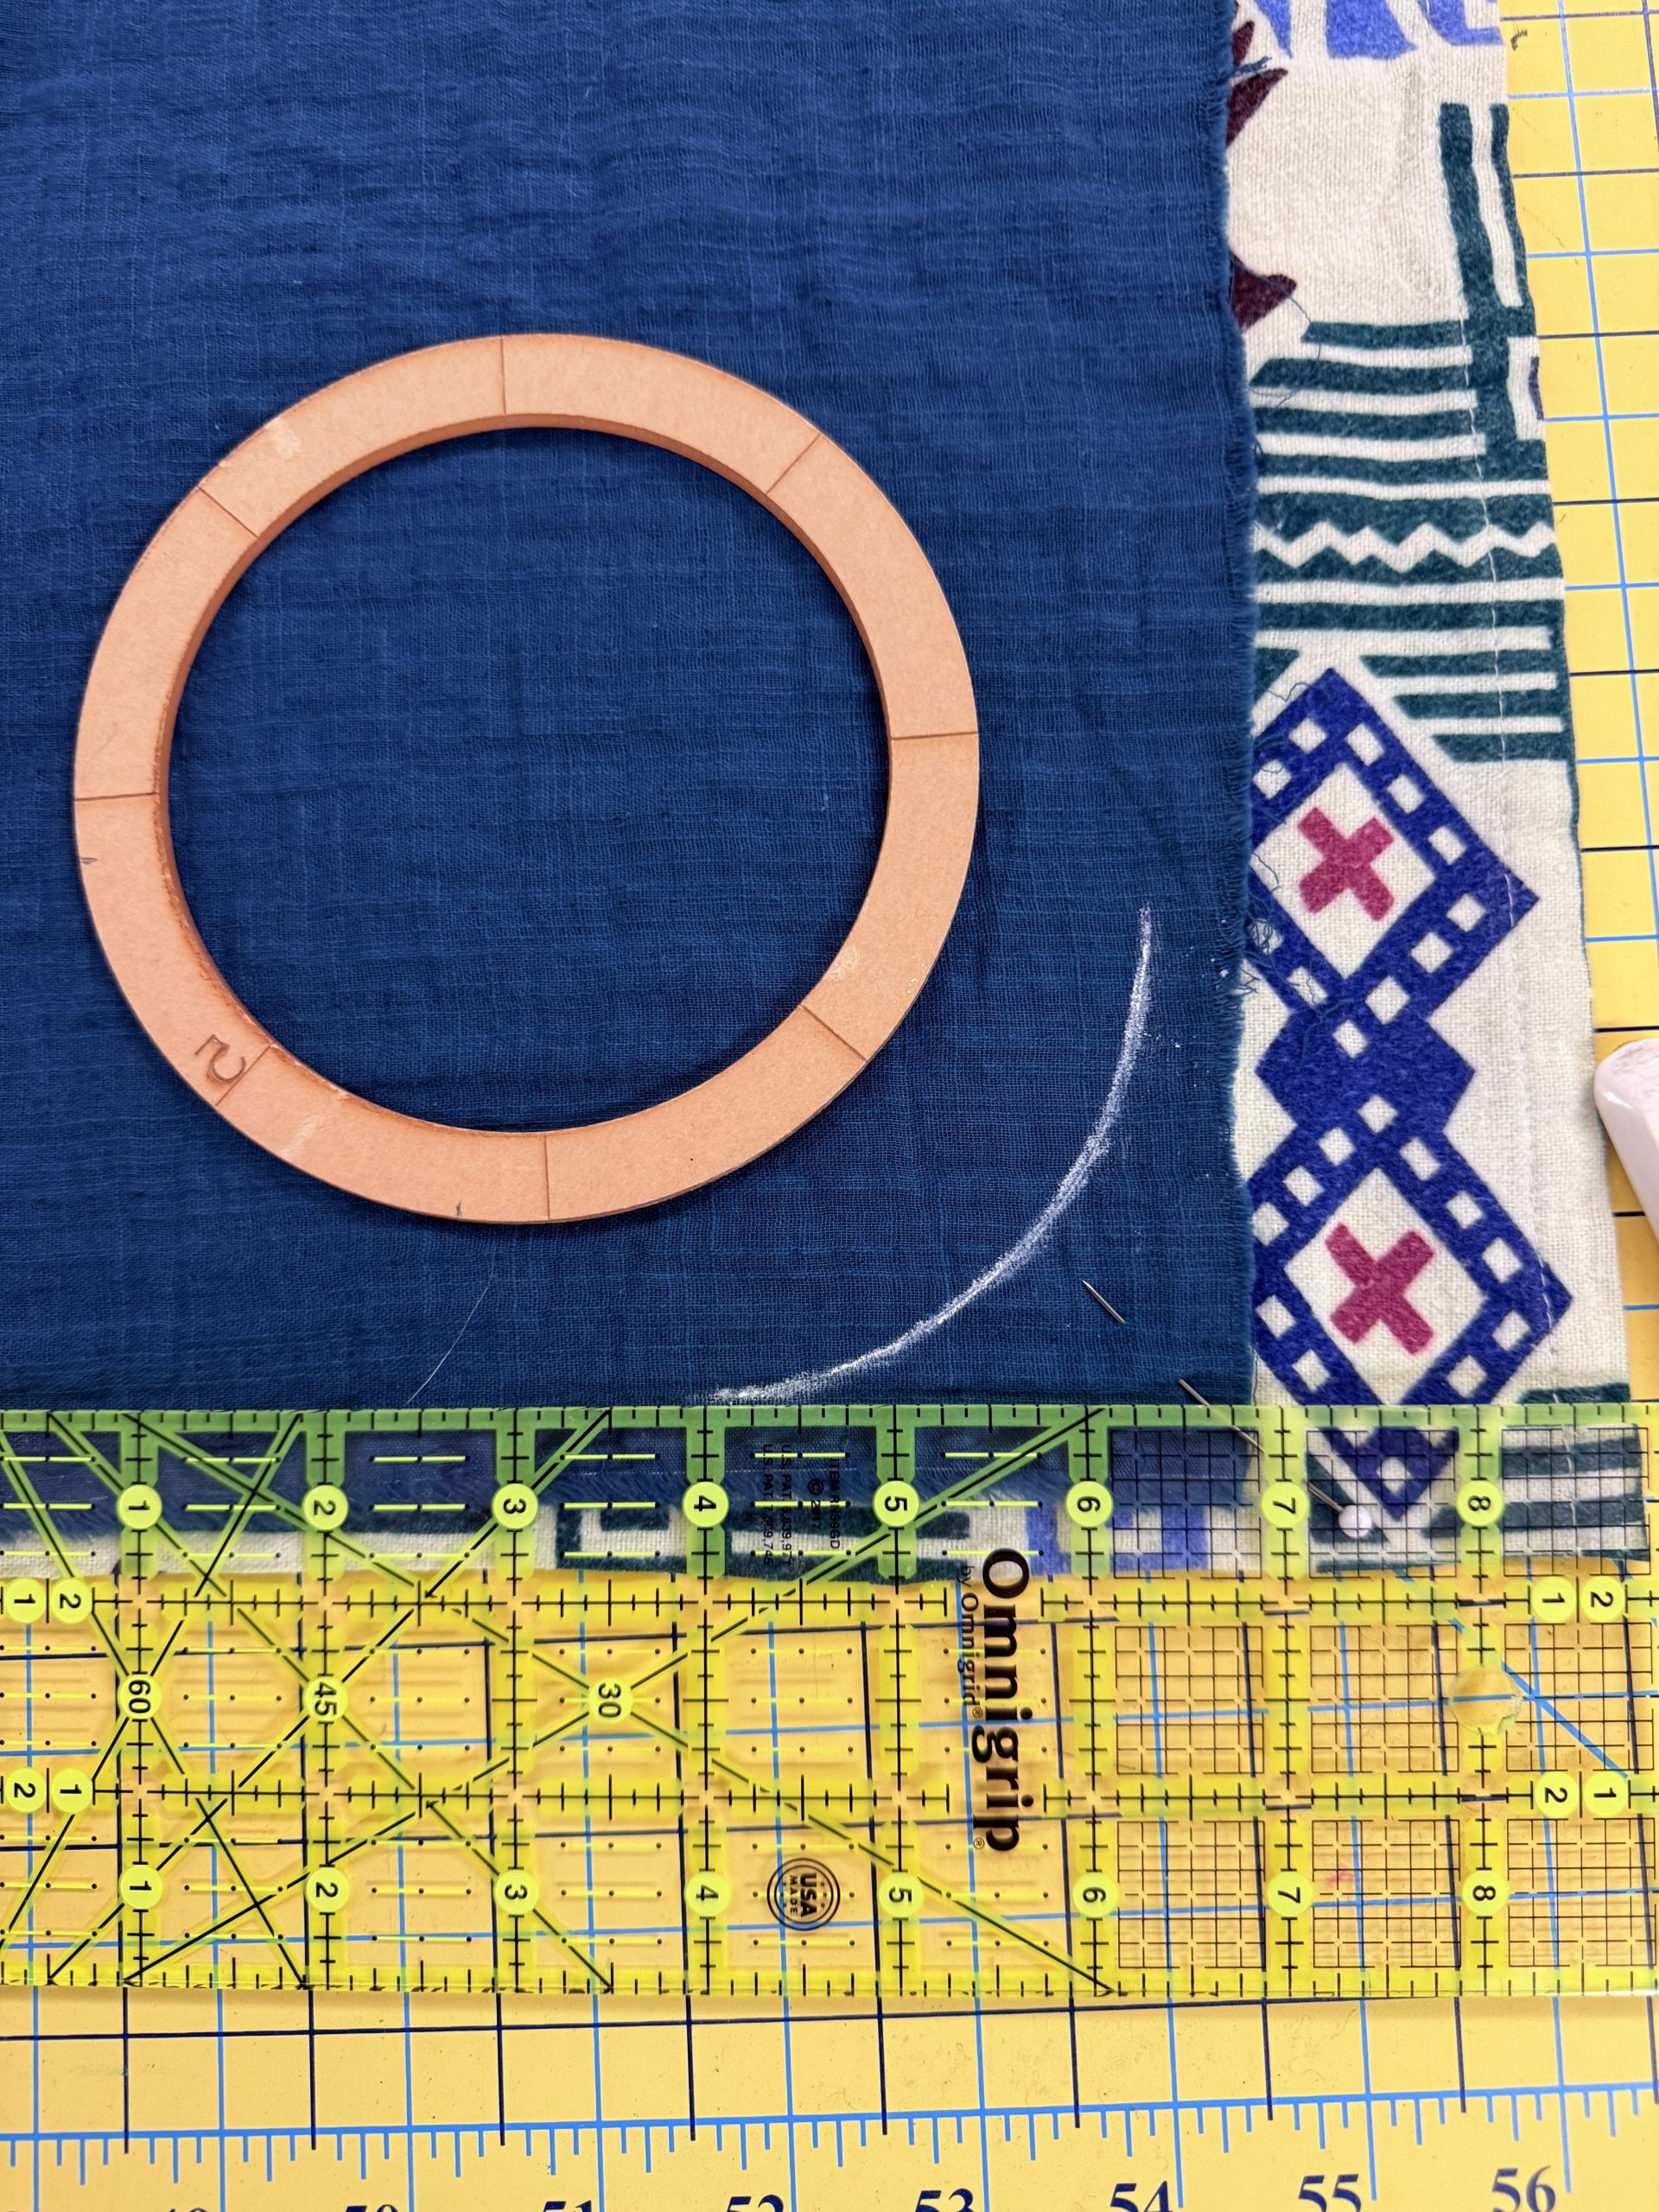
Step 3:  Mark the corners to round them: easier to sew, much easier to turn and lay flat, less for a baby to chew <ggggg>.  I have plastic templates but the bottom of a large soup or tomato can or a saucer works perfectly. I wanted to use a 1/2″ seam allowance so all the seam allowance would be caught in the topstitching (see below) so I made sure my white chalk line lined up with the seam line (notice ruler is about 1/2″ in from the edge).Note:  I used the blue double-gauze fabric as my edge; I trimmed up the flannel sheet after sewing.
Use a template, dish or big can to mark a curve that aligns with the seemliness.

Use a template, dish or big can to mark a curve that aligns with the seamlines.

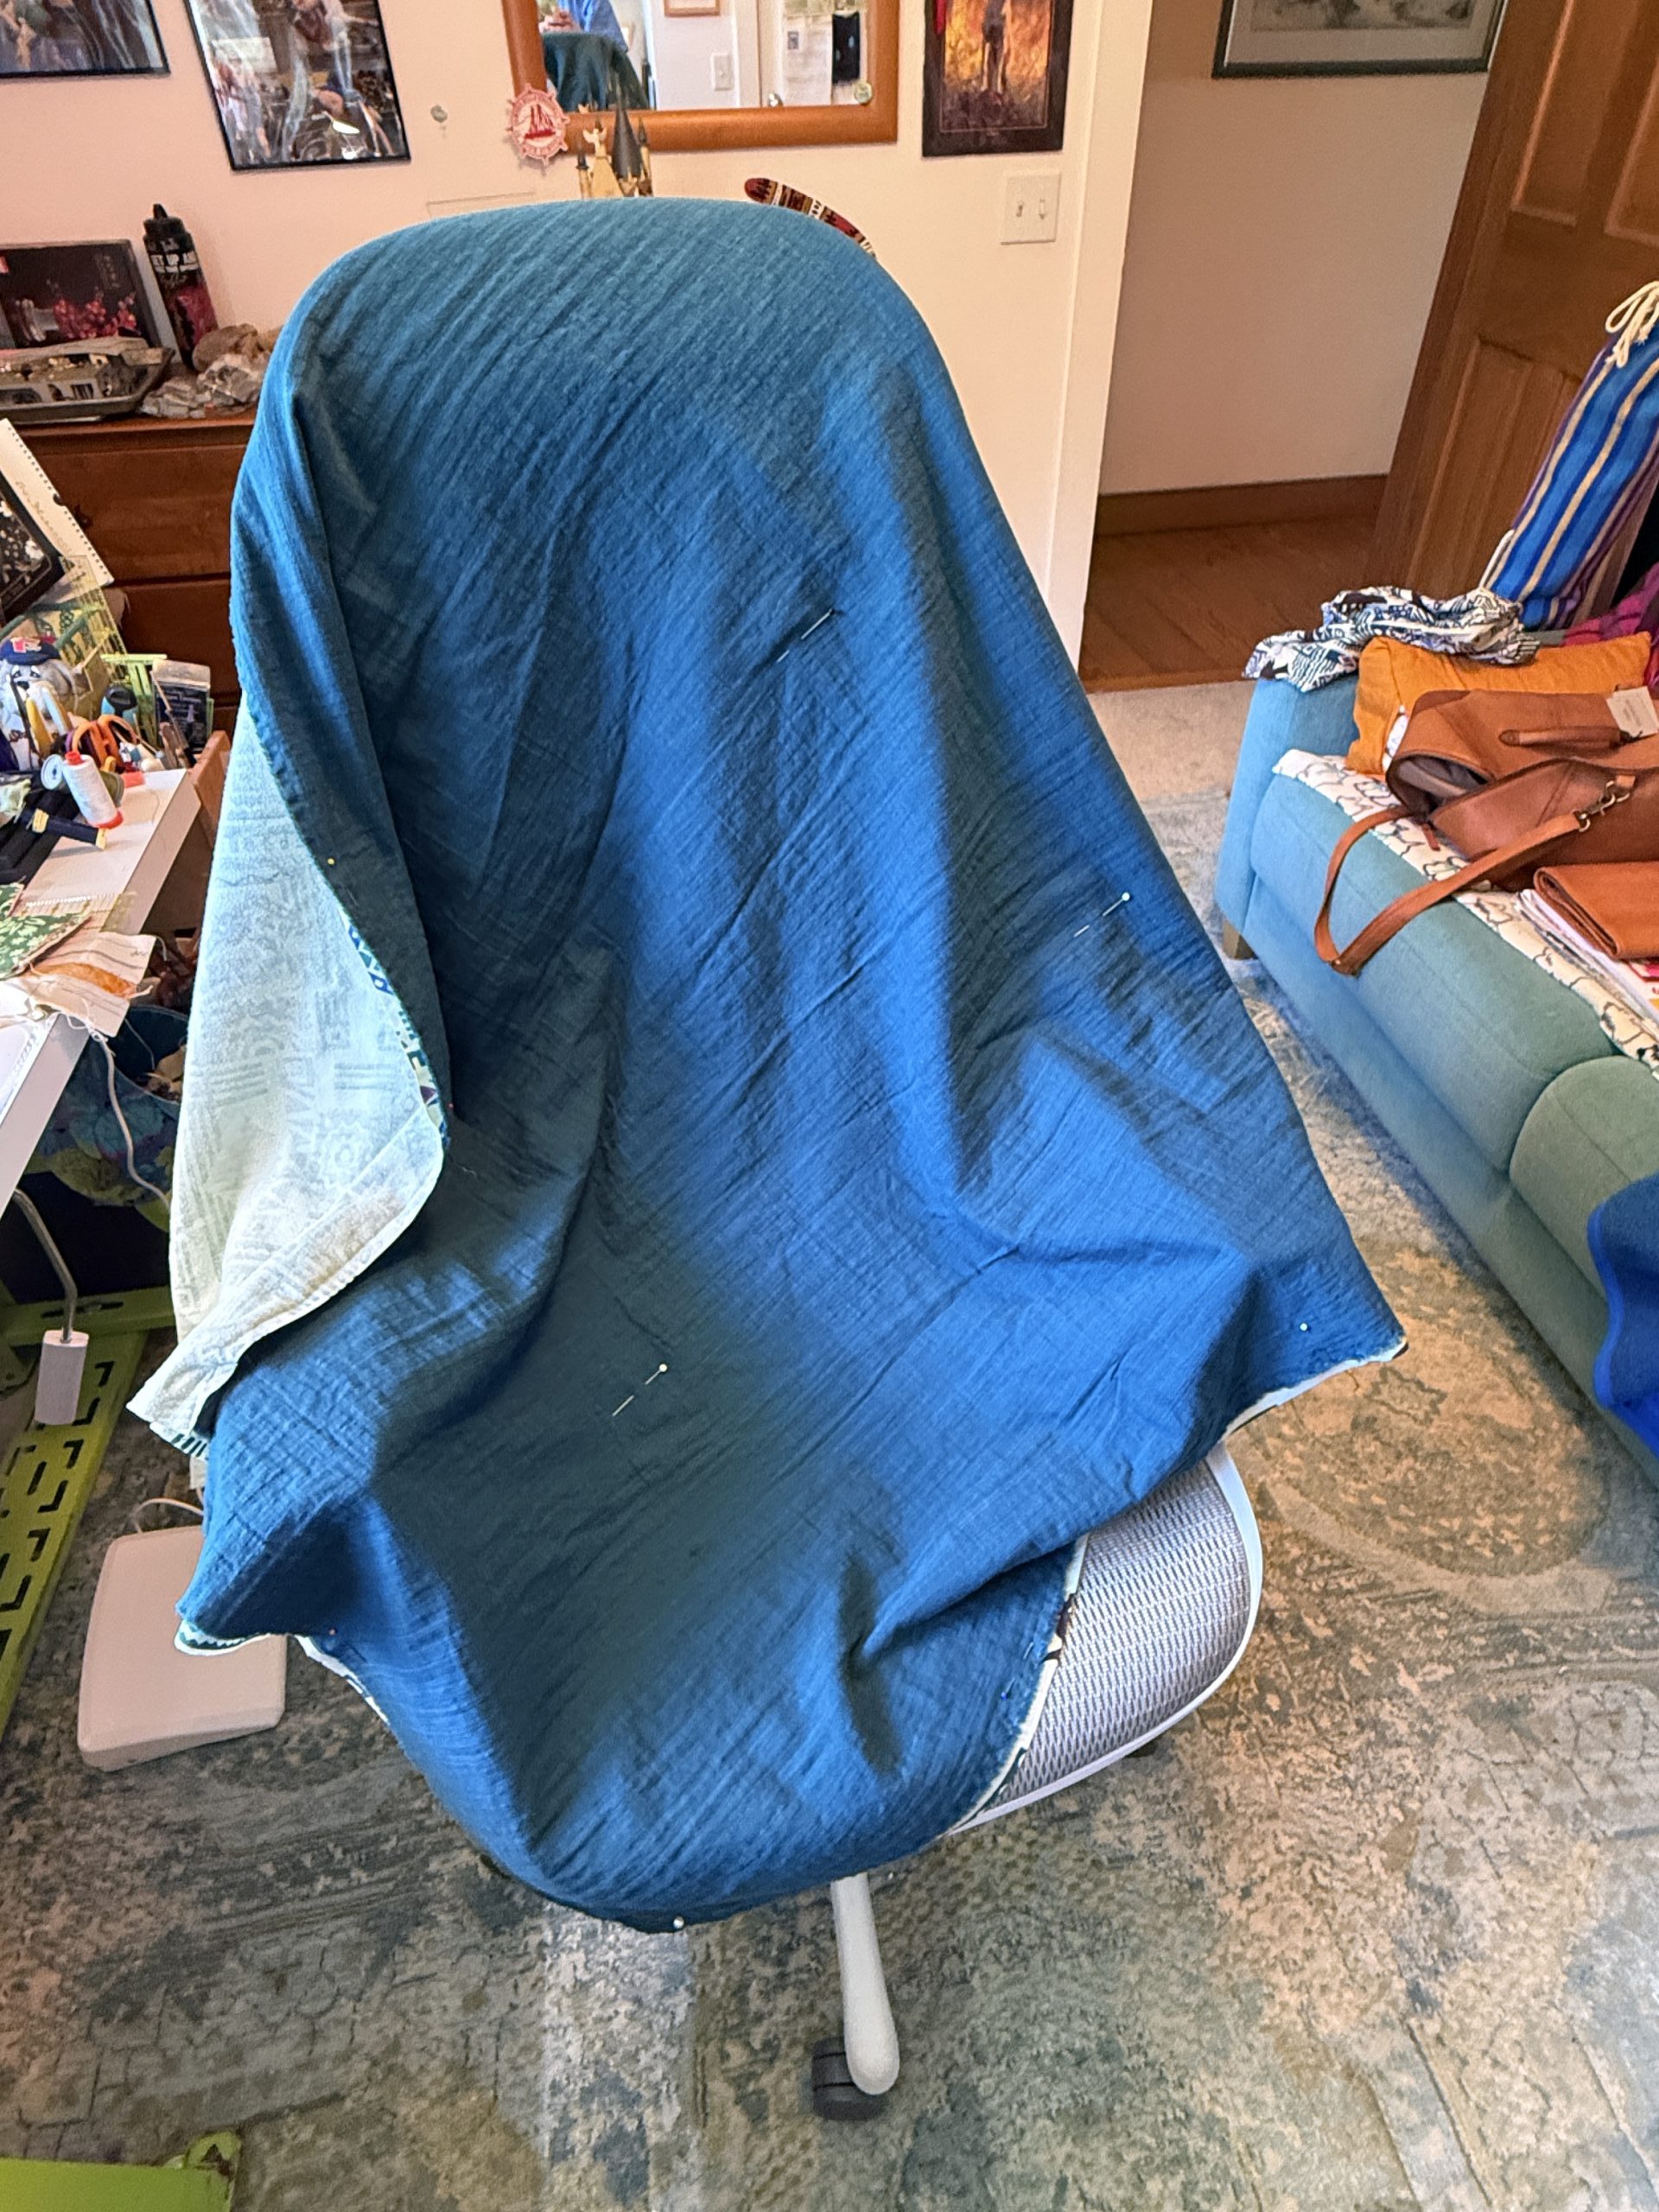
Draped over my chair to show scale, you can see the pins in the center to minimize shifting when sewing.

About to sew.. you can (barely) see the pins in the center. On to sewing!

About to sew.. you can (barely) see the pins in the center. On to sewing!

Step 4:  Sew all the way around the blanket.

Step 5:  Trim edges if needed.  Clip corners so the seam allowance won’t bunch up when turned.

Step 6:  Press the seam allowances as stitched (wrong side out).  Then press the seams open (see video above or on YouTube, links above).  Especially press the seam allowances at the opening.

Step 7:  Pin the opening closed.  Select a decorative stitch to secure the edges.  I used a 3-step zigzag to echo the design of the flannel sheet, but often I use the serpentine stitch as I did in the items below.  If you look closely at the photos at the end of the burp cloths and first two flannel blankest, you’ll see the serpentine stitch.

FREE PDF LINK IS HERE! 

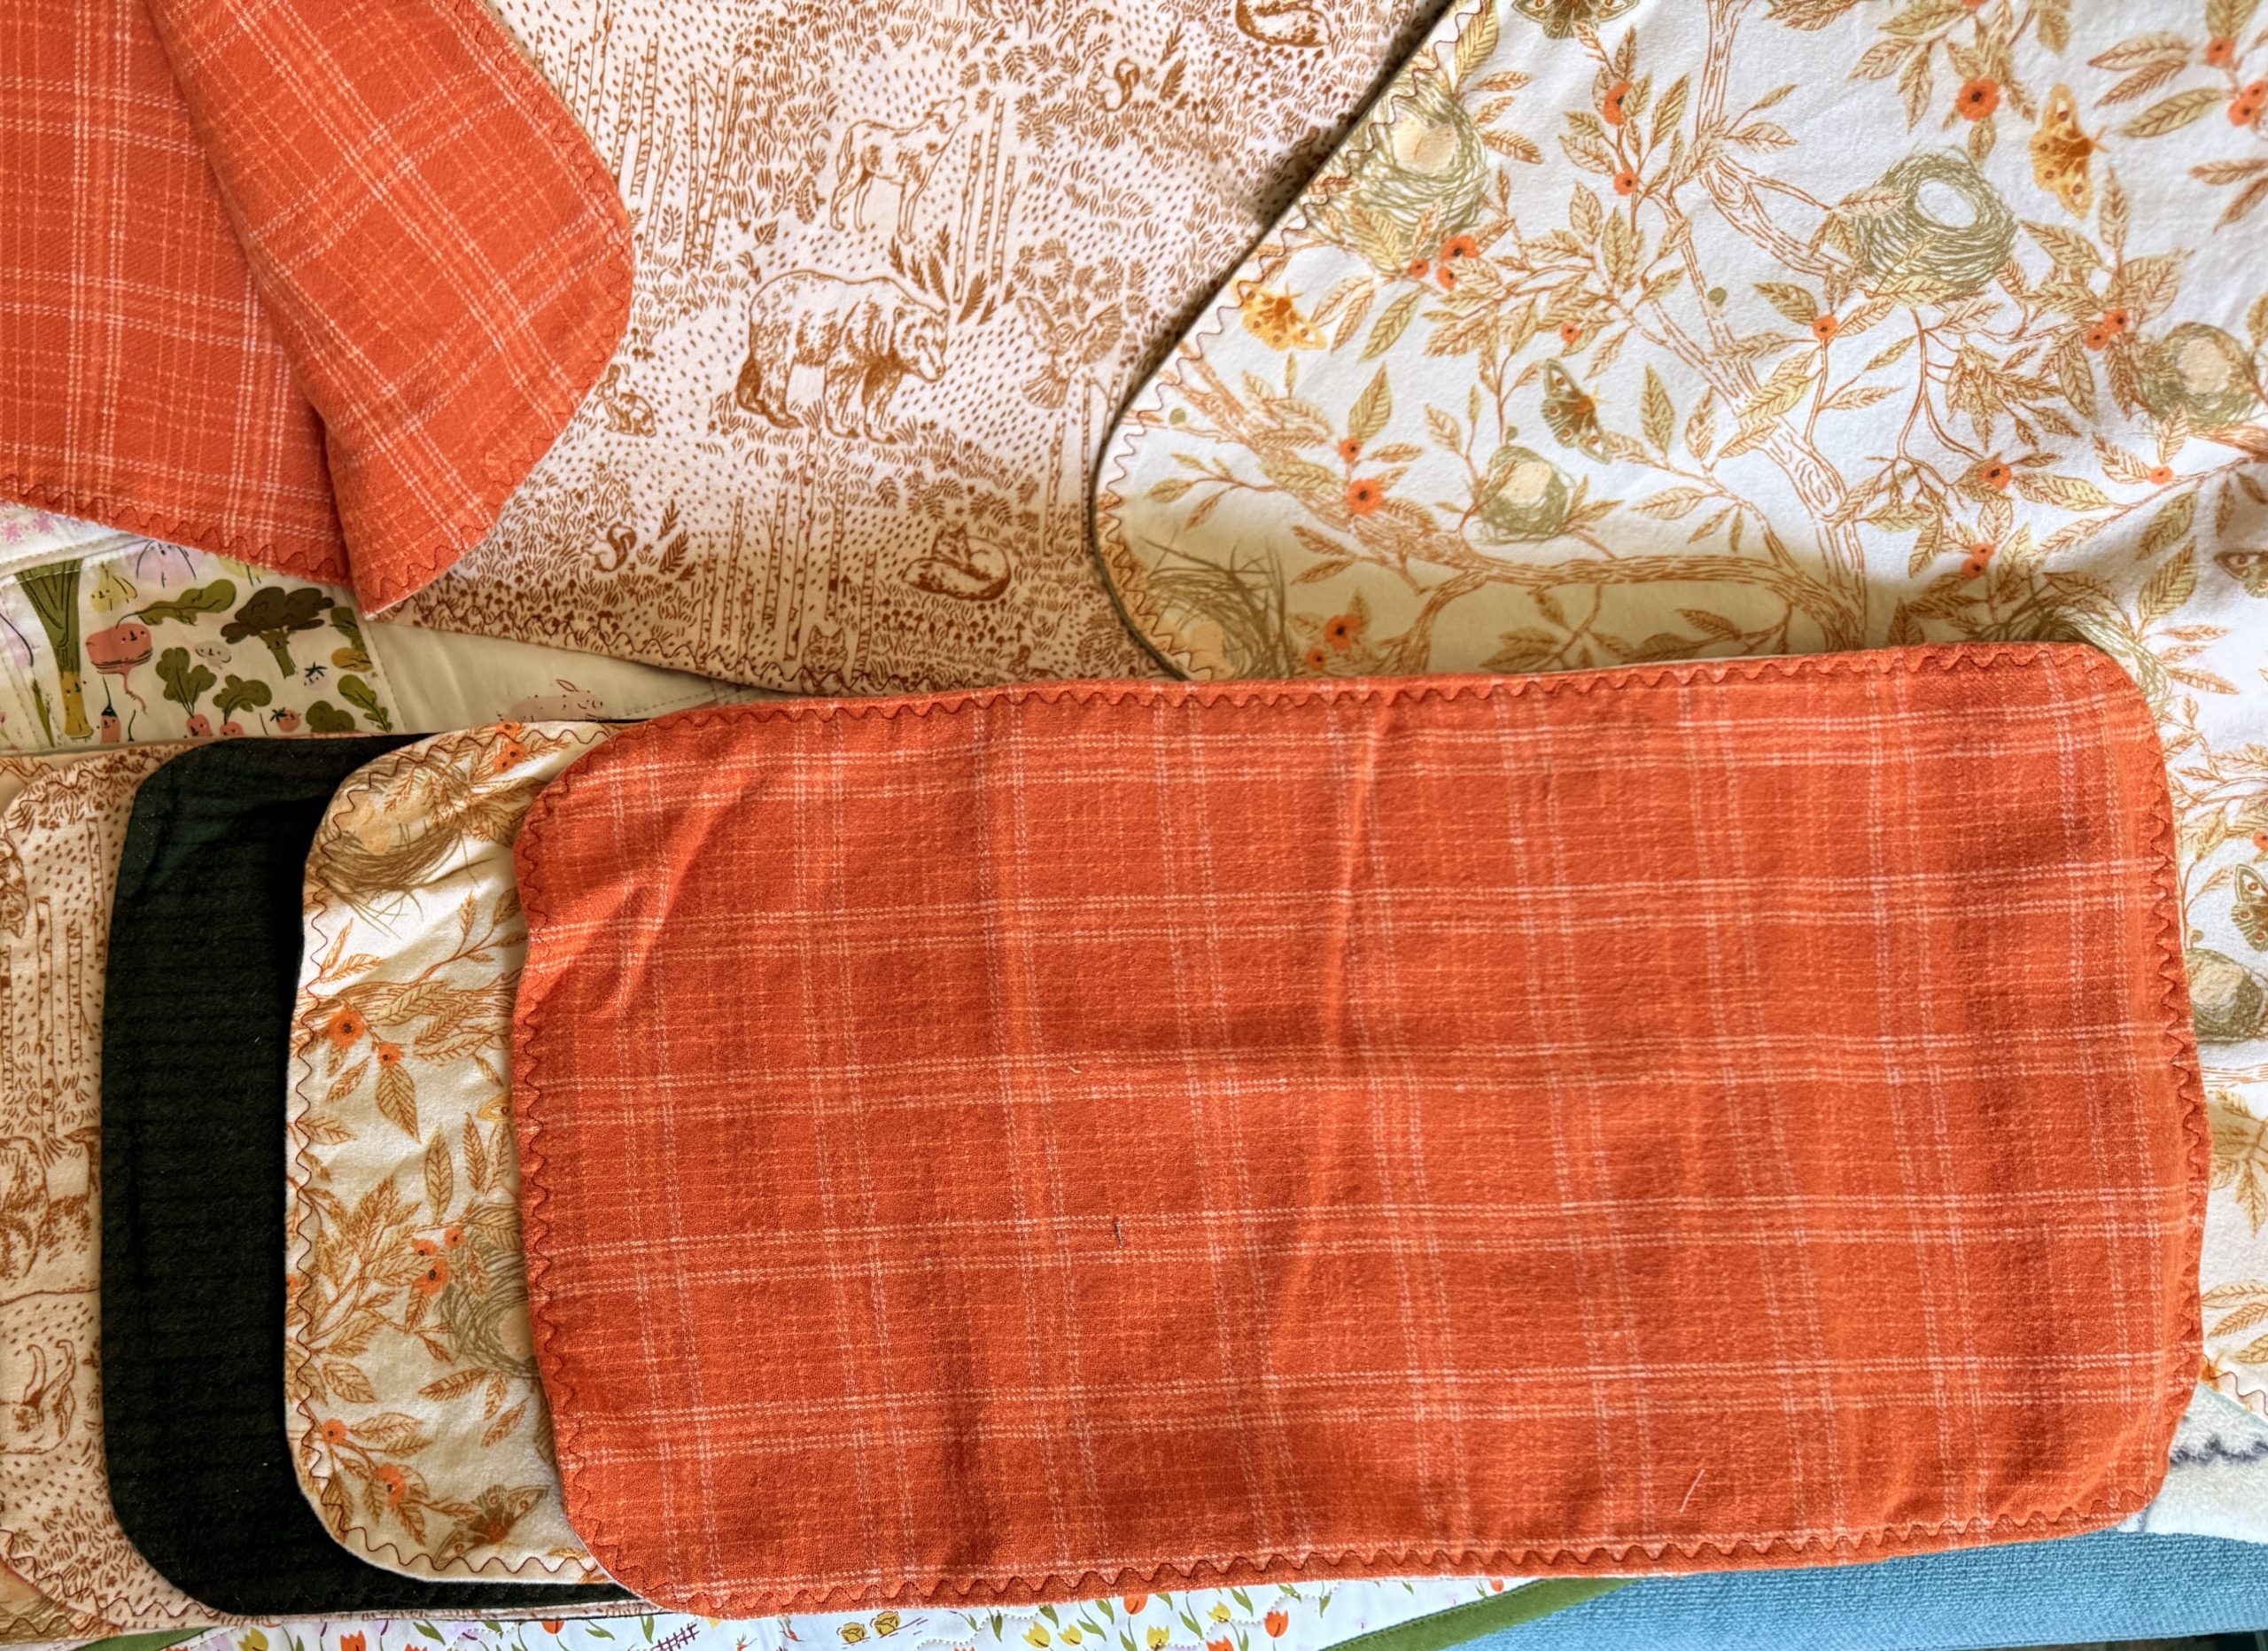
A close-up of the burp cloths

A close-up of the burp cloths

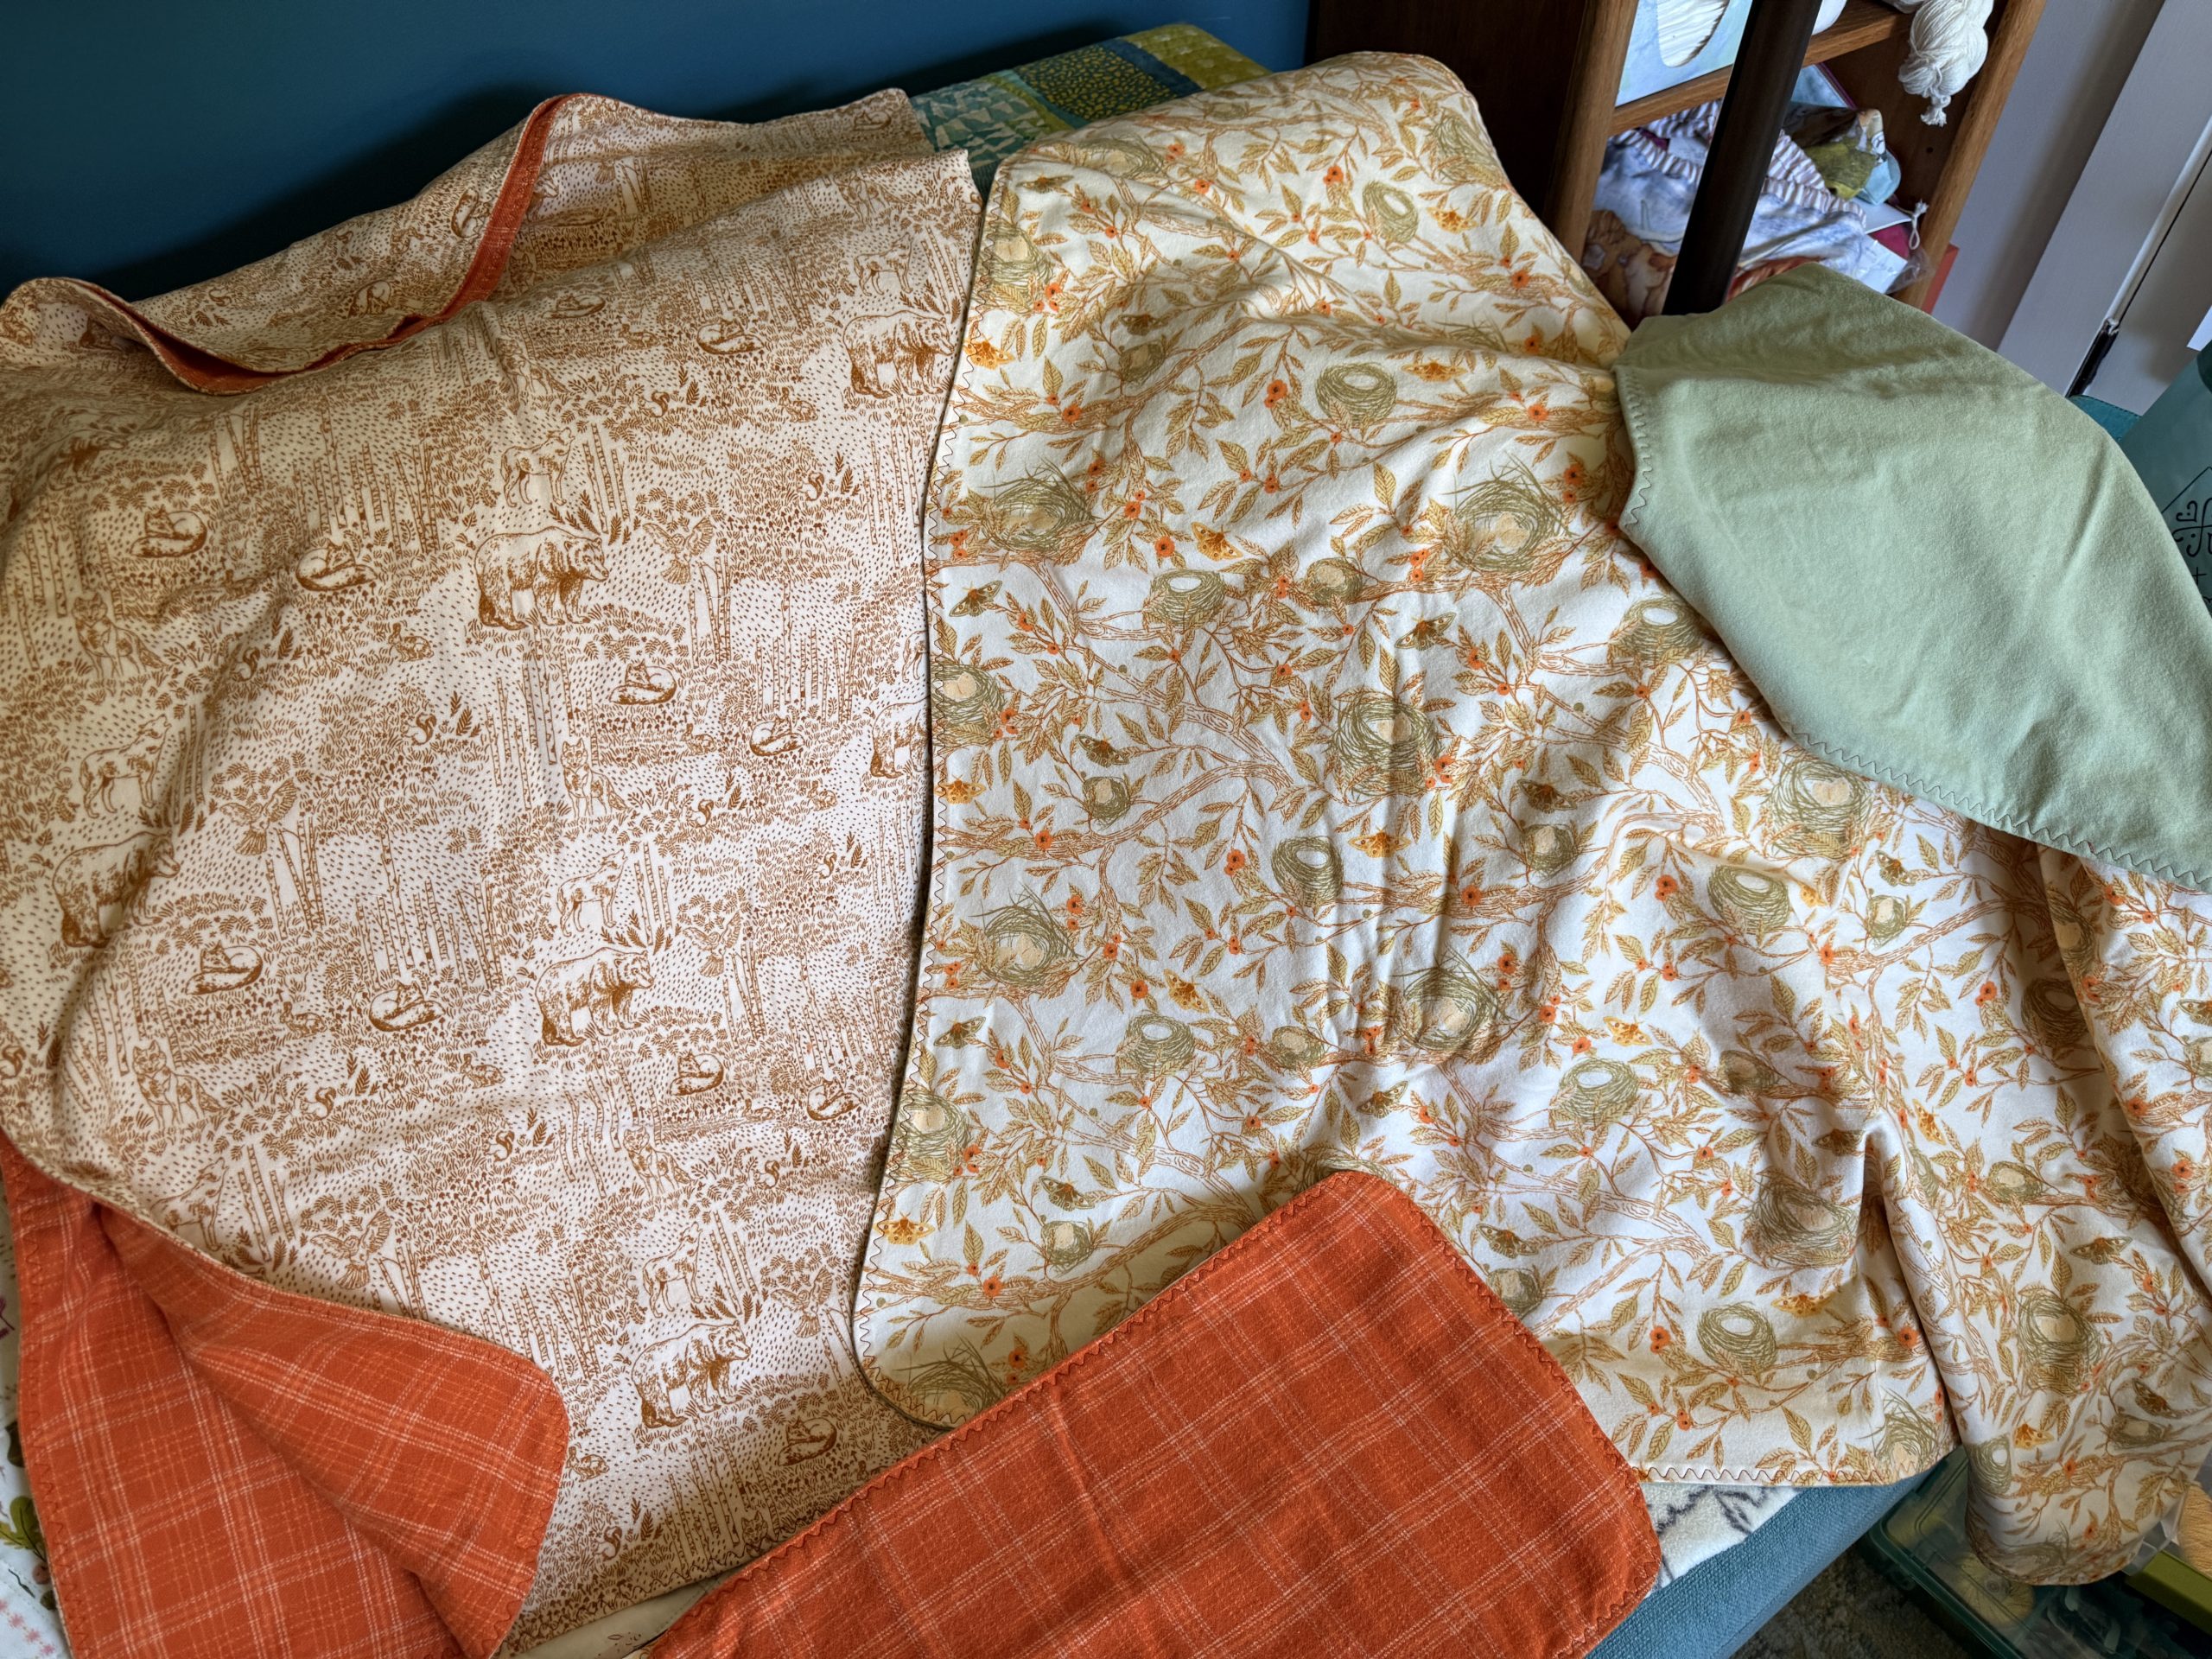
And the original two blankies and burp cloths

Alas I gave these to my son and DIL before getting better photos because they were moving houses in addition to expecting soon.  The fabric is perfect for a woodland themed nursery.  I hope they find them as useful as I did.  Enjoy!

Moss Jacket, new for summer!

Thursday, July 20th, 2023

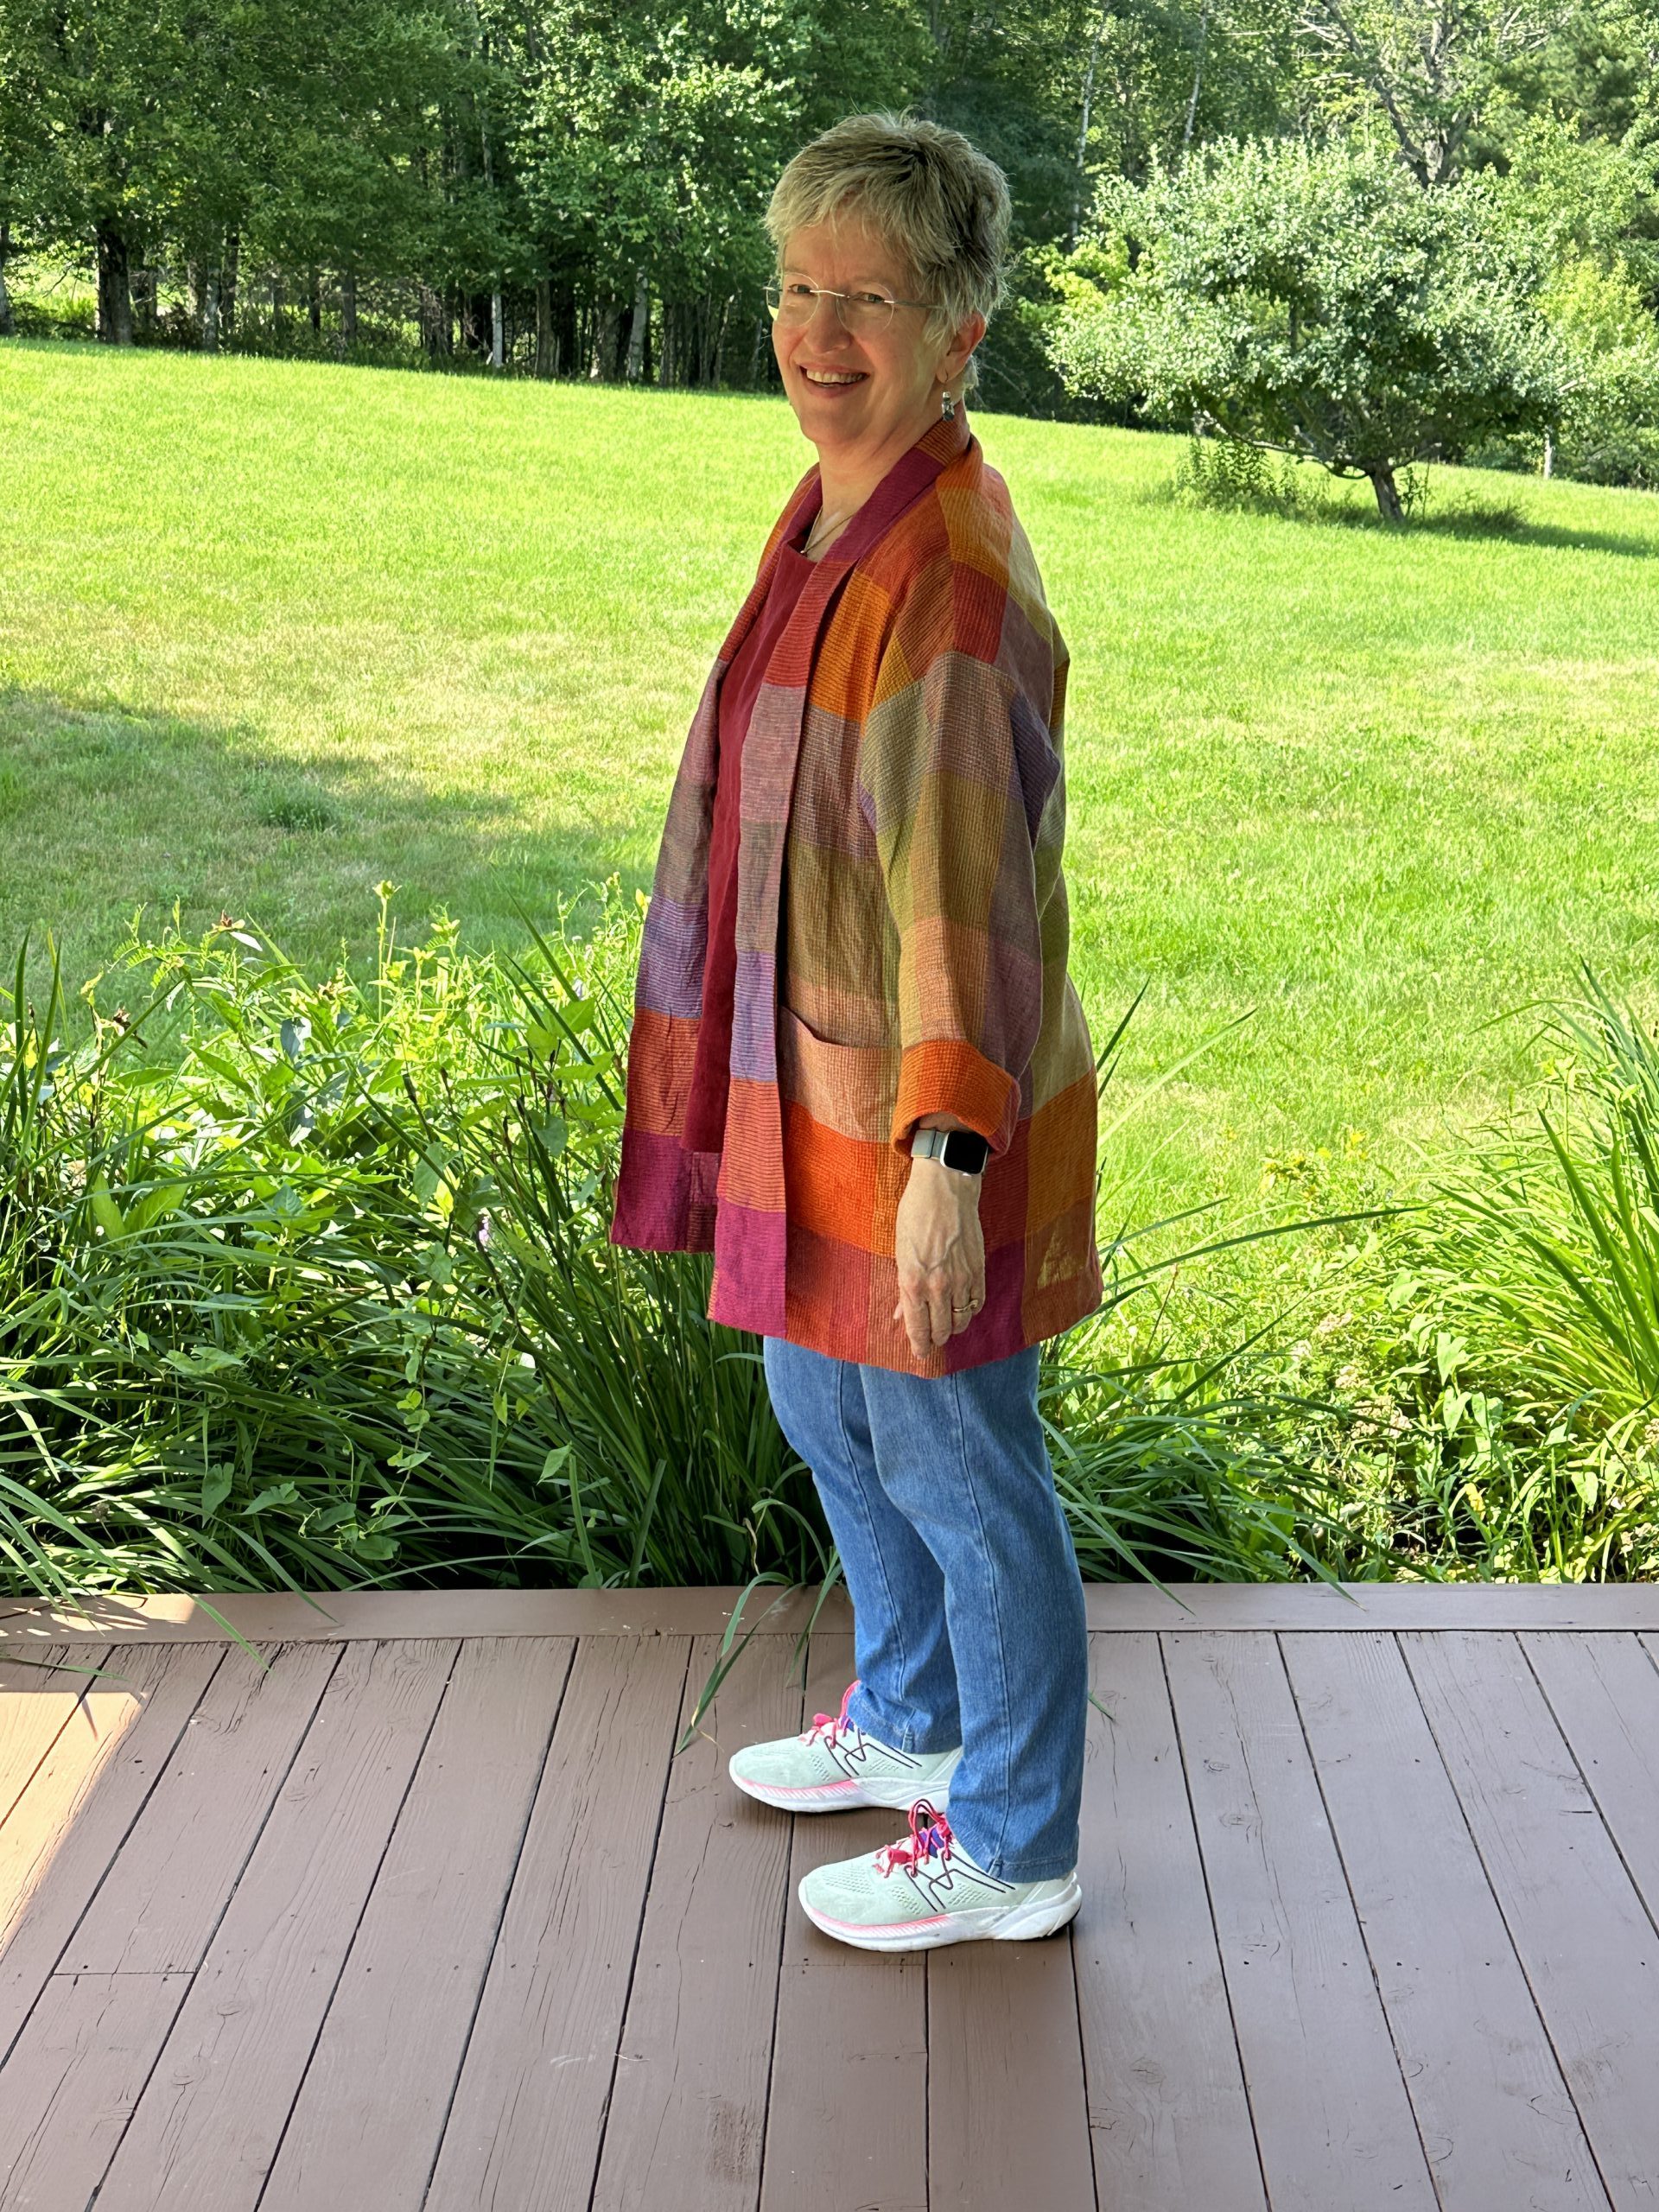
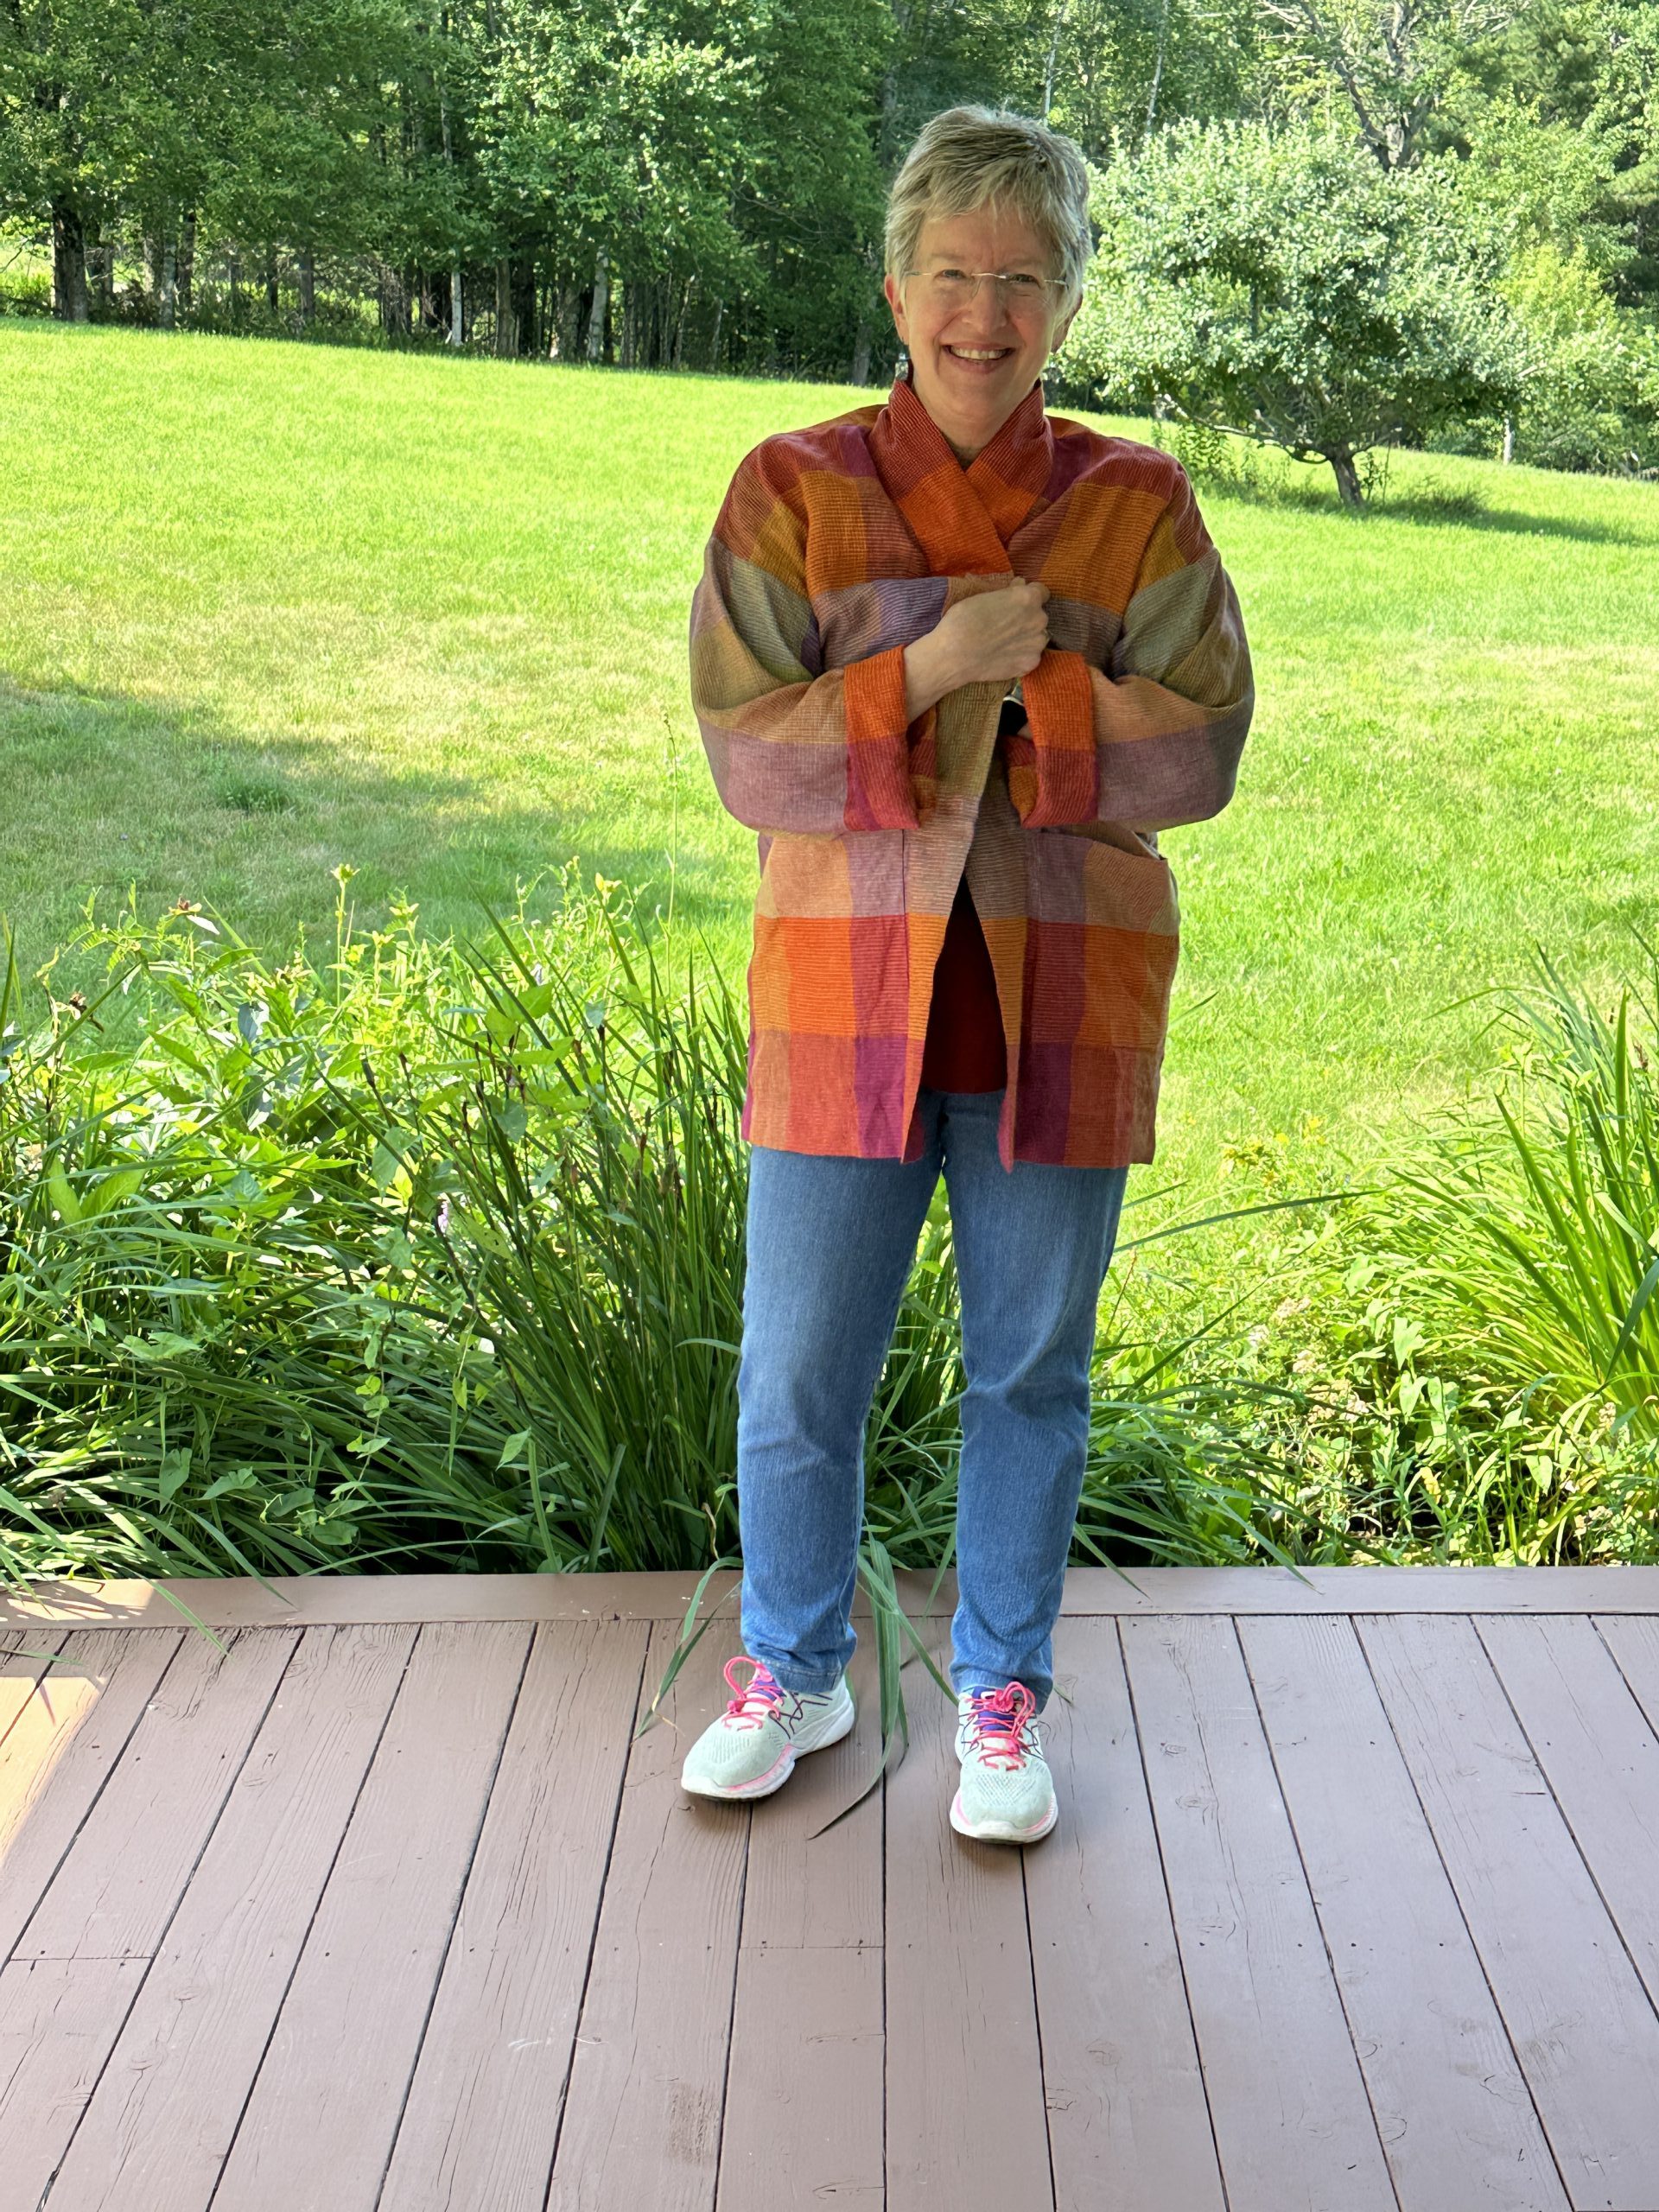
It’s time for some summer fun–in this case a lightweight summer jacket that has languished since last summer!  The pattern is the Moss Jacket from Helen’s Closet Patterns and the fabric is this one from Blackbird Fabrics in Canada.  I’ve ordered from Blackbird before and luckily had no issues with US customs.
I love a super light jacket–I don’t care for the feel of 99% of sunscreens, but I burn very quickly.  This type of garment is my solution.  When making a garment, the first thing I do is figure out my fabric layout.  Invariably, fabric is not any of the widths for which yardage is offered on the pattern envelope.  In this case, I think the fabric was 54″ wide, and pattern layouts were generated for the more widely available 44″ and 58-60″!  I bought three yards of the 54″ and figured it would be whatever length I could fit!

The Moss Jacket comes short (high-hip length) or tunic length, as seen here.  The collar can be fold-over, which I chose, or half that width and rests flat.

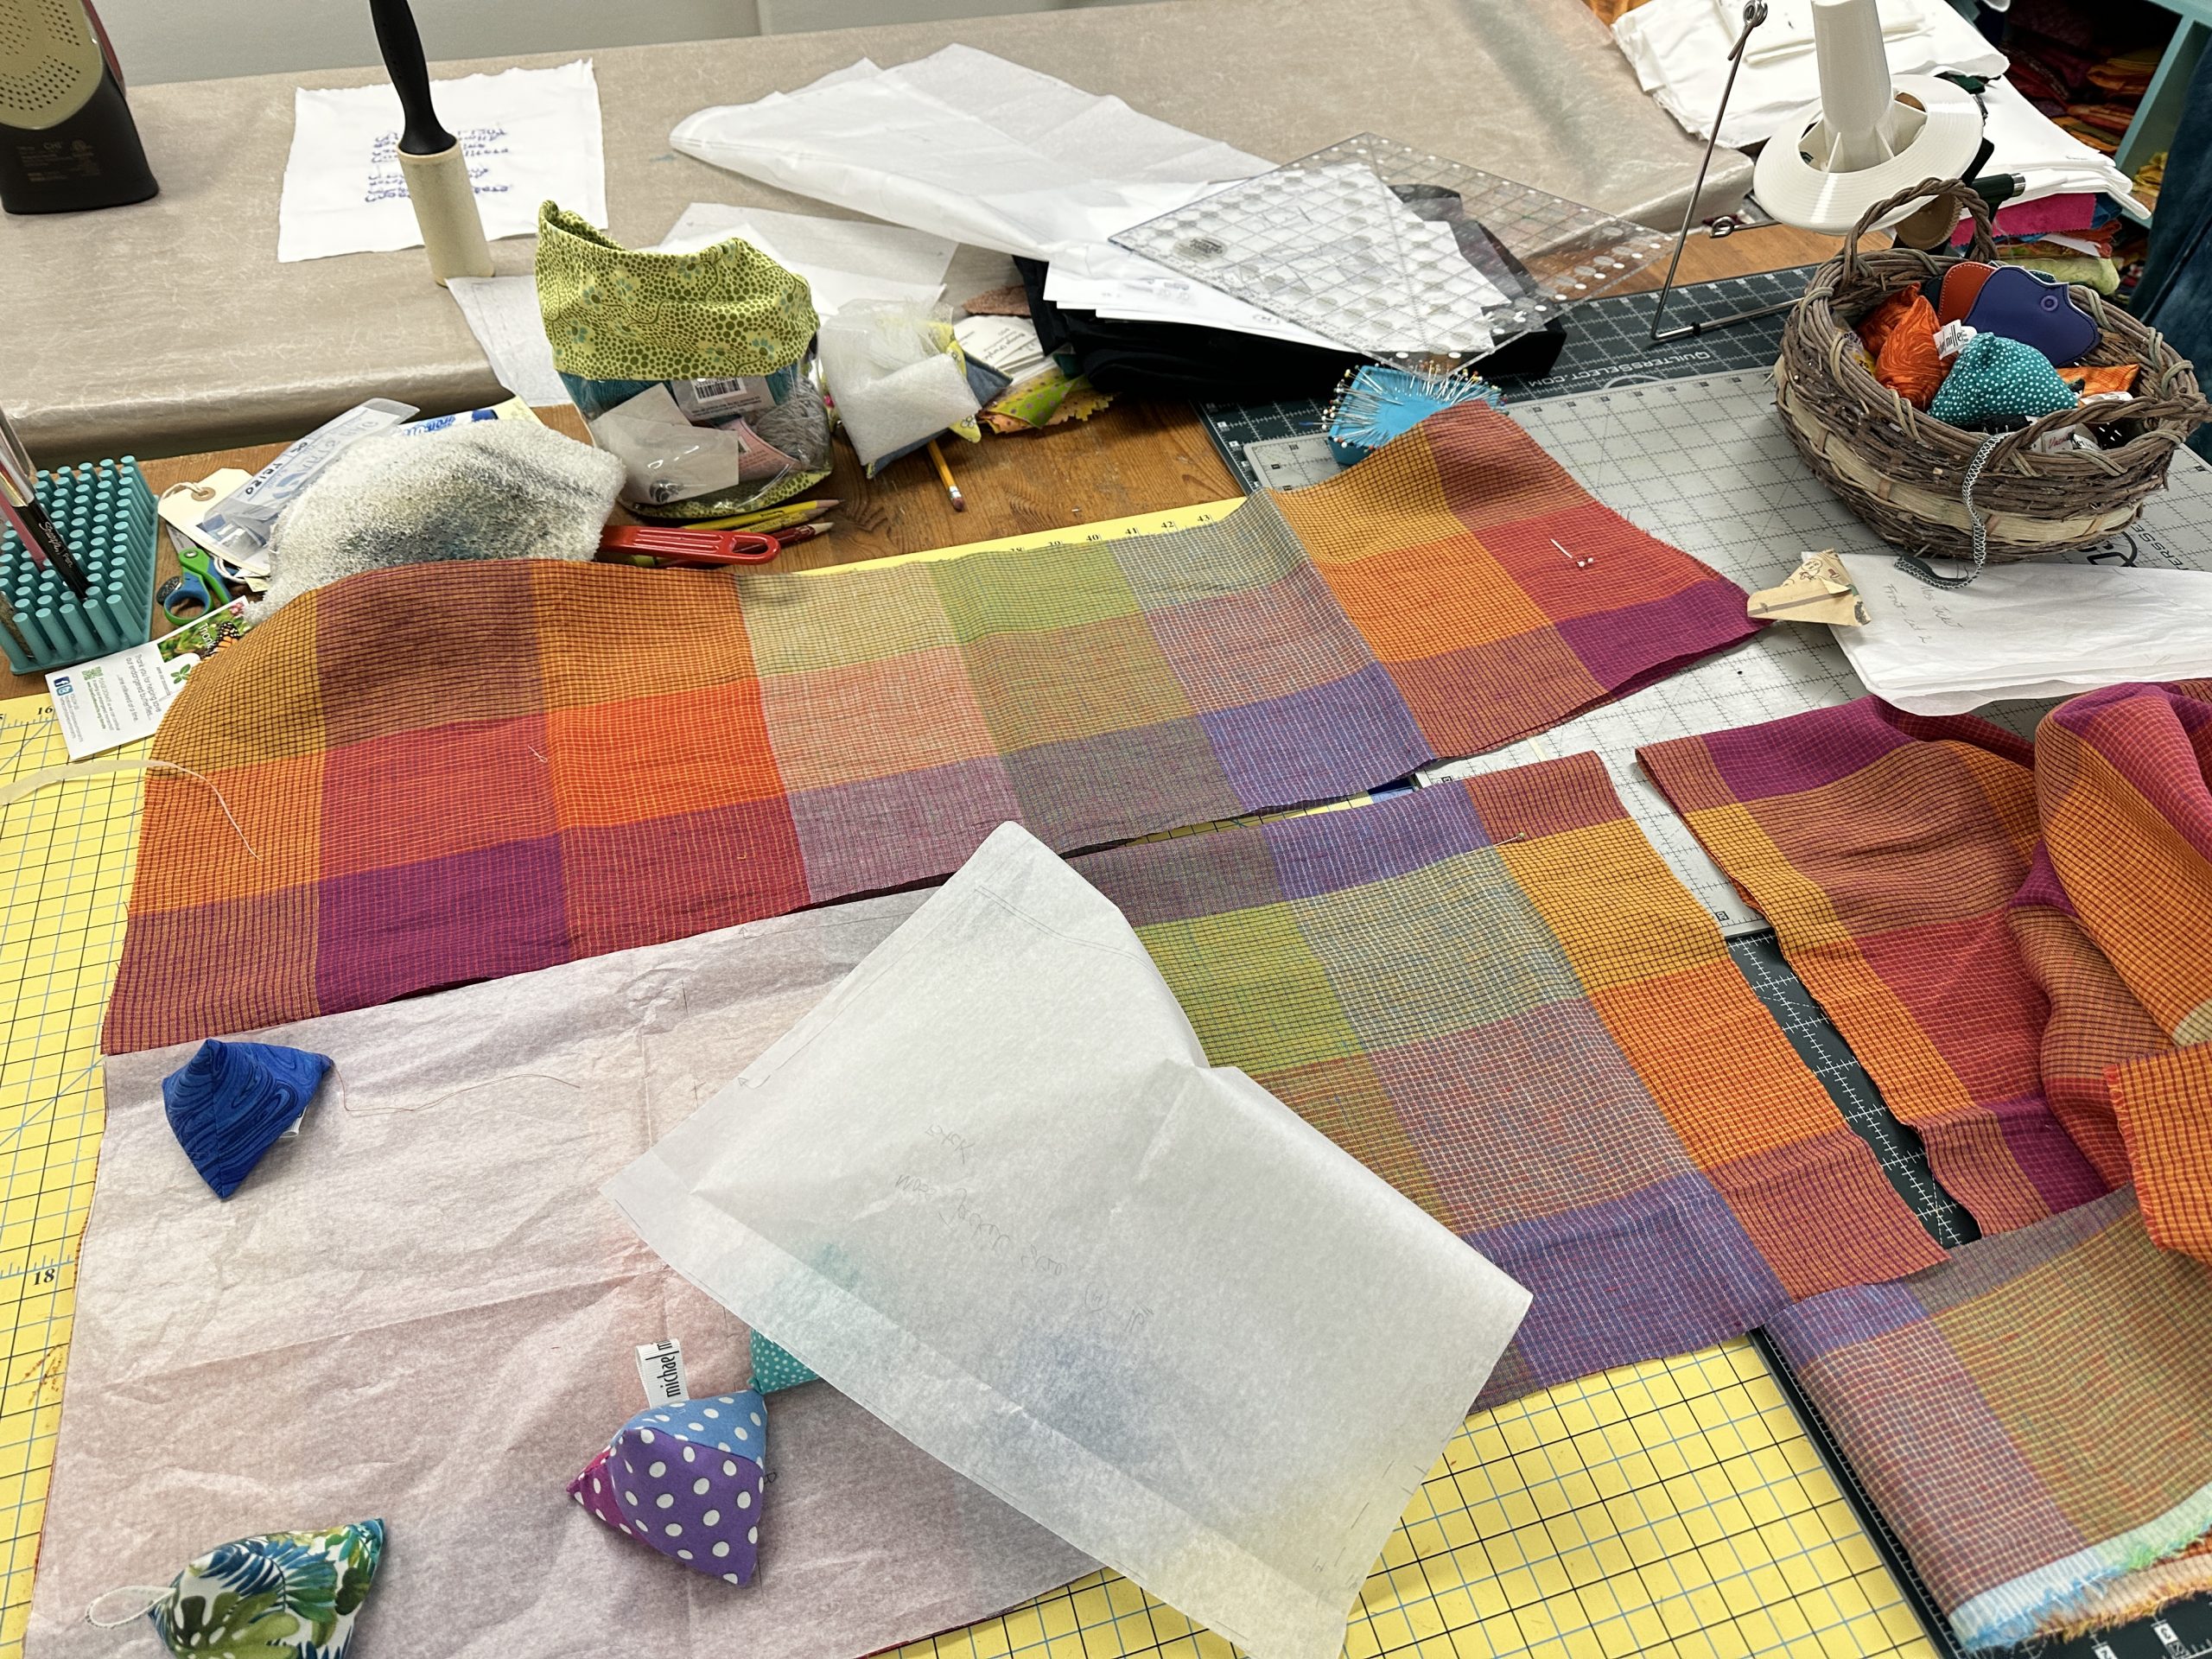
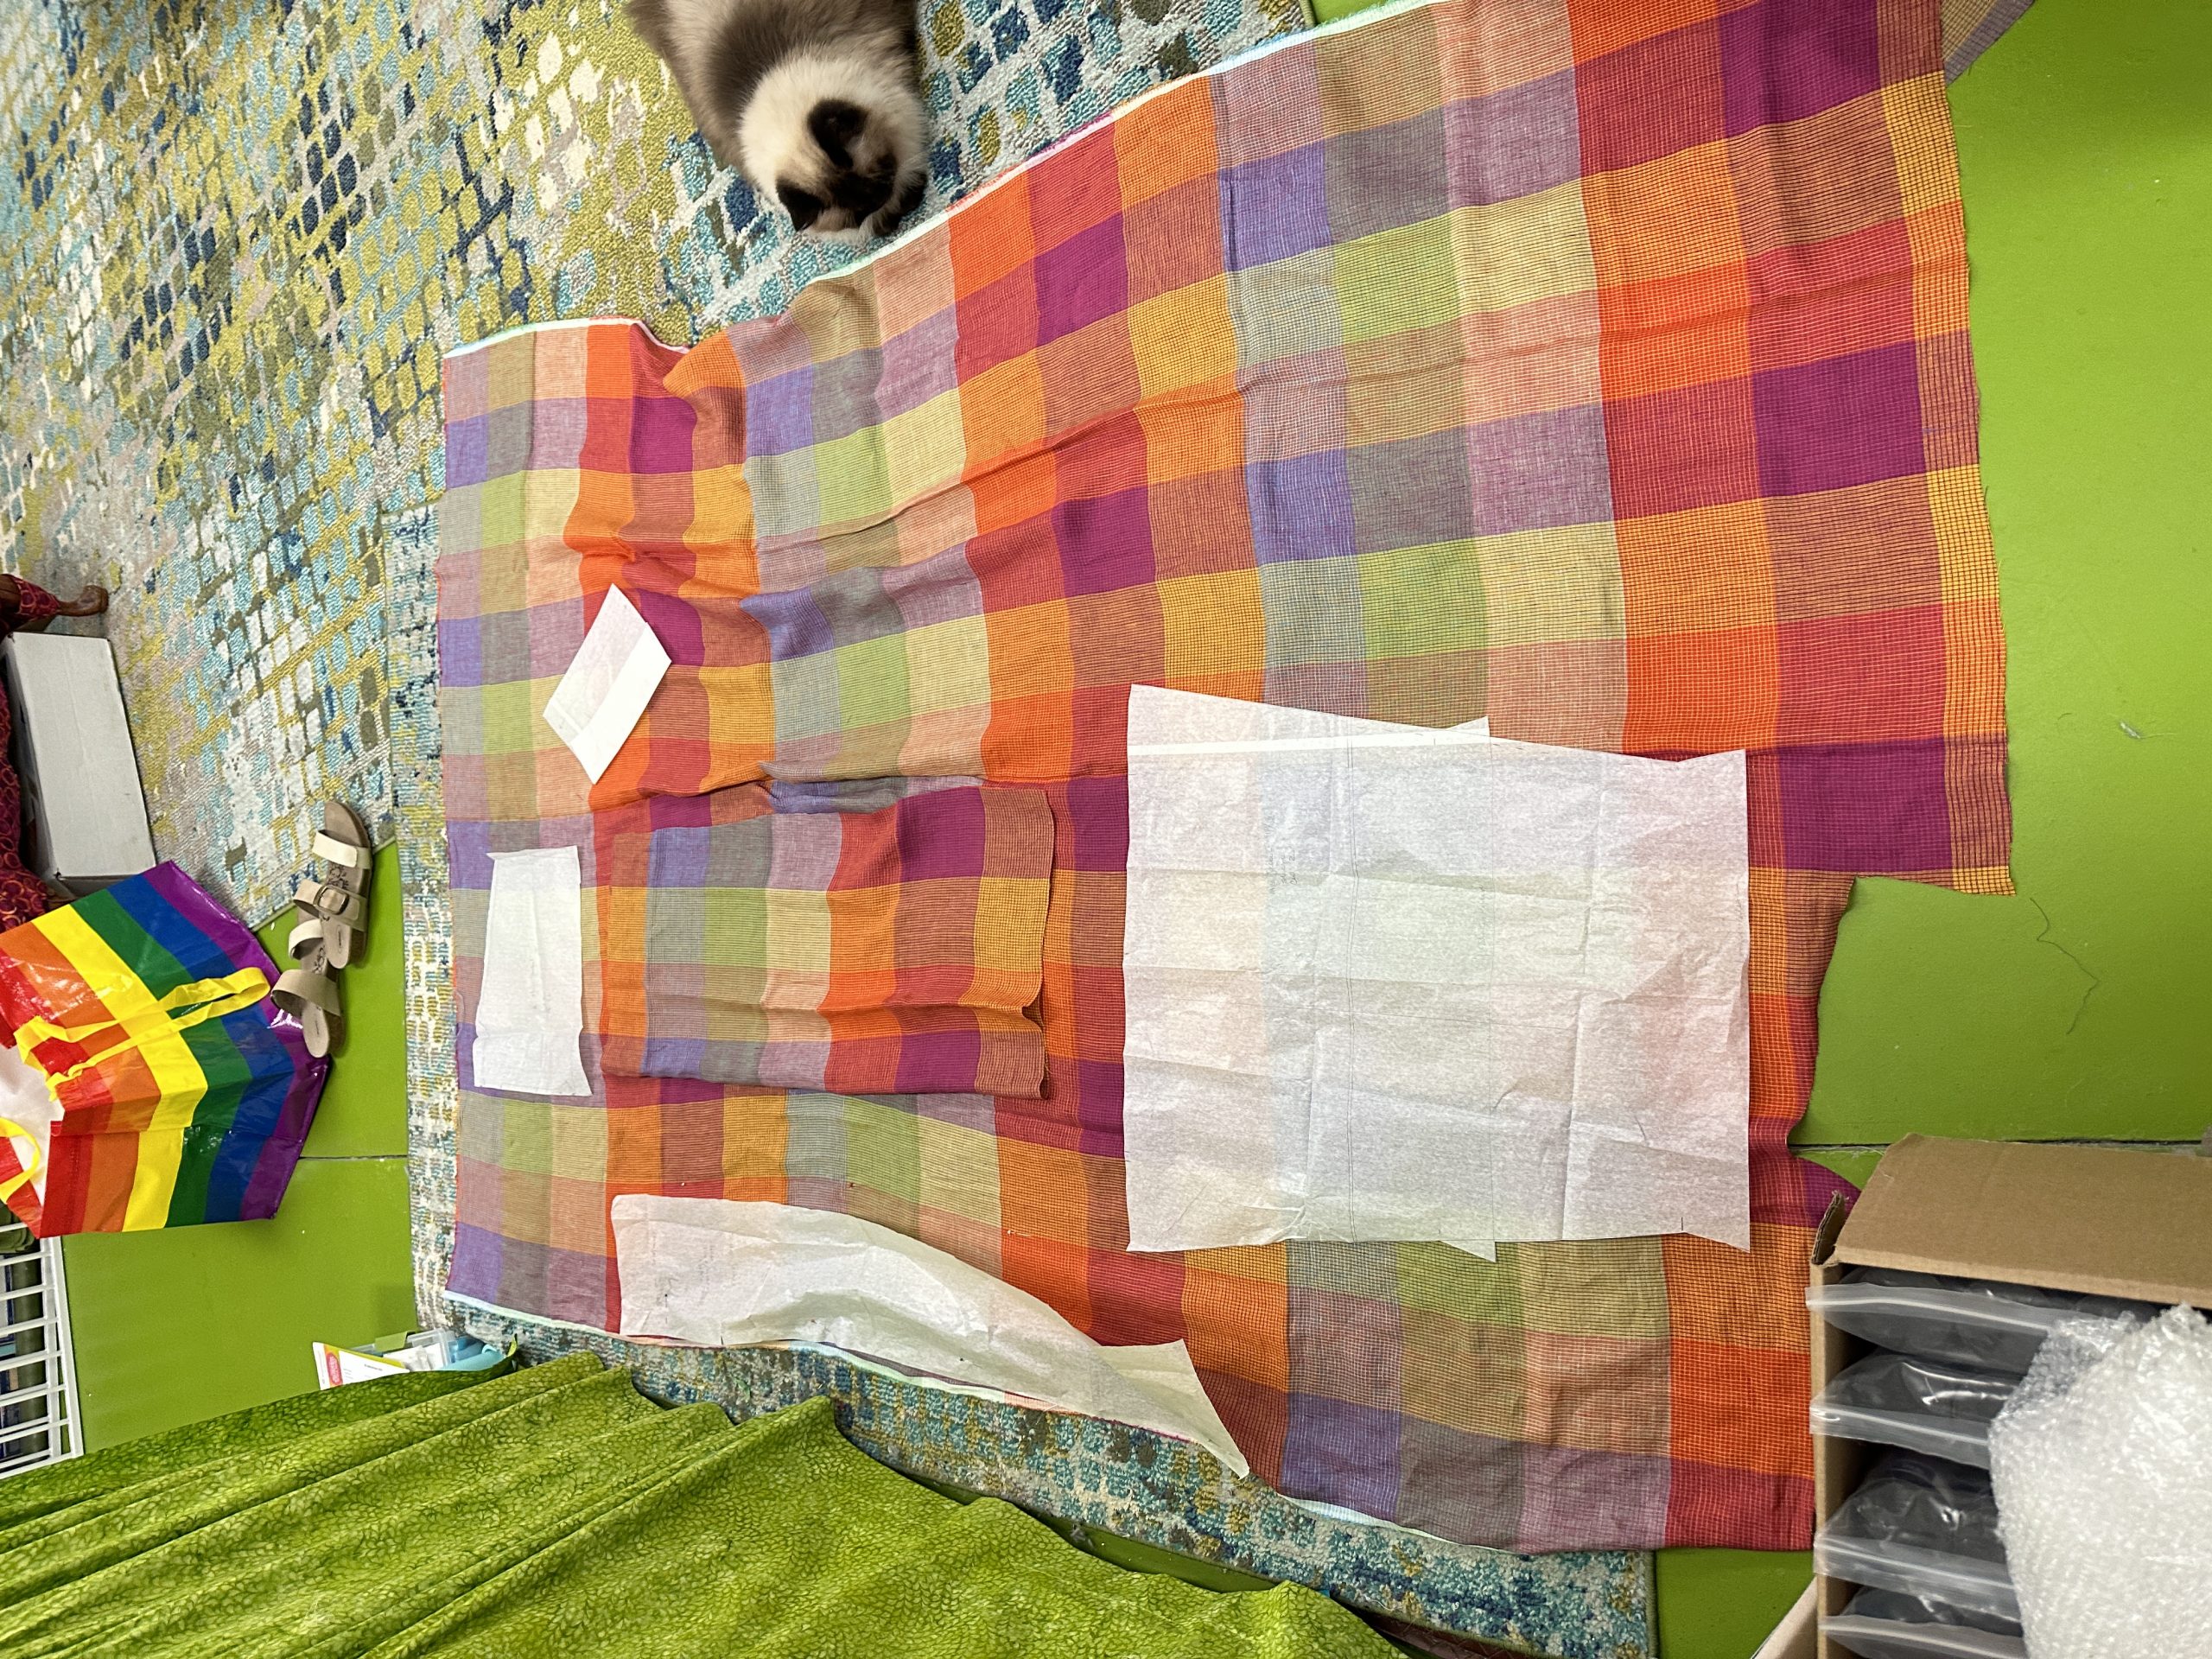
The first thing I did was to cut the fronts (at the top) and the back (with the white tissue folded back) so the horizontal bands in the plaid match perfectly.

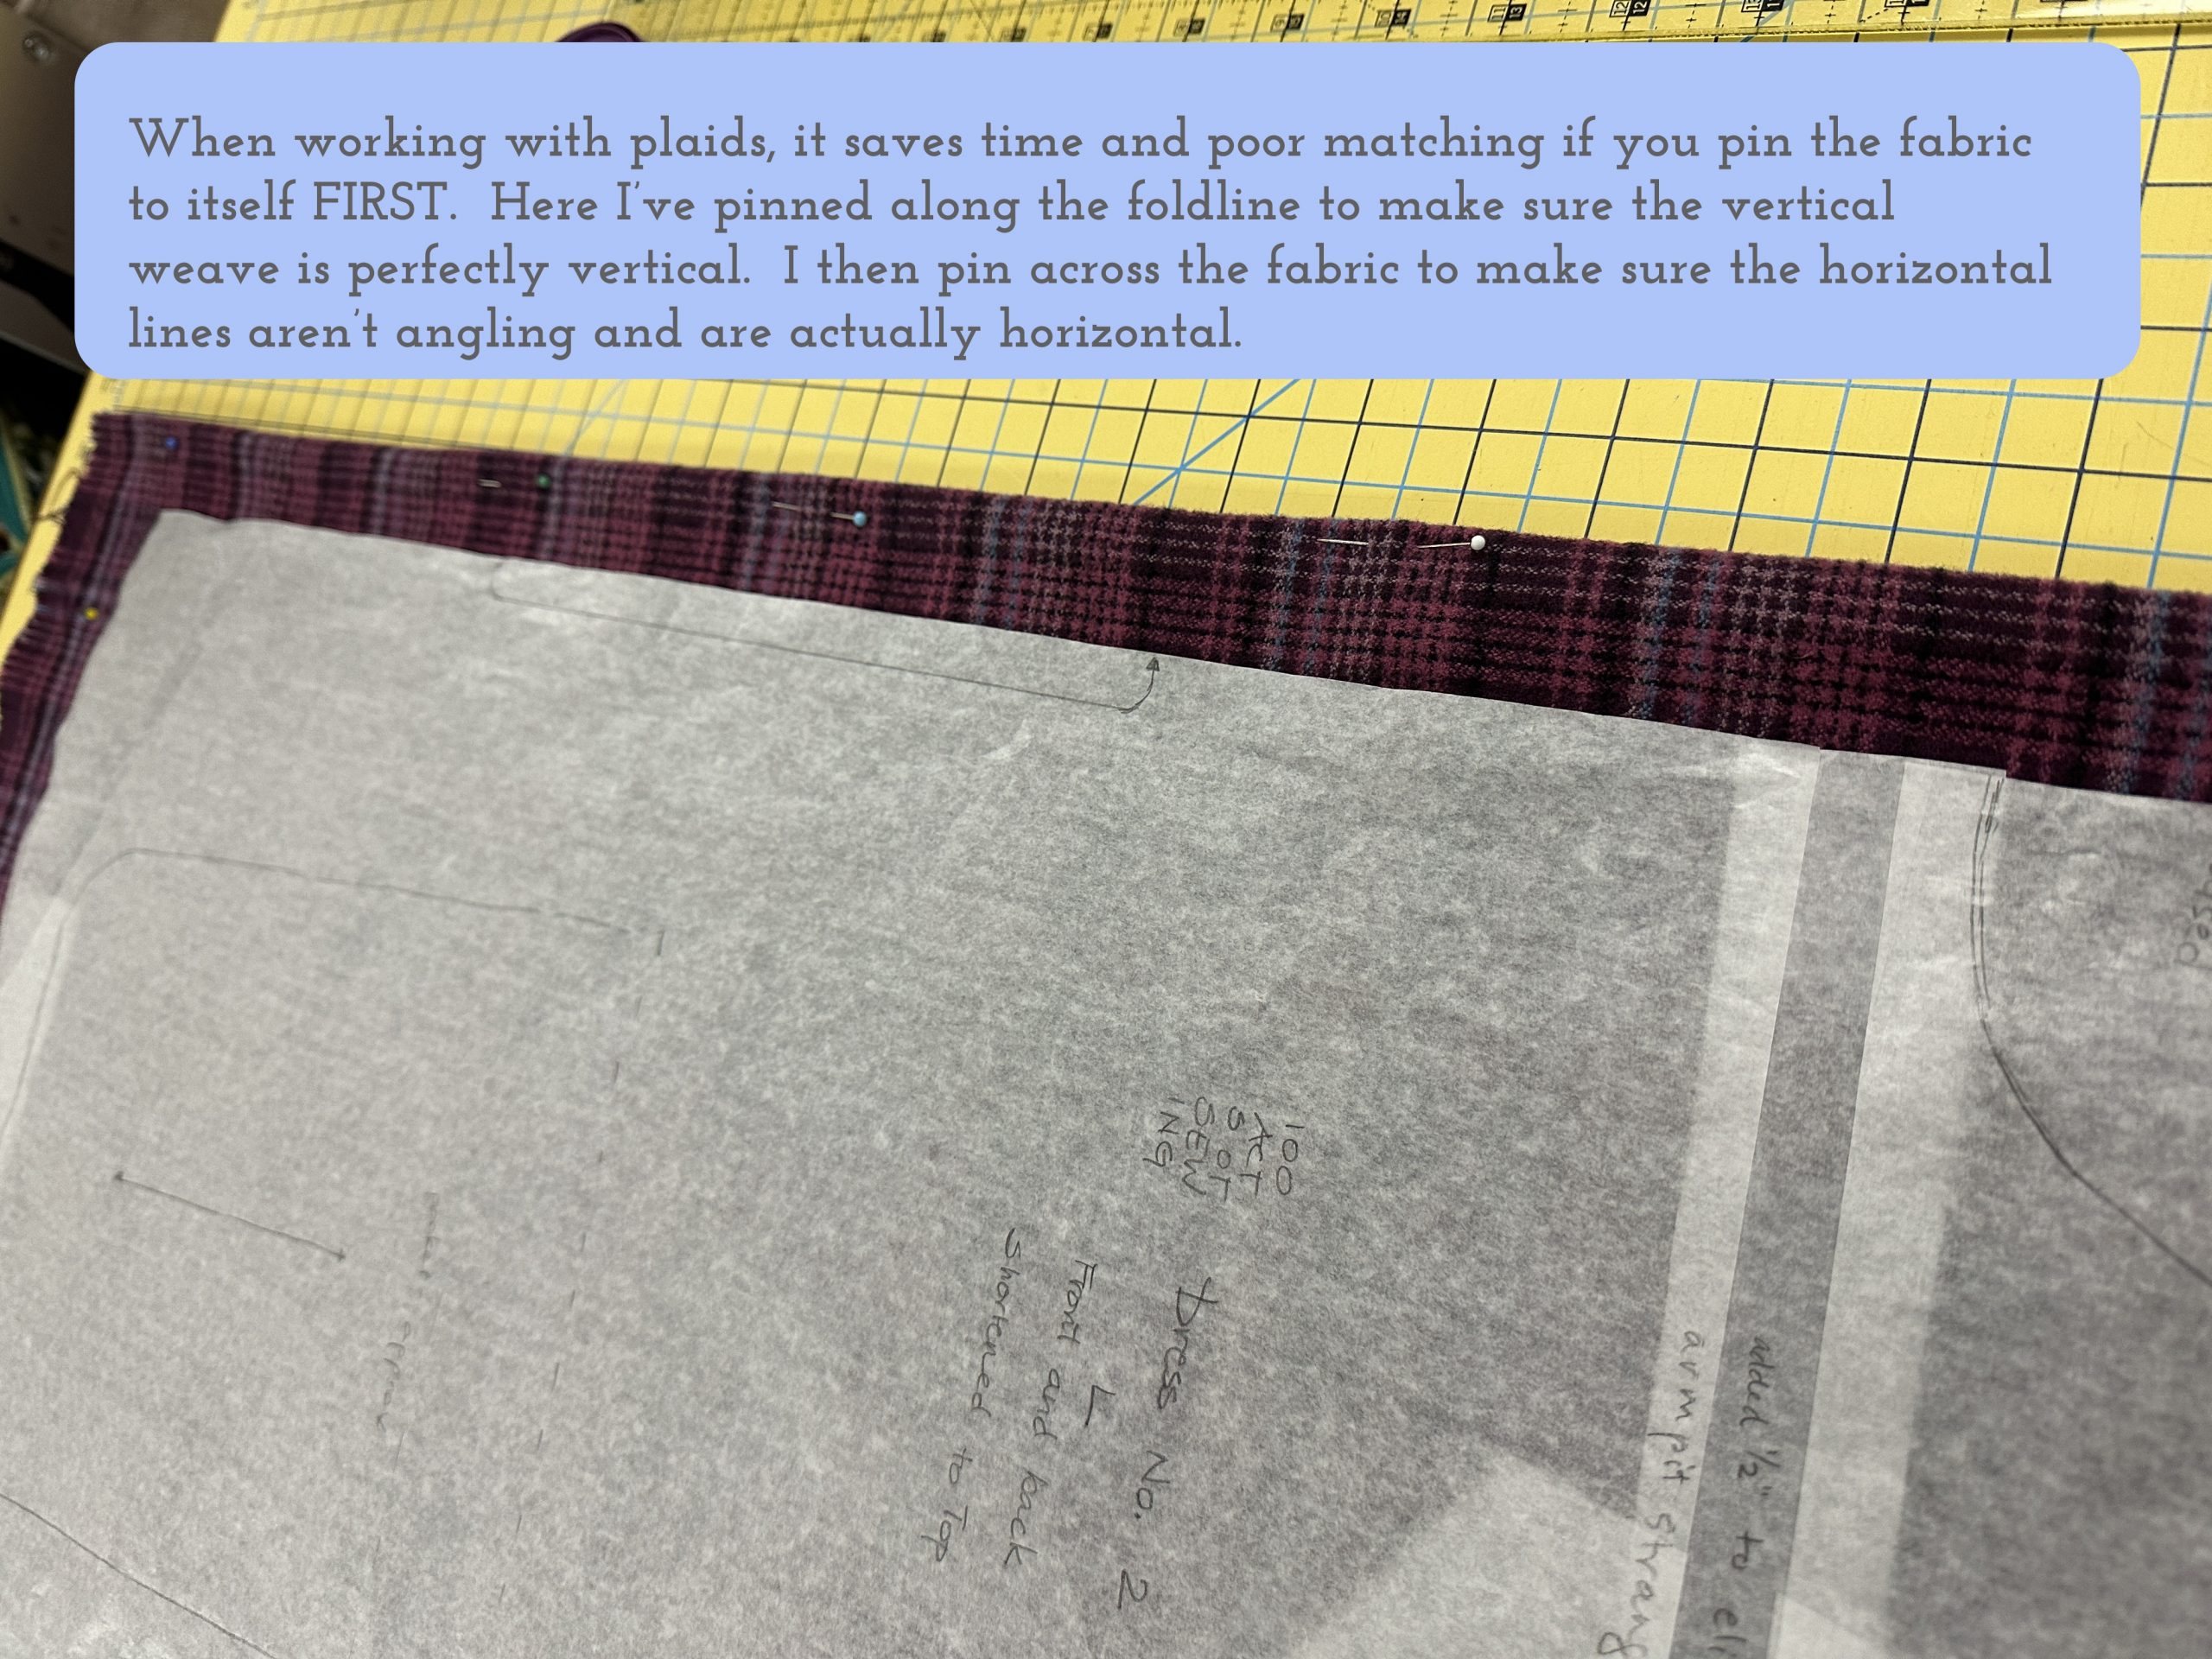
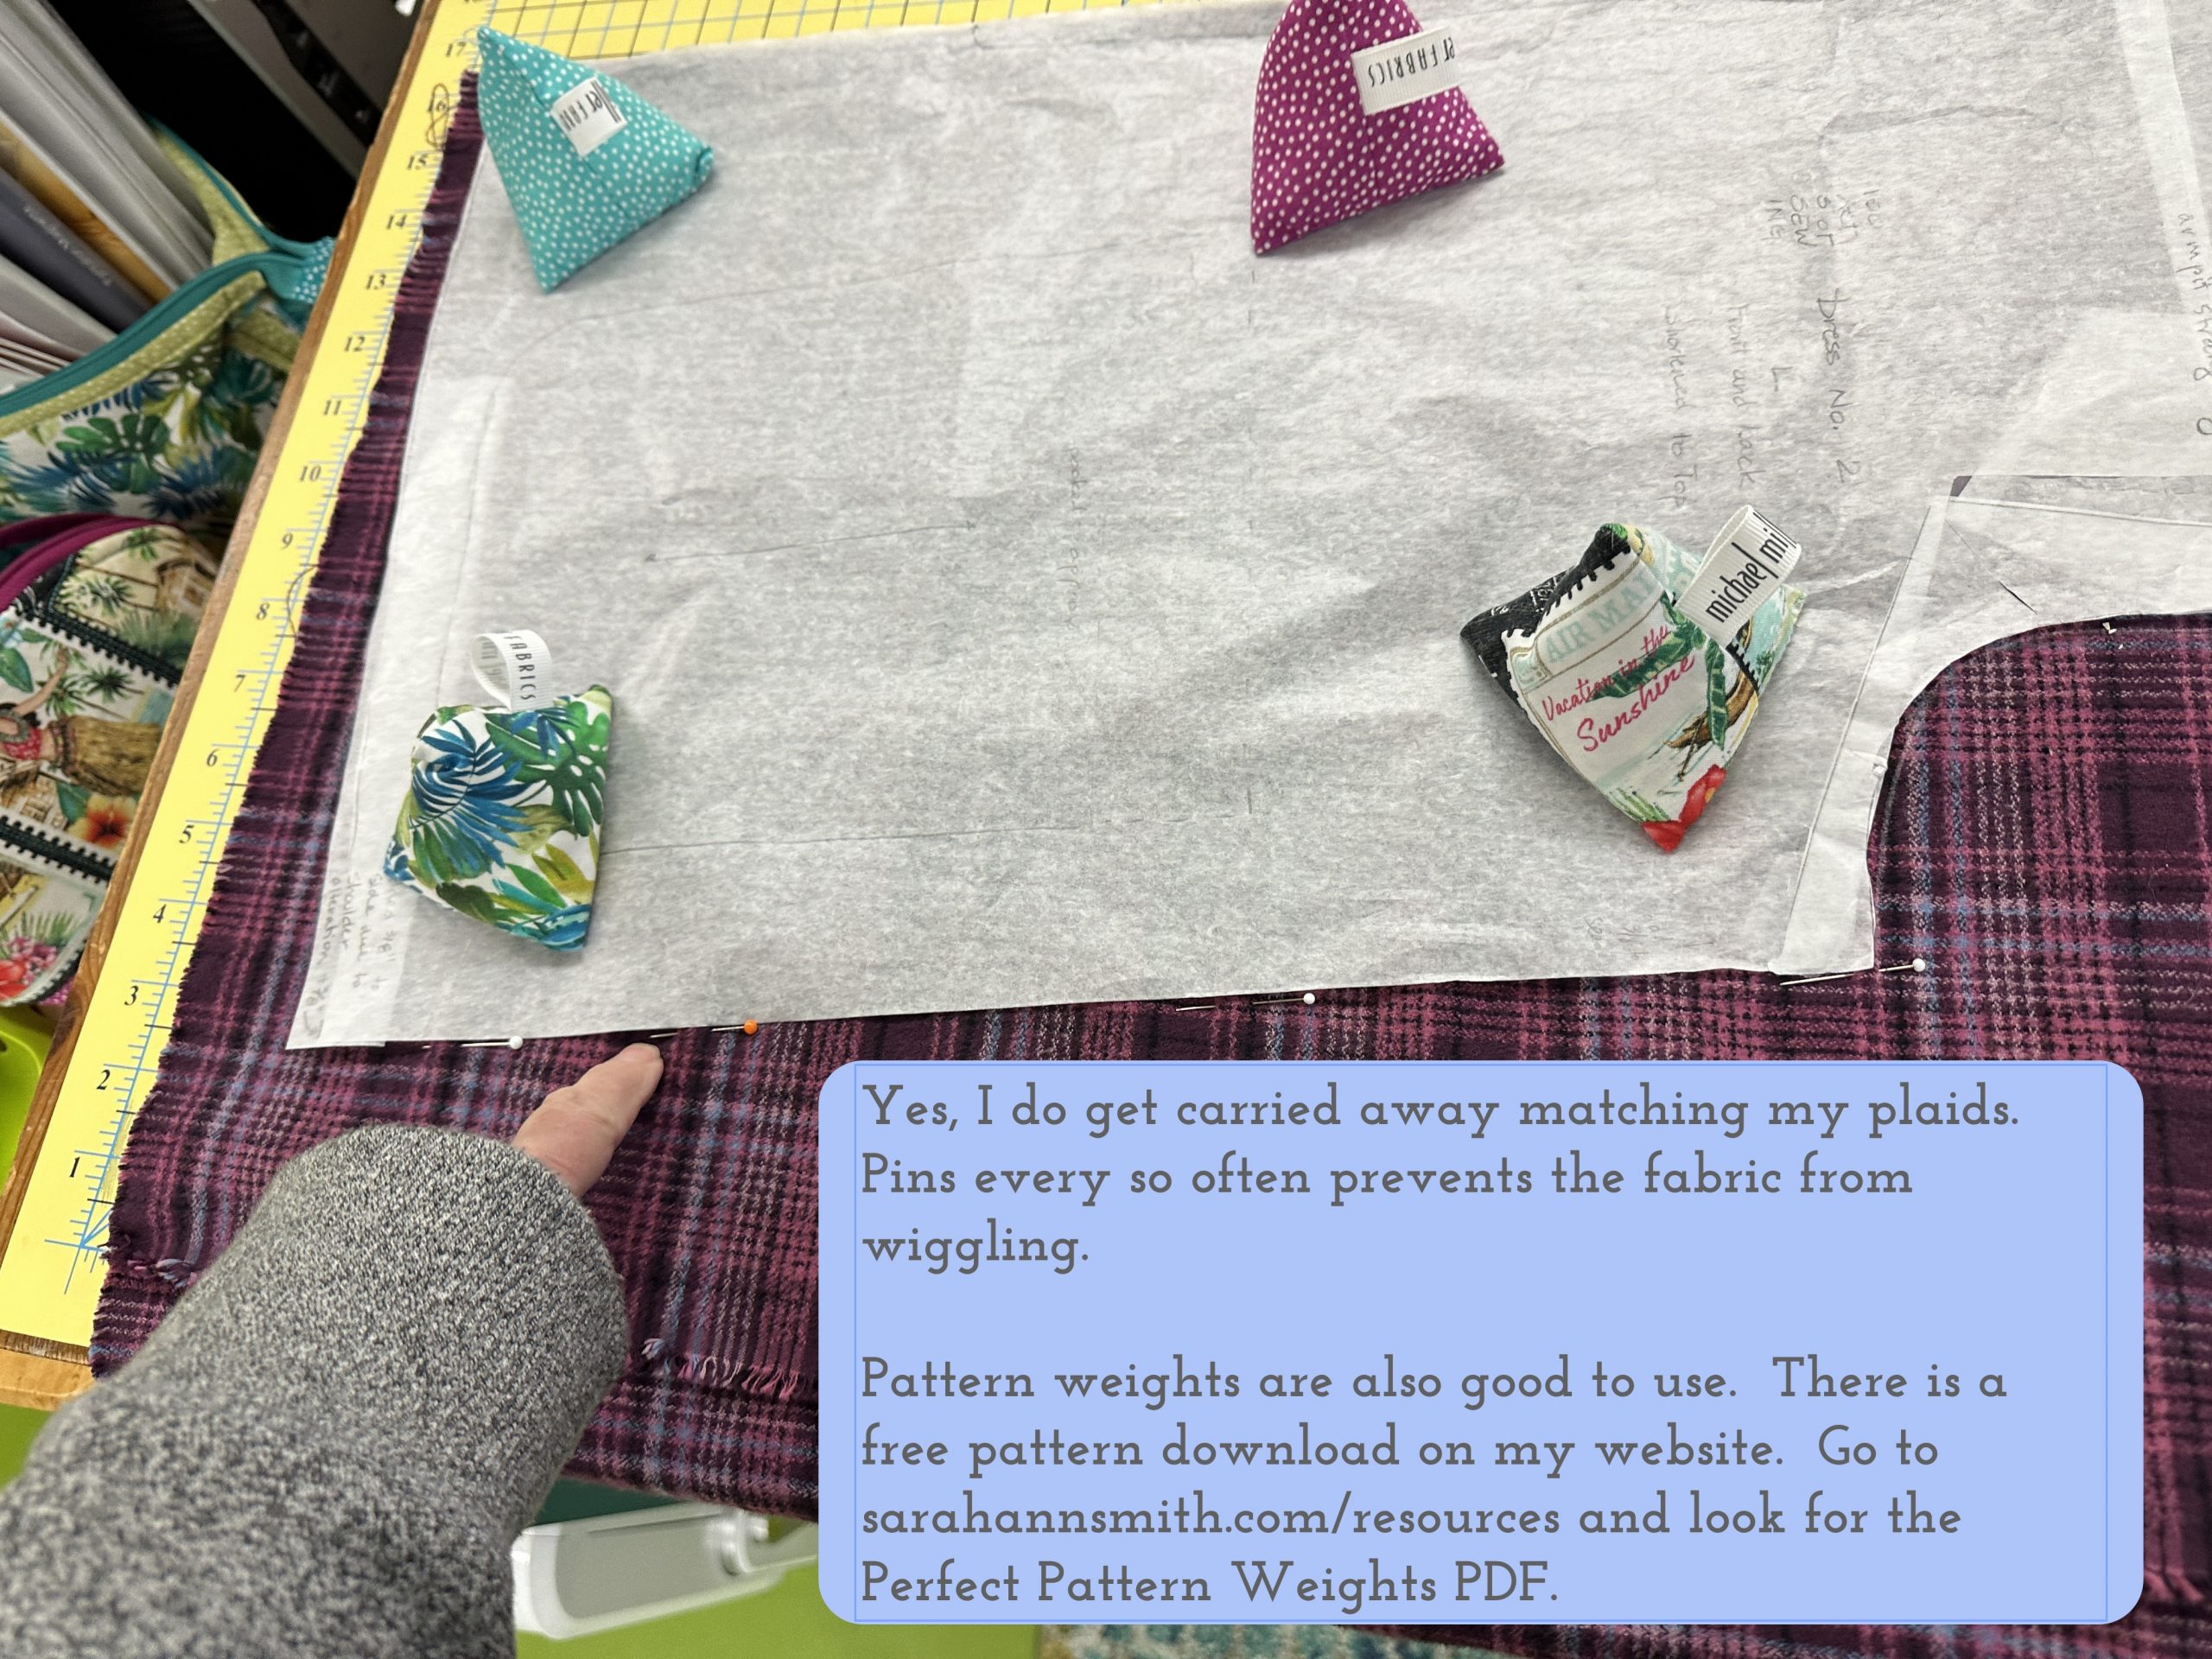
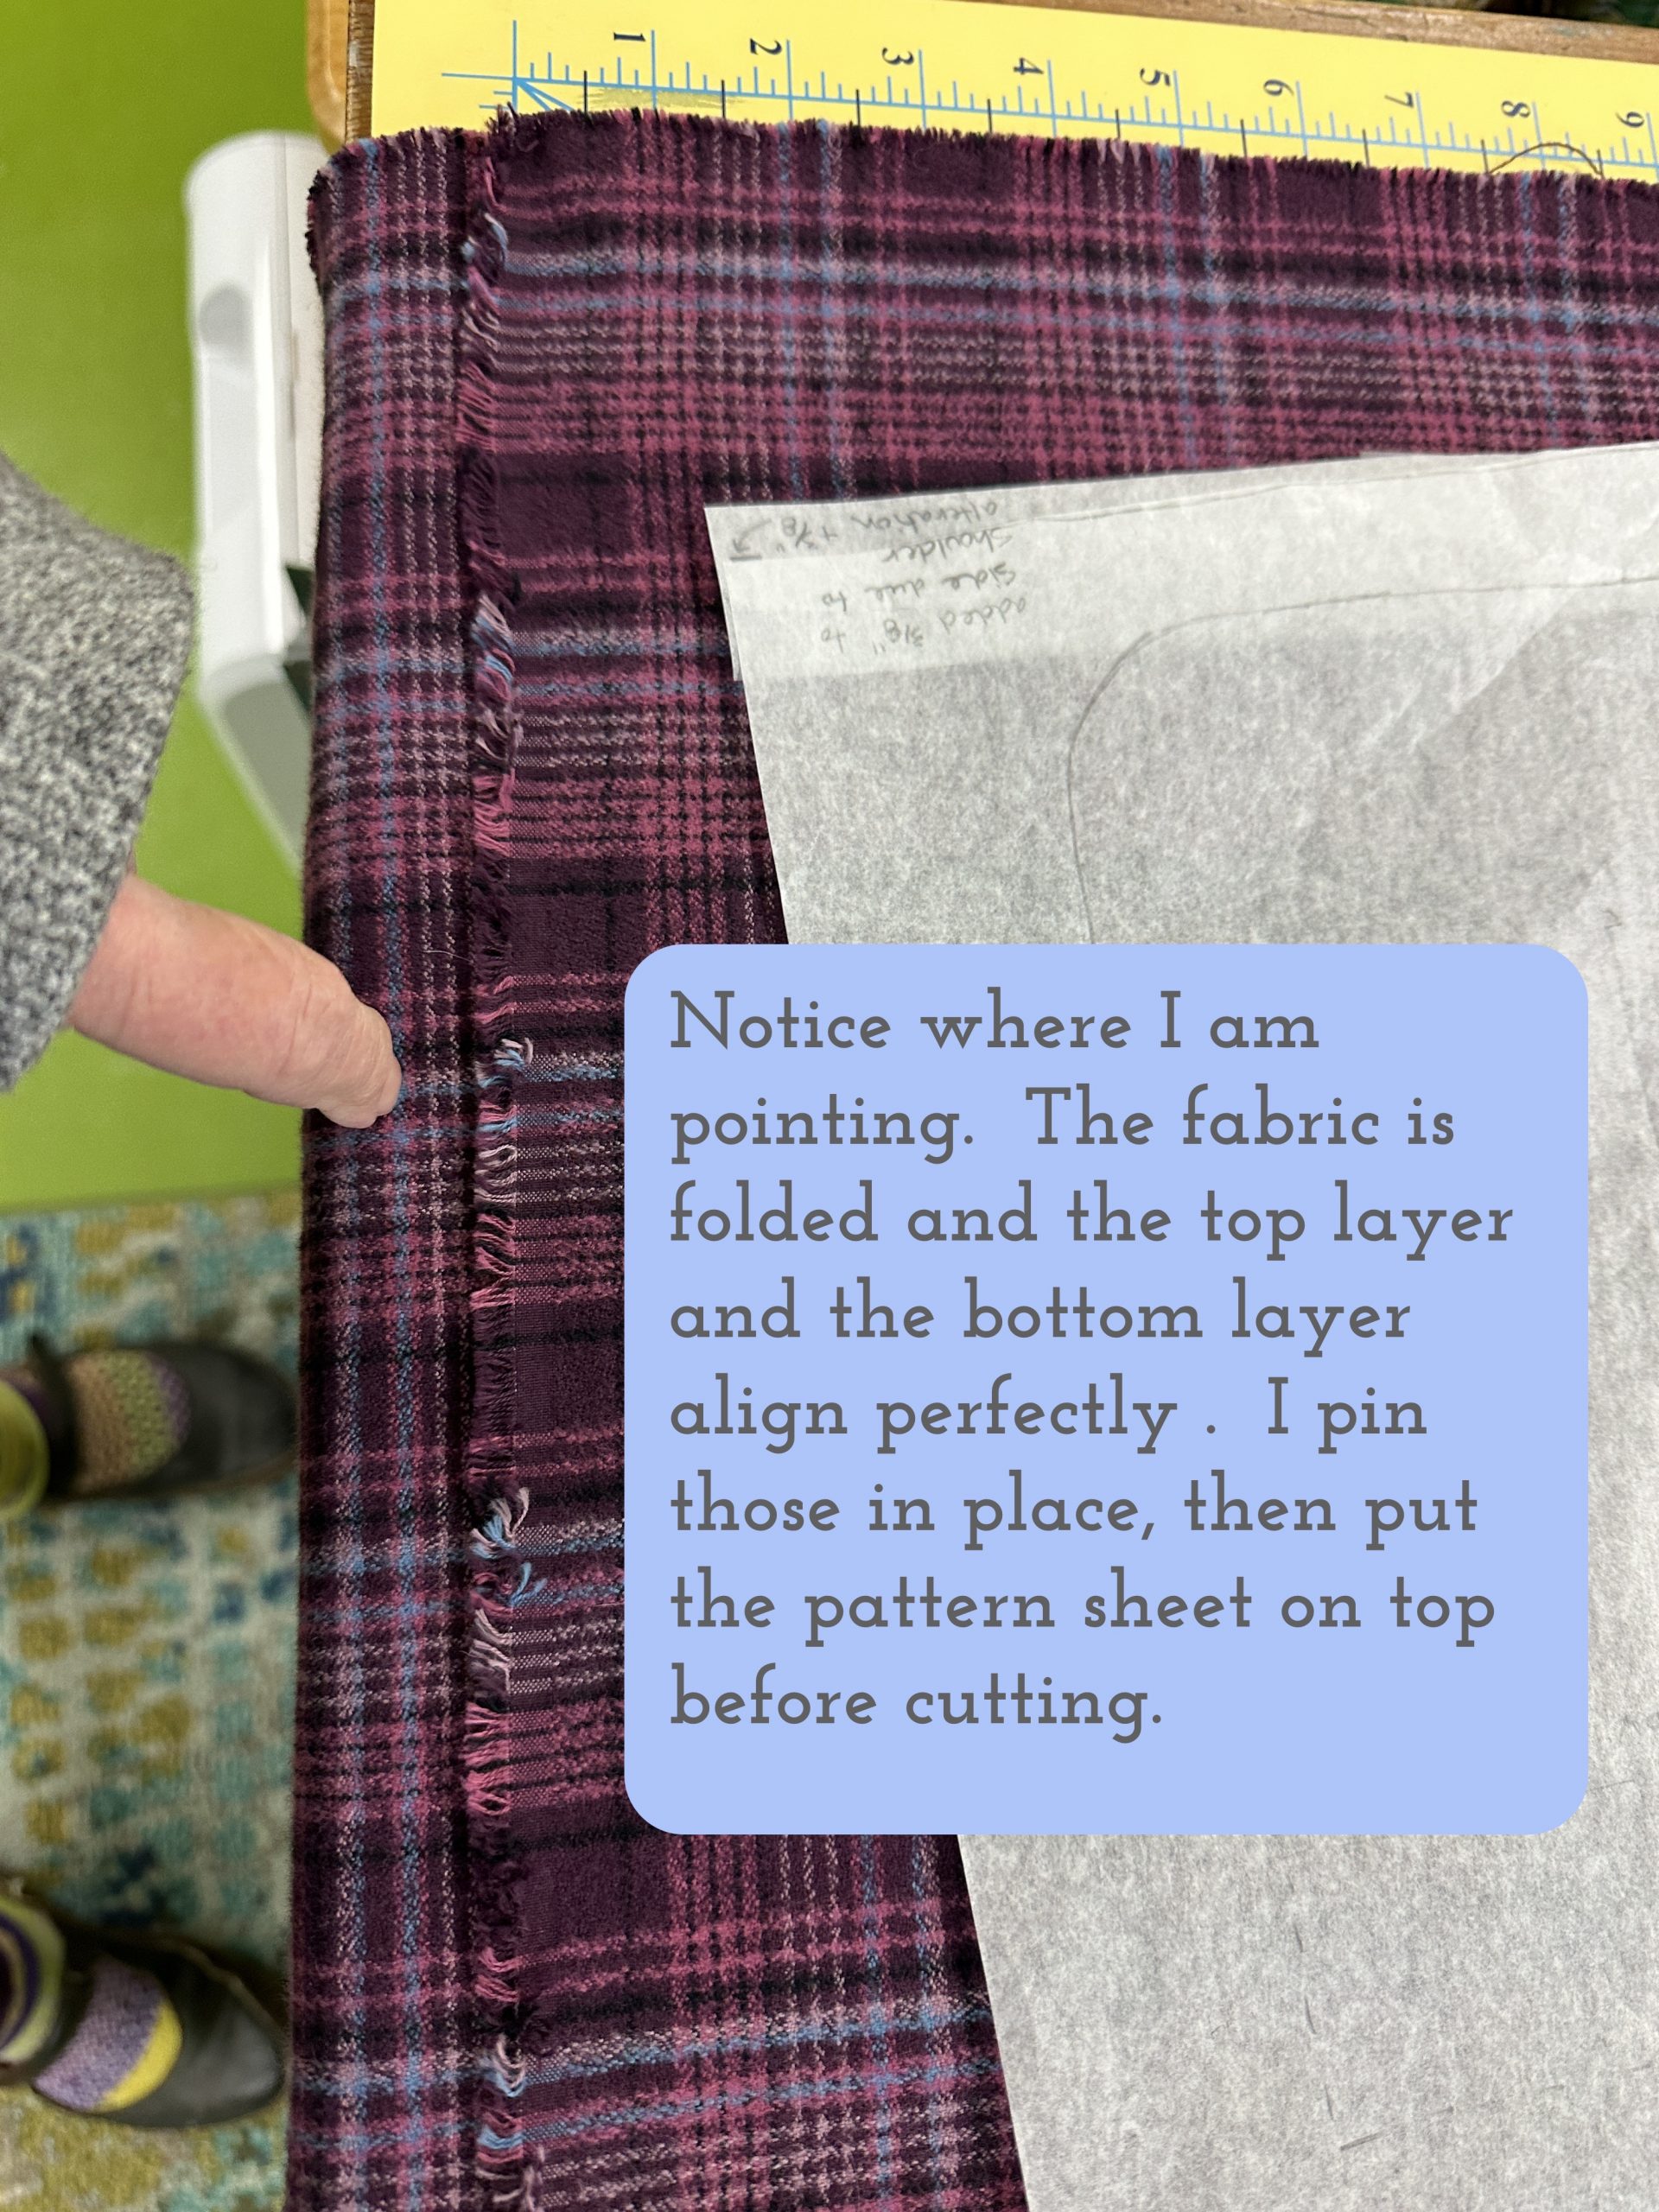
When I cut plaids, I am meticulous about pinning the fabric so that it doesn’t wibble-wobble on the cross-grain… I pin through to make sure it is precisely lined up before placing and cutting my pattern pieces.

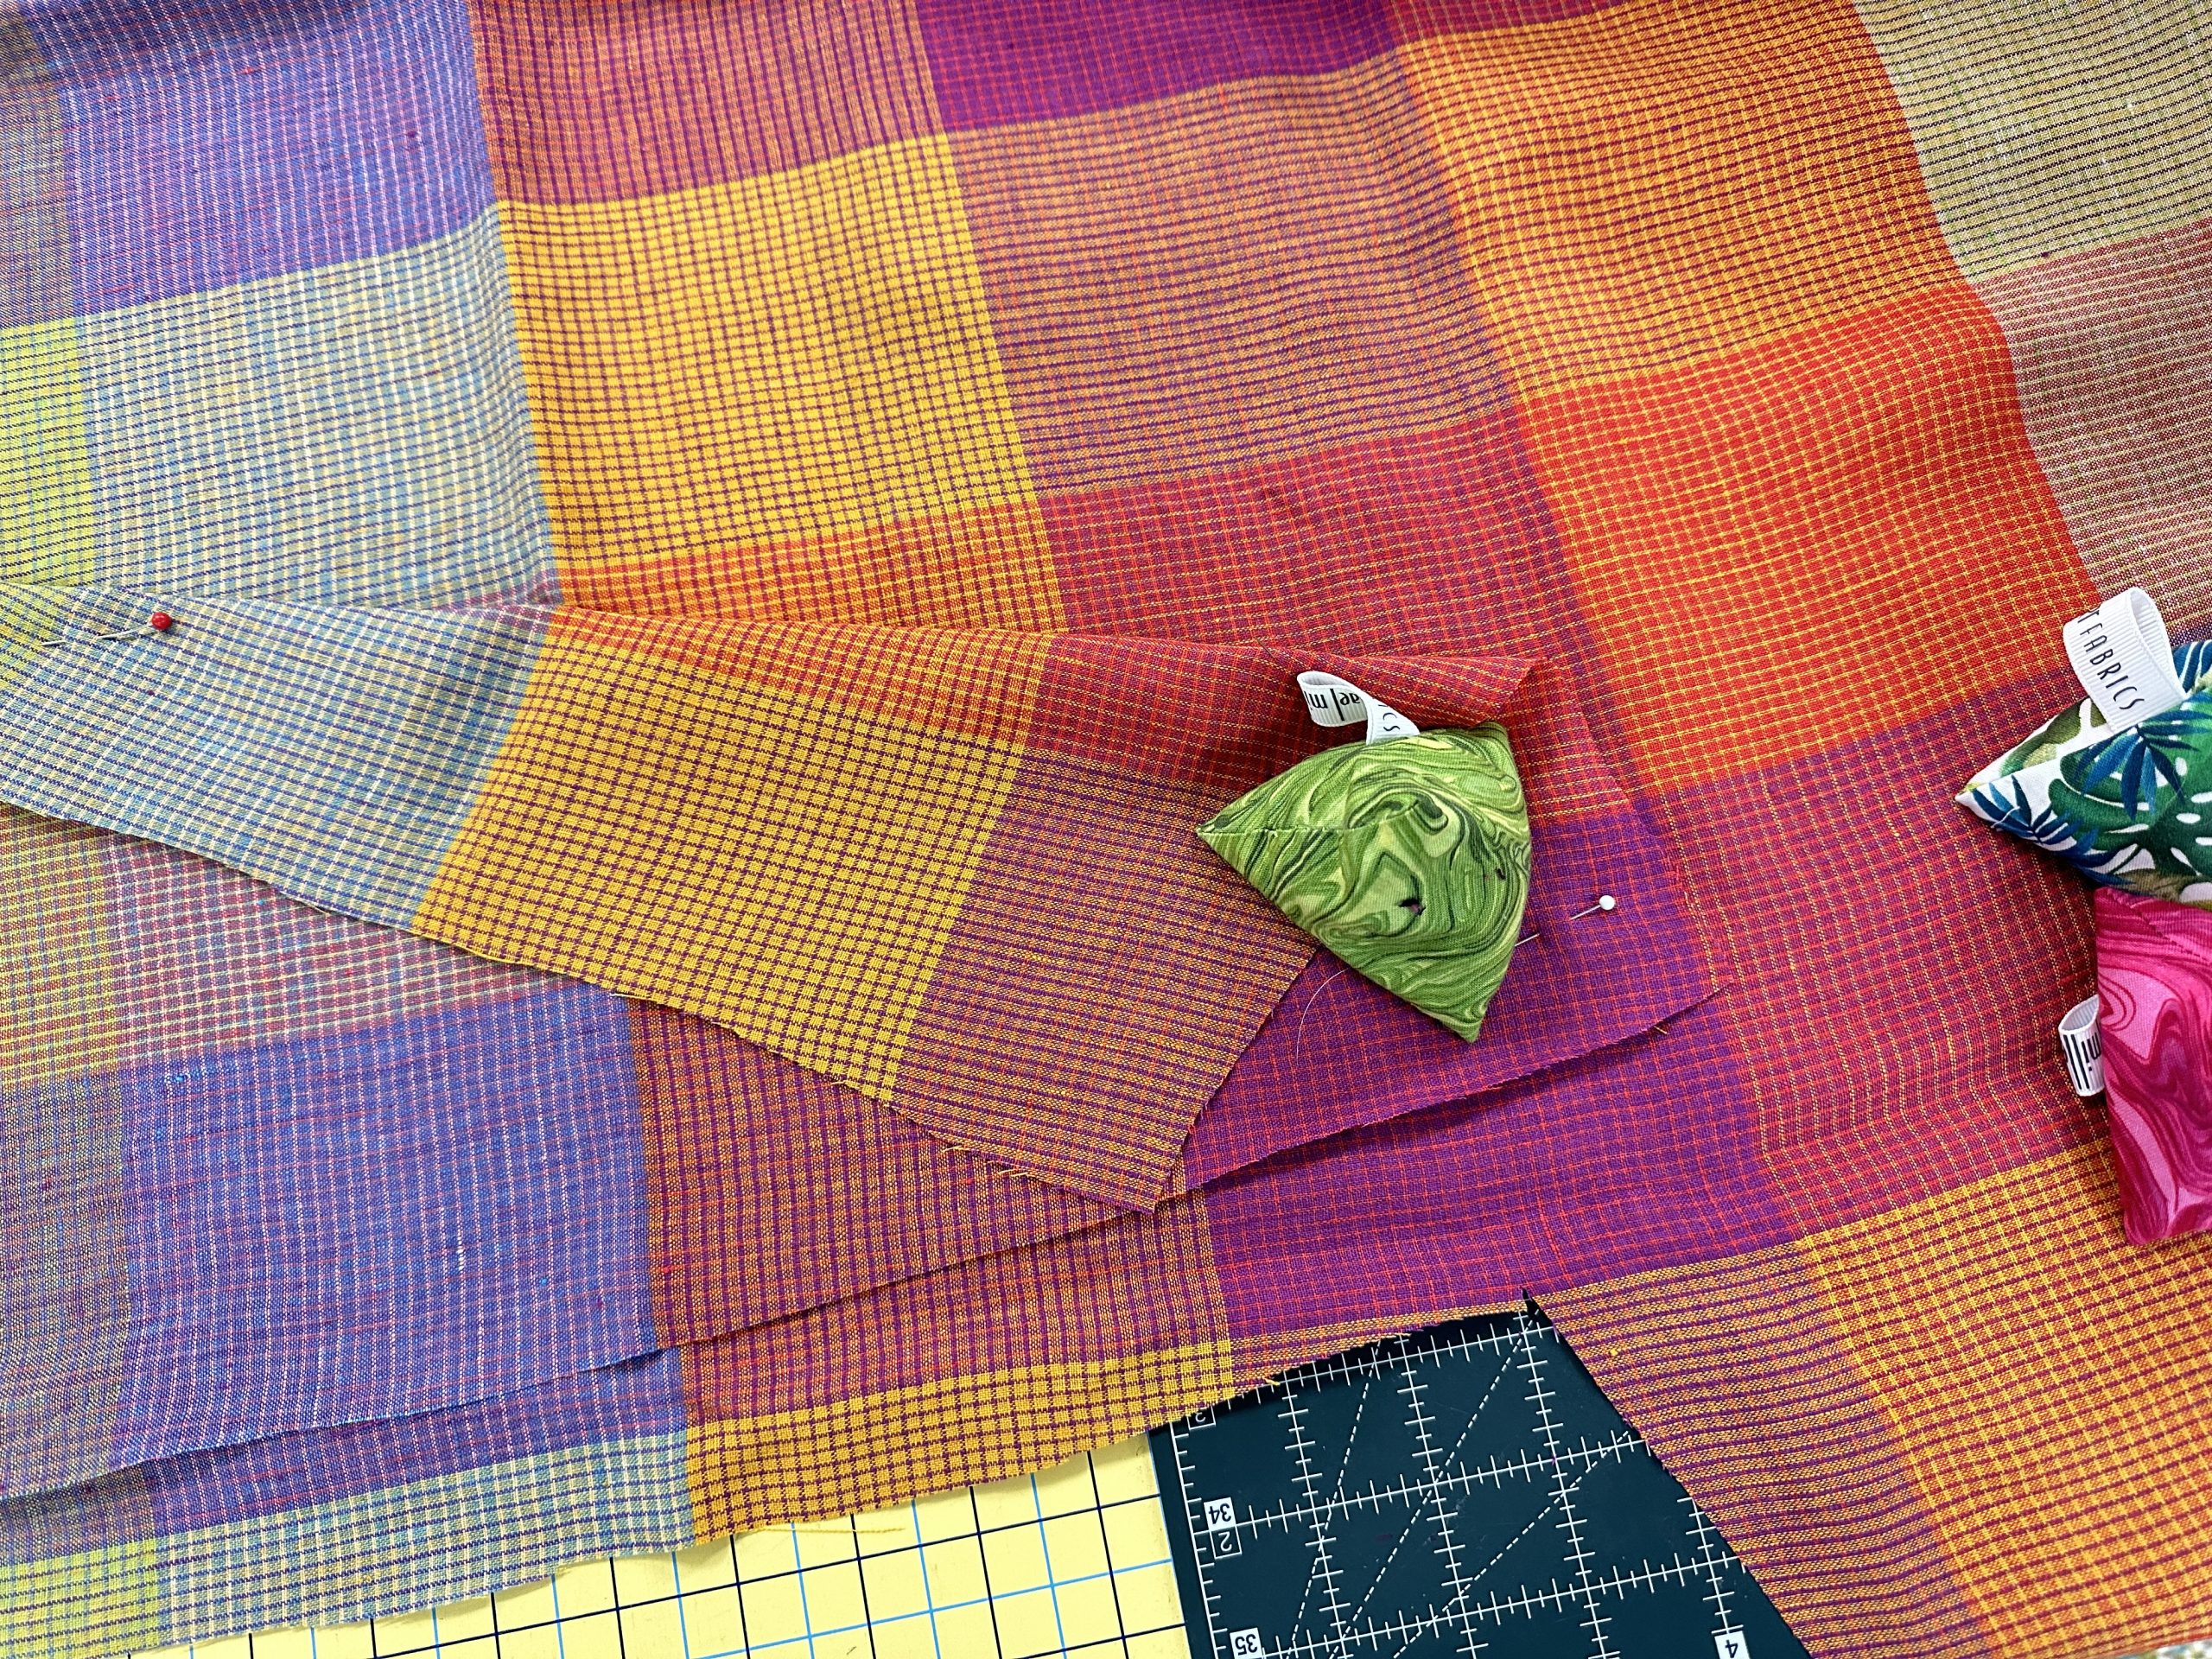
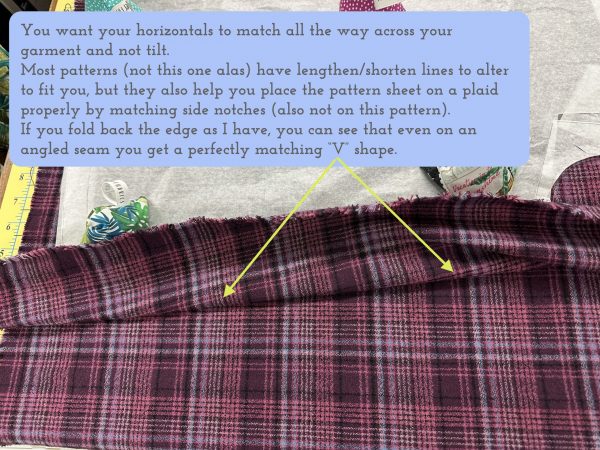
Here’s how I double check that the fabric lines up: pin it at the near edge, then fold back and see that the design matches. I like using pattern weights…this little pyramid is a small, rice-filled (I’d maybe use shotgun pellet next time) bag–my free pattern is here! You can find all sorts of goodies including this one on my Resources page (up at the header click on Resources).

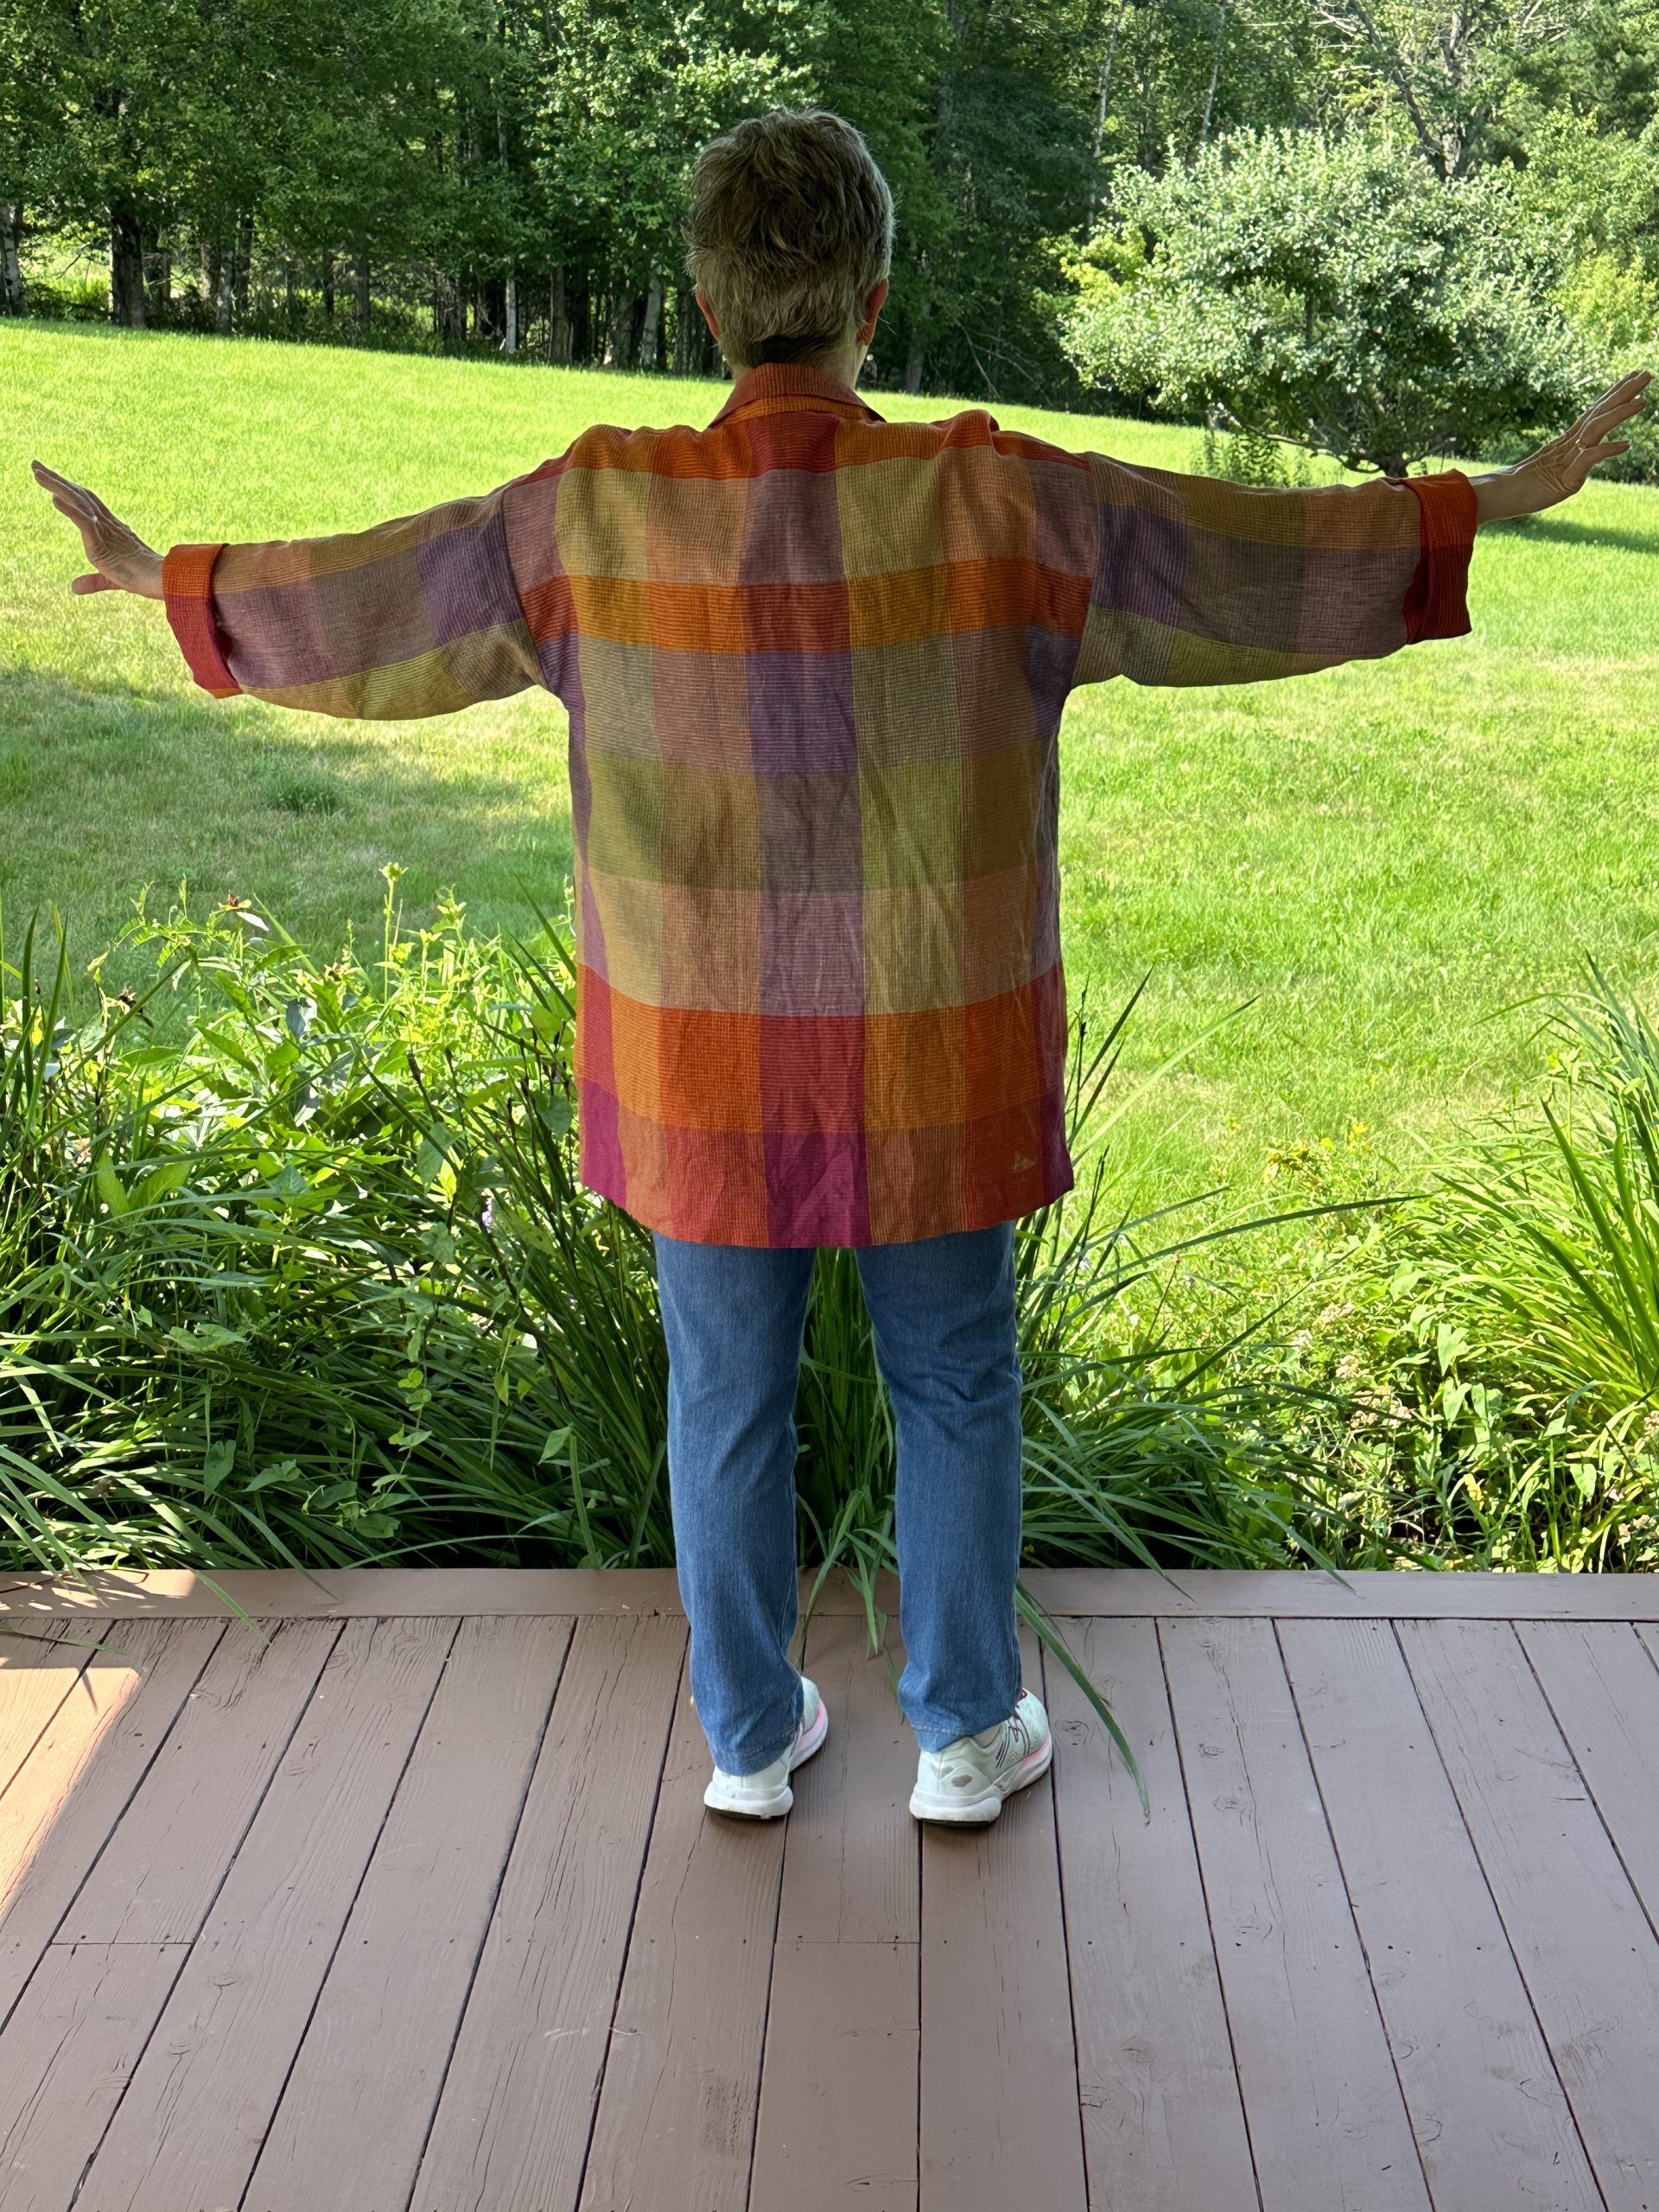
My next task, supervised by Yoda, is to determine layout for pattern matching. You all know I LOVE a perfectly matched design! I had already cut the back and the fronts to match horizontally; the folded back is placed on the fabric above to determine where to cut the yoke so the center darker red vertical aligns perfectly.  I then fit the smaller bits in the leftover spaces.  Luckily, I was able to get the collar pieces to align perfectly, too.

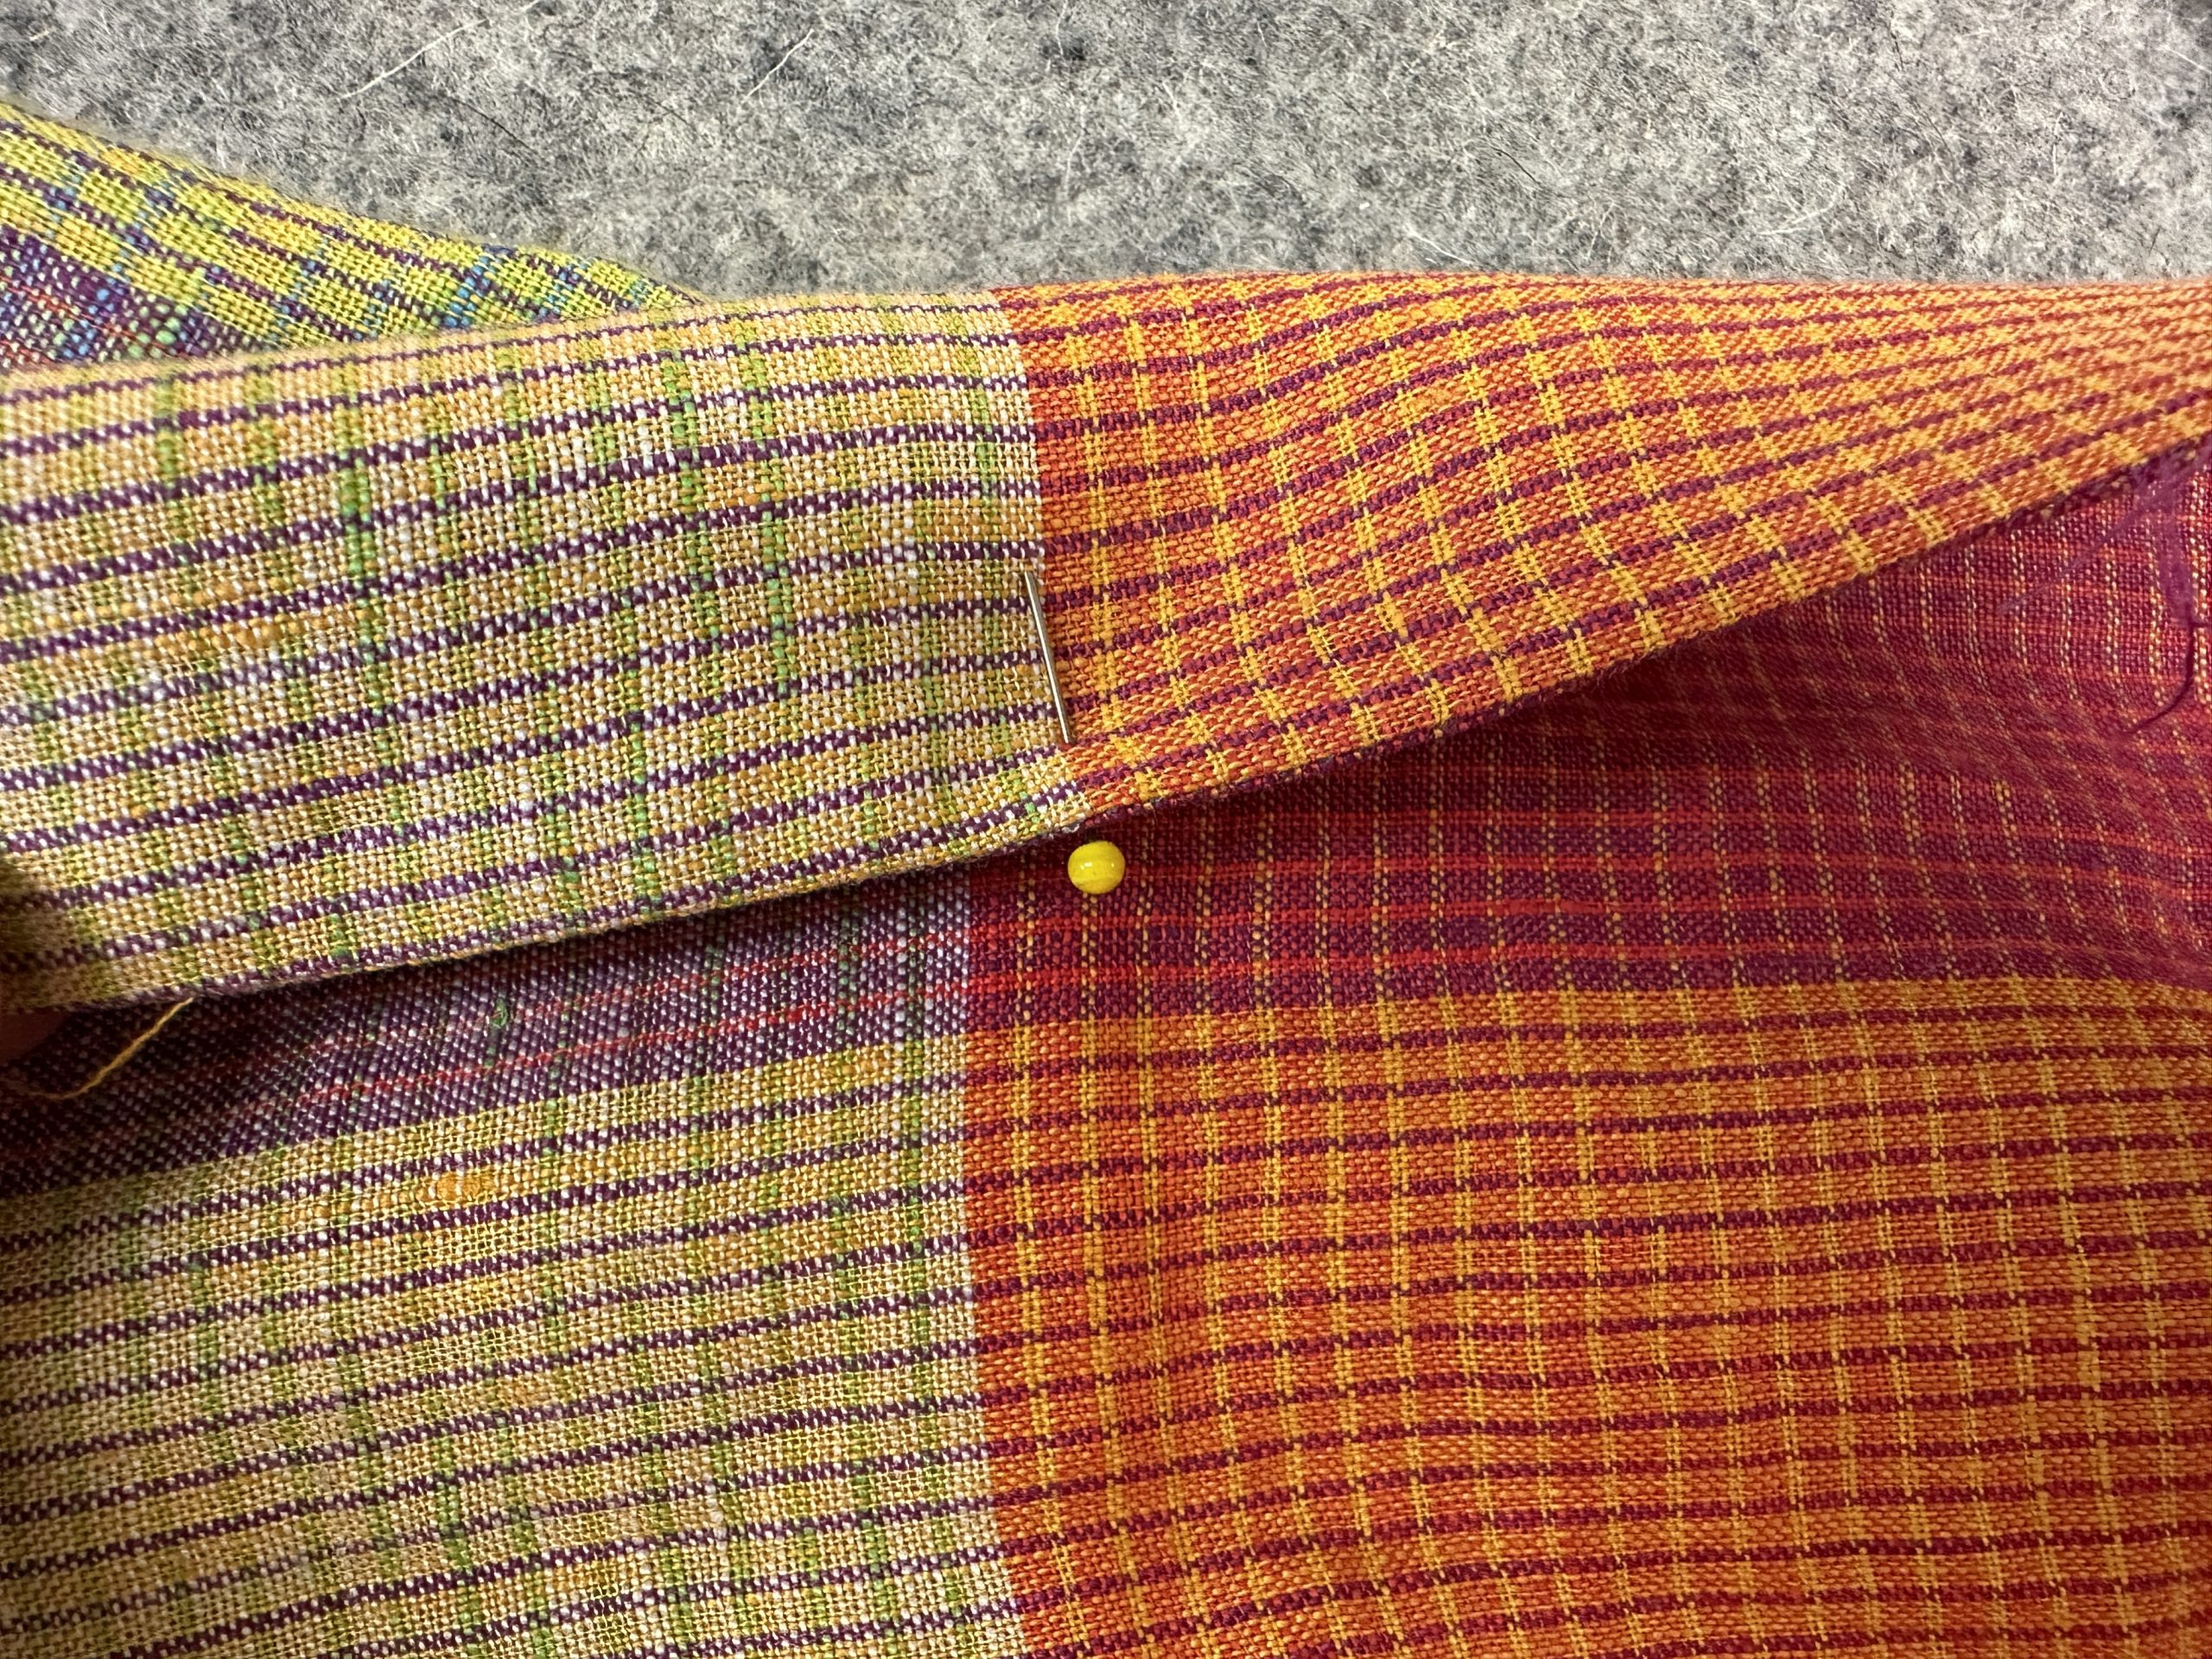
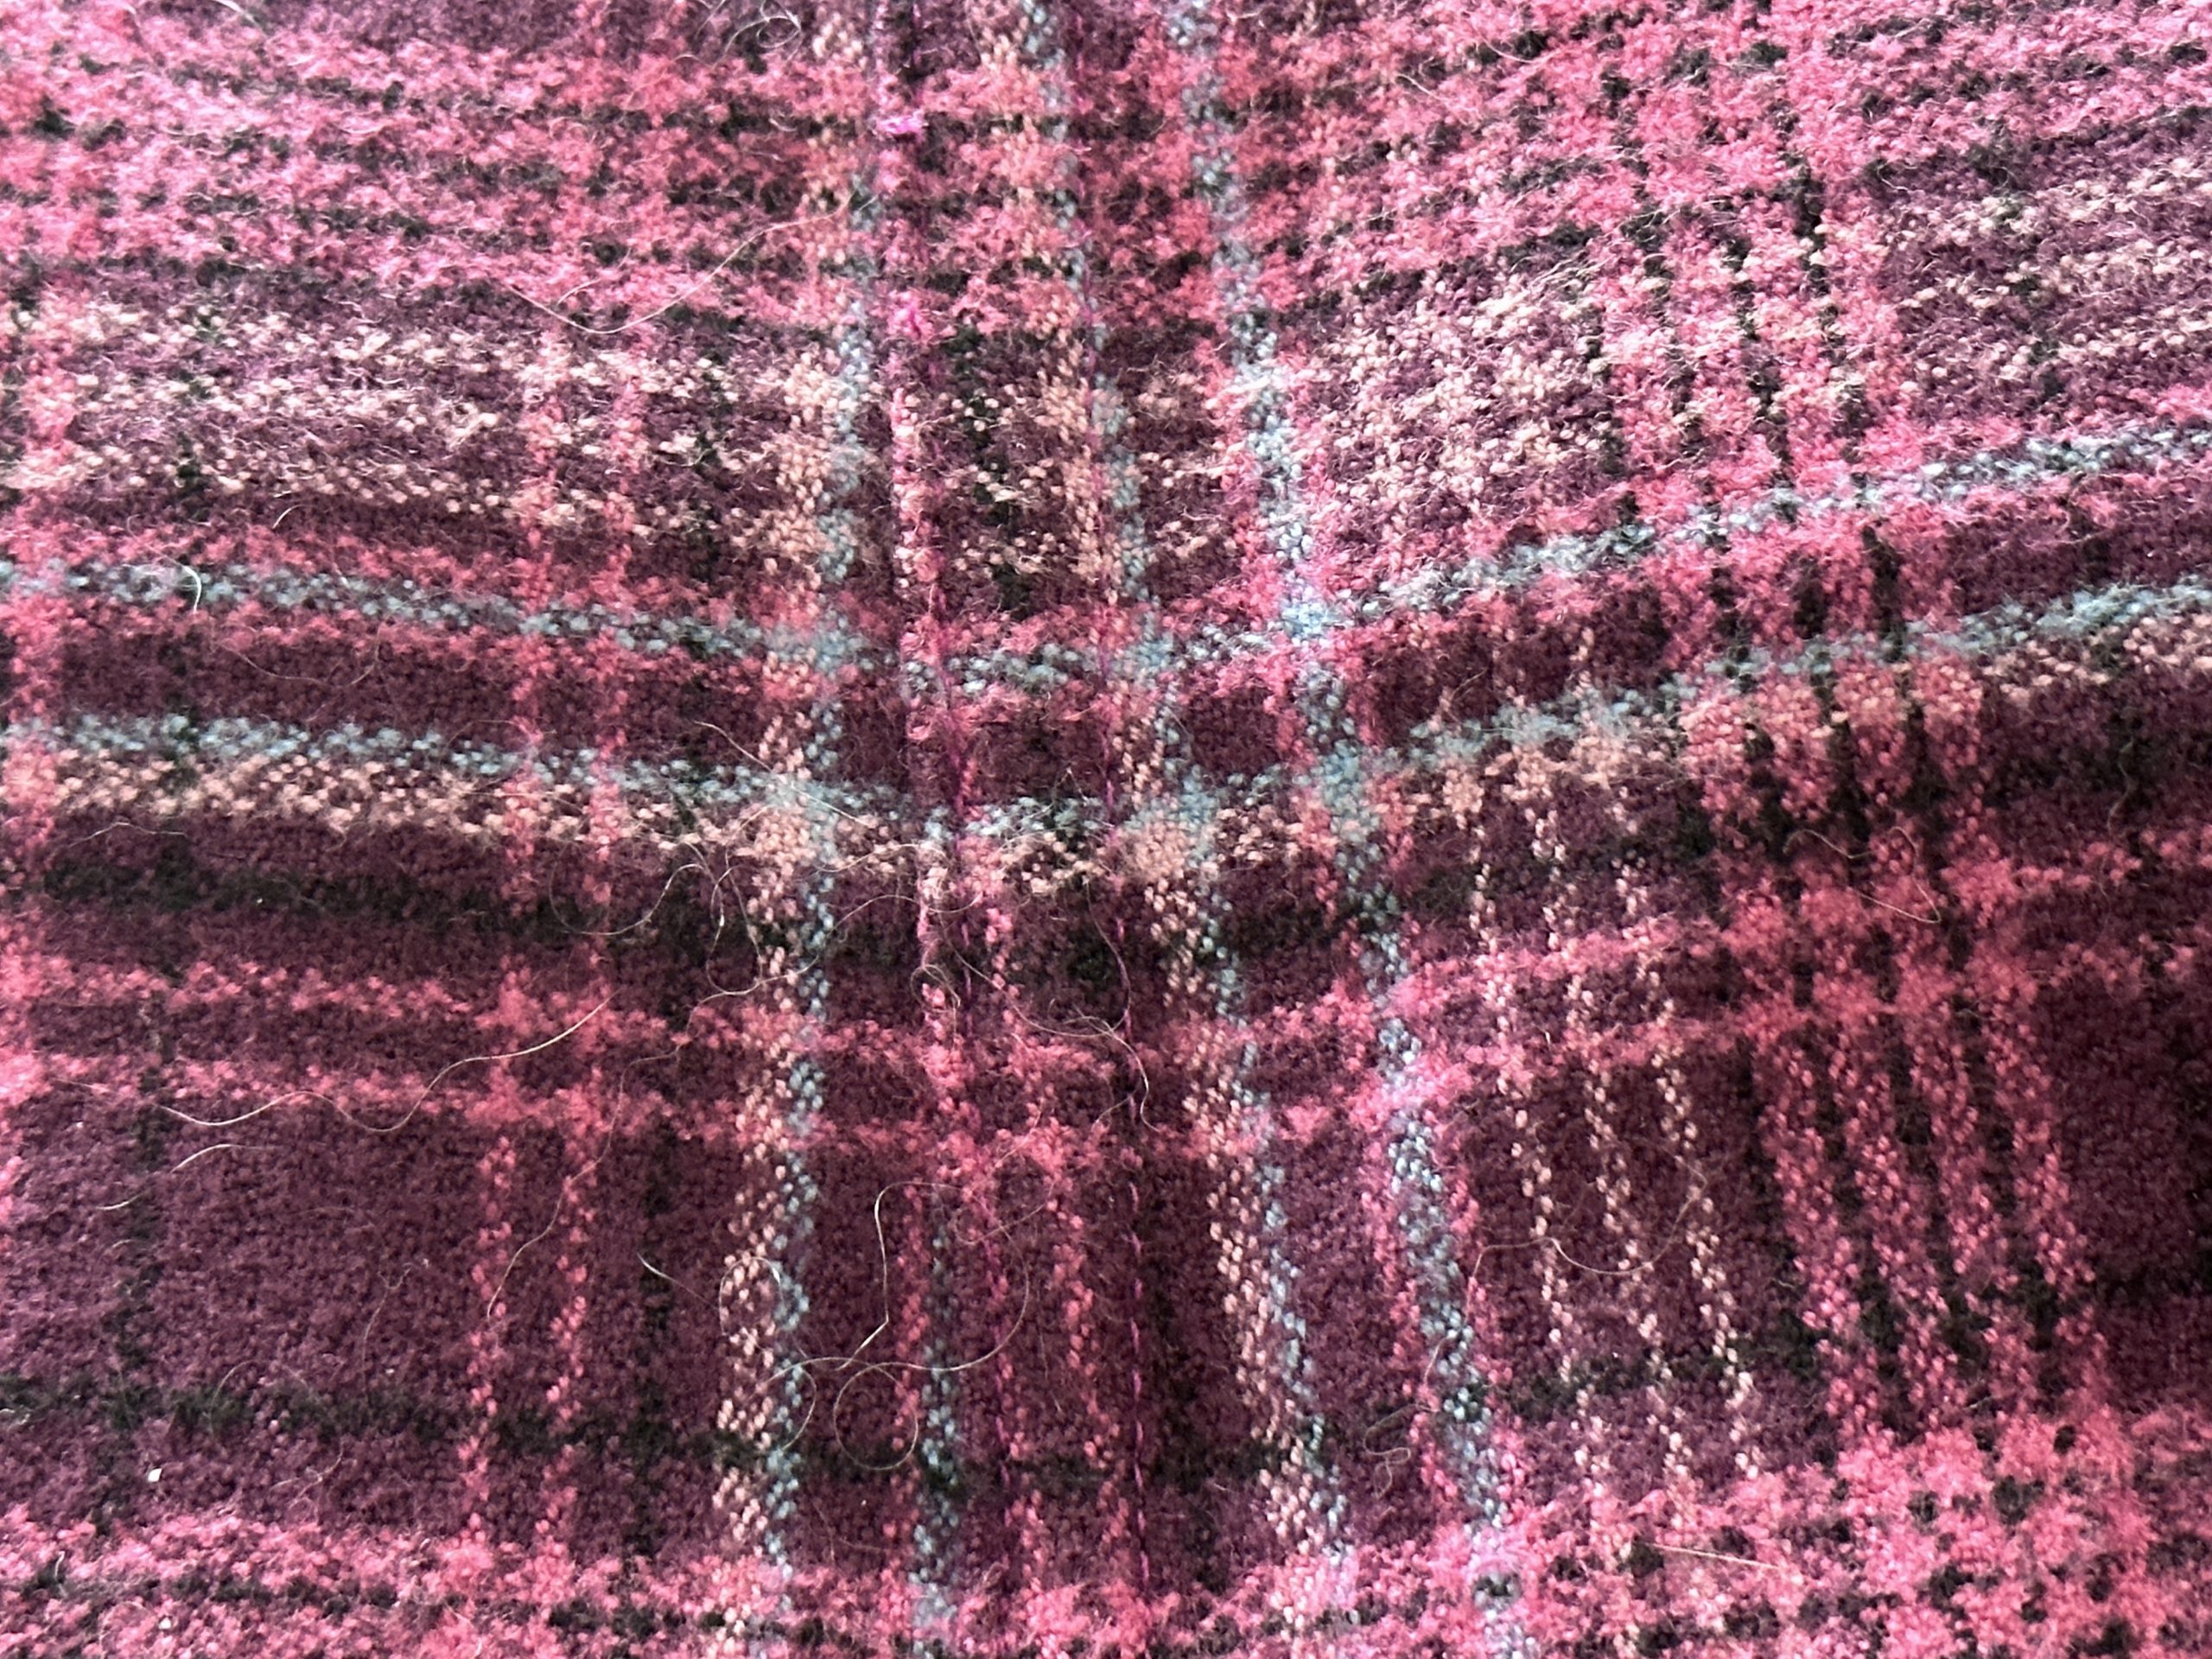
This is how I slide the pins in on the edge of a line or motif.  I check both sides to make sure it is even.  In this photo, I am folding over the collar to prepare it to sew down the second side.

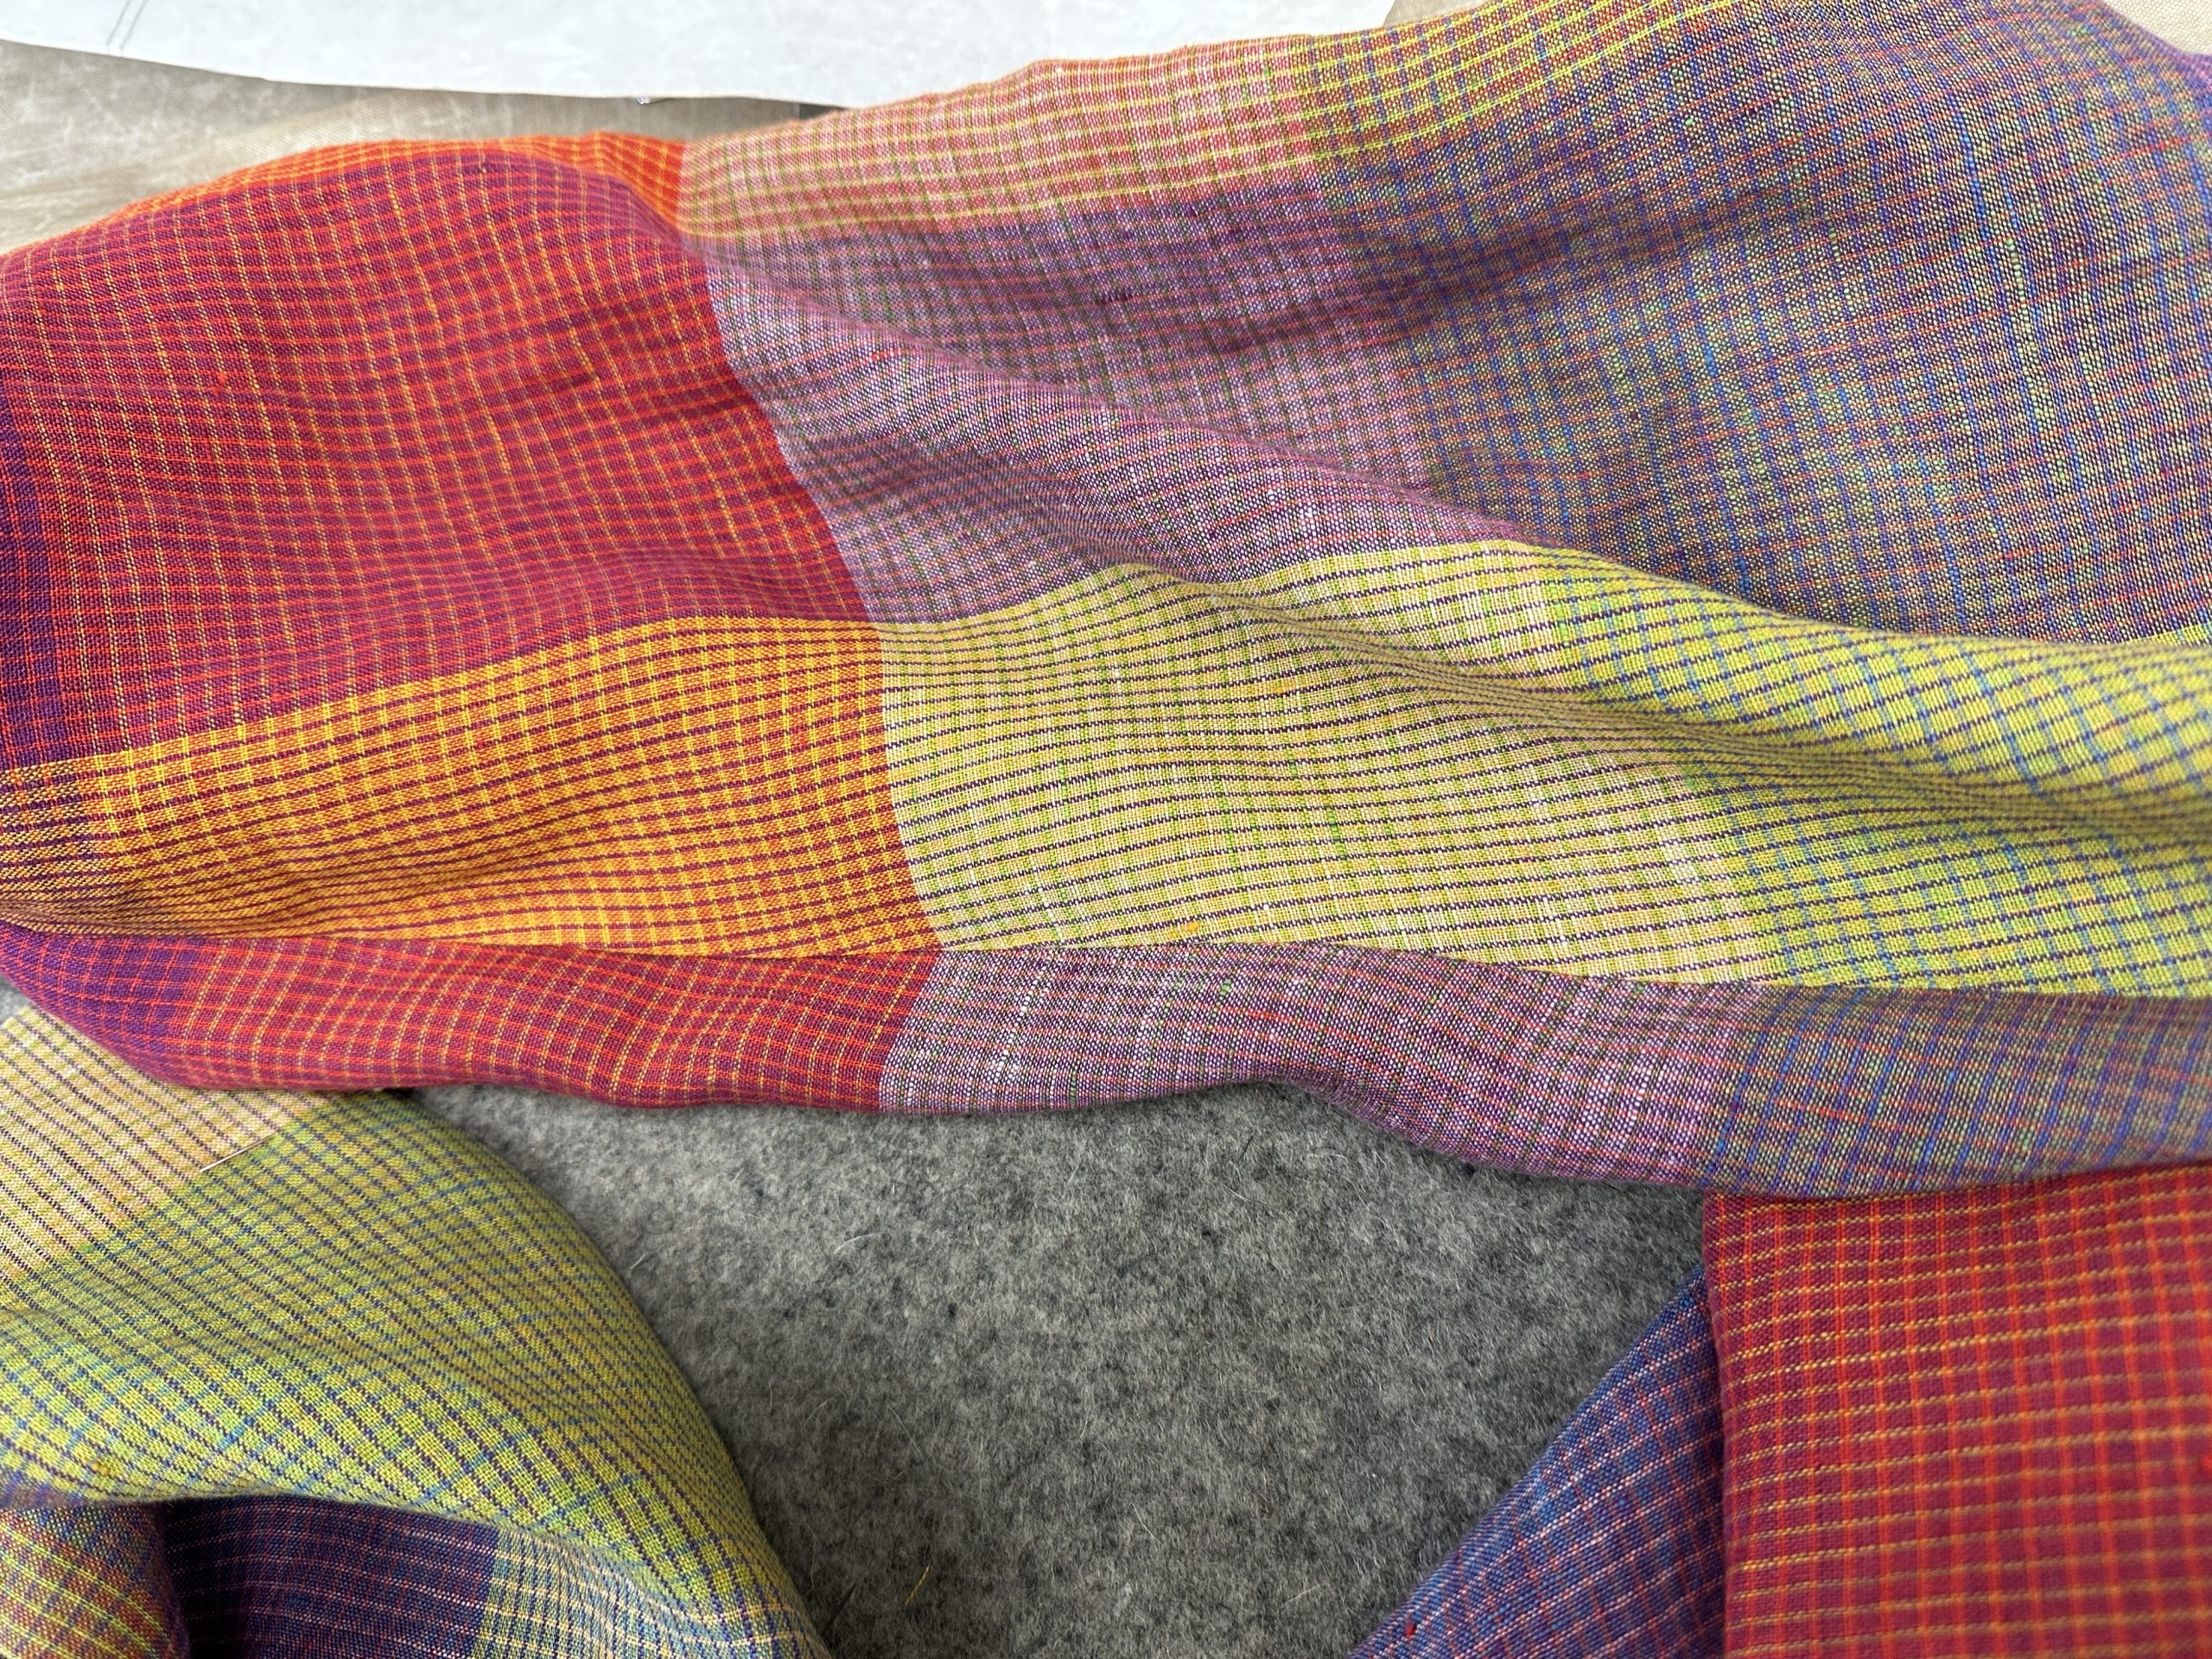
This sort of perfect matching makes me giddy–I LOVE watching this happen!

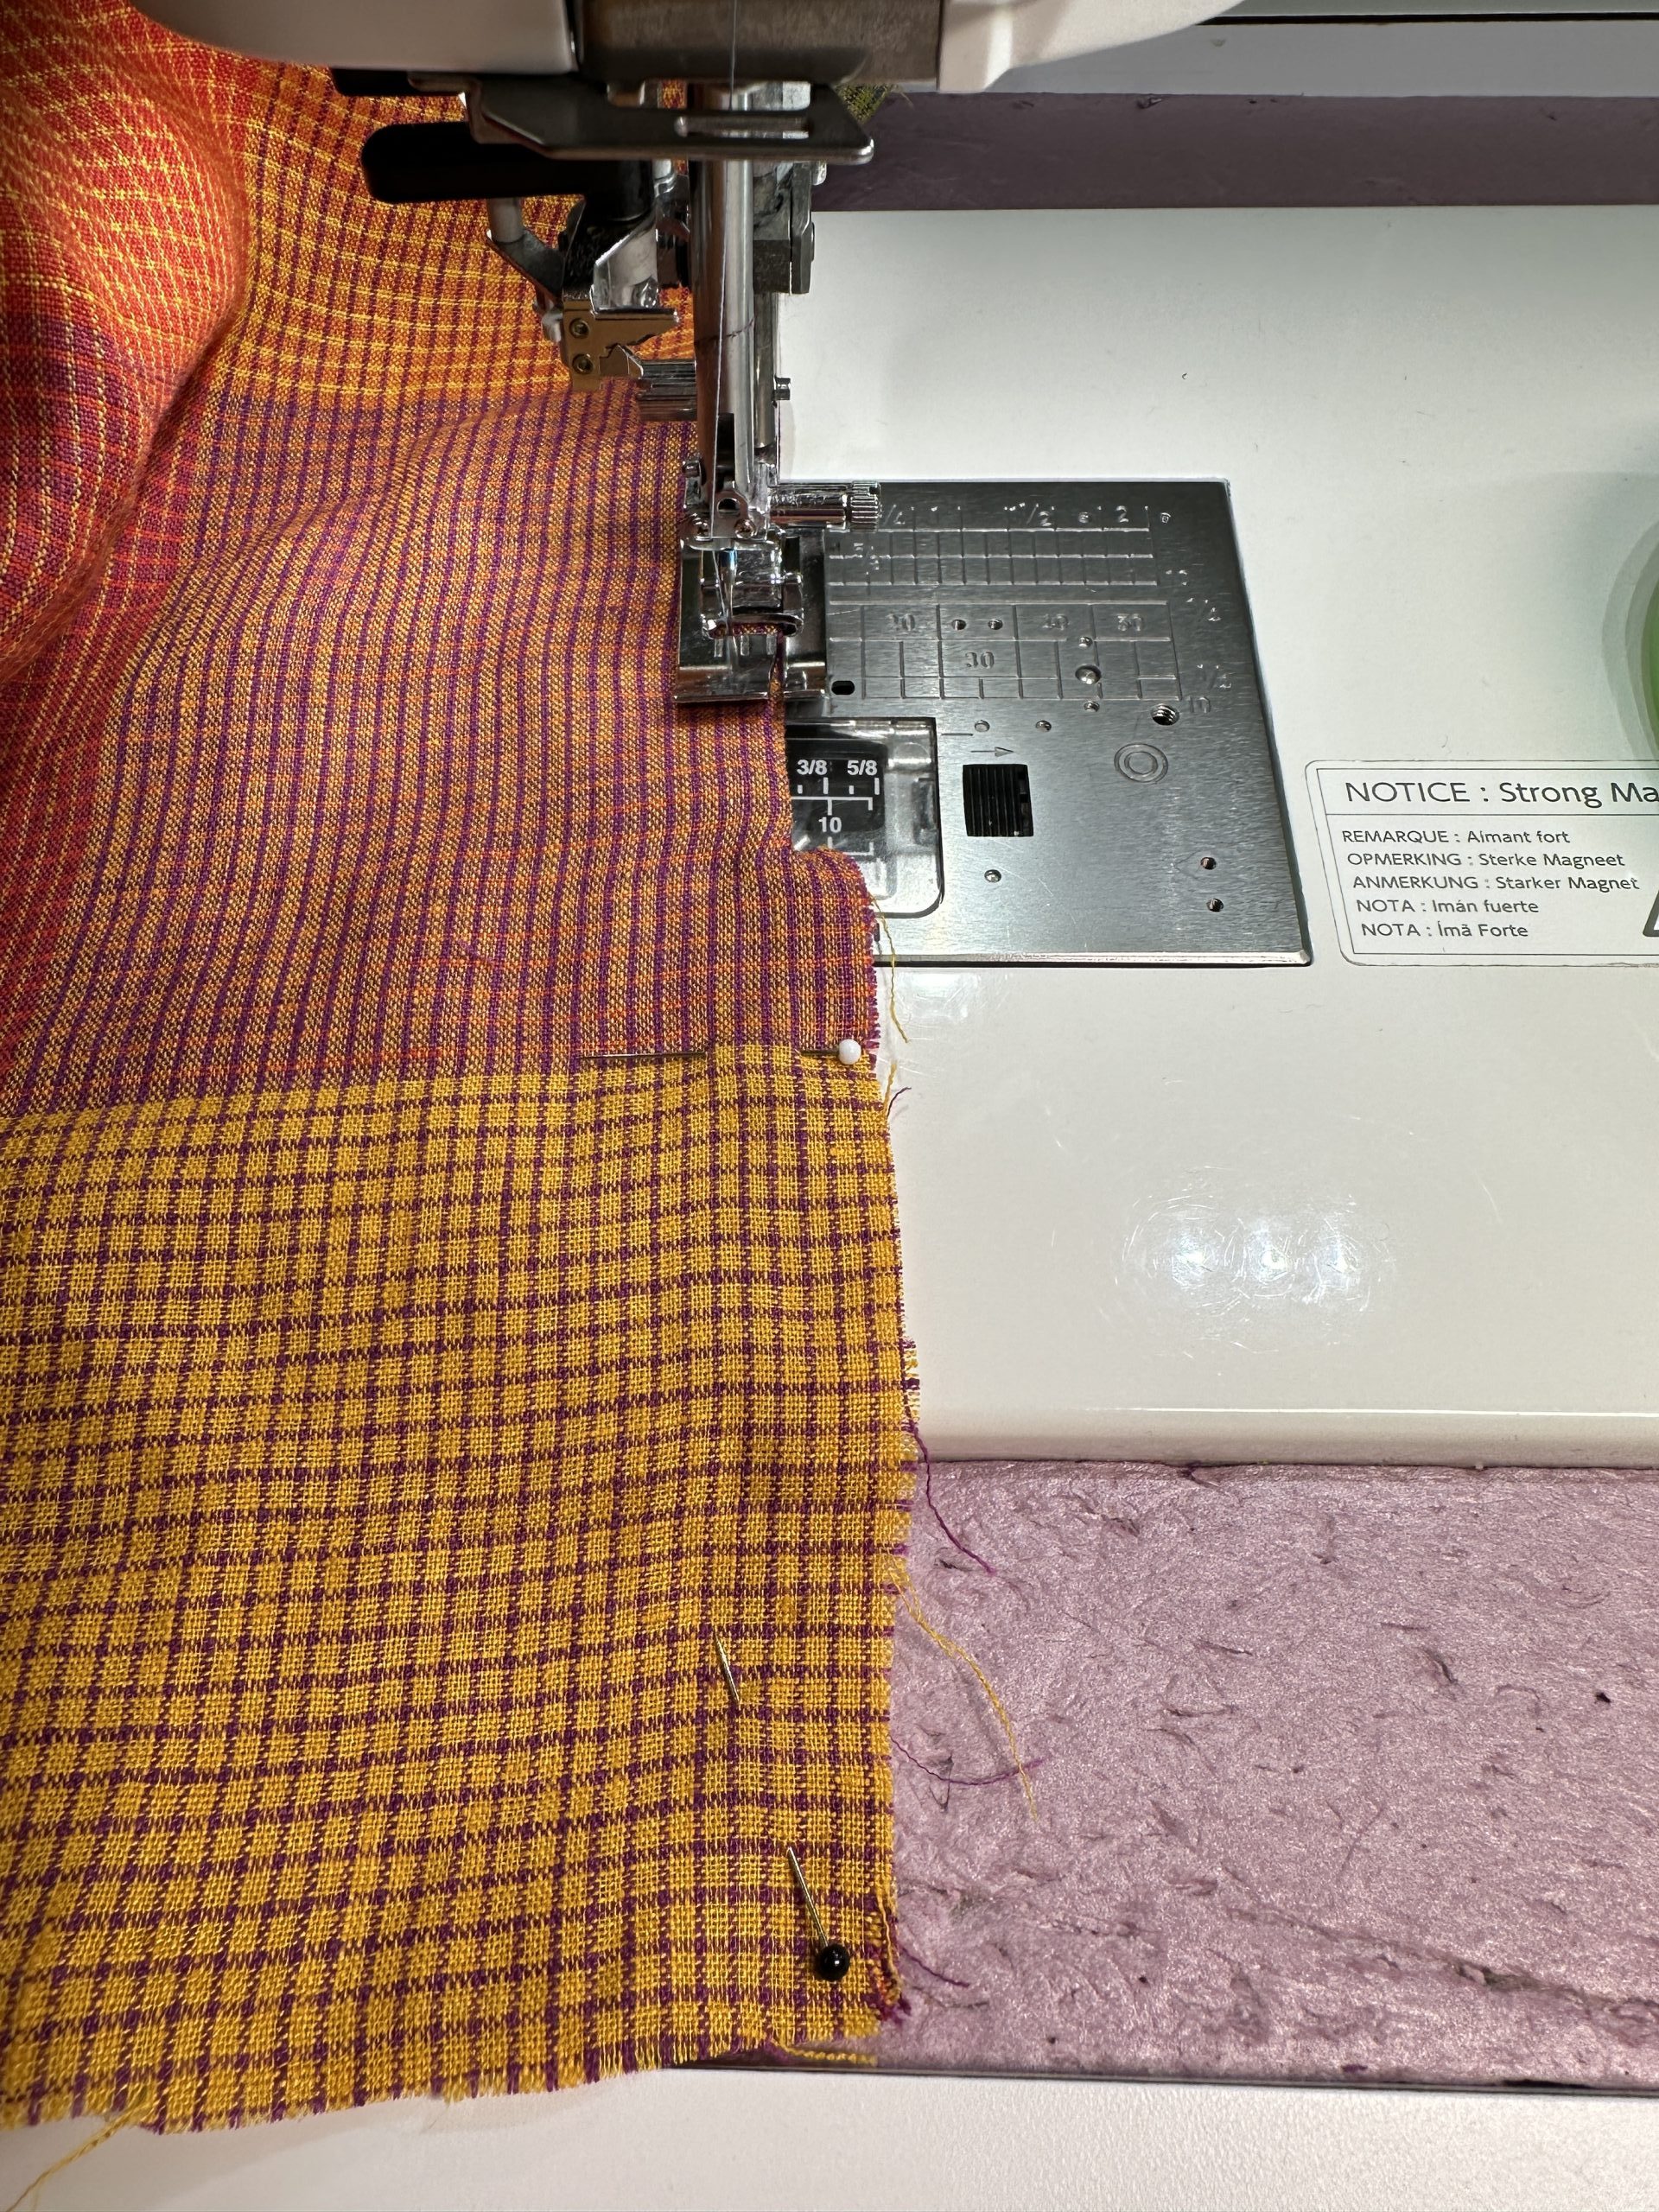
My favorite new presser foot from Janome is the bi-level foot. There is just a bit more room under the left side than the right side of the foot. So far this is giving me the best combination alignment and visibility for edge-stitching.

Here’s the foot in action–the right sides rides OFF the edge; the left side rides ON the fabric, then you set the stitching distance from the edge by adjusting your needle position. I understand that at least some other brands have similar feet. Also notice those pins holding the plaid in alignment.

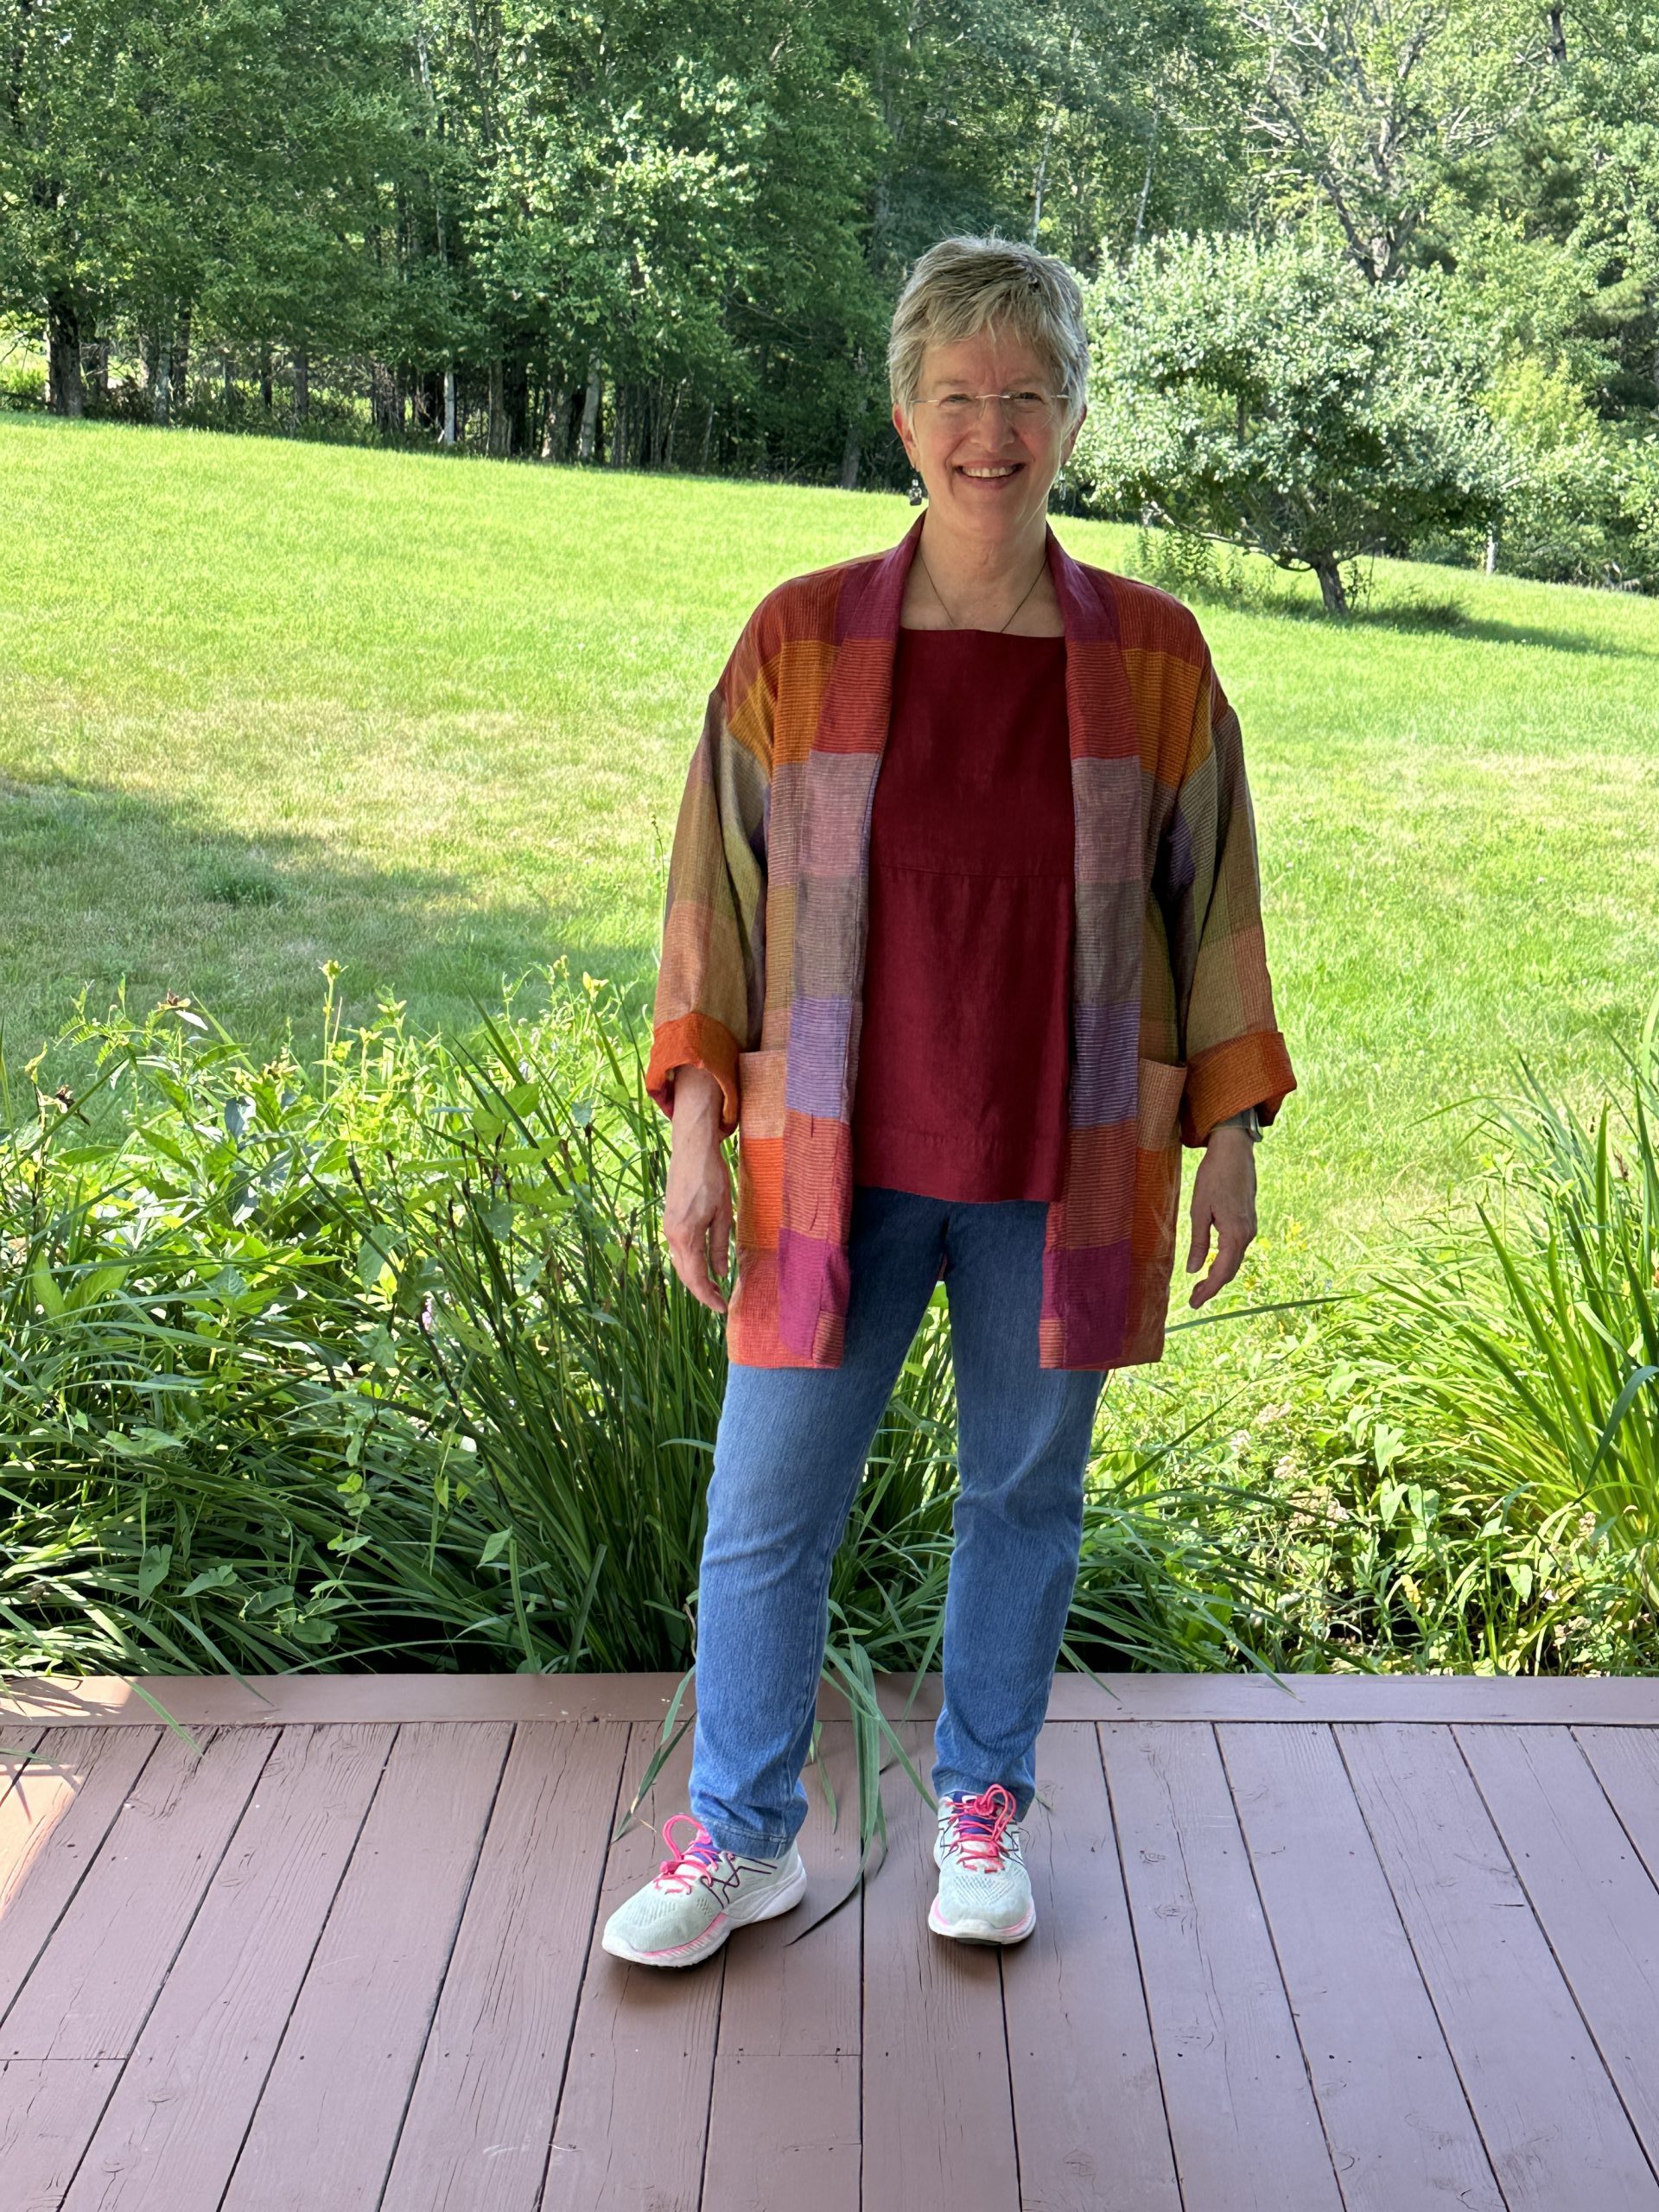
And here are a few more photos of the finished garment on one of this summer’s rare lovely days:

I have several more clothes projects in the pile, so I’ll be back with more before winter hits!

Plaid Top Tutorial: Lesson 6-Lapped and Flat-Felled Seams

Tuesday, March 7th, 2023

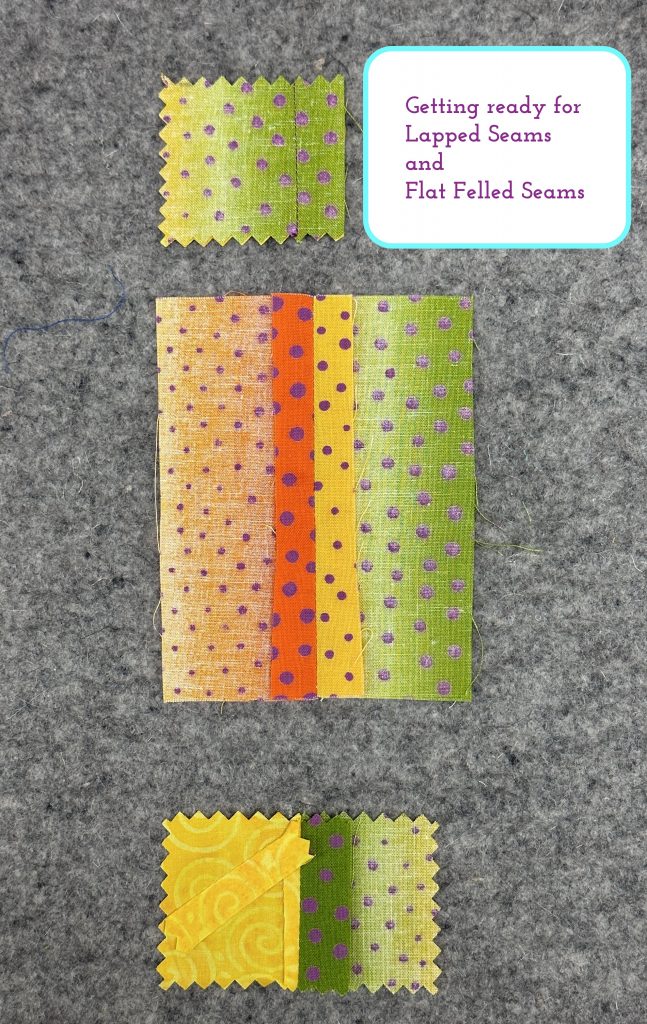
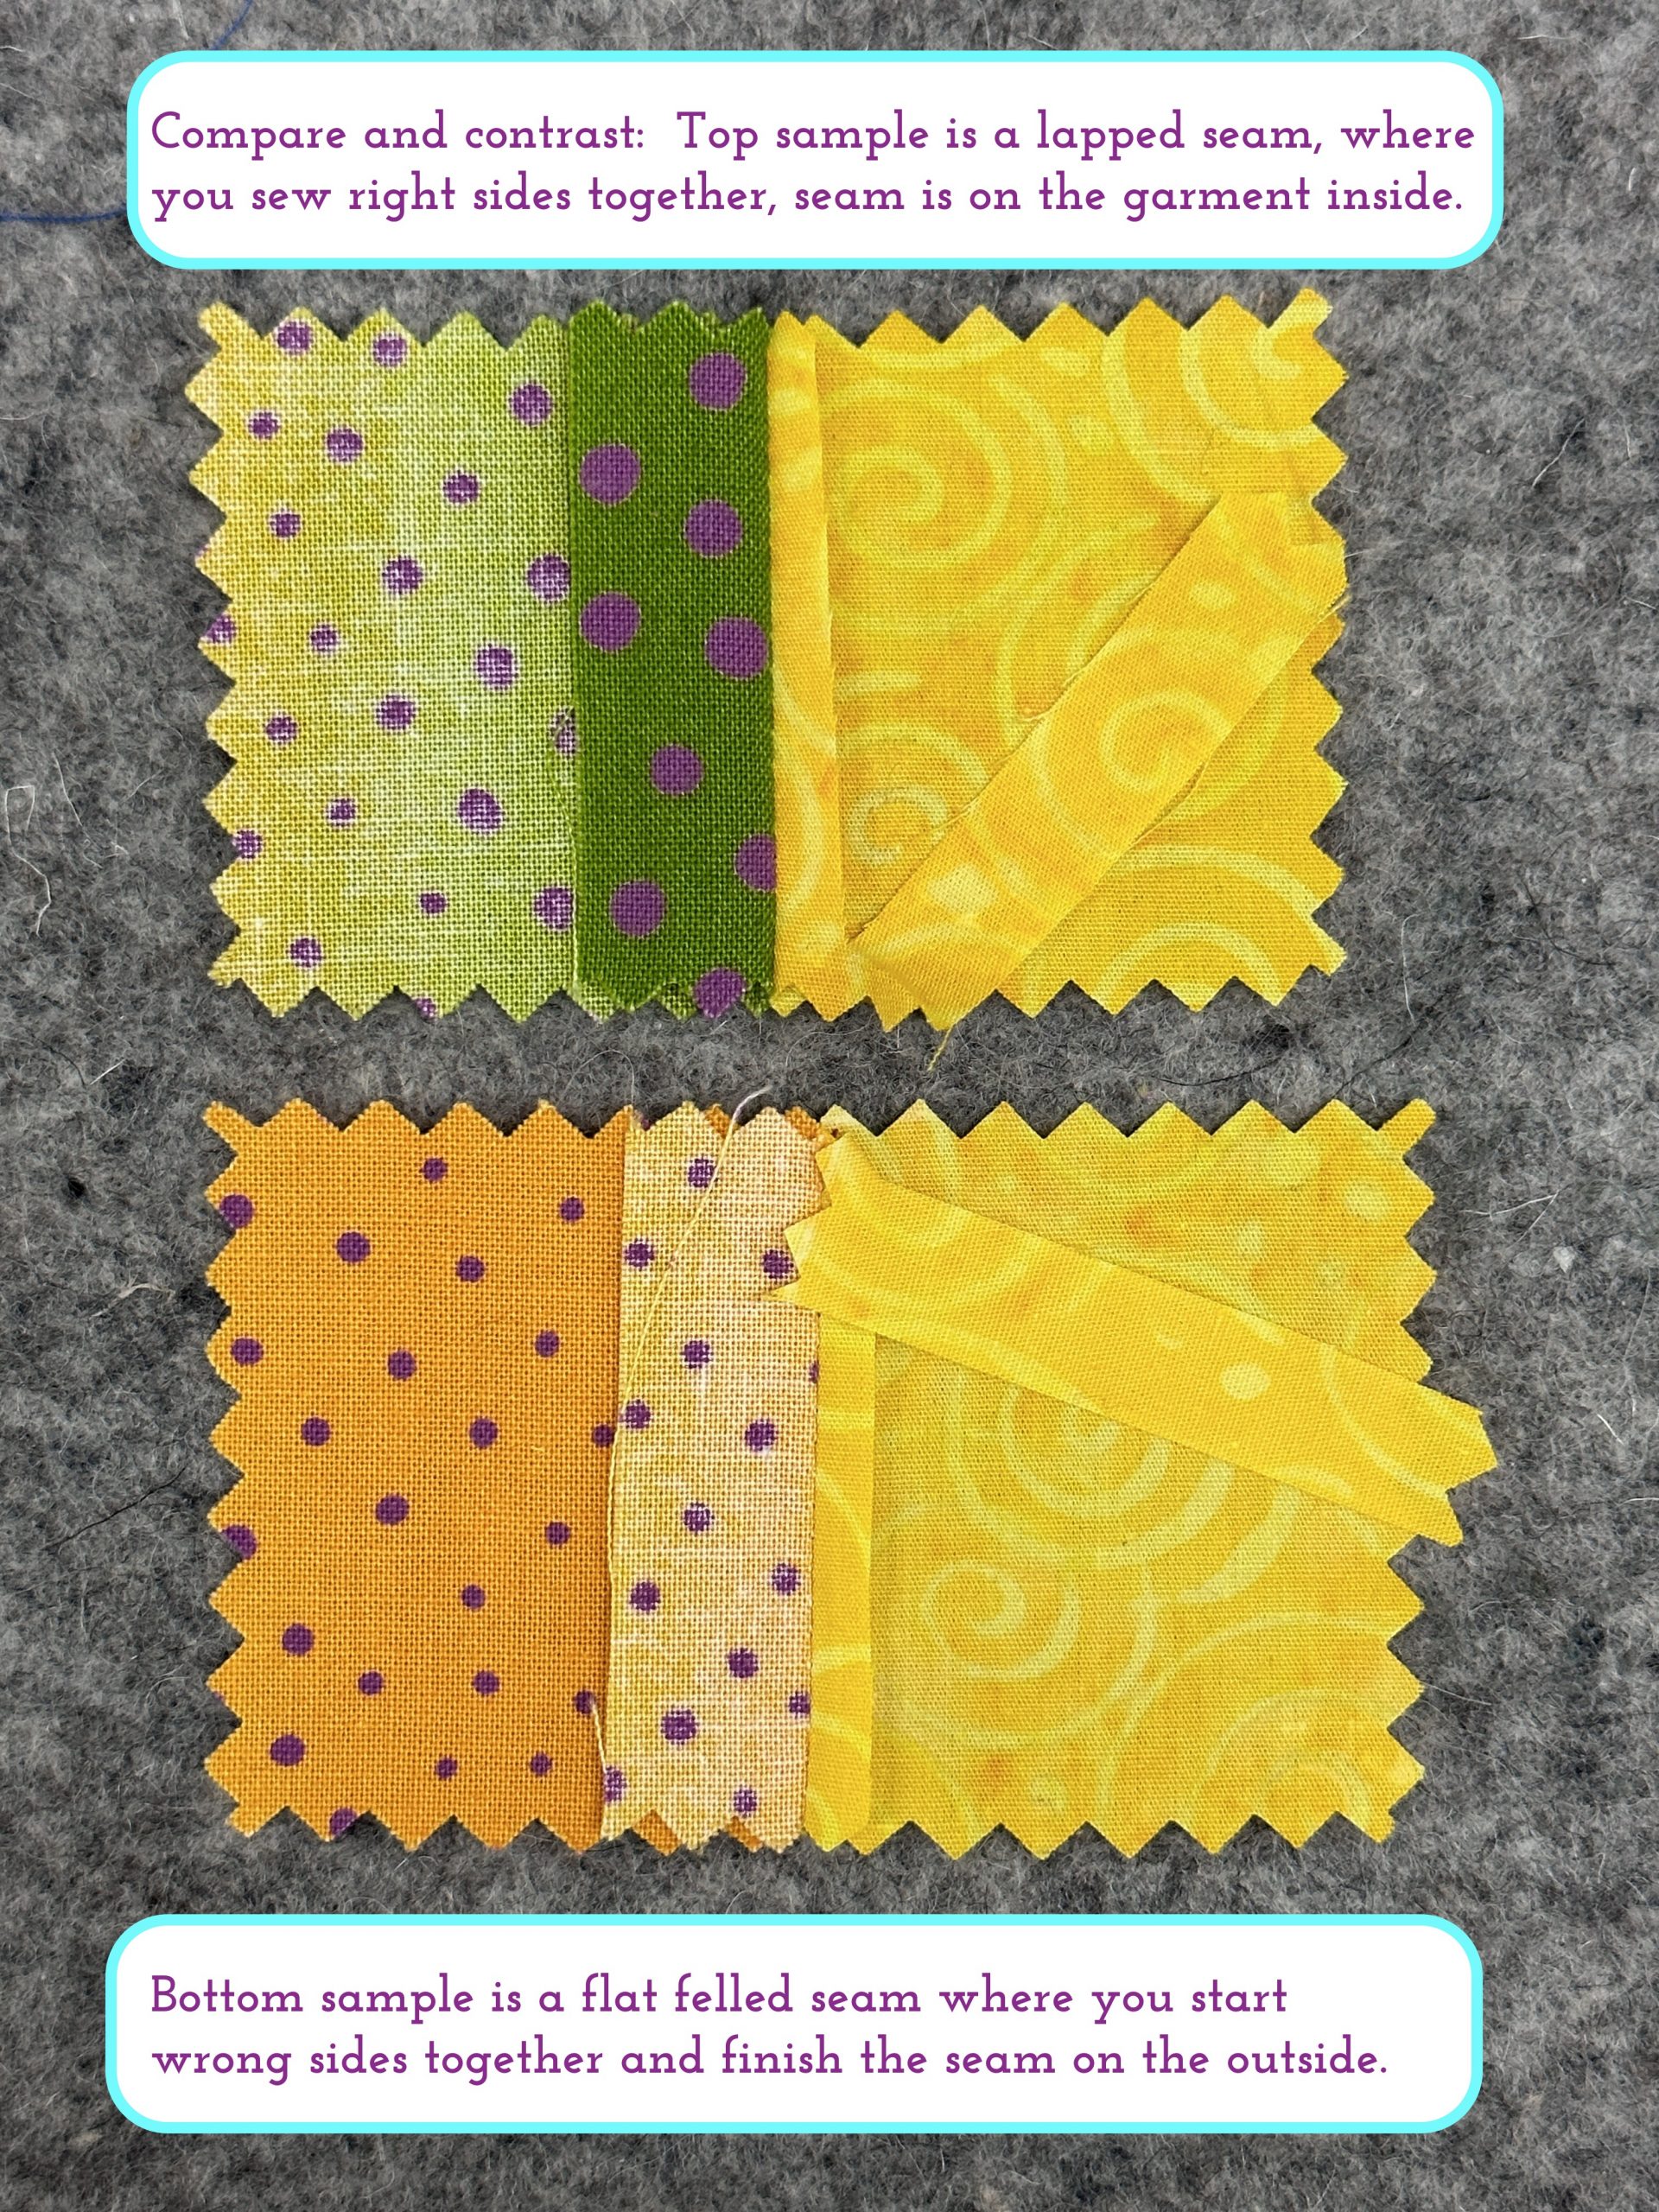
Lapped and flat-felled seams are two sides of the same coin.  Both are found in ready to wear–the lapped seams I see most often in men’s dress shirts.  Flat-felled seams are found on jeans…they’re that heavy, bulky seam!  The double stitching makes it strong, so it is good for seams that endure strain–like tight jeans!  They can also be used decoratively with contrasting and/or heavy topstitching thread. Let’s start with the ….

Please note:  I am affiliated with Janome as a Janome Artisan and am compensated.  However, my reviews are honest and I would say what I say whether affiliated or not.  I’ve also chosen to be affiliated with Janome since 2003 (!!!) because their machines are so good and they are so responsive to the interests and needs of their customers.

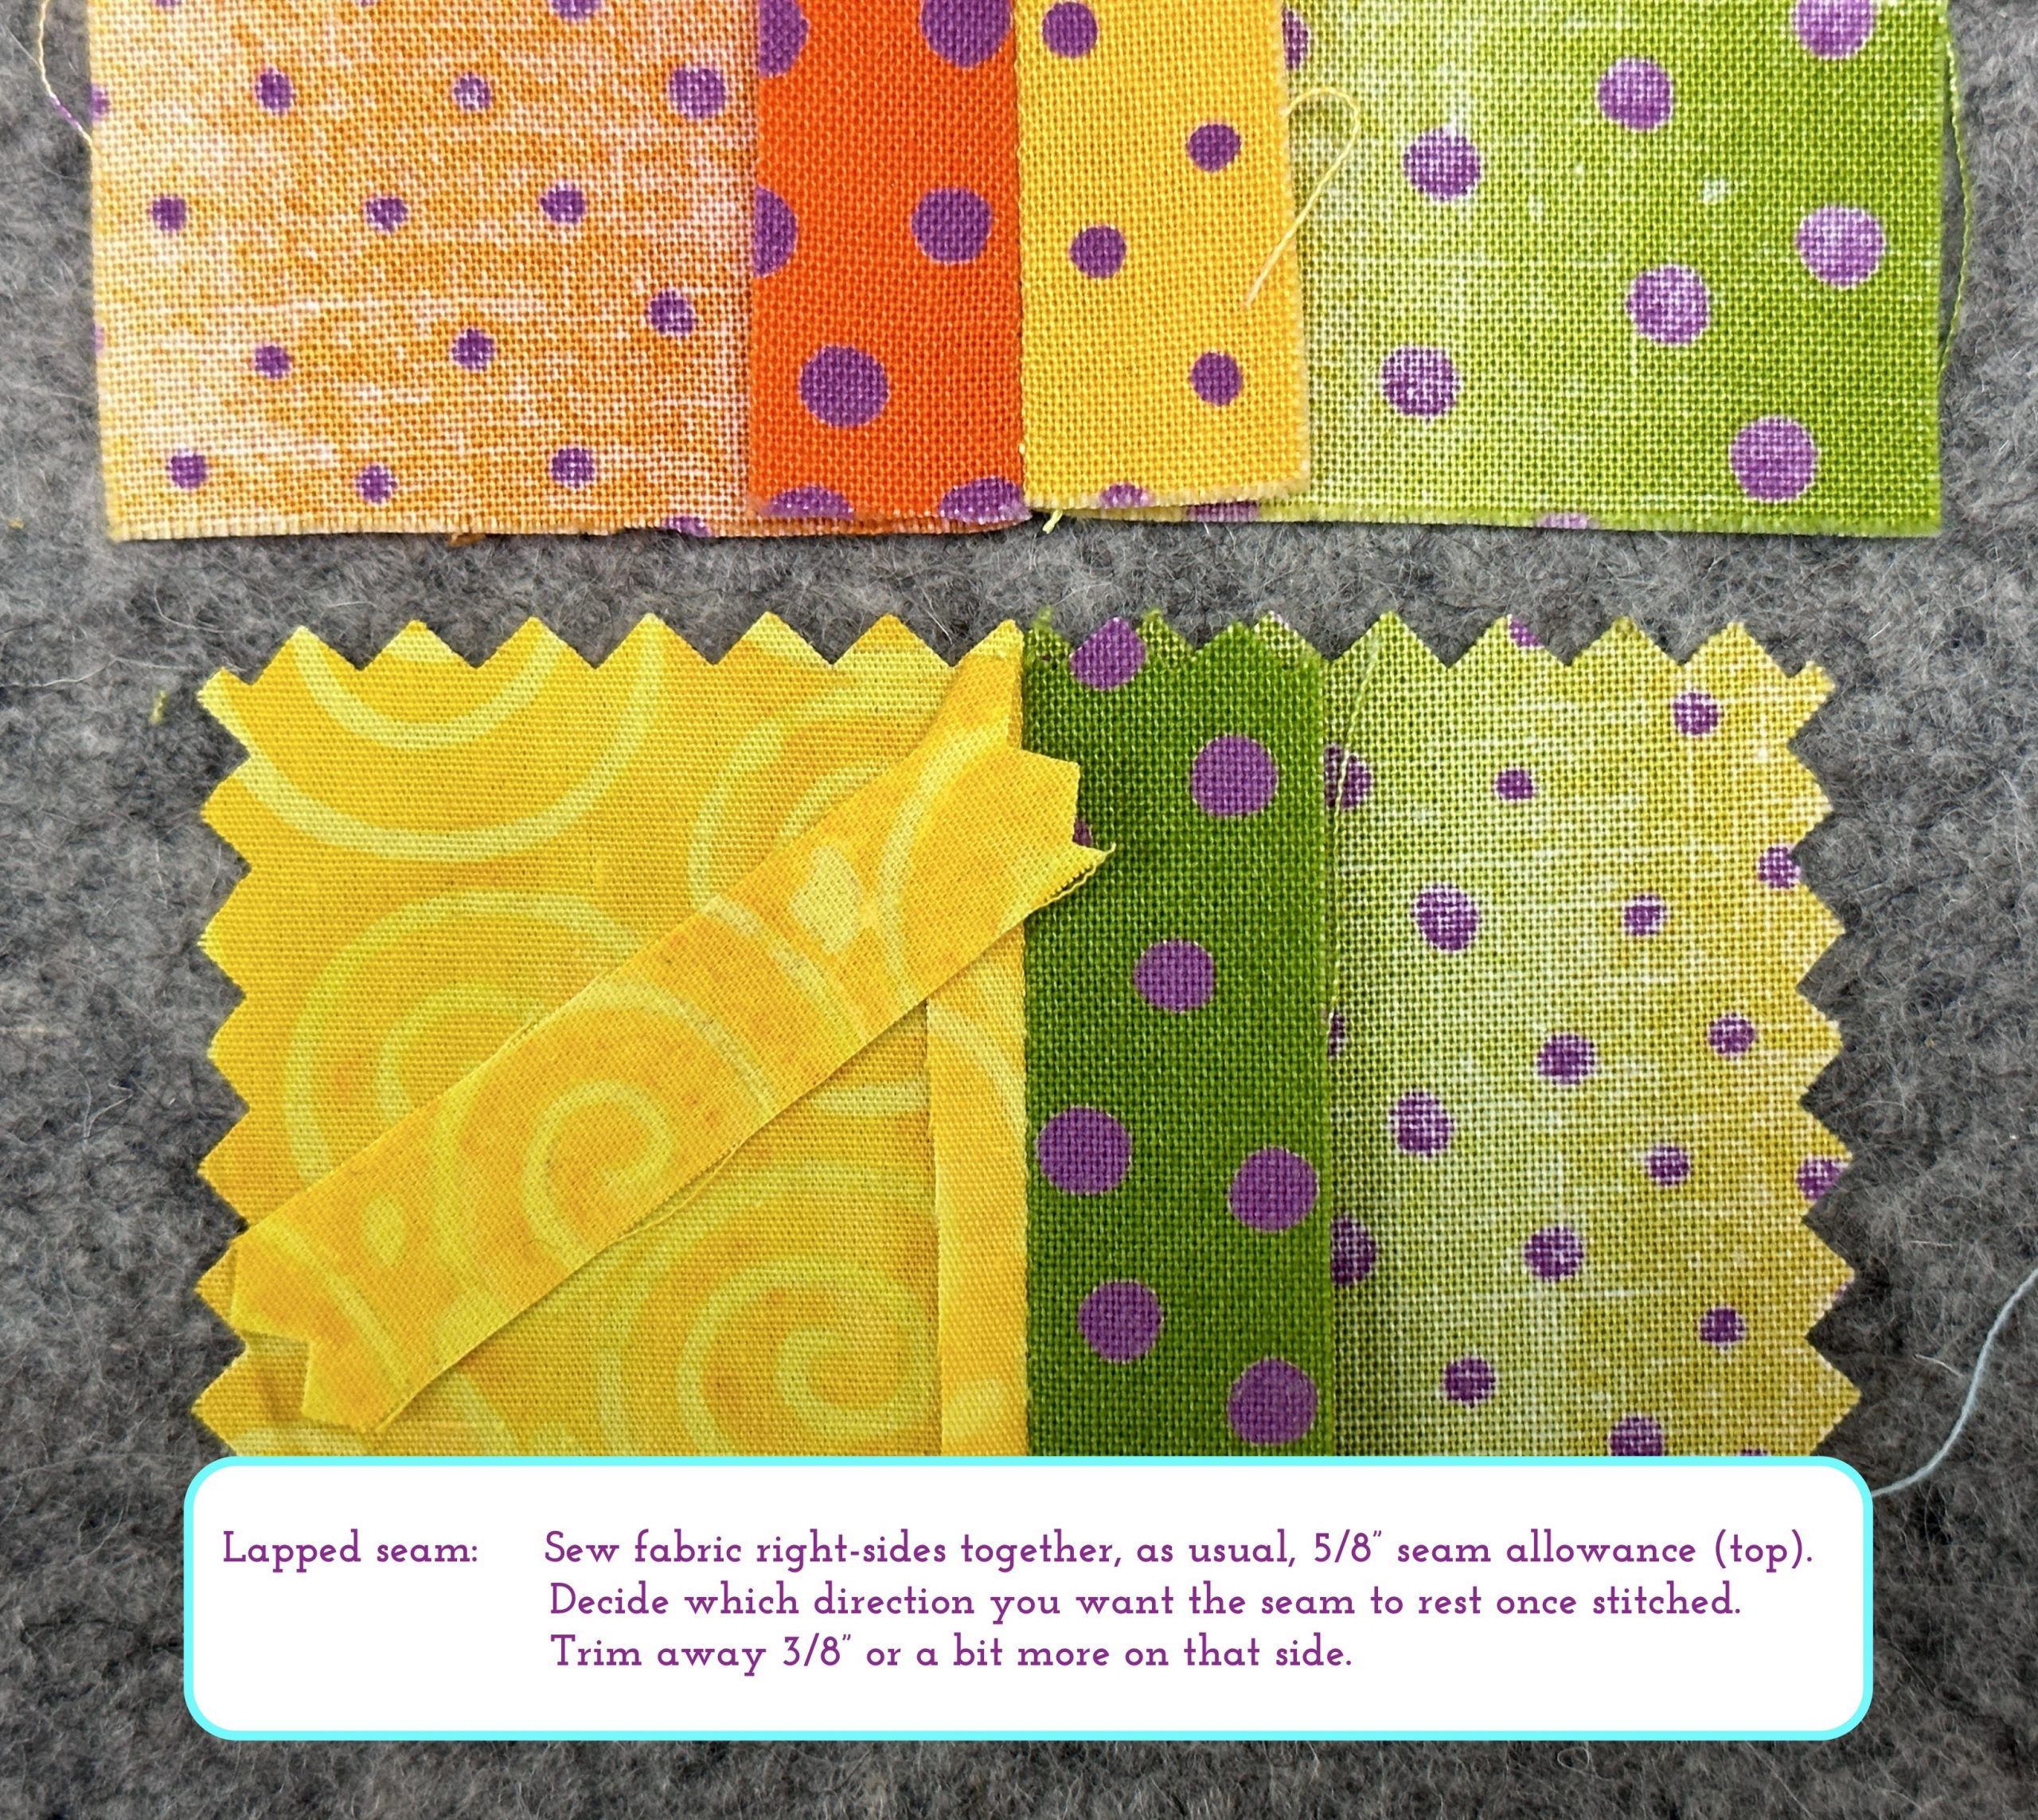
Lapped Seam

The first step is to sew fabric at the designated seam allowance, right sides together, above.

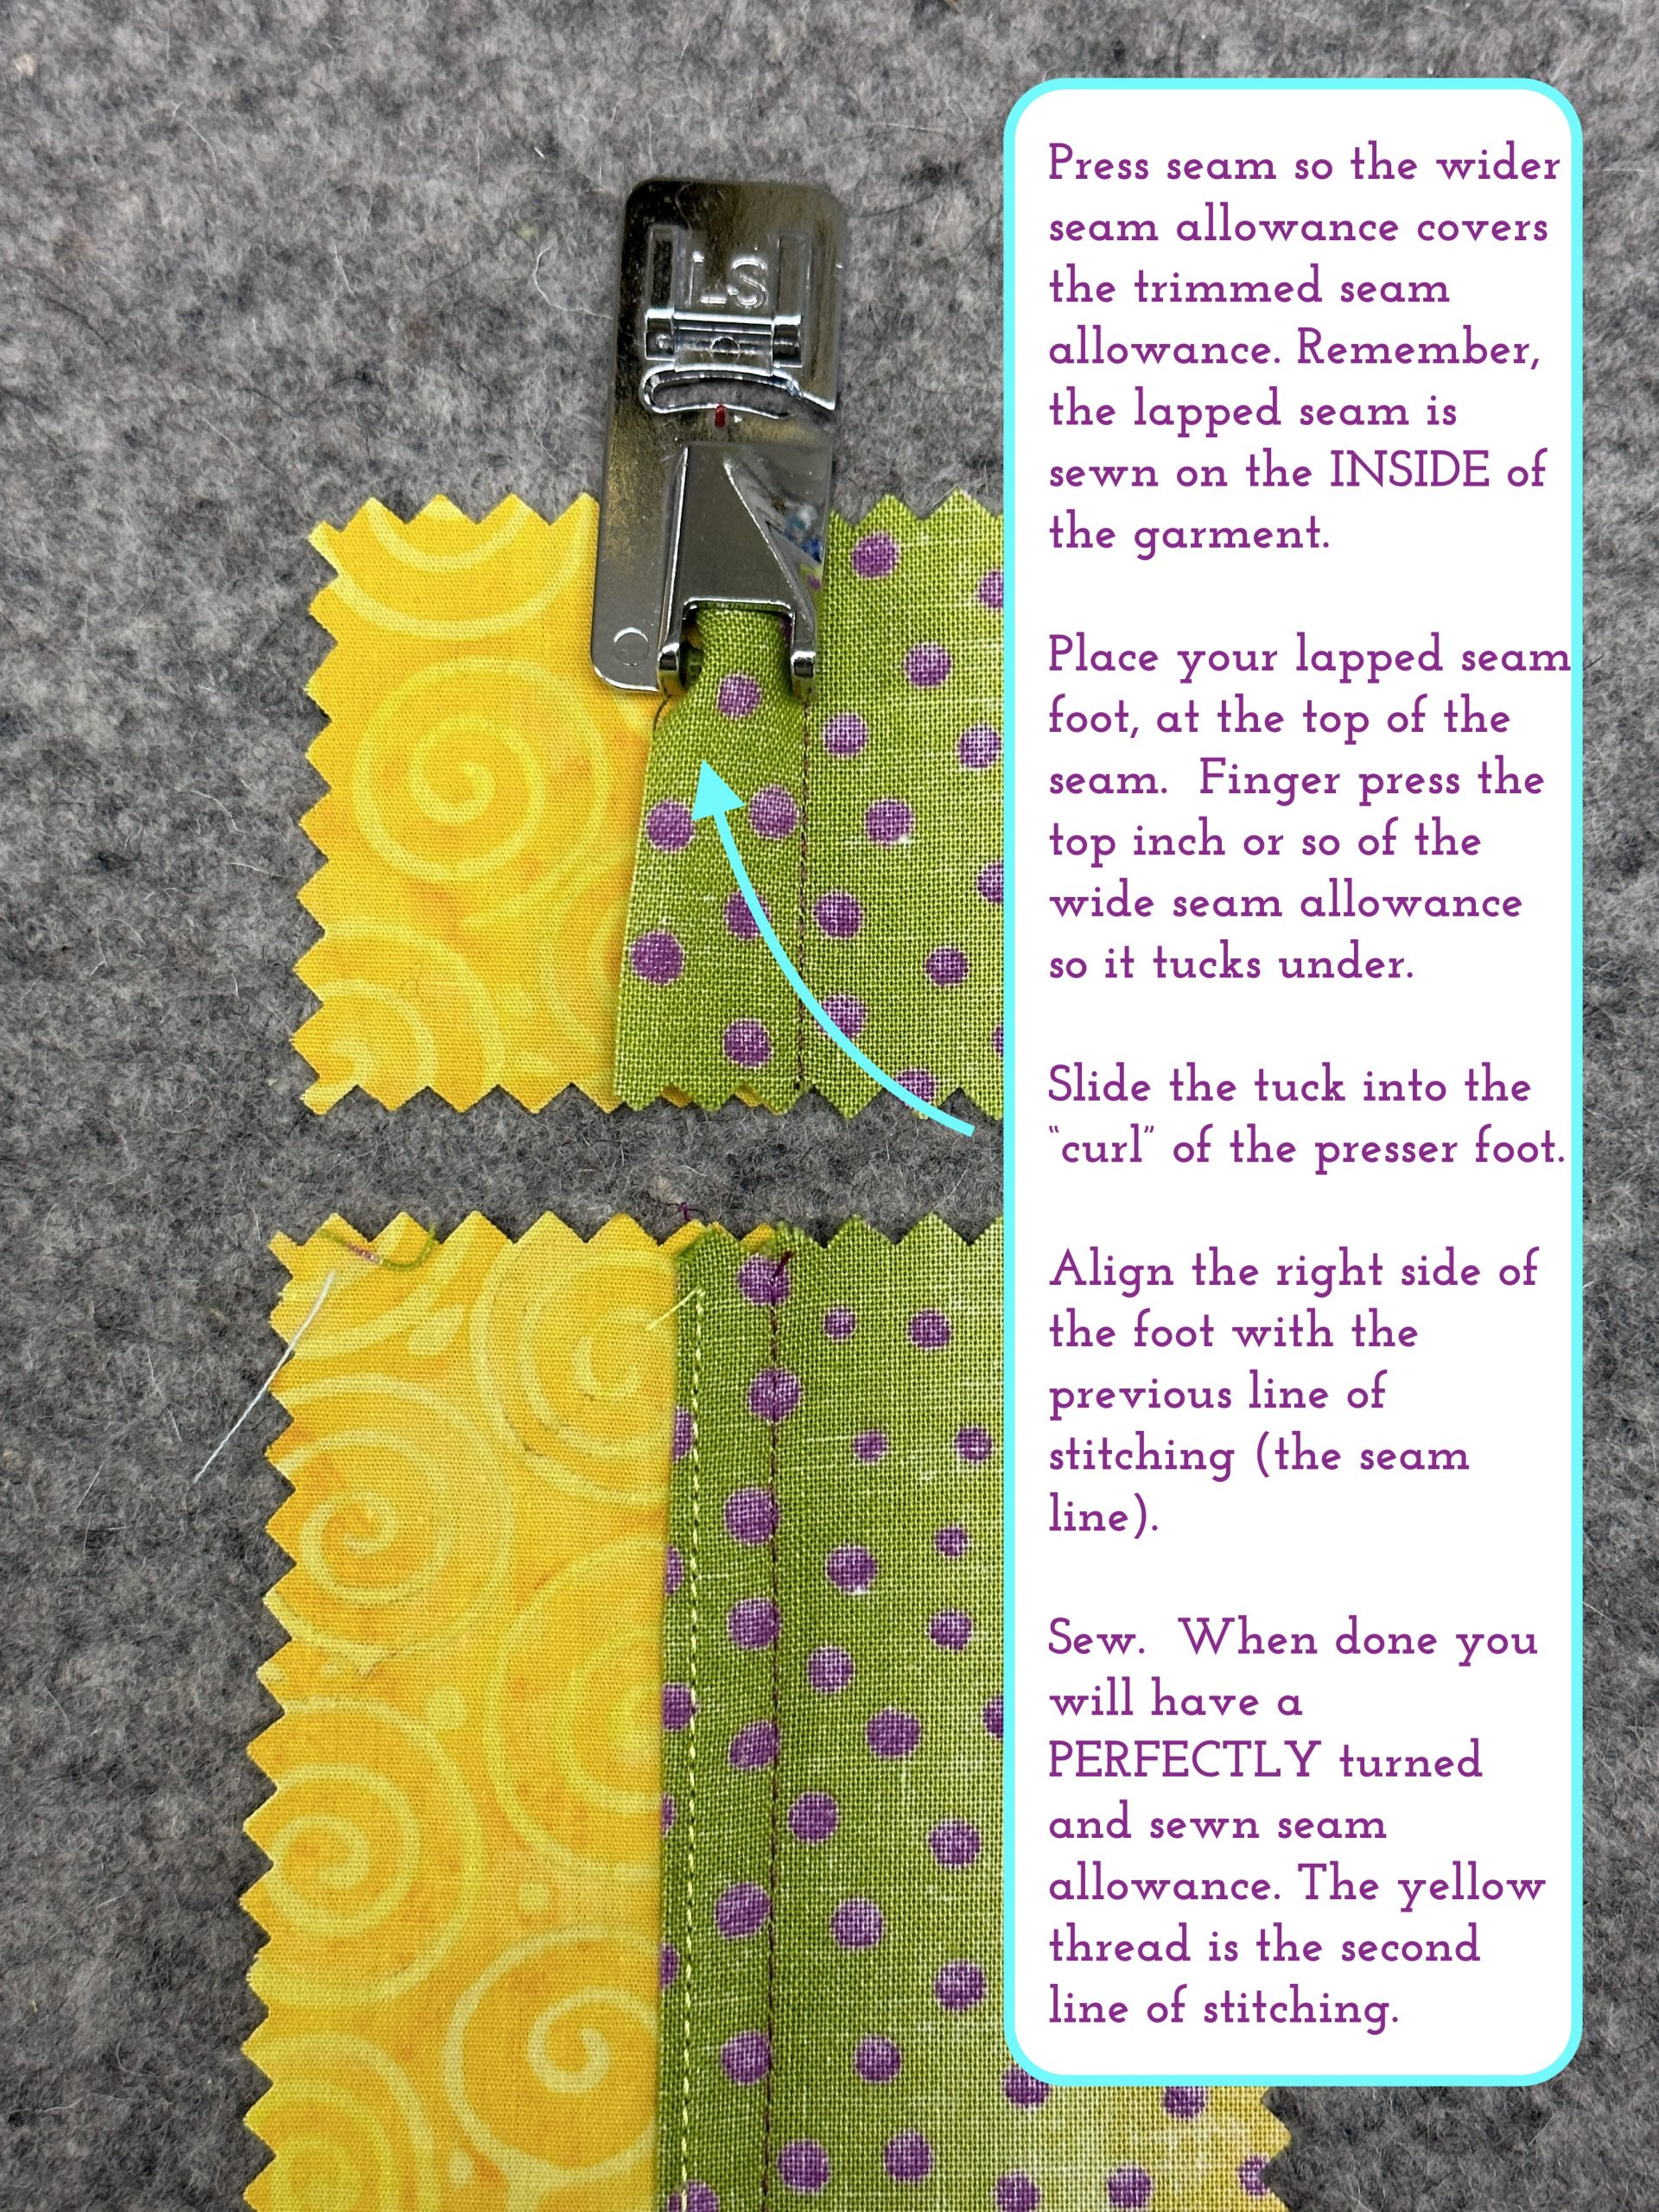
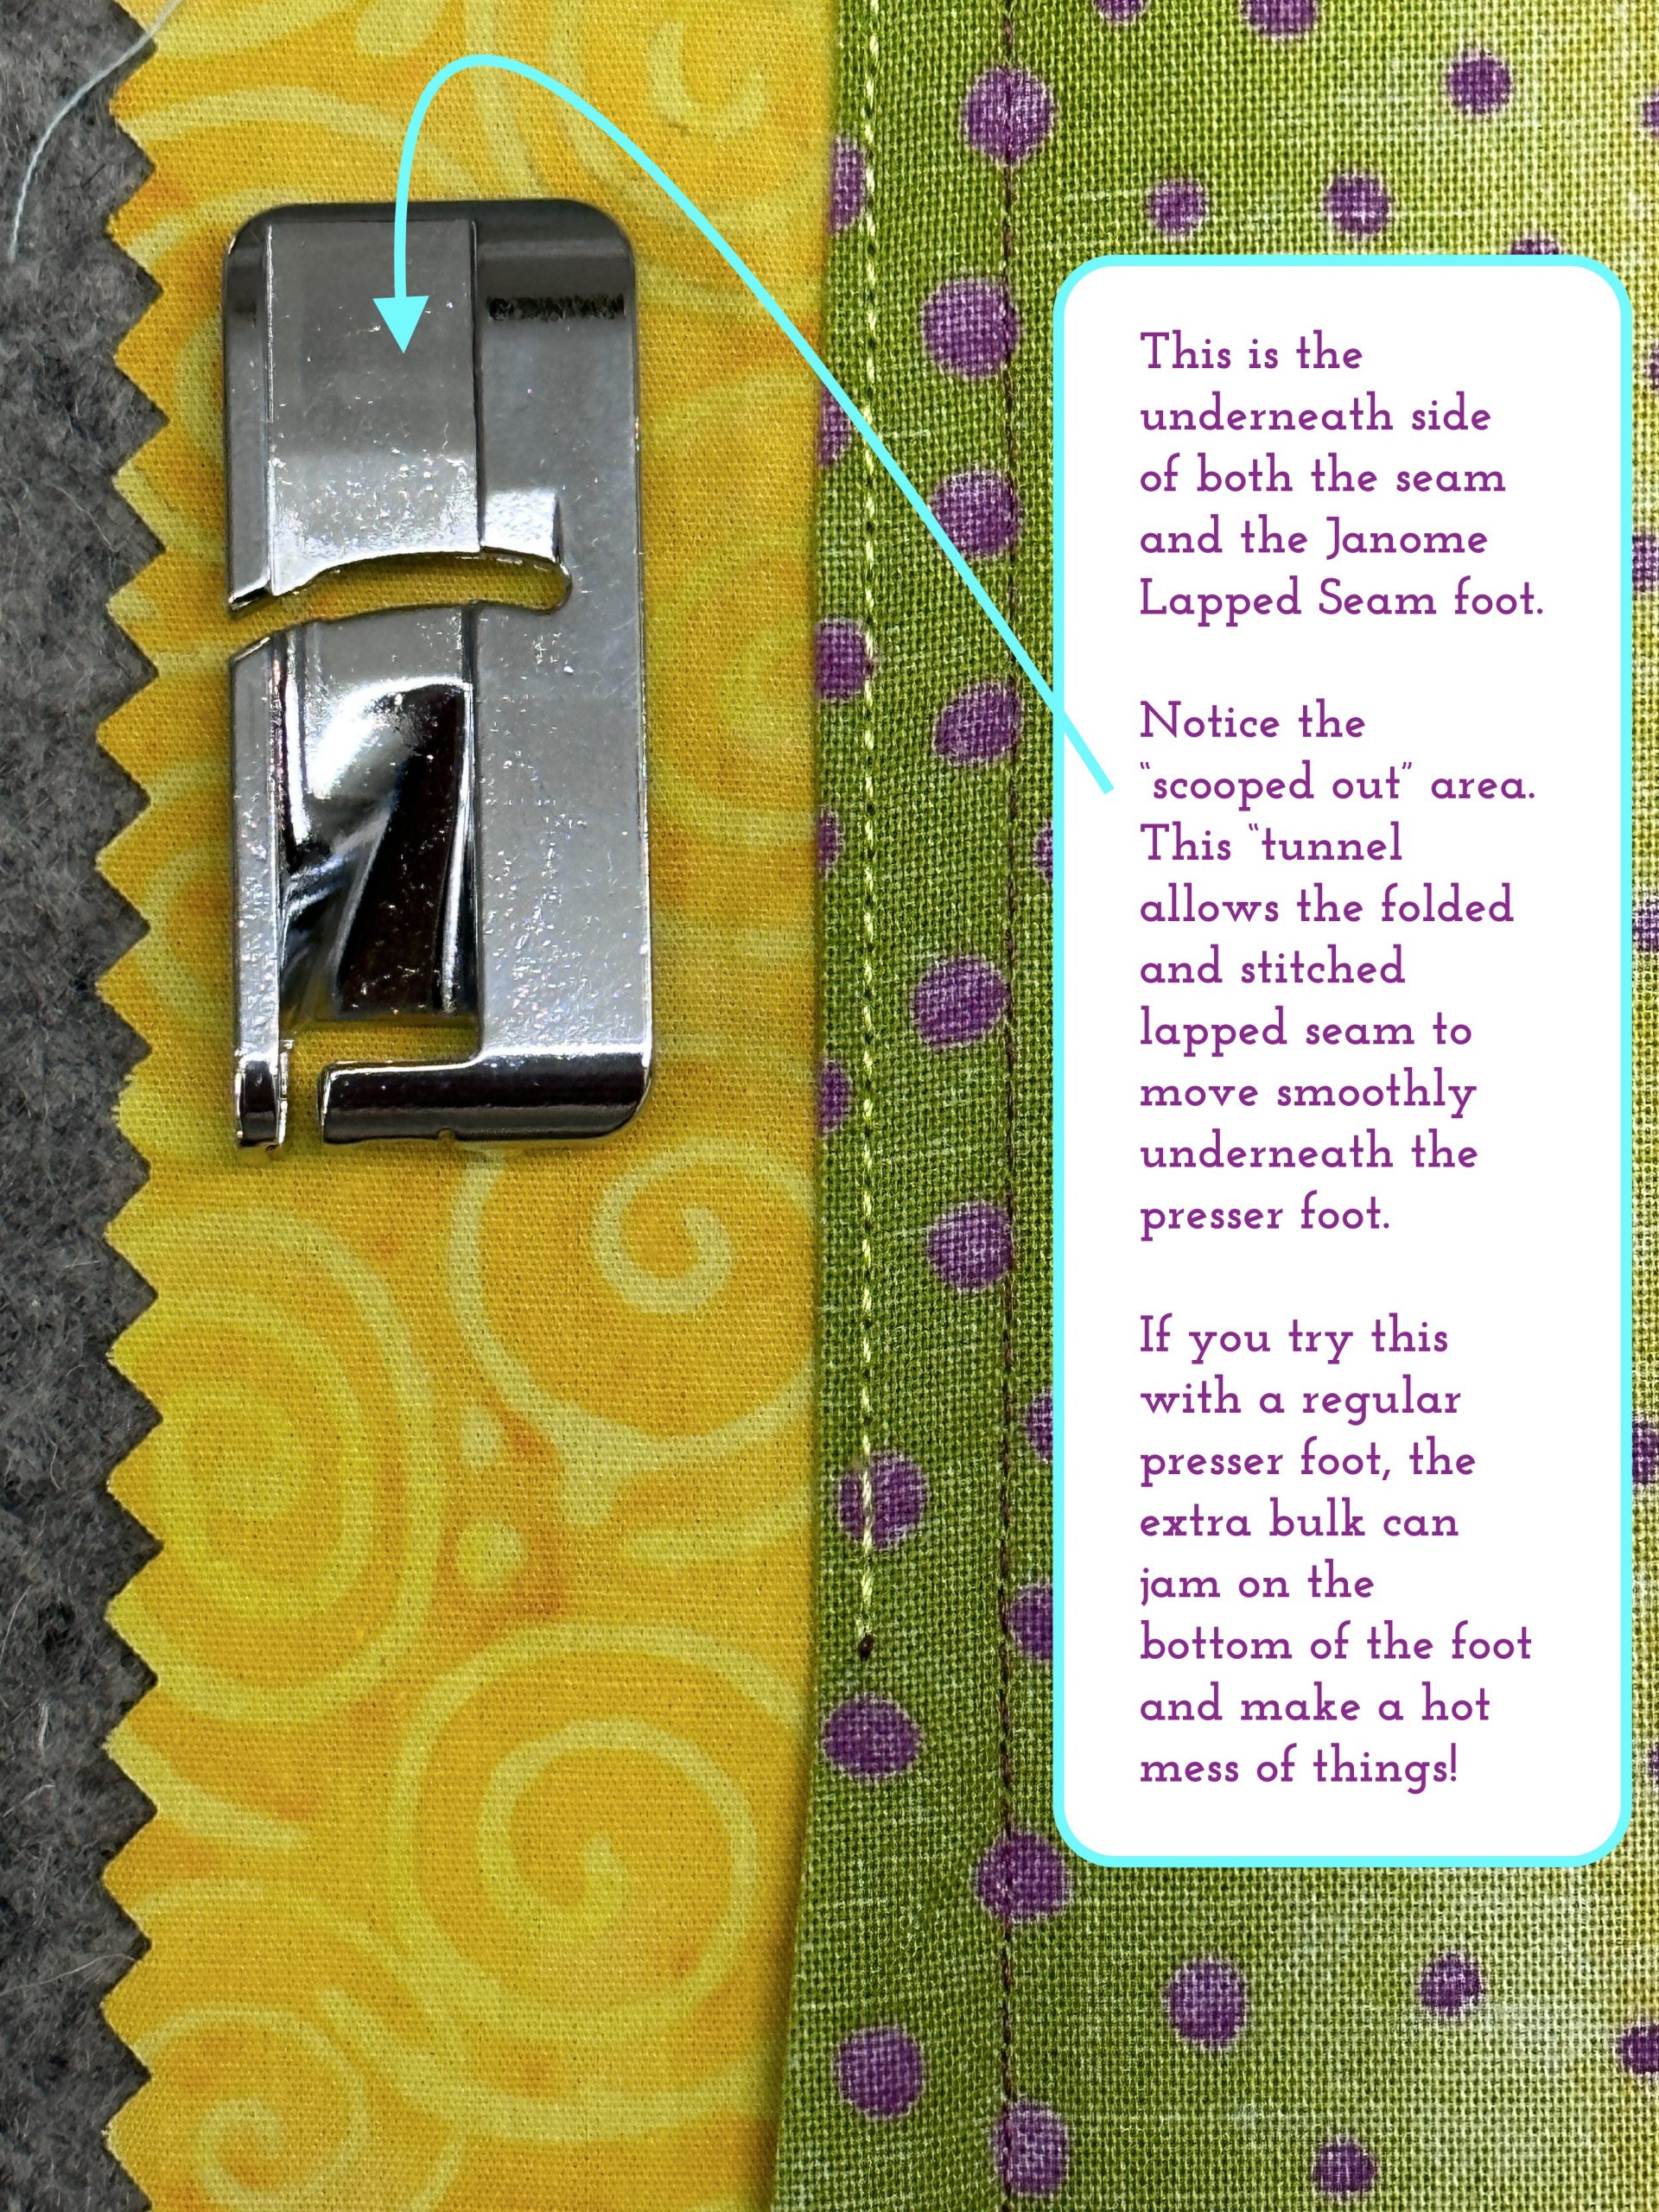
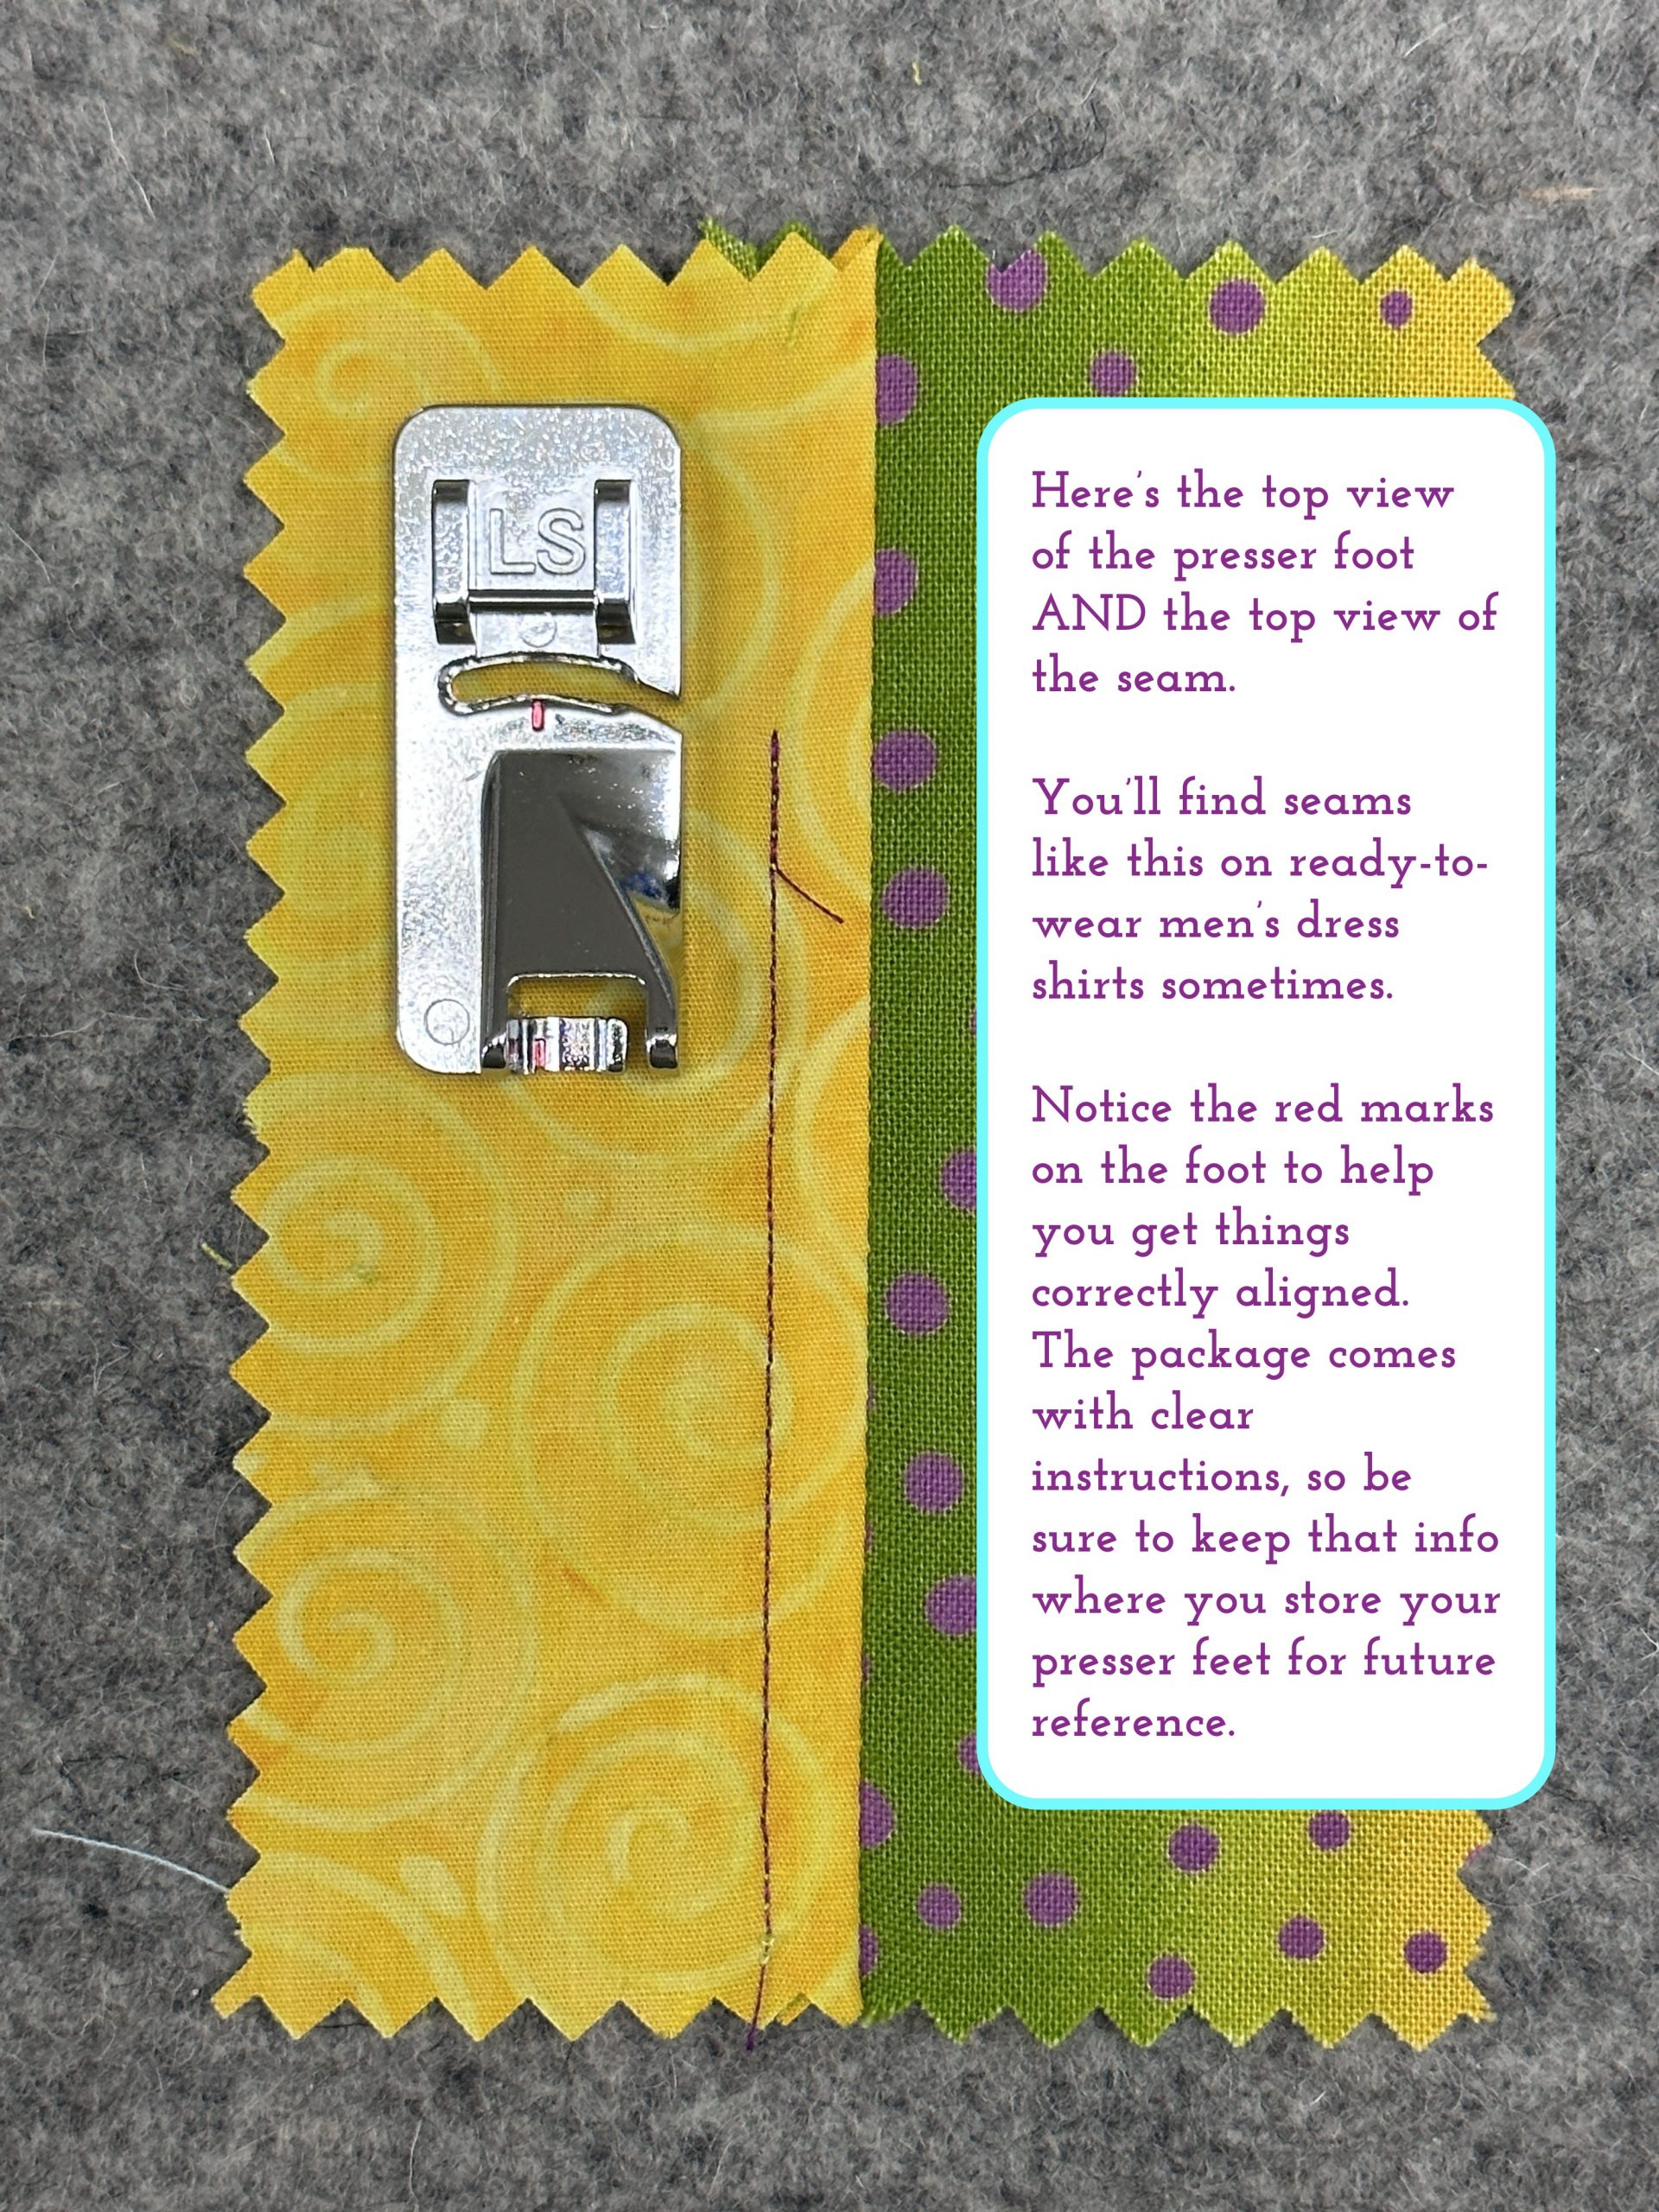
You might wonder why you  need a special foot to do this–you could turn under the seam allowance and, if you are a meticulous person (I am decidedly NO, not matter how hard I try), could sew this neatly.  Well, here’s why:

This is what the seam looks like on the outside when finished:

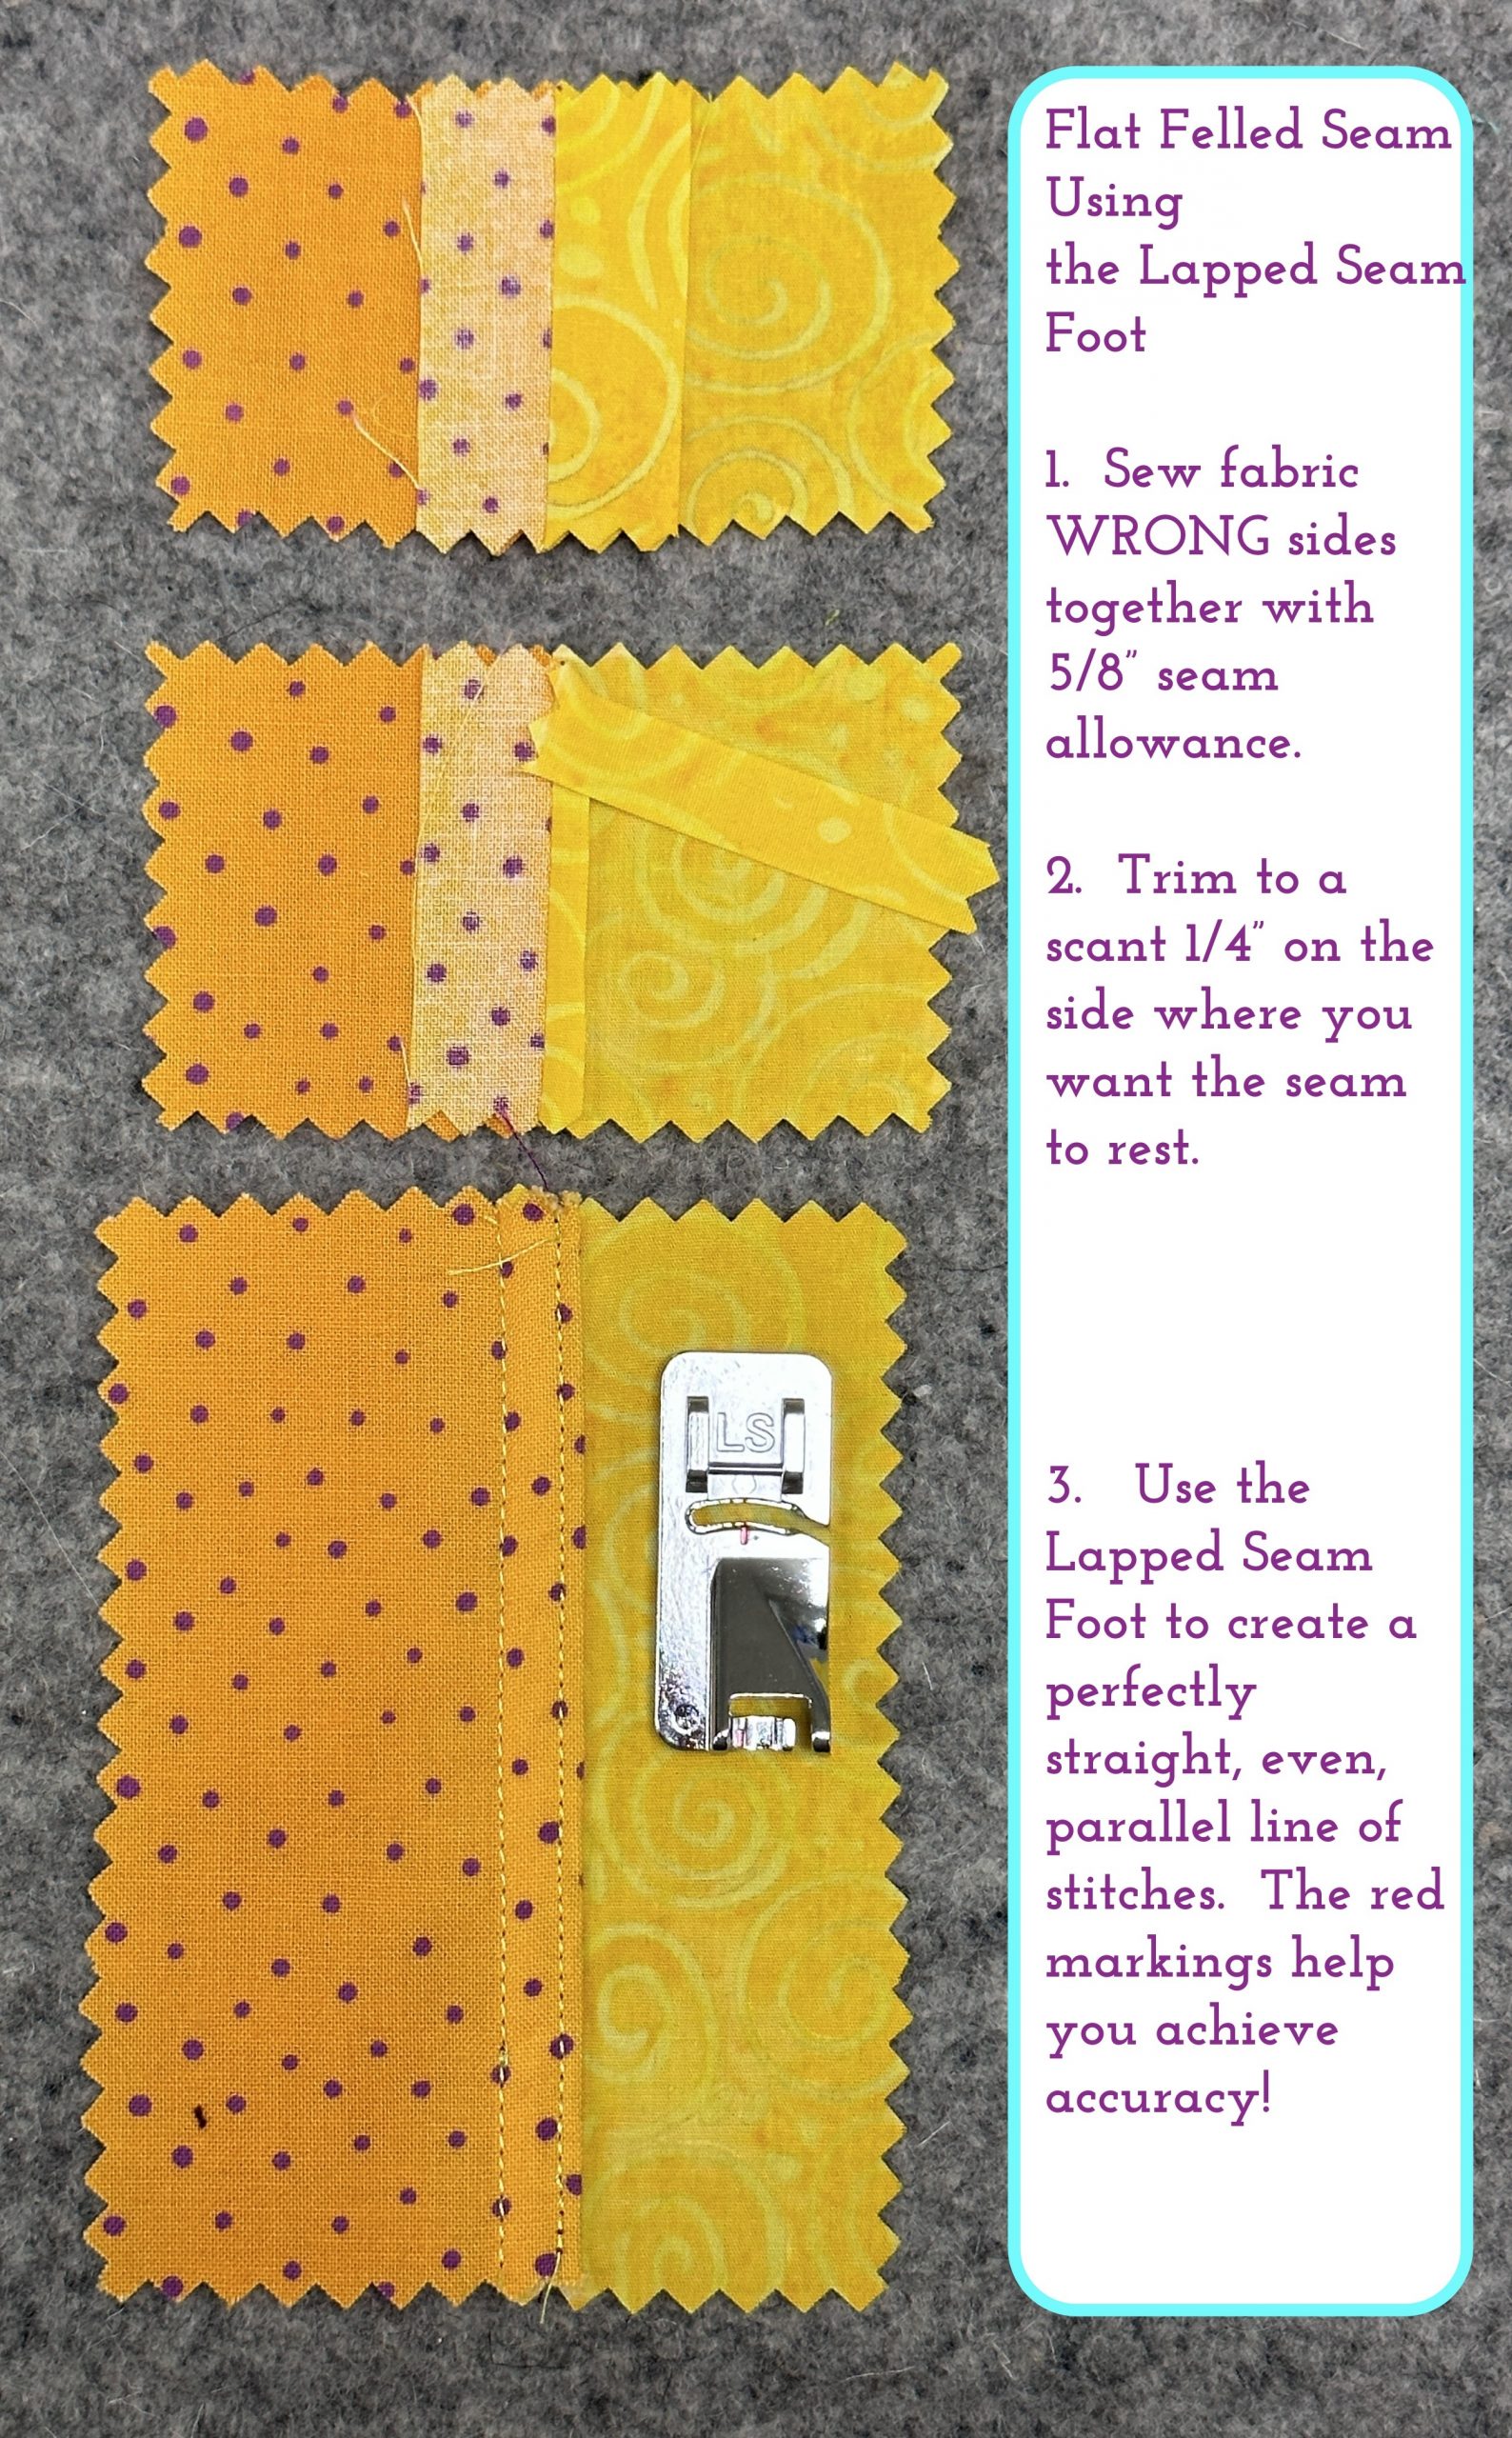
Next up is the Flat-felled Seam which is sewn on the OUTSIDE of the garment.  Both the seam thread and the topstitching thread will show.

The process is much the same, but you start with the fabric wrong sides together instead of the usual way.

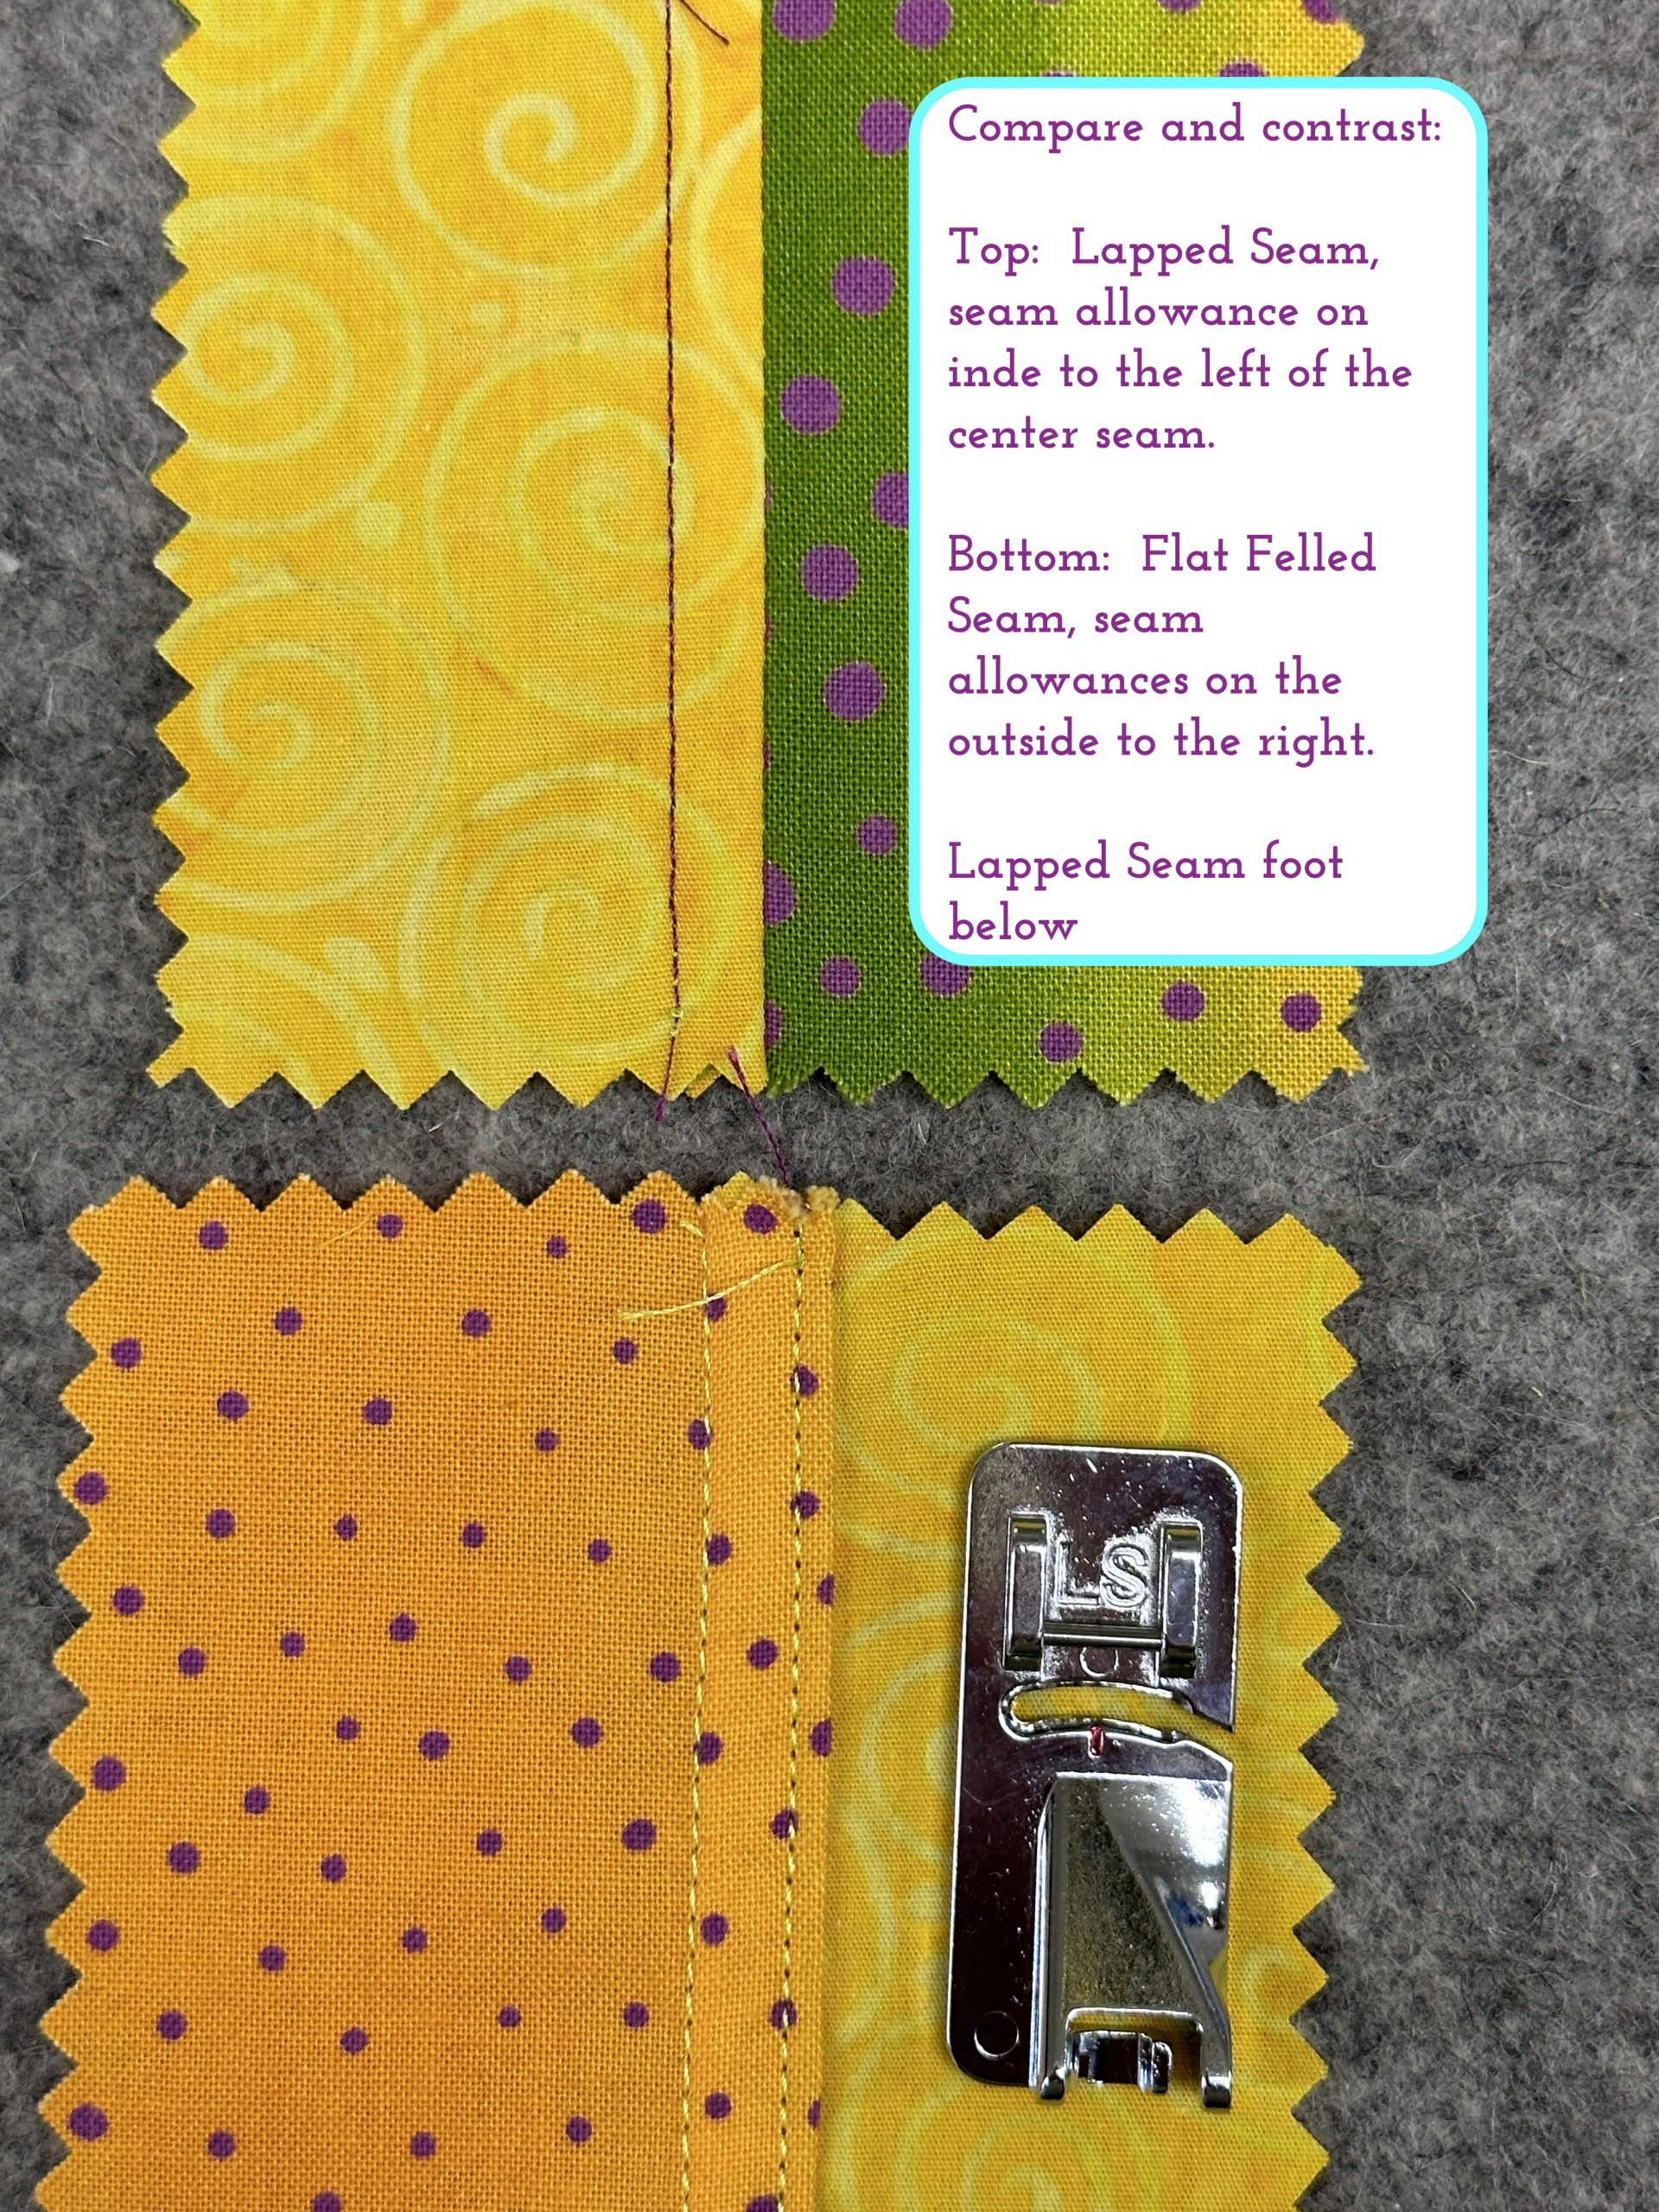
It may help to compare the finished seams:

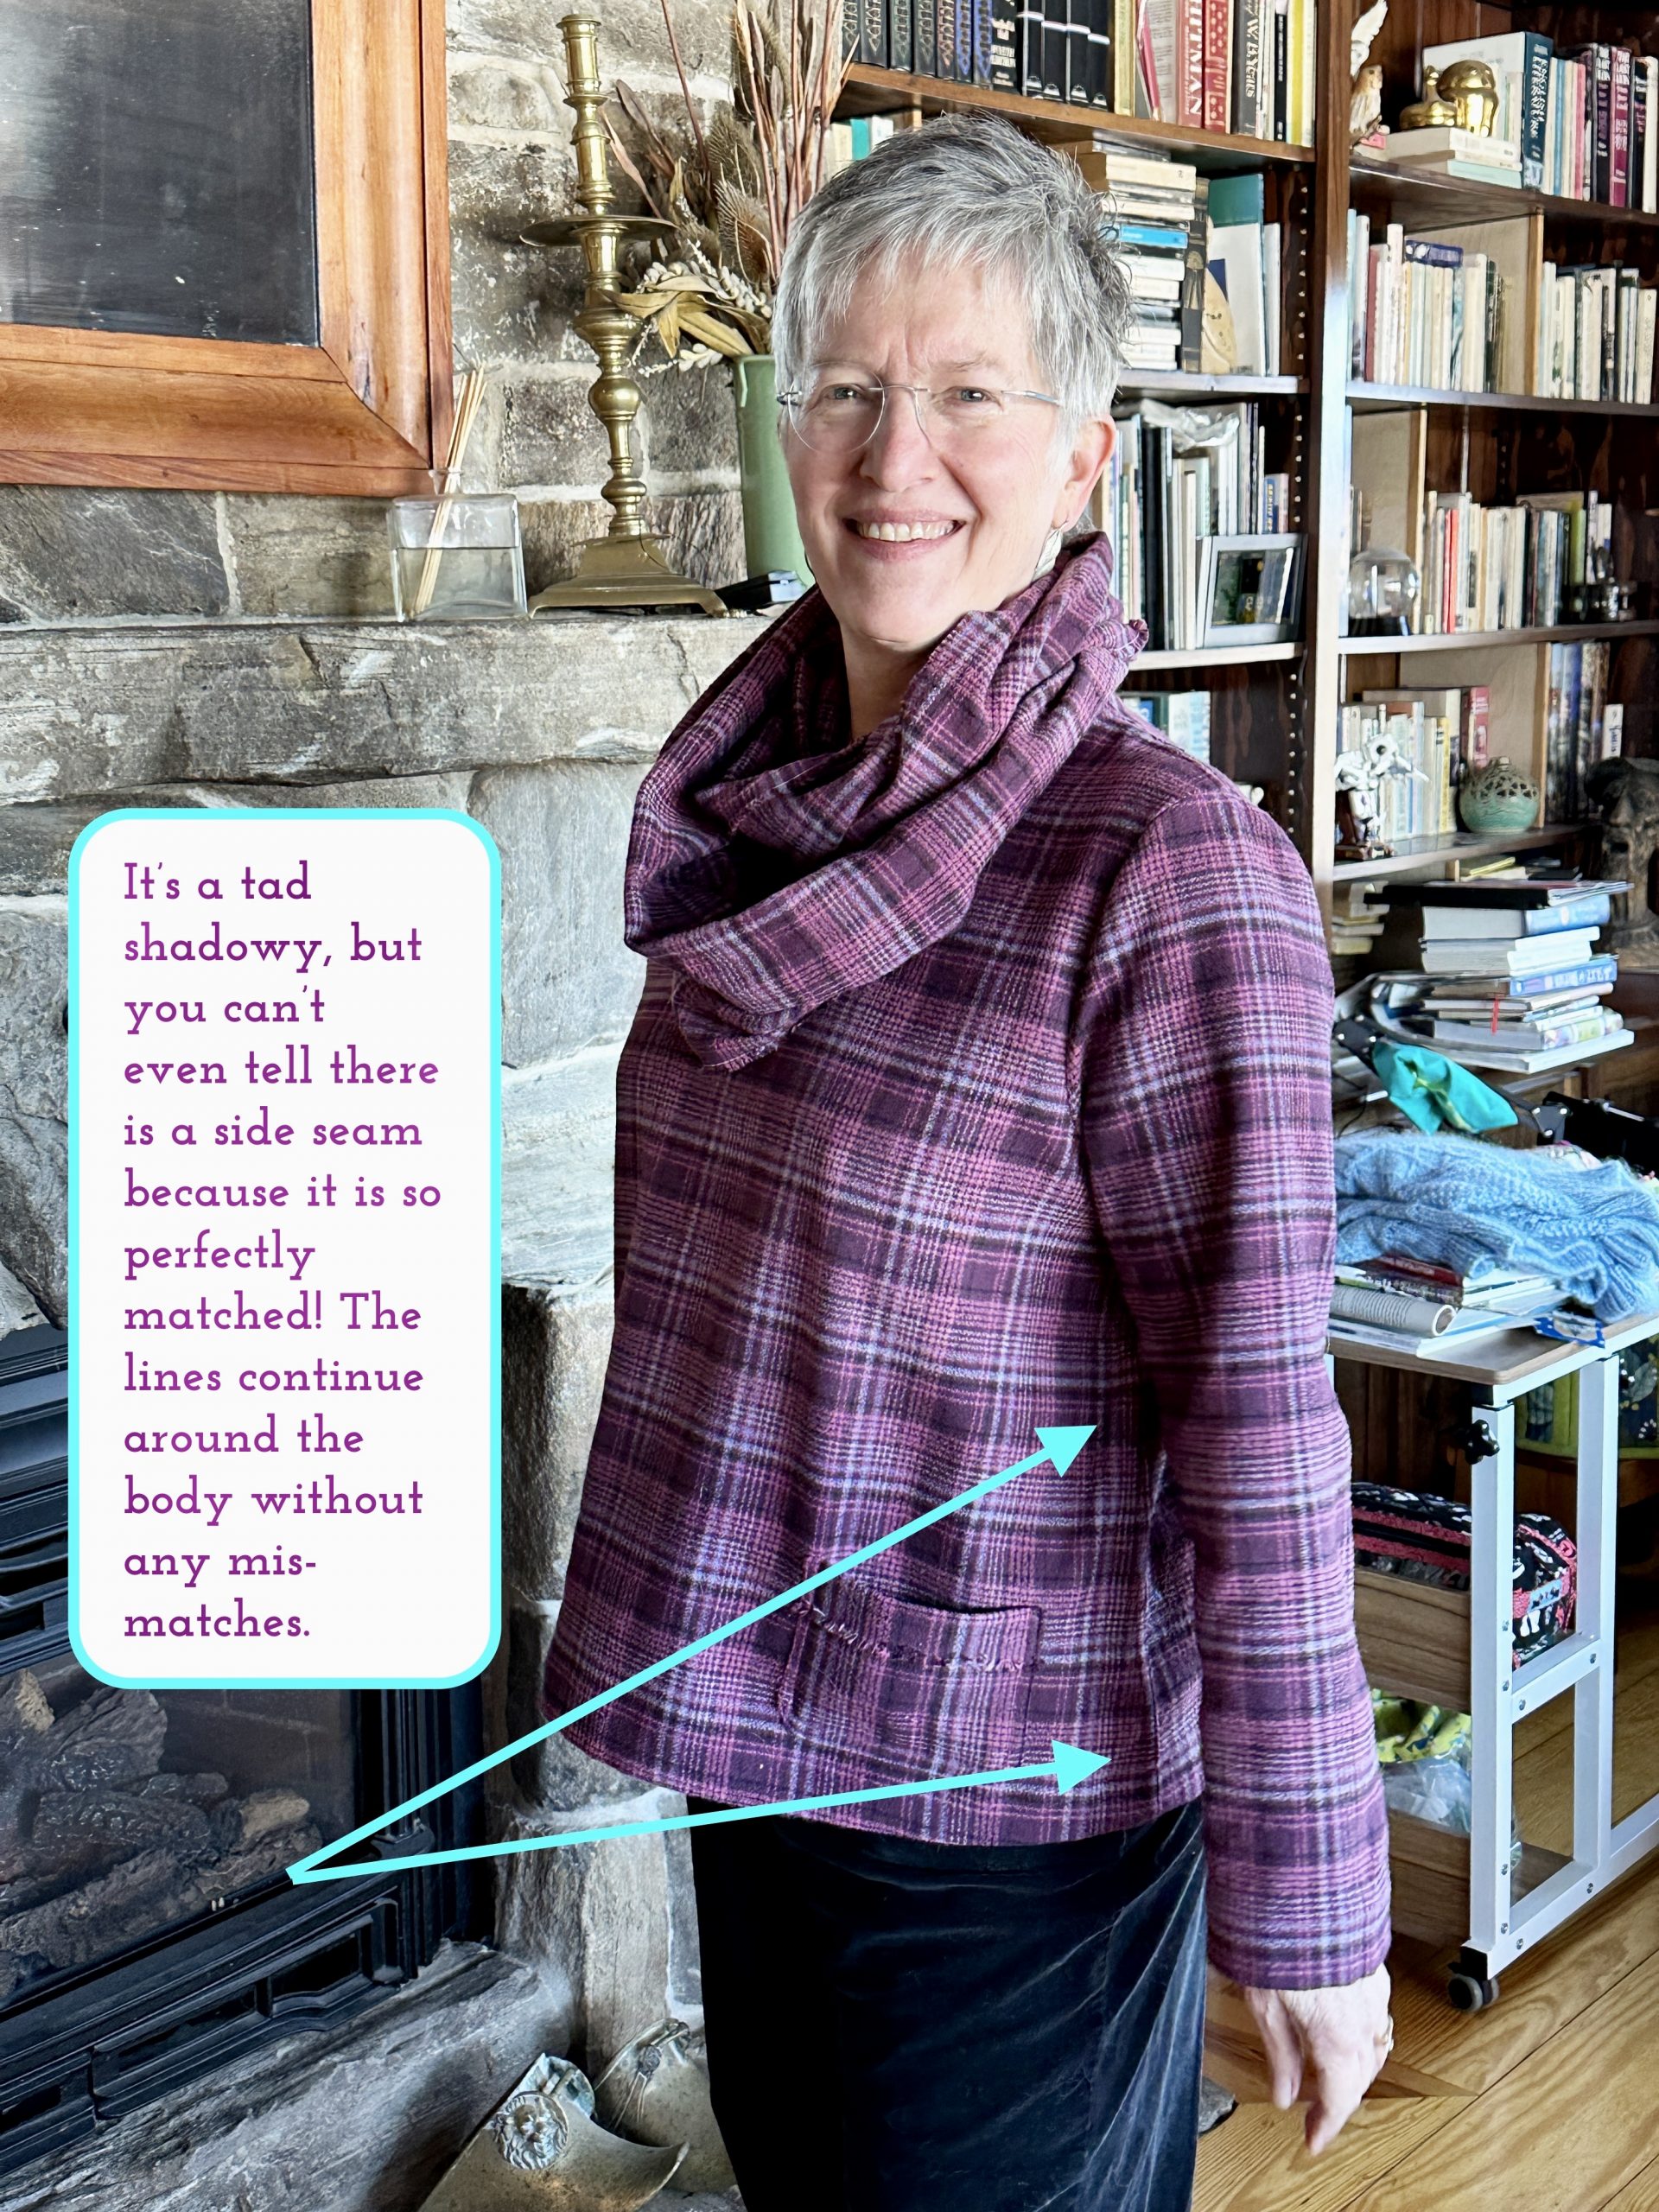
On the Plaid top, I used a flat-felled seam on both the shoulders and side seams, though with the fluff on the flannel and match of the thread, it’s mighty hard to see that in the photo!  Honestly, it blends so well with the matching on the plaid, I had to feel for the bump of the turned seam allowance.  It’s on the outside, which is how I knew.  Gotta say, that’s pretty fine plaid matching to disguise it that well! And sorry about the cat hair…. I swear I will carry it with me to the great beyond some day!


Here are the links to all the posts in this series of lessons, techniques that can be applied to virtually any garment and many home dec projects.   Let me know what you’d like to learn and see here on the blog.  Cheers and thanks, Sarah

Lesson 1:   Choosing a Pattern and Starting Tips

Lesson 2:   Making a Muslin, Fitting and Sleeves

Lesson 3:   Matching Plaids, Cutting out Your Garment Pieces

Lesson 4:  Overcast Seams, just like Serged Seams

Lesson 5:   French Seams

Lesson 6:  Lapped and Flat-felled Seams

Lesson 7:  Hong Kong Finish for Seams

Lesson 8:  Lined Patch Pocket Tutorial

Lesson 9:  Hems and Scarf

Plaid Top Tutorial: Lesson 3–Matching Plaids, cutting out your garment pieces

Friday, February 24th, 2023

While visiting a favorite local shop in nearby Rockland, Maine, Clementine, I happened to fondle this amazing thick, soft flannel and thought it would made a perfect winter top.  The plaid adds a bit of complexity and opportunity to teach a few more advanced skills along with a fairly simple pattern for this series.

Please note:  I am affiliated with Janome as a Janome Artisan and am compensated.  However, my reviews are honest and I would say what I say whether affiliated or not.  I’ve also chosen to be affiliated with Janome since 2003 (!!!) because their machines are so good and they are so responsive to the interests and needs of their customers.

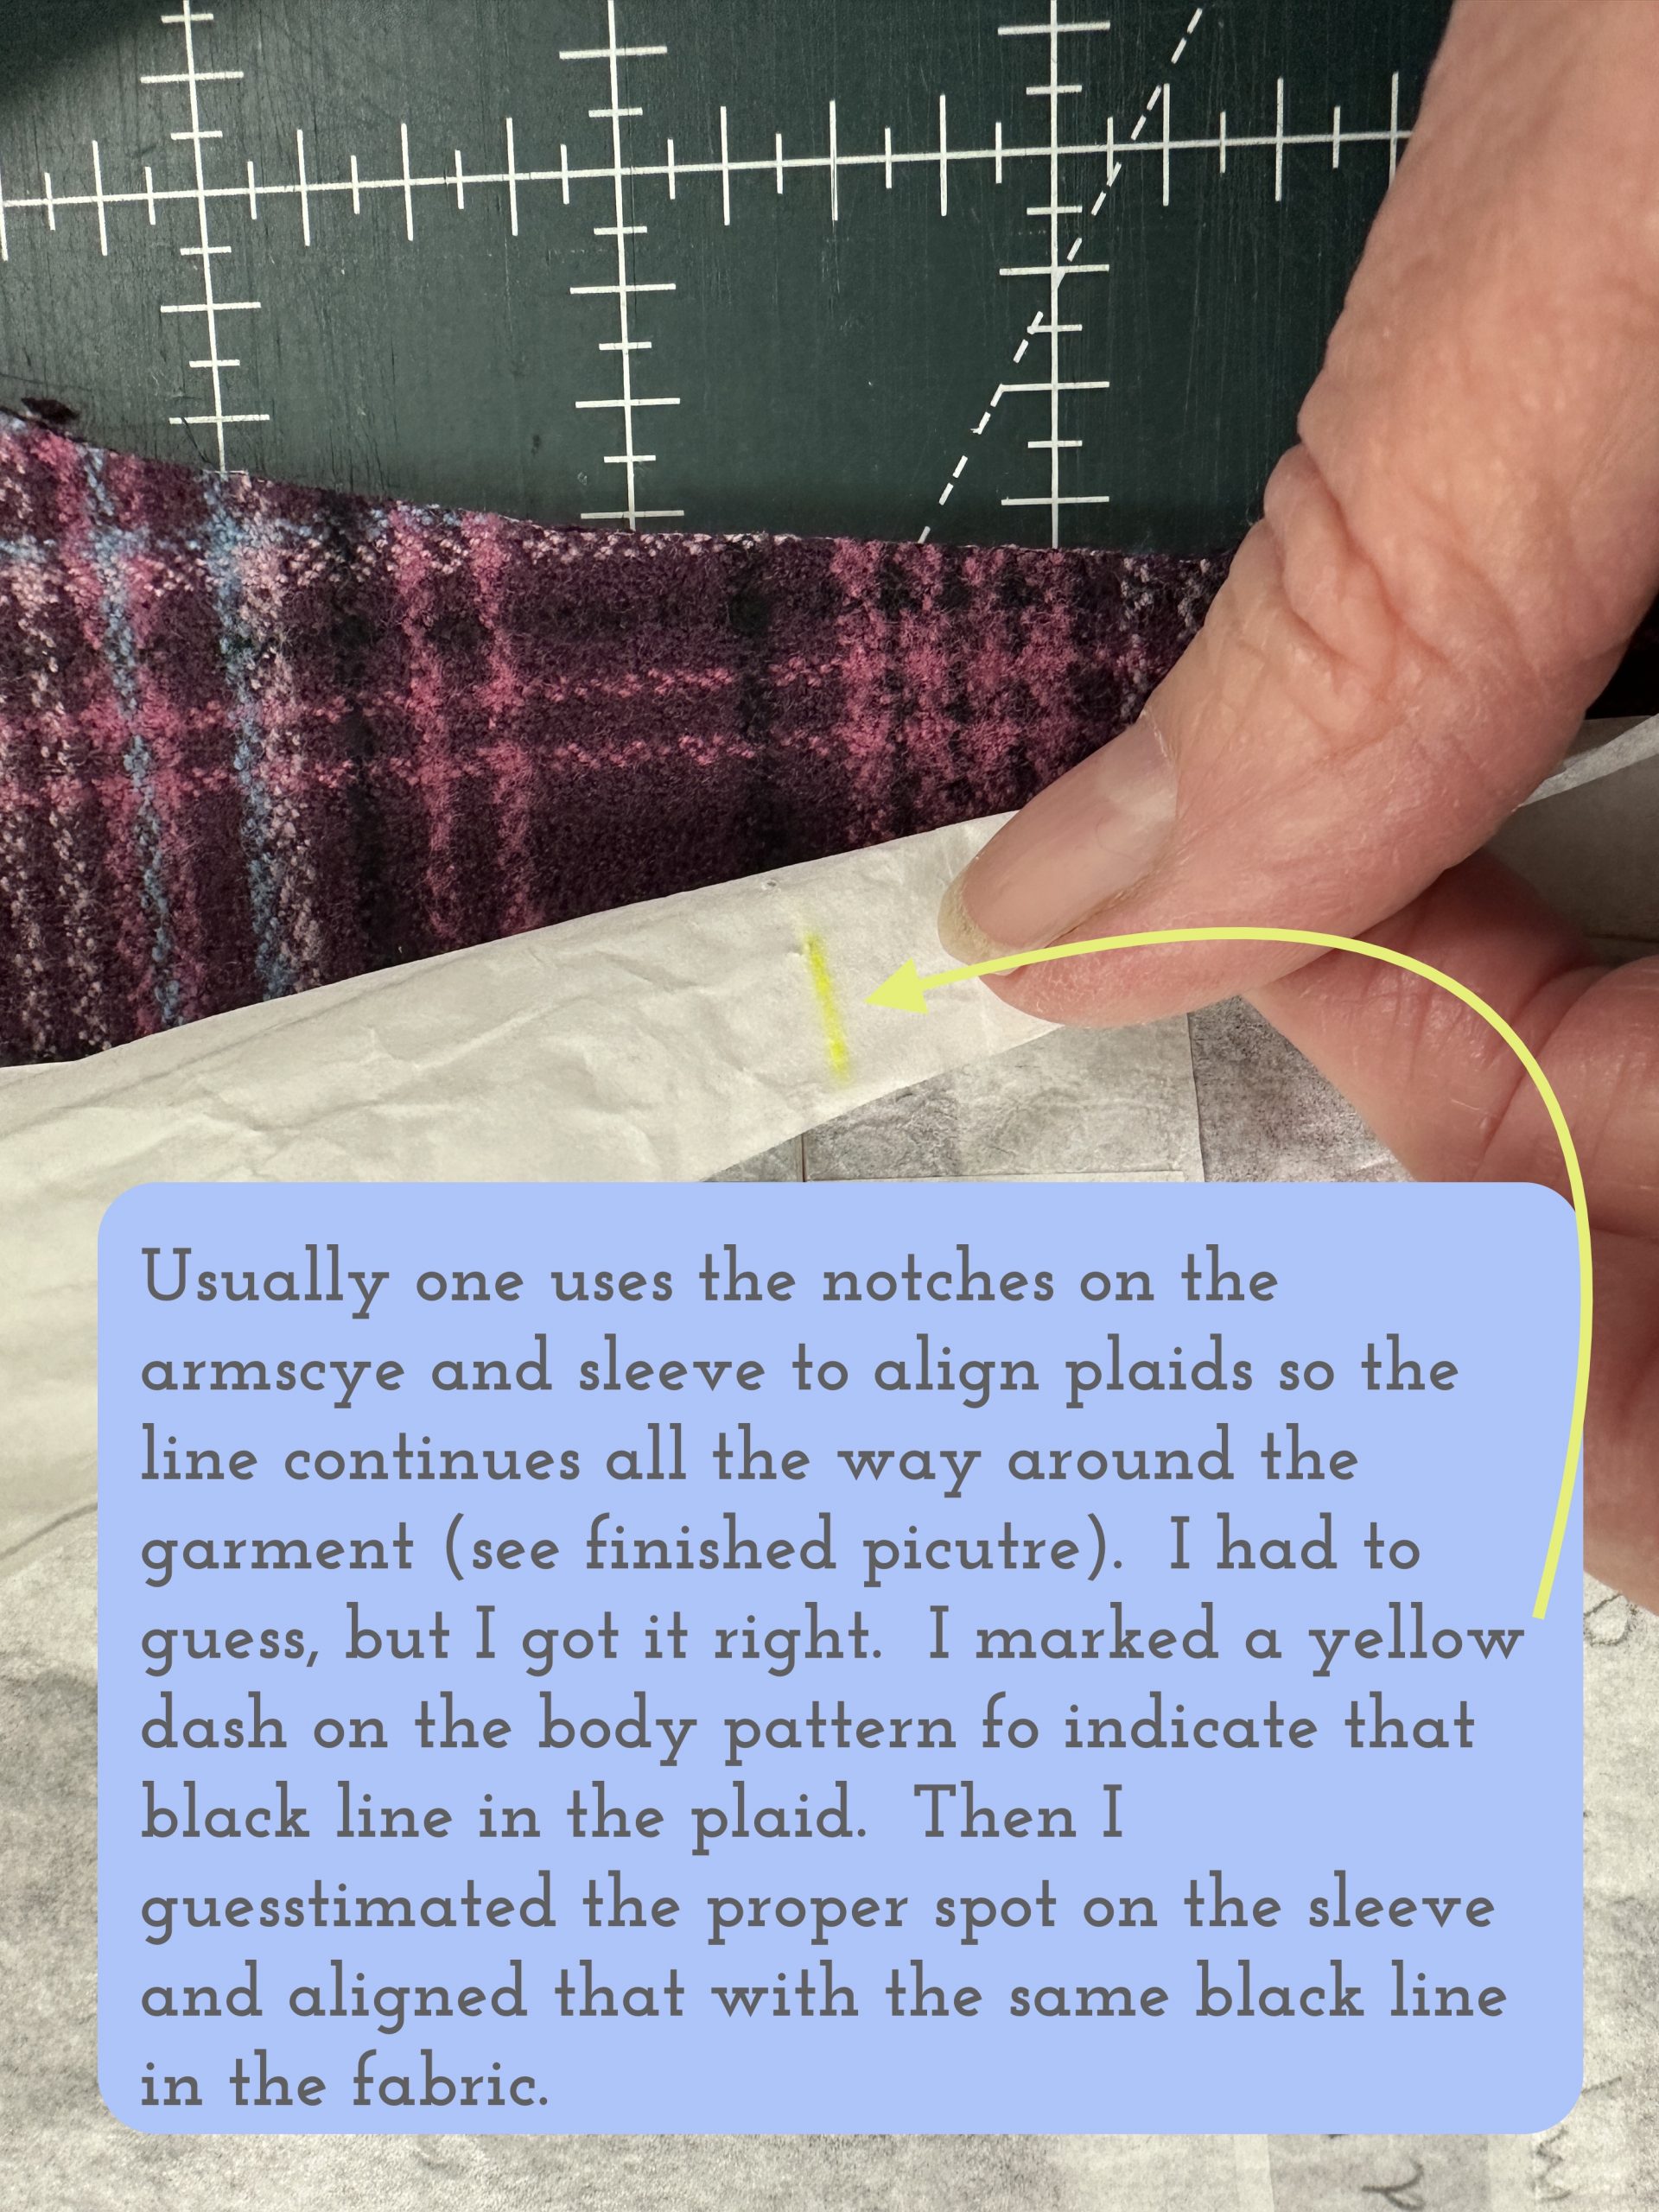
You use the lengthen shorten line to make sure the pattern piece is places squarely on the plaid–the line on the pattern runs on top of the same horizontal band all the way across. The notches (when you have them on a pattern…still grumpy about that!) give you additional “checkpoints” to make sure the horizontals on the front will align with the horizontals on the back.


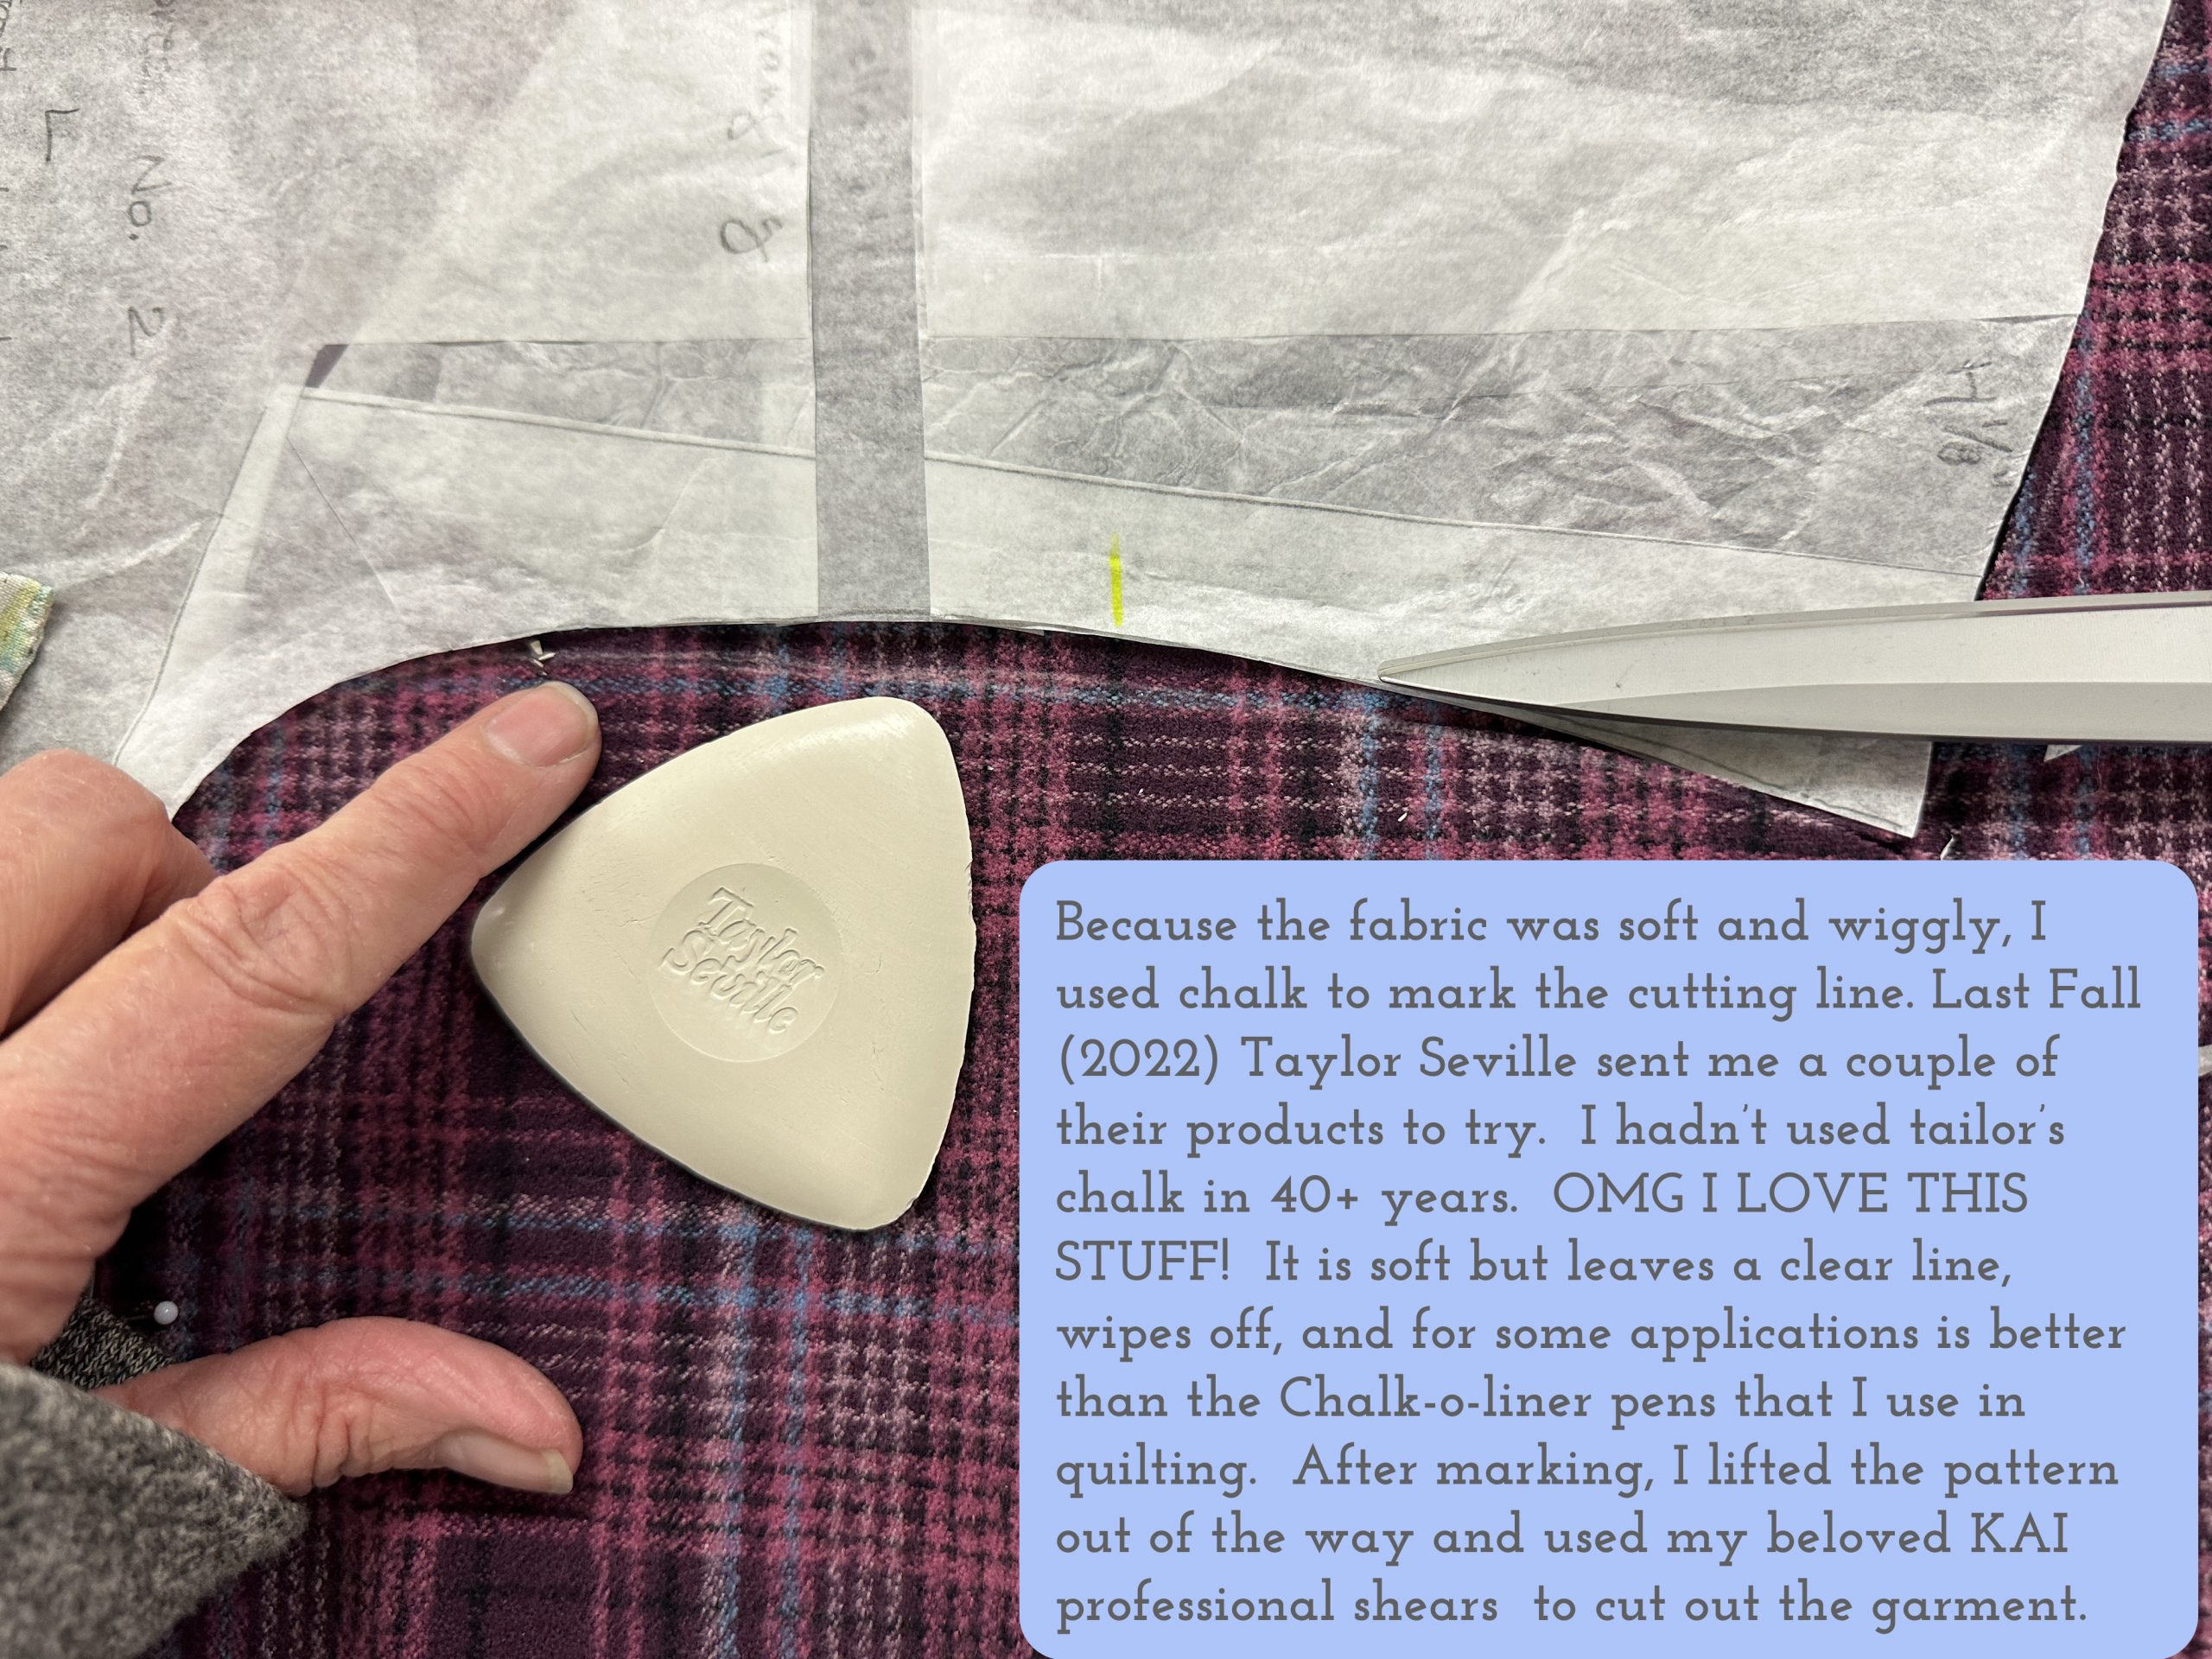
The Taylor Seville chalk is much nicer than the tailor’s chalk I remember from the 70s and 80s. It comes in a nice plastic case that prevents the edges from getting chipped, too.  The KAI shears are these.  They are the first fine shears I’ve bought in nearly 30-35 years.  WHY did I wait so long????? To be blunt, these make my Ginger shears look like lead clunkers!  They weigh less and are SO much easier on my arthritic hands.  They cut like a hot knife through butter!

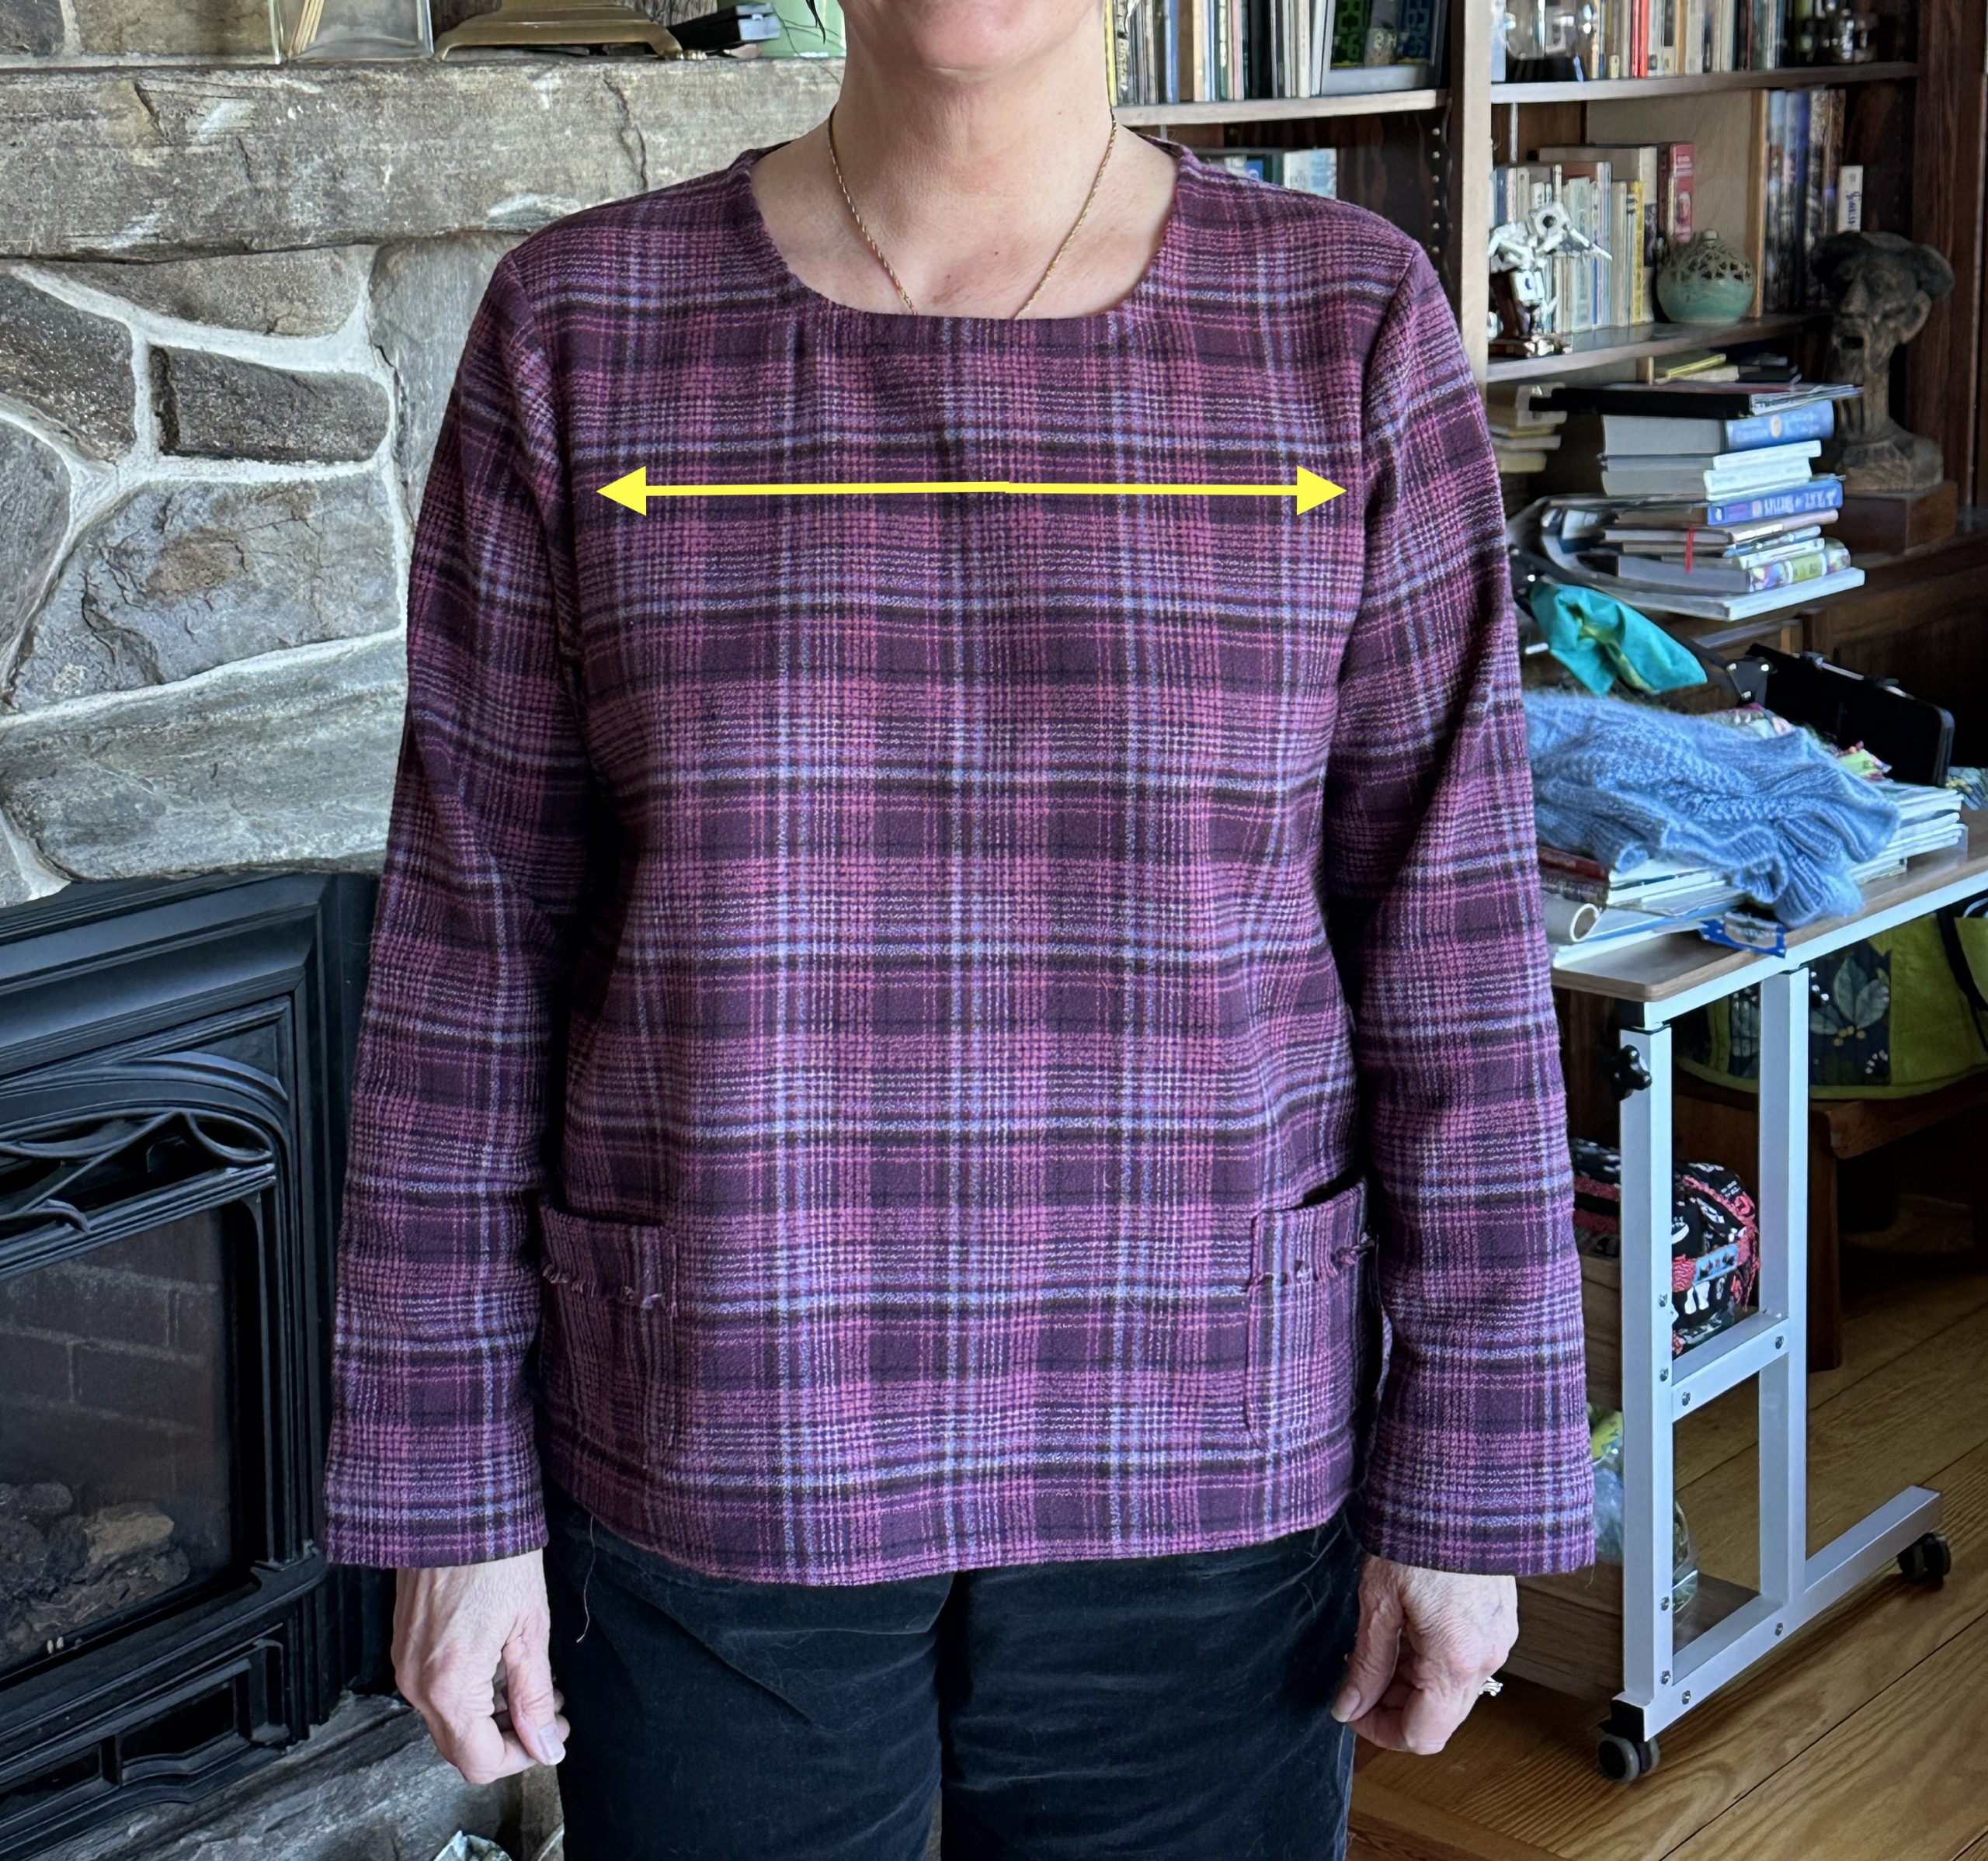
By matching the plaid at the (made by me) “notches” the horizontal lines of the plaid will match up all the way around the garment, continuing from the front to the sleeve to the back to the other sleeve and back to the front. The next photo shows how nicely the line matches up across the garment.

The arrow shows how the black line carries across the garment. Because you need to ease in extra at the sleeve cap, the matching goes off a bit at the top of the sleeve.  That’s why it is so helpful to have notches marked on the pattern–that’s where you match up a plaid or stripe as well as easing the sleeve cap to fit properly!

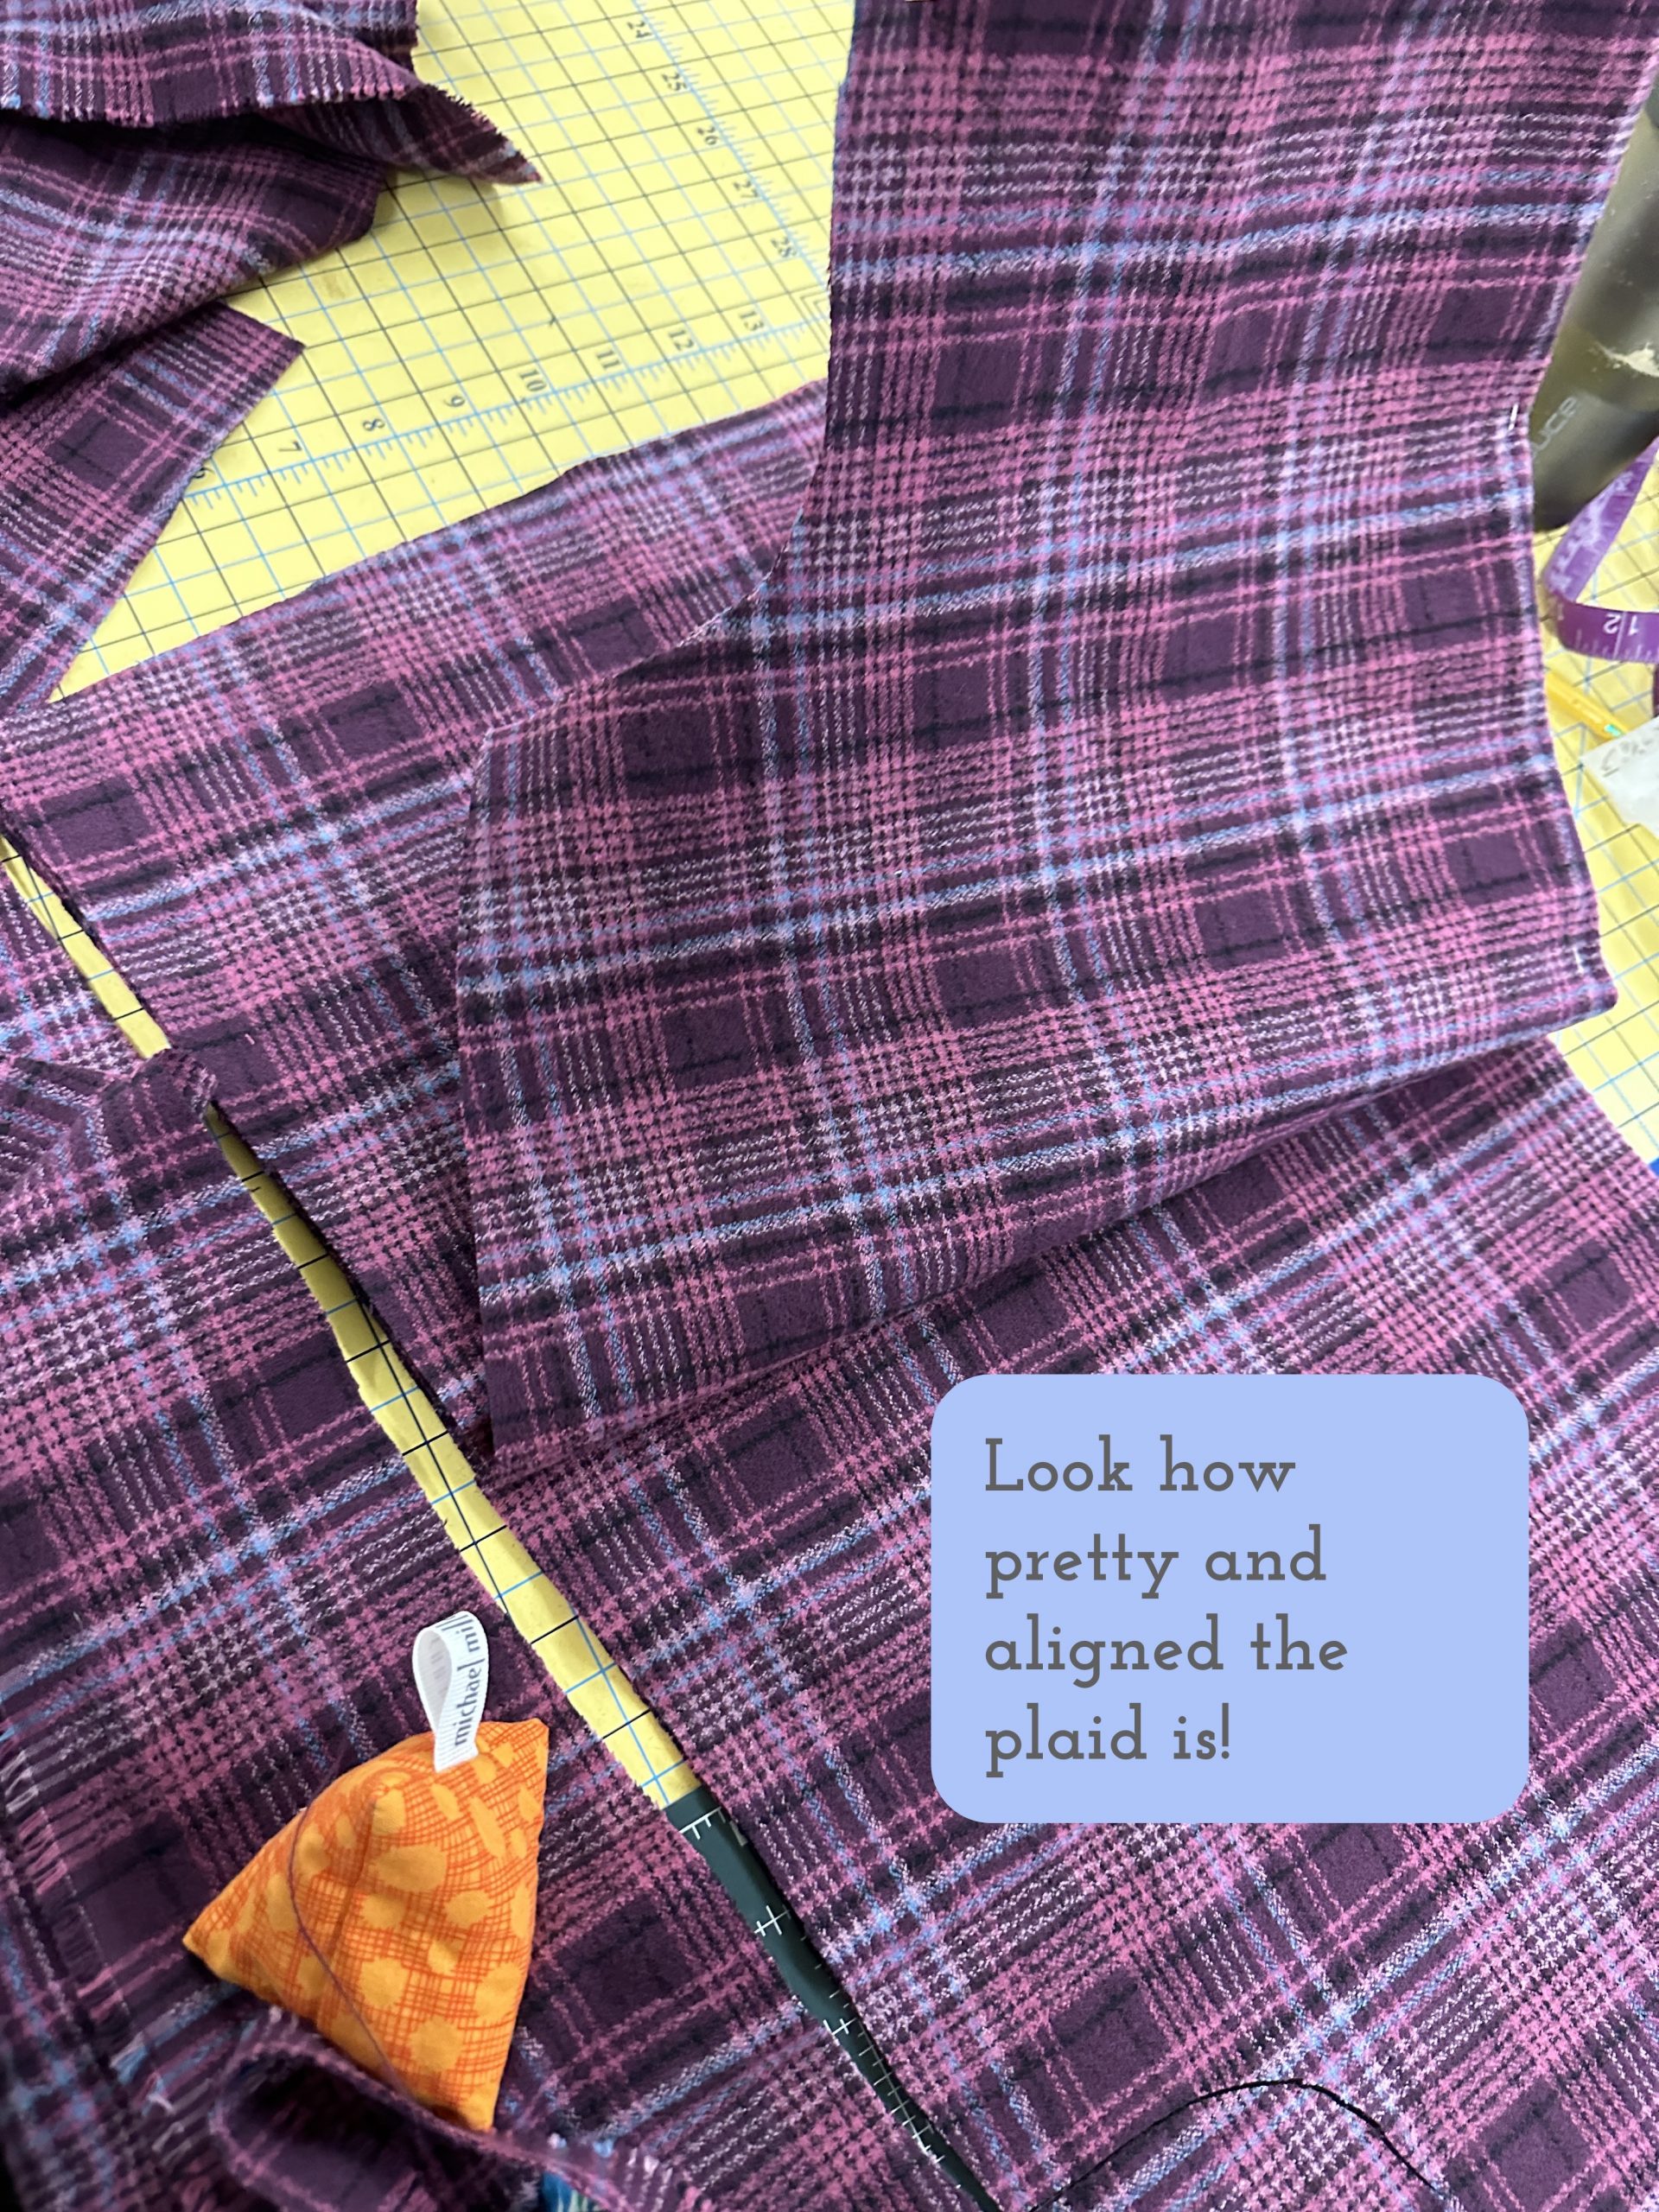
Now that the top is cut out, it is time to start sewing.  My next post will be the first one on seam finishes.  See you then–but one more side-view to show what a beautiful seam you get when the plaids are properly aligned!

Here are the links to all the posts in this series of lessons, techniques that can be applied to virtually any garment and many home dec projects.   Let me know what you’d like to learn and see here on the blog.  Cheers and thanks, Sarah

Lesson 1:   Choosing a Pattern and Starting Tips

Lesson 2:   Making a Muslin, Fitting and Sleeves

Lesson 3:   Matching Plaids, Cutting out Your Garment Pieces

Lesson 4:  Overcast Seams, just like Serged Seams

Lesson 5:   French Seams

Lesson 6:  Lapped and Flat-felled Seams

Lesson 7:  Hong Kong Finish for Seams

Lesson 8:  Lined Patch Pocket Tutorial

Lesson 9:  Hems and Scarf

Plaid Top Tutorial: Lesson 2-Make a muslin, fitting and sleeves

Tuesday, February 21st, 2023

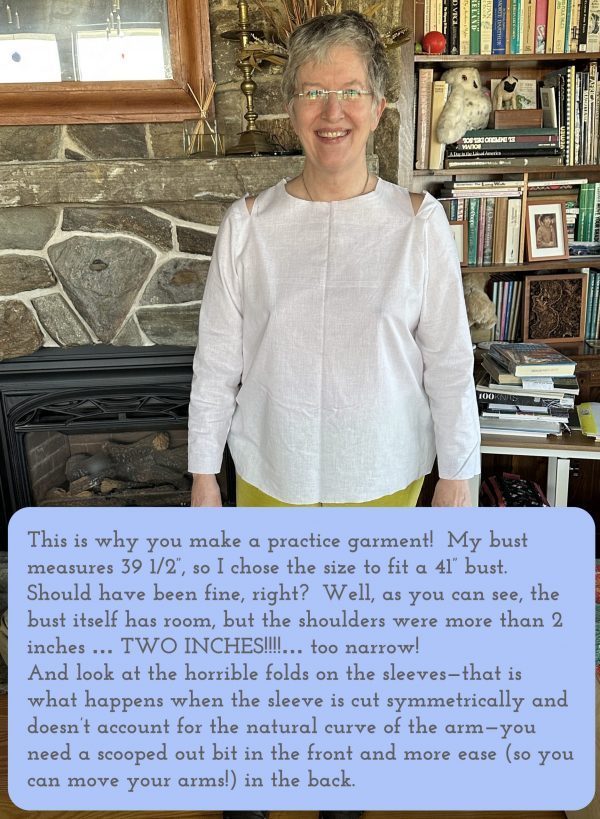
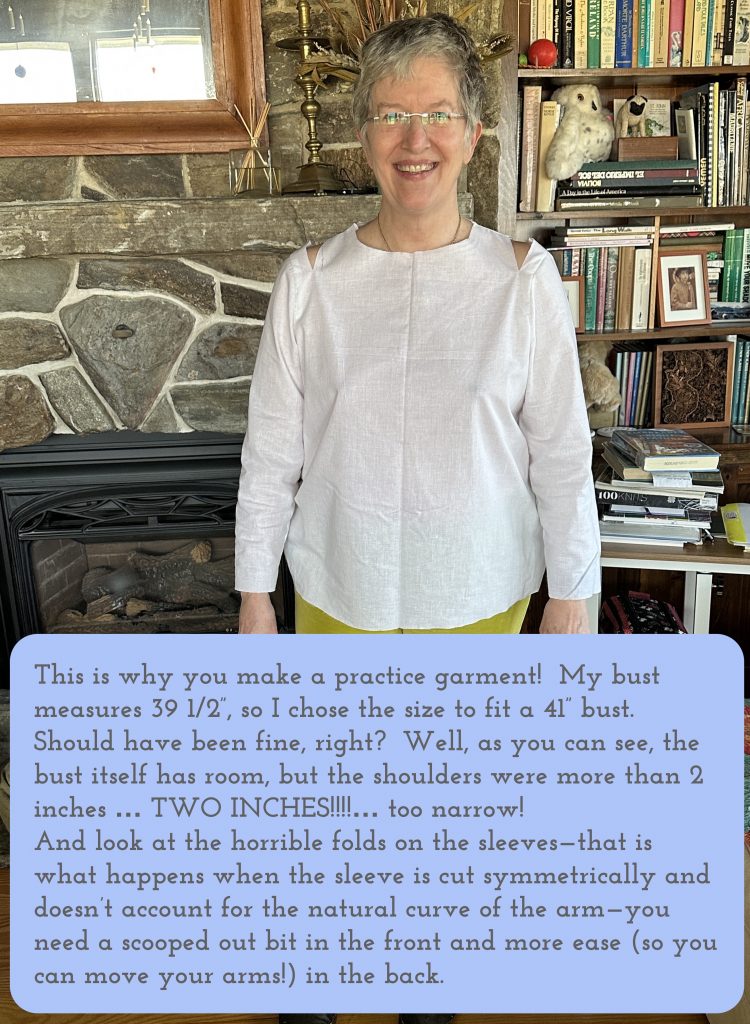
At the end of Lesson 1, I was showing you how far off the fitting is in this pattern when applied to my body: broad shoulders, small bust.

Please note:  I am affiliated with Janome as a Janome Artisan and am compensated.  However, my reviews are honest and I would say what I say whether affiliated or not.  I’ve also chosen to be affiliated with Janome since 2003 (!!!) because their machines are so good and they are so responsive to the interests and needs of their customers.

There’s a LOT of detail in this post, but if you read through you’ll learn why it’s a joy and a wonder when you can find a pattern that works for your body.  And once you make any necessary changes, it is fairly easy to use that pattern and make variations on the theme.  Somewhere down below I mention taking a WONDERFUL, highly-recommended, can’t say enough good tings about Garment Makers Question Time with Philippa Naylor.  I have been sewing over 55 years.  Others in the class have never made a garment. Yet we ALL are learning and getting good results!    You start out easy with a shift dress, move to a skirt, on up to rain jackets and fancy stuff!   I got sidetracked with life last year but can’t wait to get back to it.  Her work experience in the garment industry long before she became a quilter is golden.

It’s kinda like prepping a house to paint it–you have to do the yucky sanding and spackling and priming or the paint job won’t turn out well now matter how good the paint and painter.  This is the prep work part of a successful garment!
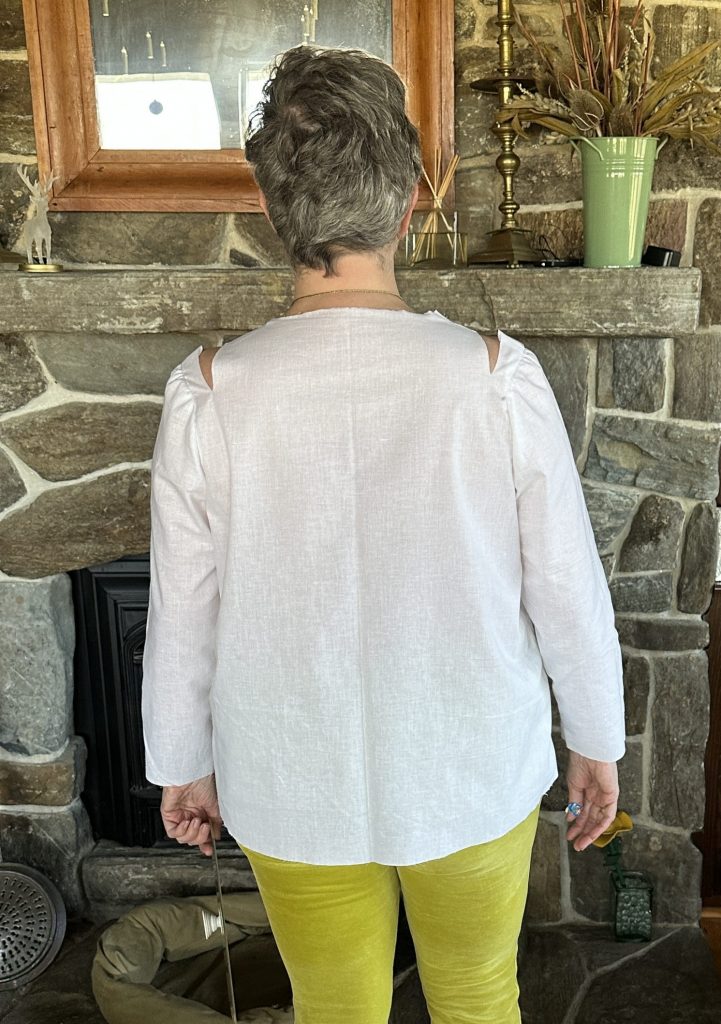
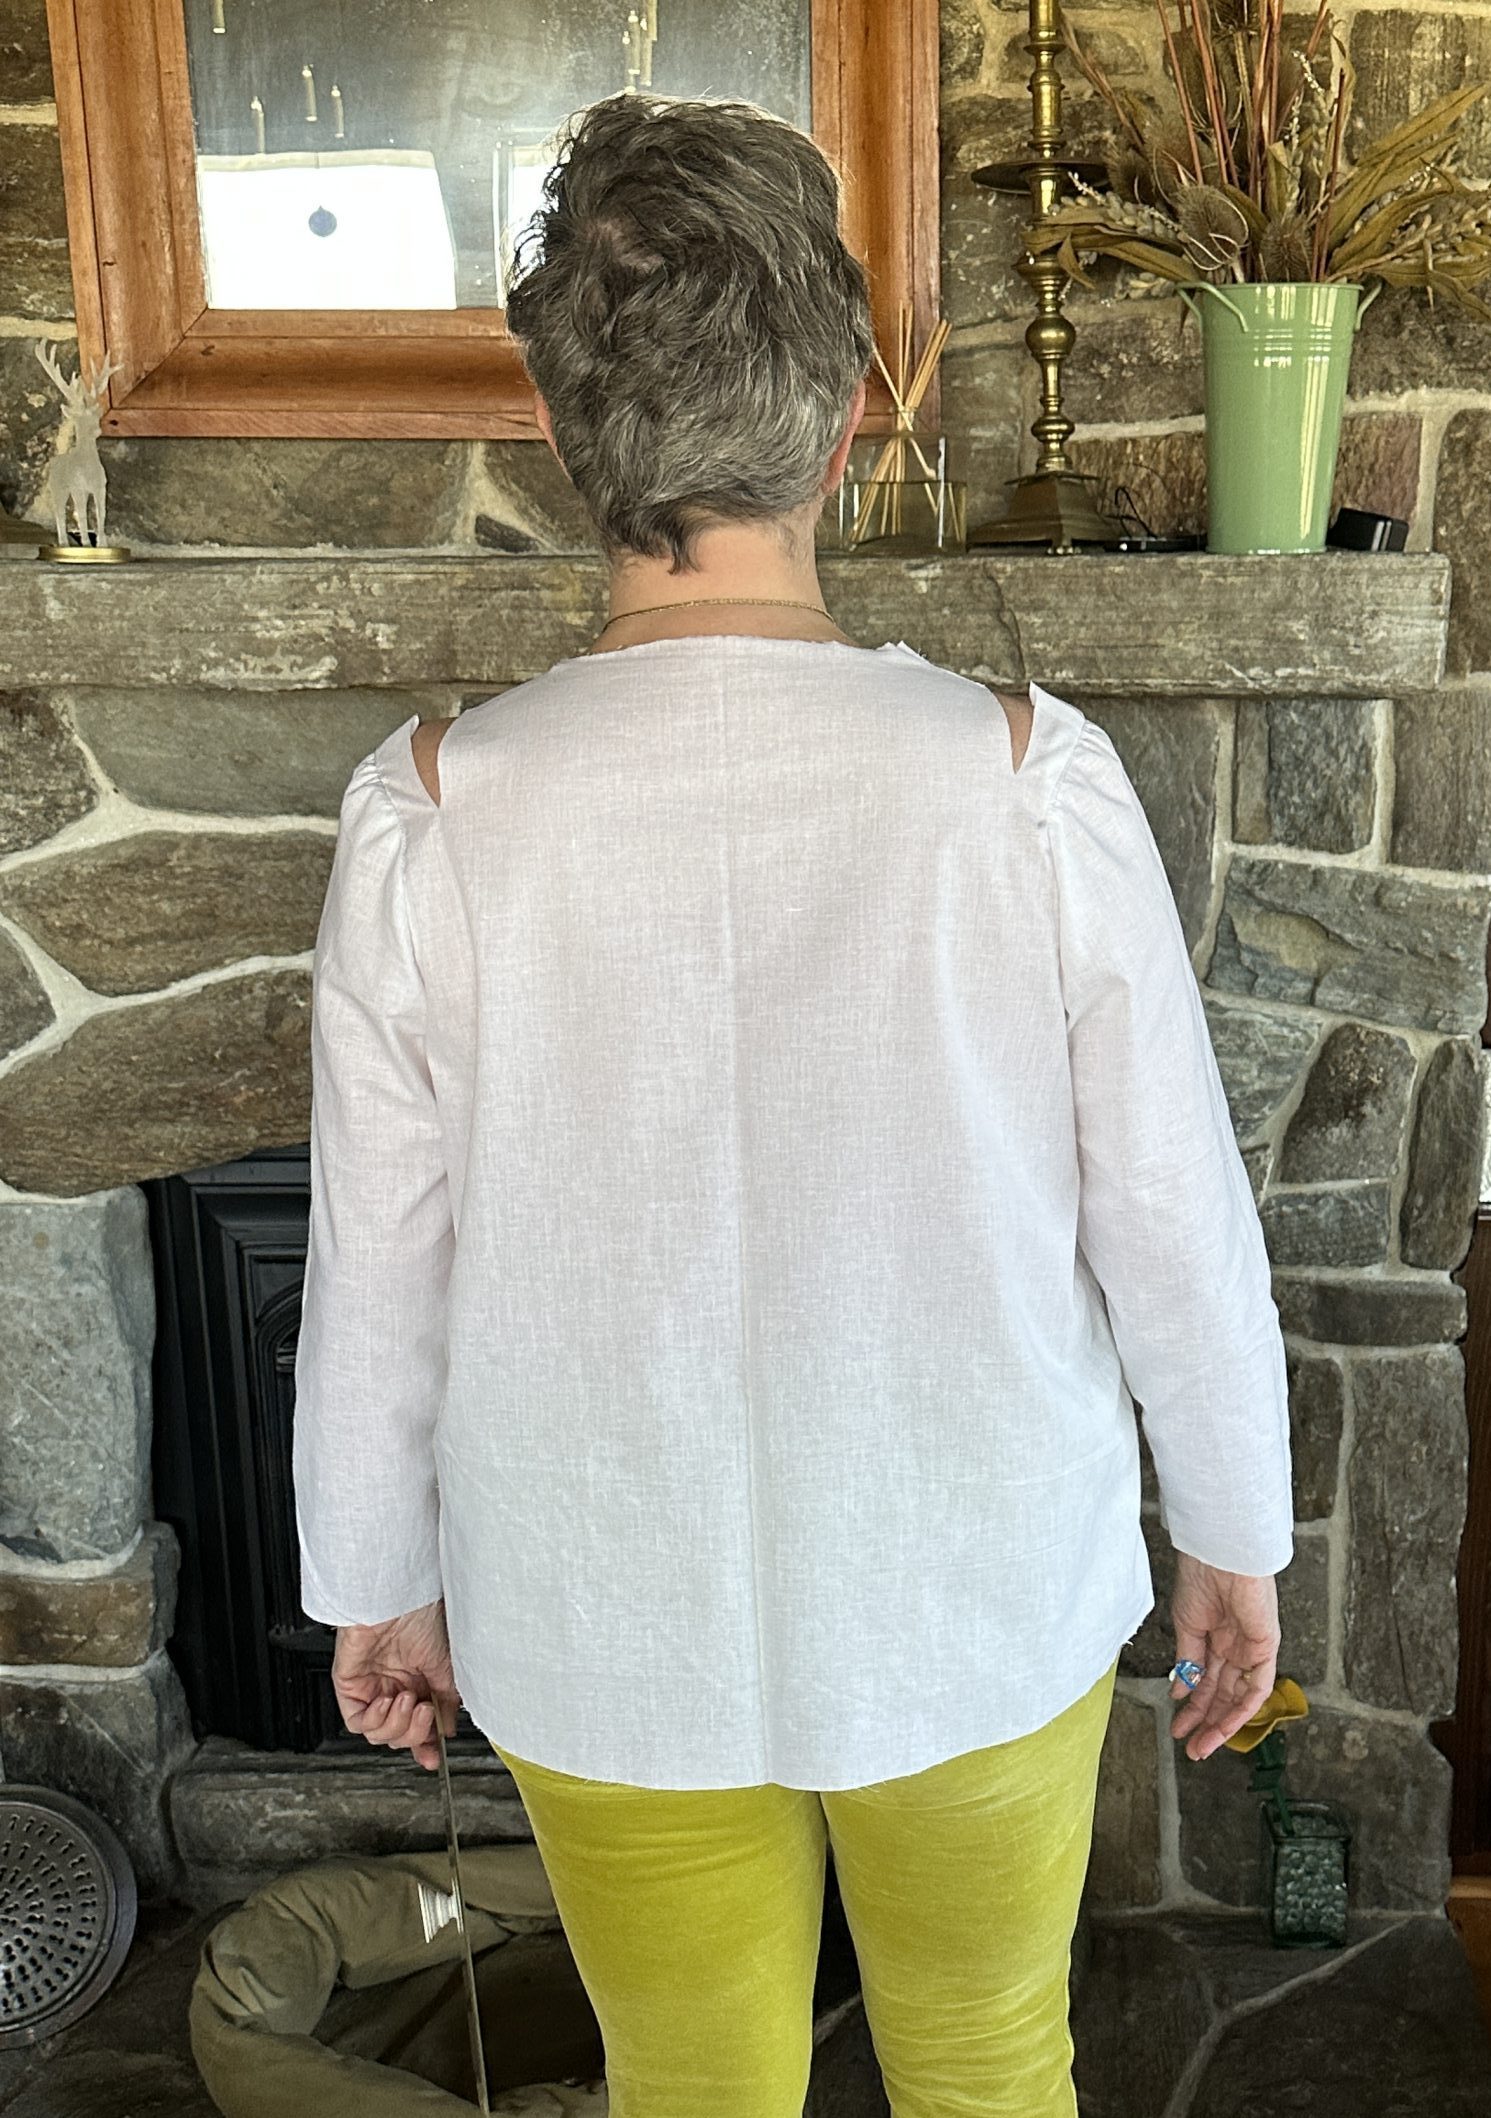
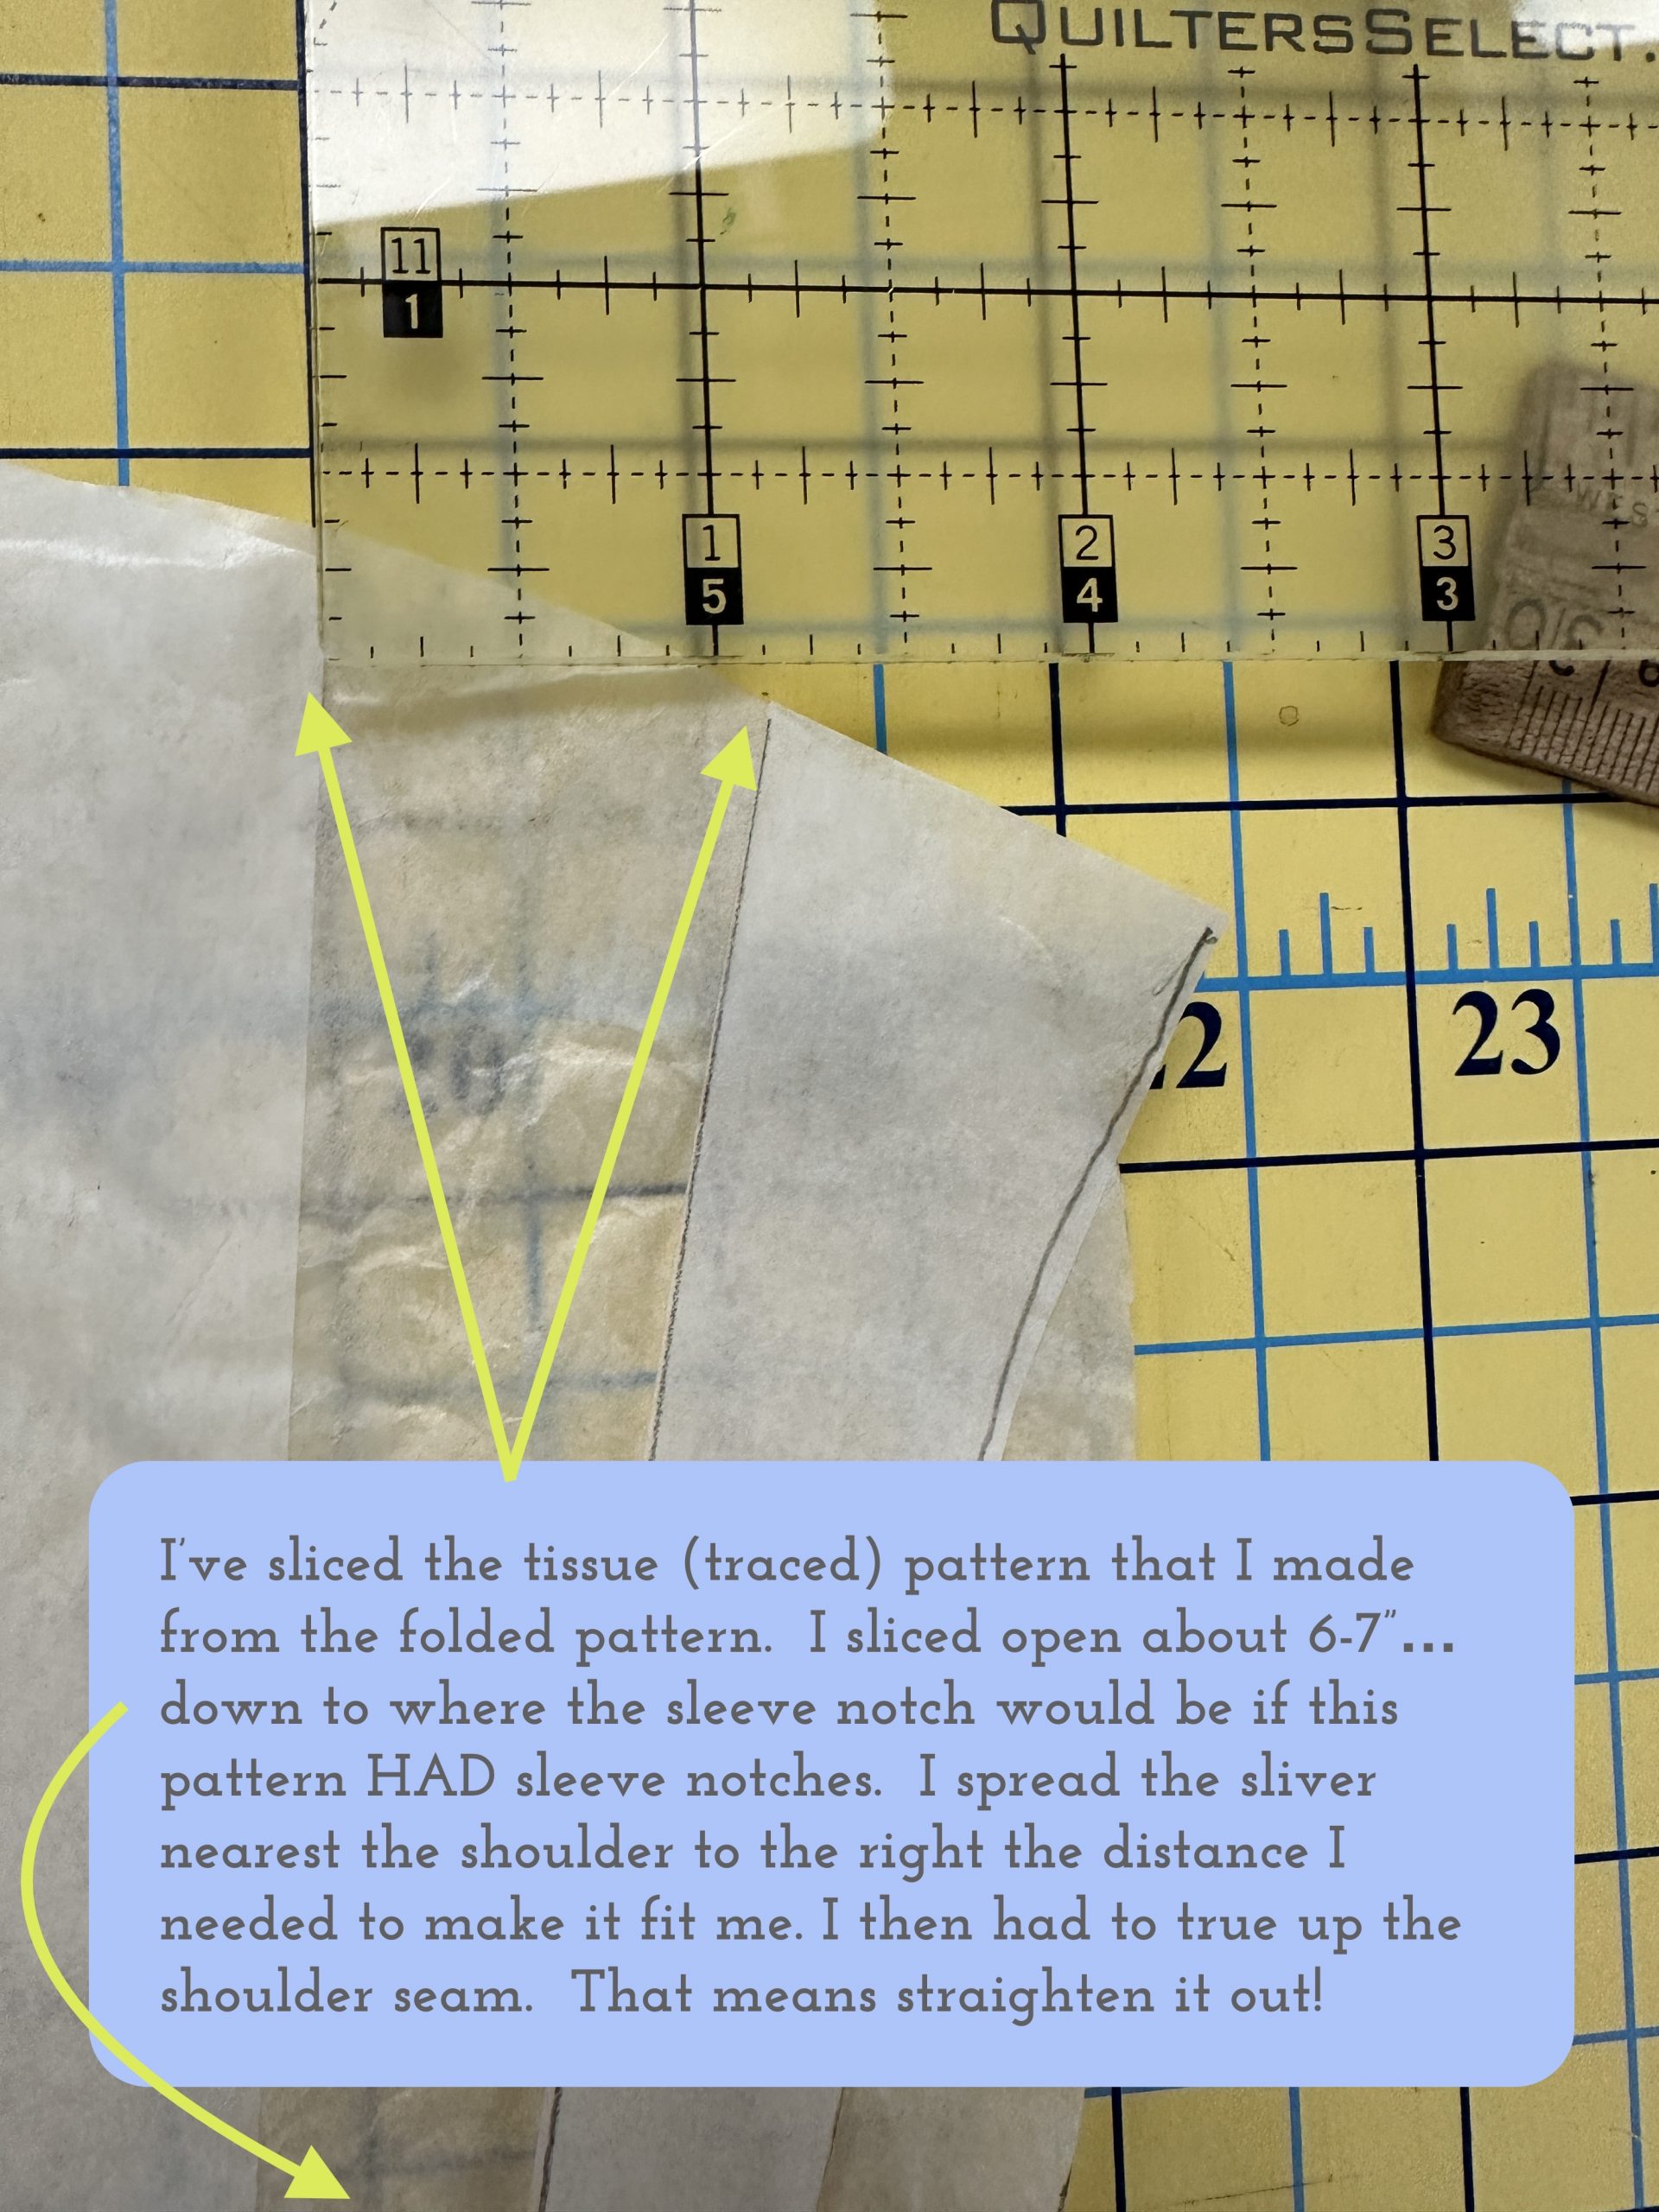
View from the back..see those pull lines across the upper back, that means even with the slices it is still too tight! Part of the problem is that the pattern sleeve pieces are cut without a front/back to the sleeve cap.
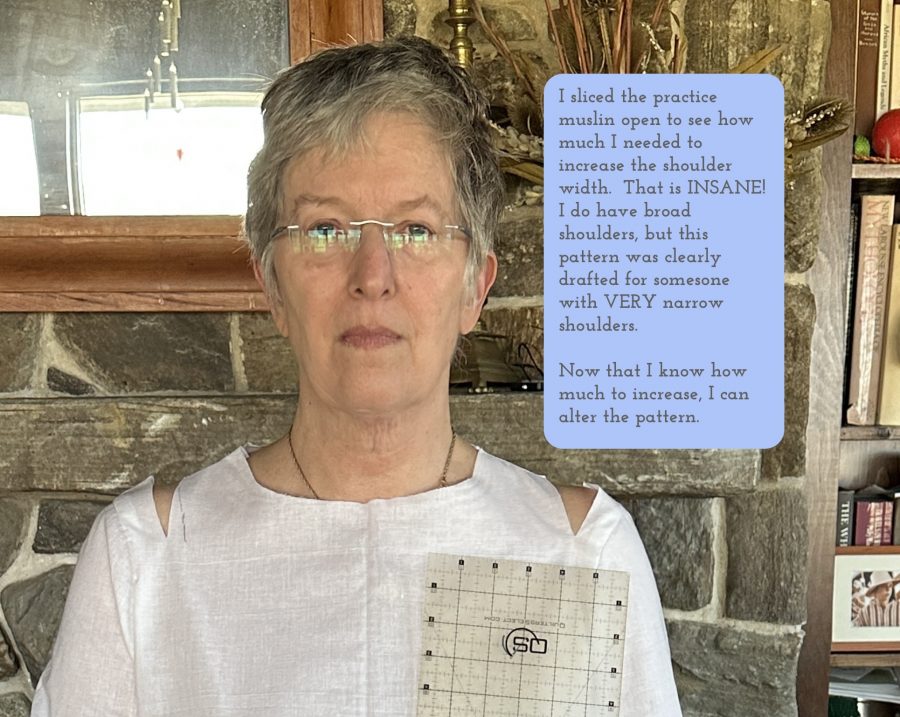
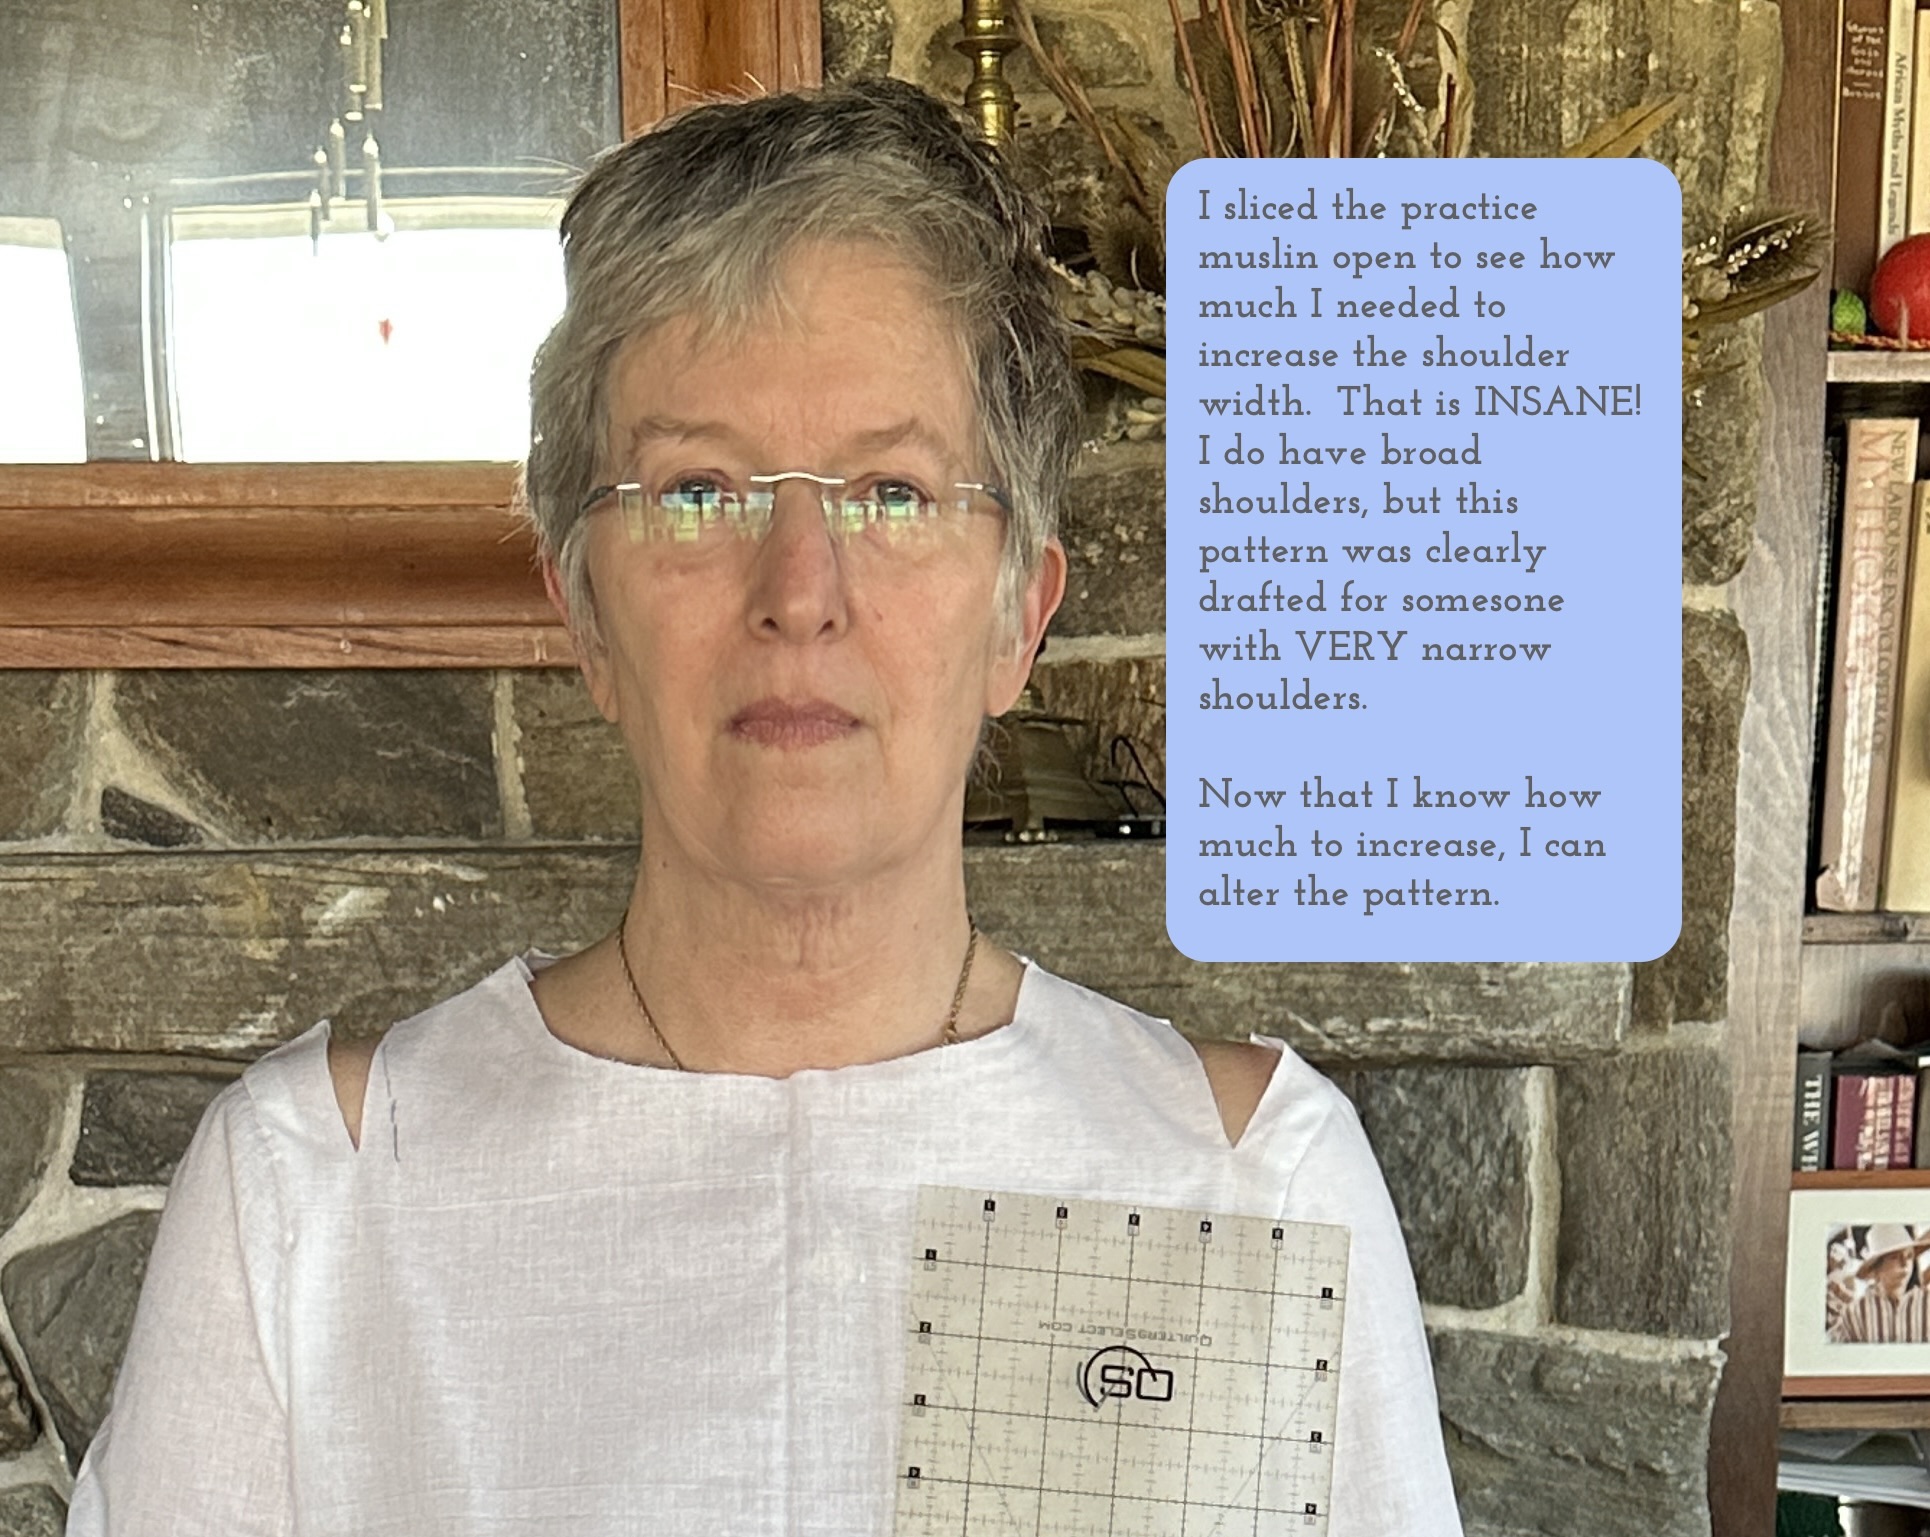
A close up of the top…holding a ruler to show how much I need to alter the pattern to make it anywhere near fitting properly. There are many books and videos and workshops to learn how to do this, but the one that finally made it click and work for me was GMQT.  Your mileage may vary, you may grasp the concepts well from some of the tried-and-true books from the 80s even.  But this is how I finally “got it.”
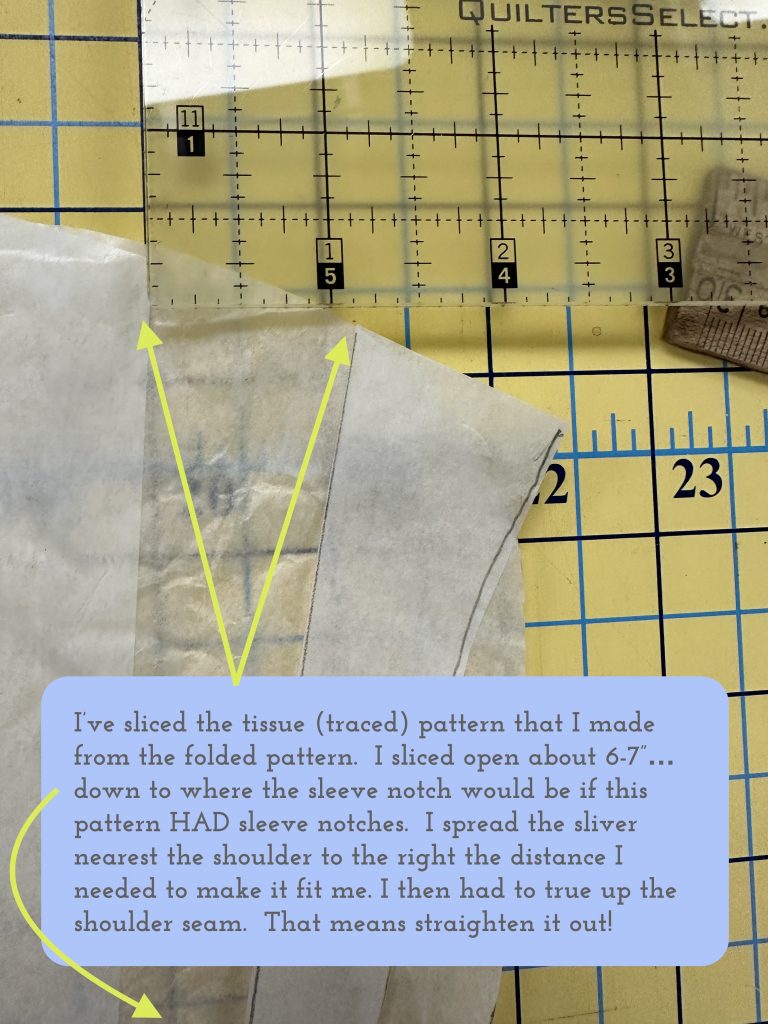
There are MANY resources, from books to youtube to online and in person classes to learn about fitting. A year ago I signed up for Philippa Naylor’s Garment Makers’ Question Time, a 12-month series of classes for a price that is modest, especially considering the vast amount of knowledge and content. I HIGHLY RECOMMEND THIS WORKSHOP GMQT.co.UK (not affiliated, just a happy student). Finally, after making clothes for more than 50 years, I feel confident in making alterations. The caption on the photo explains what I did to make it fit.
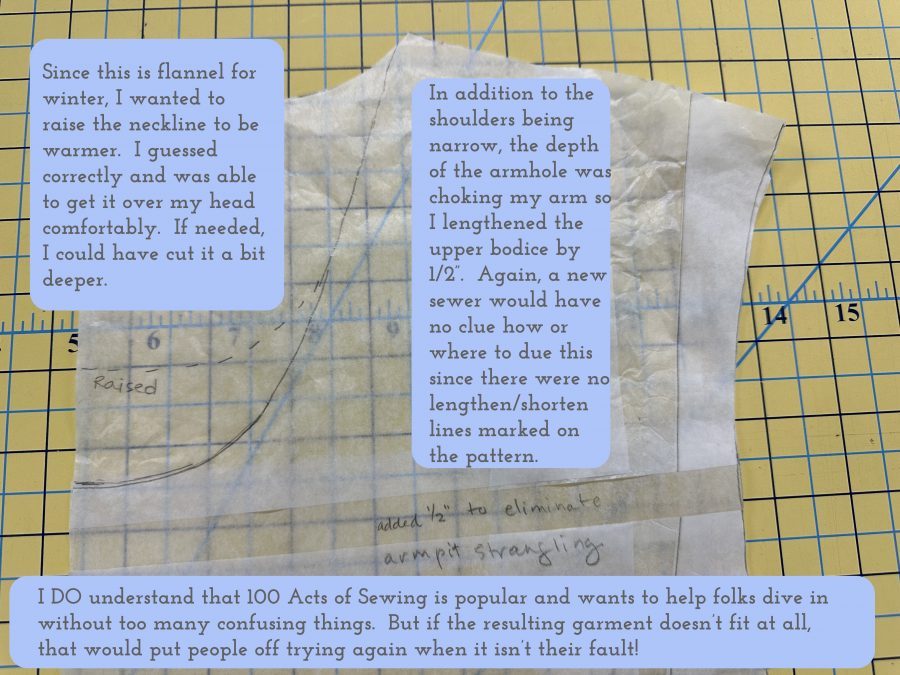
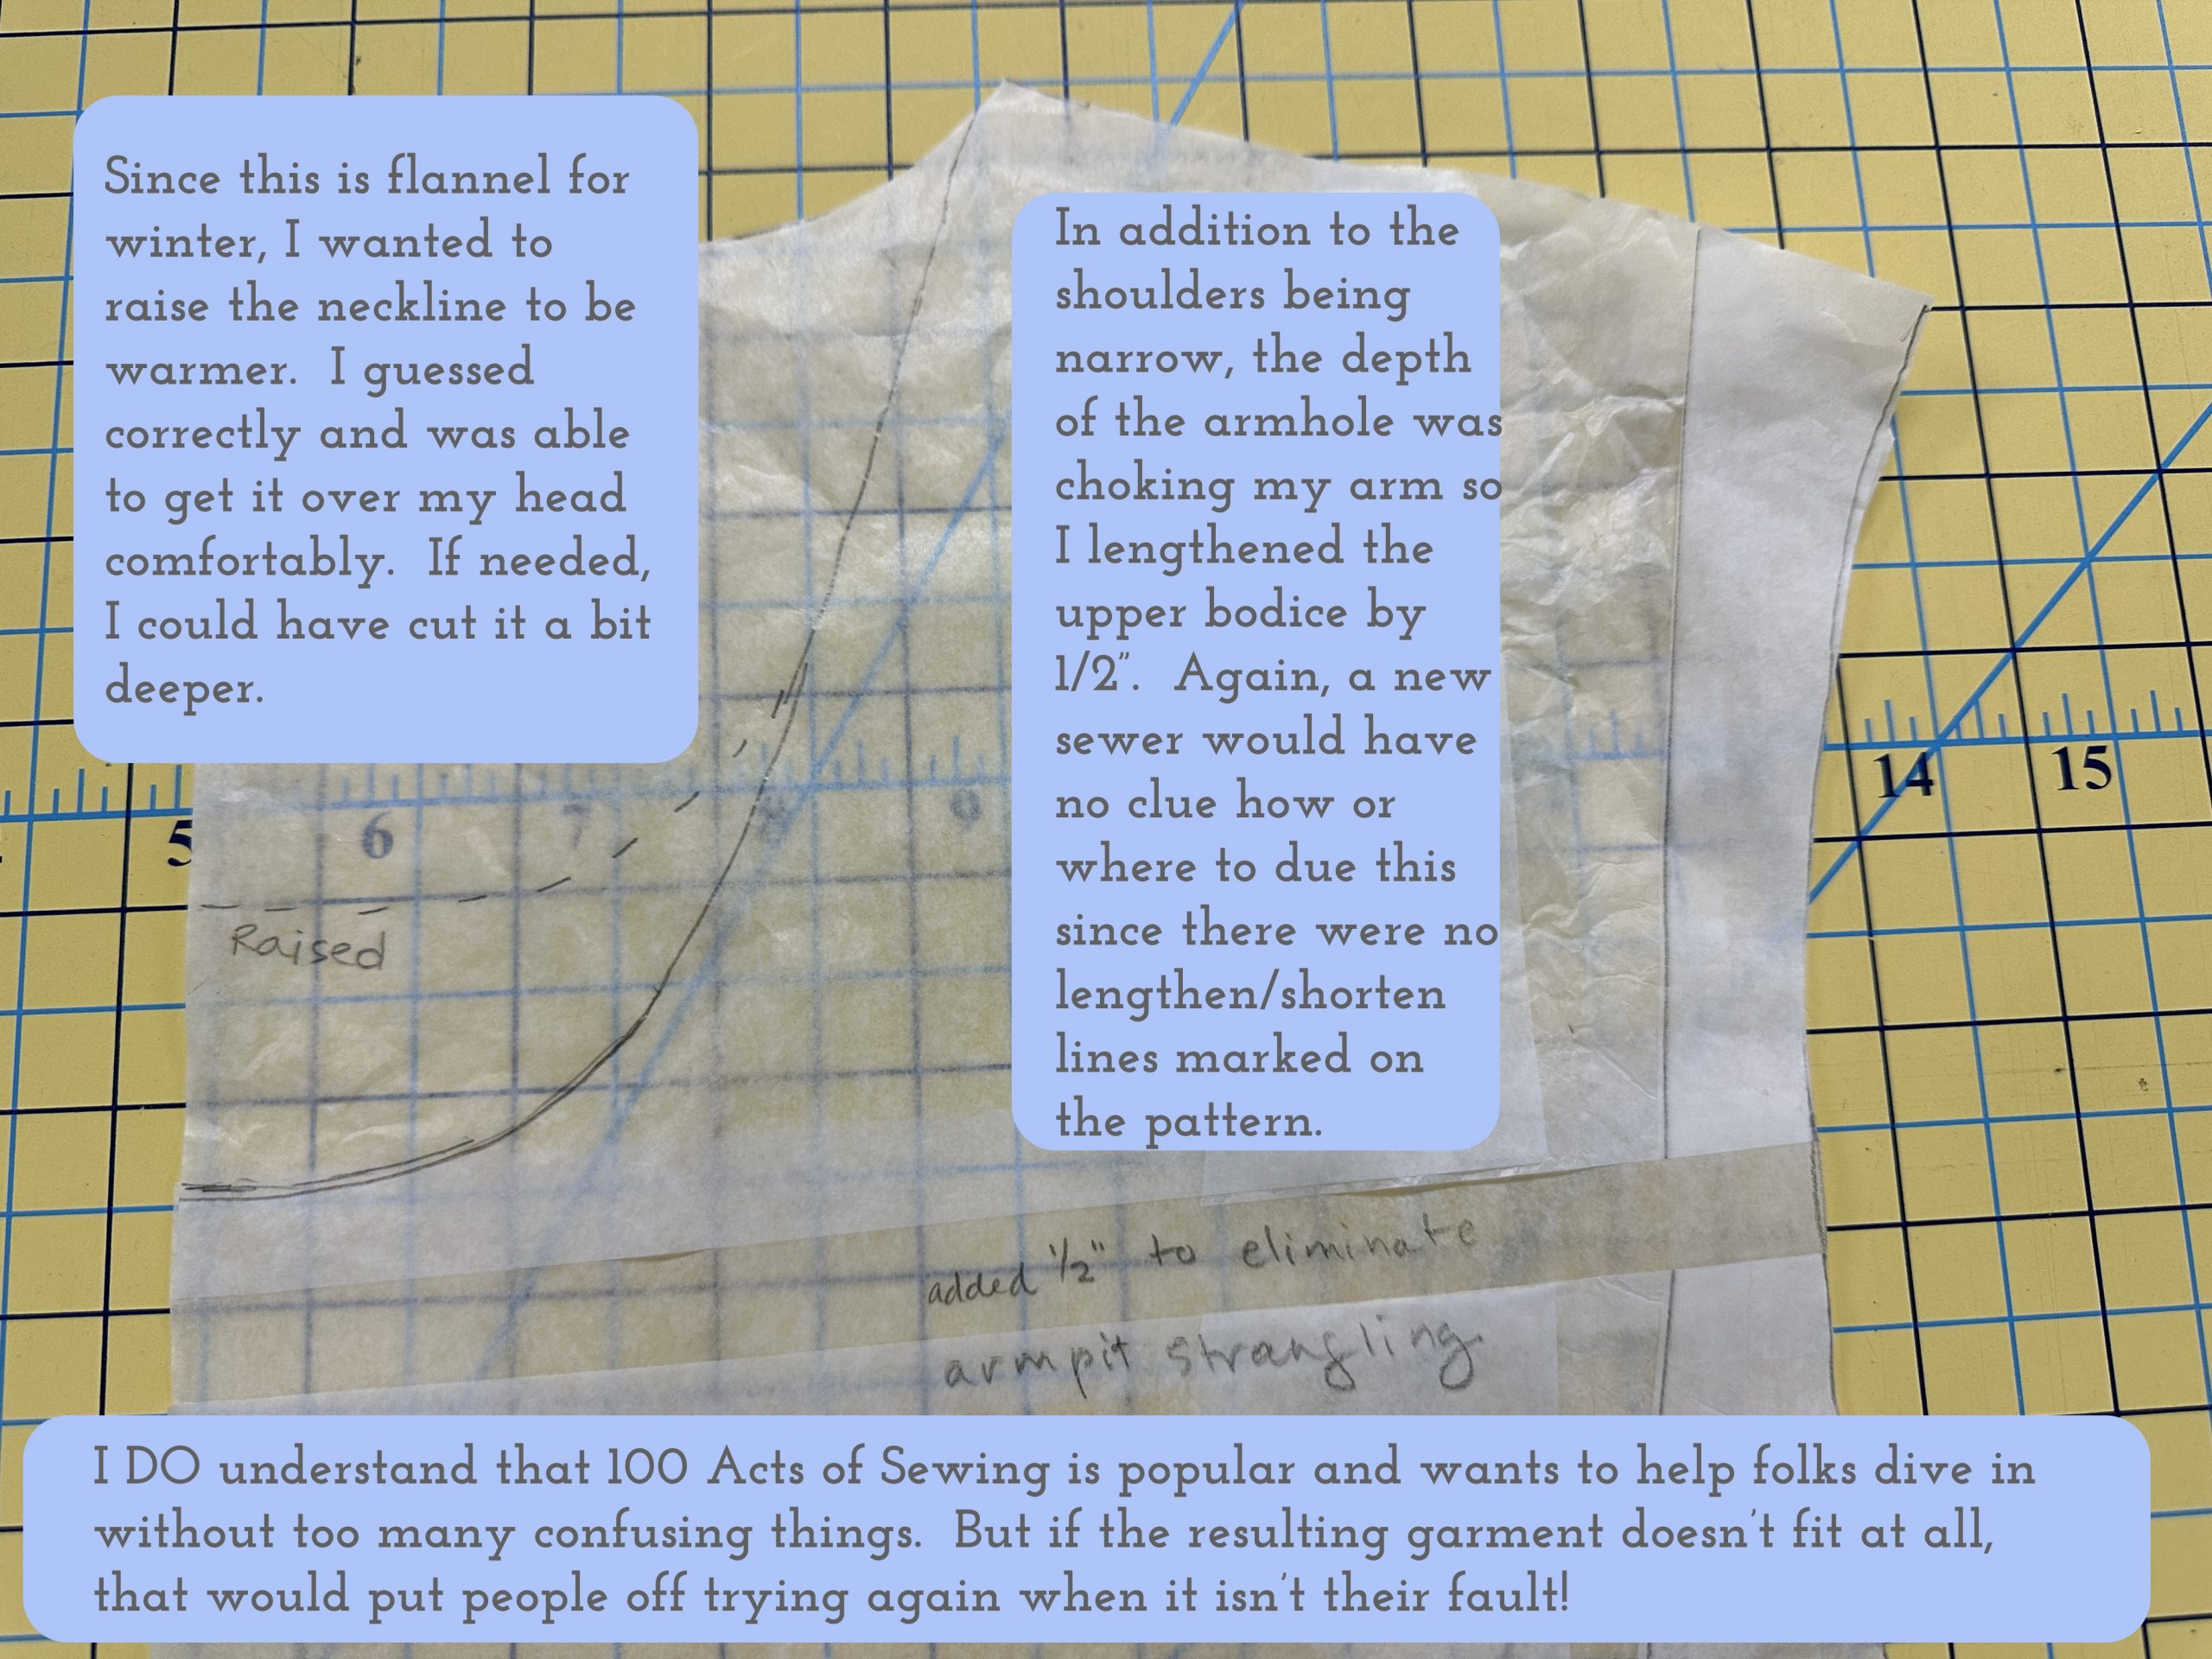
The upper bodice area was also too short…not enough room for my arms to move, so I lengthened by 1/2″. You can see the pencil notes… I made the cut perpendicular to the center front, spread the pieces and inserted more paper. I guesstimated where to make this change since the pattern itself does not include the standard lengthen/shorten here markings. I also raised the neckline since this is a winter top and Maine is cold!

I knew that the sleeve pattern was a problem as soon as I saw that it was cut symmetrically.  If you look at a human body from the side, the arm curves to the front.  A sleeve needs to do the same, not hang like a plumb line from the shoulder point.  The fact that the pattern piece was symmetrical (cut on the fold) meant it could never fit properly. I knew I could modify a sleeve pattern piece from another pattern if the length of the seams matched closely enough to make it work.

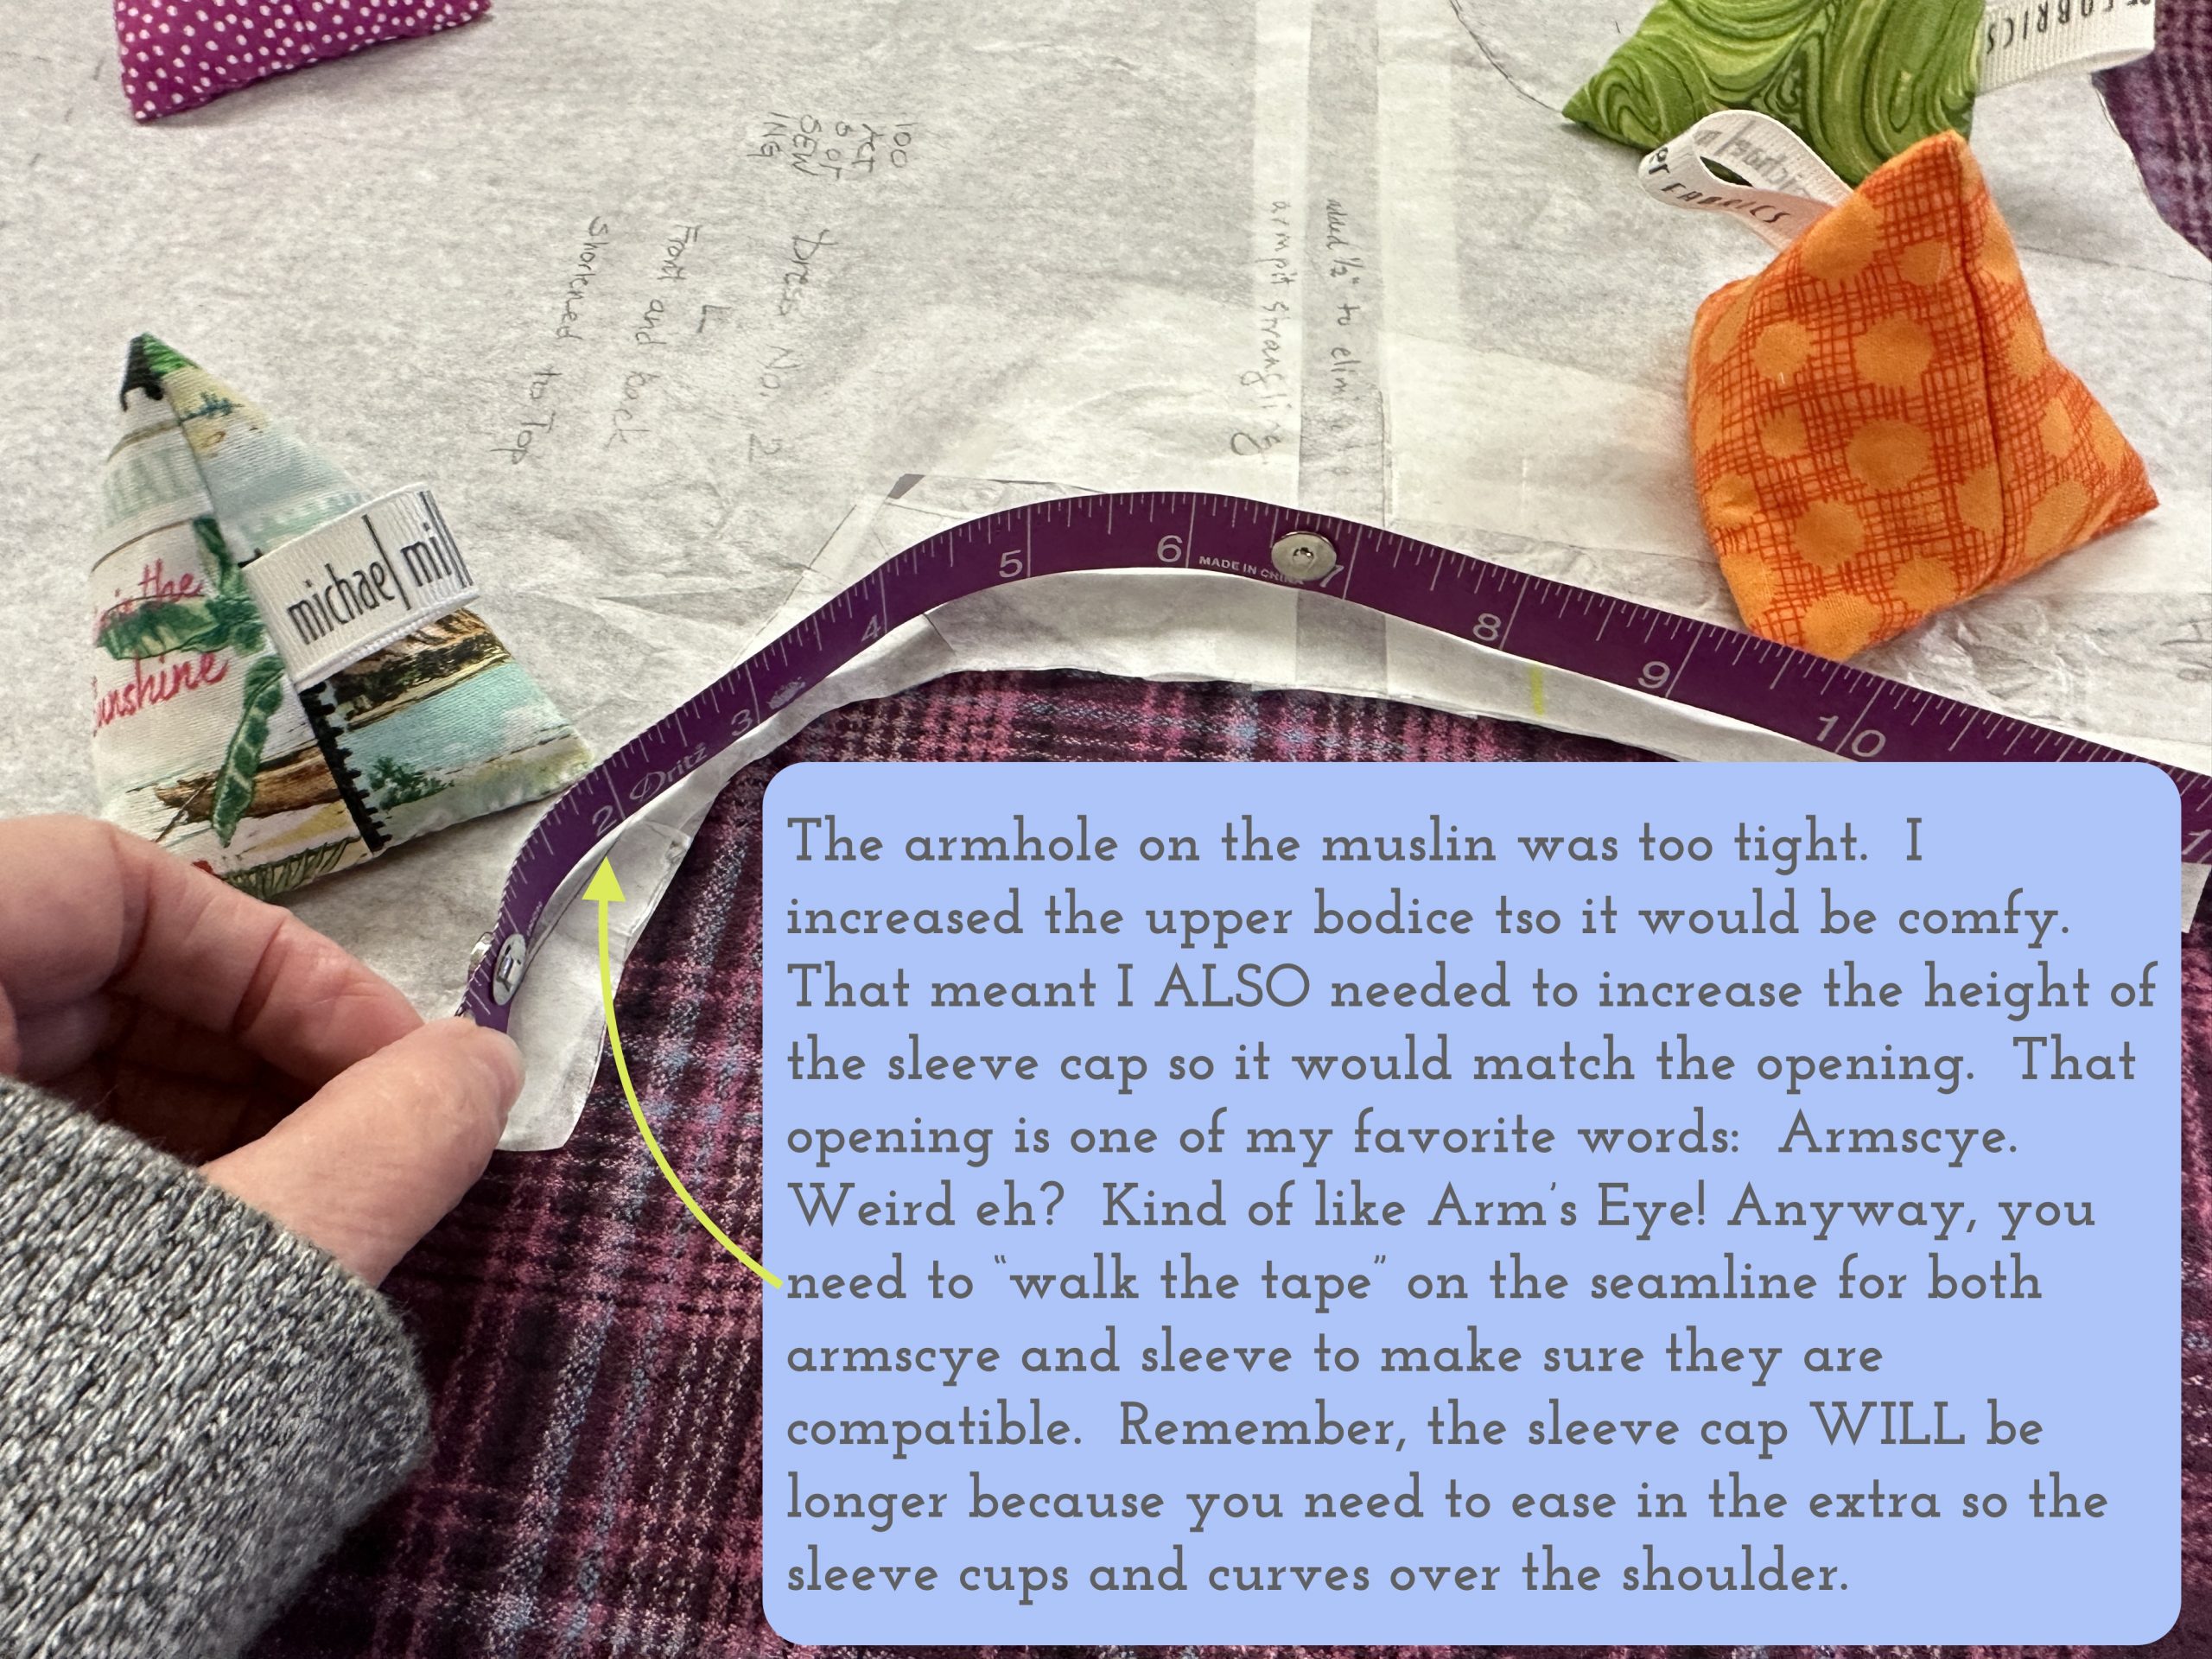
I used a technique I learned in GMQT.co.UK that is called “walking the seam.”  You measure the length of the SEAM line, not the edge of the pattern piece on, in this case, the armhole opening and the top of the sleeve.  Luckily, my pattern piece from a different garment was within 1/4″.
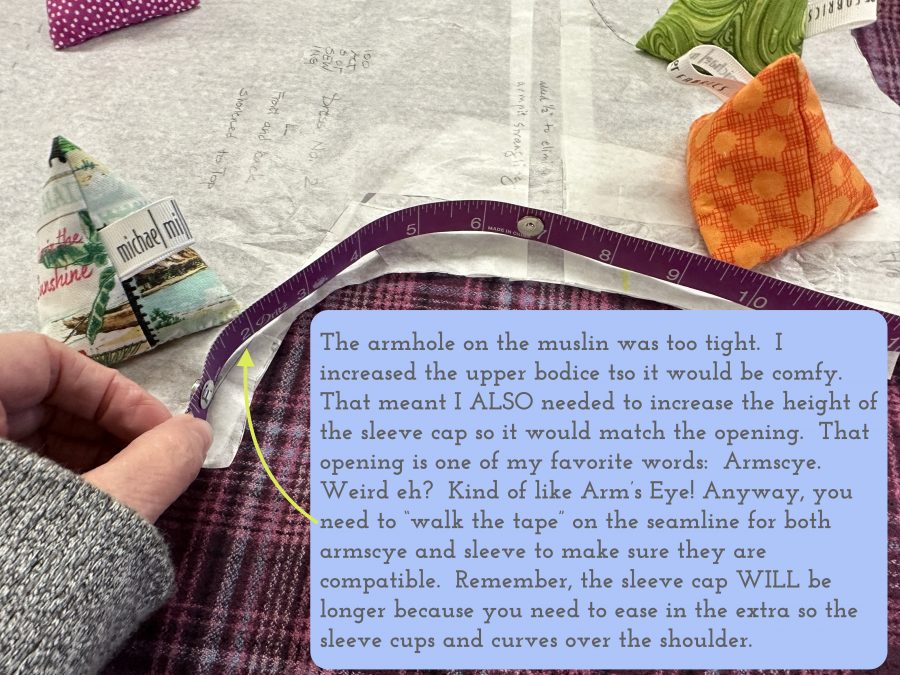
To “walk the seam” you set your tape measure on its edge, and measure along what will be the seamline.  After adding in the extra 1/2″ length (you can see the taped insert in the photo above), that changed the side seam length, which meant I needed to make sure the front side seam matched the back side seam (easily done since it is just a straight line).  See next photo.  PS–if you want to make pattern weights like mine, my free tutorial is here.
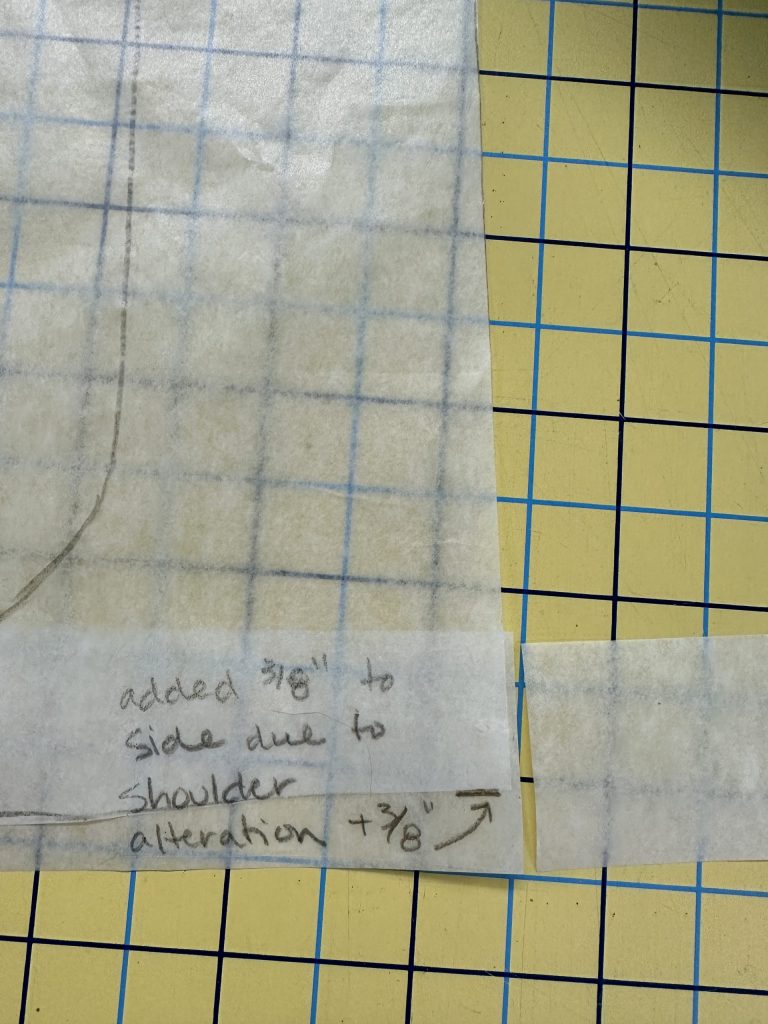
 

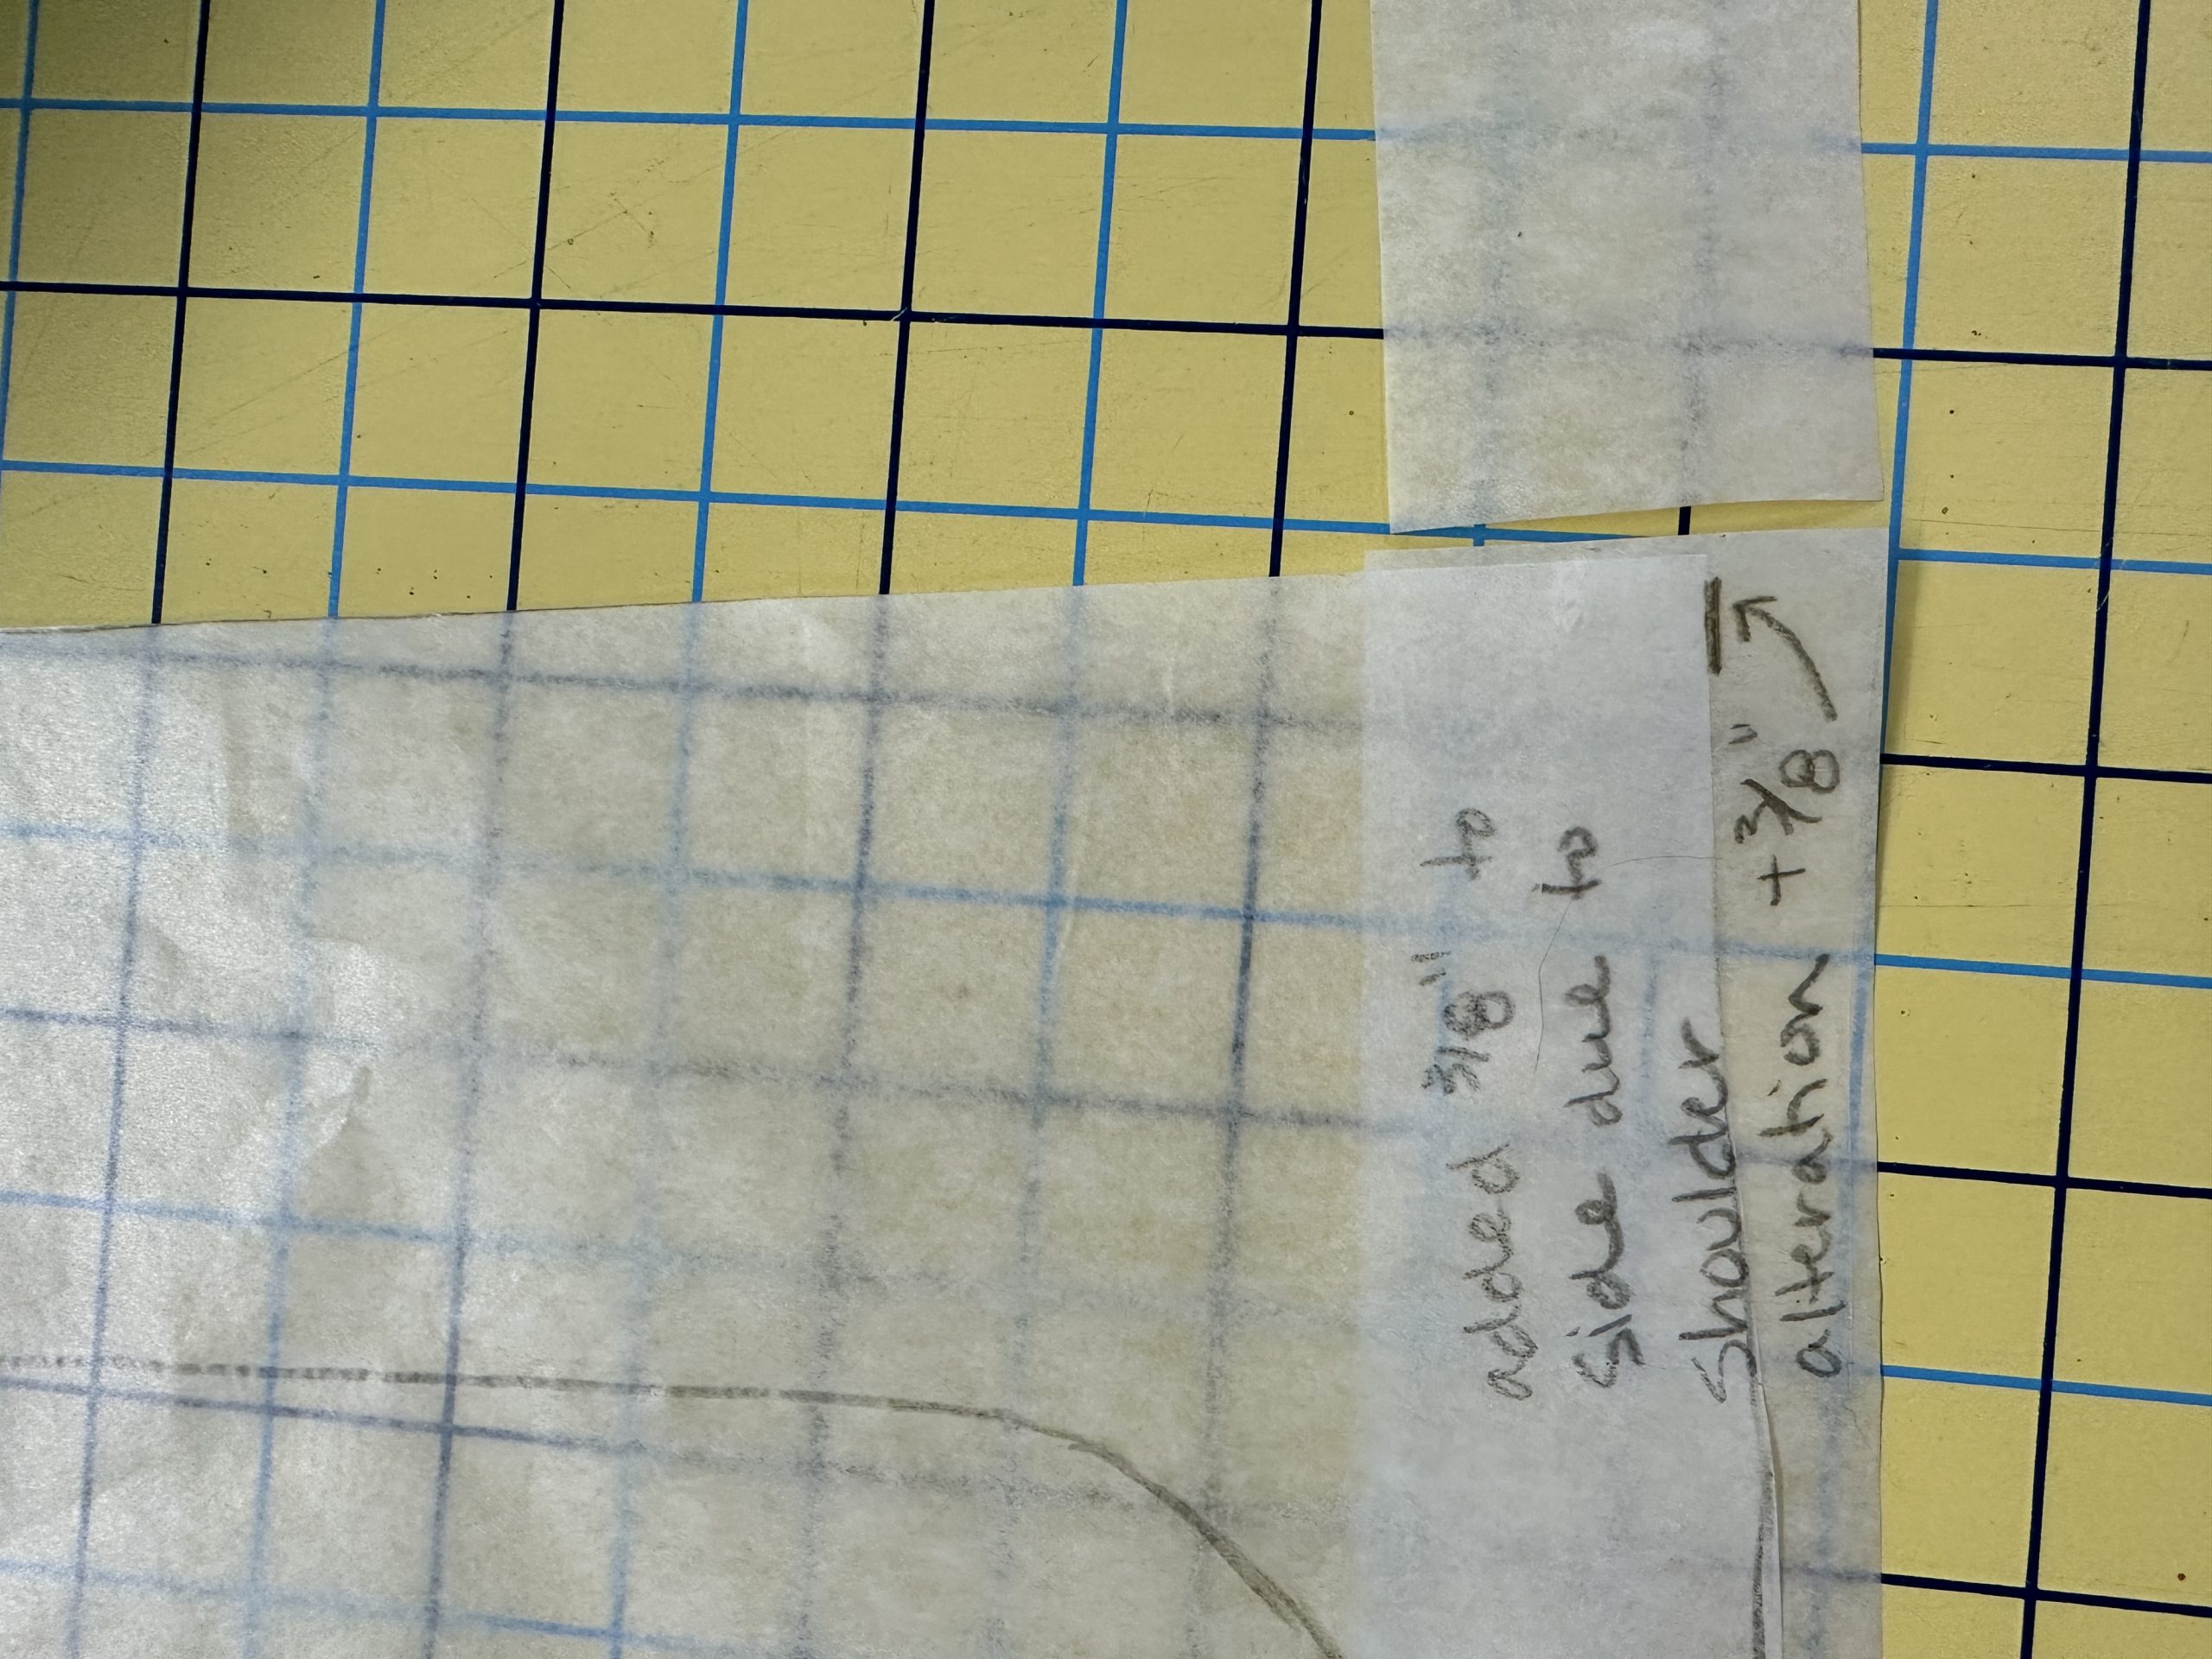
This is the bottom front of the garment. Because of the changes to fix the narrow shoulders and shallow armpit, it altered the side seam, so I had to lengthen the side seam so the front and back side seams would be the same length.

I looked in my collection of patterns–yes, I have patterns going back to the 1970s!–and found one with a sleeve I thought would work. It did!
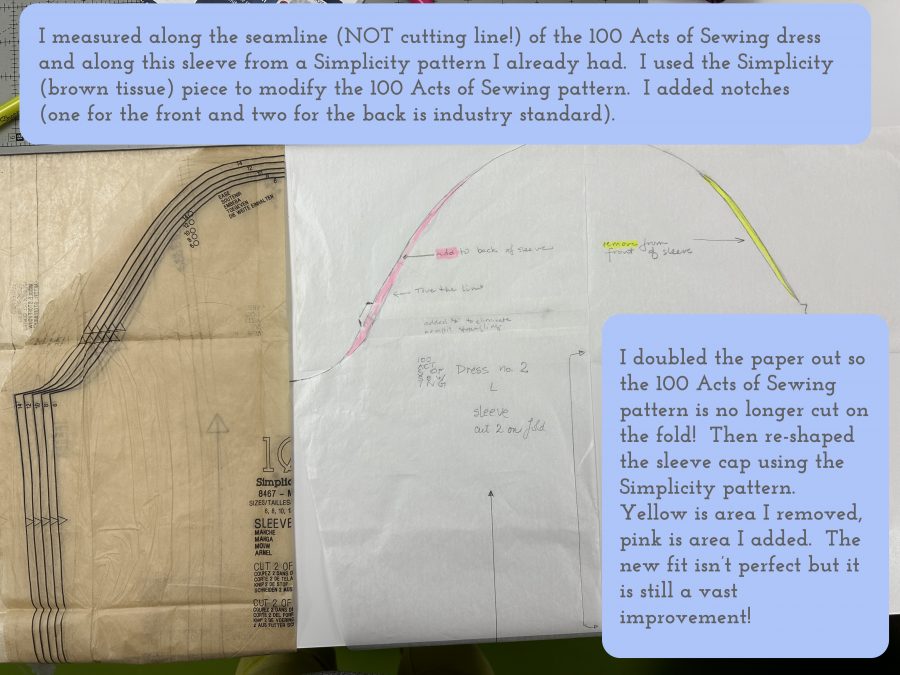
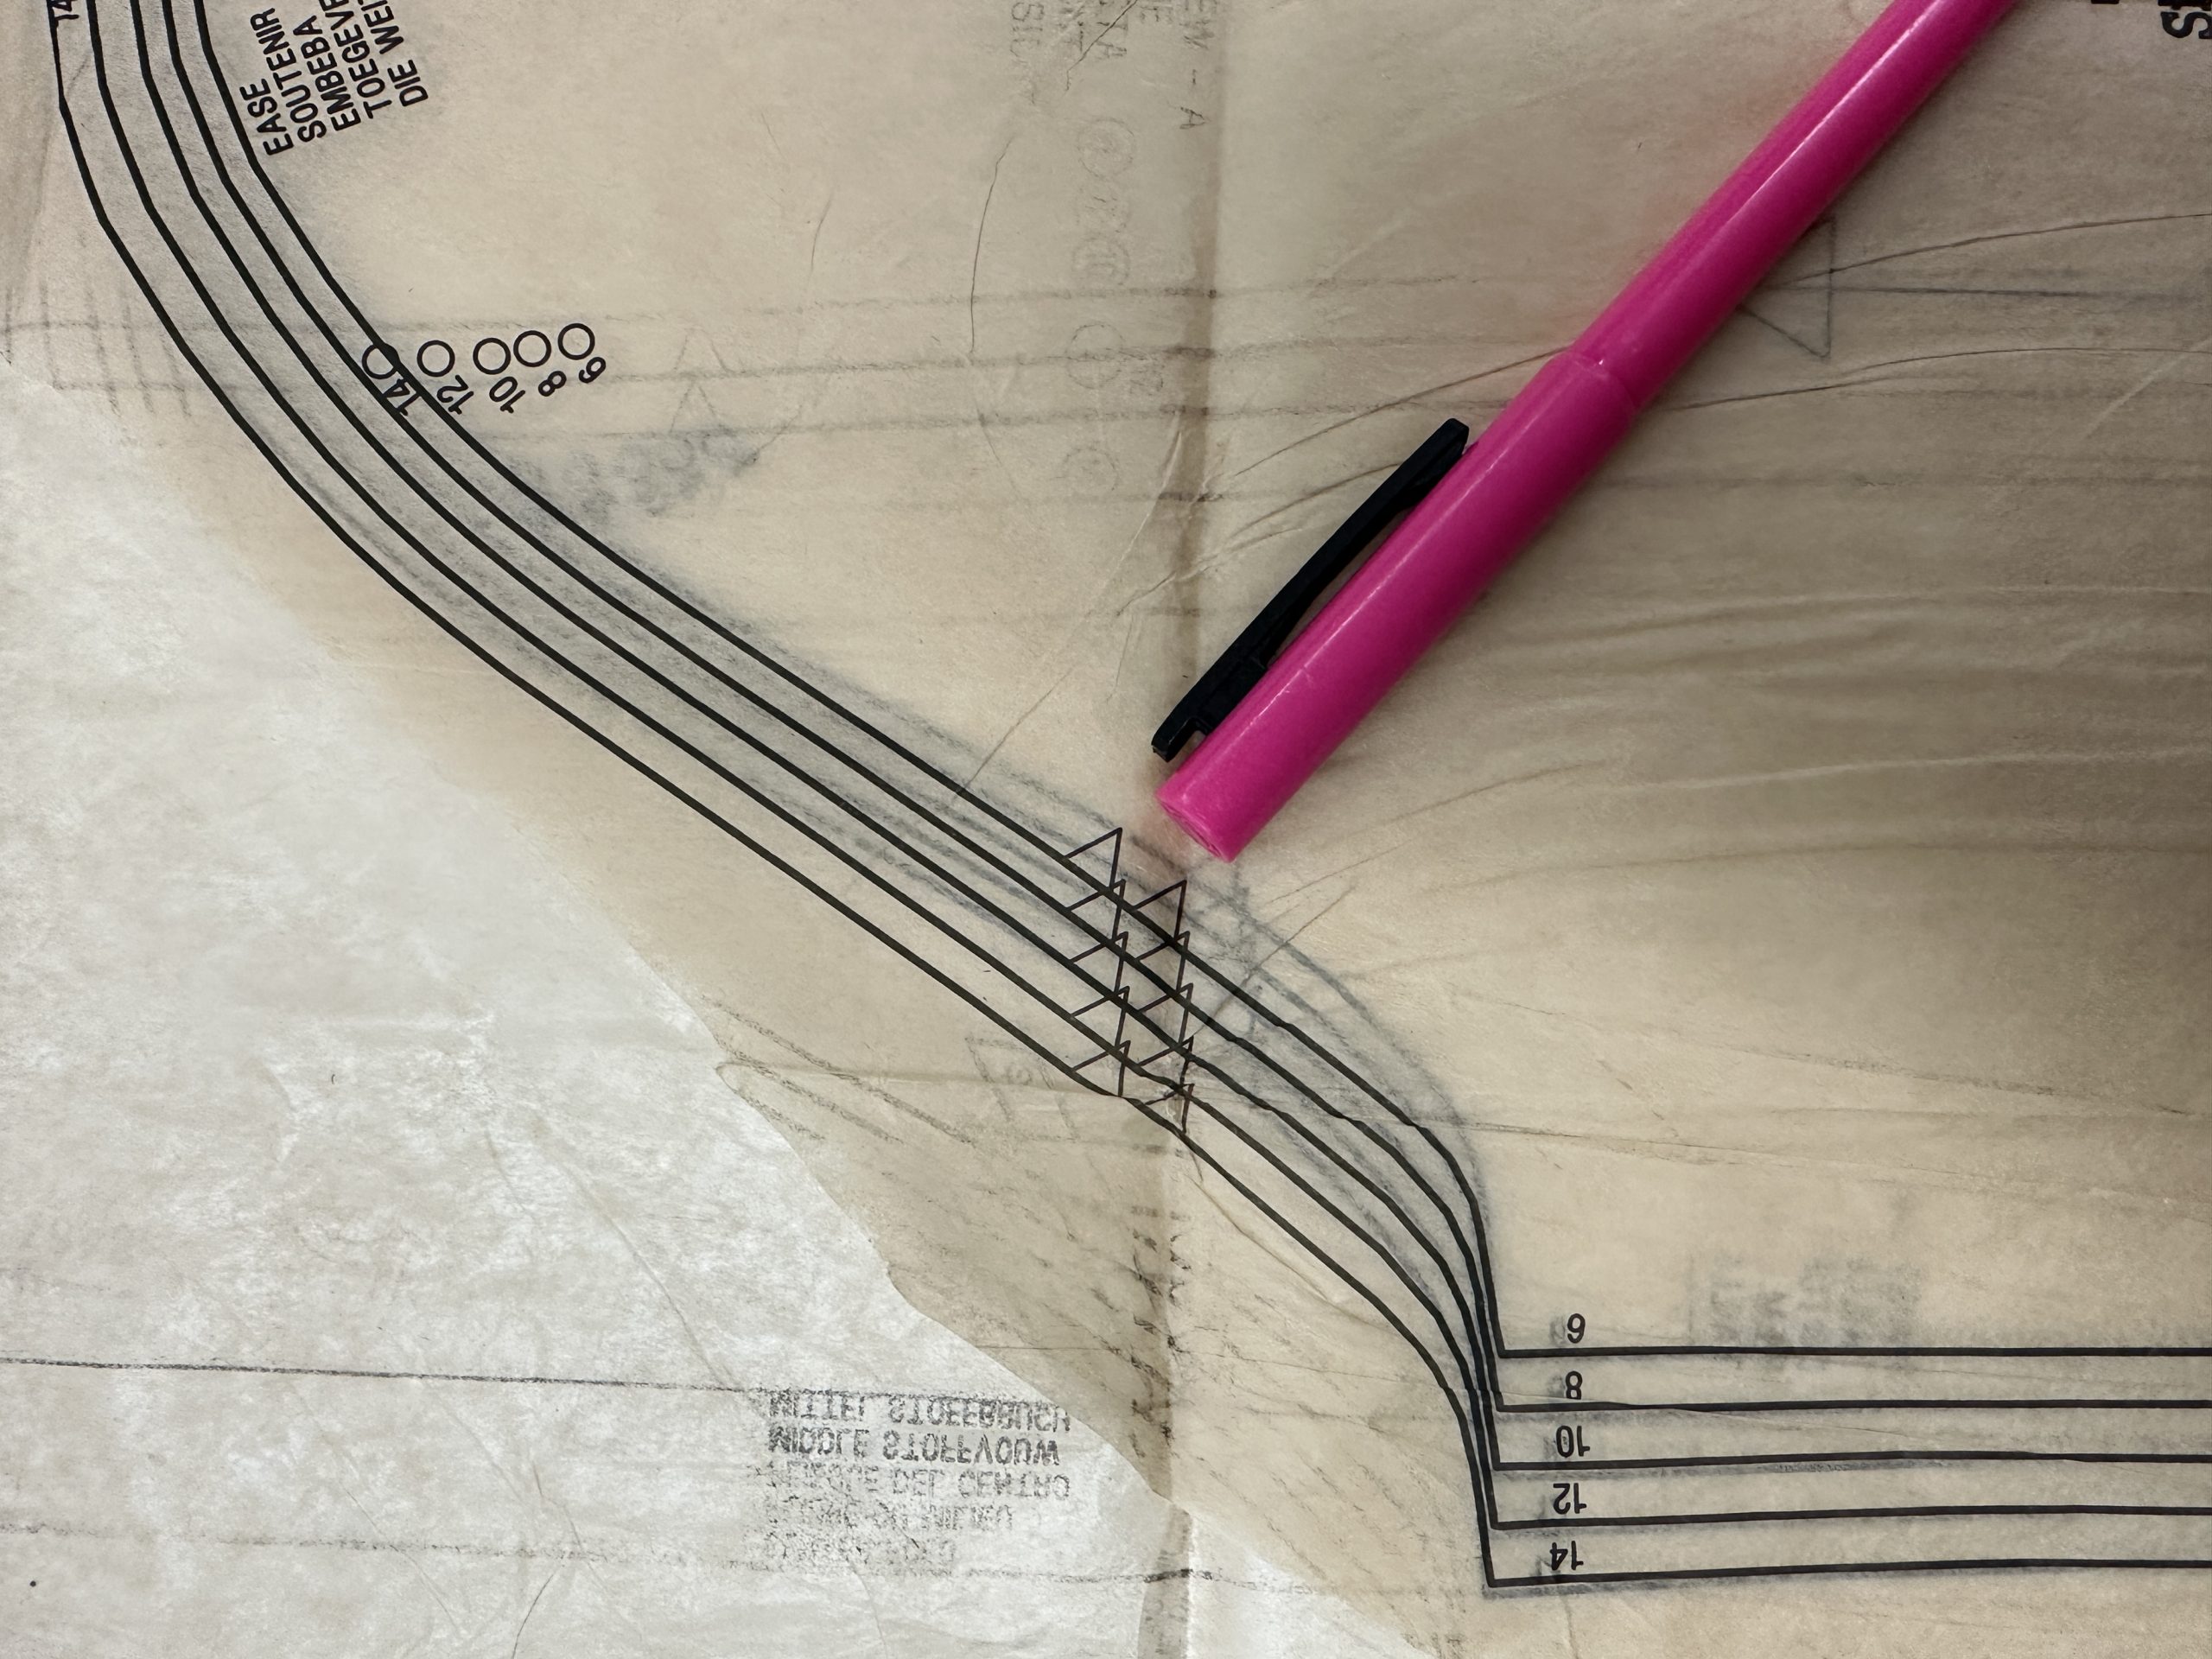
In the next photo you will see notches and dots.  These are standard in the pattern industry.  One notch on a sleeve usually means the front of the sleeve, two notches is the back side of the sleeve.  Dots are used for various purposes.  Sometimes they show where to run gathers from one spot to the next.  Other times they indicate where you match up the shoulder seam.  That means you can distribute the easing/gathering on the sleeve cap so the sleeve actually FITS and runs around the body in a way that allows you to move your arm.  Sorry–but I was just SO frustrated with this pattern.  It is, sadly, destined to make new sewers think they can’t do anything right, when the error lies in the pattern!
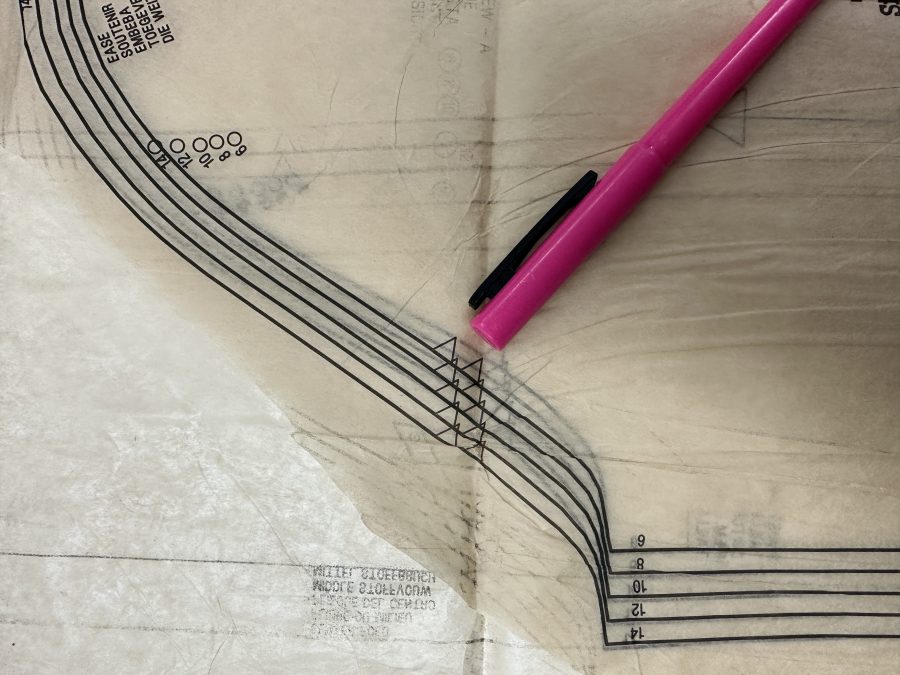
Notches, dots and lengthen/shorten lines actually make it EASIER for a newbie to figure out what goes where. Eliminating those marks does not help!
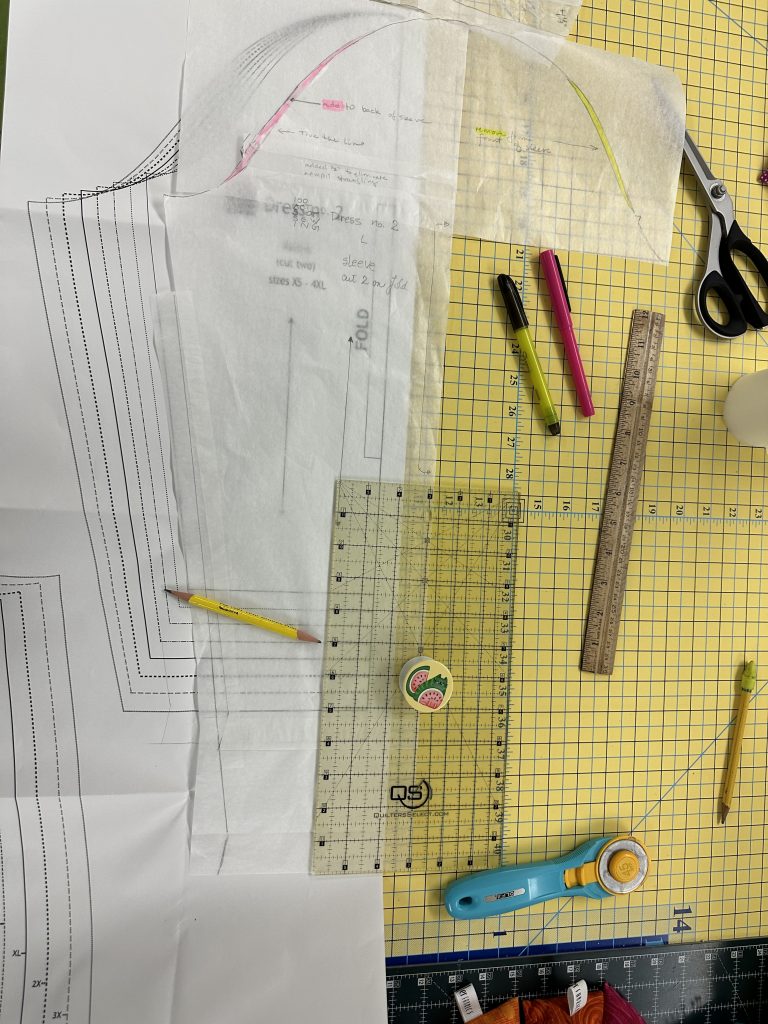
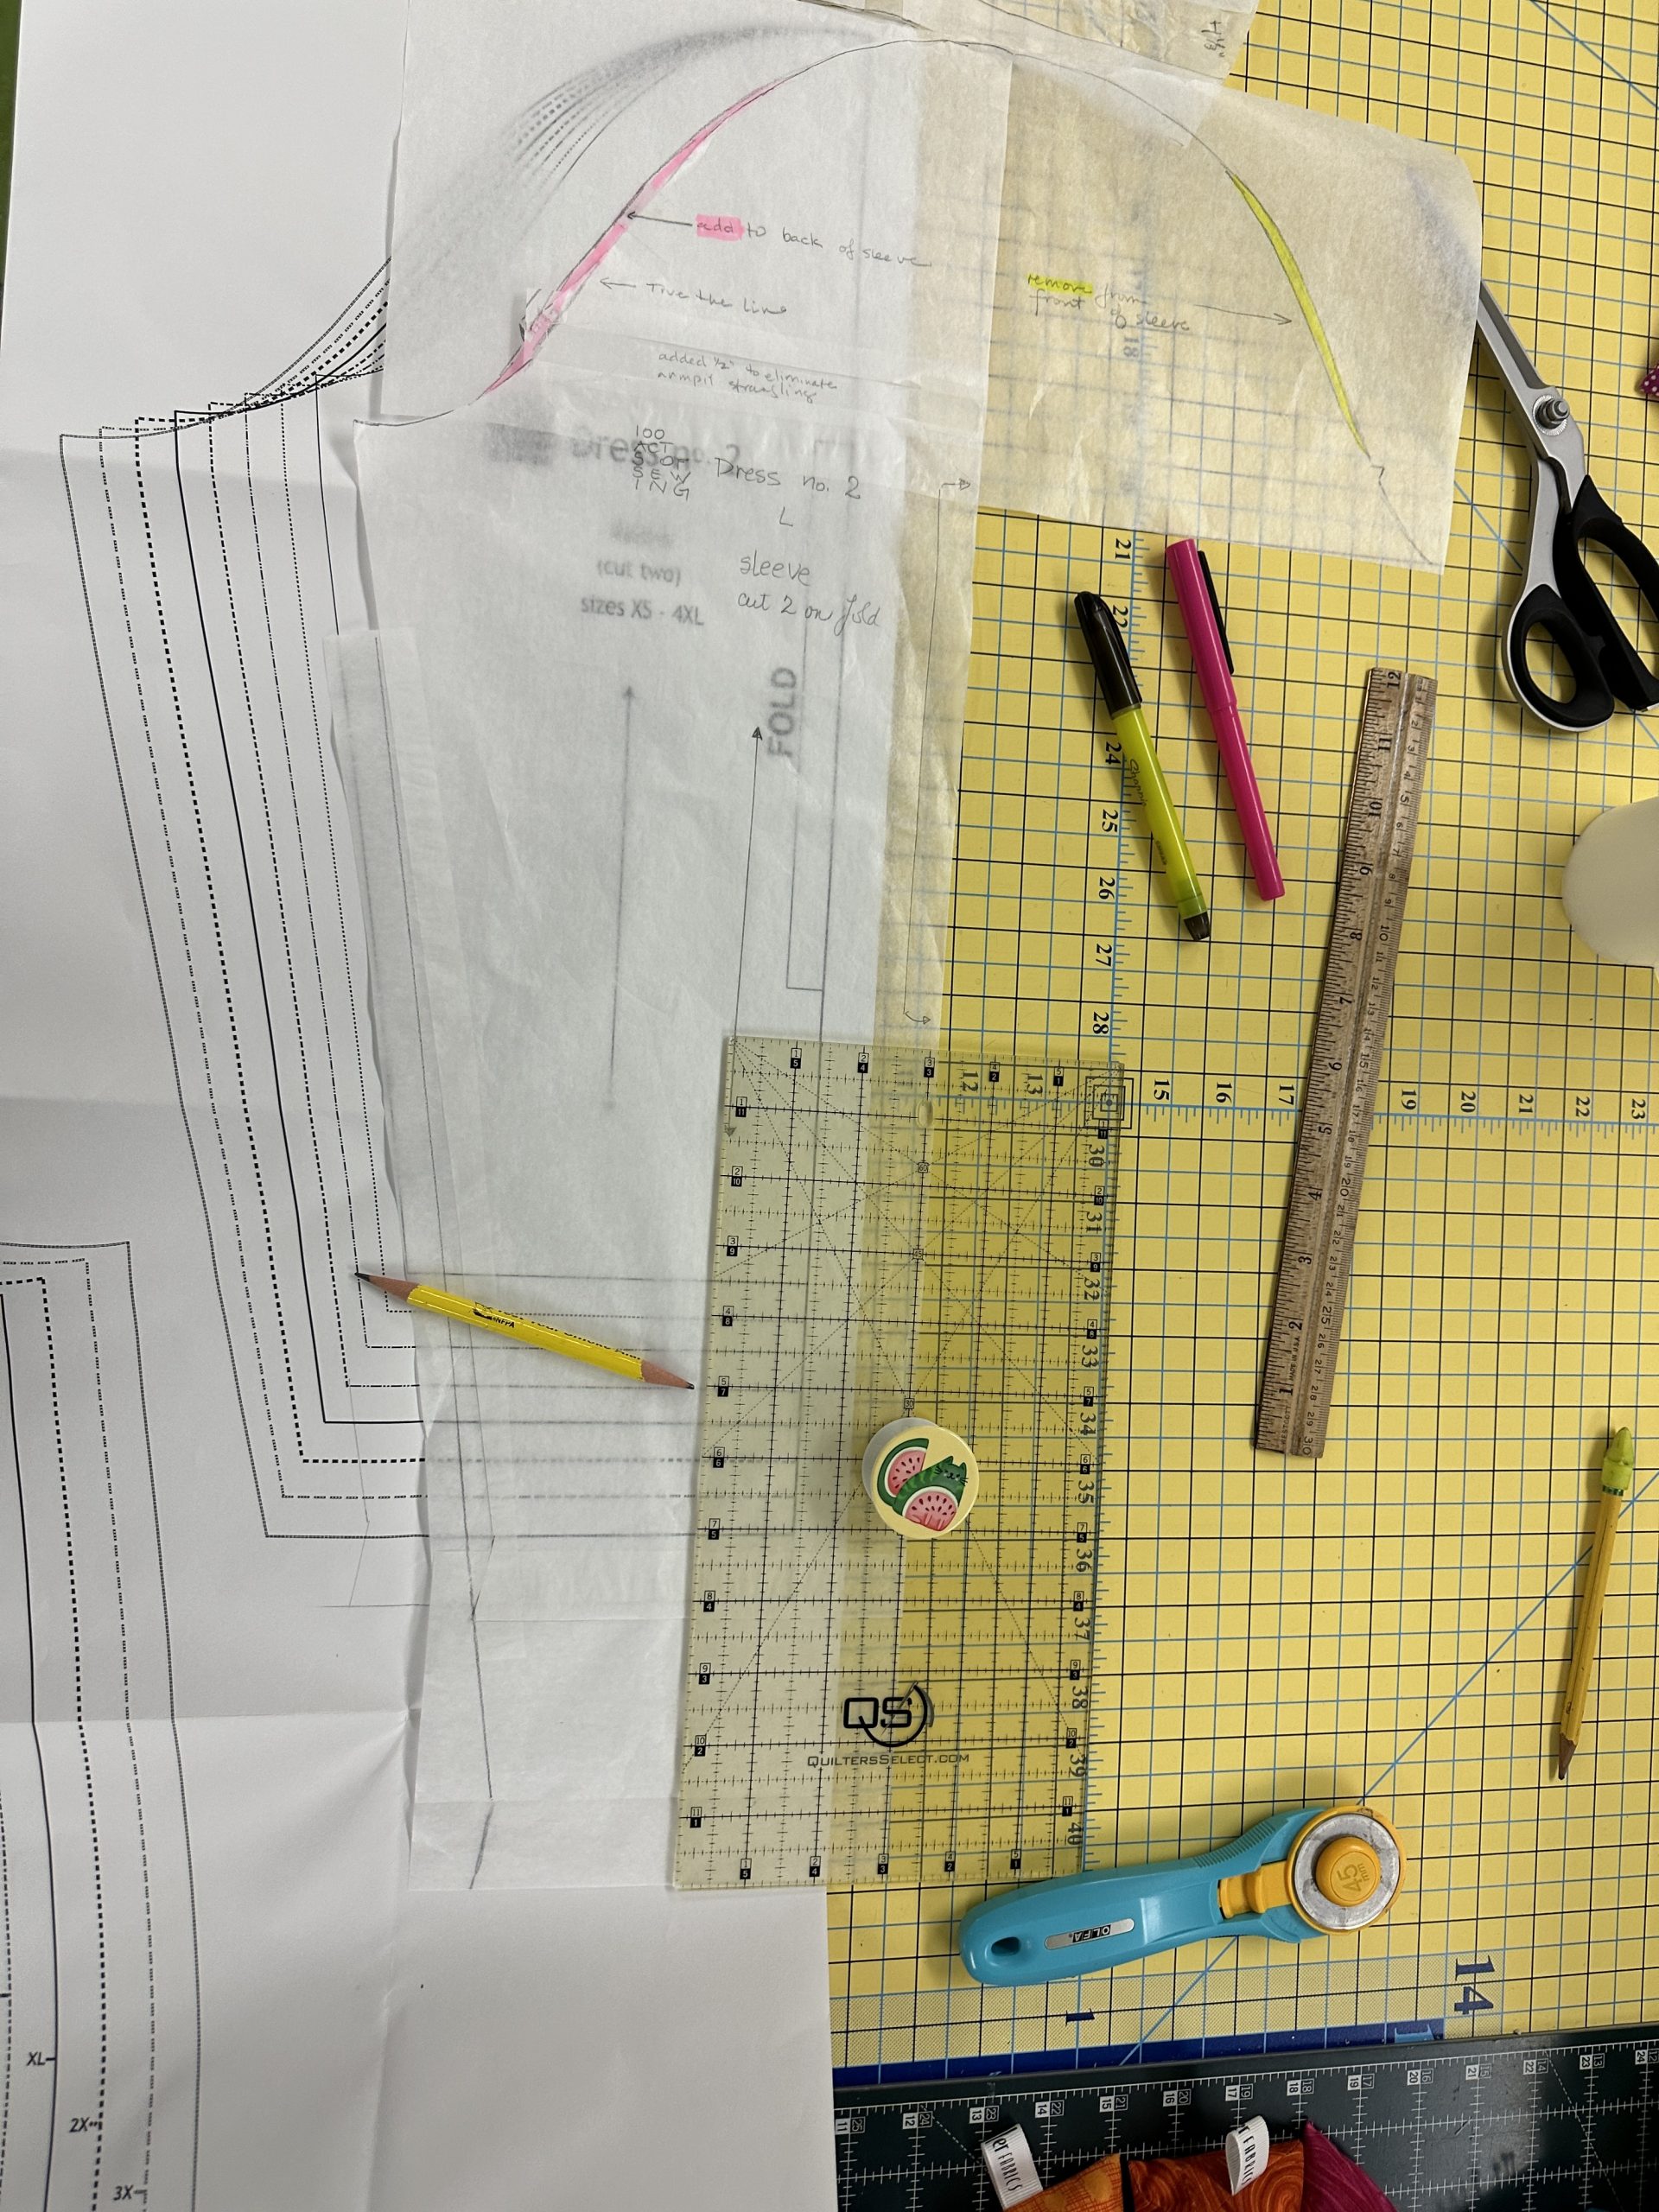
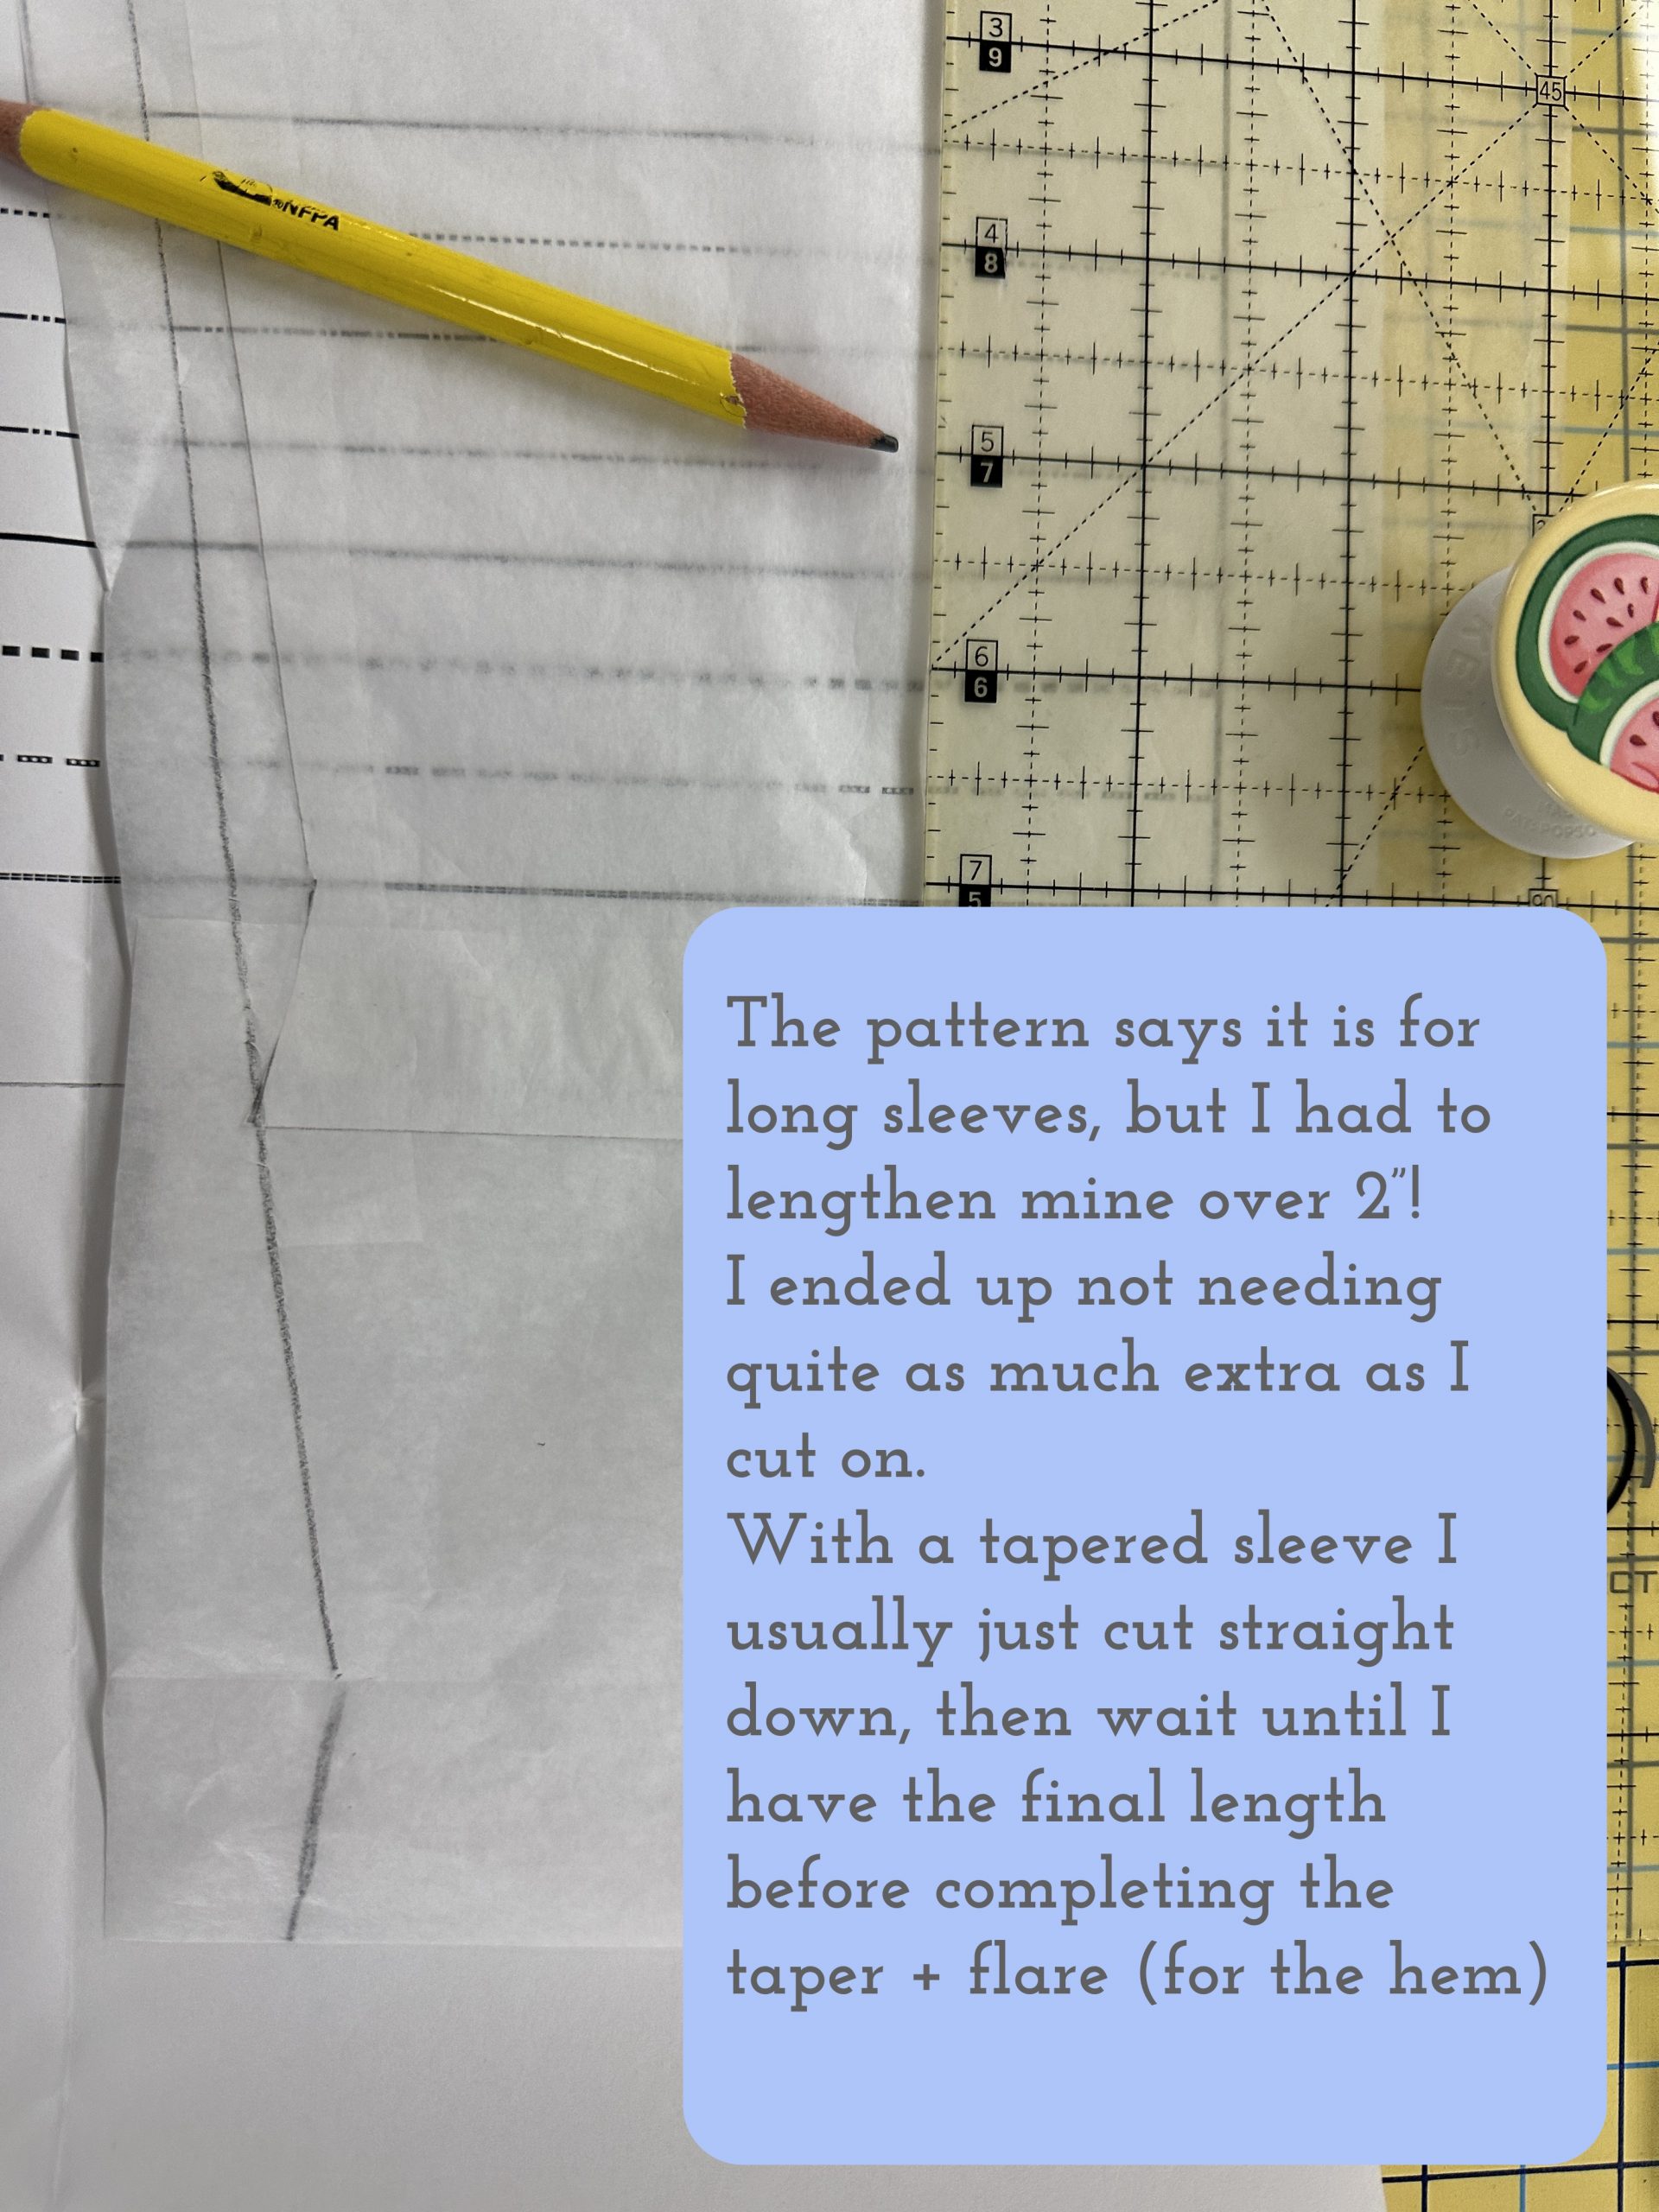
I have cut a sleeve pattern that merges the 100 Acts of Sewing pattern and the Simplicity sleeve pattern. I removed (yellow) from the sleeve cap to eliminate the bubble in the front of the sleeve and added (pink) to add room to move your arms forward. The sleeves on the pattern are described as long, but doesn’t specify if that is halfway down the forearm, 3/4 and/or bracelet length, or full length. I needed to add more, but not quite as much as pictured here.
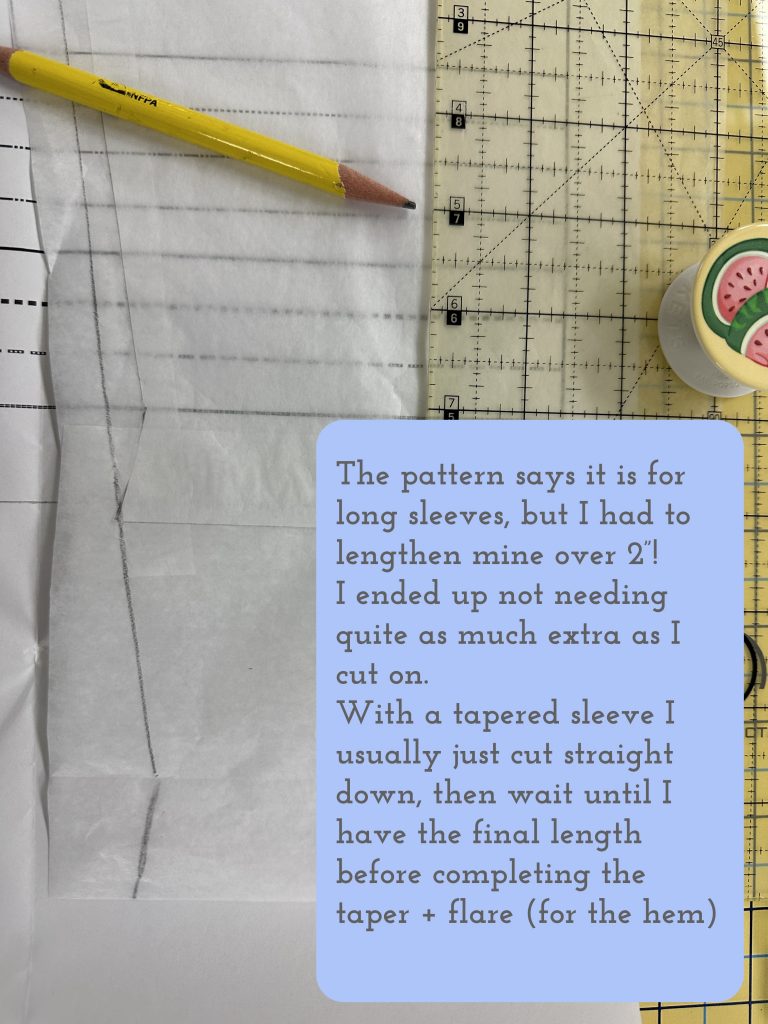
Flare at the hem, you ask?  Why yes…if your sleeve angles out (or pants leg) and gets wider as it goes up, you need to have a hem that does the same.  Once you have figured out the correct spot to hem, fold the fabric up on the hemline and trim to match the angle of the seam.

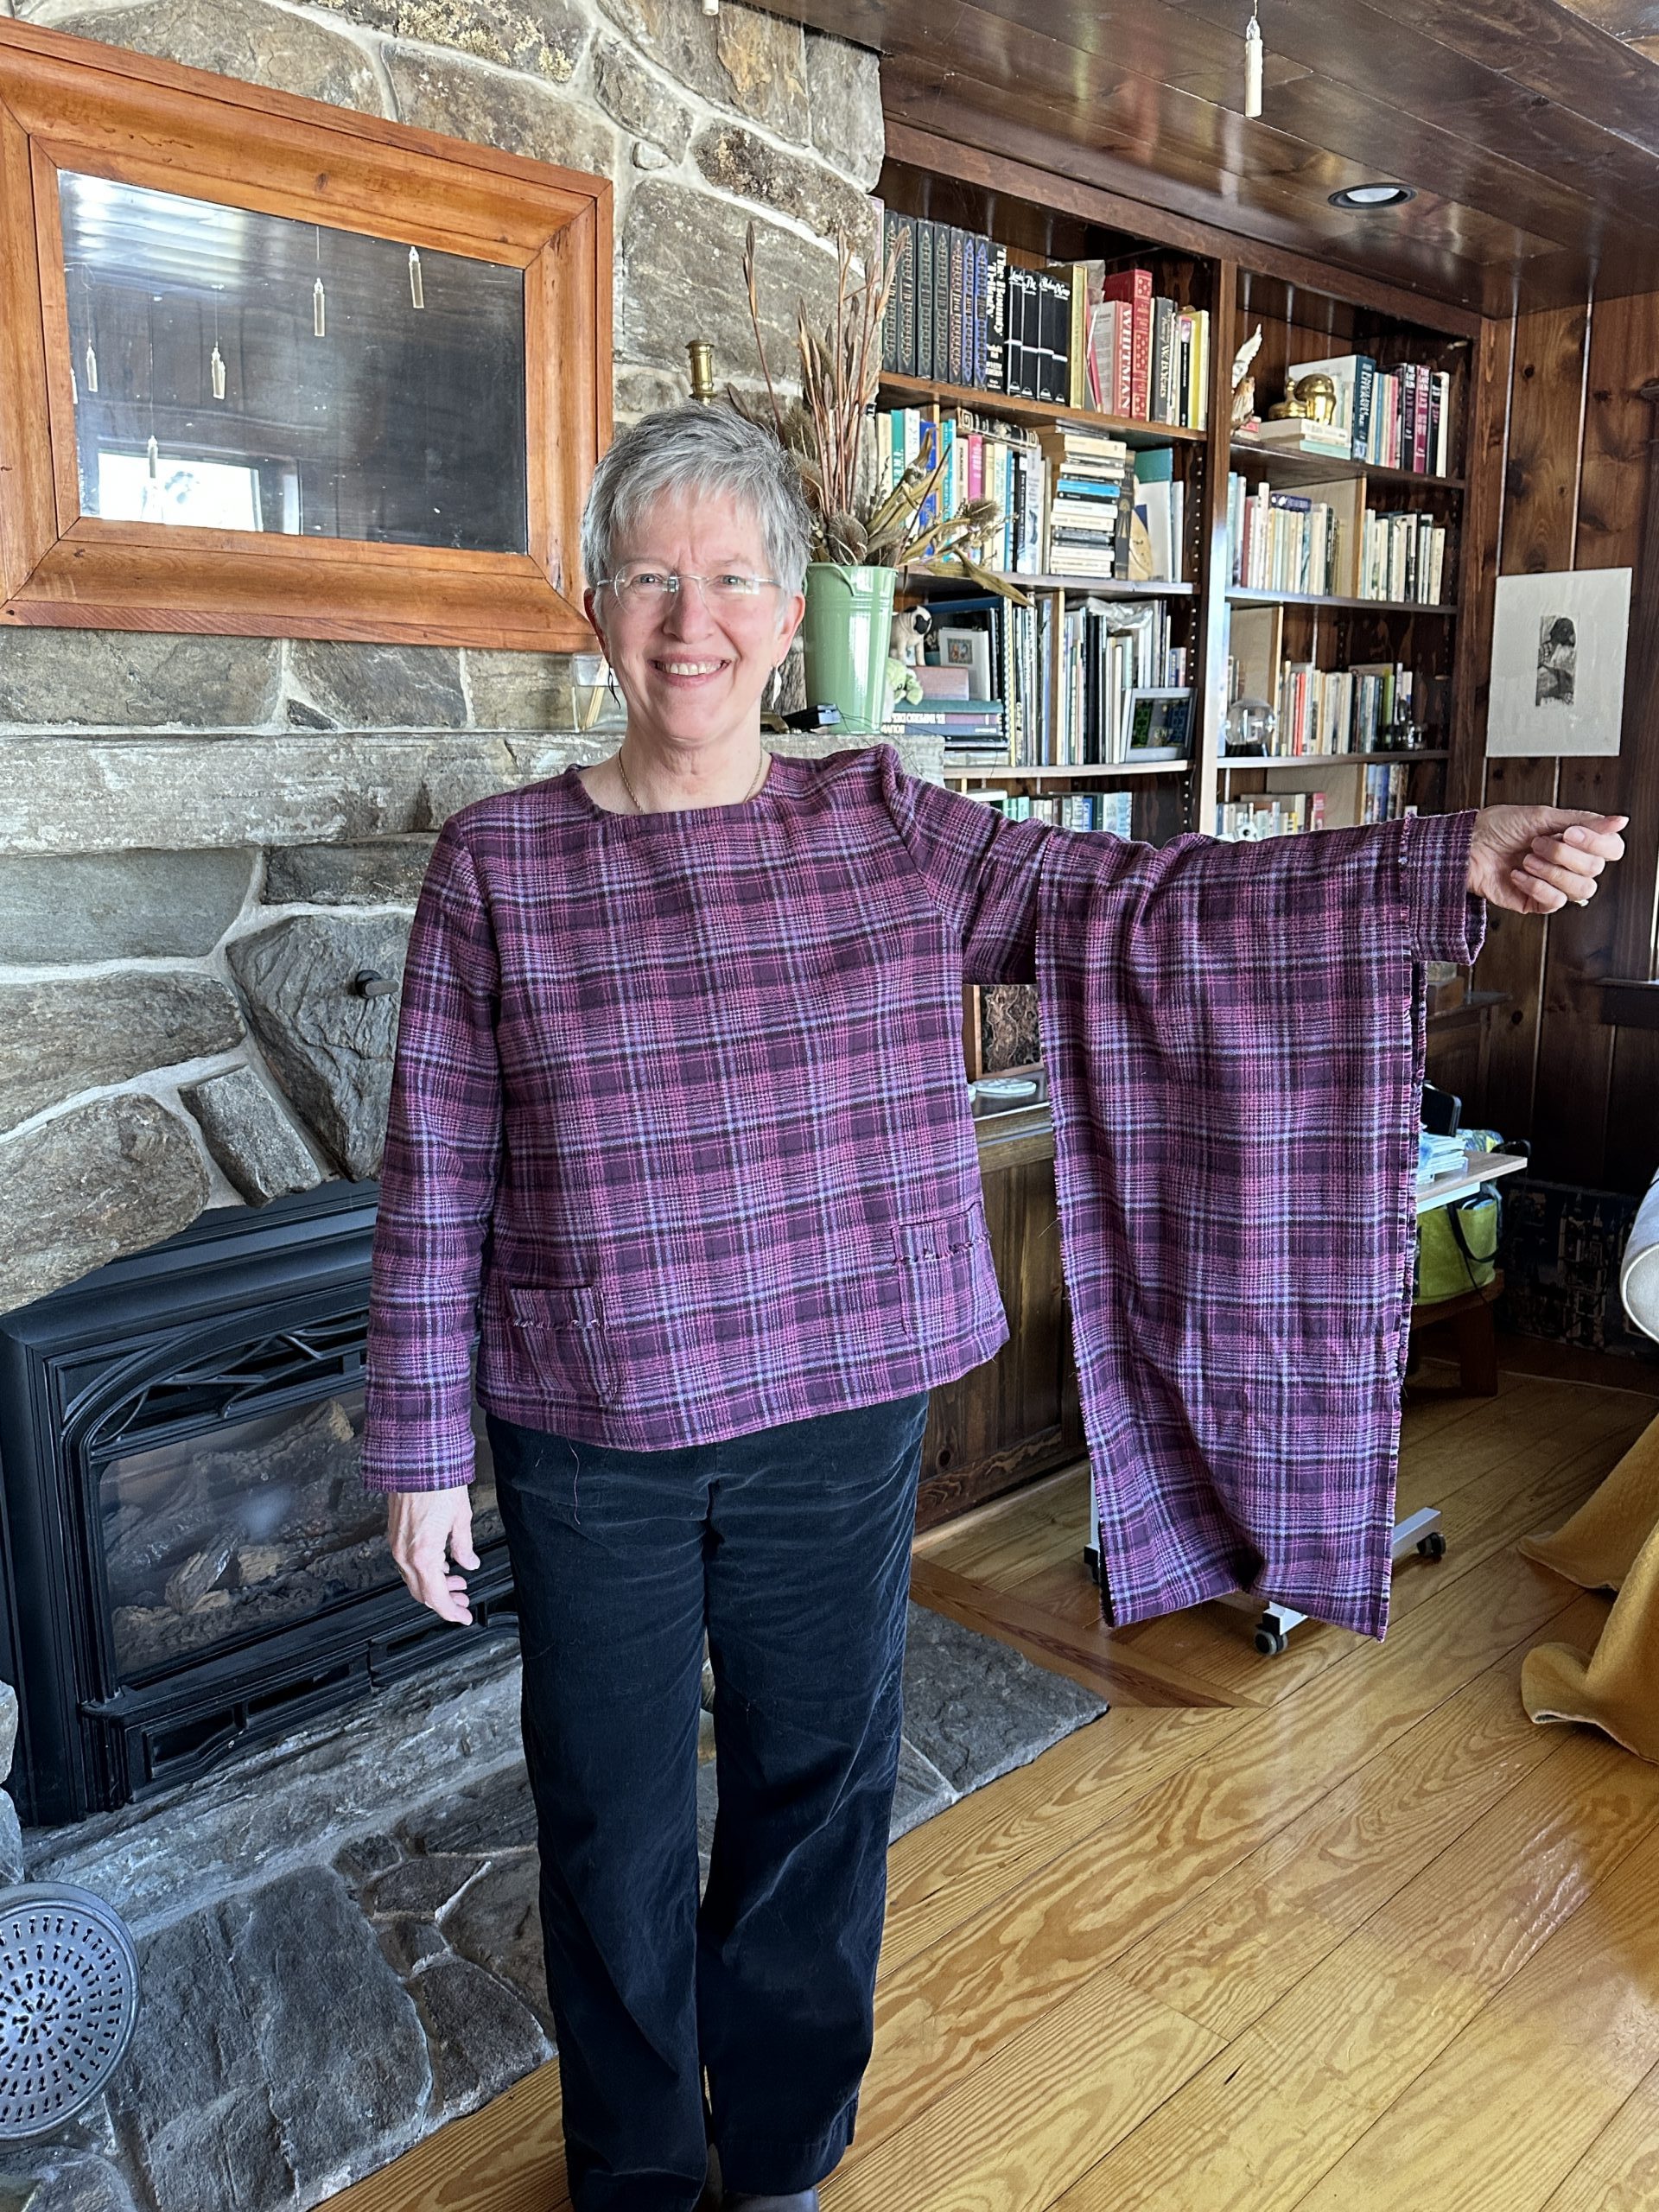
PHEW.  So…that’s a lot.  Thanks for reading this far–so you get another shot of the finished top, with the infinity scarf on my arm so you can see the top better. Next up:  seam finishes, with a couple short videos!
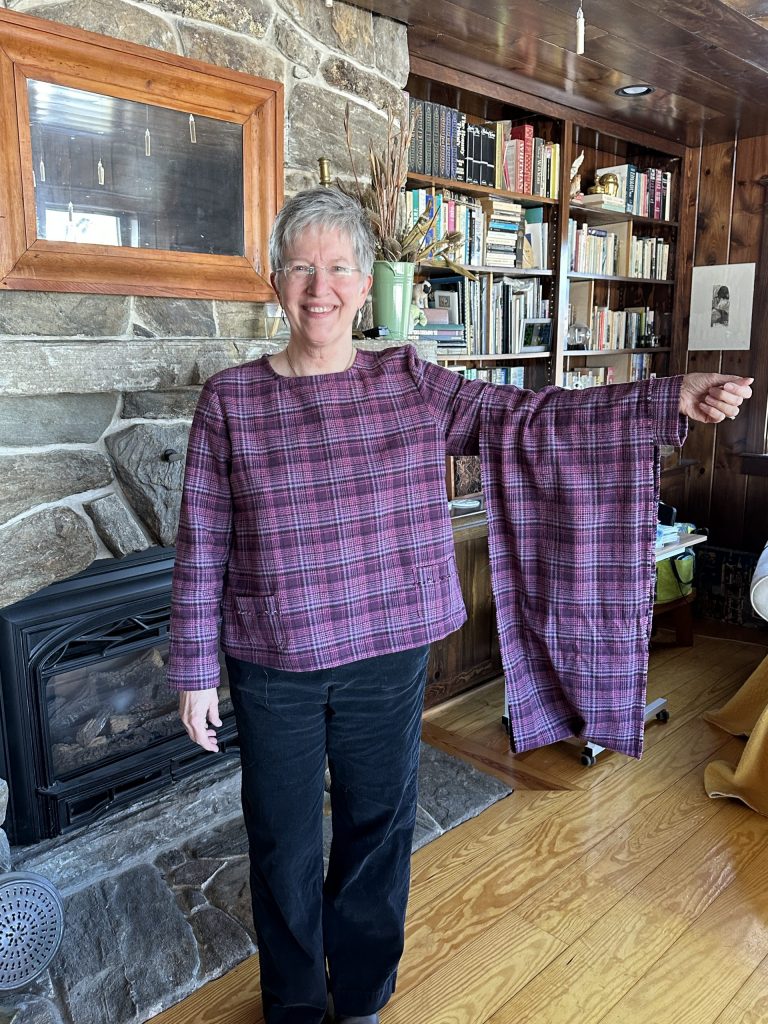
I had just enough leftover that I was able to make myself an infinity scarf to keep my neck warm.

Here are the links to all the posts in this series of lessons, techniques that can be applied to virtually any garment and many home dec projects.   Let me know what you’d like to learn and see here on the blog.  Cheers and thanks, Sarah

Lesson 1:   Choosing a Pattern and Starting Tips

Lesson 2:   Making a Muslin, Fitting and Sleeves

Lesson 3:   Matching Plaids, Cutting out Your Garment Pieces

Lesson 4:  Overcast Seams, just like Serged Seams

Lesson 5:   French Seams

Lesson 6:  Lapped and Flat-felled Seams

Lesson 7:  Hong Kong Finish for Seams

Lesson 8:  Lined Patch Pocket Tutorial

Lesson 9:  Hems and Scarf