Plaid Top Tutorial: Lesson 6-Lapped and Flat-Felled Seams
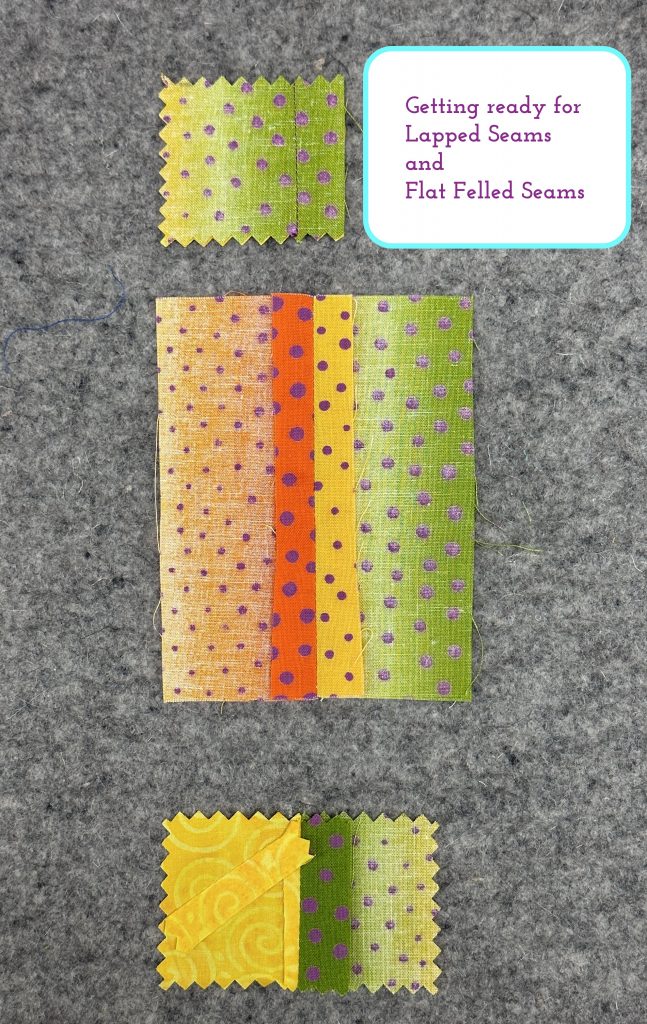
Lapped and flat-felled seams are two sides of the same coin. Both are found in ready to wear–the lapped seams I see most often in men’s dress shirts. Flat-felled seams are found on jeans…they’re that heavy, bulky seam! The double stitching makes it strong, so it is good for seams that endure strain–like tight jeans! They can also be used decoratively with contrasting and/or heavy topstitching thread. Let’s start with the ….
Please note: I am affiliated with Janome as a Janome Artisan and am compensated. However, my reviews are honest and I would say what I say whether affiliated or not. I’ve also chosen to be affiliated with Janome since 2003 (!!!) because their machines are so good and they are so responsive to the interests and needs of their customers.
Lapped Seam
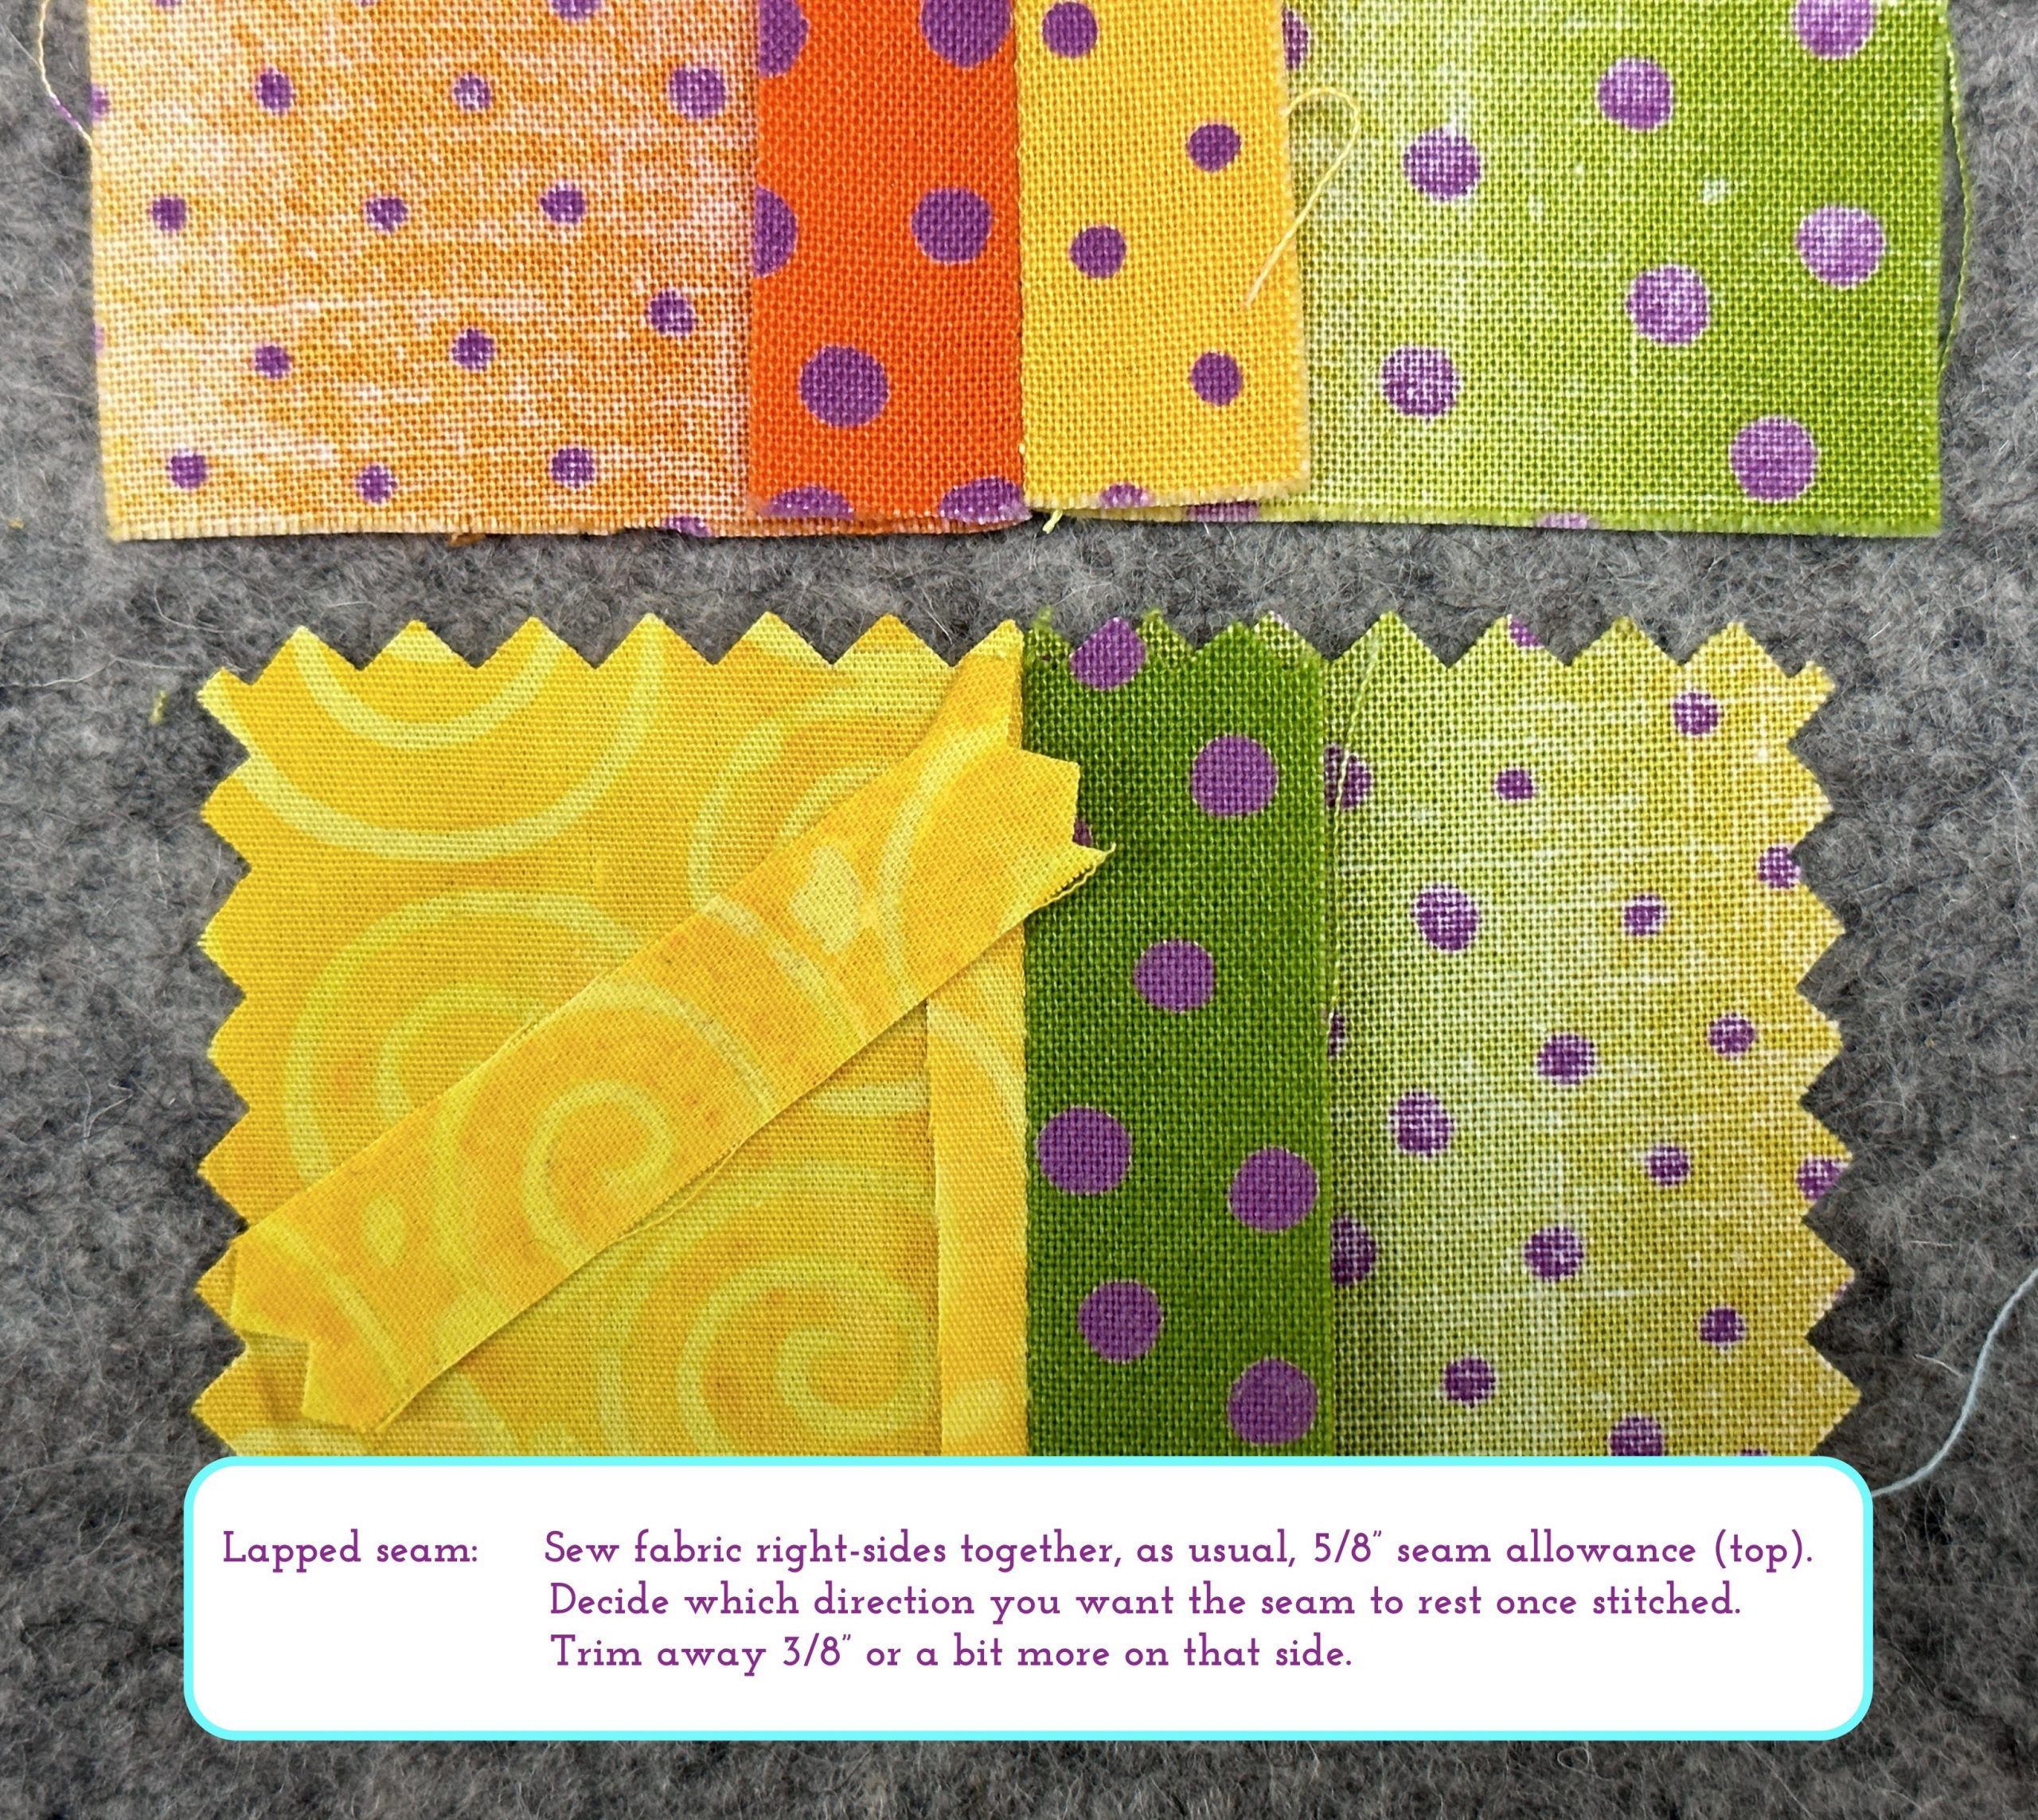
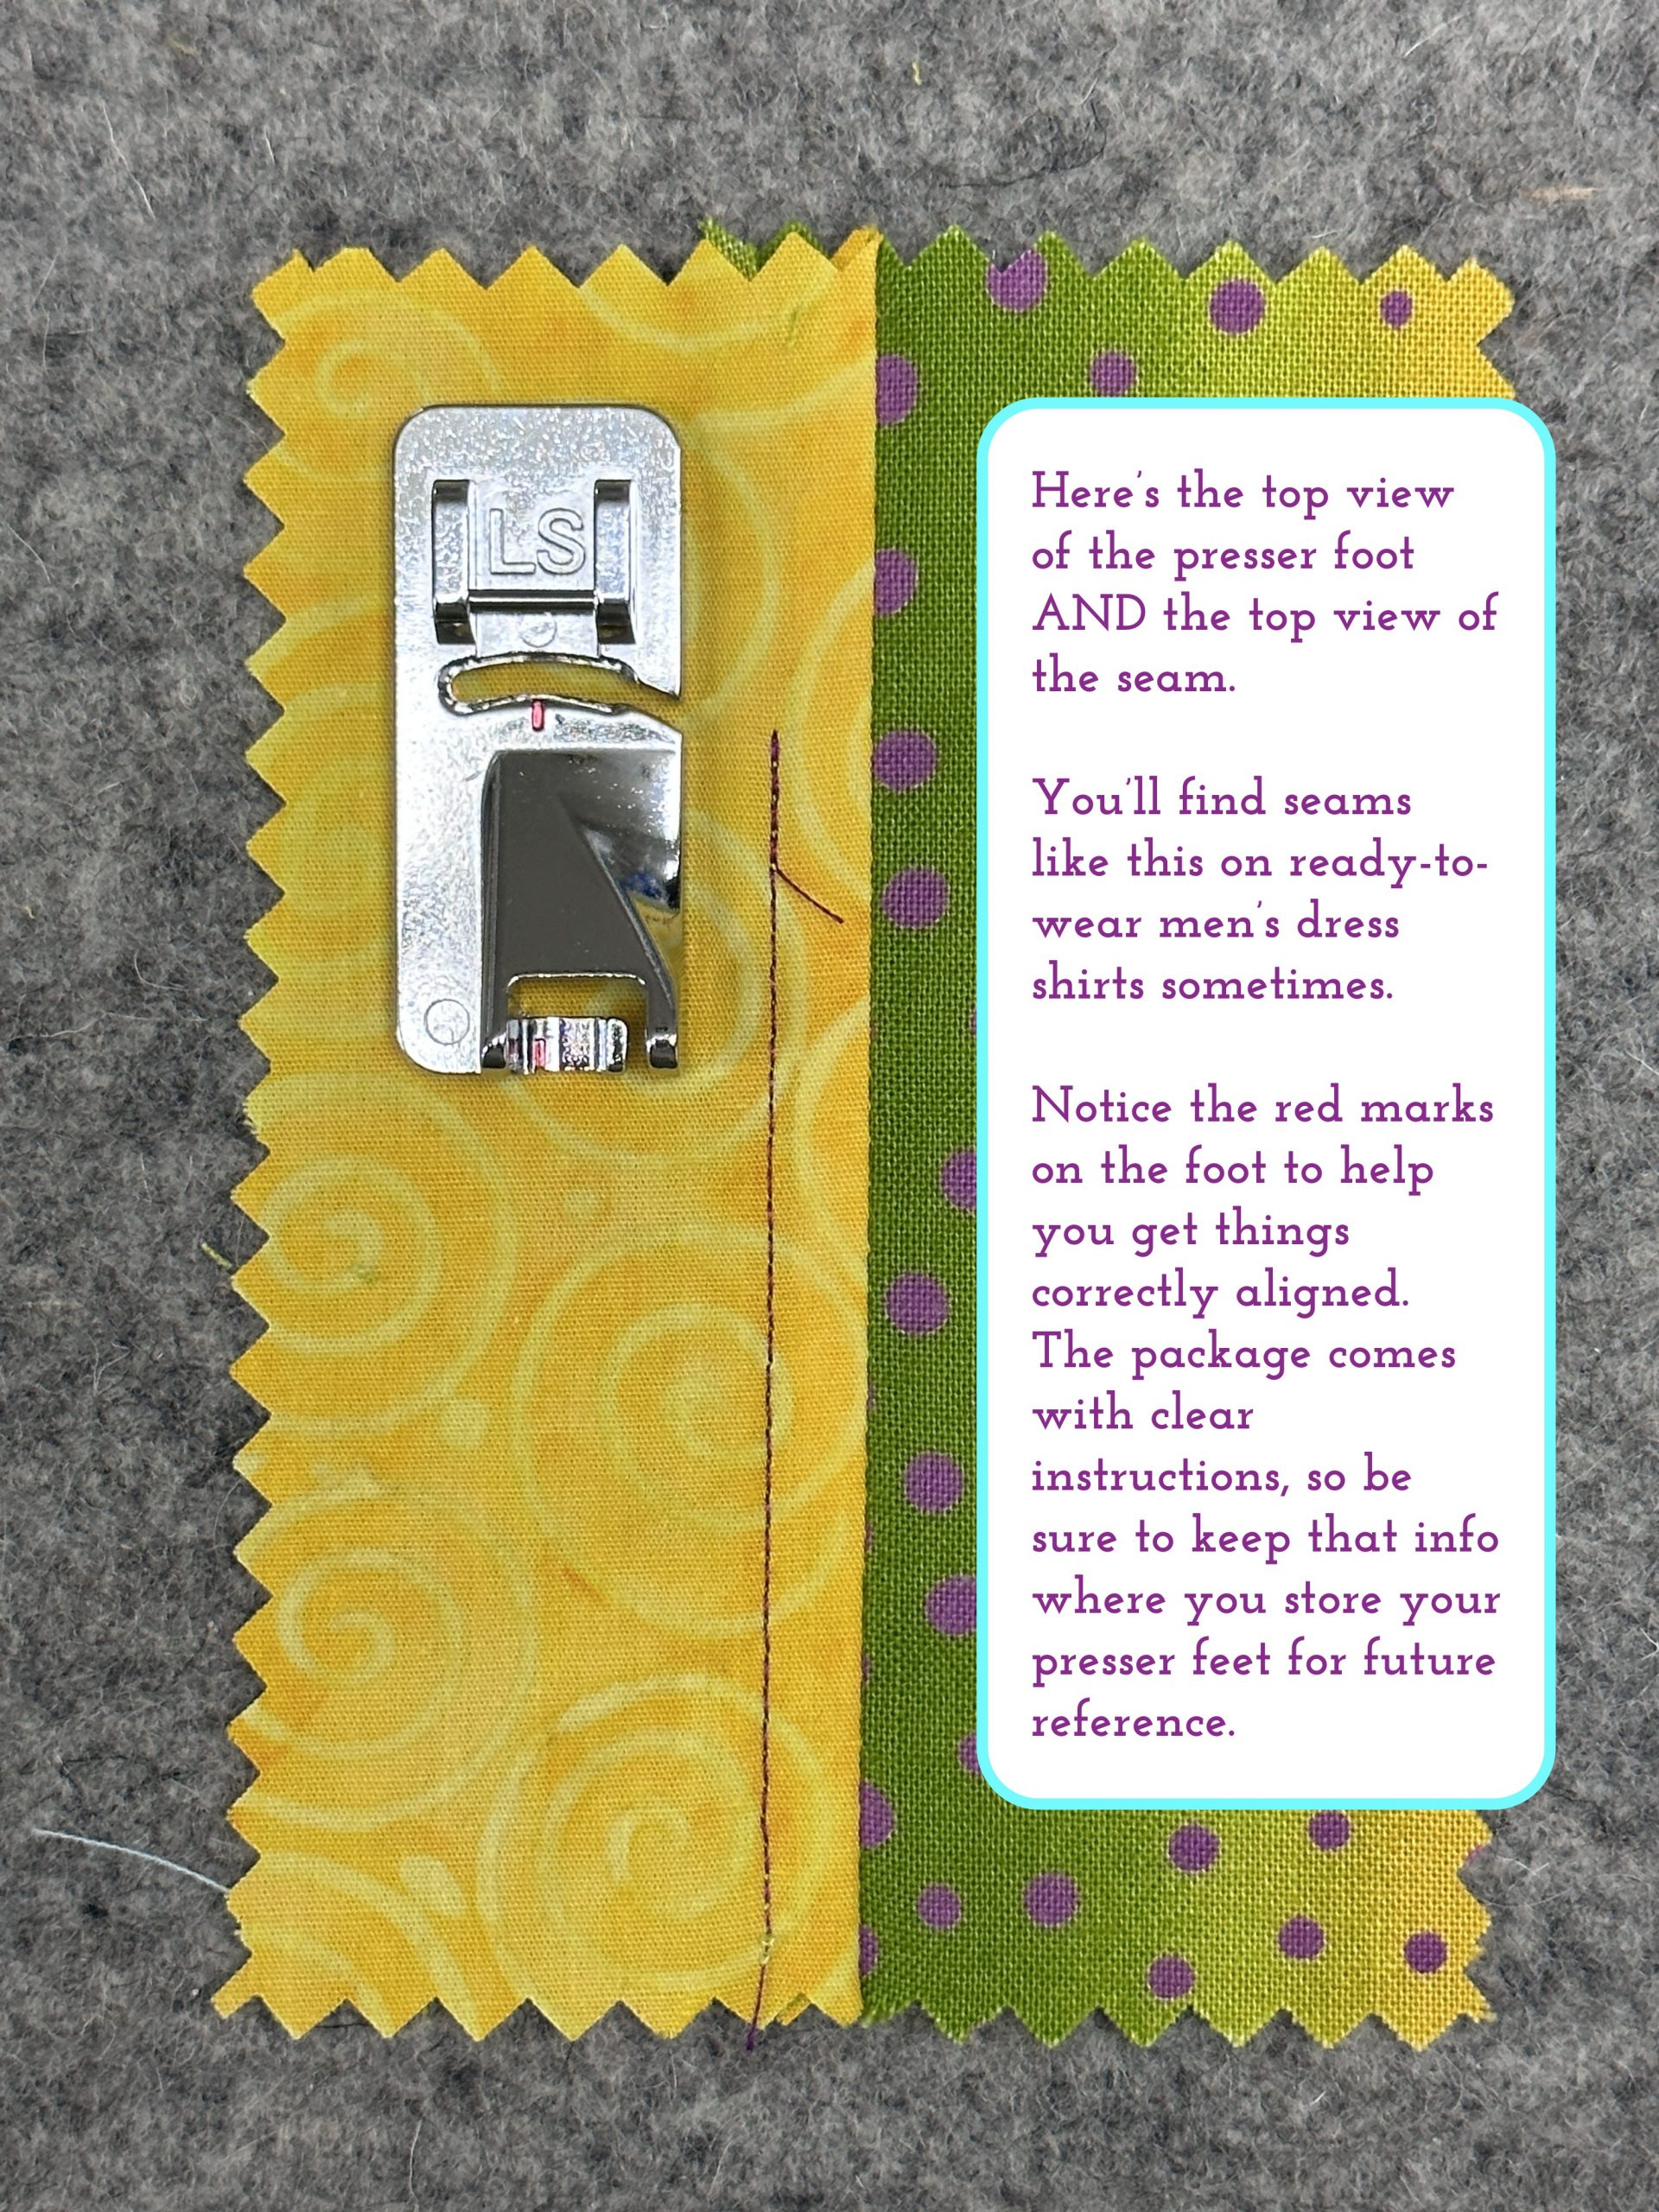
The first step is to sew fabric at the designated seam allowance, right sides together, above.
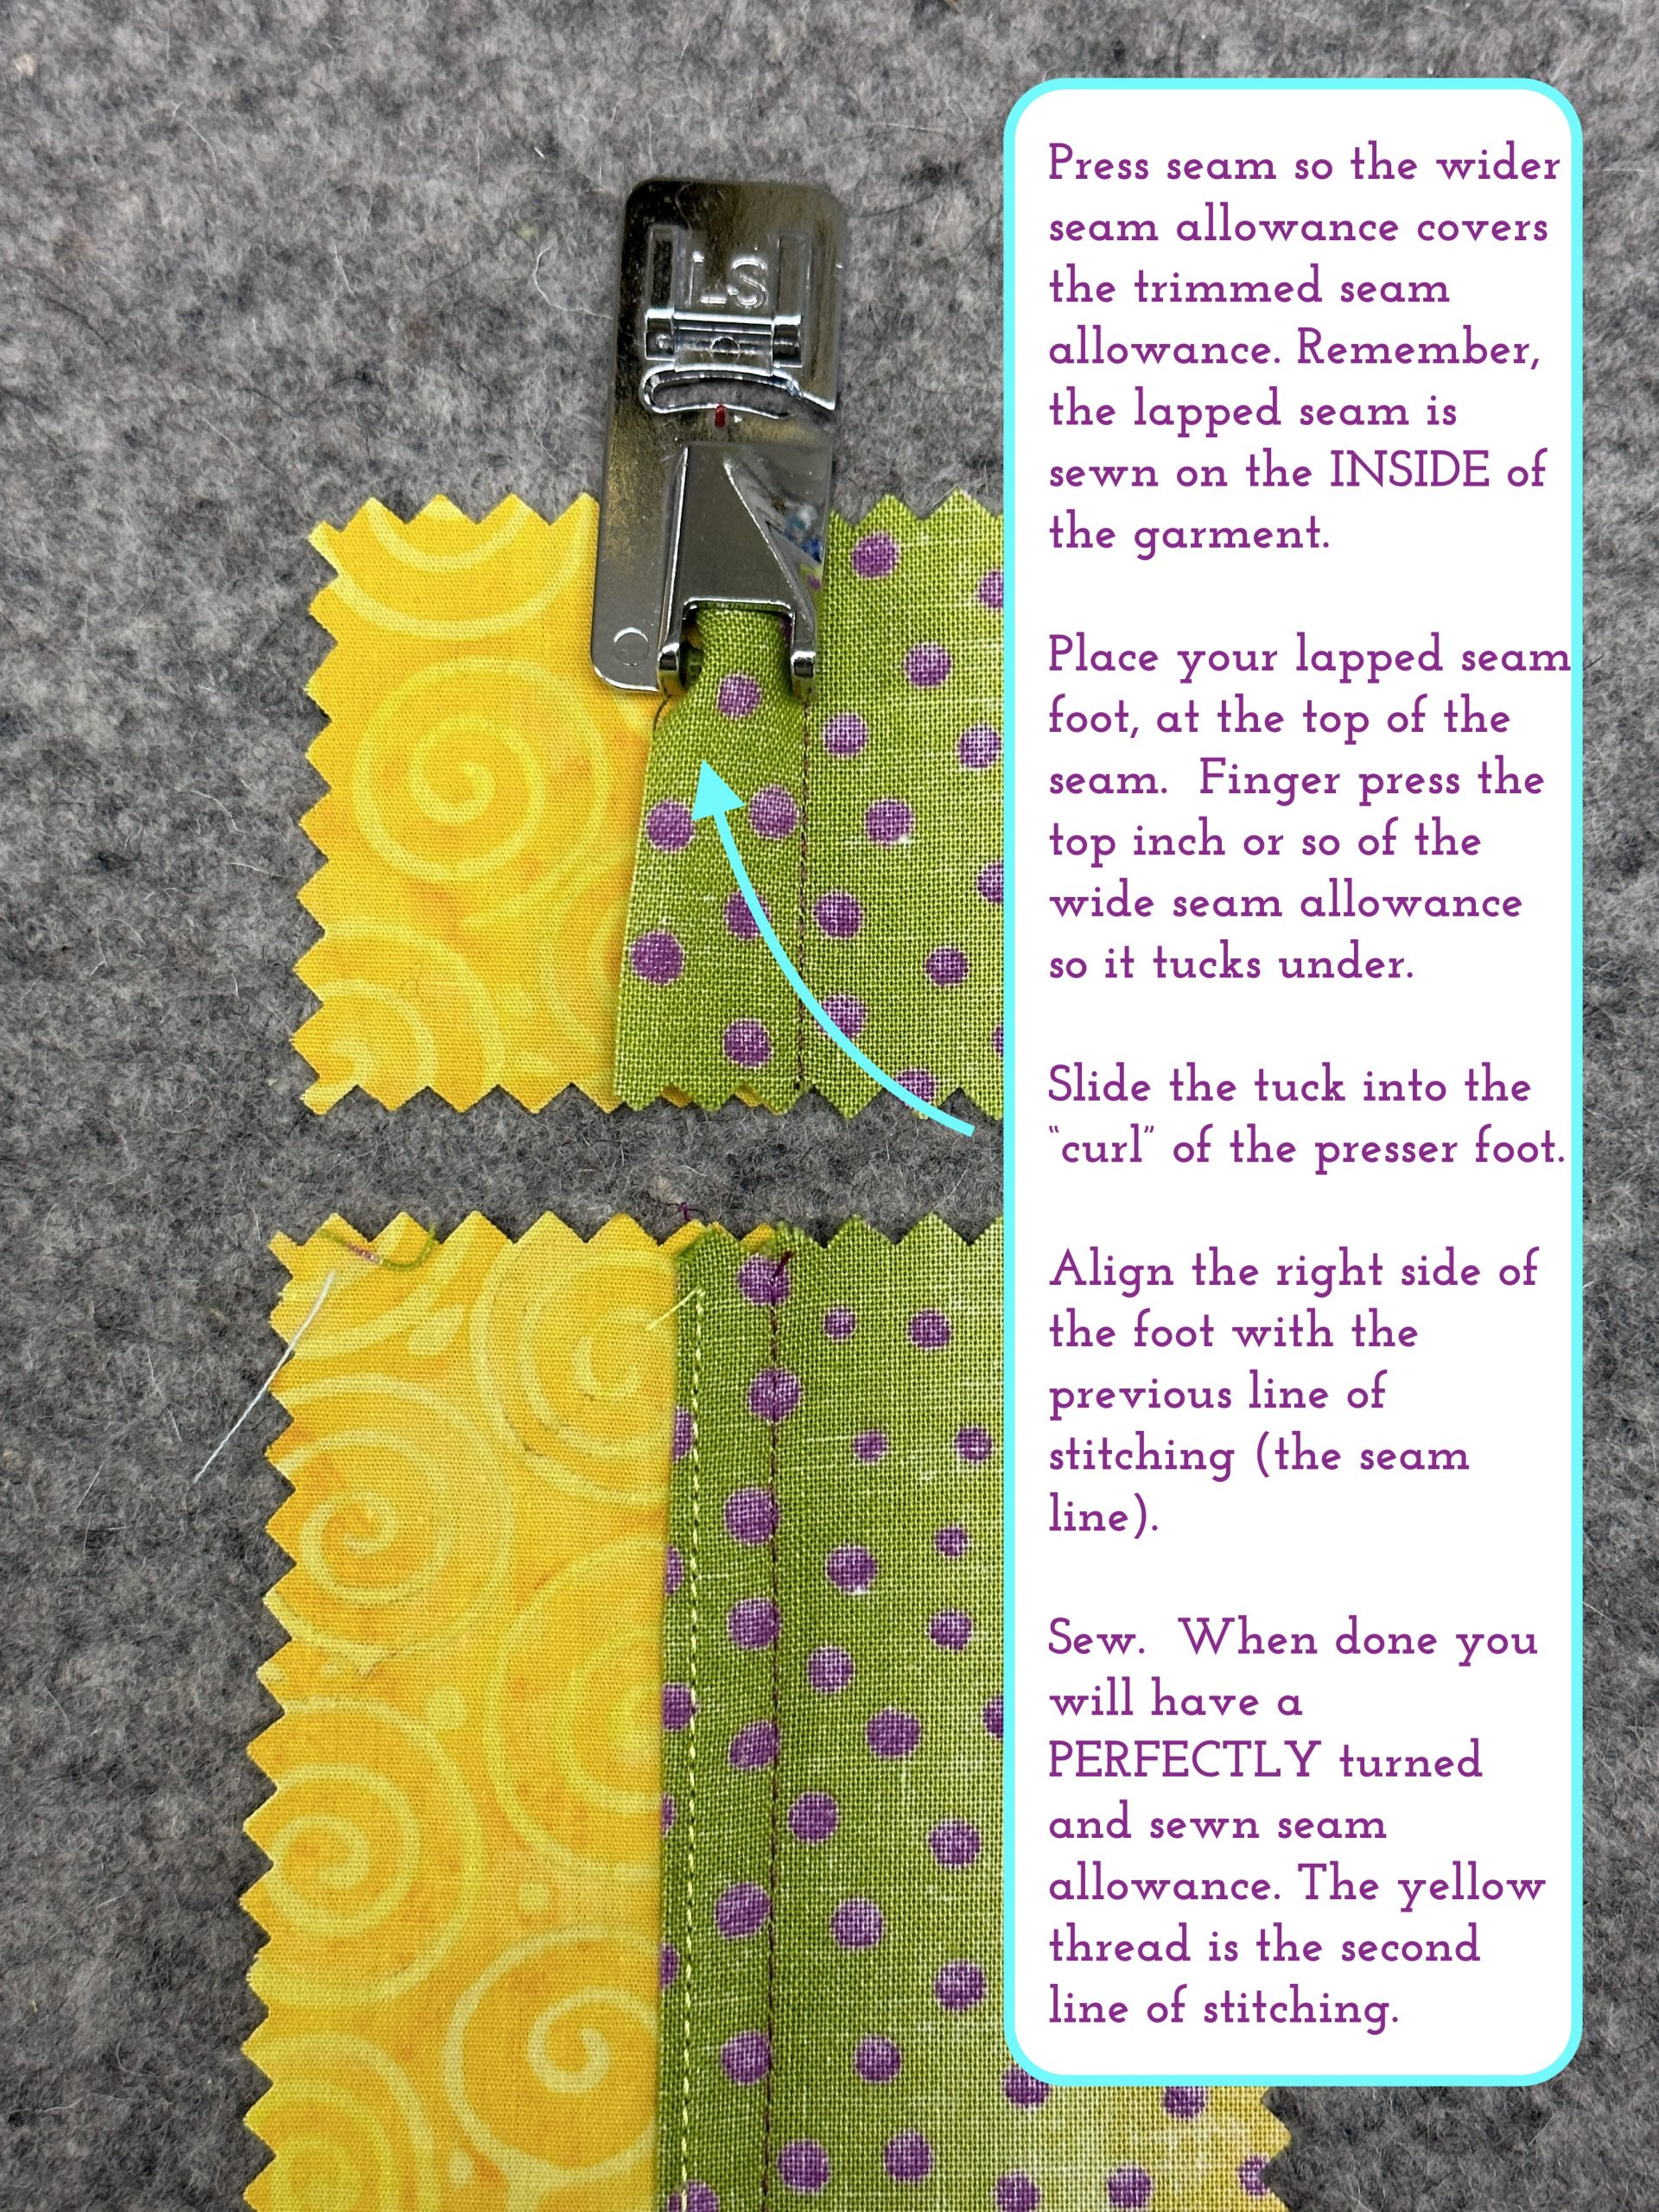
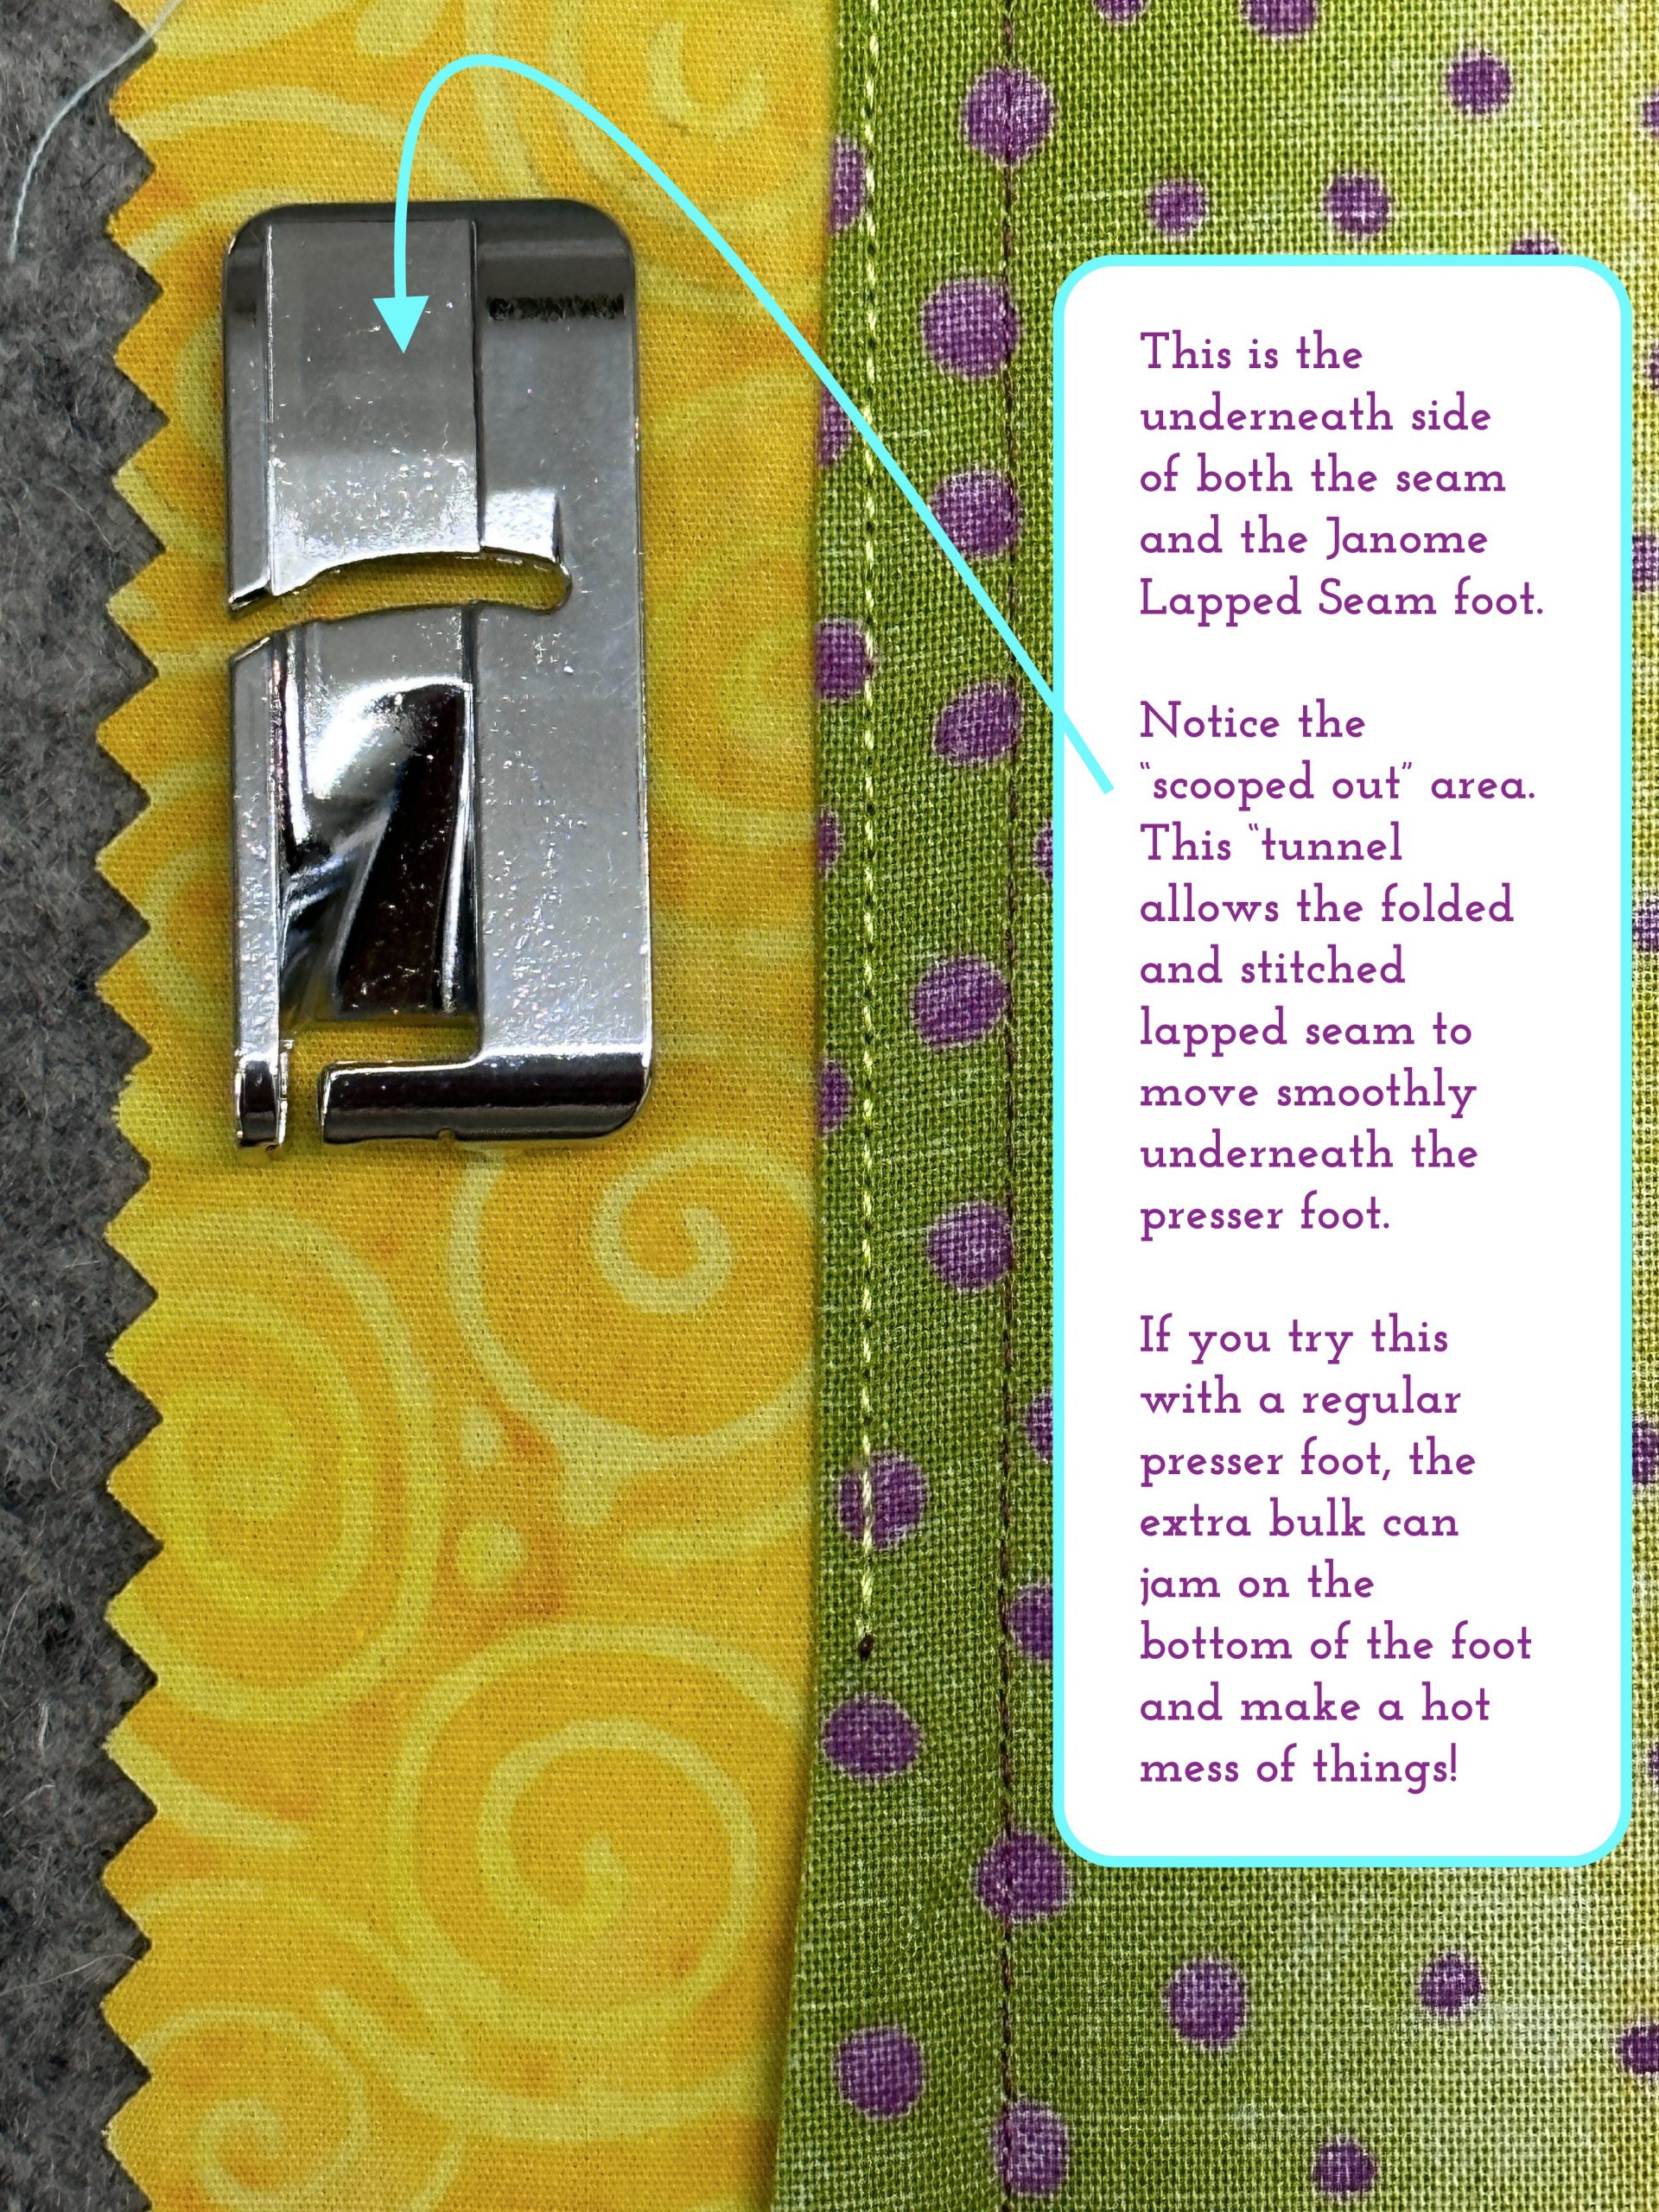
You might wonder why you need a special foot to do this–you could turn under the seam allowance and, if you are a meticulous person (I am decidedly NO, not matter how hard I try), could sew this neatly. Well, here’s why:
This is what the seam looks like on the outside when finished:
Next up is the Flat-felled Seam which is sewn on the OUTSIDE of the garment. Both the seam thread and the topstitching thread will show.
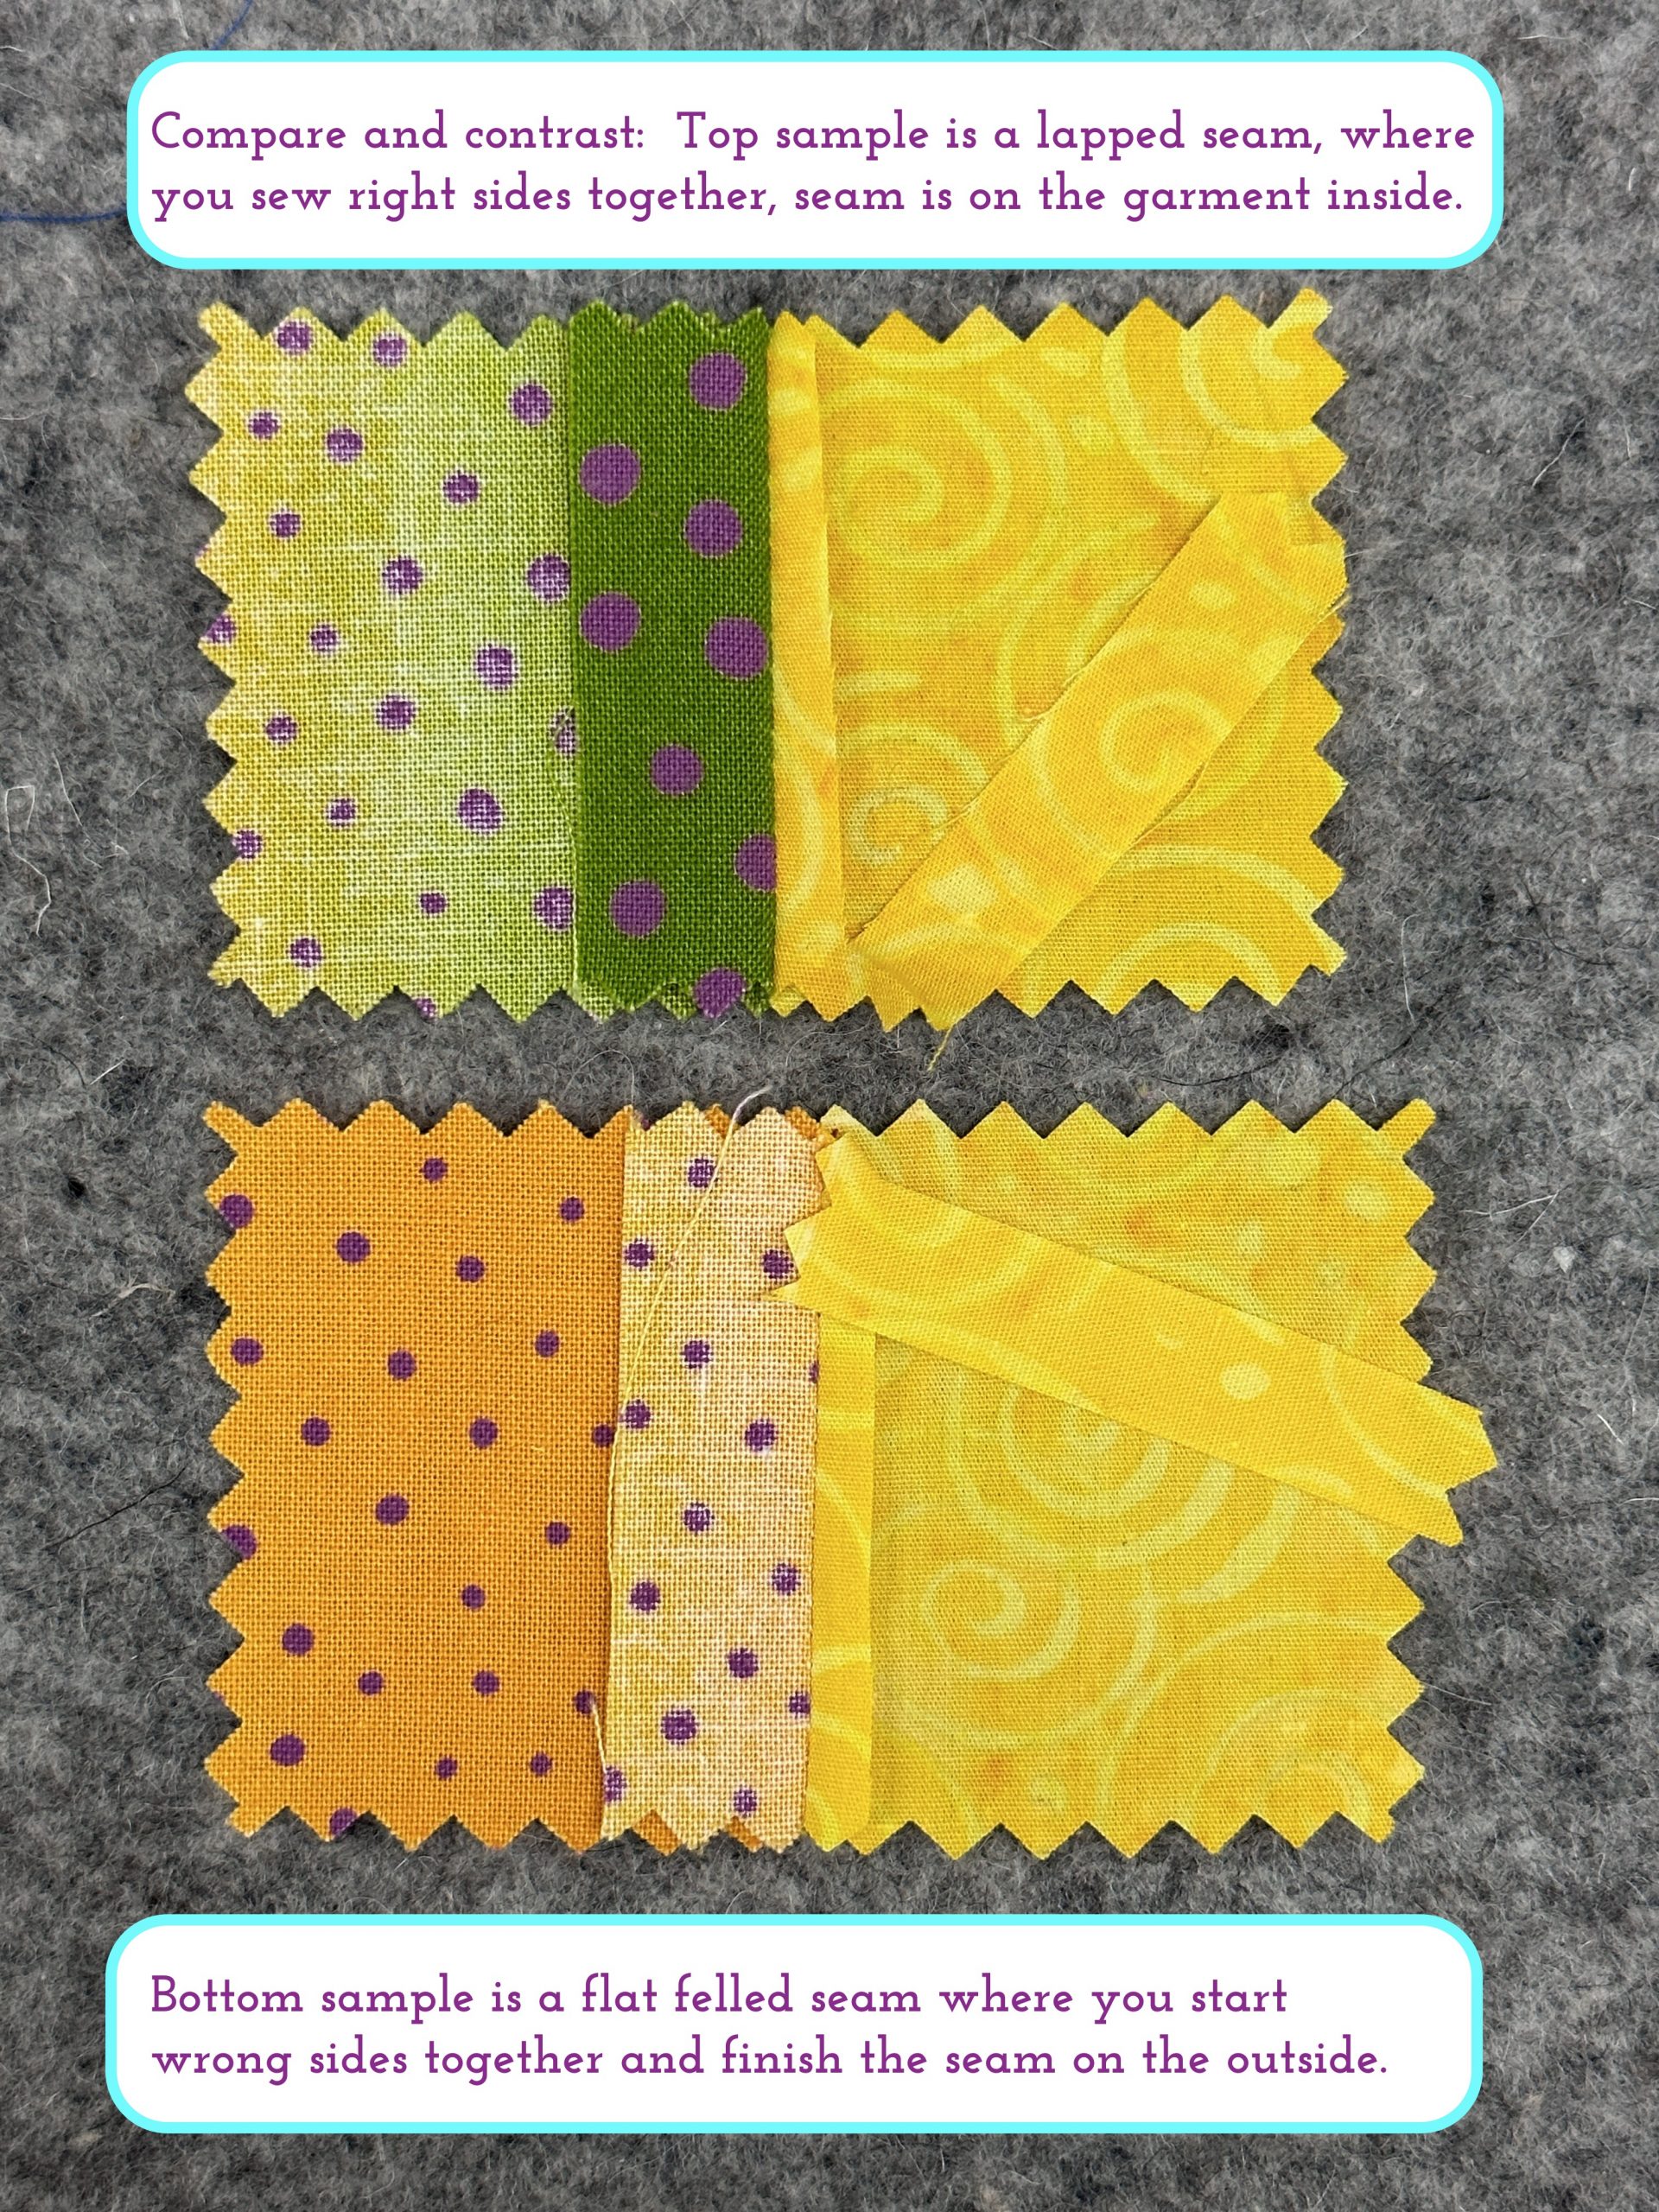
The process is much the same, but you start with the fabric wrong sides together instead of the usual way.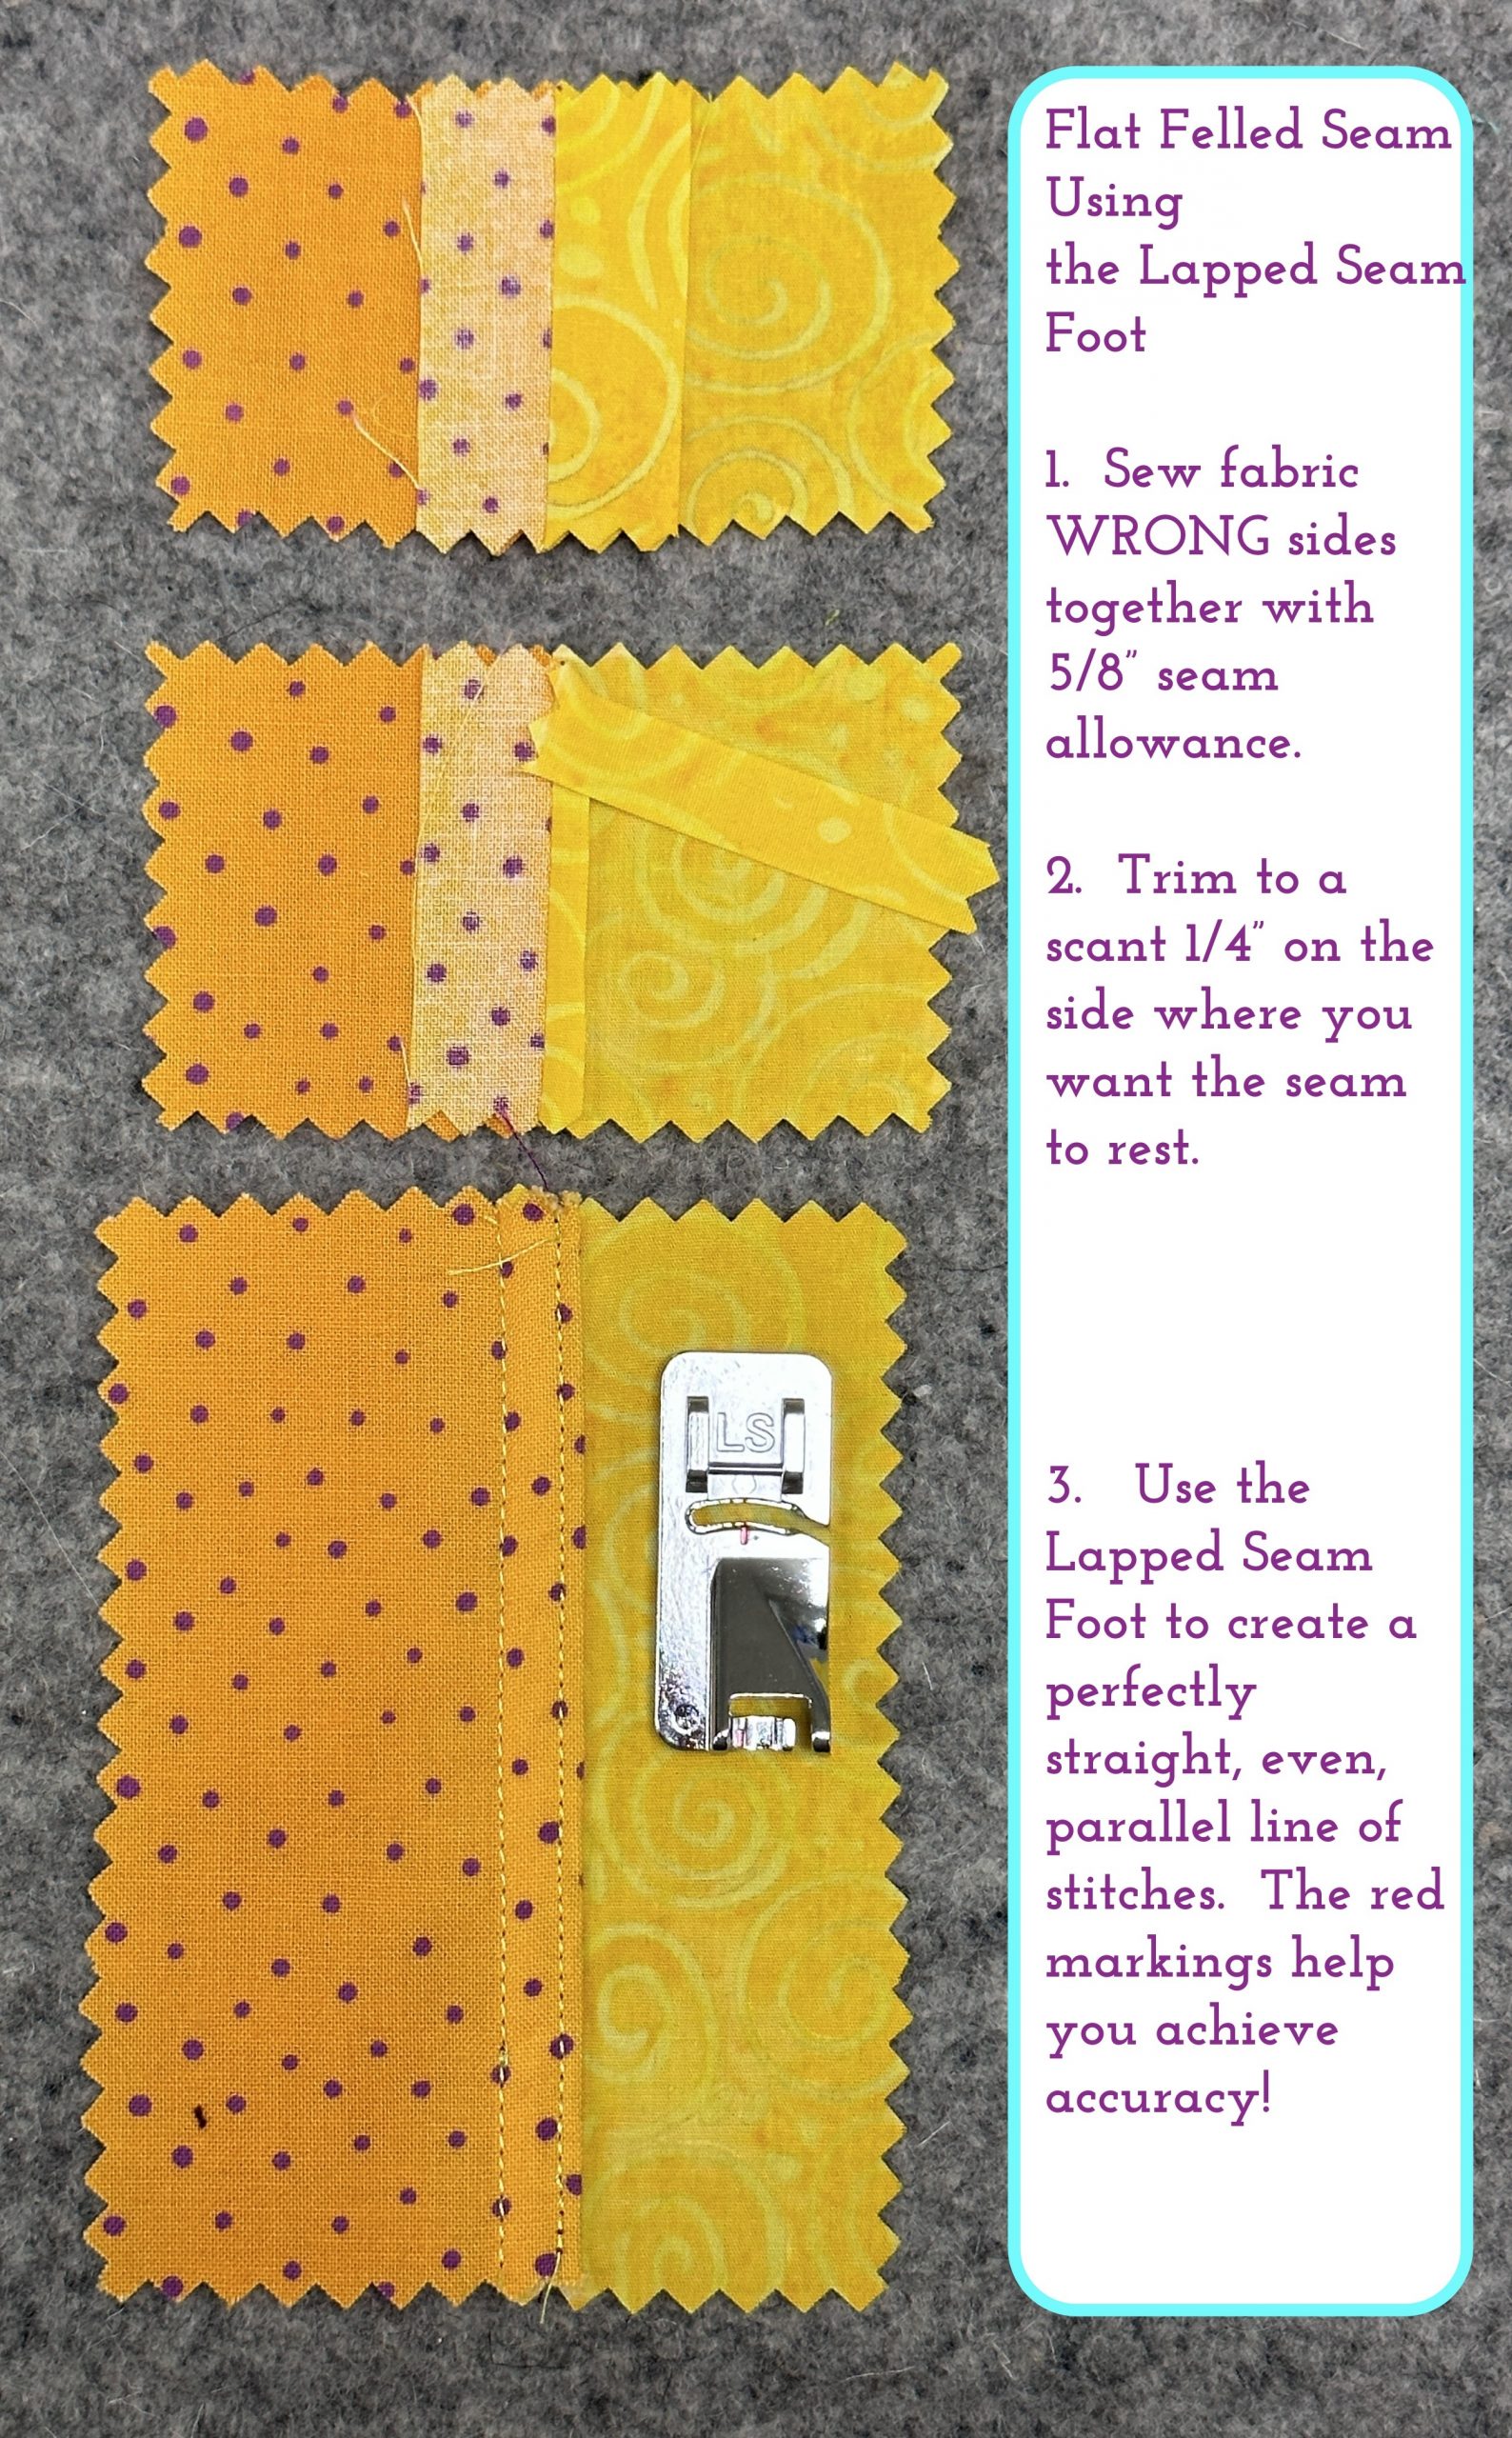
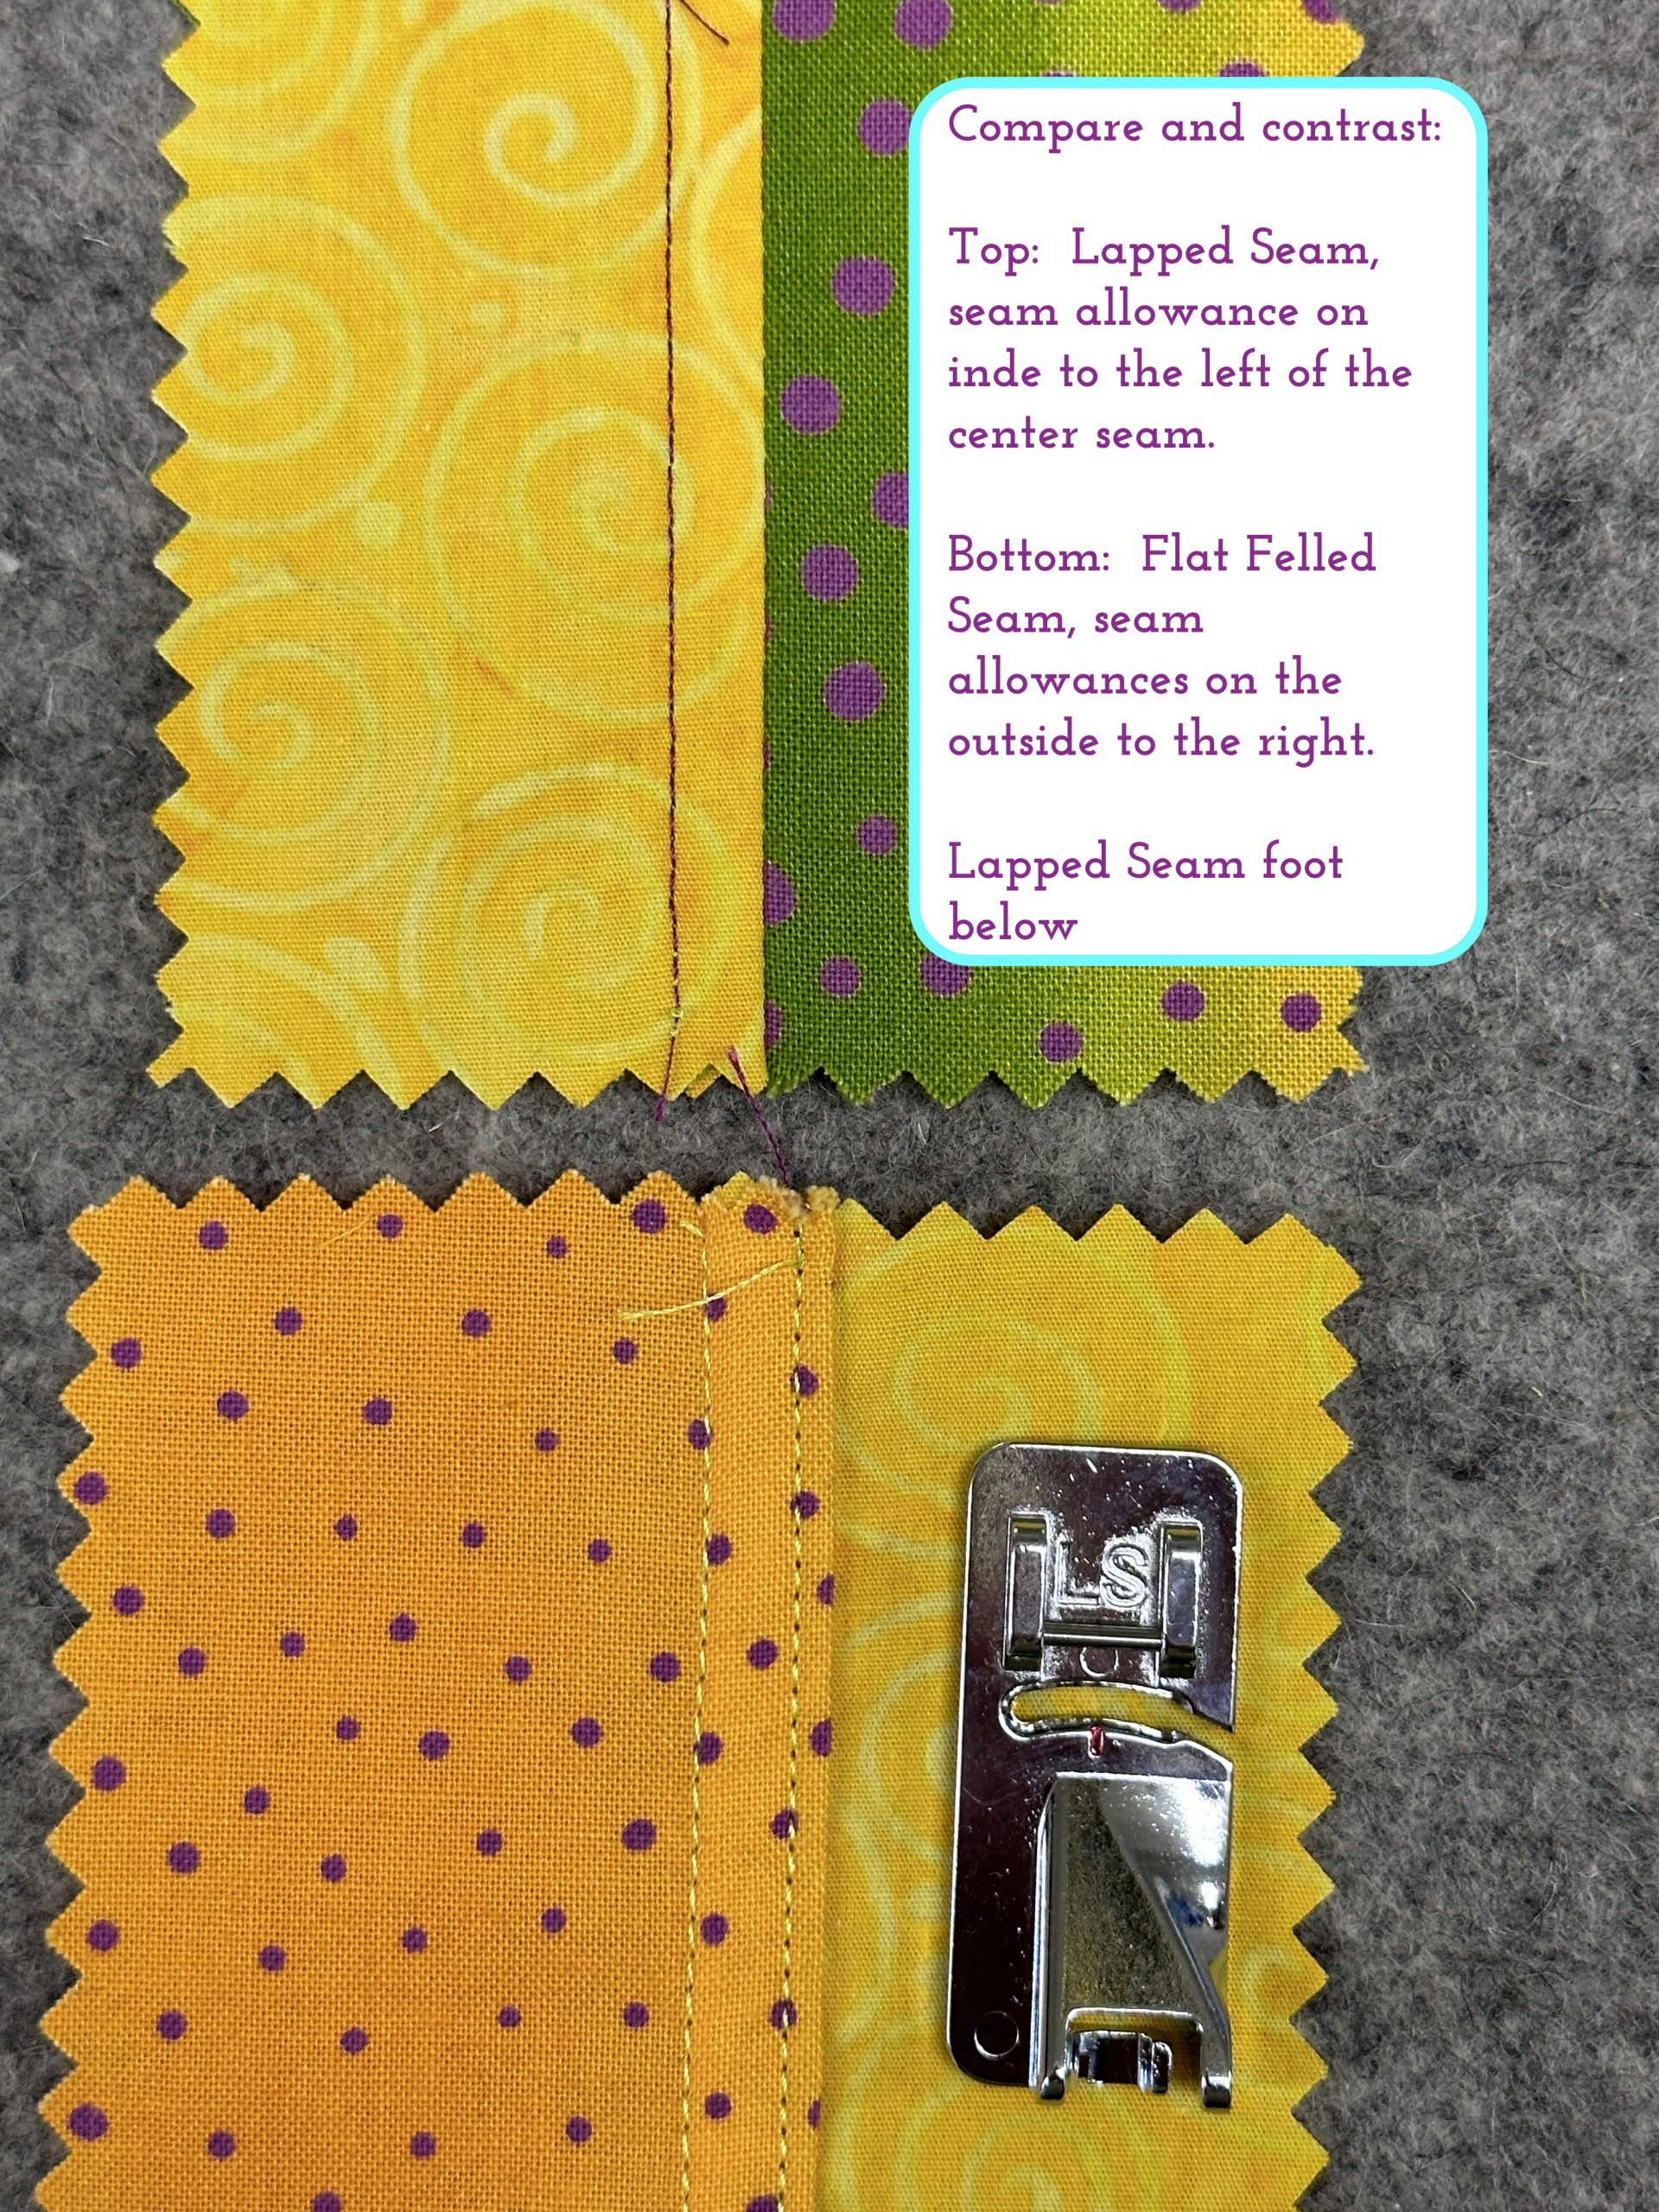
It may help to compare the finished seams:
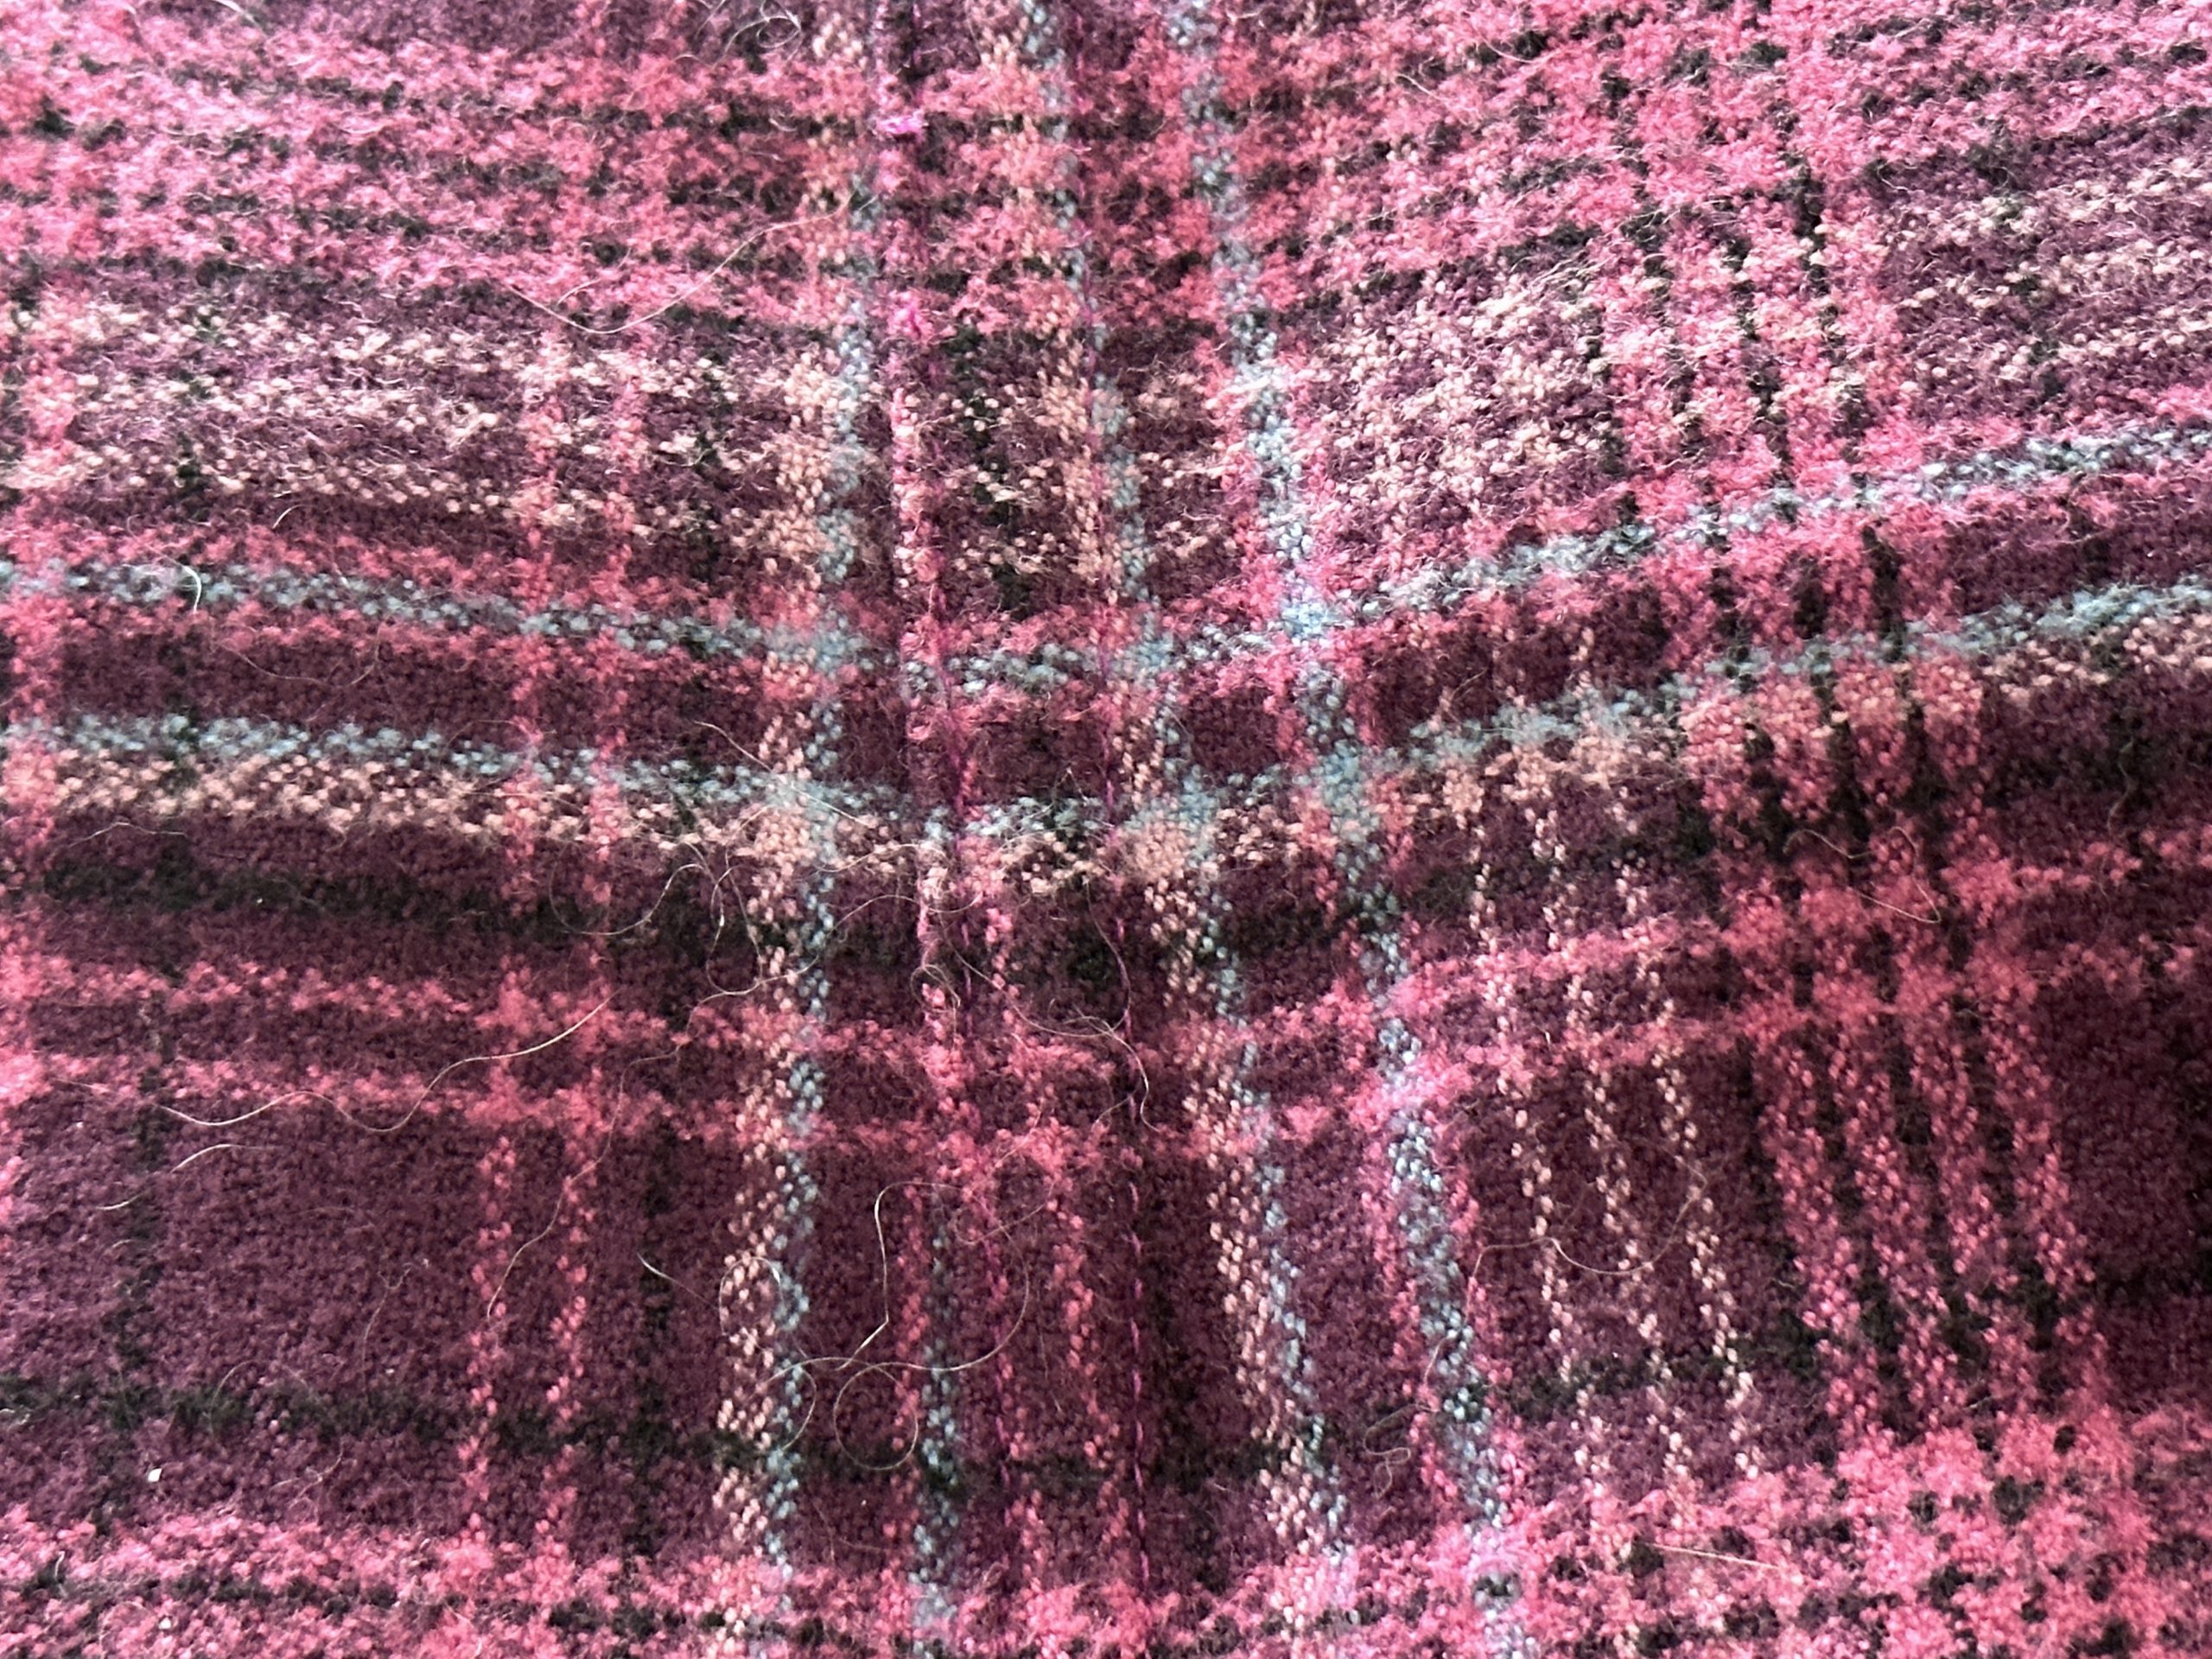
On the Plaid top, I used a flat-felled seam on both the shoulders and side seams, though with the fluff on the flannel and match of the thread, it’s mighty hard to see that in the photo! Honestly, it blends so well with the matching on the plaid, I had to feel for the bump of the turned seam allowance. It’s on the outside, which is how I knew. Gotta say, that’s pretty fine plaid matching to disguise it that well! And sorry about the cat hair…. I swear I will carry it with me to the great beyond some day!
Here are the links to all the posts in this series of lessons, techniques that can be applied to virtually any garment and many home dec projects. Let me know what you’d like to learn and see here on the blog. Cheers and thanks, Sarah
Lesson 1: Choosing a Pattern and Starting Tips
Lesson 2: Making a Muslin, Fitting and Sleeves
Lesson 3: Matching Plaids, Cutting out Your Garment Pieces
Lesson 4: Overcast Seams, just like Serged Seams
Lesson 6: Lapped and Flat-felled Seams
Lesson 7: Hong Kong Finish for Seams
March 16th, 2023 at 8:46 am
[…] Lesson 6: Lapped and Flat-felled Seams […]
March 16th, 2023 at 8:48 am
[…] Plaid Top Tutorial: Lesson 4- Overcast Seams, just like Serged Seams Plaid Top Tutorial: Lesson 6-Lapped and Flat-Felled Seams […]
March 16th, 2023 at 8:49 am
[…] Lesson 6: Lapped and Flat-felled Seams […]
March 16th, 2023 at 8:50 am
[…] Plaid Top Tutorial: Lesson 6-Lapped and Flat-Felled Seams Plaid Top Tutorial: Lesson 8–Lined Patch Pocket […]