Plaid Top Tutorial: Lesson 3–Matching Plaids, cutting out your garment pieces
While visiting a favorite local shop in nearby Rockland, Maine, Clementine, I happened to fondle this amazing thick, soft flannel and thought it would made a perfect winter top. The plaid adds a bit of complexity and opportunity to teach a few more advanced skills along with a fairly simple pattern for this series.
Please note: I am affiliated with Janome as a Janome Artisan and am compensated. However, my reviews are honest and I would say what I say whether affiliated or not. I’ve also chosen to be affiliated with Janome since 2003 (!!!) because their machines are so good and they are so responsive to the interests and needs of their customers.
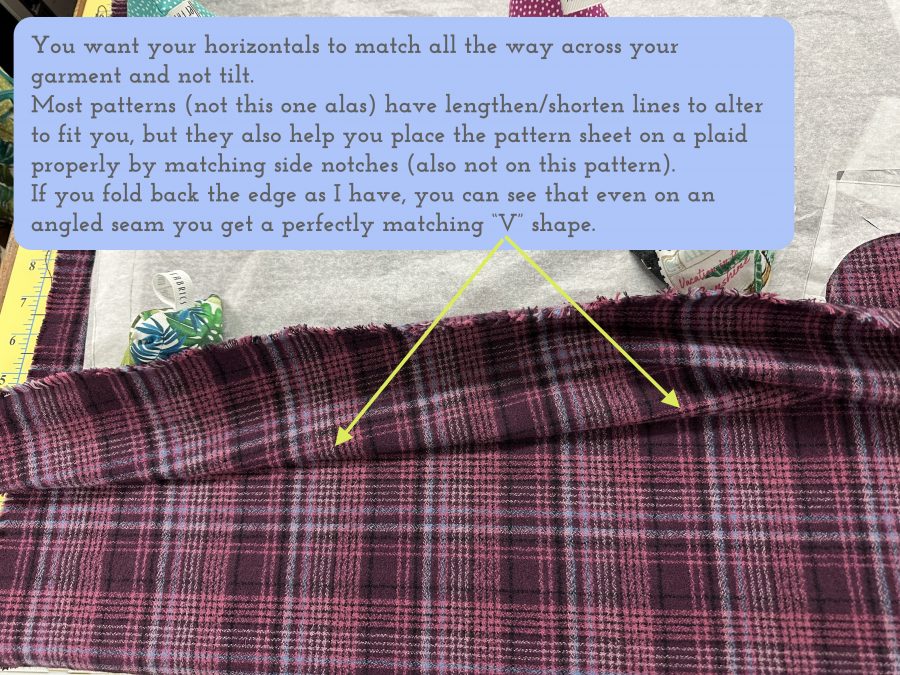
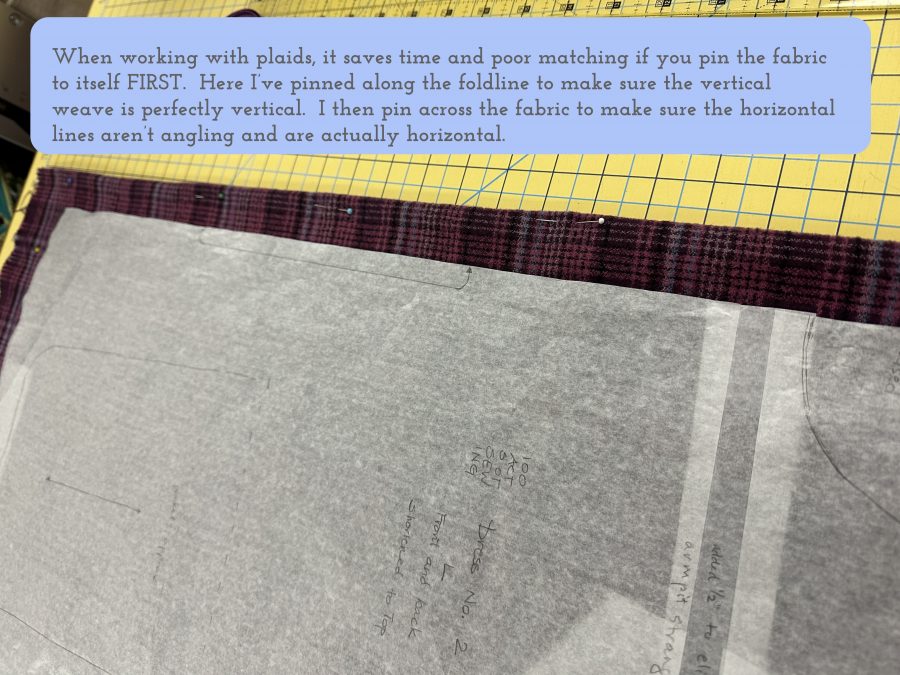
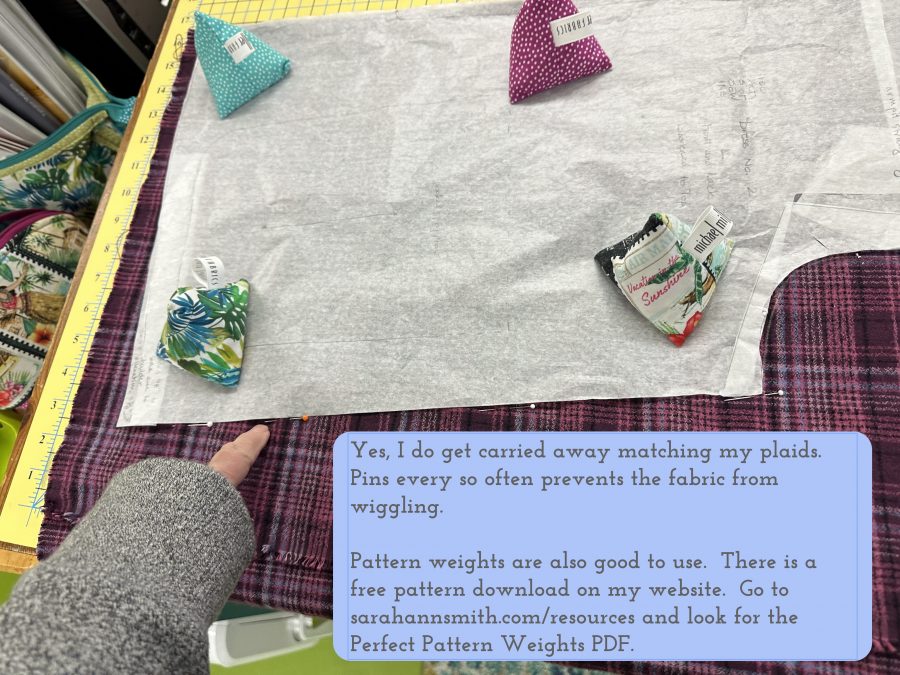
You use the lengthen shorten line to make sure the pattern piece is places squarely on the plaid–the line on the pattern runs on top of the same horizontal band all the way across. The notches (when you have them on a pattern…still grumpy about that!) give you additional “checkpoints” to make sure the horizontals on the front will align with the horizontals on the back.
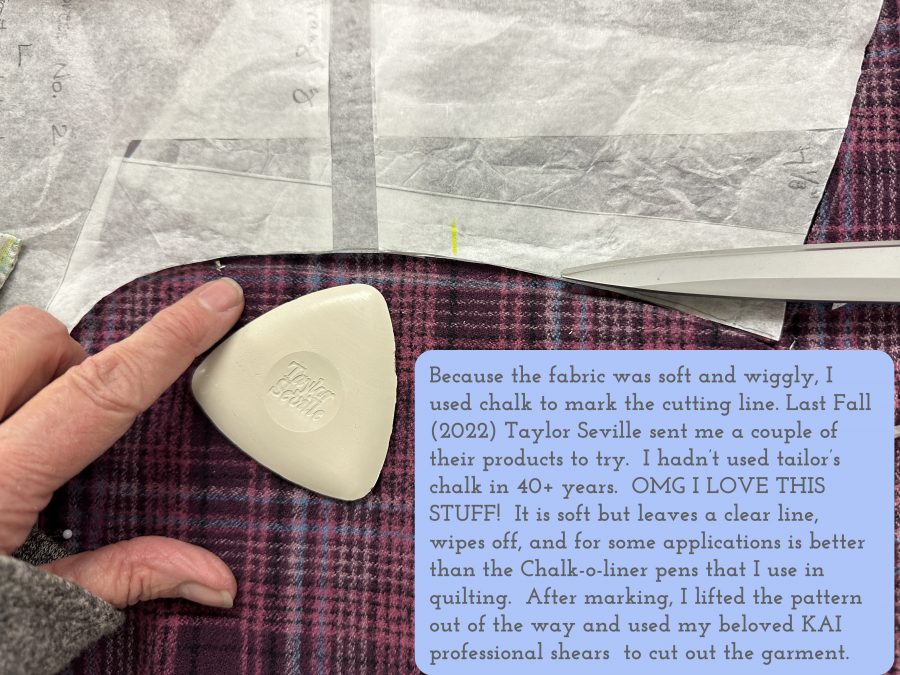
The Taylor Seville chalk is much nicer than the tailor’s chalk I remember from the 70s and 80s. It comes in a nice plastic case that prevents the edges from getting chipped, too. The KAI shears are these. They are the first fine shears I’ve bought in nearly 30-35 years. WHY did I wait so long????? To be blunt, these make my Ginger shears look like lead clunkers! They weigh less and are SO much easier on my arthritic hands. They cut like a hot knife through butter!
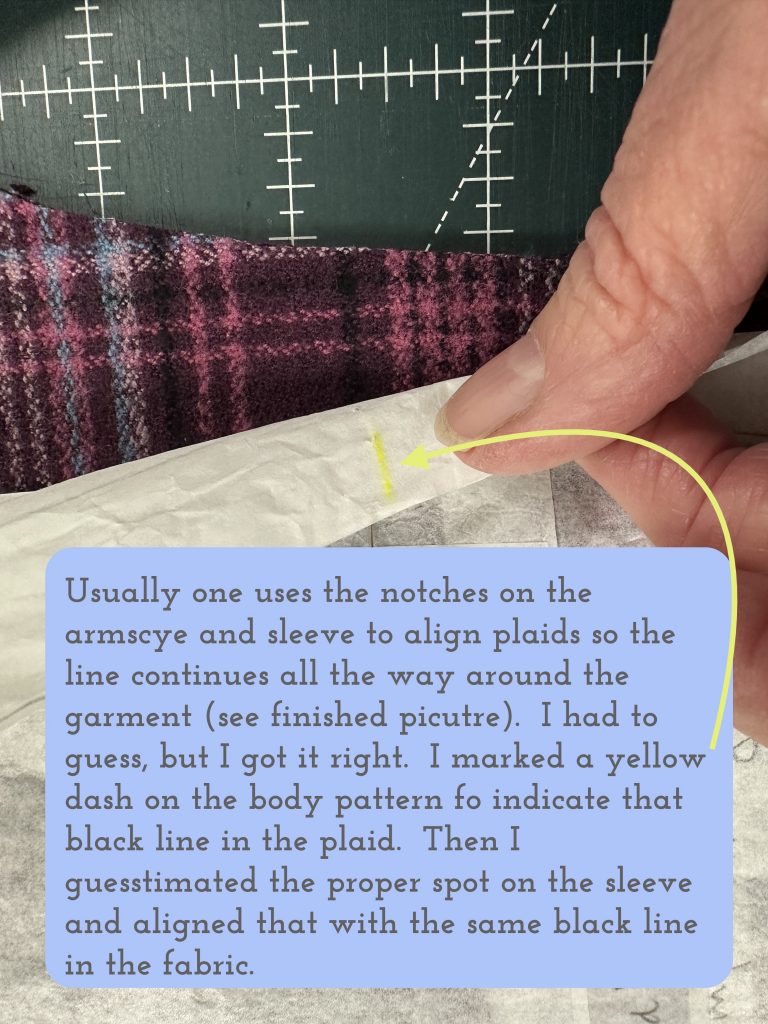
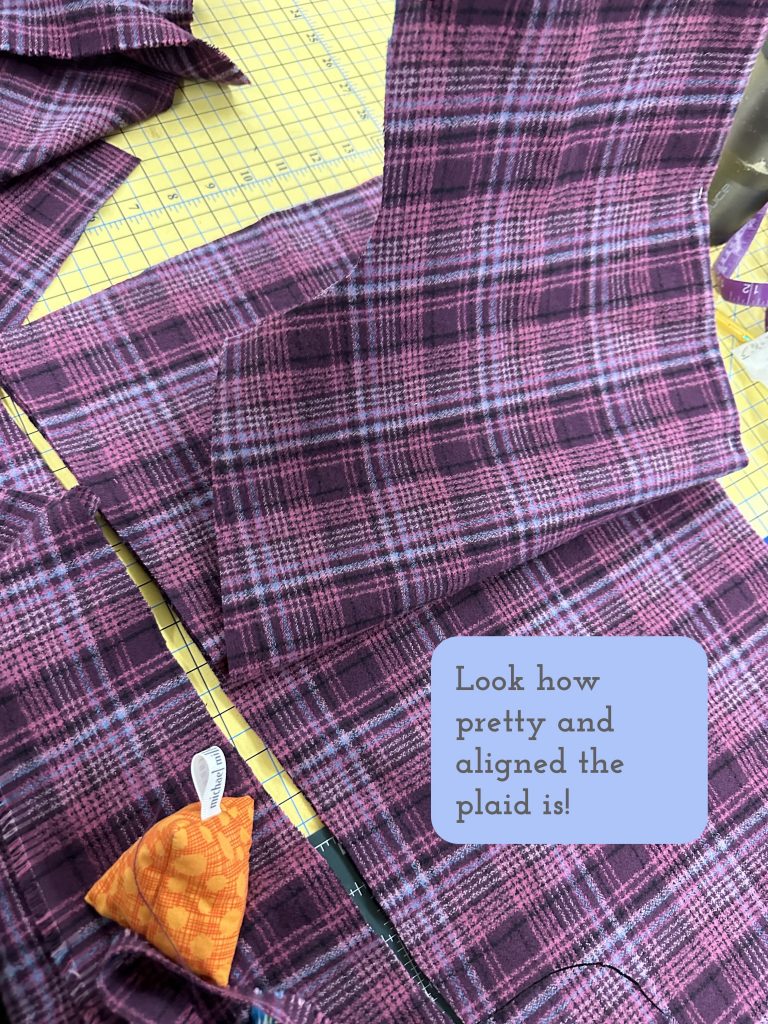
By matching the plaid at the (made by me) “notches” the horizontal lines of the plaid will match up all the way around the garment, continuing from the front to the sleeve to the back to the other sleeve and back to the front. The next photo shows how nicely the line matches up across the garment.
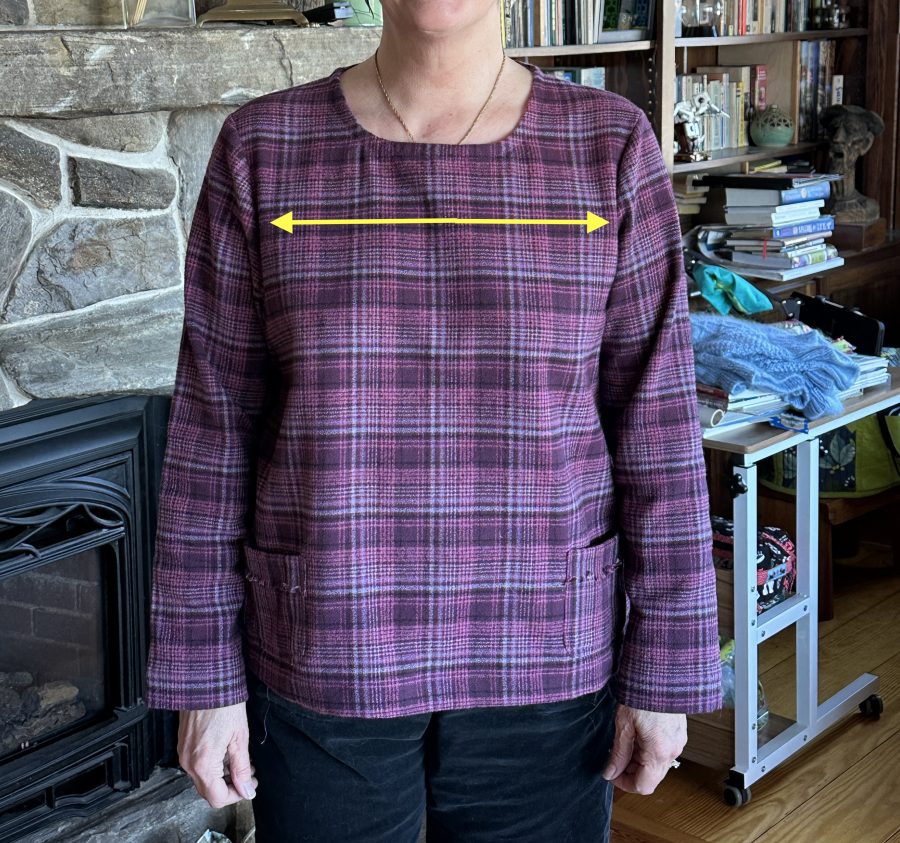
The arrow shows how the black line carries across the garment. Because you need to ease in extra at the sleeve cap, the matching goes off a bit at the top of the sleeve. That’s why it is so helpful to have notches marked on the pattern–that’s where you match up a plaid or stripe as well as easing the sleeve cap to fit properly!
Now that the top is cut out, it is time to start sewing. My next post will be the first one on seam finishes. See you then–but one more side-view to show what a beautiful seam you get when the plaids are properly aligned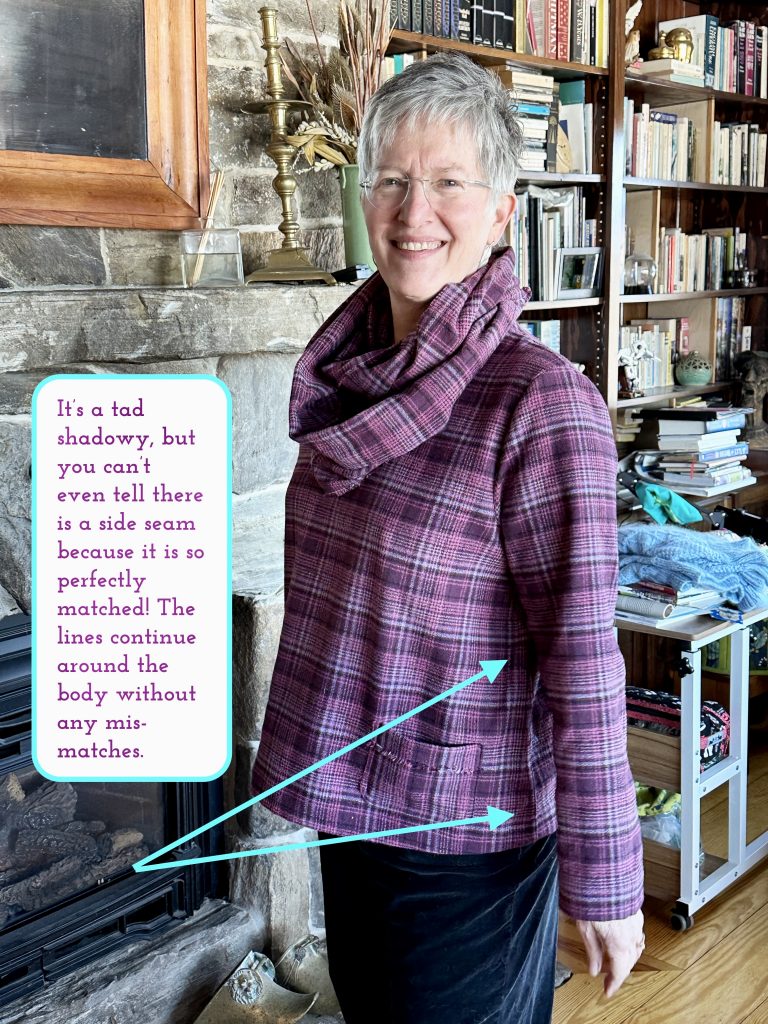 !
!
Here are the links to all the posts in this series of lessons, techniques that can be applied to virtually any garment and many home dec projects. Let me know what you’d like to learn and see here on the blog. Cheers and thanks, Sarah
Lesson 1: Choosing a Pattern and Starting Tips
Lesson 2: Making a Muslin, Fitting and Sleeves
Lesson 3: Matching Plaids, Cutting out Your Garment Pieces
Lesson 4: Overcast Seams, just like Serged Seams
Lesson 6: Lapped and Flat-felled Seams
Lesson 7: Hong Kong Finish for Seams

February 25th, 2023 at 6:57 pm
This was very interesting to read. I am trying to get up my nerve to try sewing a top with plaids, and this is helpful. Yours turned out beautifully!
February 25th, 2023 at 11:14 pm
Thanks so much! GO FOR IT! The only way to do it is just try, be proud of what you make, learn, and make another!
March 16th, 2023 at 8:38 am
[…] Lesson 3: Matching Plaids, Cutting out Your Garment Pieces […]