Perfecting the Tote Bag–Part 1, the Turquoise Onion Tote
Tuesday, September 26th, 2023Confession: I love boxes, bags, baskets…. the more, the merrier. I still wonder what happened to that plaid and a little bit of leather bag I had when I was six! And I love having my bags work for me, offering the perfect combination of color, print and cloth, and function.
Over the years I have learned that I HATE rummaging around in the pitch dark bottom of a deep bag. I think of those as North-South bags, taller than they are wide. I vastly prefer East-West–where I can actually FIND stuff inside. It also means black and other dark linings are a big Nope. I also like a bag that stands up on its own–no having to fight collapsing sides!
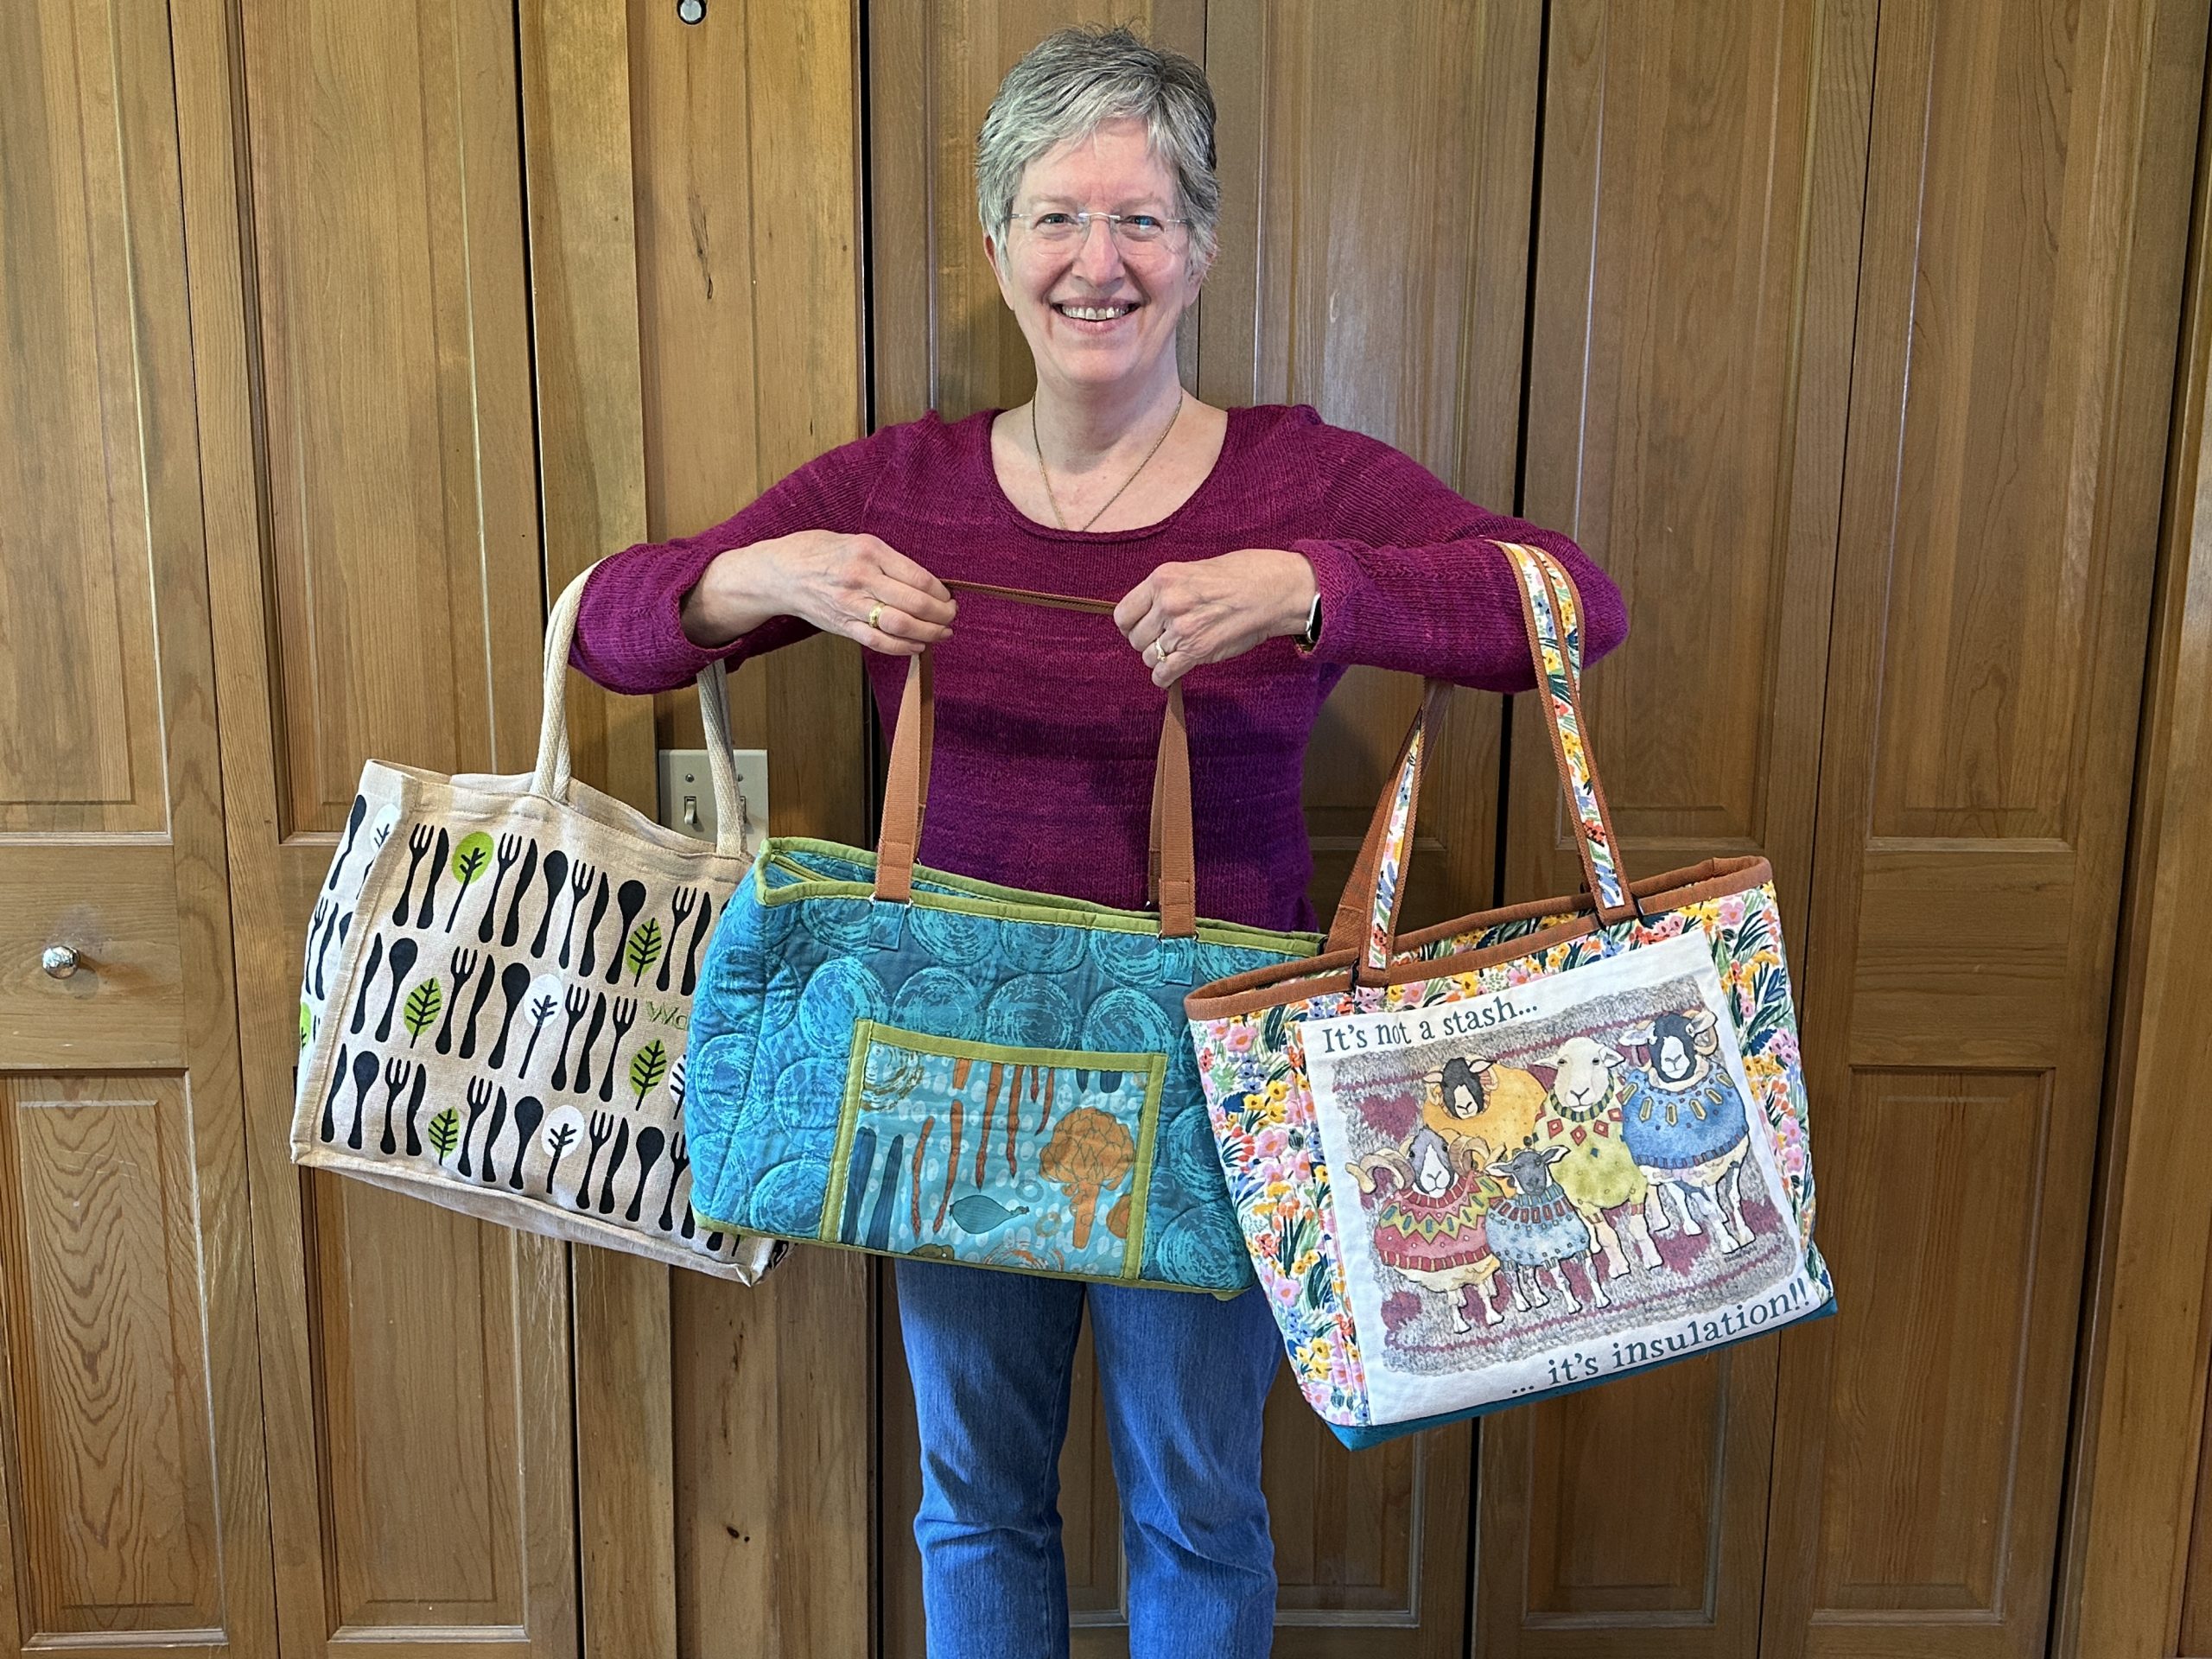
When in England in 2014 on a once-in-a-lifetime trip with younger son Eli, then 16, we stopped at a grocery store. The store-brand totes were fun, sturdy, not bulky to pack, and inexpensive so I bought one for grocery shopping on the trip (he learned about frugal AND the occasional splurge method of travel, where I alternate thrifty lodgings and take-and-make meals with comfy hotels with hearty breakfasts). That is the Waitrose tote bag you see in the photo above. Once we got home, I decided it was just about the PERFECT shape: wide, not too deep, a sturdy removable base so I can wash the bag but have structure to hold the stuff in it. The Waitrose bag collapses though, so I vowed to make one that checked off my must-have items:
- sturdy base
- stands up by itself
- comfortable handles
- pockets, inside and out, including one large enough for knitting pattern, magazine or ipad
- washable
- base that is easily spot cleaned and more durable than woven fabric (I made an all cotton tote once, spent eons quilting it beautifully, and then the corners wore out in nothing flat and spill out white batting… BUMMERS)
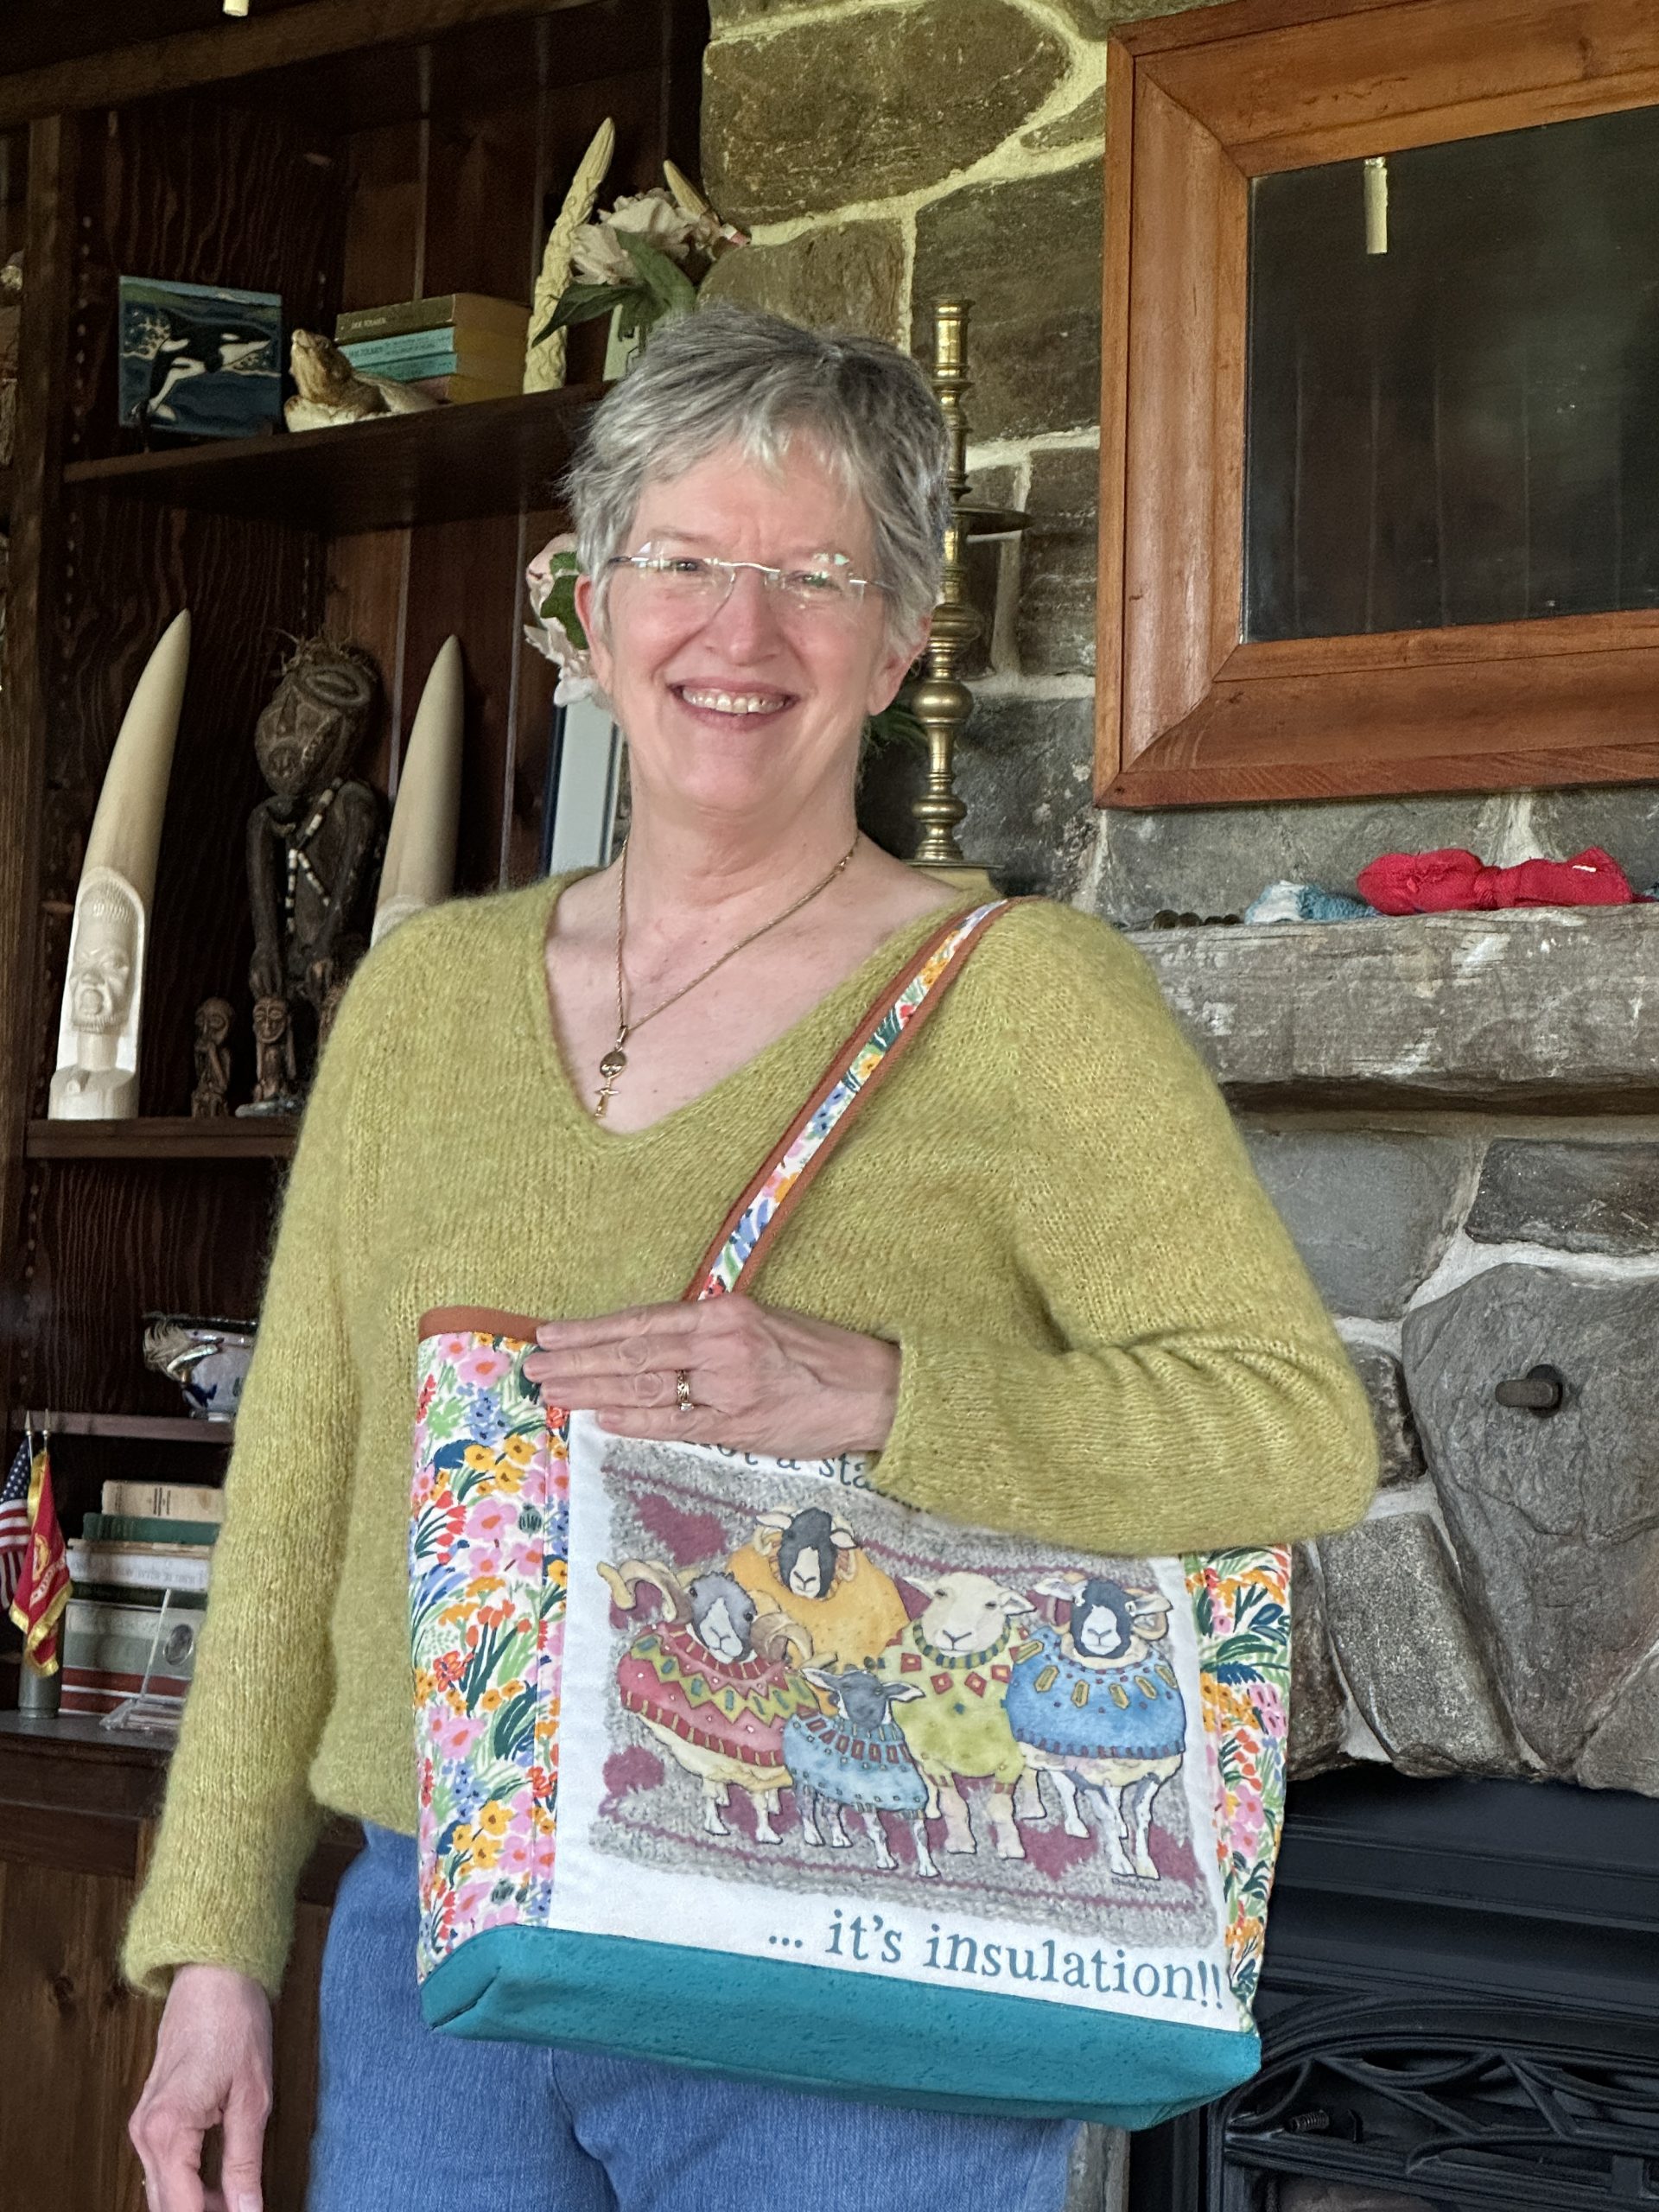
Fast forward eight (OMG…gulp) years and I finally made the Turquoise Onion Tote. Why turquoise onion? Those round circles on the fabric were made from printing with an onion! By late 2022, COVID had happened, things were starting to open up, and I wanted to pitch my ideas to fabric companies (alas that didn’t succeed, at least not at this point and likely not ever), so I printed some of my own designs at Spoonflower and made the turquoise and lime bag to carry and show off my fabric while meeting with company reps at Quilt Market. The tote is pretty close to PERFECT. Alas, I apparently did not blog about it, just the ever-vanishing social media posts. That means this post just turned into two parts, this one about the turquoise and the next about the sheep in sweaters!
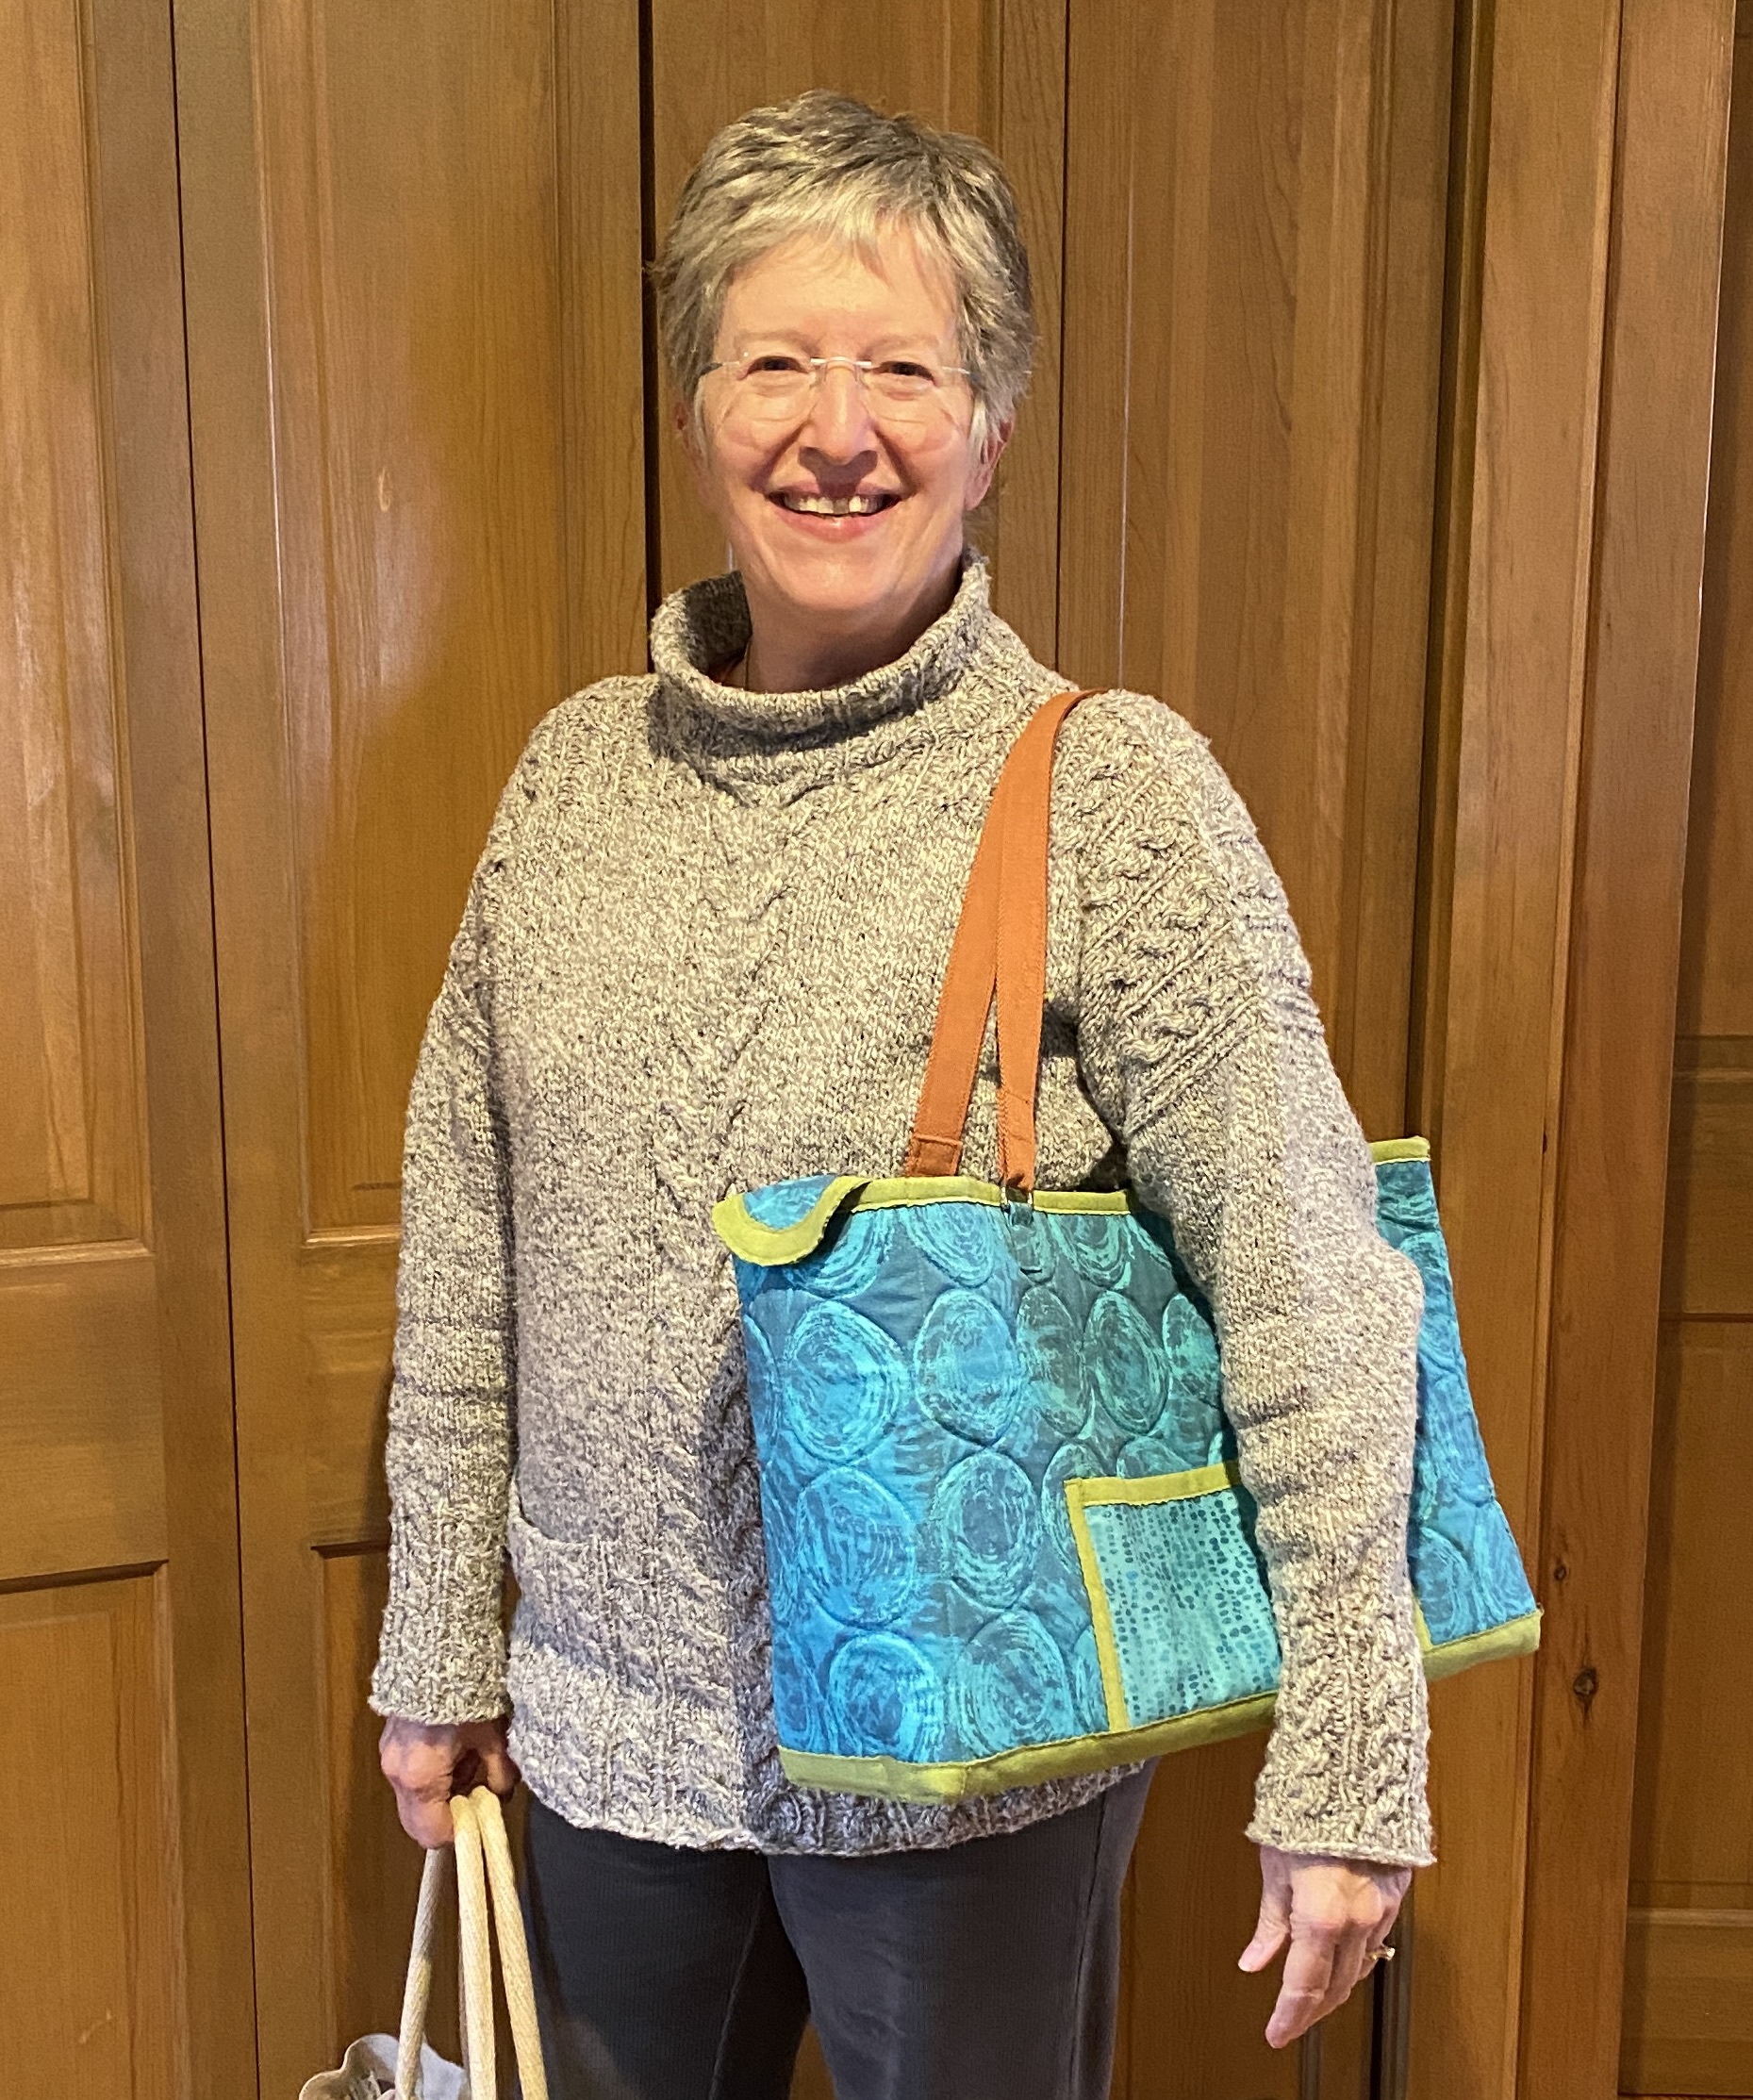
The turquoise bag is the same width as the Waitrose bag, but not quite as tall. It has two flat outer pockets of different sizes (for readily grabbing the cell phone or business cards), assorted interior pockets, a removable base, and a zippered top that completely encases the contents, meaning cats and puppies cannot access and chew a knitting project inside of it!
I used the following supplies–note, you can find hotlines to some of these products on Amazon by going here:
- Fabric from Spoonflower (my designs, not currently available but maybe someday) and commercial fabric
- Synthetic suede for the base
- byAnnie Soft and Stable for the “batting”–it is a foam with a peached (softly fuzzed) fabric that looks like nylon tricot but soft and grippy
- Polyester and cotton threads
- Carpet binding tape–I folded this in half, sewed at the edge and presto, nearly perfect handles that are soft, sturdy and comfortable
- Bag rings/rectangles–I bought mine from byAnnie but Sallie Tomato also has a good selection
- Zippers from byAnnie –these zippers have wider tape and sturdy teeth that are perfect for bag-making
- Magnets from byAnnie
- Corrugated plastic: looks like cardboard but made of plastic, available at art and/or craft stores. Cut to size to make a base for the bag. Cover in a tube of fabric or leave as is. Fabric is nicer, but…..life happens and sometimes that tube happens later! Makes a fairly sturdy base, inexpensive, easily found. You could also use cardboard or mat board, but they are more likely to bend eventually.
I started by measuring my desired size. I quilted the main body (and base) of the bag–the linen blend with the onion print (darker turquoise) is an extra wide fabric, which meant I needed only one vertical seam which I placed on the corner.
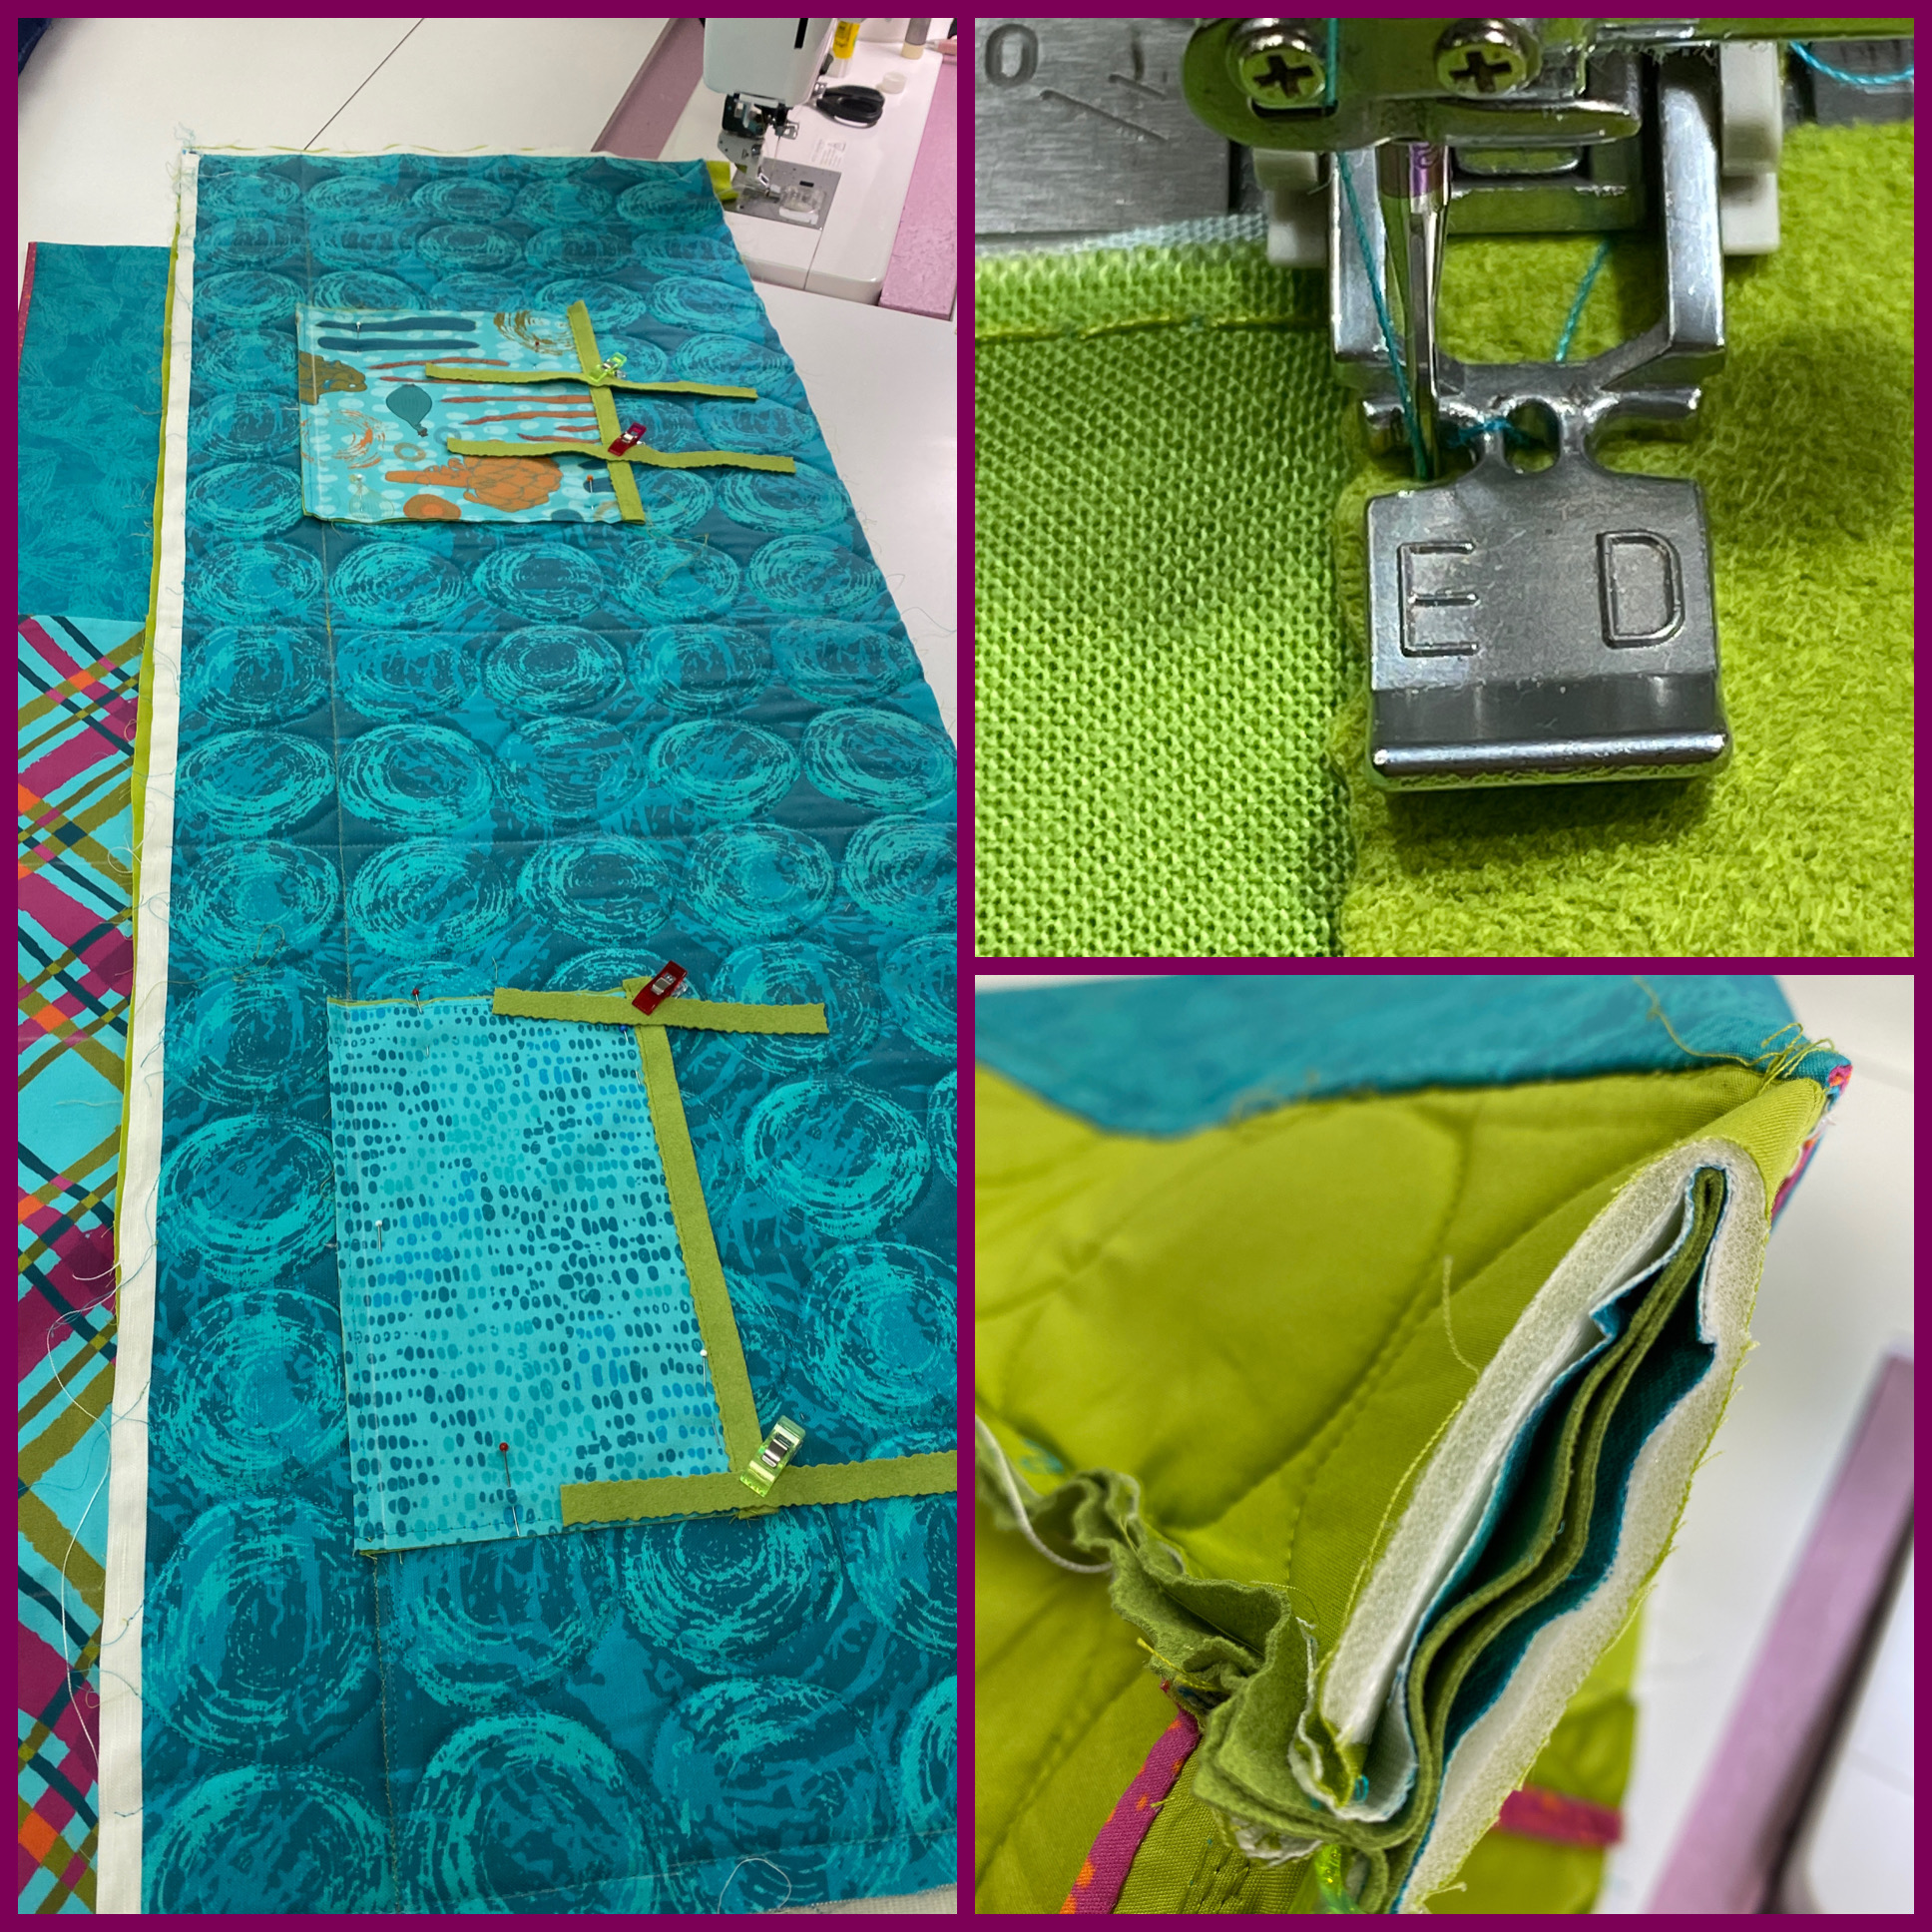
Left photo, above: I made and placed the pockets on the outside and stitched them in place first. Then I put the plaid inner pockets inside and created separate pockets avoiding sewing through the outer pockets.
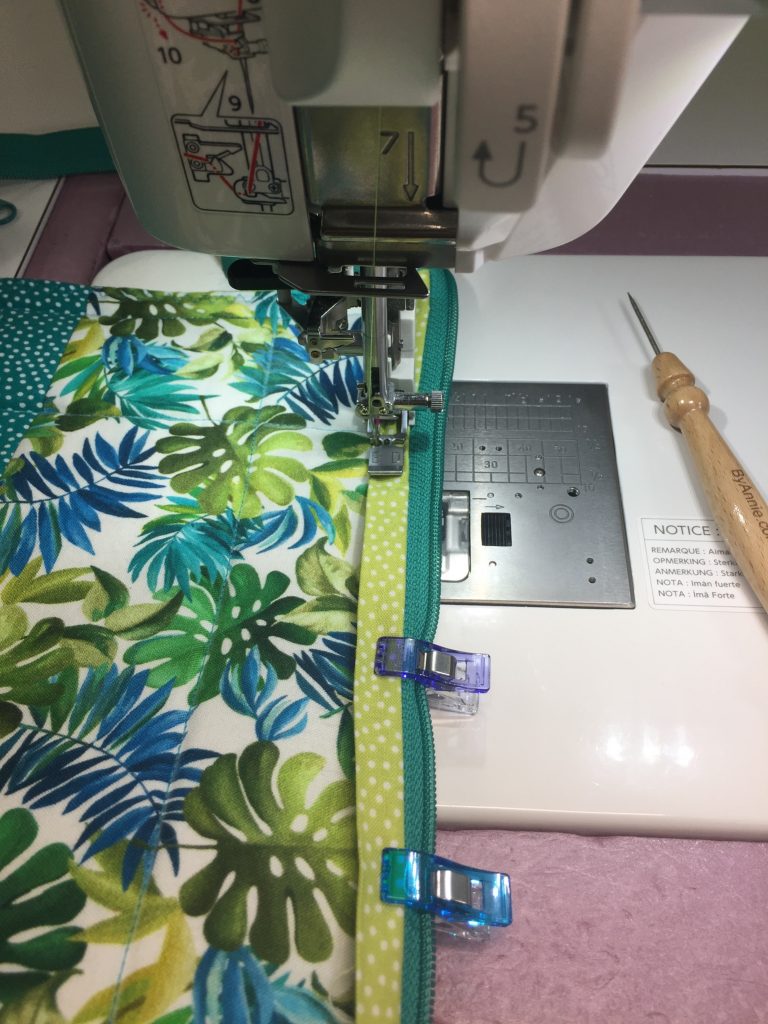
Top right, above: I used my AcuFeed zipper foot for edge stitching
Bottom right, above: boxing the corner: after sewing up the vertical side seam, I sewed the bottom edge together, then boxed the corners making sure to get the seam exactly in the center (which gets you perfect 90 degree corners).
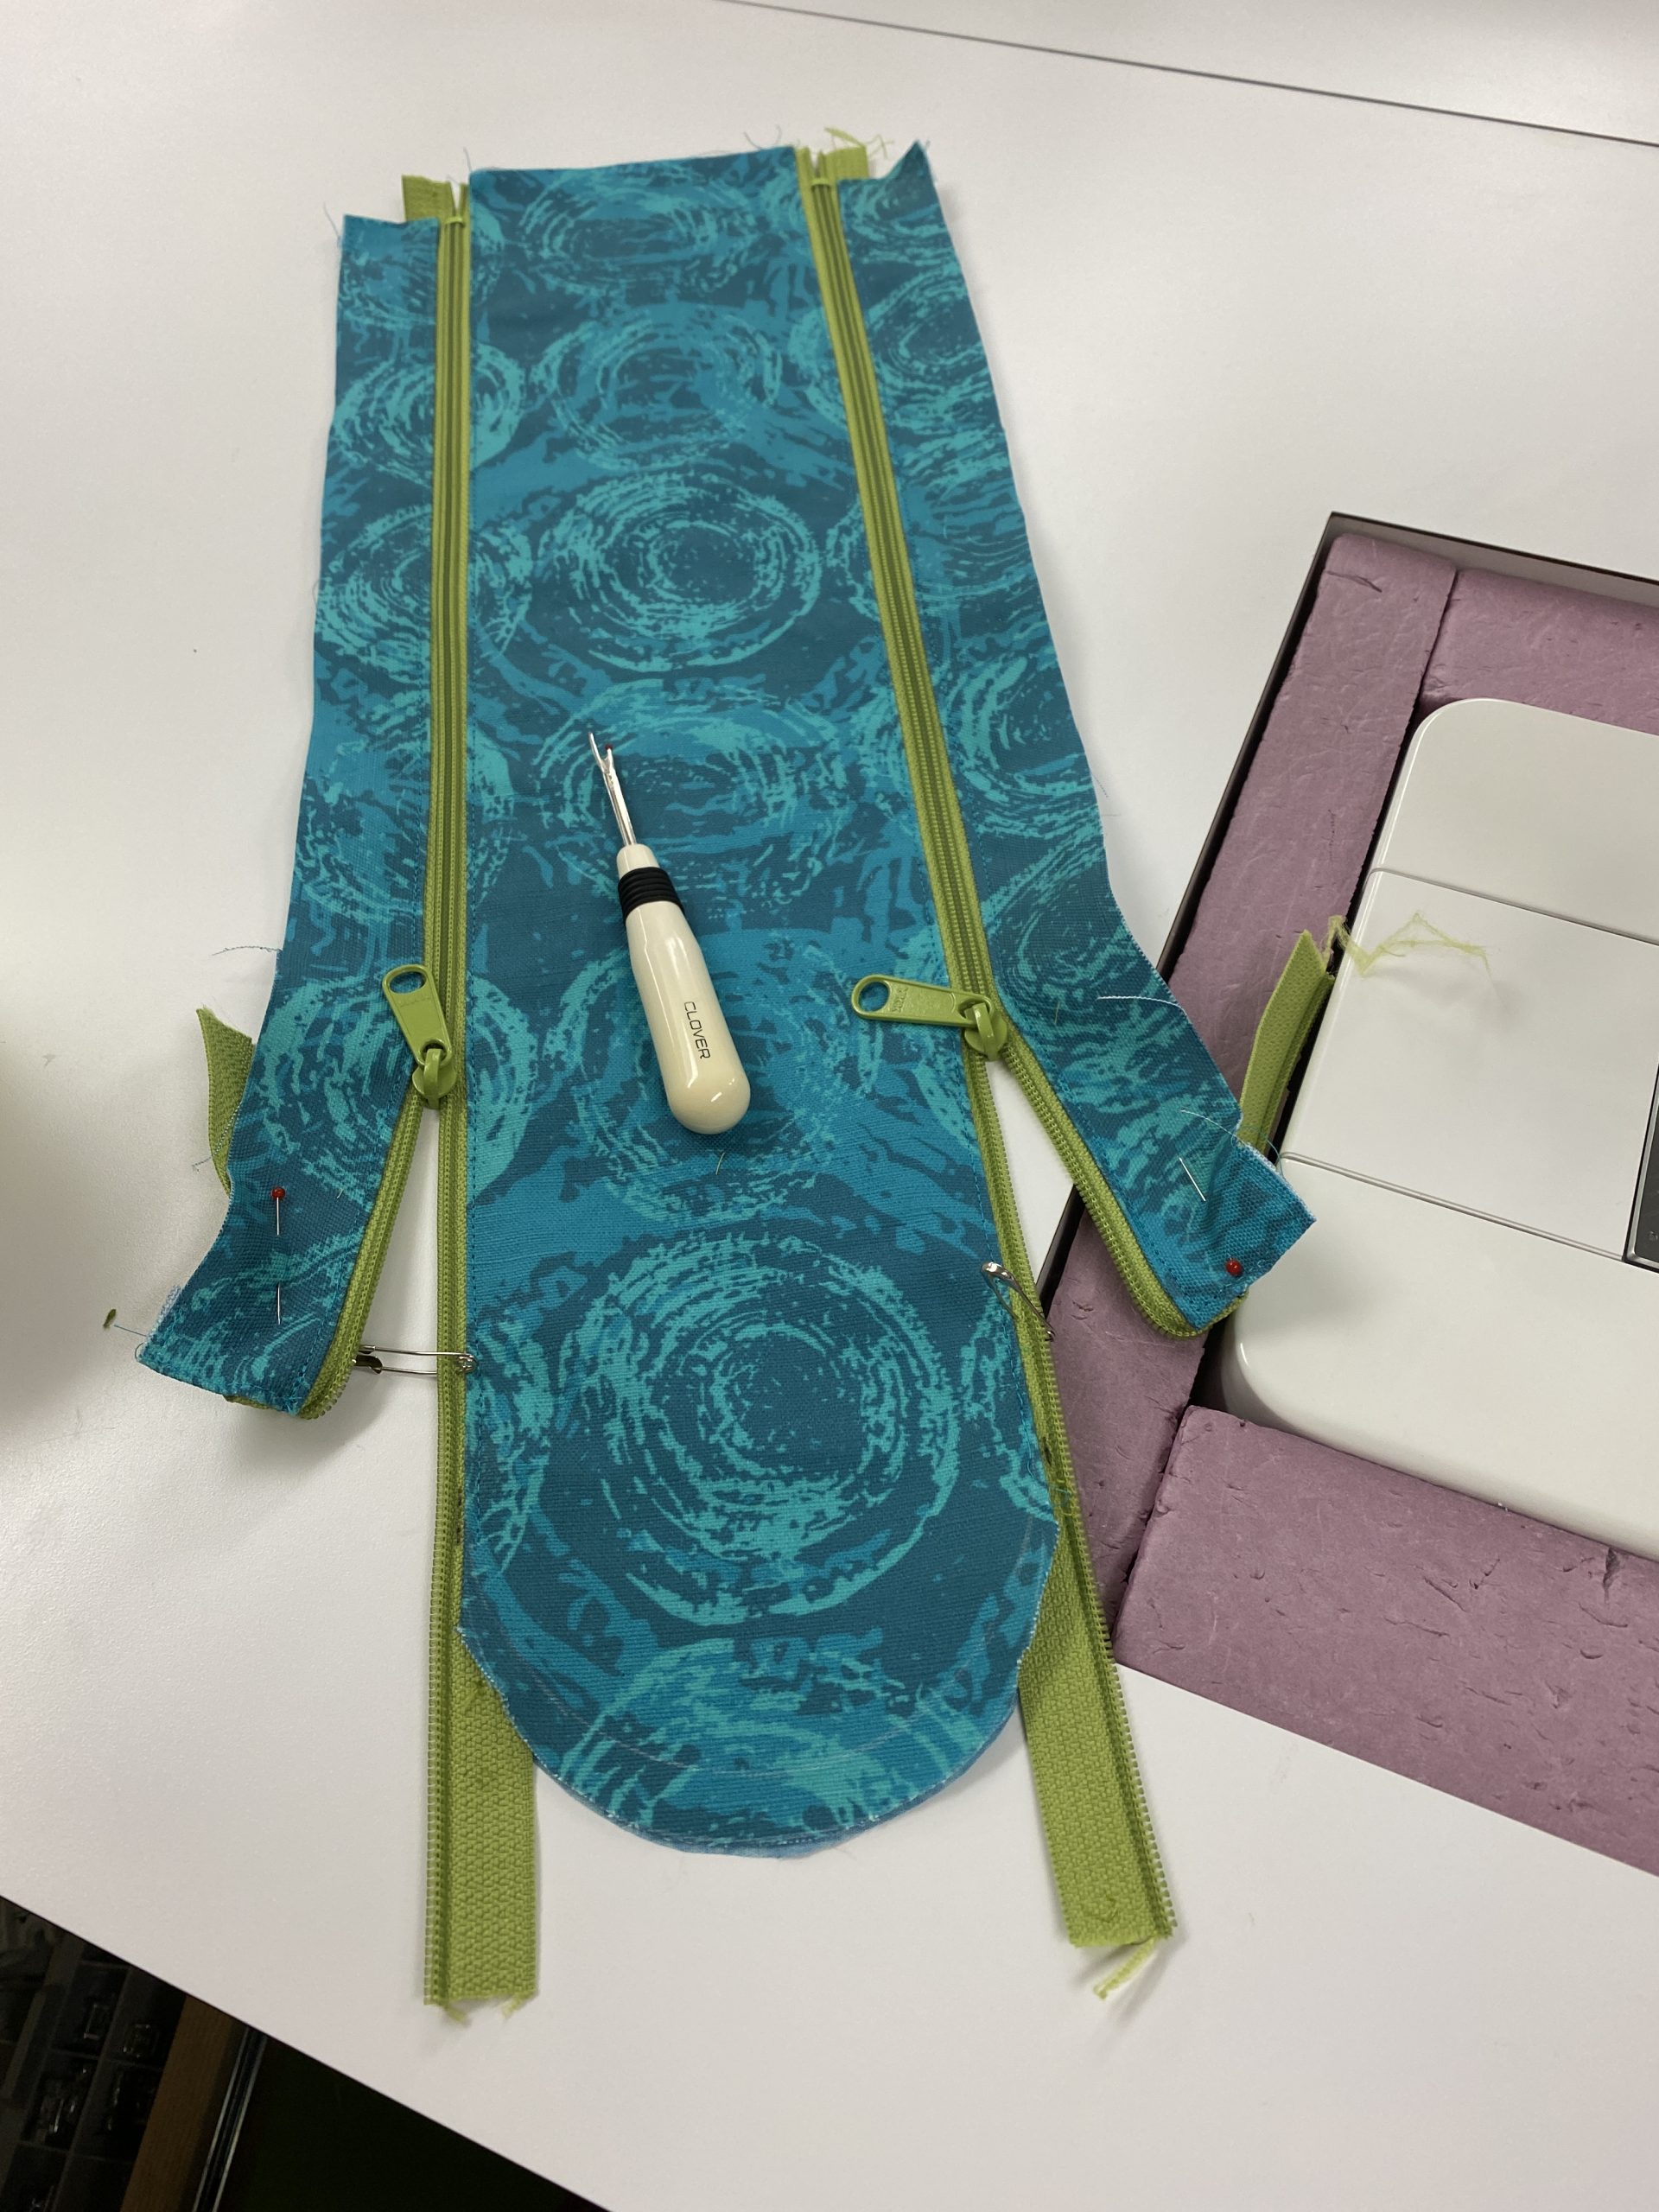
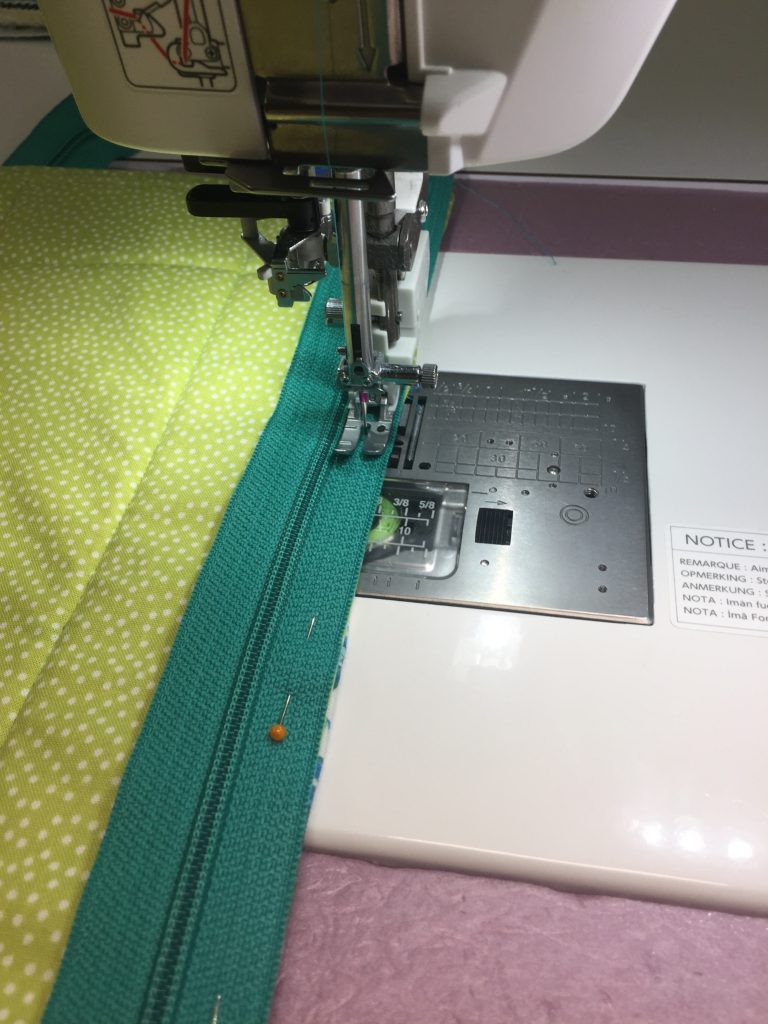
I made the top zipper panel so that three sides would be sewn to the top of the bag and subsequently covered by the synthetic suede (purchased EONS ago and wish I could find a source for fun colored ultra suede now!). The curved end will wrap up over the end of the bag and hold together with magnets sewn to the under side of the rounded end and the inside of the bag.
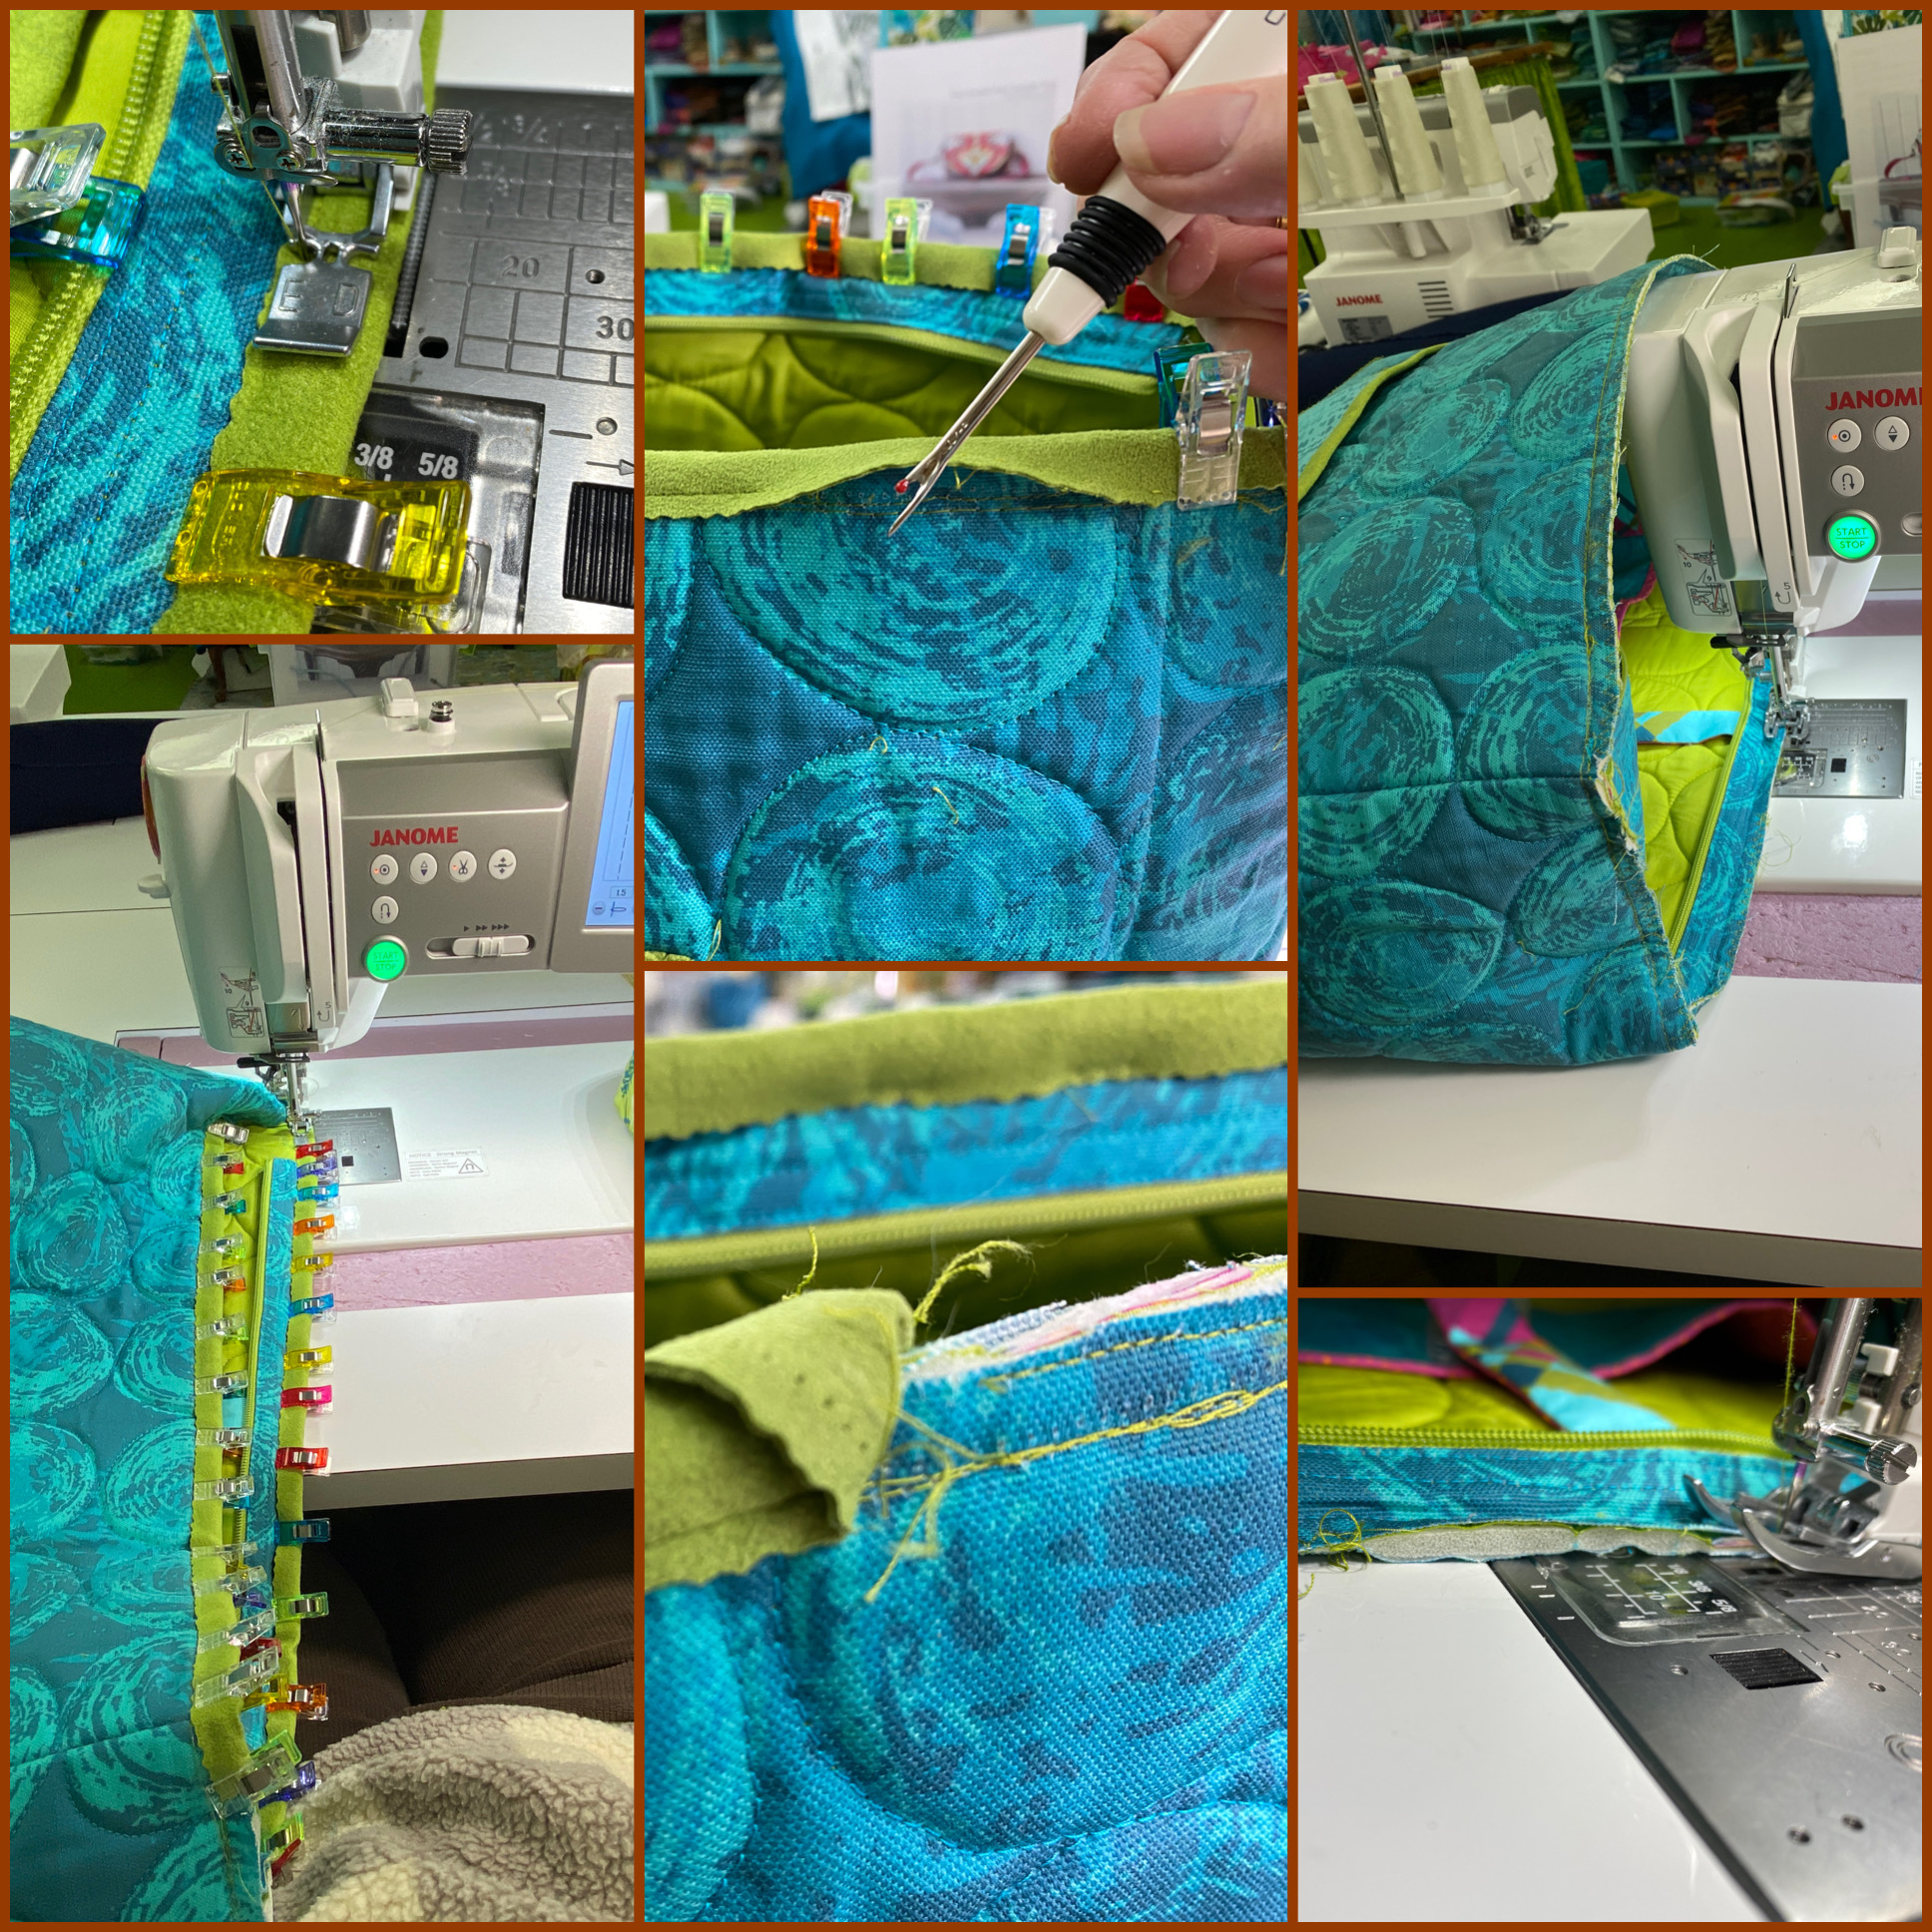
There was a lot of sewing, and some ripping out, to get it all together. Glue stick and WonderClips are my friends! The UHU brand glue stick (link will be on store page soon) is archival, acid free, and washes out. Makes life SO MUCH EASIER. Top right photo shows sewing the narrow side strips of the zipper panel to the bag. Bottom right shows that I zigzagged over the raw edges to compress the foam (USE a WALKING FOOT or AcuFeed in my case) before adding the binding.
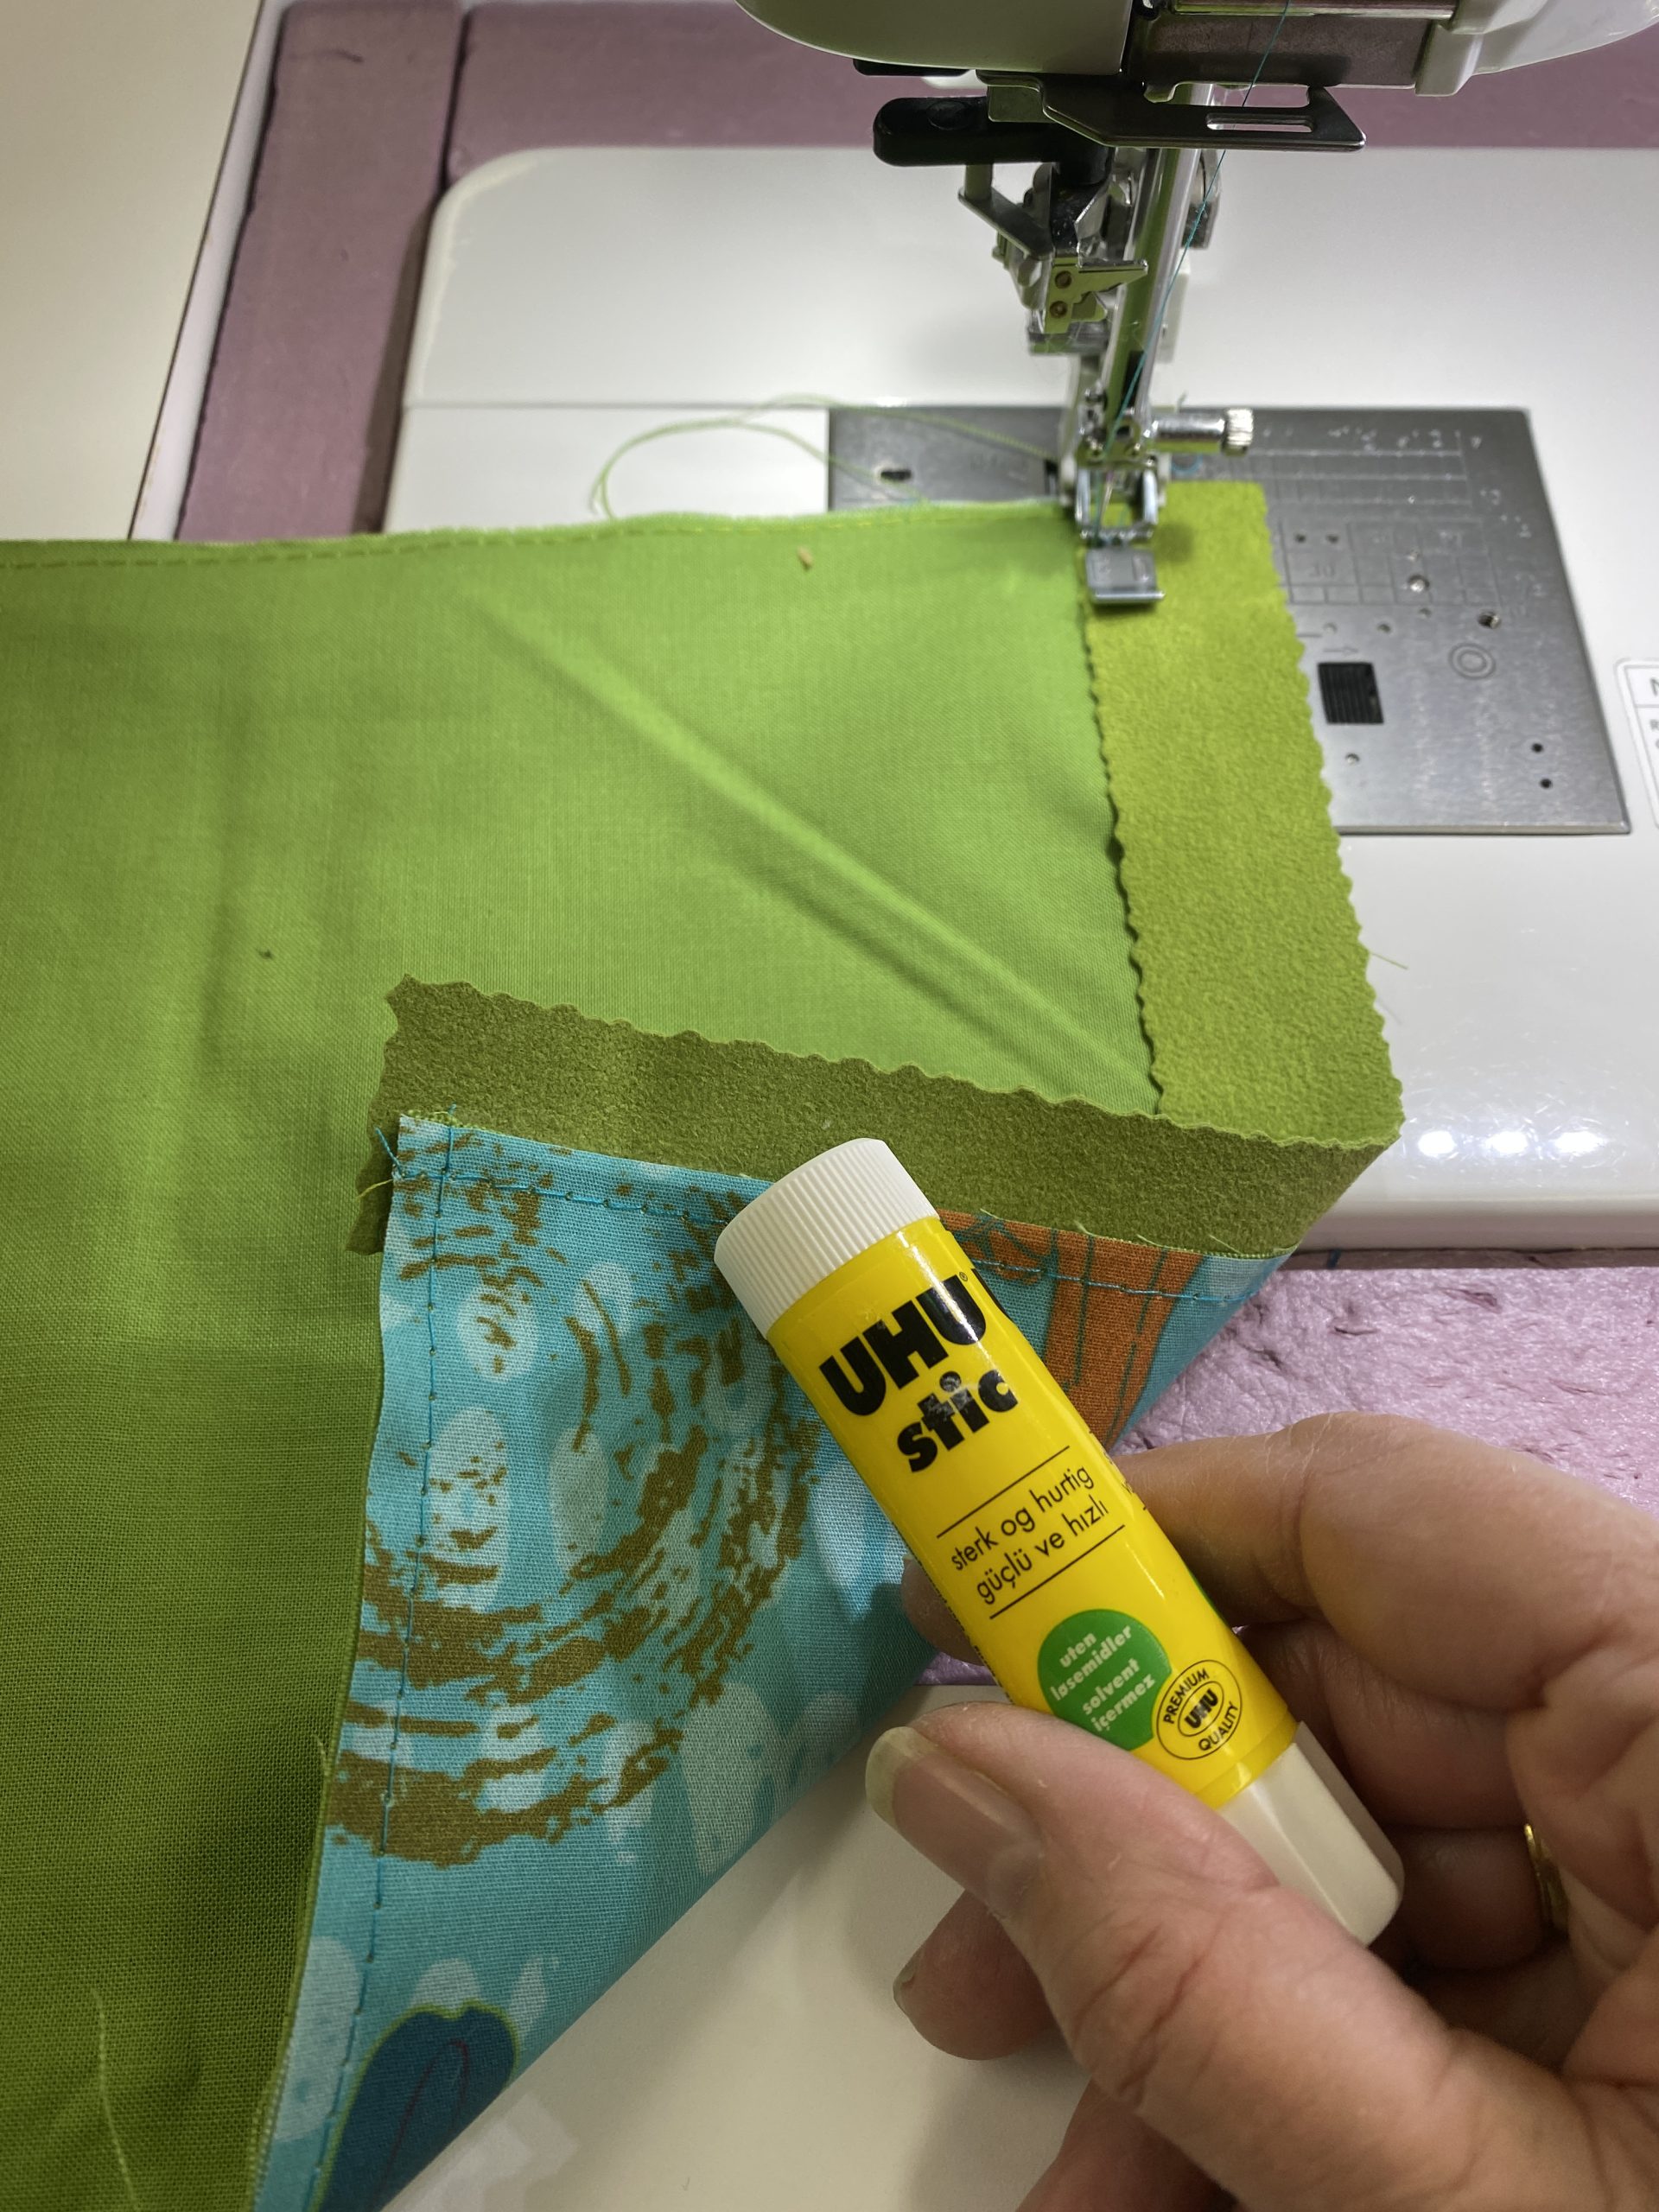
Oh UHU, how do I love thee, let me count the ways!
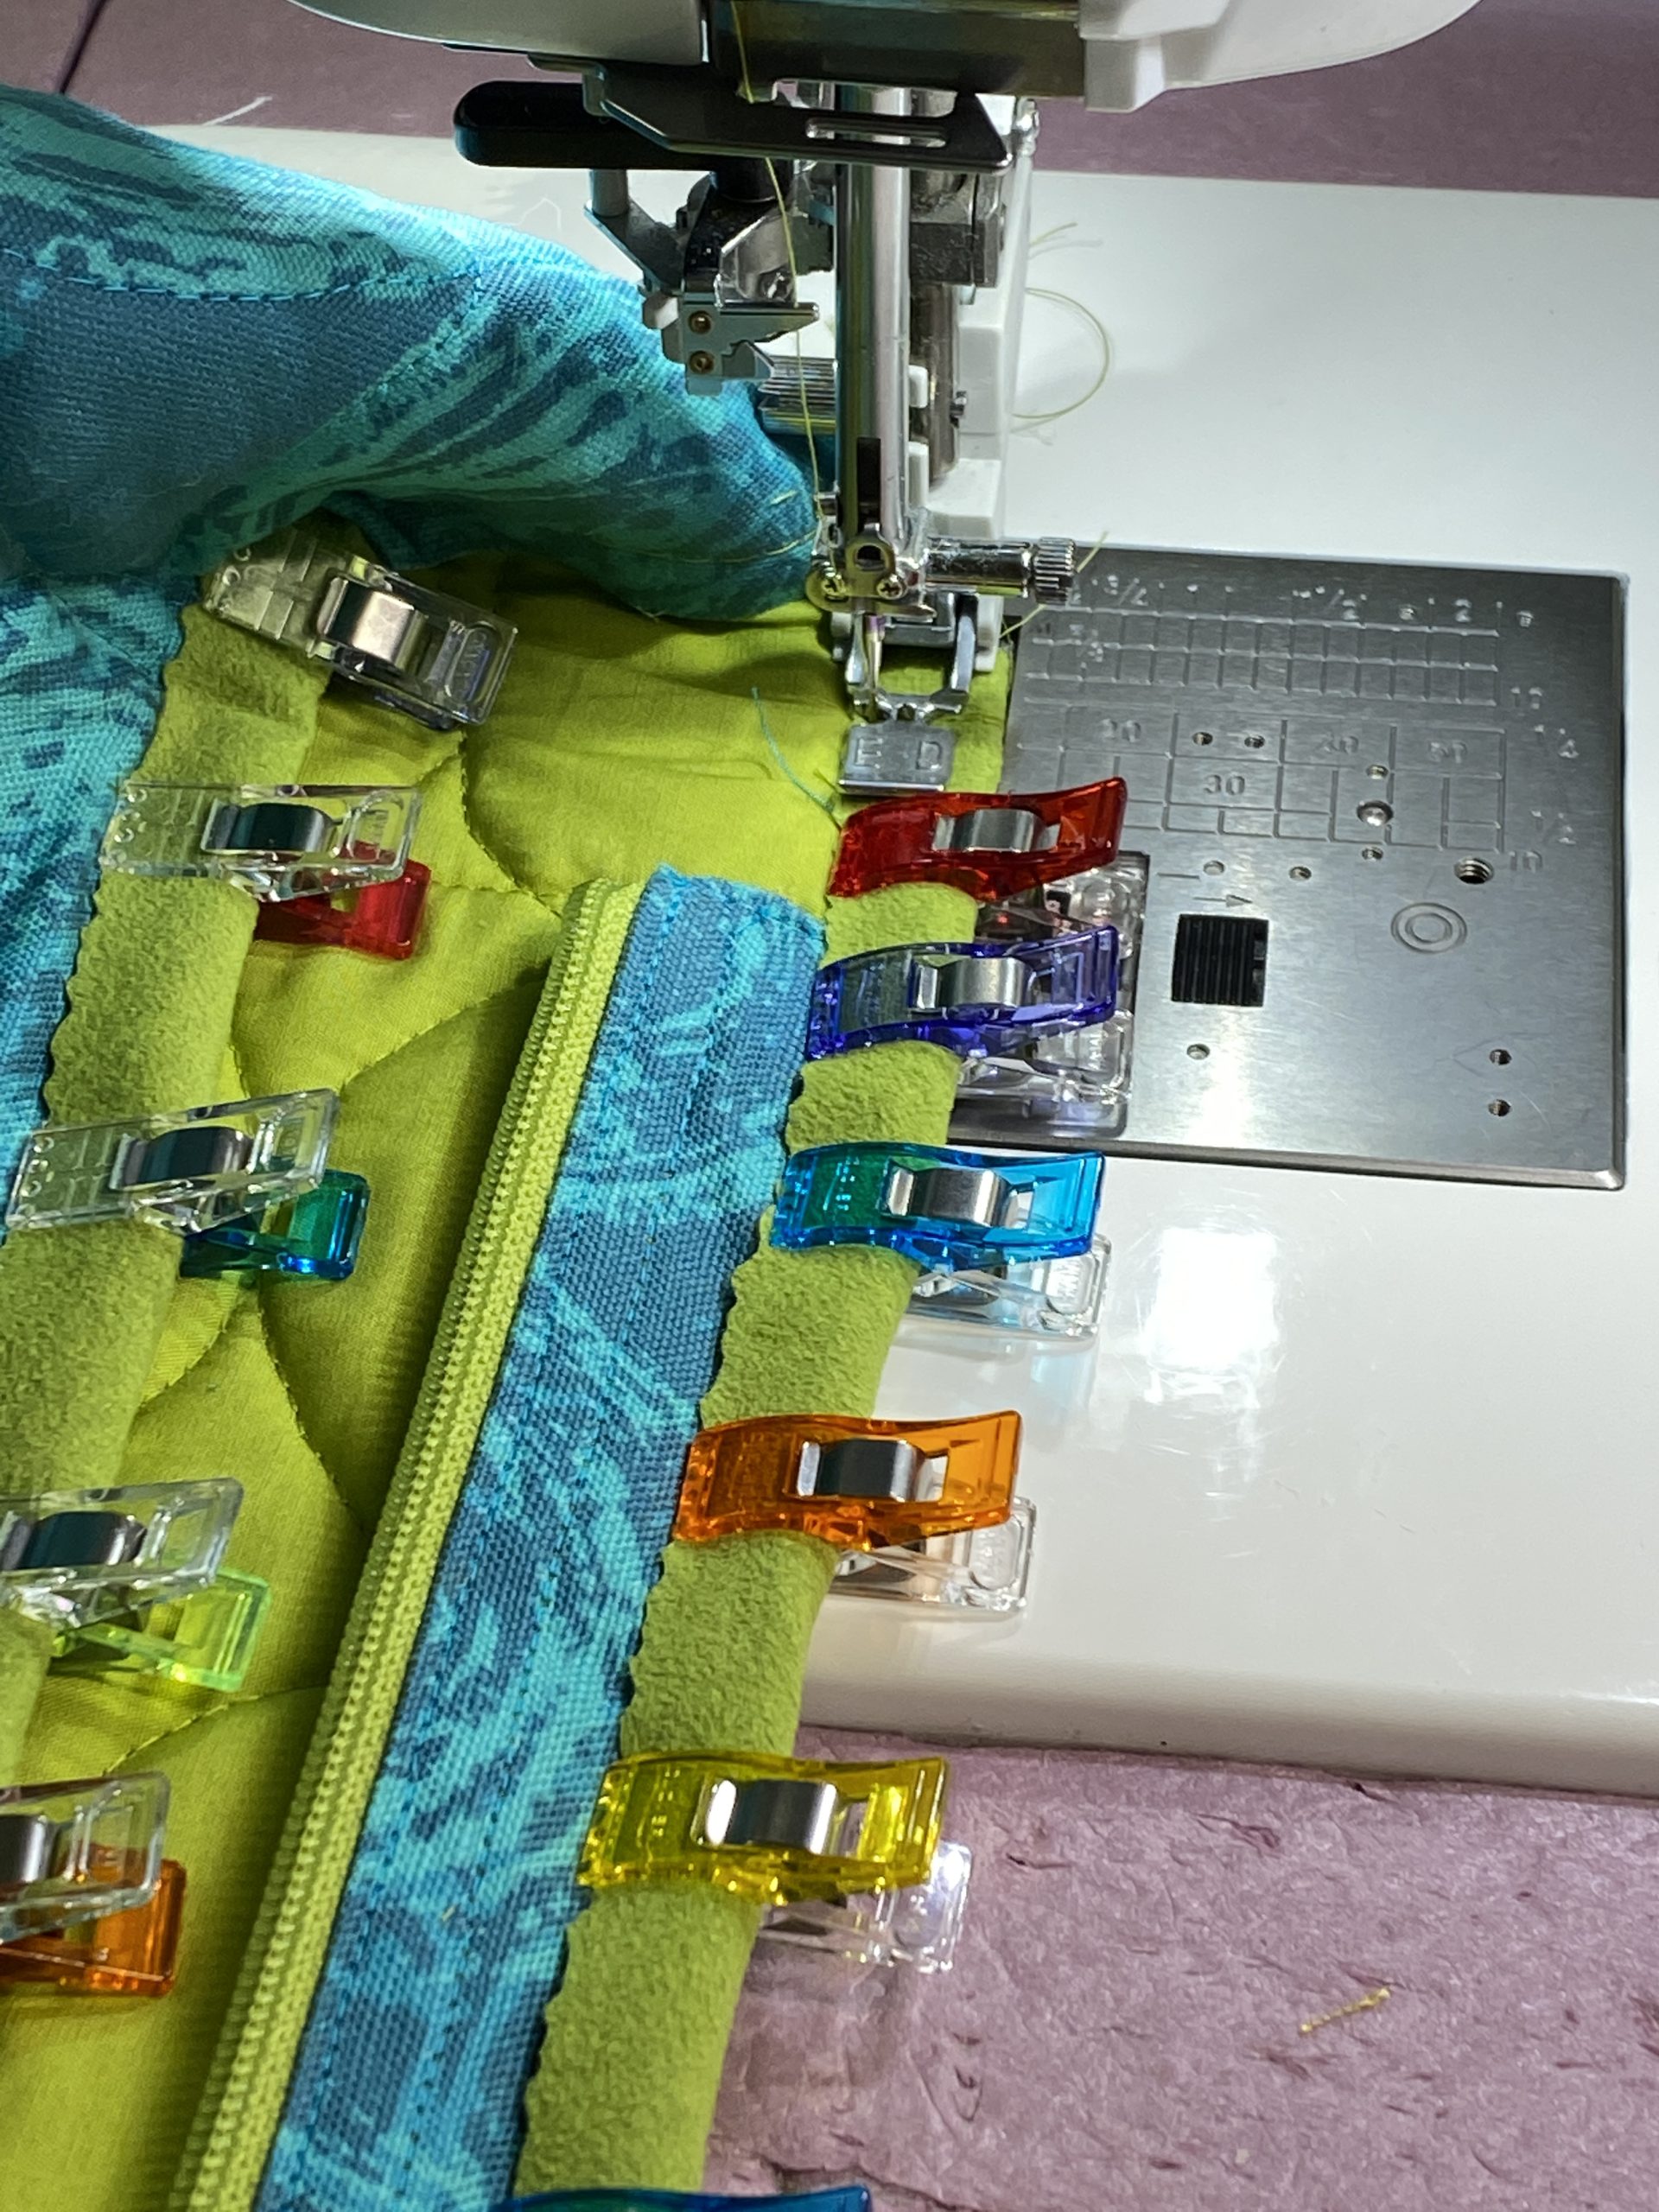
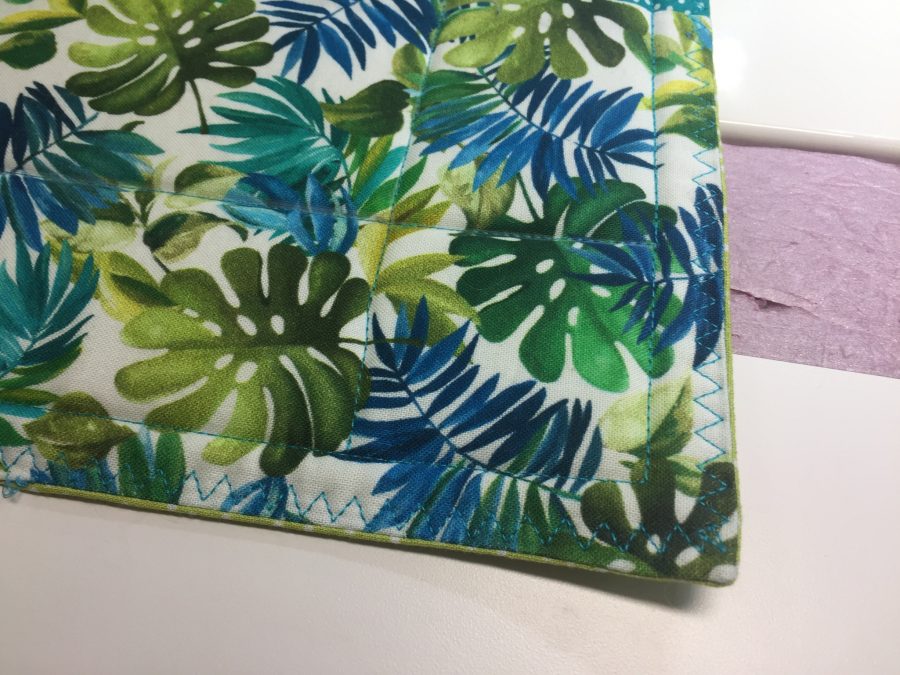
A large close up of sewing the synthetic suede binding to cover the raw edges. More durable than cotton! Getting the edges on top and underneath lined up perfectly is a tad fiddly–using the UHU glue really helps. And that deckle edge is from a Fishers scrapbookers blade that fits in my Olfa cutter. Sometimes these blades are hard to find and stupid expensive… straight or pinking blade also work well.
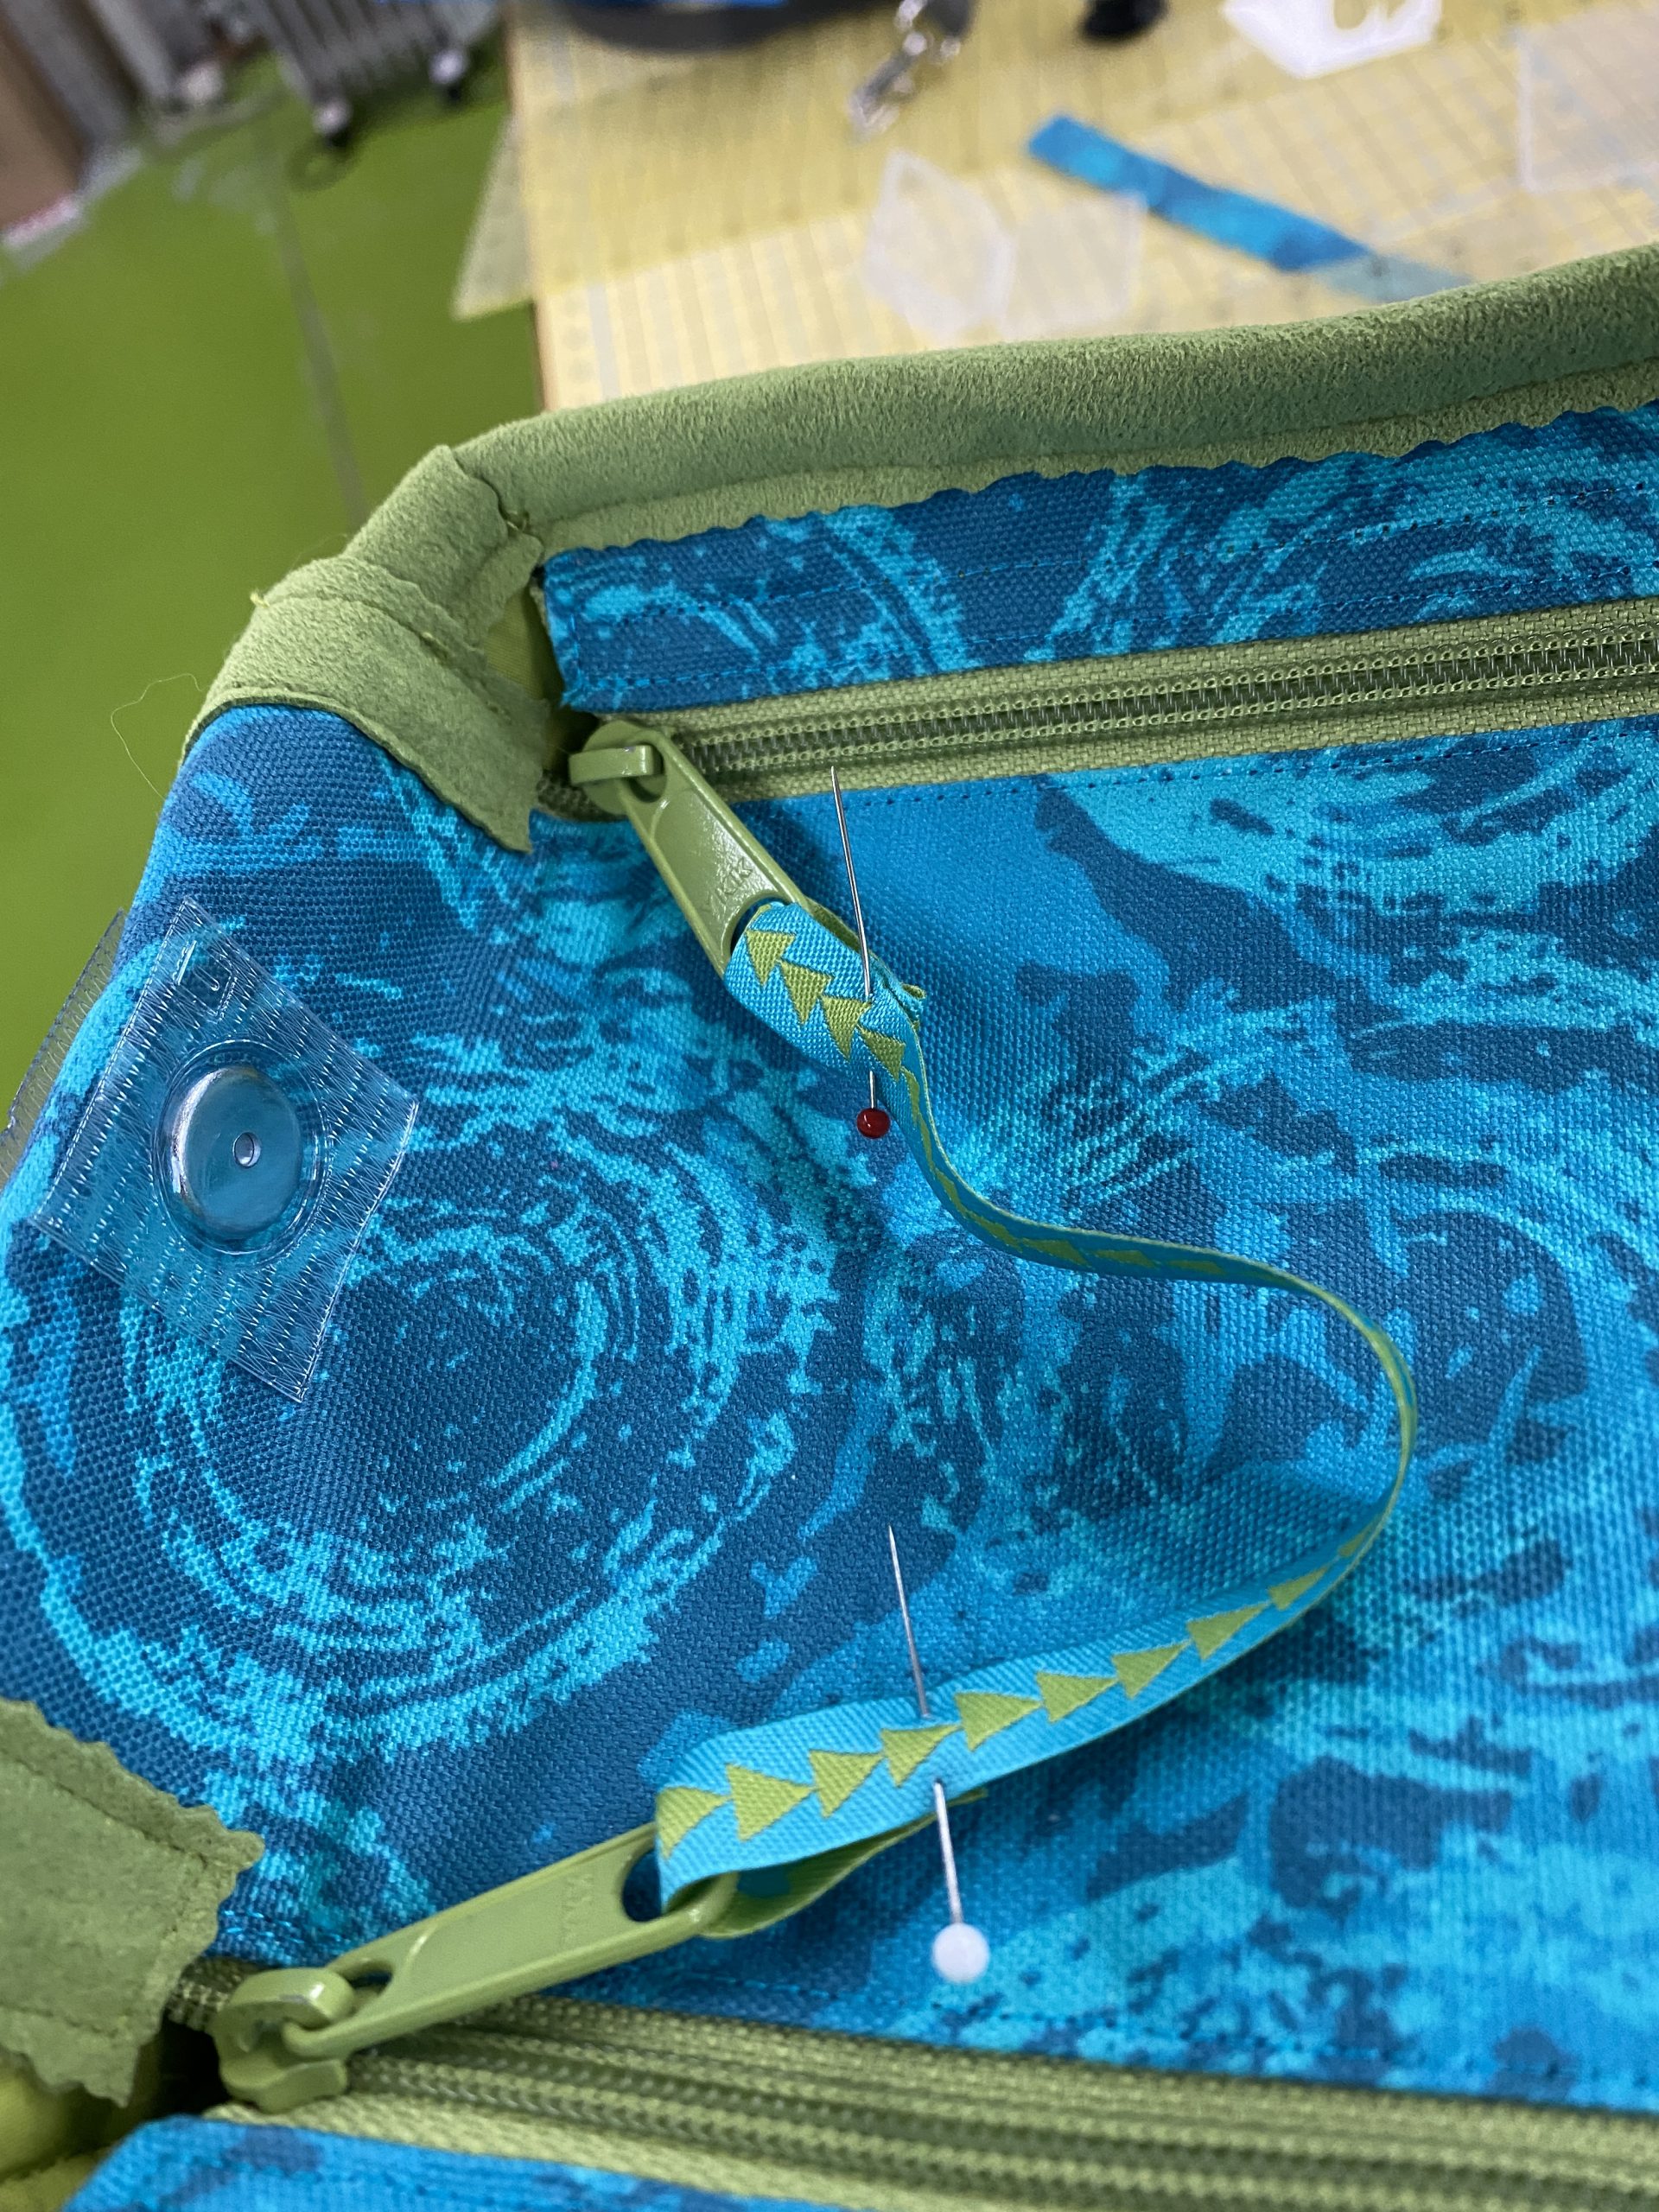
Close up of the bag top. I used ribbon to create a handle to pull both zippers open at the same time. The center flap tucks nicely into the end of the bag if you want to leave it open. On the left you can see the magnets (still in plastic) as I was testing to see if they are strong enough to hold through all the thicknesses: they are! I used small squares of scraps to create an appliquéd shape under the round tab and on the corresponding spot on the side end of the bag. I sewed three sides, slipped the magnets in—with the correct orientation to grab and not repel the other magnet!–and sewed them shut. I’ve used this bag a ton in the past year and it is still working brilliantly.
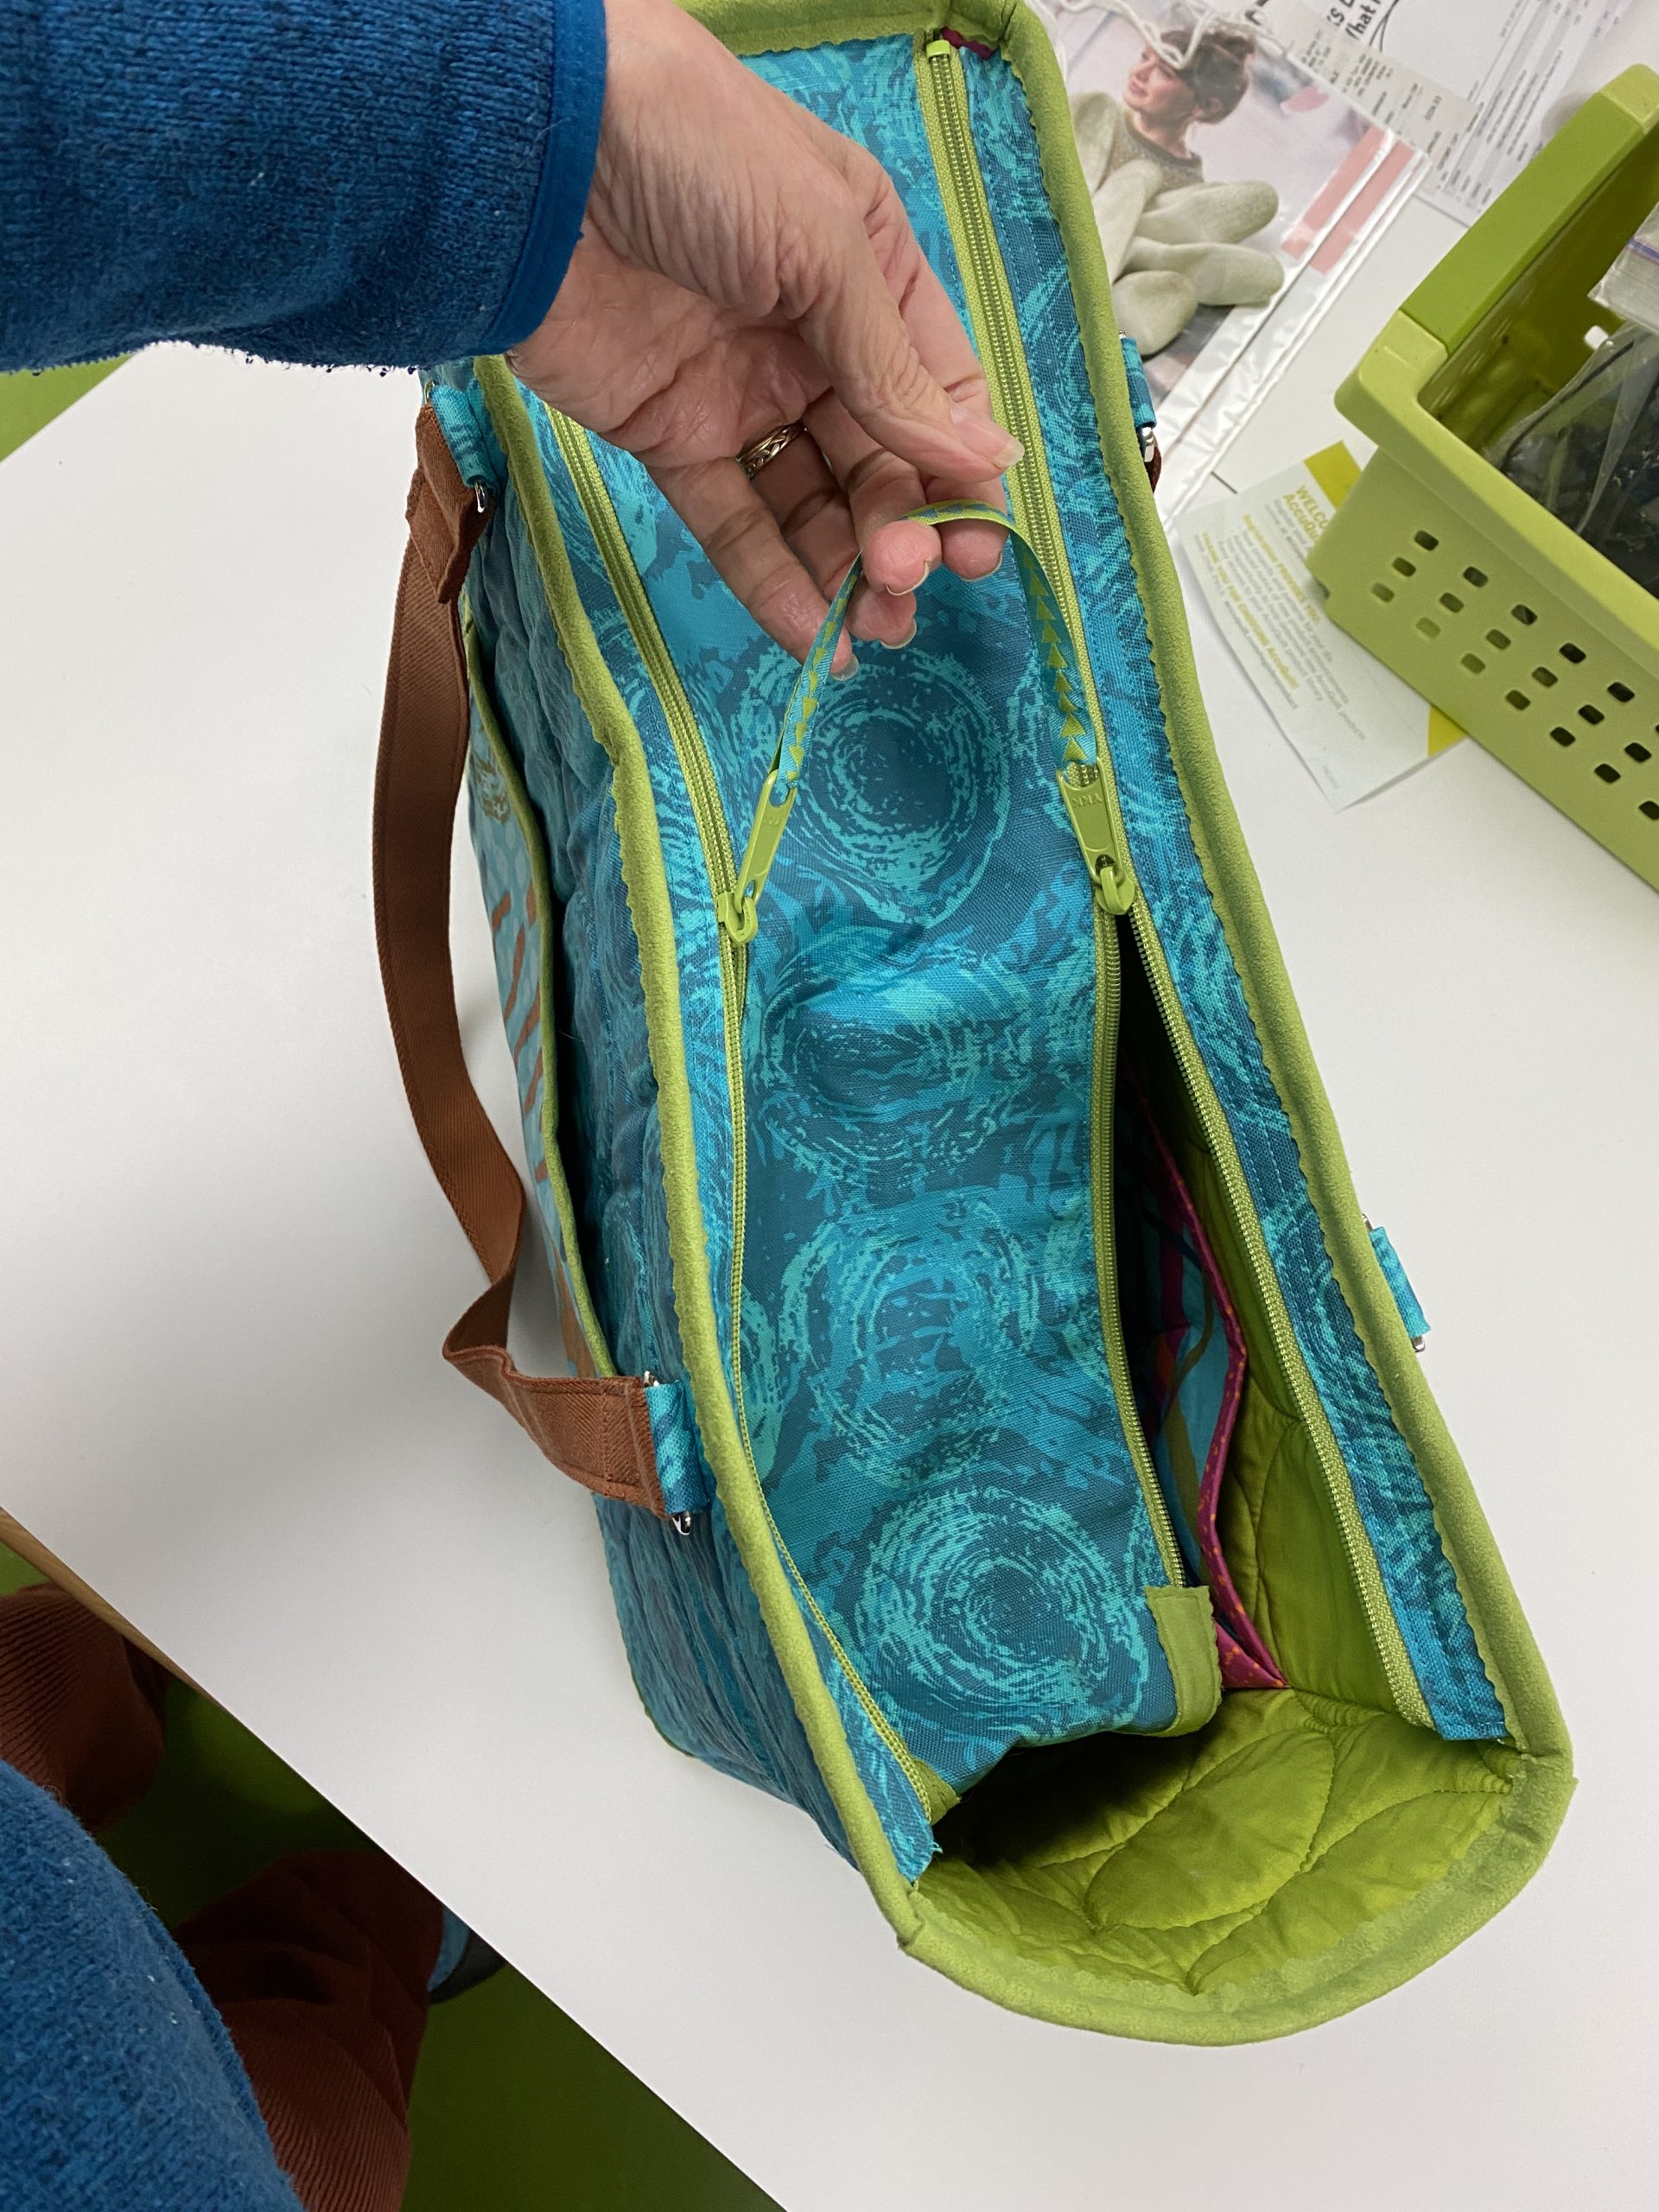
And the zipper pull in action.
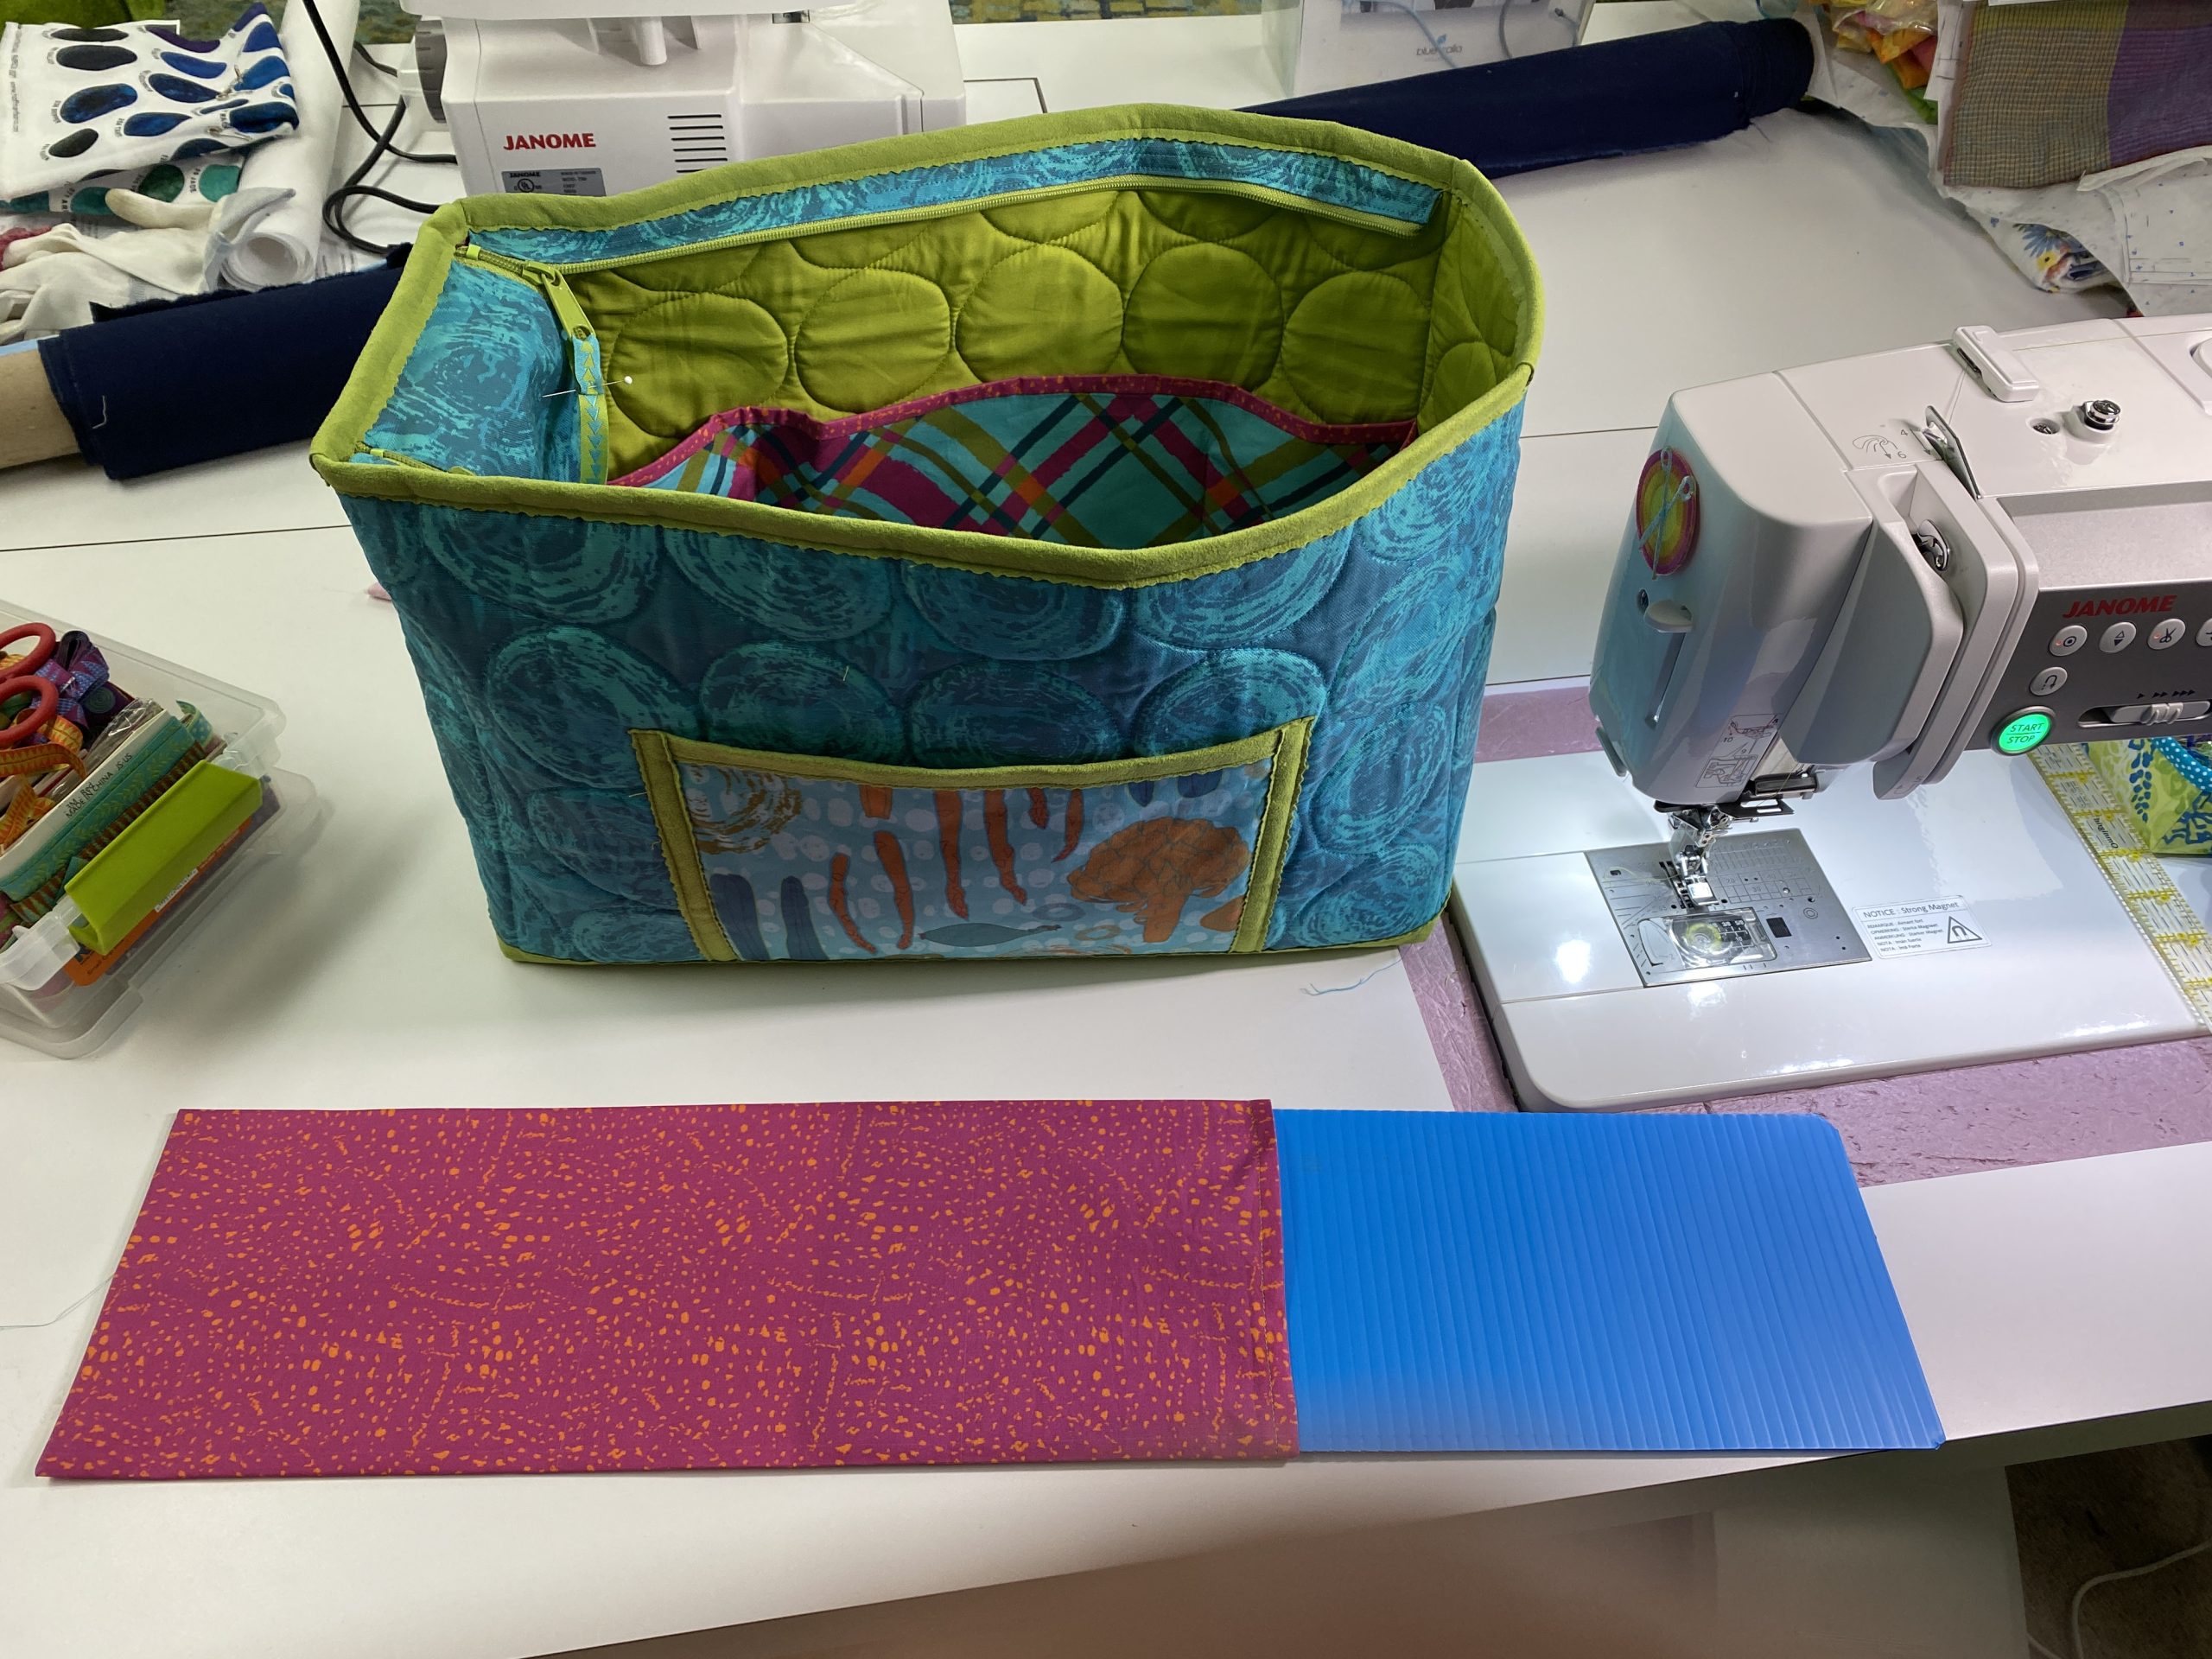
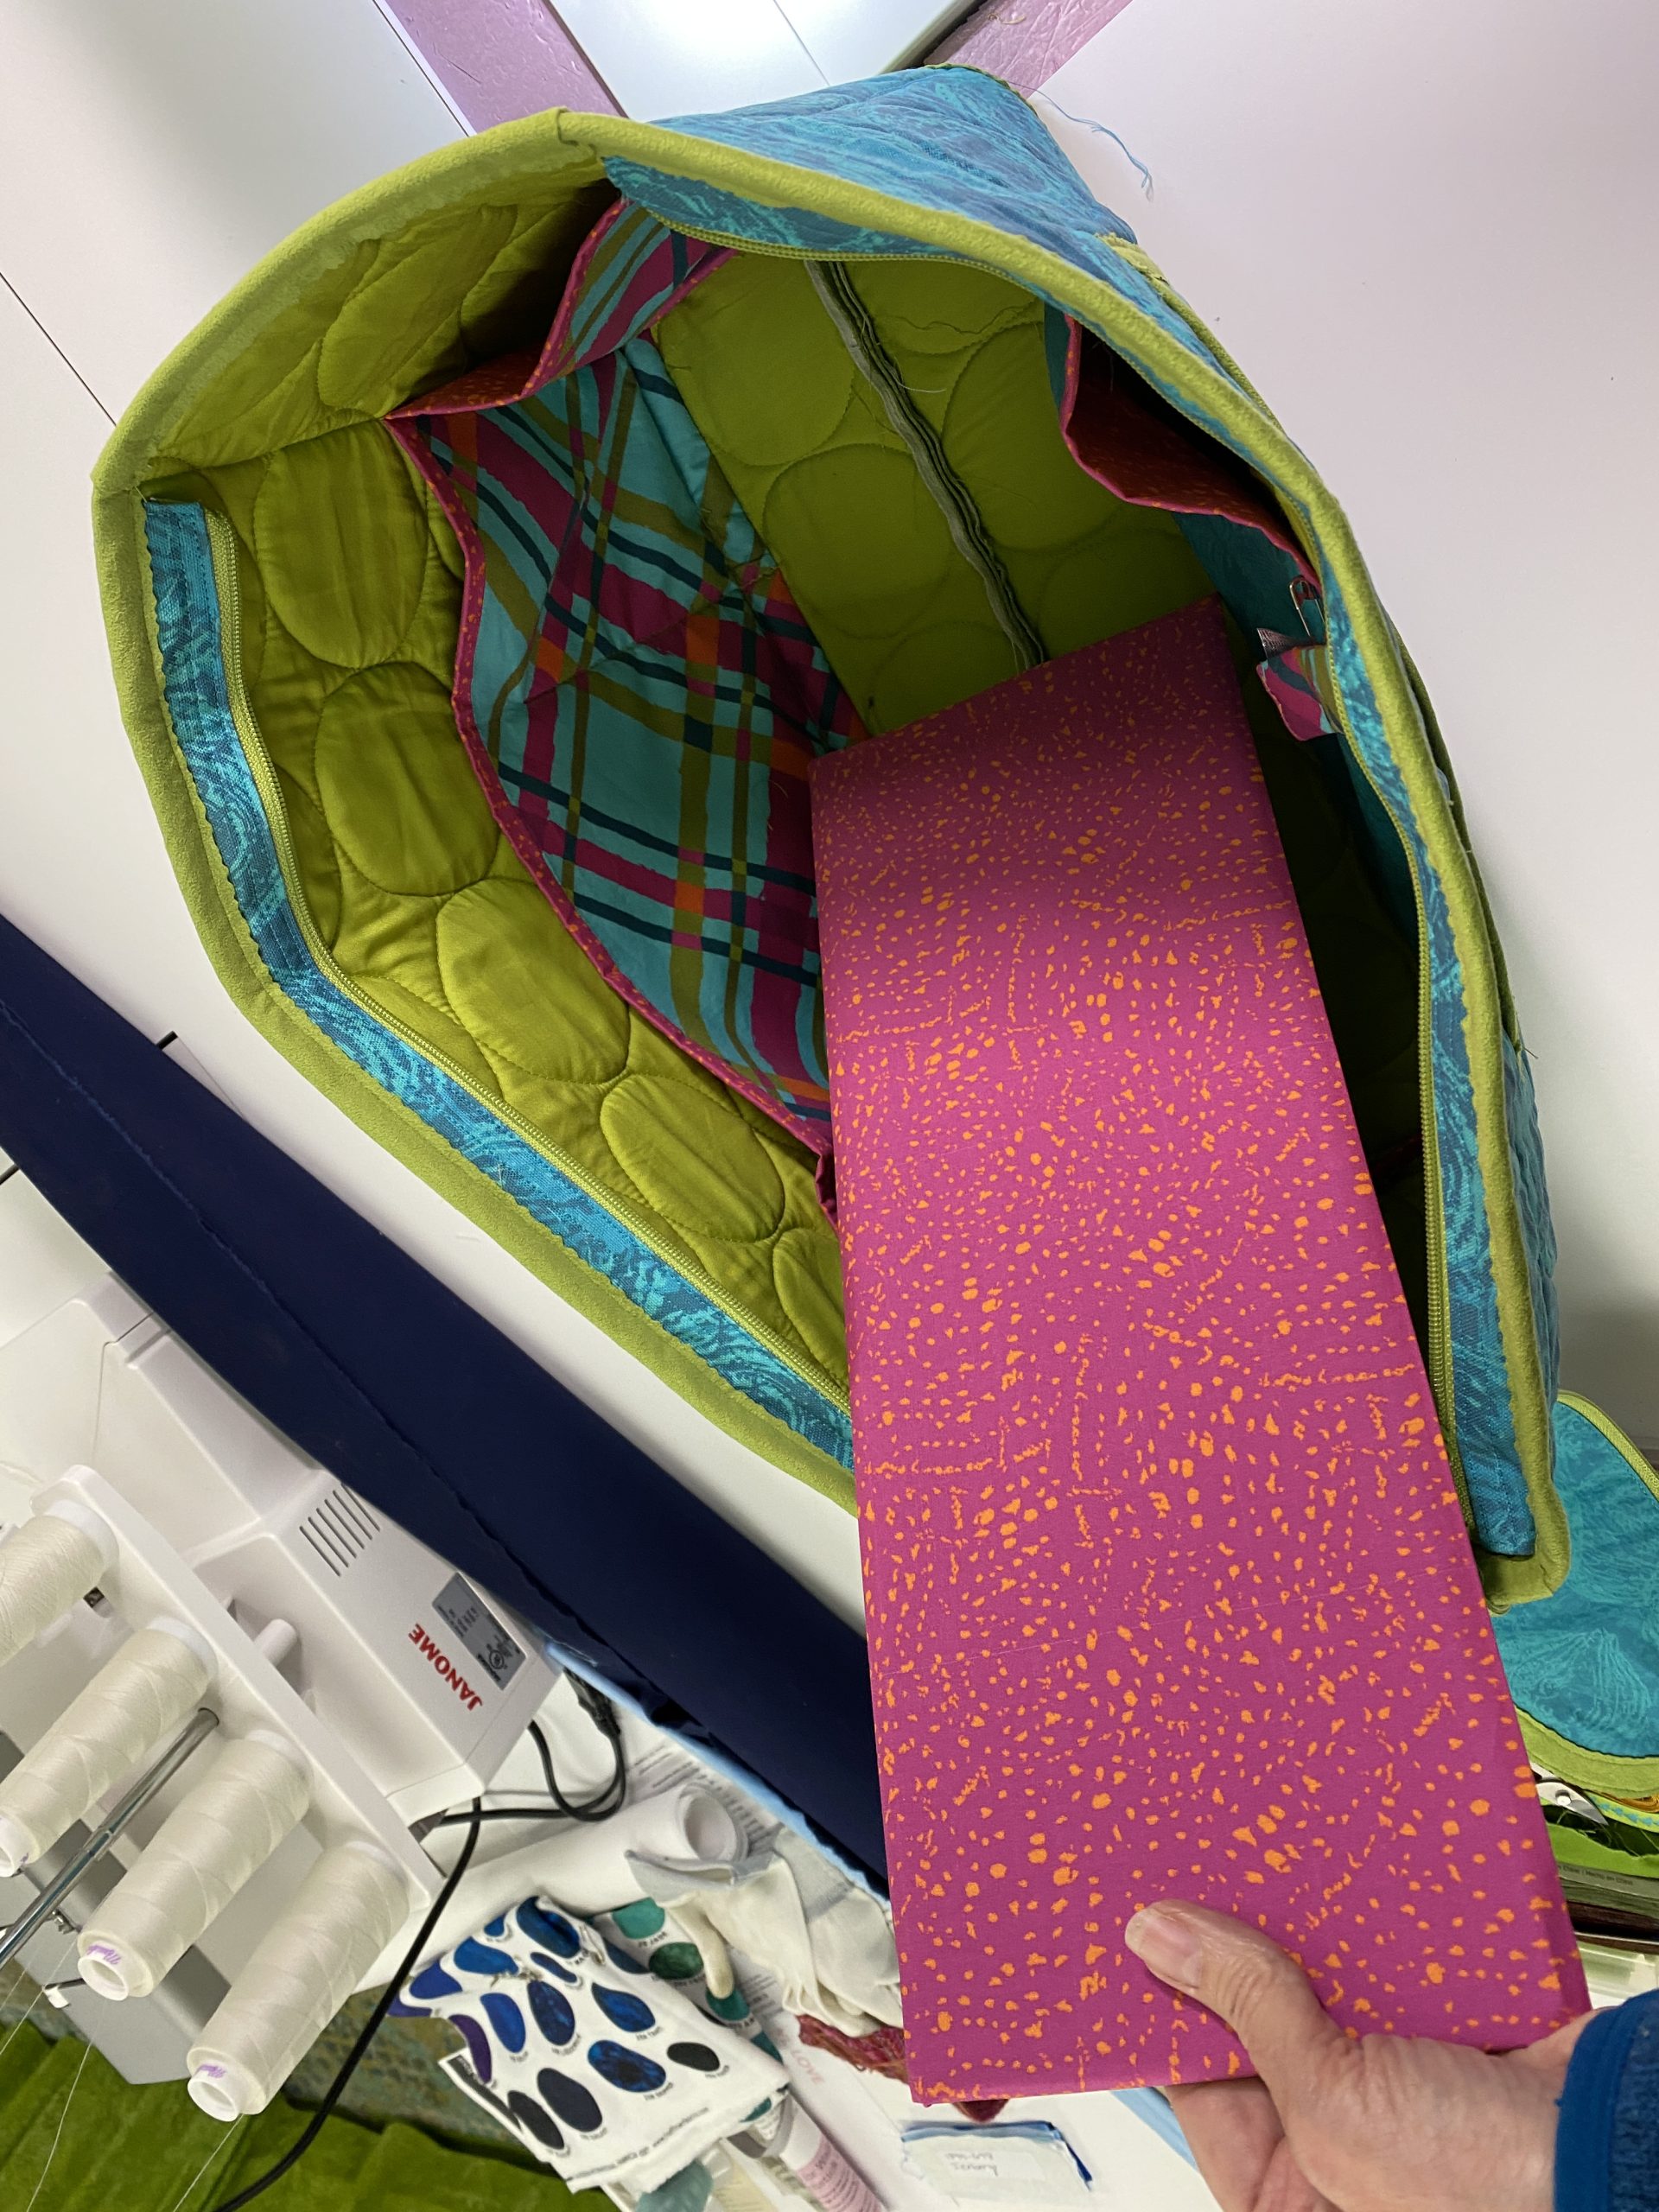
Here’s the piece of corrugated plastic I cut–note the rounded corners. I got the idea from Joan Hawley of Lazy Girl Designs who used to (maybe still does?) manufacture plexiglass bases for her bag patterns. But those are expensive, getting one custom made even more so, and hard to find. I made a tube that is about 1″ too long out of the pink fabric, then tuck the open ends over the short end of the plastic to enclose it. Below: tucks right into the bottom of the bag!
AND that brings us to the new “Sheep in Sweaters” tote bag! Come back in a day or two for Part 2!