Dyeing for Living Colour
Woooohoooo! I got IN! Yep, I am thrilled that I will soon be spending a small fortune to send a 40 x 100 cm quilt to Australia to be in the Living Colour Textiles exhibit! The bad news is that I can’t share a full picture until the exhibit opens at the Australasian Quilt Show in Melbourne in mid-April! But I can share some of the “early” pics…..
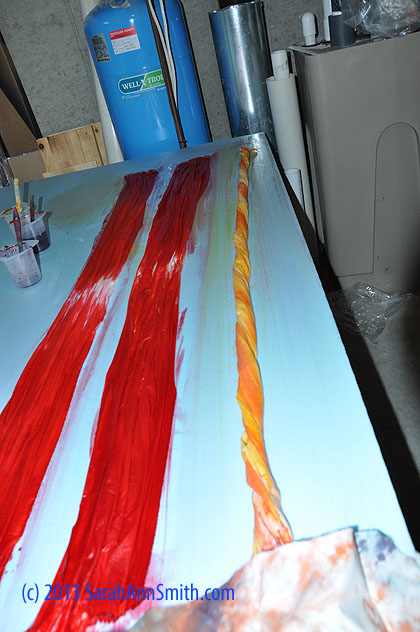
Fabric stretched out on some rigid foam core, manually pleated/folded, dye applied, ready to be covered and batched!
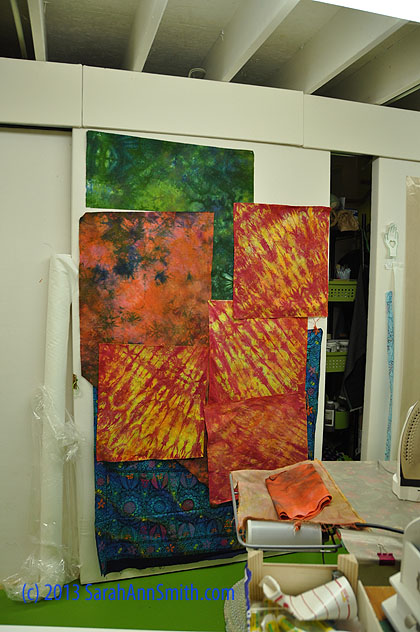
The exhibit is called Living Colour, and as the curator Brenda Gael Smith reminded folks, there are two parts to that title! I have been noodling around with an idea for a week-long workshop around the theme Quilting the Good Life (c), and Quilting the Garden as a part of that. The workshop would involve learning my collage and thread-coloring techniques with a small project (similar for all), then moving on to develop a quilt based on one’s own photography or imagery, then quilting it. (If anyone wants to hire me to do this, please write!) This quilt will fit in that rubric! Although I usually use lots of batiks, this quilt was mostly my own hand-dyes with a few batiks. And of course I left it to the last minute to make the quilt! About 10 days before it was due, I dug out the dye pots (above) to make the red fabric in exactly the color and texture I needed, which I did by manually “pleating” the wet fabric and applying dye with a sponge paintbrush.
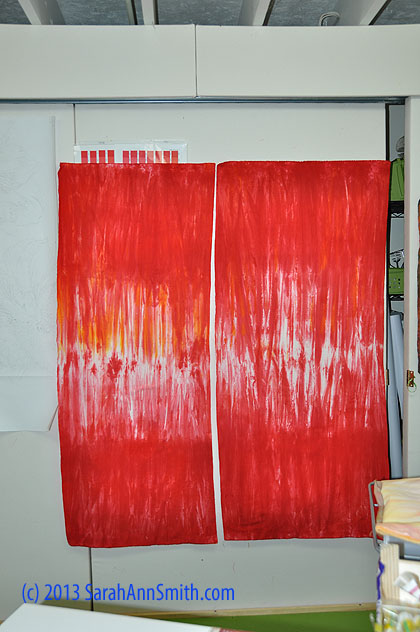
The resulting red fabrics used on the front (and back) of the quilt.
As long as I had dyes mixed up,
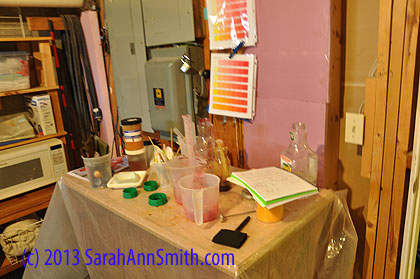
Last year’s $$ investment in the business was to put a sink into the basement. It is in the room with the water pump, oil tank, water heater, etc., but I have just (barely) enough room to put the 4×8 rigid foam core on top of a folding table and have this re-purposed kitchen cart on the side for mixing. Those of you who have take Carol Soderlund’s fabulous classes will recognize some of my color pages clipped above the mixing station. And I have learned to keep notes in my spiral notebook of what primaries I’ve used so I can replicate–like the green in a photo below.
I overdyed some hideously ugly fabric I had made, some in a workshop, some on my own. The beauty of cotton hand-dyes is that if they turn out vile, you can just keep throwing on dye. Either they turn good, or you add more dye and get some great deep browns and mottled forest colors! These are clearly the before shots:

The plum fabrics on the left were from a workshop exercise. I cut a small bit off each to remind myself, then over dyed. The teacher won’t tell you the purpose of the exercise, she wants you to learn by doing. That’s fine, but if I had known the exercise was to force splitting of the dyes I would NEVER have selected the final plum color because the blue-yellow make that nasty mint green! Thankfully I did not follow her suggestion to use a yard each, but instead only wasted a fat quarter each. Which are still hideous enough!
This ugliness was a mopping up cloth. UGLY.
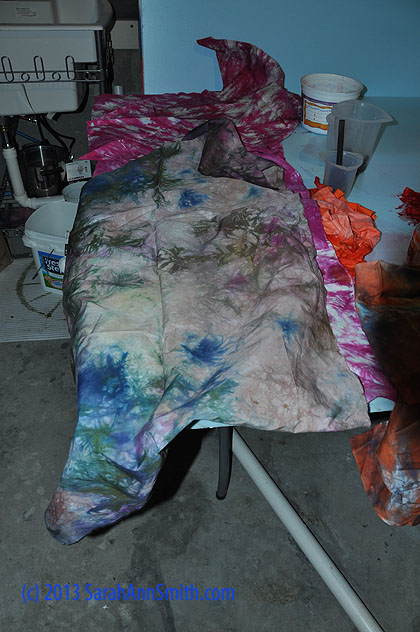
These are the after:
The green on the top is a hand-dye I like and want to reproduce. The blue on the bottom is a purchased batik. The pink-coral with blue splotches is the fugly piece just above. The orange-fuchsia-yellow are that plum-mint ugliness. The fuglies are going back for more color. Ugh. They will make good browns eventually!
Result: less awful than before, but back in the over-dye (again) pile!
SNEAK PEEK: and finally, here you can see a pile of red off-cuts from my quilt for Living Colour Textiles. I fused the reds with Mistyfuse, cut my shapes, and had leftover bits. Those will go into the next project, a quilt of Eli during cross-country season in his red team uniform of tank and shorts. That one is already in the sketched out, fabrics selected, fusing happening stage! I WILL make more than two quilts this year!
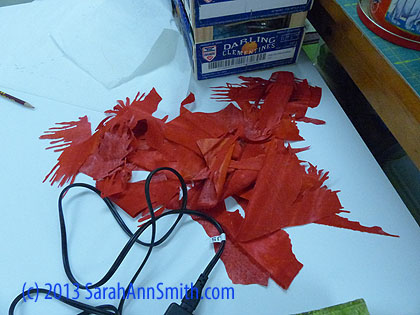
Off-cuts from my Living Colour piece, all Mistyfused. They were SO fiddly to cut I figure I will use these somehow…
And I had to add Tyger, who decided to help warm some of the fabric by sitting on top (thankfully the plastic extended well beyond the edges of the pan) of the fabrics batching by the woodstove!
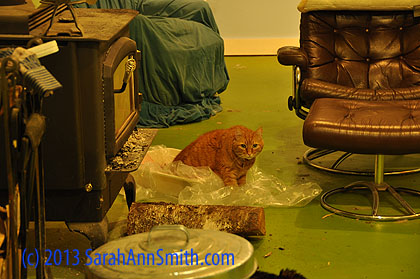
What a silly cat! Tyger has his back half sitting on the fabric, his front half going paw-paw on the plastic on the floor.
February 6th, 2014 at 11:14 am
I got so depressed with my ‘fuglies’ the last time I went “to the basement” I just walked off and left everything. Sad, sad…. But seeing that YOU, my GODDESS OF GOODNESS make fuglies too? I am back to the basement this afternoon to clean everything up and get “back on the horse”! Or, the dye pot, as the case may be!
Thanks!
Leiah
February 6th, 2014 at 11:15 am
You have been a busy woman. So proud of you for getting into Living Colors! As always thanks so much for sharing your process. Especially the fuglies. It is so important to those of us at my level to be reminded again that whatever it is you are doing, it sometimes just doesn’t come out right, but you move on.
February 6th, 2014 at 2:33 pm
My Tiger was called “P’nut”.
February 6th, 2014 at 3:42 pm
Oh my, I just love the way Tiger sat there 🙂 Your fabrics are just gorgeous, it is going to be exiting to see what you made of them.
Myself has tried to paint pieces of fabrics with fabric paints to be used in my Infinity project, but it all turned out butt ugly. Well, test and learn LOL.
February 6th, 2014 at 4:14 pm
Congratulations, looking forward to seeing it
February 6th, 2014 at 4:52 pm
Good on you! I look forward to seeing the quilt in…you did say mid-April? Great, something to brighten up Tax Time.
February 7th, 2014 at 5:35 am
Congratulations! It will be wonderful to see the end product in person!
February 8th, 2014 at 8:23 am
Thanks, everyone! Those juried in to the Living Colour Textiles exhibit are now posted here: http://livingcolourtextiles.com/category/glimpse-of-living-colour/