email Youtube

Home
Galleries
Blog
Workshops & Calendar
Store
Resources
About
Contact

Author Archive

Drawing Upside Down

Tuesday, May 26th, 2009

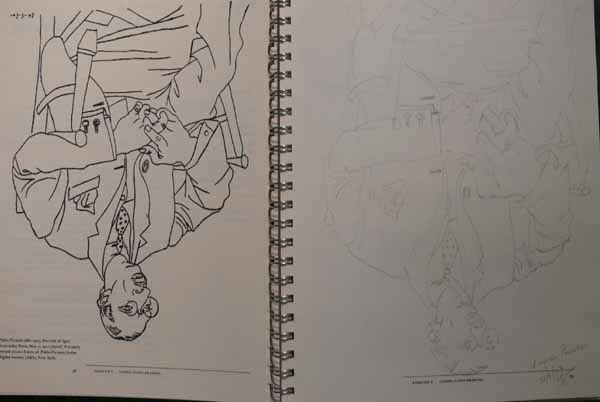
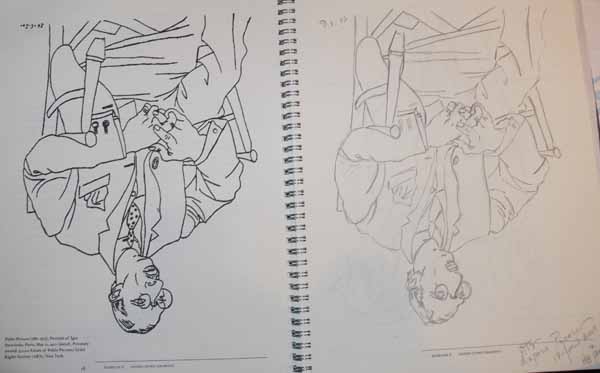
One way Betty Edwards has taught students to see what is actually there—as opposed to what they THINK they see—is to have them draw things upside down.  This skill is part of what she calls “Perception of Edges.”  (As always, these exercises come from The New Drawing on the Right Hand Side of the Brain, available at Amazon and elsewhere.  I purchased the companion notebook so I would have everything in one neat and tidy place, but you don’t need the workbook.  You can do all the exercises on your own paper.)

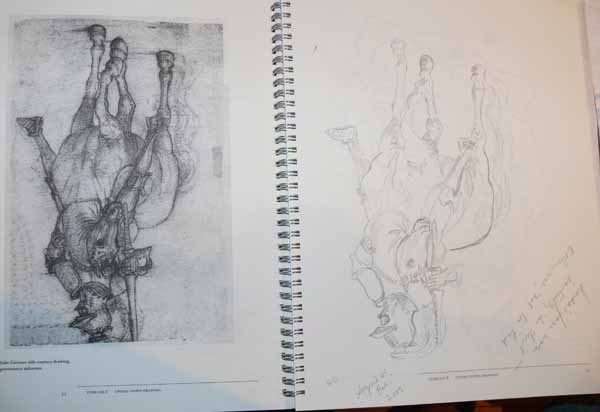
Here is a drawing by Pablo Picasso and my attempt to duplicate it in pencil from five years ago.  Not great…obviously it is larger than the reproduction on the facing page…sorry the sketch is so light…I tried the merge/layers thing to darken it, but my photoshop skills aren’t that advanced….

200905blogdrawing0122

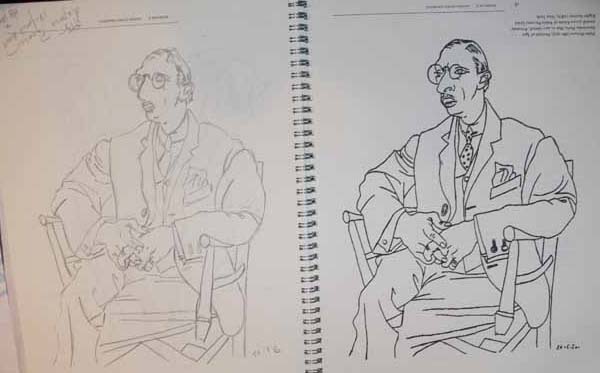
Here is my 2009 version.  Better.

200905blogdrawing006And right side up:

200905blogdrawing006b

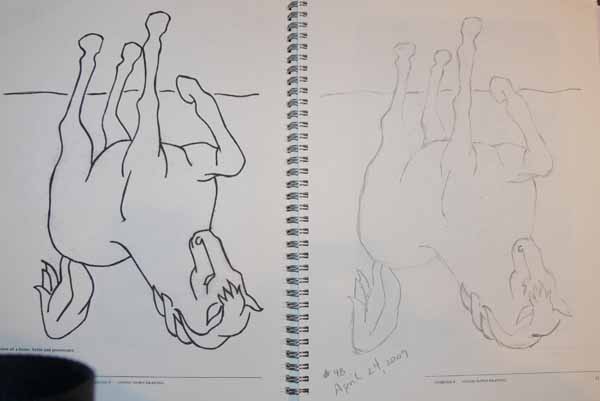
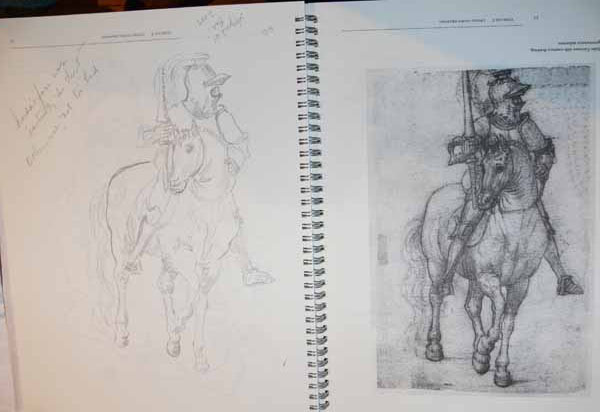
This time I decided to do all the upside down exercises (one still to go I think).  Here is a simple line drawing from a horse.   It makes me think that doing the exercise with a child’s coloring book could be useful…..

Upside down line-drawing of horse

Upside down line-drawing of horse

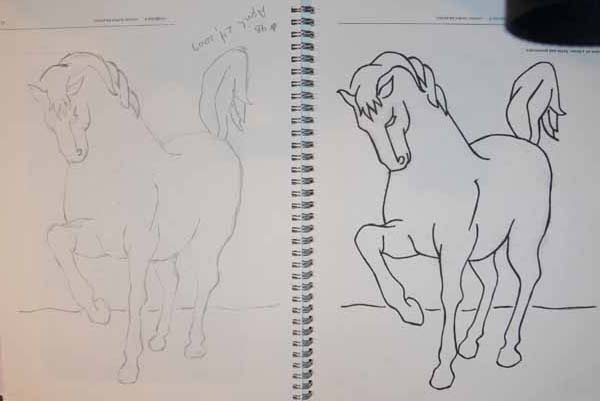
And right side up:

200905blogdrawing005b

I was VERY happy with how this turned out, as it is much more complex to me.  The horse’s face was not quite right.

200905blogdrawing004

When I turned the picture right side up, I saw it instantly and was able to improve it.

200905blogdrawing004b

I don’t think I got the lance (in the knight’s left hand) quite right…. the head / helmet area might need some work, but also, life happens and I couldn’t spend all my time drawing….  good enough.  At least I’m practicing.

Sarah’s Hunter’s Star top

Sunday, May 24th, 2009

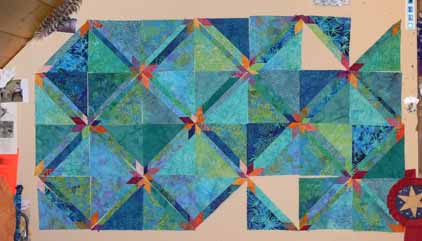
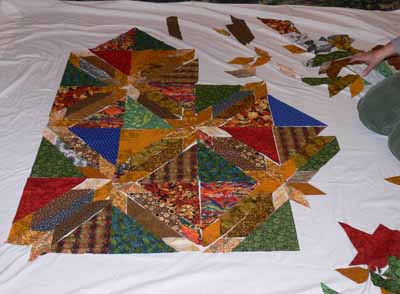
I promised that I’d share the top I began in the Jan Krentz Hunter’s Star workshop, so here you go!  Since my goal for the class was to get hints on improving my teaching, and since I haven’t made a pieced top in YEARS, I was fairly laid back about what I would do.  I selected “Caribbean” colors from my stash (yes, I have a goodly sized stash, and did serious reduction of the aquas!).  To make matters worse, since of COURSE I couldn’t do the quilt top just like the teacher said but instead had to do my own thing, I had an arithmetic hiccup while calculating, and now have enough blocks cut to make TWO 68×68 tops.

200905blogkrentz010

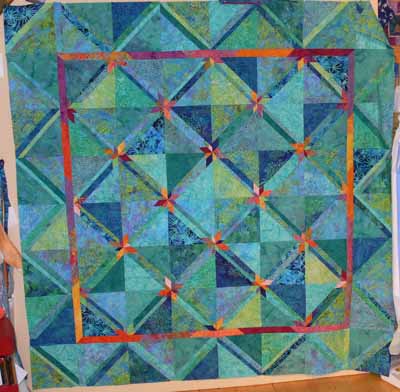
My blocks finish at 8 inches, so the total quilt is about 66 1/2 inches before quilting (which usually shrinks it up a couple of inches).

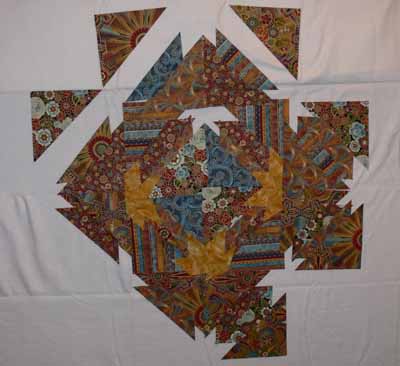
Before the class, Jan had sent me a jpeg of a student’s piece using two different sized diamonds.  I LOVED the motion, so decided to make FOUR different sized stars.  In the end, that proved to be too much, so I selected two of the sizes for the first top, and two for the one that will be made at some point.  Ahem.  The photo above is the blocks I made in the class up on the wall for testing at home.

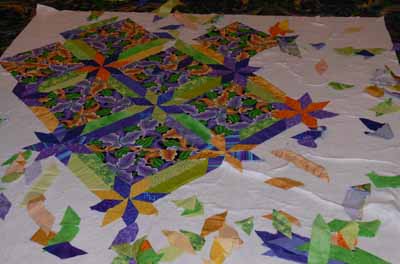
And here is the completed top:

200905blogkrentz009

I’ll have to take a break now and do things I ought to be doing like writing my next article for Machine Quilting Unlimited, finishing up my Birch Pond pattern, and working on a commission quilt.  Ahem.  Nothing like taking a detour, eh?

Jan Krentz Class, May 1, Augusta, Maine

Thursday, May 21st, 2009

Last April, when I was teaching in Paducah, I had the great good fortune to meet Jan Krentz (we shared a van ride, 2 hours each way, from the Nashville airport to Paducah, and ran into each other in the teachers’ boxes room…where all the shipped stuff resided).  She gave so many wonderful tips and tidbits on being a traveling teacher, that when she mentioned she was coming to Maine to teach, I decided then and there to sign up for her class.  If I want to do the best by my students, learning from one of the best in the industry is a good thing.

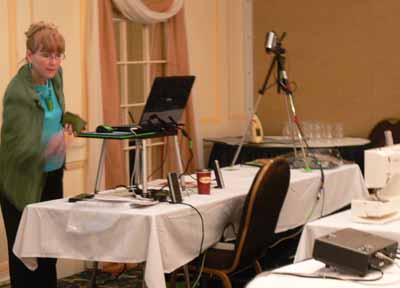
Maine’s Pine Tree Quilt Guild had scheduled Jan for two classes and one lecture.  I picked the one on Friday, when the kids were in school, besides it was closest to me in Augusta (and hour west of Camden).  It happened to be a Hunter’s Star workshop.  My education in good teaching began even before the class began:  Jan had set up her projector and laptop to run a short “slideshow” loop telling students what supplies they needed to have out and how best to set up for the morning.  Great idea! Here’s a picture of Jan 200905blogkrentz008

I particularly liked the little table she has, which means you don’t have to stoop to see the screen…it’s at lectern height.  The whole table packs down into a 3 pound unit about the size of a large laptop.  Cool.

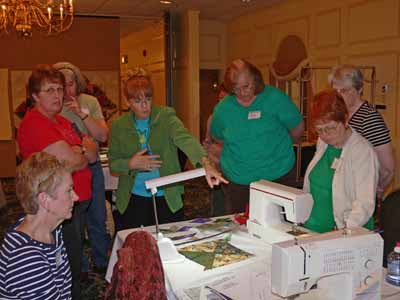
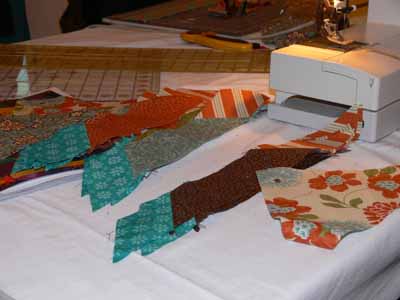
The class was a diverse lot… I knew only one person, Dot.  Here we are gathered around one person’s machine…. cool tip:  when you’ve done a ton of chain piecing, turn your machine sideways (or scooch around the end) to where the thread cutter is, then cut the chain apart lickety split on the thread cutter.  KEWL.

200905blogkrentz007

There were lots of great combinations of fabrics–some awesome Hoffman oriental prints:

200905blogkrentz005

A dynamic combo based around a Jane Sassaman print:

200905blogkrentz001

A wonderfully scrappy version:

200905blogkrentz004

My tablemate Mari’s selections to make a quilt for her “tween” granddaughter (not quite a teen, older than a little girl):

200905blogkrentz002

Of course, did I take a picture of my first mock-ups?  Nope.  I’ll do a second post with more on mine….

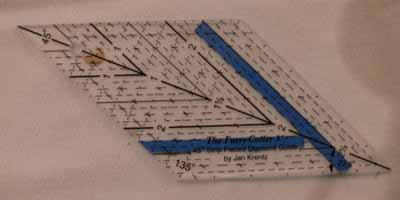
The tip of the day for me, and probably old hat for those of you who do more piecing than I do, was to (a) mark your rulers on the BOTTOM so as to avoid distortion from having your markings above the quilt (the thickness of the lucite in the rulers).  And even better…cut stacks of blue painters tape (about 4-6 layers), cut into narrow strips.  Stick these to the BOTTOM of your ruler at the appointed spot, and the ruler snugs up against your stack of fabrics to be rotary cut.  This ruler is one of Jan’s (she was out of stock but it was SO good I’ll have to add one to my collection…somehow hers was easier to use than the 45 degree diamonds that I currently have).  In this case, you cut your strips the width of your diamond, make the first 45 degree cut, then snug the blue painters tape up and zoom-zoom-zoom you can quickly and very accurately cut a bazillion diamonds.

200905blogkrentz006

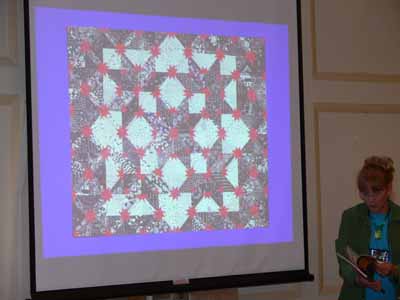
Jan also used the projector during class to show variations on the theme of Hunter’s Star quilts, and I particularly liked this one:

200905blogkrentz003

That’s it for now!

Coastal Quilters Challenge

Monday, May 18th, 2009

Last year, my local quilting group, the Coastal Quilters, did their first ever challenge, inspired by the 5 Artists, 5 Ways project the Frayed Edges did (you can see it here and here).  Last year’s challenge, Ropes and Buoys, was so successful, we all decided to do it again.  Program chair Barb Melchiskey and co. decided on a Grab Bag challenge.

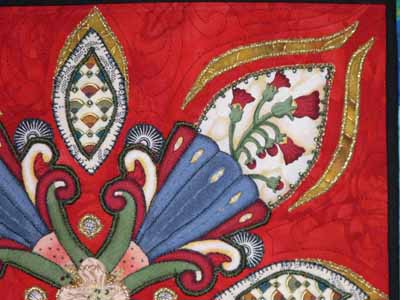
Here’s a teaser:
200905blogcqchallenge006

The rules:

  • Put some stuff into a brown lunch bag.
  • Turn in.
  • Collect a different bag.
  • Make something from it.
  • Finished size 10 x 10 inches.
  • Must use some of EVERYthing in the bag, with a recognizable bit of the largest item.

Initially, folks were then going to return the finished quilt to the person who donated the bag.  So, having done this and realizing that I get possessive, I opted out.   Then Leigh Smith (not a relative) asked if I would like to do a swap, as she had not been at the meeting.  Then Mathea wanted to join, so we did a 3-way swap.

In her defense, Mathea didn’t know the rules when she filled her clear baggie.  When she dropped it off at my house (I was the swapper person for  our on-the-side group), I took one look and KNEW I couldn’t do that to Leigh (a beginning quilter).  Here is what Mathea put in the bag:
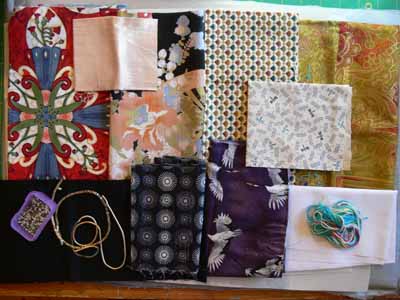
200905blogcqchallenge004

SHRIEK!   At best, any 3 fabrics went together.   I cried.  I swore.  I said I wouldn’t do it.  Then I really started looking at it.  I tried to use the kimono fabric as the focus, but it wasn’t working.  So the next dominant piece was the red…. but parts were cut off, so I fussy cut down the long center.

I also happened to be having a rare DVD-fest, watching The Tudors (rented from the local video store…we don’t get Showtime…it’s gonna be a LONG year until it is available on DVD!).  Anyway, the influence is clear, especially when you get to the finished piece.  Here is fused stage:
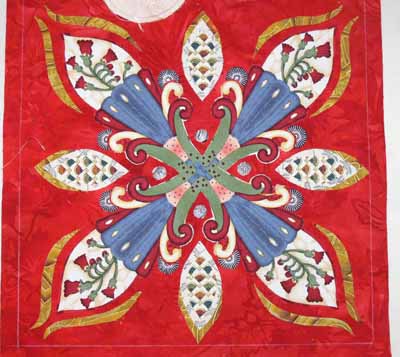
200905blogcqchallenge003

Then after the quilting, including lots of sating stitching and blanket stitching:
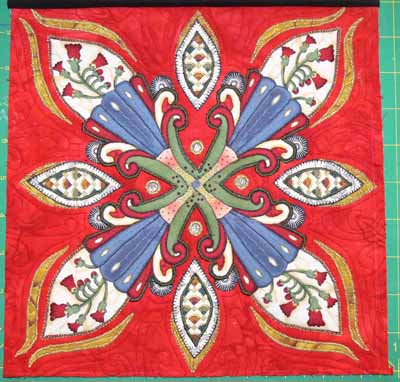
200905blogcqchallenge001

This is what the back looked like… I painted the embroidery floss black, and pressed it dry using the white cloth.  Then used the white INSIDE the piece while I quilted.
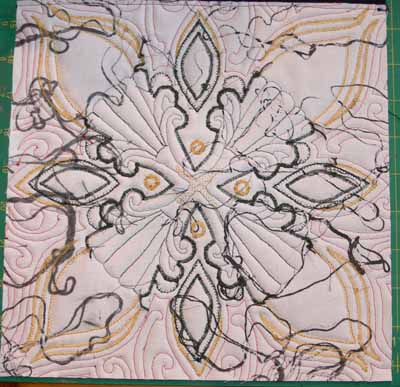
200905blogcqchallenge002

After quilting I beaded, then added a false back.  The beading makes me think of the costumes in the Henry VIII and Anne Boleyn episodes I was watching, so I named it something like “Quilting with Henry VIII and Anne Boleyn.”  Nothing like short and pithy.  Ahem.  Here’s the false back showing the assorted fabrics (and when I get them added, the various embellishing items),
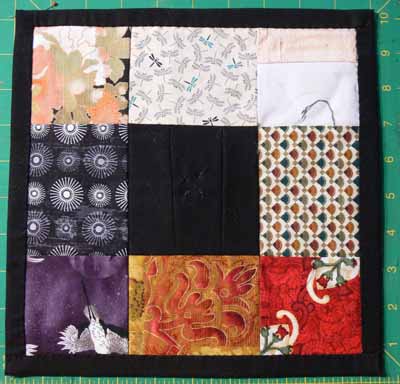
200905blogcqchallenge005

and, drum roll, the front:

200905blogcqchallenge008

Finally, another detail shot of the center, where I “hid” all sorts of little difficult to use bits.  Hope you like it… I sure do!:
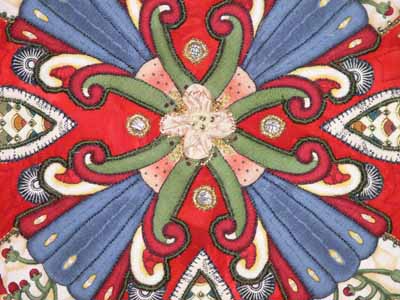
200905blogcqchallenge007

From kid’s pullover to mom’s vest

Friday, May 15th, 2009

About five or six years ago, I purchased this fleece pullover on sale at Hannah Anderson.  Once it arrived, Joshua wouldn’t wear it, despite the fact that I’d asked him about the colors before ordering.   So it sat until Eli fit into it.  Same response.  It was worn *maybe* twice.  Eli has now long since outgrown the sleeves.  So as I was getting too-small stuff ready for the rag bag or (if not too delapidated) for Salvation Army, I decided this top was just too nice to let go.

200905blogvest002

  1. So I opened up the sleeves and removed them from the body.
  2. I opened up the side seams.
  3. I cut a slice up the center of the front.
  4. Test fit with the sleeves inserted as side gussets.
  5. Cut one sleeve in half, trim to two rectangles.
  6. Sew new blue gusset into the sides to make the top large enough to go around my body.
  7. I found THE perfect batik in my stash, and used that to finish the armhole openings and the front.
  8. Once it was stitched, I decided it doesn’t need a closure.

Here’s me at the last Frayed Edges in it.and yes, it matches my glasses! And I also happen to have lime green pants (summer weight) and turquoise Ts:

200905blogvest001

This is how I spliced half a sleeve up the sides to make room for a mom-body (sigh):

200905blogvest004

And here’s a picture of the vest (on the same floor)

200905blogvest003