email Youtube

Home
Galleries
Blog
Workshops & Calendar
Store
Resources
About
Contact

Author Archive

Joshua is 15

Friday, November 21st, 2008

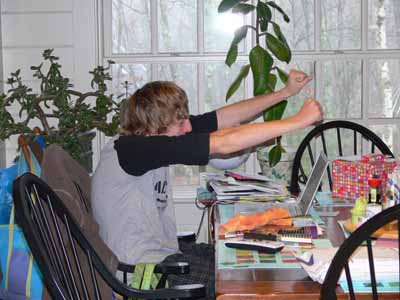
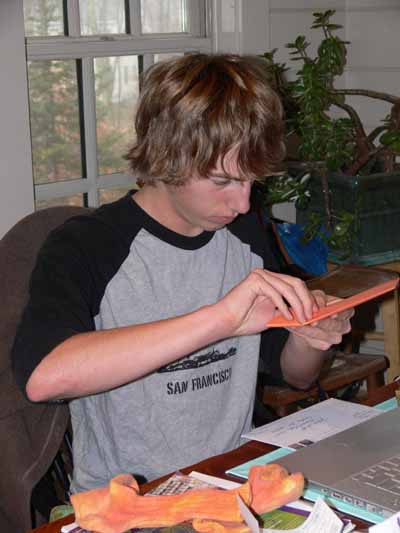
The birthday boy, waking up, waiting for Dad to get up so he can open his gifties….

Waking up

Opening the box…gee…what do I do with it?

A box?

Oh!  Open it…good….a check from Nana!

A check

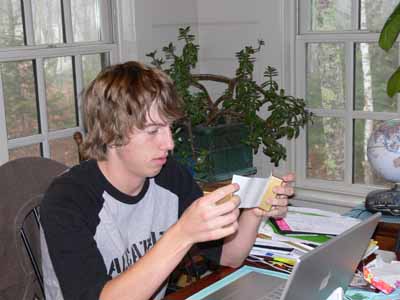
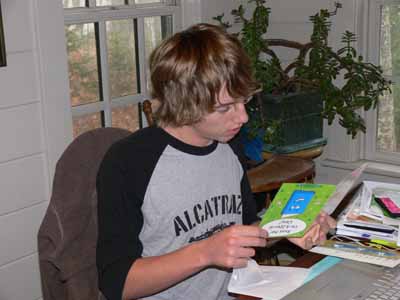
Next…envelopes…hmmm…what could be in them?

A card….

Hmmm…another card, from Mom and Dad, an annoying one that you have to turn upside down and around and around to read…..but it has a check!

More cards

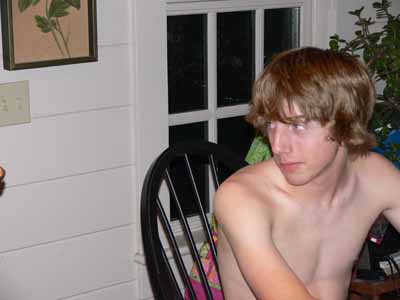
Now what are those pesky parents of mine doing?

Now what are those pesky parents doing?

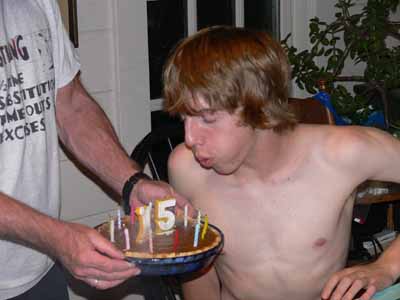
AH!   Heaven, also known as pumpkin pie (yes, Joshua vastly prefers his pumpkin pie to cake…..)

Pumpkin pie

The “1” candle is getting shorter….. I bought year candles every year from 1 to 10…now we are recycling them, and as he goes through his teen years, the 1 is getting a lot of use!

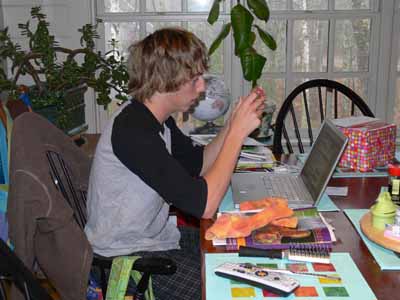
And what will Joshua do with those checks?  Well, they were spent before I left the house to give a lecture at 8:30… his old iPod got crushed, then stepped on (in his backpack, on the floor next to his desk at school), so he has a new red iPod nano which is just about permanently attached to his ears.  And here is what he does when he’s NOT listening to music…he makes it:
If you look carefully at the (unmade) bed, and below the (nearly naked) blond girl in bikini, you’ll see my laptop on top of the quilt made from blocks from the quiltart list… I am having a devil of a time getting him to let me take a photo of him with it to share with you all.  If he doesn’t soon, I’ll use the one of him sound asleep on the TOP of his bed, on top of the quilt….. blackmail works?????PS…if anyone knows how to embed youtube videos so that the formatting on my blog stays the same, drop me a note!

The Frayed Edges, November 2008

Thursday, November 20th, 2008

Well, we really need Deborah here to remind us to TAKE PICTURES!  Sigh……   I remembered about the lunch food photo… AFTER we ate, so alas this is all you get:

After lunch

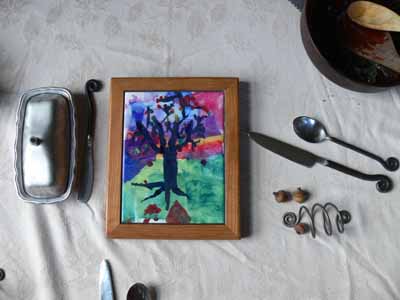
Kate has this beautiful hand crafted silverware (hand wash only!) which she brings out for our visits, with the matching scroll napkin rings.  Her son H. did the artwork on the trivet; his school does an (expensive) annual fundraiser where you can pick the product onto which your child’s 8 1/2 x 11 artwork is printed (size is reduced but proportions stay the same I think).  Kate chose the tile, then had a friend make the wooden holder to turn it into a trivet.  Wonderful!

The lunch menu:  Corn chowder (me, recipe from Martha Stewart’s Sept. 2007 issue of Living….I’d skip the cayenne, cumin and coriander next time, but loved the cheddar and the bacon –I added the latter), baby organic spinach greens (which we picked from the field next door…the farmers had already harvested, so neighbors can now go in and cull from the still-growing roots…..yum…but why didn’t I take a picture???? where was my head?), and Kathy brought these delectable (Sorry Deborah….we ate them with you in mind…since she introduced us to them) molten lava cakes…chocolate, with a gooey, yummy hot “lava” center of chocolate (if you have a Hannaford store, look for the On The Go Bistro or Hannaford Inspirations line in the frozen food section).  Best of all, they are only 300 or so calories, so it is a decadent treat that doesn’t use up an entire day’s worth of calories.

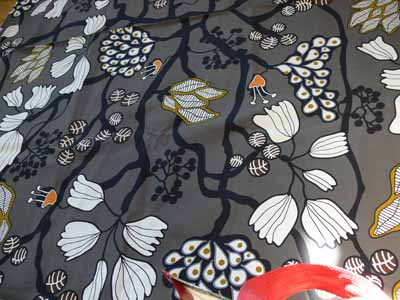
We shared a few things… my loot from Houston, Kathy’s in progress piece (glorious as always, for the Art Quilts Maine black-white-plus one other color challenge…. Kath picked blue), and some Ikea fabric Kate bought to make cushions for the Bowdoinham library kids’ area:

Ikea fabric

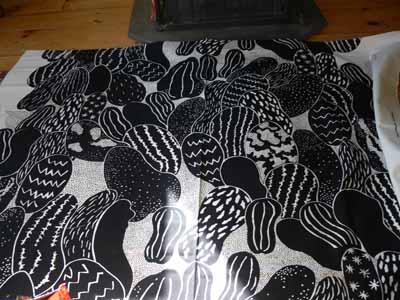
Kate had been to NYC on business, and she and her business partner in Adoption Day Cards snuck in a stop at the Ikea south of Boston (about 6 hours away from me! boohooo….. I wish it were closer).  I think Bowdoinham is very lucky to have Kate as their new librarian!   Here’s the other fabric… Kate has a totebag made from this one that I have loved… it would do well in the black-white-plus one challenge… Kate of course thought leaf green, I thought vivid cranberry……(and sorry about that triangle of bright sunlight in the center bottom!)

Ikea fabric 2

And on the way home, I got gas for 2.15 a gallon.  This guy was perched on the top of the building as the sun began to set:

seagull on roof

He stood there on one foot the entire time I was filling my tank…

That’s it for now….. off to Boston as soon as I finish writing this, and by the time it “publishes” I’ll be on my way home.  Giving a lecture for the Bead Designers International group… gonna be fun!

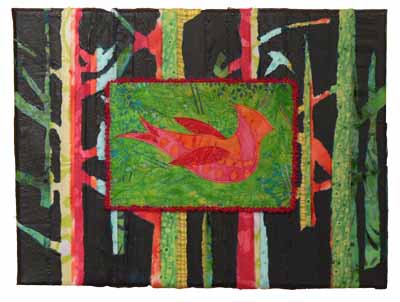
Bird in the Woods

Tuesday, November 18th, 2008

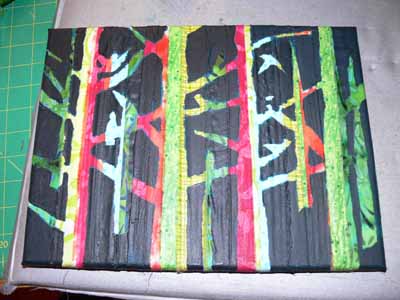
So am I the only one, or are other folks trying to get their holiday shopping done EARLY!?   I have two new pieces that I’ve just (finally!) uploaded onto my website, but wanted to share them here, also.  The first is a modestly priced art quilt postcard mounted on a mixed media canvas, Bird in the Woods:Bird In the Woods

The price is $60 (includes shipping by US Mail, within the US, write for other shipping options).  This began as just a canvas…at one of our Frayed Edges meetings.   Rather than simply create a silhouette of something and paint over a plain piece of cloth (Hannah was jazzed by a project on Martha Stewart), I decided to get clever and stretch strips of multicolored cloth over the canvas frame before slathering with Mod Podge (or was it Gel Medium?  same result….), letting it dry, then using torn masking tape to make the trees.  Well… I wasn’t so thrilled with the result:

canvas, before postcard

It’s OK, but no great shakes.  So I thought I’d just cover it all up with batting, fabric, and mount a postcard.  I tossed a lovely card Deborah Boschert had sent to me a few years back–yellow with a red bird, and Presto…. I  decided I’d make my OWN (very different) bird in fabrics because it looked great (except for the fact that her bird was red and the fabric is magenta…shudder!  color change necessary, but the idea worked).  SO, I rooted through my stash, made up a quick bird postcard (inspired by my Batiki bird, which you can read about here), and got to work.  I hope you like it!

I’ll share the next piece in a few days… I also want to blog about Houston before it is ancient memories.  AND, I need to dash out, walk the dog, and meet Mom for lunch…. toodles, and back soon, Sarah

Refining the t-shirt–how to take a boring t-shirt to fitted and fine!

Friday, November 14th, 2008

Quite a long time ago, about a year in fact, I took my second dyeing workshop with Carol Soderlund (wonderful! highly recommended!  go here to find out more!).  I tried again to get my dream-colored t-shirt, and this time succeeded! Here’s a picture Beth P. took of me (weighing, sigh, less than I do now):
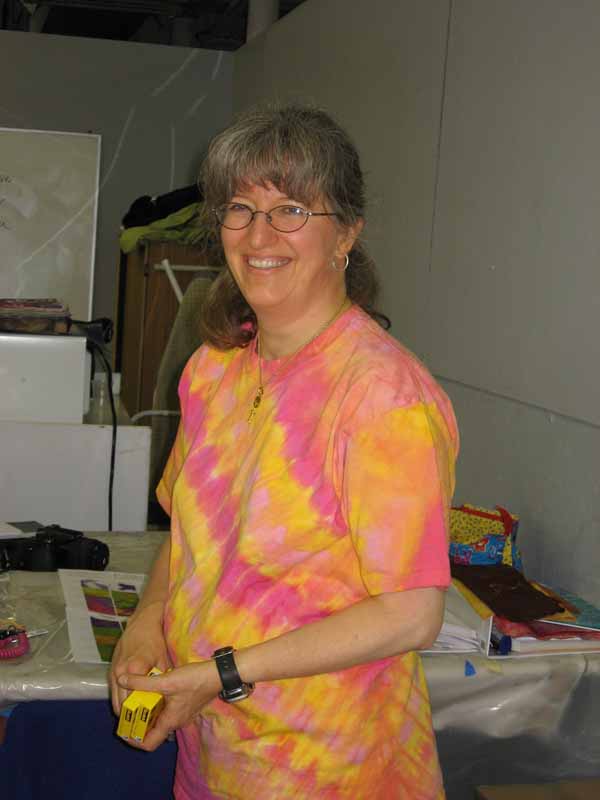
SAS at Workshop in t-shirt

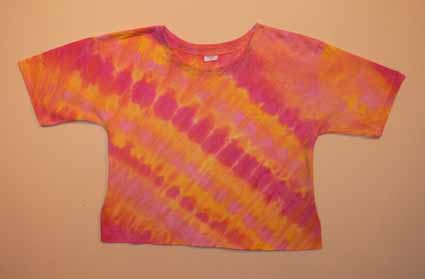
I knew back then that I wanted to re-make the shirt into a nicer top, but ProChem only had t-shirts in stock, plain old T’s.  Here is what the shirt looked like before I took to it with pins, sewing machine and scissors in late October:
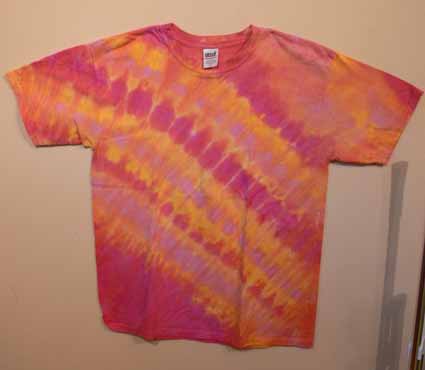
T-shirt, before

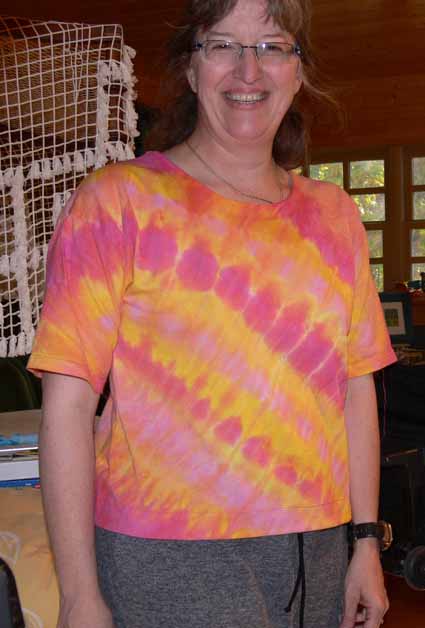
I used fuchsia dye, the other red that is MX R4 (Fuchsia is 8R), a warm yellow and a cool yellow… it was pleated on the diagonal with the lines running from upper left shoulder to right hip.  The dye was then poured – squirted – painted on in the opposite diagonal.

First, I pinned out what I thought I wanted to take in on the sides and underarm, then went into the bathroom (which has a low enough mirror) to see how long I wanted the shirt to be.  I ended up cutting 5 1/2 inches off the bottom, then taking a 1 1/2″ hem.  I used a twin needle, which gives the double-straight stitch on the top, a zigzag on the bottom, and stretches just a little bit.

Second, I took in the sides (alas, I am not blessed with a generous bustline, tho in summer I actually am grateful), leaving the extra room at the bottom my hips need.  I also took in the sleeves a bit.  This photo shows the taper…from about 3/4″ at the hem of the sleeves, to a smidge over an inch at the torso, tapering to a point like a dart. I used the stretch stitch on my machine…basically it looks like three stitches on top of each other.
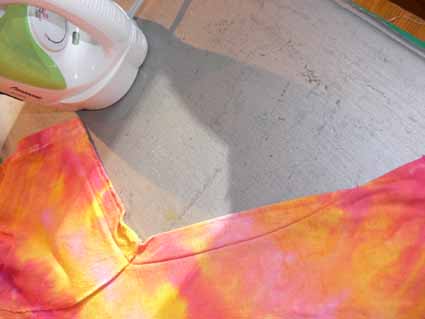
Side seam

For those of you with a larger bustline, you can also take vertical darts in the waist area underneath the bust for a more tailored fit…just put the shirt on inside out and pin.  Carefully.  Then REALLY carefully remove the shirt, try it on right side out and if it looks good, take it off even more carefully and stitch.

At first I wasn’t going to trim and finish the edges, but the amount taken in was enough that the underarm seam pulled unattractively, so I trimmed to 1/4″ seam allowance,  and zigzagged the edges.  Serging would also work, but I don’t have matching thread and didn’t feel like setting up the serger!
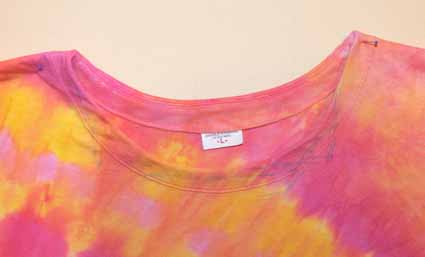
Square neckline mocked up

You might (?) be able to see the blue washout pen markings on the top in the photo above.  I look good in square necklines, so had planned to trim off the neckline edging and sew a facing using the cut-off fabric from the bottom.  However, I wanted this to be a simple tutorial, and–on a whim while checking out the fit after stitching the sides –turned the collar ribbing inside.  I liked the look!  So, I simply stretched the ribbing so that it would instead function as a facing, and topstitched it in place with the twin needle.  Here t is without the blue pen!
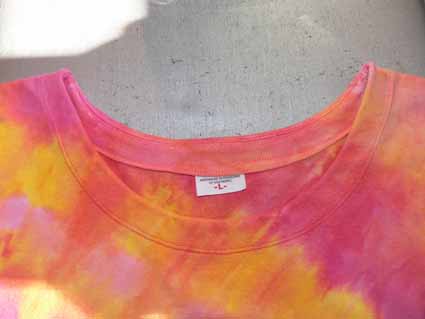
with blue stuff washed out, neckline

And here is a so-so picture of me (with no make-up and messy hair… what am I thinking putting a picture like this on the internet?????) in the shirt–sorry about the partial lobotomy…that’s what happens when you set the camera on timer to take a photo of yourself:
Sarah in shirt, angled view

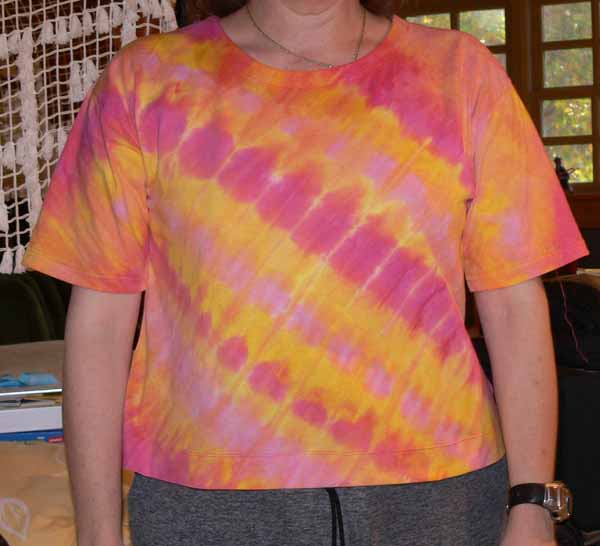
And an even less flattering photo (I decided to decapitate myself with photoshop…the fat sloping chin was just too awful LOL!), but straight on so you can better see (?) the final result:
SAS in shirt, straight on

Remember the original look of the shirt?

T-shirt, before

Here’s the finished outline:

Finished shirt on design wall

All in all, I think it is a vast improvement over the baggy shirt.  Even with trying it on about four times, it took easily less than two hours to do everything.

Bow-Tucks Tote

Tuesday, November 11th, 2008

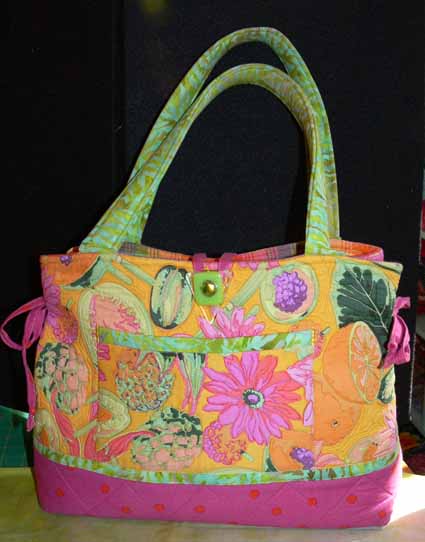
My how time flies!   I totally love my new totebag…which I made back in JULY!   I bought the glass button for it after teaching at Lowell, and here is is nearly November….. Well, better late than never!

Bow Tucks Tote

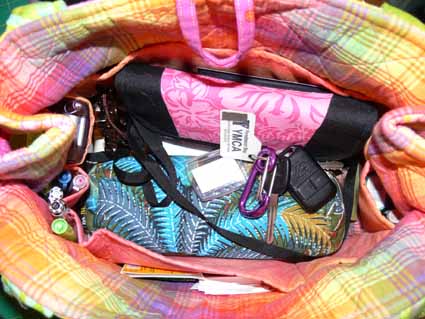
The pattern is by Penny Sturges of Quilts Illustrated (click on name for website homepage), and the pattern is listed here.  I think this must have been one of Penny’s first patterns, as the production value is–to be rather blunt–not so great…. the written instructions are on one page, the illustrations are on another….    Still, since I sew well I was able to make the pattern easily.  Because  the bag has fusible fleece on both the lining and the outside, it stands up beautifully, which I really like. I also really like how I customized the pockets… usually when I go to Houston / Festival I leave my regular purse at home, but this one is perfect…pocket for phone, for pencils, wide enough for wallet to go flat on the bottom, carry a small notebook AND the camera…. so it is going with me!

Tote inside

However, I would change a few things…. even my beloved work-horse Janome 6600 had trouble with the many thick layers on the sides where the pockets and lining (all with fleece) are stitched together. I think I’d trim the fleece so that it just barely misses getting stitched into the seams, at least on the pockets. One of the local quilters has made MANY of these, and she tried doing one with just a single layer of fleece, but we both agreed it was kinda floppy and we prefer the “stand-up-ish-ness” of the two layers.  Wonder if I can find a slightly lighter-weight fusible fleece somewhere?

And, I solved the problem of “embarrasing stuff spilling” by using an old round case, purchased in Gabon (central Africa) when we lived there in 1990.  All the little messy stuff goes in there…available but hidden.

Finally, the fact that you can tighten up or loosen the bows on the end means that when tied snugly to create the tuck, the opening on the top is really quite small…when on your shoulder it would be very difficult for someone to pick one’s pocketbook, so I don’t miss a zipper or flap at all.