email Youtube

Home
Galleries
Blog
Workshops & Calendar
Store
Resources
About
Contact

Author Archive

Mastering Metallic Threads

Monday, August 19th, 2013

Lookit what arrived in the mail today!   My September/October issue of Machine Quilting Unlimited, with my Metallic Threads article mentioned ON THE COVER!  I’m thrilled with the layout and how the article looks and reads, and hope you will be too.  You can find MQU at Barnes and Nobles (on Sept. 1) as well as order this and back issues online, here.
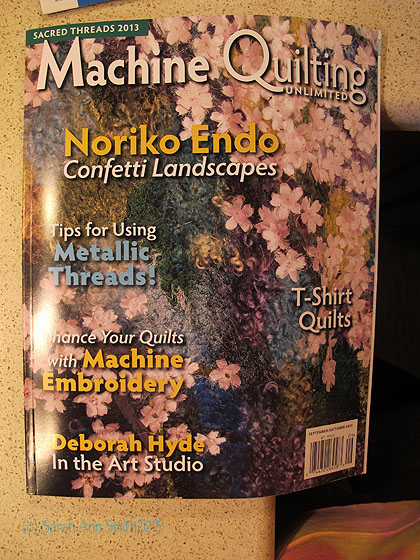
 

Machine Quilting Unlimited...notice the Metallic Threads on the left, that's my article!  WOOT!

Machine Quilting Unlimited…notice the Metallic Threads on the left, that’s my article! WOOT!

I LOVE Metallic threads, and once you learn a few basics it really isn’t difficult to use at all!   My book, ThreadWork Unraveled, talks all about threads including metallics, but for the skinny on just the metallics, it’s covered in this six-page (!!!) article.
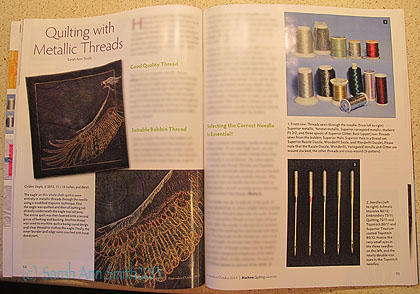
THe opening spread on the Metallic thread article.  The golden eagle quilt on the left, 13 x 13 inches, is a wholecloth quilt using one of my murky "background / forest floor" hand-dyes.

The opening spread on the Metallic thread article. The golden eagle quilt on the left, 13 x 13 inches, is a wholecloth quilt using one of my murky “background / forest floor” hand-dyes.

I was thrilled that my buddy Jim VanderNoot, who lives in Pennsylvania but will be returning to the best place on Earth (well OK, the are other really great places too, but Maine ROCKS) when he retires in a few years (or sooner we hope in the local guild…Jim is a welcome addition!), let me use his “Celebrate!” quilt for the article.  Jim’s a fabulous quilter, so I can’t wait until he and his wife get to move north.  Thanks, Jim!
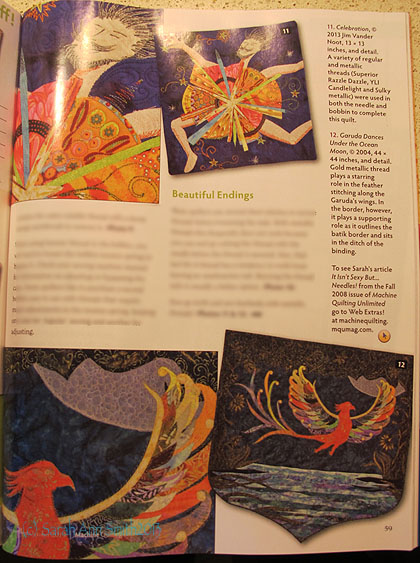
Here's the last page of the article with Jim VanderNoot's quilt on the top--love his sense of whimsy and UBER LOVE his quilting.  That's my Garuda Dances Under the Ocean Moon on the bottom, made with Princess Mirah Bali batik fabrics.

Here’s the last page of the article with Jim VanderNoot’s quilt on the top–love his sense of whimsy and UBER LOVE his quilting. That’s my Garuda Dances Under the Ocean Moon on the bottom, made with Princess Mirah Bali batik fabrics.

AND…drum roll for thorough readers…. MQU has a “Web Extra,” a free PDF download of my 2008 article on sewing machine needles.  Click here to visit MQU’s Web Extras page and find the link.

I’ve finally finished the major house chores–well, except for painting ALL the trim on the garage–done, so hope to get back to a regular blogging schedule soon!   In the meantime, hope you can lay your hands on a copy of this magazine and enjoy this and the other great articles.  MQU is  one of those magazines that I read cover to cover AND keep all the back issues!   Thrilled to be able to write for them again.

P.S.  And one benefit to this article… in the past I had avoided bobbin work like the plague.  But I thought it would be good to include bobbin work in the article.  Guess what… I now LOVE using the Razzle Dazzle thread–I figured out a way to use it and still fill my need to SEE what I’m doing with something that needs to be worked upside-down!   So add one more technique to my arsenal…and a few more spools of thread to my stash.
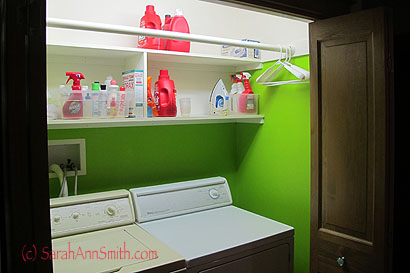
Let there be LIME green!!! Or, if it’s August, it must mean house repairs!

Friday, August 9th, 2013
Let there be LIME green!  Keep reading for more on my August so far....

Let there be LIME green! Keep reading for more on my August so far….

Hi all…I’m back from two weeks in California, most of it teaching, a little of it travel (and several blogposts coming on that–I PROMISE there really will be quilting and art here, eventually!).  But that seems distant memory because as soon as I got home and unpacked, it was “fix it” month!  This seems to be my cycle:  teaching starts up as soon as the snow melts, then I’m off for August and September before more teaching.  This year is the same, and I’ve been crazy busy with the garden and assorted long-postponed household chores.

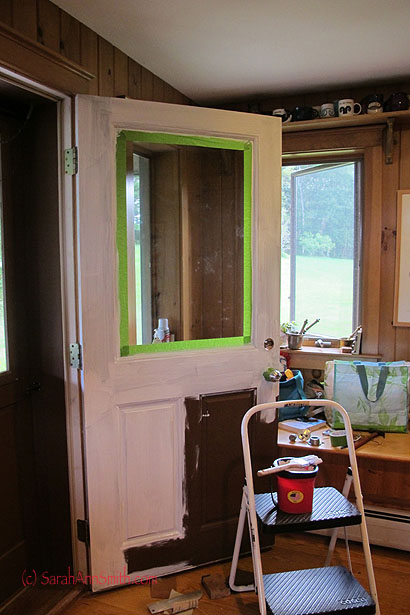
First on my list was PAINT THE UGLY DOORS to the house.  Our house is a ranch style, with a dark green roof (just fine) and DARK chocolate brown paint and trim.  UGH.  Talk about a hulking presence.  So eventually it will be painted a lovely dove gray with white trim like the garage we built last fall.   But it doesn’t need painting, so I’m starting with the doors:

The formerly dark brown (lower right corner) door is primed and ready to be painted!

The formerly dark brown (lower right corner) door is primed and ready to be painted!

John, our carpenter/builder, is here today installing the new doorknobs–what a concept, a doorknob my arthritic hand can actually turn!   As soon as he is done, I’ll show the “finished” door! The one above is to the entry/kitchen.  Of course I forgot to take a photo of the dark ugly thing before I began priming, but in the lower right corner behind the stepstool, you can see the original very dark paint.  Not a bad color, just not all over the house!

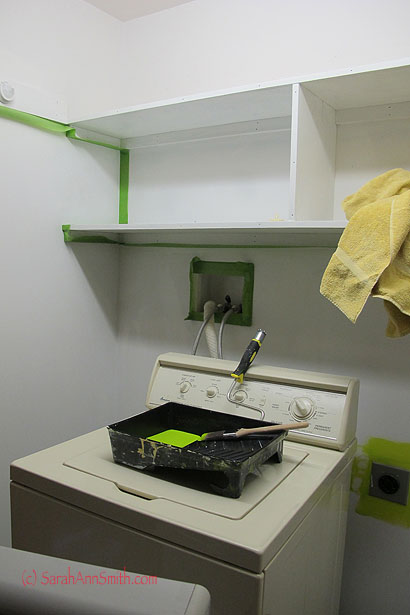
Then I turned my attention to the laundry closet.  I loathe our machines:  old, scratched, mismatched, and one is in that vile almond that I also really don’t like.  Give me WHITE!  But until they die, we’re stuck.   The fridge died earlier this spring, so we’re hoping these last another year, then maybe……   in the meantime, I wanted to spruce up the closet.  The “white” paint was a dingy, gray white and scuffed.  The shelves are wood, installed by the previous owner.  If he had just left them natural and put a finish on them they would’ve been nice.  But like all the rest of the woodwork in this house, he mucked it up with a “Fruitwood” stain that puts this grayish pall over the wood.  Sigh.  Ick.  (You can see the wood in the entry in the photo of the door).  So here’s the closet during the priming phase:

Green painters tape to seal off the areas that will remain white, Margarita/Lime green in the pan

Green painters tape to seal off the areas that will remain white, Margarita/Lime green in the pan

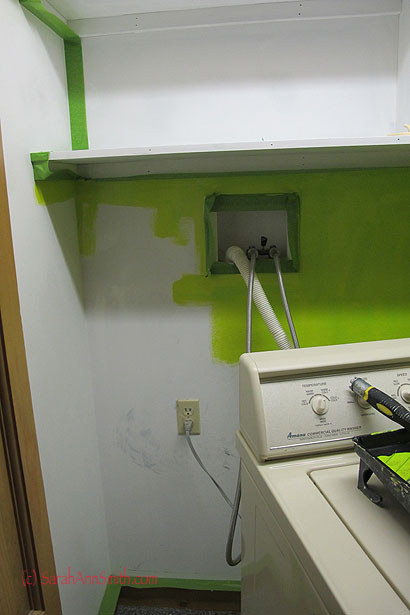
Then partly painted (LOL…I had typed PARTY painted, that could work too):

Cutting in with the green, first coat.  Took THREE coats to cover.

Cutting in with the green, first coat. Took THREE coats to cover.  And those smudges are UNDER the primer.  Have no idea what the plumber got on there when they installed the burst-proof hoses.

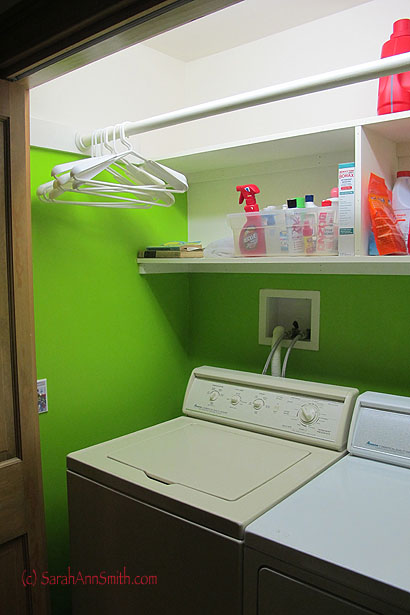
and, from the other angle, DONE!

One of the first things I did when we moved in two years ago was install the closet rod over the washer and dryer.  LOVE being able to pop stuff in the dryer for 10 minutes to get the wrinkles out, then hang to dry.  Longer life on the clothes with less ironing.  WOOT!

One of the first things I did when we moved in two years ago was install the closet rod over the washer and dryer. LOVE being able to pop stuff in the dryer for 10 minutes to get the wrinkles out, then hang to dry. Longer life on the clothes with less ironing. WOOT!

And some day we will have high efficiency washer and dryer where the clothes don’t feel like they  need to be put in the spin cycle when they are  allegedly done.  And the appliances will be crisp, clean WHITE!

My Quilting Arts Article on Backgrounds!

Friday, July 26th, 2013

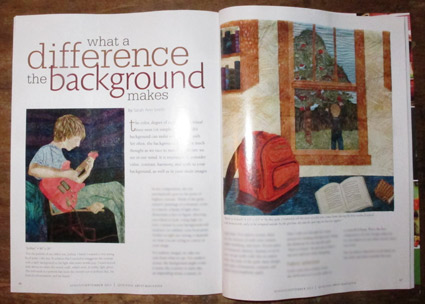
Great news!   I’ve got a new article in Quilting Arts, in the August-September issue.  I’m dashing out the door momentarily to Maine Quilts (I helped with set-up on Weds., you may have seen a picture if you’re on FaceBook), and today I get to help with Appraisals for a couple hours.  Looking forward to learning!  BUT in the meantime, WOOOHOOOO, my article on “What a Difference the Background Makes” is in this issue:

The August-September Issue of Quilting Arts has my new article on choosing backgrounds.

The August-September Issue of Quilting Arts has my new article on choosing backgrounds.

Here’s the first two pages of the article (I blurred the text since QA has the copyright).  Issues should be on stands now or soon; if you live somewhere that you can’t get a paper copy, the issue is available by digital download from Quilting Arts/Interweave, here.

My new article on backgrounds.  Thanks to my friend Pat D. for suggesting I propose this to QA!  You rock, Pat!

My new article on backgrounds. Thanks to my friend Pat D. for suggesting I propose this to QA! You rock, Pat!

I did up a second version of the quiltlet on the right, but gotta run so will share that in the next day or two.  If you’d like to see how I applied this process to a recent larger quilt, Mr. Wiggles Does the Circle Dance, check out this blogpost from earlier this summer.


Houston here I come!

Wednesday, July 17th, 2013

I’m thrilled to report that I will be teaching in Houston at International Quilt Festival, Fall 2013!  I’ve sent off my contract, and will be teaching or presenting Tuesday through Saturday.  On Sunday, I get to play and shop!   Here’s my schedule:

Tuesday, October 29:  Tame Fussy, Fiddly Threads, an all day class on how to use successfully those beautiful sparkly, holographic and variegated threads on your stencilled tossed leaves.  See blogposts from previous classes here/1, here/2, here/3 and here/4.

Wednesday, October 30:  Birch Pond Seasons, an all-day class in fused collage.  You can see the pattern here and a blogpost from a local class here.

Thursday, October 31:  I’ll be one of 7 teachers presenting at the Machine Quilting Forum.  My subject will be Find Quilting Design Inspiration Everywhere.  The forum is like speed-dating for quilters:  each of the teachers gives an overview of their work (in 10 slides or less), then groups move from station to station listening to the teachers’ presentations.  It was a lot of fun, and I wish that in addition to hearing the teachers’ overview at the beginning that I had been able to sit in with the students.  It’s a great way to decide if you’d like to save up for a big class with a teacher or have them come to your guild.

Friday, November 1:  Decorative Stitch Sampler, all day class that teaches you to use all those fun stitches and threads.  We had a blast in this class in 2012!

Saturday, November 2:  Quilts, Inc., has a whole new fun thing on Saturday!  The Christmas Delights Forum.  I’ll be presenting the Stenciled Snowflake Ornament.  Each teacher will have a project suitable for quick gift giving and holiday celebrations.  I’m currently working on the samples, but hope to share with you before too long.  I discovered when teaching surface design technqiues a while back that it is fun to make a paper snowflake or mini Hawaiian-style design out of freezer paper, then stencil the image on cloth.  Then you can quilt it and turn it into a holiday ornament or decoration.

Looking forward to my students, friends, and quilts, quilts, quilts!   See you there!


Catching up, more March and April

Sunday, July 14th, 2013

Gosh, I must say I am thrilled at all the work that fell  out of the sky onto me this past spring, but it is nice to be able to take a breather, blog a bit, sit on the sofa with a bit, sit on the porch and enjoy the summer breeze (ok, so at the moment the breeze is imaginary but I can hope one wafts in soon ans disperses the hot and muggy weather that is doing us all in as I type this…hopefully by the time this posts to the blog the “hot, hazy and humid” forecasts will be done and we’ll be back to glorious Maine summers).

This is a bit of a catch-all post to catch you up on life, so in somewhat random order….

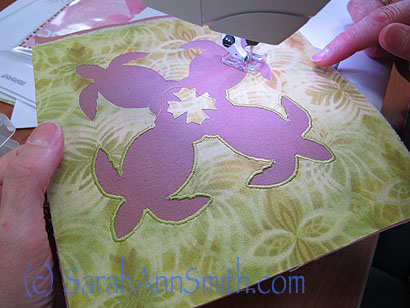
In April I lectured in Massachusetts, then taught in Rutland, Vermont.  As you might guess, the class was Hawaiian Applique by machine which I will be teaching TWICE in Southern California this month!

In April I lectured in Massachusetts, then taught in Rutland, Vermont. As you might guess, the class was Hawaiian Applique by machine which I will be teaching TWICE in Southern California this month!  Didn’t this student do a beautiful job with her satin stitching on the turtles block?

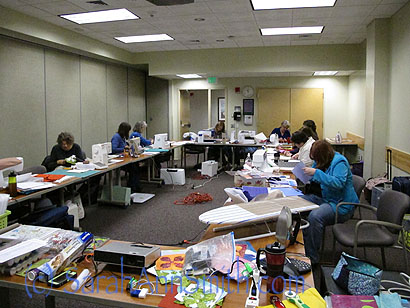
Here's the classroom, on the lower level of a hospital center!

Here’s the classroom, on the lower level of a hospital center! Thanks to all the ladies who came–what fun!

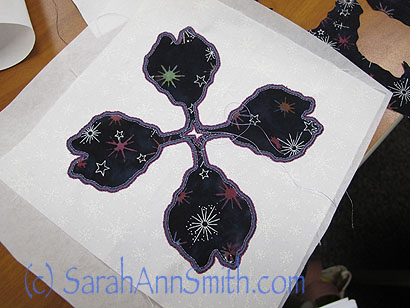
And here's a taro leaf block, another of the "small" options in this class.  Lovely!

And here’s a taro leaf block, another of the “small” options in this class. Lovely!

As luck would have it, my route (yippeee!) took me from Massachusetts right past my friend Jacquie’s house on the way to Rutland, where I didn’t have to be until the evening lecture.  So of course I got to make a small detour and visit, and of course she fed me (Jacquie is a MUCH better and more inspired cook than I am).  When I arrived (late, I’m Sorry jq!) she was on Skype with her daughter Melanie, who lives in Germany, so I got to visit with Melanie too!   We had so much fun yakking and sharing that we forgot to pull out Melanie’s elderflower cordial that she made, so I’ll just have to manage another trip to Vermont.

I LOVE this picture...which I managed to take with arm extended.  It only took about three tries to get a decent one, too!

I LOVE this picture…which I managed to take with arm extended. It only took about three tries to get a decent one, too!

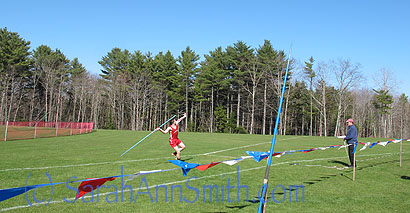
In April, Eli's track and field season began.  Here's an early season meet, with him throwing the javelin.  Look at that glorious sky and that beautiful boy-child (OK, soon to be young man) of mine!  So proud of him--this is his third varsity sport this year, as a Freshman!  And he qualified for States, making it three for three.  Well done, kiddo!

In April, Eli’s track and field season began. Here’s an early season meet (the deciduous trees are still bare), with him throwing the javelin. Look at that glorious sky and that beautiful boy-child (OK, soon to be young man) of mine! So proud of him–this is his third varsity sport this year, as a Freshman! And he qualified for States, making it three for three. Well done, kiddo!

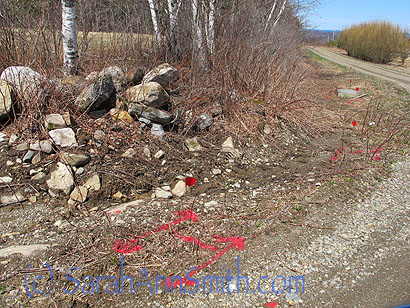
Earlier, in the spring snowmelt and rain, our driveway (3/10 of a mile long…there is this big rectangle with lots all around it, and one long skinny driveway to the lot in the middle which is us) washed out, really badly on the bottom.  So we sucked it up and paid serious money to put in a proper ditch that would deal with all the water.  Cost about as much as (OUCH!) a nice used car! Here are the markings from when DigSafe came to show where NOT to dig:

Getting ready for ditching on the uphill side of the long driveway.  The red shows where there are utility pipes (electric and phone/internet) underground.

Getting ready for ditching on the uphill side of the long driveway. The red shows where there are utility pipes (electric and phone/internet) underground.

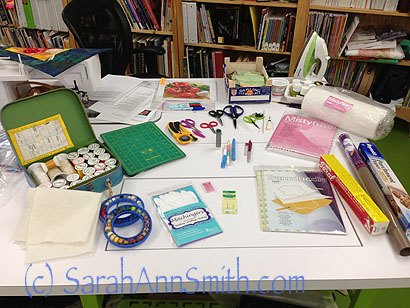
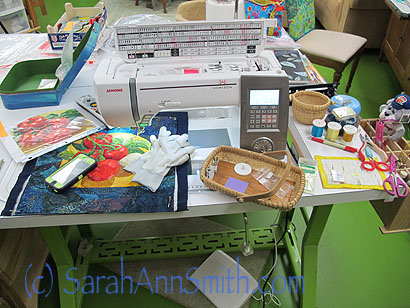
Then, here are a couple more shots of me prepping for filming the Quilting Arts DVD on May 1 (my full blogpost on that is here):

Setting things up as they would be seen on camera, in the "stuff you'll need" part of the DVD at the beginning.

Setting things up as they would be seen on camera, in the “stuff you’ll need” part of the DVD at the beginning.

And working on the preliminary quilting for the piece I would quilt on the set.  I needed to have the tomatoes in various stages of being quilted to demo the difference from unquilted to partialluy done, to done, plus one to work on while filming.

And working on the preliminary quilting for the piece I would quilt on the set. I needed to have the tomatoes in various stages of being quilted to demo the difference from unquilted to partialluy done, to done, plus one to work on while filming.

So that’s a bit more of why I’ve been so quiet these past months–LOTS of work and family life.  Life is good!