email Youtube

Home
Galleries
Blog
Workshops & Calendar
Store
Resources
About
Contact

Archive for the ‘Exhibiting’ Category

Conversations, Part 3: the smaller pieces and fixing it…

Friday, August 12th, 2011

By the time I got to making the two small pieces, I had ONE week left, and lots of other stuff to do during that week.  Can you say work fast?  Under pressure?  SHeesh!  I really hope life slows down, because I can’t take too much more of this!

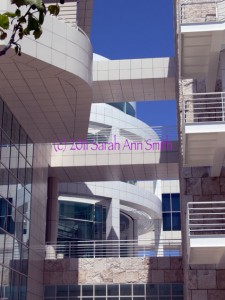
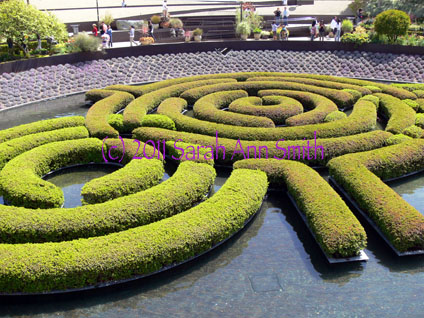
One of the architetural photos I took and used for the small pieces

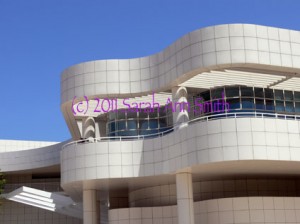
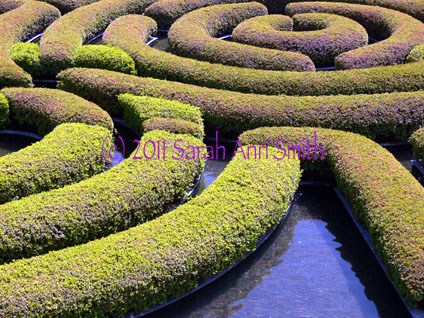
The other of the architetural photos I took and used for the small pieces

These two photos were the ones whose lines shadows most inspired me.  I love the interplay between straight lines and the curved, the grid of stone and the undulating shapes, the blue sky and the white stone, and the shadows.  I love how the architect used bands/lines of (metal?) whatever to create de facto louvers to shield the galleries and interior spaces from the bright sunlight, and how those bands create striped shadows on the pillars and walls.
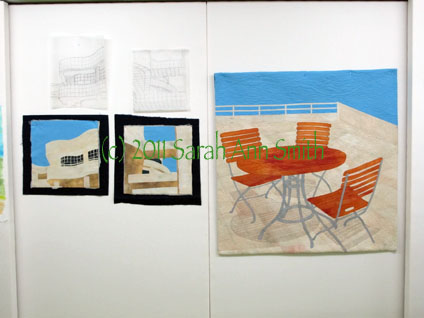
Here are the two smaller pieces, with batting and backing sticking out, and their sketches/tracings above.

Due to lack of time, I quilted both small pieces at once… I’d thread up on say ivory, quilt those areas, switch to cream and repeat, then to tan, etc. on both quilts, working my way to the dark of the windows and the sky and, finally the facings!

But I still wasn’t happy with the shadows from the table and chairs, so I went back to the now not-quite-done central piece.  In the next photo you can see the two pencils plus the paintbrush.
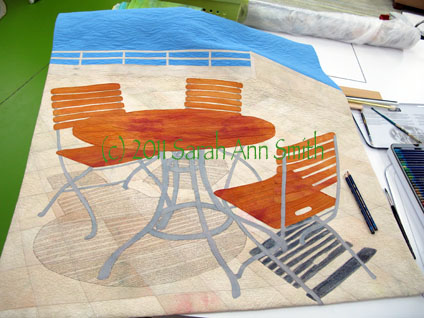
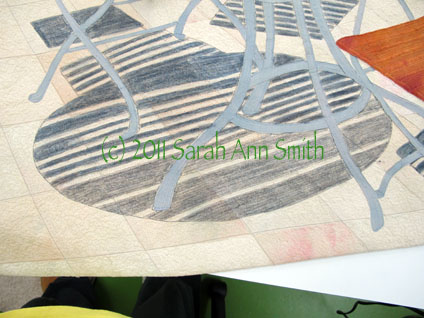
I still wasn't happy with the shadows (or lack thereof) on the main piece, which was ostensibly finished. Guess not. So I took out my Inktense by Derwent pencils (the Payne's Gray and a neutral gray) and took a deep breath
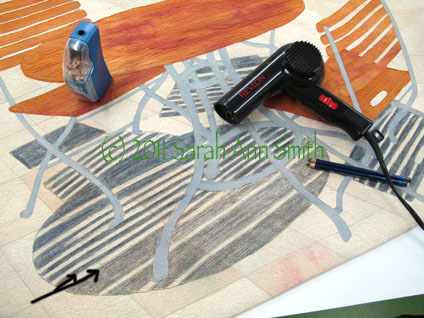
This picture shows the table shadows partially done....

Using the pencils was a bit of a "thriller" moment: I used two colors of gray to get the shade I wanted. The lighter gray on the bottom is where I have colored over the gray quilting threads with the pencil (see black arrow marks on the photo). You can then dampen the pencil marks to create an ink and intensify the color. However, I didn't want the color to bleed into the sunny stripes that came through the slats of the table. So I took out the hair dryer! I used a damp paintbrush in my right hand to moisten the ink, and the hair dryer in my left hand to dry as I painted/wet the pencil-ink. I had very little bleeding into the sunny stripe as a result, and what I did have doesn't really impact the image much at all. PHEW...time for a nice glass of wine after that... I could have totally ruined the whole, finished thing...with just days to go before hanging the show!

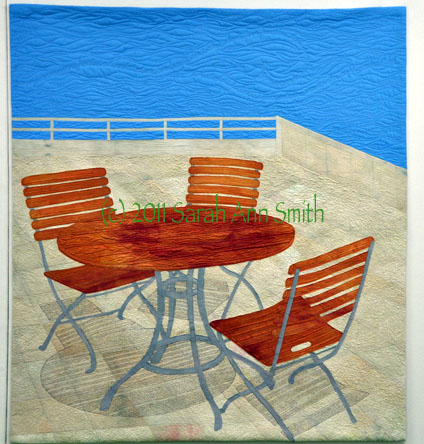
The quilt was getting better and I was disliking it less.  But it still wasn’t quite right to me.  There was too much blue at the top.  So for the show I “cropped” it by folding the top to the back… I’ll decide how much to trim off the top and re-do the facing and hanging sleeve after the show comes down.  So here is a question for those of you who have slogged through these blogposts:  how much should I remove from the top?  Here are three VERY similar versions:
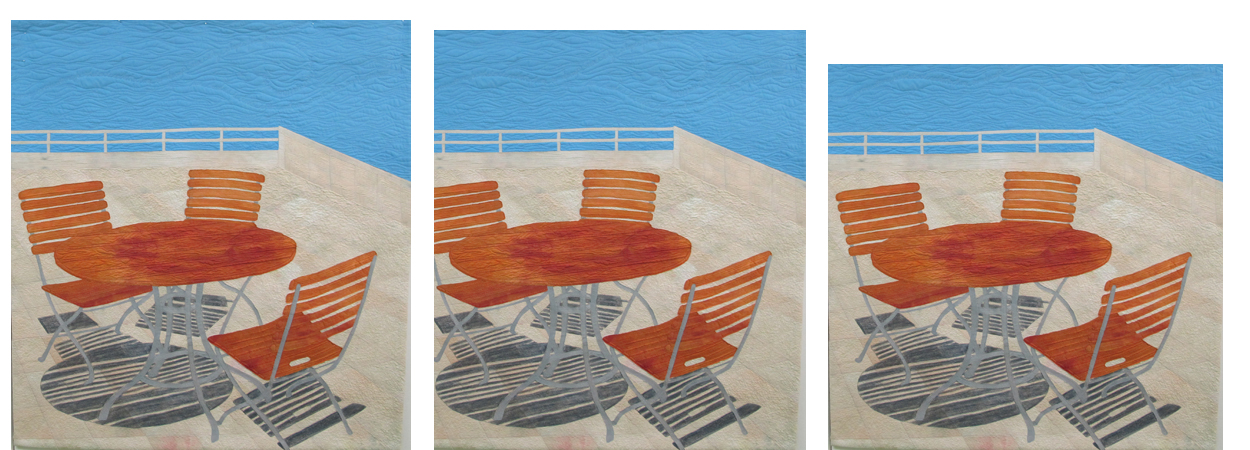
So I do I leave it alone (far left), crop a little (center) or crop a bit more (right)? Photo is clickable to see it larger...

So do I leave it alone with lots of blue, crop a tiny bit, or crop a little bit more?  The photo on the far left is as made.  The way it is hanging is about where I photoshopped it in the center photo, and the one on the right is close to square (think symmetry with the proportions of the two small pieces).  So do I crop?  How much?

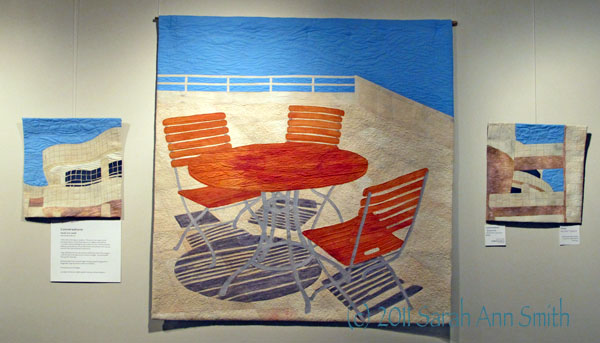
And just to remind you…here are the three pieces done and in the show:

Conversations by Sarah Ann Smith -- click to see larger

And yes….I might maybe do another quilt or two… I mean, look at this water-maze-garden-hedge…  how cool is that?  and the cropped version below?

the green is hedge, the dark in between is water!, and beyond are plants on the "bowl" shaped slope in the gardens that surround this water feature.

I just LOVE this rhythm and repetition....

Conversations, Part 2–starting the quilting

Tuesday, August 9th, 2011
The last time I wrote, I shared the ideas and dyeing the cloth and assembling the top to Conversations.  In this post, I’ll share the quilting, or at least the first part of i
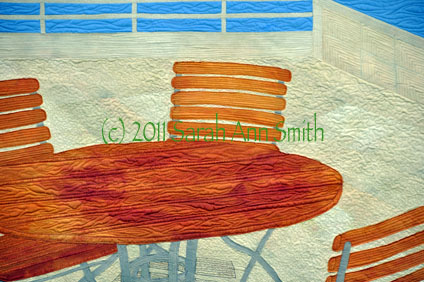
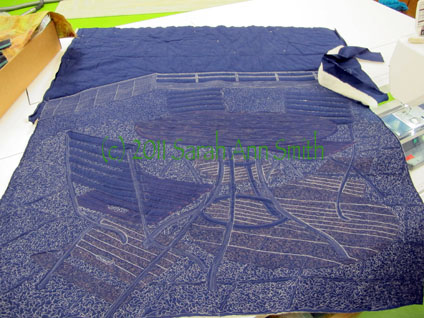
I guess you’ll have to believe me when I say that in the narrow channels on the table, where the wood goes down vertically, there is writing to create the “shadow”

The path to finished wasn’t exactly smooth.  I dyed the fabric…several times.  I was having a bit of a brain scramble, and not once but twice mixed up the proportions of red-yellow-blue.  At least I have some lovely browns, and fortunately I managed to make just enough of the creamy stone to make all three pieces!  The sky fabric is the first time I’ve tried a vat dye (versus low immersion) where you stir the fabric to get a smooth, even color.  But since the Los Angeles skies are screaming blue, I was so happy when this turned out just right, and on the first attempt (thanks to taking a few dyeing fabric workshops with Carol Soderlund).

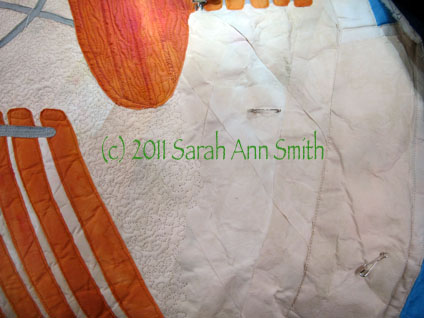
For this piece, I decided to try something different…instead of fusing the entire top, shifting my piece of non-stick press sheet as I work (I LOVE my Goddess Sheets from MistyFuse!), I thought I’d fuse everything to water-soluble stabilizer, often used in embroidery or thread  sketching.  What I didn’t think through is that because the top is FUSED, the stabilizer wouldn’t disintegrate when wet.  In fact, it ended up looking like a crumpled paper bag.  Erg.

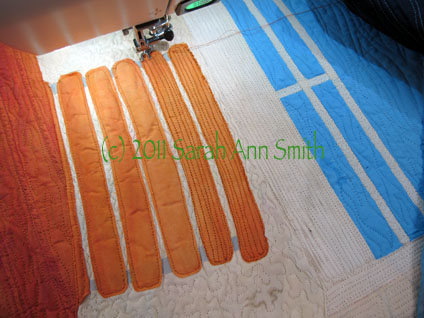
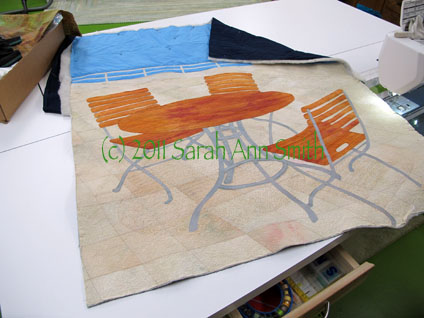
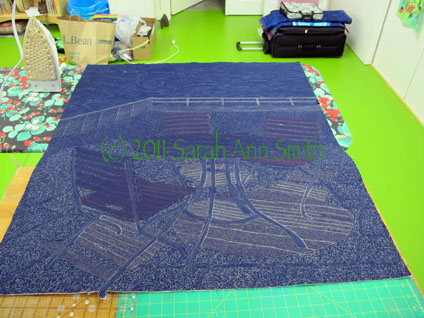
I used a small stipple on the paving stones to simulate the porous texture of the stone (usually I stay far away from a “regular” stipple!). As you can see from the unquilted part, the fused-to-stabilizer area looks hideous!
The slats on the chairs also just looked rumpled. I had wanted to leave them unquilted in the center so they would have more pop or loft to them, but they just looked icky. So when in doubt, quilt it to death! Here’s the in progress picture…


Some quilting done, but not all…yet.  Size will be 36 wide by about 40 tall….
And at the same stage, but the back. As you can tell, I haven’t begun work on the sky or the chairs/slats.  Why do I so often prefer the backs of my quilts?


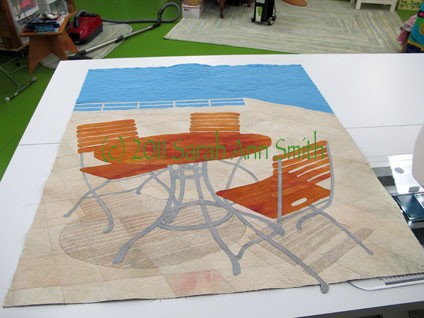
Shadows quilted, sky quilted, squared up.  I don’t really like it.  (Don’t worry…I made it better…at least I think it is better….)
The back, with the quilting done.
Facings and hanging sleeve are on, and up on the design wall. Still not happy…the shadows aren’t bold enough. It was those striking lines and contrast that grabbed me, and that impact isn’t there.

In the next post on this series, I’ll share what I did to fix the quilt (well, I hope I fixed it and didn’t make it worse!) and the two smaller pieces.  More coming soon!

The Frayed Edges, July 2011–Part 3: The Letters Challenge

Monday, July 25th, 2011

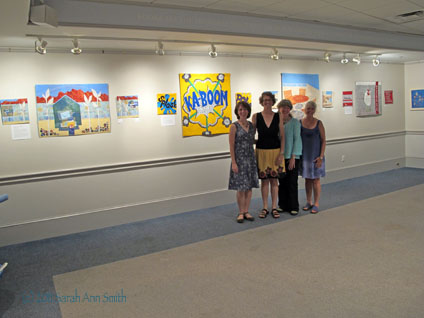
Back in early 2010, Kathy, Kate, Deborah and I started talking about having another show.  Since we had a fun time with the five-by-five challenge (see blogpost here), we decided to do another special set of quilts for this show.   Here are the four of us in front of the twelve  pieces.

"Letters" quilts and the four Frayed Edges

Using the wonderful press release that Deborah wrote as my start, here’s what I wrote to accompany the exhibit:

Letters

The Frayed Edges Challenge, 2011

For our first group show in 2006, also held here in the Picker Room, we worked on a group challenge which was a great success, so we decided to try it again.  This time, we chose the theme Letters, to celebrate the written word, our shows in the Camden Public Library, and our love of letters which all of us have used (some more than others) regularly in our art quilts. 

The centerpiece of the collection is a set of four triptychs designed especially for this exhibit. Each artist created two small art quilts with a third larger piece in the center. The artists embraced the theme “Letters” in many different ways. Kate, the Bowdoinham town librarian, used graphic novels (cartoon-books) as her inspiration, while Kate Daniels was inspired  by the children’s book Tillie Lays an Egg (and received the permission of the author to use the name and image inspiration).  Deborah explored images of letters in envelopes and words on cloth.  Sarah’s more subtle approach uses words as shadows on the table and chairs and in the quilting to explore the idea of conversations.

We opted for a single larger art quilt about 36 inches wide but of varying height to permit design flexibility, and two 12×12 inch squares on either side. The size of the smaller pieces were inspired by Deborah’s work and participation in a very successful group, Twelve by Twelve, (blog: http://twelveby12.blogspot.com/)  Their collection of quilts was published in a book this spring.  A display copy of that book is on the glass case by the doors, along with a non-circulating copy of Sarah’s book ThreadWork Unraveled and a non-circulating copy of Creative Quilting with Beads, which features projects by all four of us. 

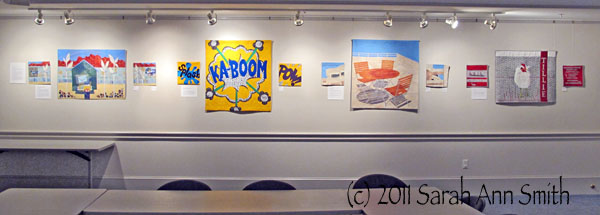
And a photo of the four sets without us in the way (click to see larger):

The Letters Challenge

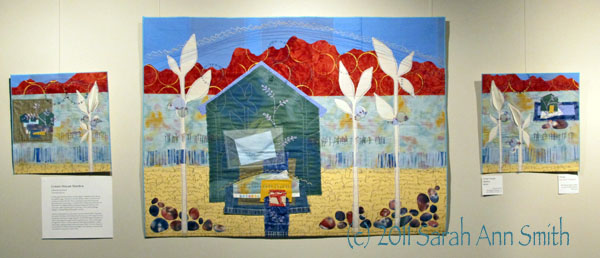
Green House Mantra by Deborah Boschert

DeborahsStudio.com

Green House Mantra by Deborah Boschert--click to see larger

To fully explore the theme “letters” for this triptych, I wanted to include obvious, but symbolic images. This led me to the idea of letters written to loved ones and envelopes received in the mail. There is something so personal and expressive about this kind of communication. I created a sheer envelope with just the idea of a letter inside. The collage of fabrics and shapes leading up to the house in the center piece might represent a porch or doorstep. There could be packages waiting or a message whispered through the windows.

I also love exploring letters, words, stories, voices and ideas in books. Tiny books are nestled in the leaves of the tall plants on the side pieces of the triptych. It’s as if the leaves are unfurling a message of growth. Several of the images, techniques and motifs in this triptych are regular parts of my artistic lexicon. I return to them again and again like a mantra. I love the repetition of stitching tiny wild flowers, cutting stone shapes, stamping painted circles and writing on fabric. The house shape acts as a foundation for these techniques and images. In the same way, a home provides a foundation for many other aspects of life.

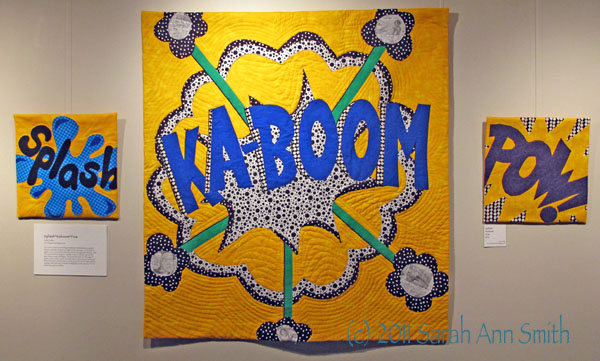
Splash*Kaboom*Pow by Kate Cutko

Splash*Kaboom*Pow by Kate Cutko--click to see larger


barnofopportunity.blogspot.com

The “Letters” theme had me thinking immediately of individual letters as graphic elements, each letter having its own negative and positive space.  In the world of graphic novels (comics) letters often stand alone as strong graphic elements.  While I do not pretend to be a huge fan of graphic novels, as I librarian I see that this genre draws in readers of all types.   I do love to look at the art in the pages of graphic novels.  In these 3 pieces I went with classic comic book action words, and direct, bold color so that the letters could be as powerful as their shape and their meaning. In the center piece I included a small glimpse into the artwork of Tin Tin, Zita the Spacegirl, and Jellaby.

Conversations by Sarah Ann Smith

Conversations by Sarah Ann Smith -- click to see larger

you’re here at my link!

Letters make words make conversations.  These pieces were inspired by the stunning architecture of the Getty Museum in Los Angeles, where there are conversations between buildings and sky, architecture and art, friends and sisters, landscape and architecture, sea and sky and stone and seabreeze, and in my case, artist and cloth, cloth and thread, friends and art. 

I began with photos from my visit, words to recall that day, white cloth and dyes to create the colors of the sky and stone and wood and glass.  The words include those specific to that day:

Sea breeze sister friend Leonardo dragon teaching aching feet dragons lunch bougainvillea rough smooth stone water sound shadows…

And words about art and design:

Line shape form function rhythm repetition harmony contrast unity space ….

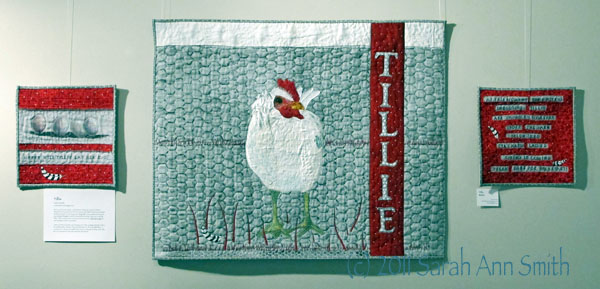
Tillie by Kathy Daniels


Tille by Kathy Daniels -- click to see larger

Studiointhewoods.blogspot.com

Which came first, the chicken…or the letters? In this case, it was the chicken, observed at a country fair and stored in memory until called forward and committed to fabric and stitch. As she hung on the design wall, a chance statement from my 6-year-old granddaughter turned her into what she is today: “Nana, you’re making Tillie!”  Tillie is a chicken from our favorite book at the time, Tillie Lays an Egg, by New Hampshire author Terry Golson.

Letters, printed and written, are showing up more often as design elements in fabric art as well as other mediums. They can stand alone, as Tillie does, BOLDLY, or can be part of a story as the smaller 12×12 side pieces attempt to portray. With Tillie, there’s no guesswork in who she is and what she’s about!

In a while, I’ll share the process of making my series. Stay tuned!

The Frayed Edges, July 2011–Part 1: the Library Show

Tuesday, July 19th, 2011

WOW… what a whirlwind it has been, and what a lot of fun we had.

"Letters" quilts and the four Frayed Edges at the Picker Room, Camden Public Library, on July 9, 2011

Deborah Boschert, our “expat” member now living near Annapolis, Maryland (for those of you not in the US, that is near Washington, DC) flew up for the weekend to visit, so Deborah, Kathy Daniels, Kate Cutko and I had a glorious weekend.  The reason for the gathering was our second show (the first was in 2007, and is here and here and here) at the Picker Room of the Camden Public Library.  On July 1, Kate drove over an hour from her home to help me hang the show, and was I ever grateful for the help!  A week later, Deborah arrived and spent the night with me in Hope.  The next day, July 8, we gave a program on the show for the Coastal Quilters in the morning:

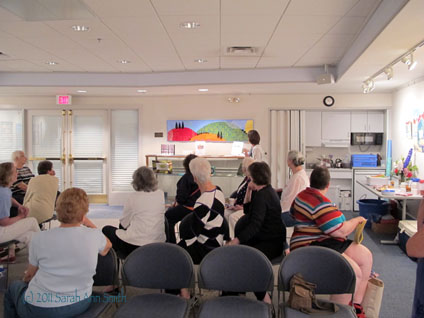
Deborah Boschert talks about her "long and skinny" piece which hangs over the glass display case in the Camden Public Library's Picker room; this is a first for the Coastal Quilters--rather than meet in the usual Lions' Club location, we met "on-site" in the library! Thanks to all who were able to come!

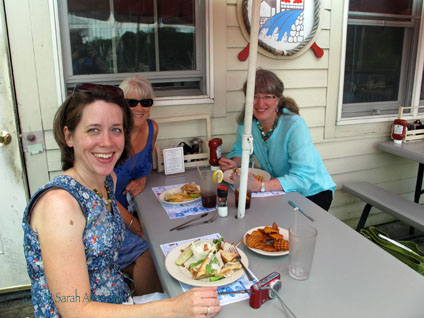
We had a short break on a glorious summer’s day , minus Kate who had to work her morning  job as Bowdoinham town librarian, and ate on the back deck at Marriner’s for lunch…astonishingly, we all look good in this photo! Clearly we are happy to be together!


Lunch at Marriner's, on the back deck over the Falls. L to R: Deborah Boschert, Kate (Kathy) Daniels, and me

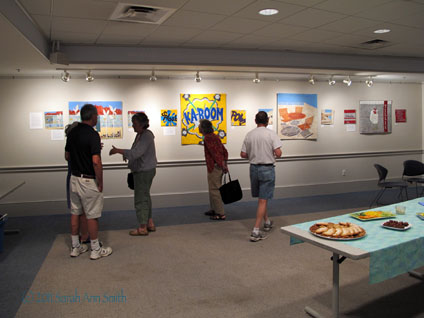
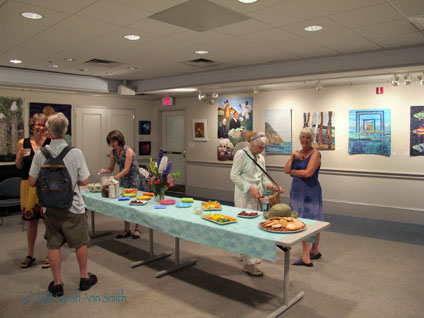
Kate arrived in time for our 2-4 p.m. Artists’ Reception, which was well attended—I expect that is was almost all Kathy’s friends and relatives, and we so appreciate their coming!

Viewers at the Artists' Reception looking at our Letters pieces


Eighteen months ago, we starting noodling about the idea of a group challenge/themed pieces that would be new for the show.  I’ll blog more about the pieces in a later post, but the photo at the top of the post shows all the 12 pieces.  We each made two 12 x 12 inch pieces (inspired by Deborah’s participation in the Twelve by Twelve project, here) and a center piece that was 36 (or thereabouts) inches wide and anywhere between 16 to 42 inches tall.  I was inspired by the quilt exhibit by tACTile, a group of quilters from the Australia Capitol Territory (ACT), which you can see here.  But we decided since other groups have taken the idea of a line running through all the pieces, to not do that for our series.  Our theme was “Letters,” which we thought was a good one for a show in the Library and because each of us, to a greater or lesser degree, has used letters or words on our quilts.

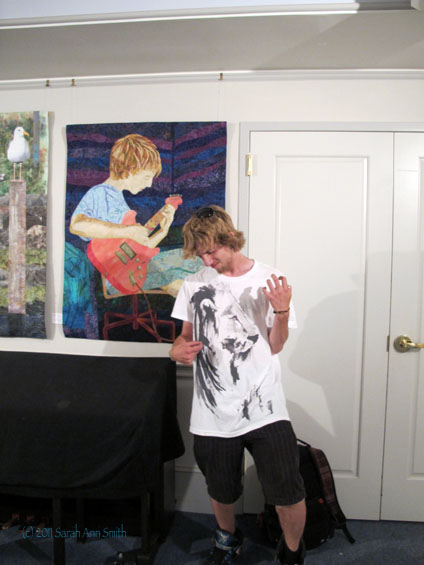
At one point, Joshua drifted through (to see if I’d take some stuff home for  him, actually), but he kindly consented to let me take his picture with the portrait of him…he has grown up a bit!

Joshua playing air guitar in front of the quilt of Joshua playing guitar... I think I'm glad I didn't have to quilt the beard that he has had since shortly after the photos I took for the quilt! And isn't that a cool lion on his t-shirt?

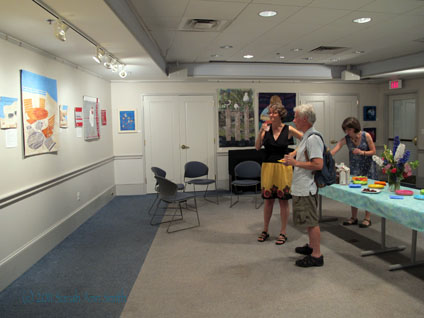
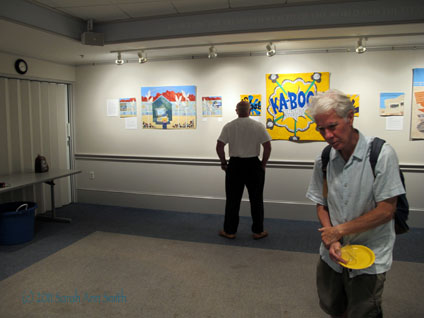
We had lots of thoughtful visitors:

Kate chats with a gentleman who really seemed to enjoy the show and spent lots of time looking at the pieces.

and

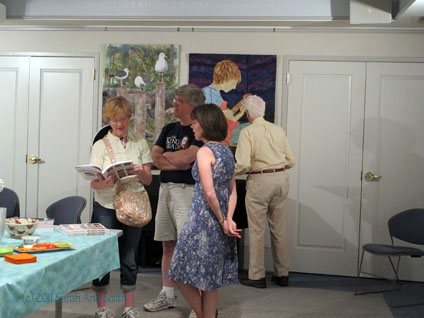
Kate chatting with the architect, Deborah at the far end of the table, Kathy speaking with the artist who did the recent show with the colorful goldfish paintings

and

Deborah's three pieces on the left, Paul (hubby!) looking at Kate's graphic novel-inspired pieces

and

More of Kath's friends and family, plus a really nice couple who are part-time Maine residents and drove an hour just to come up for the show...way cool!

and

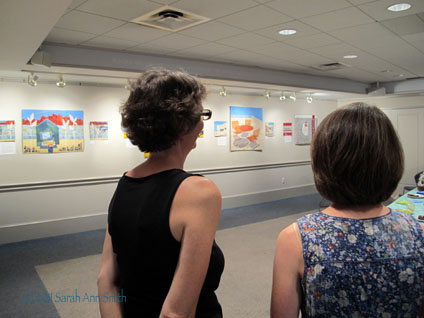
Kate and Deborah looking at the room and show

and

"Letters" quilts and the four Frayed Edges. We are standing in the same order as our quilts: Deborah's inspired by letters home, Kate's graphic novel-inspired pieces which will find a home at her Bowdoinham Library, me with pieces inspired by the Getty Museum, and Kathy's chicken who became Tillie of Tillie Lays an Egg (with permission of the author)

and that’s it for the day….  I’ll post again about the Frayed Edges FUN as well as our Letters Quilts.  Of course, I think I had better go take good pictures of the quilts…would make blogging about them a lot easier, eh?  That’s it for today…stay tuned!


Clothed in Color–more photos

Saturday, April 16th, 2011

As I promised on Friday, more pictures!   A while back, Kris C. asked in a comment for more detail photos in general…of  course we ALL want more pictures, so here you go–ask and it shall be given!  And I’ll try to include more close-ups in the future.

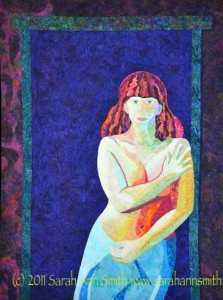
Here's the overall quilt

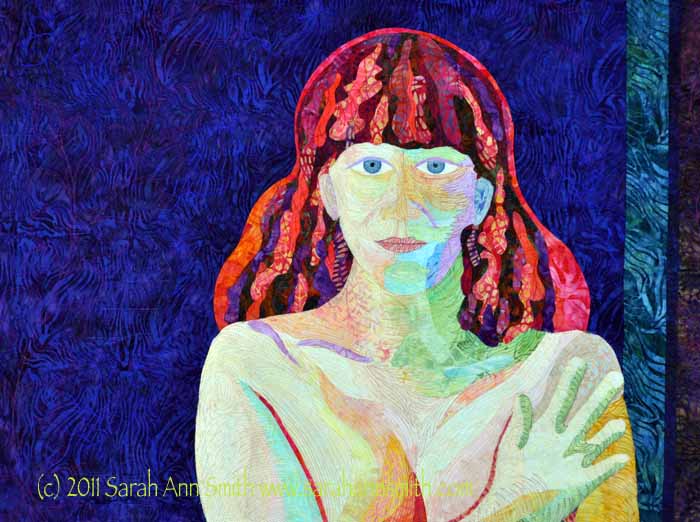
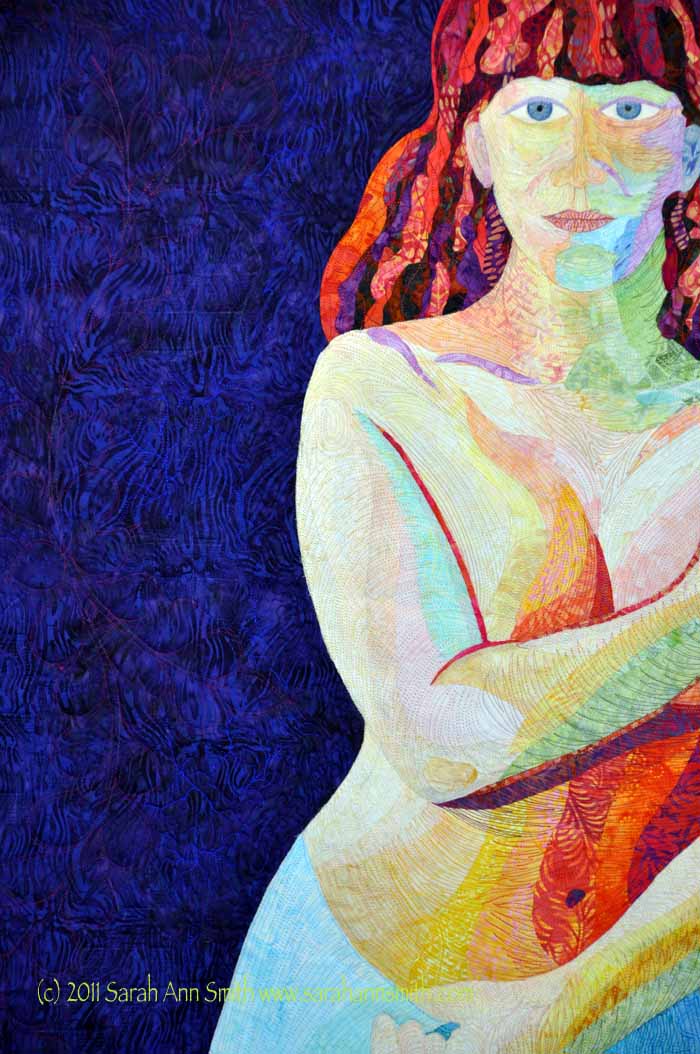
The detail photos are large–you should (in theory) be able to click on them to see them a bit larger and therefore see more of the quilting.  All of the color on this quilt comes from either the cloth or the thread–no paint or pencils on this one!

Clothed in Color, detail 1

and another:

Clothed in Color, Detail 2


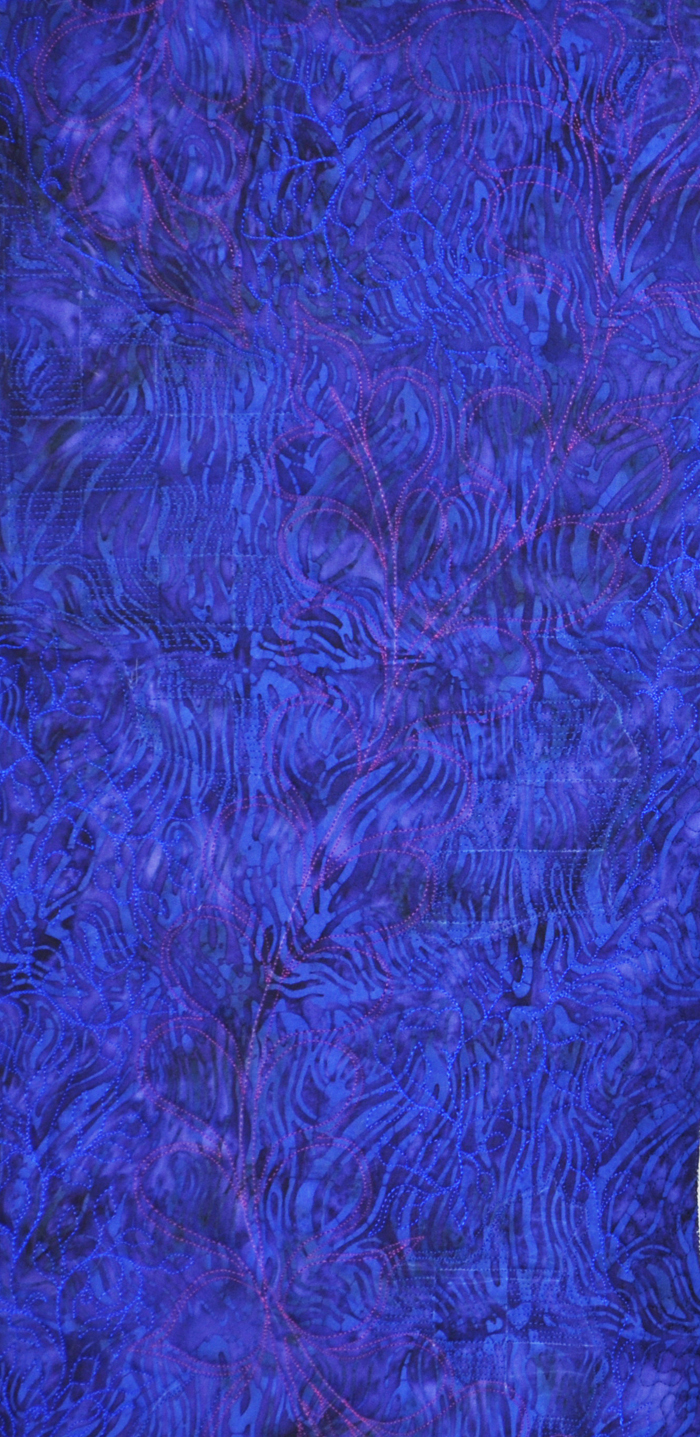
And a few more…these are cropped sections so I’m not sure how well they will display on the internet at internet resolution….

This feather is in the background to the left of the figure. Thanks to Photoshop Elements I lightened the color a bit so you can better (I hope) see the stitching. The background quilting is a checkerboard in some areas (you can still see the chalk mark guidelines) and freeform small vine in others.


Another feather in the border, along with words facing both forwards and backwards. The words include the things that are the good and the not so good that make me the one caught in the space between: mother, daughter, wife, quilter, tired, artist....

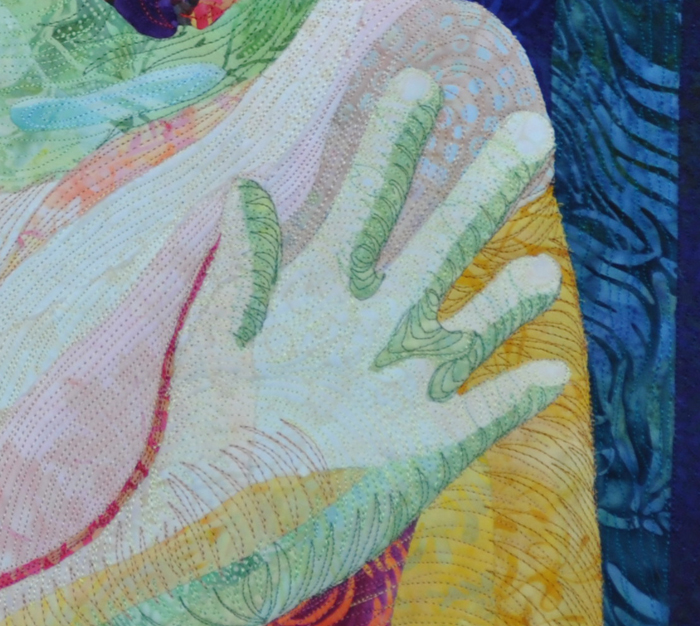
And a close up of the hand:

Hand by the shoulder in yellow, orange and green


Once again, great comments from my readers lead me to add a PS:

Kris…believe it or not, the “nested “V” is really easy…..  think of it as free-motion multi-stitch zigzags…..   I’ll do a row or two of nested Vs in one color on the edge of the arm (darkest), ditto on the opposite side in the next-to-lightest (or whatever color is suitable for the way the light falls).

For example, on the arm I’ll use maybe 4 or 5 colors….depends on the value (light-light medium-medium-medium dark-darkest tones) on that part of the arm.  The trick is learning to see what is there and then break it down into colors.

Sometimes, I use my thread stash as a guide.  If I have four colors that blend well but not five, then the color shift must be done in four colors.  You’d think with the gazillion threads I’ve got I’d have plenty, but when you really start sorting out tones, it’s amazing what you DON’T have LOL!  I’ll sometimes alternate a row or three of two colors to try to blend it, letting the eye “moosh” the colors into a seemingly smooth transition.

I can’t recommend “The New Drawing on the Right Side of the Brain” by Betty Edwards highly enough, or a drawing class in general.  Learning to actually SEE what is there, as opposed to what you think is there, is wonderful.  Also fiddling around with the filters in Photoshop Elements (just the cheapie version is unbelievably robust) can teach you to figure out where the lights, mediums, darks and deepest darks are.   I was surprised when in a drawing class 20 years ago someone said the darkest part of the face is the line between the lips.  It actually is, but I’d never noticed, and now I believe nostrils aren’t far behind!

Thanks to all who take the time to comment on my blog… I learn so much from all of you and your questions and comments!