email Youtube

Home
Galleries
Blog
Workshops & Calendar
Store
Resources
About
Contact

Archive for the ‘PTQG’ Category

Maine Quilts–before the show opens…

Sunday, August 3rd, 2008

Have you ever wondered what a quilt show looks like before the quilts are hung?  I always had, and two years ago when I first volunteered to help hang the quilts, I got an inkling.  With permission from the powers that be at Maine Quilts, I took some photos during set-up this year for sharing on my blog.  Here,

Quilts in pillowcases

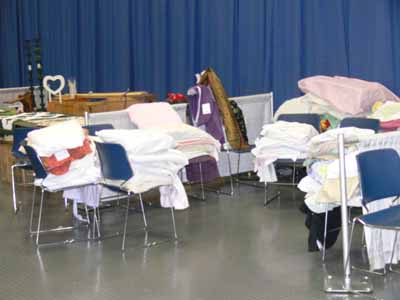
The quilts have arrived.  Since quilts come in from the entire state, there are regional drop-off centers (most often quilt shops) where they are logged in as they arrive.  Entrants must fill out their forms and place their quilts in a pillowcase or cloth bag, then deliver their babies to the drop-off point the Saturday before the show opens.  A volunteer for each drop-off point then drives all the quilts to Augusta where the show is held at the Civic Center.  If, like me, you have “fussy” quilts that need special handling, you may ask for special permission to hand-deliver your quilt on the Wednesday before the show, when the quilts are hung.

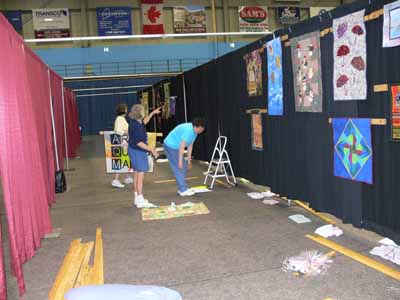
This photo is looking down the center aisle toward the main entrance.  The juried quilts are on the left, the display section is on the right, and special exhibits are either in the first aisle or the last aisle or two (depending on how many special exhibits).  Fortunately, the Civic Center is adding black drapes.  The blue ones aren’t so bad but those faded burgundy..well…bleah! They suck the life out of some quilts…. Anyway, the juried quilts are hung first so they are up and done in time for judging on Thursday (the show previews on Thursday evening and opens for Friday, Saturday and Sunday).

Down the center aisle

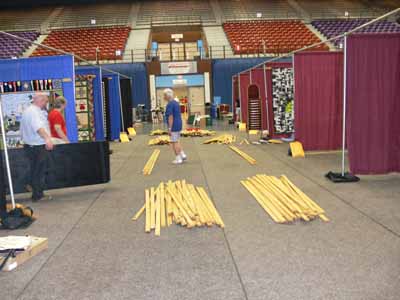
Those wood slats are for hanging the quilts.  My dream is that someday the Civic Center will have ALL black drapes, then we can spray paint the used-for-years slats so they disappear against the drapes.  In the meantime, Paula was responsible for one of the best improvements in the hanging process this year, bagging hanging loops in pairs by quilt number–saved a TON of time and frustration.  Nancy Z. is responsible for the other great improvement…for quilts hung one above the other, the lower quilt had loops that were adjustable with toggles (you know those push-clamp-gizzies on the drawcords of parkas?).  This made leveling the quilts a breeze!  Thanks Paula and Nancy!!!!

Here’s the aisle that I helped hang, which included the art quilts in the juried section and the special exhibits from the Art Quilts Maine chapter.

Aisle with rods

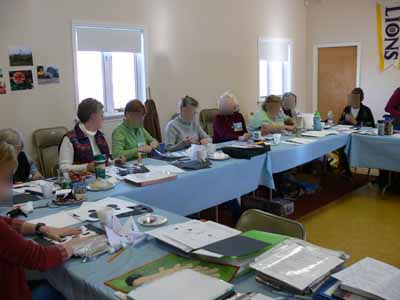
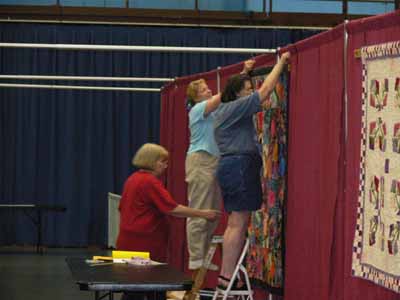
Here are some ladies hanging a large quilt in the Display section…as you can see it takes teamwork to get the quilts up and level.  Someone several years ago designed a spreadsheet that is fantastic…each aisle has a layout of which quilts in order, their width, which size bar is needed, how many inches between the quilts and (another new and appreciated item) a 12 inch wooden ruler to measure the distance between quilts so you don’t reach the end of the row with too much or not enough room!

hanging a large quilt

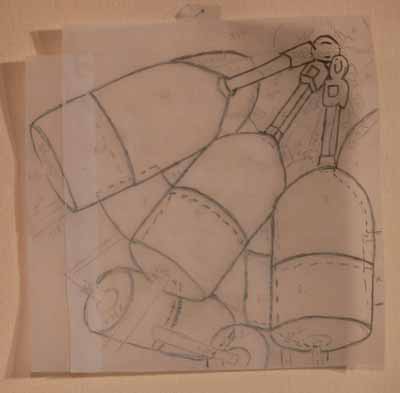
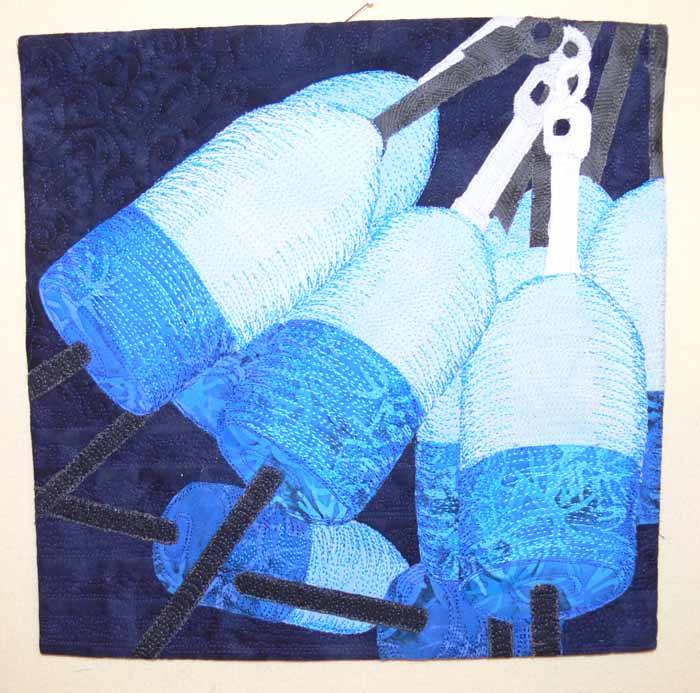
One of the best parts of hanging is getting a sneak peek at the quilts.  I got to hang my own Naiads, and it was in great company.

Art quilts aisle

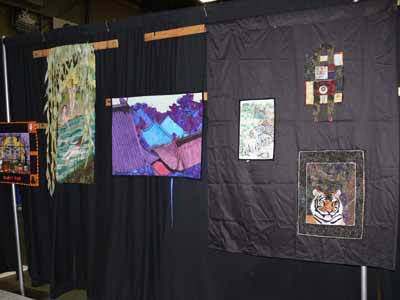
To the right is Mathea Daunheimer’s Rooflines quilt (which hoooray for her! got juried into Tactile Architecture in Houston at the big International Quilt Festival), plus another of Mathea’s pieces and two tigers from Rana O’Connor.  I’ll show you a close up of Rana’s two tigers in my next post, but wow!   I’m thrilled to have met her a couple years ago; she lives down near Portland and I wish our paths crossed occasionally….for now, just occasional e-mail.

I’ll be back with a post in a couple of days.  Thanks to the wonders of WordPress I can write my blogs BEFORE I head out the door, then they “publish” when I set the date.  That means I’ll have goodies for you while I’m off teaching at the Images quilt show / Lowell (Mass.) Quilt Festival.

Cheers, Sarah

My Buoys Quiltlets

Tuesday, June 3rd, 2008

Not so long ago I shared the results of the Coastal Quilters’ Art Quilt Challenge, to take Dwight P’s photo of ropes and buoys and make a 10 by 10 inch art quilt. I decided to crop the photo tightly on the buoys and make a piece with the same values (light and dark areas) as the original photo, but in entirely different colors. I couldn’t decide whether to go with blues or with something wild, so I decided to make two! First, I enlarged the cropped photo to the desired size, then traced the outlines by taping tracing paper over my computer screen and, with a pencil, lightly marking the outlines:

Buoys traced

The first is in blues (click to make larger):

Buoys 2 Blue large

The second is in pinks and purples:

Buoys 1

After the group quilts have been displayed at the statewide annual show, Maine Quilts (in Augusta the last weekend in July), I’ll mount my two pieces on stretched cloth the way I did with the crane (below) and offer them for sale. (The crane is for sale, too….. write me if you’re interested or go surf the for sale gallery on my website). The instructions on how to mount works this way is included in the Creative Quilting With Beads book for my second project. Hmm… don’t think I’ve shared that one yet, have I? Guess that’s a new blogpost! Anyway, hope you like the style (click for larger view):

Flying crane

ABCs for Coastal Quilters

Sunday, January 13th, 2008

Class in progress

In three short months, I’ll be packing to head to my first MAJOR teaching venue: the AQS show in Paducah, Kentucky (it is amazing how quilters instantly know what you mean when you say Paducah, but mention it to the average soul on the street and you have to tell them it’s in Kentucky!). I will be teaching a whole bunch of things, including a class I had –until yesterday– never taught! EEEK! So the Coastal Quilters, my local guild chapter, came to the rescue. I offered to teach the class for free if they would be my guinea pigs…er…. ummm…. test-run for the class (picture above…but I blurred the faces because I forgot to ask each one for the OK to share pics)!

The class members were WONDERFUL, and I came away with several outstanding suggestions for improvements, learned that I needed to show how-to-steps on one project, and also decided I need to add one more exercise (meaning I have to delete something else) that pulls together everything we did in the class (and thanks to mulling it over with Roxanne by e-mail afterwards, have figured out how to do that!). All this is complicated by the fact that I function/teach better in a six hour format, and AQS prefers to offer 3 hour classes!

With “The New Drawing on the Right Side of the Brain”

I started the class with a plug for a book that I consider nothing short of being able to work near miracles: The New Drawing on the Right Hand Side of the Brain and its companion workbook (in the picture), both by Betty Edwards–the two together cost less than US$ 24. I worked my way through the book with two friends, Linda C. and Lunnette H-H., when I lived on San Juan Island (before moving to Maine). We were all “OK” at drawing when we started (Lunnette was better than that, tho), but my gosh did I ever learn. Our before and after self-portraits showed dramatic improvement. I figure if *I* can learn on my own like that, anyone can. As a matter of fact, it was so useful I think I’ll do it again later this year. The titles above are hotlinked to the books at Amazon.com.

The class is called “If you can write your ABCs, You can draw”, and I started with a slide show… I need to improve the technical side of things, but as I showed more and more photos, all of a sudden I could see folks engage and start to “See.” As I told them, learning to draw is really about learning to SEE, then reproducing what you actually see (as opposed to what you think you see!). But, you don’t have to be Rembrandt…. you can use “aids.” some of these are the computer and your camera. To create “With These Hands,” I had my friend Marie take a few snaps of my hands…. I held them something like this:

Modelling how I held my hands while Marie took the picture

Then I enlarged the photo on my computer, taped tracing paper to the screen (moving it as necessary) and traced the outlines and major contour lines (light, medium and dark areas). THEN I could transfer those lines to my cloth and create this:

Showing With These Hands…tracing off the computer

One of the most fun exercises (and alas one which will be eliminated due to time constraints, at least from the 3 hour version of this class), was making paper snowflakes to learn to “draw” with scissors, and to look at the concept of negative space:

Snowflakes

Then, a real keeper of an exercise is the “Expanded Square” from the book Notan: The Dark-Light Principle of Design by Marlys Mayfield and Dorr Bothwell (click on the title to see the book listed on Amazon–where it costs mere pennies…way worth it!). This exercise teaches you not only about negative space, but also about balance, rhythm, and possibilities of simple changes. In the book, the authors want you to use spendy black art paper to cut the shapes and glue it to white. Being thrifty (aka cheap) I had folks cut out of common white copy paper and glue it to black construction paper…it works! Here are Betty’s and Prudy’s being-glued examples:

Betty and Prudy’s in-progress Notan exercises
And here are some of the class pieces:

Notan

I learned this week that a crafts center in Ripley, West Virginia, wants to hire me (?!!!!! WOOOOHOOO) to teach a 4-day workshop, so I think I’ll combine this class, my quilting design, a bit of machine quilting, and edge-finish classes into a “The top is done…what next?” class! Zippedy do DAH! In a couple days I’ll post my upcoming schedule of classes…. stay tuned! Cheers, Sarah the swamped