email Youtube

Home
Galleries
Blog
Workshops & Calendar
Store
Resources
About
Contact

Archive for the ‘Edge Finishes and Bindings’ Category

IQF 2012: Monday!

Sunday, November 25th, 2012
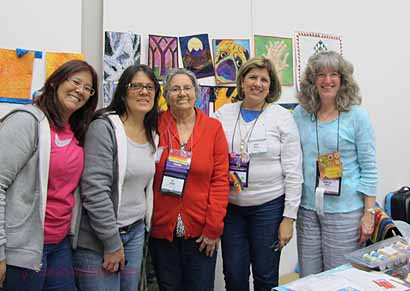
Monday’s Fine Finishes class, all about edge finishes and bindings, included a large contingent from Brazil!

Fine Finishes is one of my favorite classes to teach.  It included PERFECT mitered bindings, facings, piping and couched yarn edges, plus other techniques depending on the student’s speed.  So far, every single student has been able to get a perfect miter and corner–in part because I show them WHY they get rounded or dog-ear corners instead.  Then, I’ll have them do a couple INcorrectly on purpose so they can write notes right on the sample to remind them later what to do.  WOOT!  I really am going to write a book, I promise!  Someone find me an extra month or two, OK?   Anyway, my teaching week began late on Sunday when I arrived in Houston, went over to the awesome IQF Teacher’s room, and sorted and organized the things I had shipped ahead to be ready for each day.  On Monday–the last day of Quilt Market (for the trade only), I had a nearly-full class which was awesome.  On the left I had about seven ladies from Brazil, and one was kind enough to translate for the others whose English wasn’t as strong as hers:  thank you Leticia!  Great results all around!
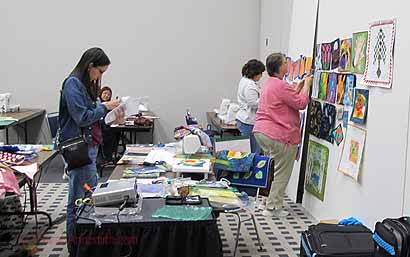
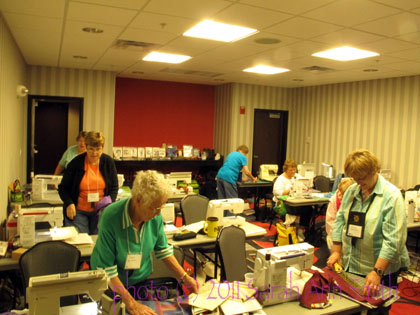
Here, some students come up to look at my samples up close and take photos to remind themselves when they get home. I’ve found that the samples tend to get buried under papers and whatnot if students take them to their machines, so am now asking students to come up and examine as long as they wish but leave the samples up so others can do the same! Plus, they’re more interesting to look at than a blank convention center wall!

Janome-America has been SO GOOD to me for over 8 years now, including me in the artist and teacher program.  Because I’m familiar with Janome machines, I always ask to teach in a Janome classroom.  For Monday’s class we got the 3160, a smaller Janome that is a great travel-to-class/retreat machine as well as a good machine for at home. It’s not heavy like my beloved 6600/7700s but has almost as many features.  The students did great on them!  Thanks to Janome for sponsoring various machine classrooms at IQF!
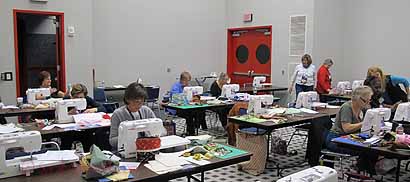
Students working!
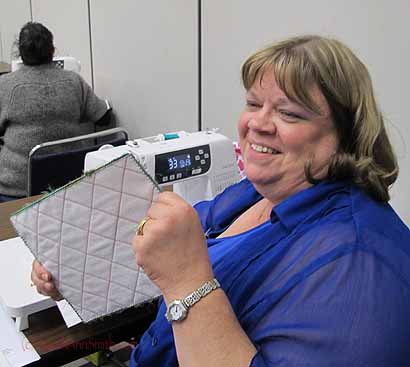
Happy! Learning to make a couched-yarn edge which is great for small pieces, fabric postcards and other small items. Would even work great on a light-use vest!  Note the white fabric in the practice sandwiches:  students can write notes to themselves right on the sample so the notes don’t get lost!  The samples are sized to fit inside a plastic page protector and can then be put into a binder for future reference.
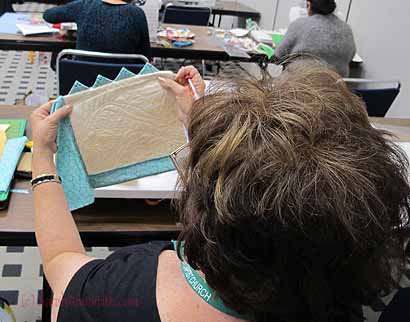
One student who worked quickly wanted to learn prairie points, so we whipped out Susan K. Cleveland’s Prairie Pointer tool (see it here). Prairie Points can be inserted into a facing, as here, or if you want the to point towards the quilt, insert into a traditional binding.  Check out the rest of Susan’s stuff…. her books are GREAT!
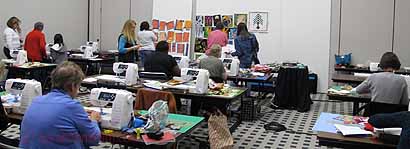
Another view of the class, with my samples on the large 4×8 sheets of foam core at the front. I selected small quilts with a wide range of edge finishes to share so students can see how to apply what they are learning in class to their own quilts.
One goal for my week in Houston was to go to the original Ninfa’s, on Navigation street, more than once. I started with Mexican food at Guadalajara on Sunday evening (walking distance from the convention center), then went to Ninfa’s on Monday….for the first time!
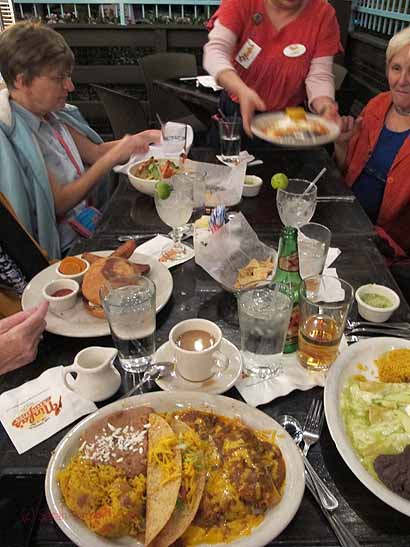
OH MY….. my stomach gets happy just LOOKING at this photo. The plate in the bottom center is mine: El Henry: a taco, tamale and enchilada with frijoles and rice. The absolutely astonishing fact is that I did not put on weight that week! And I ate myself silly-happy!

Susan Brubaker Knapp and I met online and became friends…. we both have two kids about the same age, work as teachers and authors, and love machine quilting!   When we realized we were going to be in Houston together, dinner was a must!  Susan knows Kelly Jackson of I Have A Notion (here), so we gathered up a group and went to Ninfa’s.  Believe it or not, we were NOT tipsy in this photo, just totally relaxed and happy and having fun!  I was on the phone calling the hotel shuttle (Thank you to Embassy Suites…and now that I have secured my reservation for next year, I can tell you how SUPERLATIVE the service was at the hotel!).
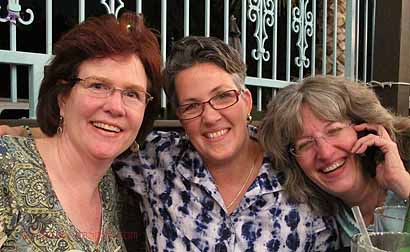
Left to right: Kelly Jackson from I Have a Notion website (great name, great site!), Susan Brubaker Knapp and me, sitting on the patio (yes, there were heaters).

I roomed this year with the wonderful Mary Ellen Kranz, who is a part-time resident here in Maine and a dear friend of one of the local quilt guild (Coastal Quilters) members.  I am SO glad she talked me into using her reservation at Embassy Suites instead of mine.  The hotel was fabulous.  The suite was fabulous. Mary Ellen was fabulous! On the way out of the hotel the last evening, I said I hoped to be able to snag a reservation there for next year.  They took our email addresses and, glory be!, sent us a heads-up email saying when reservations would “go live” since hotels usually sell out within a couple hours of taking reservations.  So I was ready and have my reservation.  NICE…and typical of the great service they offered.  Can you tell I was really pleased?  WELL worth the small extra cost per person to stay there.

Looking at the George R. Brown Convention Center in Houston (about 1/3 mile long!), site of International Quilt Festival, and the lights of Houston, from our 19th floor suite at Embassy Suites.

I’ll be back with more!


Quilt Nebraska 2011, part 2

Tuesday, September 20th, 2011

To continue the story of my trip to Quilt Nebraska….

The next day, Friday,  I was in the new convention center located a short walk (less than from the far reaches of the Hilton in Houston to the convention center floor, and they are all attached!), which was lovely.  The rooms had not been completed when they toured the facility (it was still under construction, the place is SO new), so some of us ended up in rather cozy classrooms.  The students were incredibly gracious about the tight quarters…not one single person complained (at least to me) and they all just figured this was what we had, so work with it, and we did!  I moved my stuff to the floors to create more workspace, and the rooms had these really nice counters in back which we appropriated for work and cutting surfaces.  They also has an awesome front-of-room thing with a white board, pull down screen, and two “doors” that covered it that could hold either a large pad of paper or on which you could PIN stuff… PERFECT!

Here’s the room, showing the granite/stone counter in back where I set up my mini-shop with patterns and books.

Friday, the second day, I taught one of my all time favorite classes to teach:  Fine Finishes.  I teach four basic techniques, but share a number of others.  Depending on how quickly students work, they can explore some of the other techniques… I just have them tell me which one, then I explain that one to them….there are enough hours in a class day to teach all the techiques, so I cover the essentials then let students learn what they came for.  My theory is that I am there for them to pick my brain and learn as much as they can and as I can teach, so I share as much as possible!

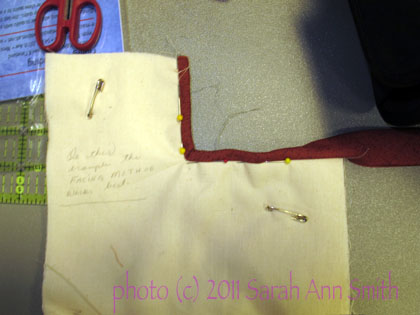
One of the best moments was toward the end of the day when a student asked something I’ve never been asked before:  how to bind an *inside* corner.  Fortunately, I remembered how.  We used one of her quilt mini-sandwiches to do up a sample.  I liked this so much I’m going to make up a sample to have on my own to add to the offerings!

How to bind an inside corner. Notice that the student has written directly on the sandwich—this is exactly why I ask folks to use a light plain fabric (also because it is easier to see what you are doing with plain fabrics)–you can write your notes ON the sample so they never get lost!

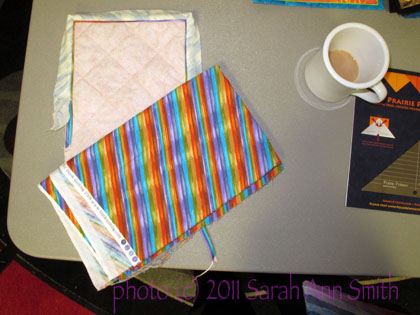
Two students shared their bias strips to try piping with a binding…they look great!

This striped fabric looks a bit bold, but when used as a piping it was subtle and fabulous!

And on Saturday, another totally fun class, Hawaiian Applique by machine!  Stay tuned for the many photos in part 3!


Free-Motion Quilting, revisited

Sunday, October 3rd, 2010

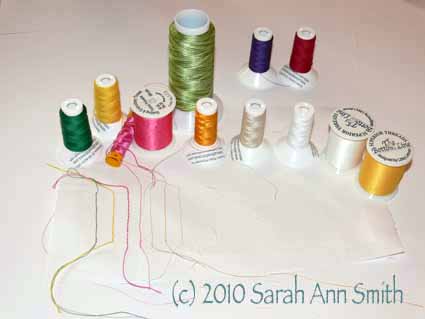
A post or several ago, I shared my new class sampler for my Intro to Free-Motion Quilting and mentioned I had received some threads from Gilbreath Threads to try out.  I used the sampler as a way to test the threads:

From left to right:

  • Gilbreath  Emerald green, cotton 30-wt, #253
  • Gilbreath Yellow wool 12-wt
  • Gilbreath hot pink silk (lying down) Seta Bozzolo 24-wt., #196
  • Superior Threads 40-wt. poly, hot pink #820
  • Superior Threads 40-wt poly, rainbows, green variegated #820
  • Gilbreath orange/mango 40-wt Palio poly
  • Gilbreath 40-wt ecru cotton, 2-ply, #025
  • Gilbreath 50-wt white cotton, 2 ply, #000
  • Superior 60-wt white poly (used in the bobbin), # 621
  • Superior 60-wt  yellow poly (used to sew down the binding), #641
  • in the back, two Gilbreath threads not used because the colors didn’t work for this piece: 60-wt purple cotton, 12-wt deep red cotton

I don’t think I’ve ever used that many different types and weights of thread in one piece, but I’m thinking this could be something to add to my arsenal of techniques! At the top you can see the completed, washed piece before the final line of stitching in the ditch on the binding.

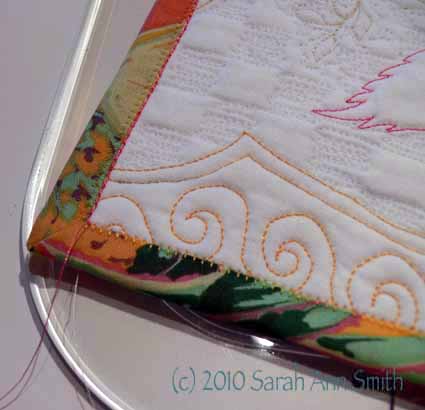
I applied the binding to the back, wrapped it to the front (the front side is 1/8″ wider than the back, so the stitching to apply it is on the back of the quilt, not the binding), and stitched it down using a buttonhole stitch and Superior Threads’ Bottom Line thread, a very fine polyester that blends in and is unobtrusive:

The last step is to use the triple-stretch stitch (a bold straight stitch) in the ditch to outline and accent the binding with the hot pink poly from Superior.  See how it crisps up the edge in this photo which shows with and without the outline stitching?  It’s a design choice; both ways are good, just pick the version you like.

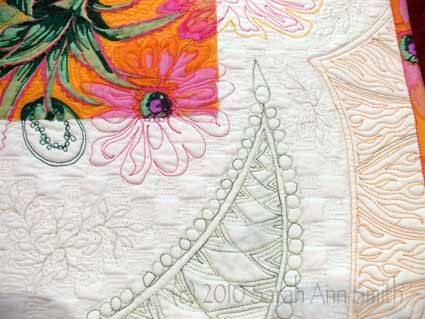
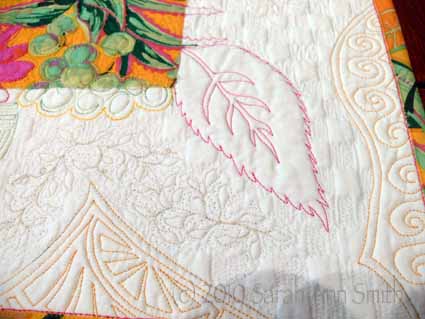
Here are close-ups of the quilting in this big-print class sample, which uses motifs from the Free-Motion Sampler (the magenta and lime quilted grid that is in the book) and my “More Machine Quilting” sampler which is featured on the cover of the book, the peach quilt:

It has been a LONG time since I’ve washed a quilt after quilting it, and was very happy to see how the fabric holes closed up around the stitches.  In this last photo, you can see where I added some stippling (ugh, but sometimes useful) around the ecru leaves after it had been washed.  The needle holes in the checkerboard have disappeared, but you can (faintly) see them around the leaves. The quilt is now dampened and back in the dryer to remove those needle-holes too.  Hmm…good learning piece:  Use thick threads in the bobbin!  Rinse and fluff in the dryer…. will have to try that with a very fused and densely quilted sampler and see what happens to the edges of the raw edge applique…. guess what my next class sample will be?

Hope you’ve enjoyed! Cheers, Sarah

NQA–Quilting and Bindings classes

Tuesday, July 20th, 2010

Four sisters took my class!

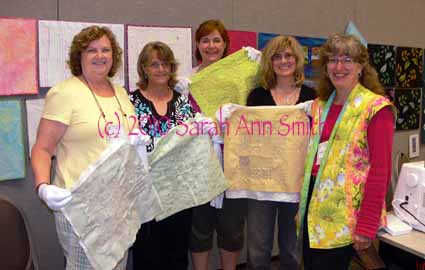
I was SO busy going around the classroom on my first day of teaching, my Intro to Machine Quilting class, that I almost forgot to take pictures.  Fortunately these four sisters wanted a picture with me, so I grabbed my camera and asked the helpful student who took their photo to snap one for me, too.  I LOVE how they all took to the quilting–lots of great designs and work in their class samples.   And can you tell it was hot and humid in Columbus in mid-June…my hair was the frizziest, but I wasn’t the only one in the place whose hair went wild!

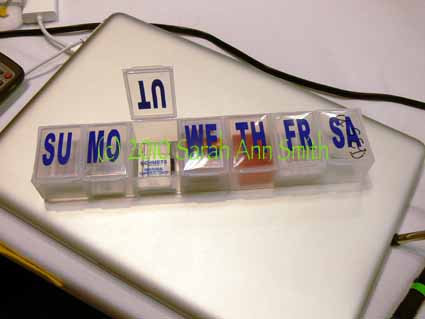
In that class, one student shared her BRILLIANT machine needle storage…yes, that’s a ginormous pill keeper!  I don’t think I’ve ever seen one that large, but it is just perfect for holding those 5-packs of needles, so I’m now on the lookout:

How to store those needle packages

Notice that Saturday is for used needles!  When done, wrap them up, tape the package shut, and the critters won’t get hurt when scavenging at the dump (and neither will the garbage guys).

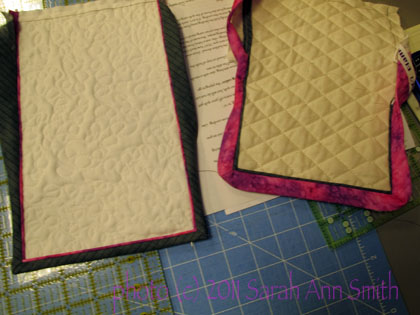
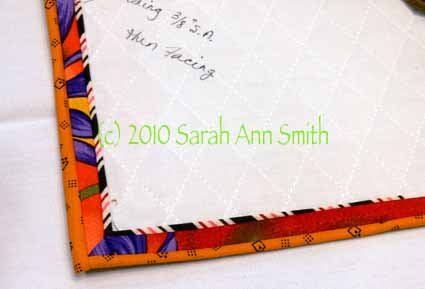
Speaking of Saturday, that was my Fine Finishes class–with 24 students, which I discovered is simply too many for such a hands-on class.  Next time I’ll set a ceiling of 20 or even 18 so each student gets more of my time.  I really liked this student’s sample using a striped cording on the inside, then a stitched-down strip (the print), then a very skinny bias binding on the outside.  I really like the thin-thick-thin look!

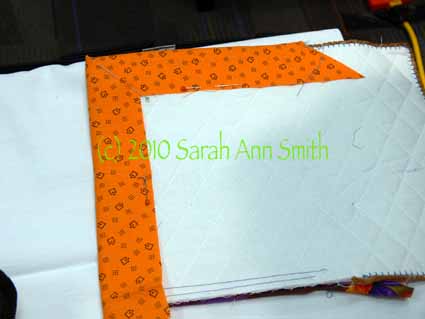
Here’s the back, where she used a VERY wide binding which will cover all the previous lines of stitching…cool beans (to quote my teenager!):

Nicely mitered on the back, too!  The other side of her sample shows the couched yarn edge-finish!

I DID take more photos during my Decorative Stitch Applique class, so that’s up next!