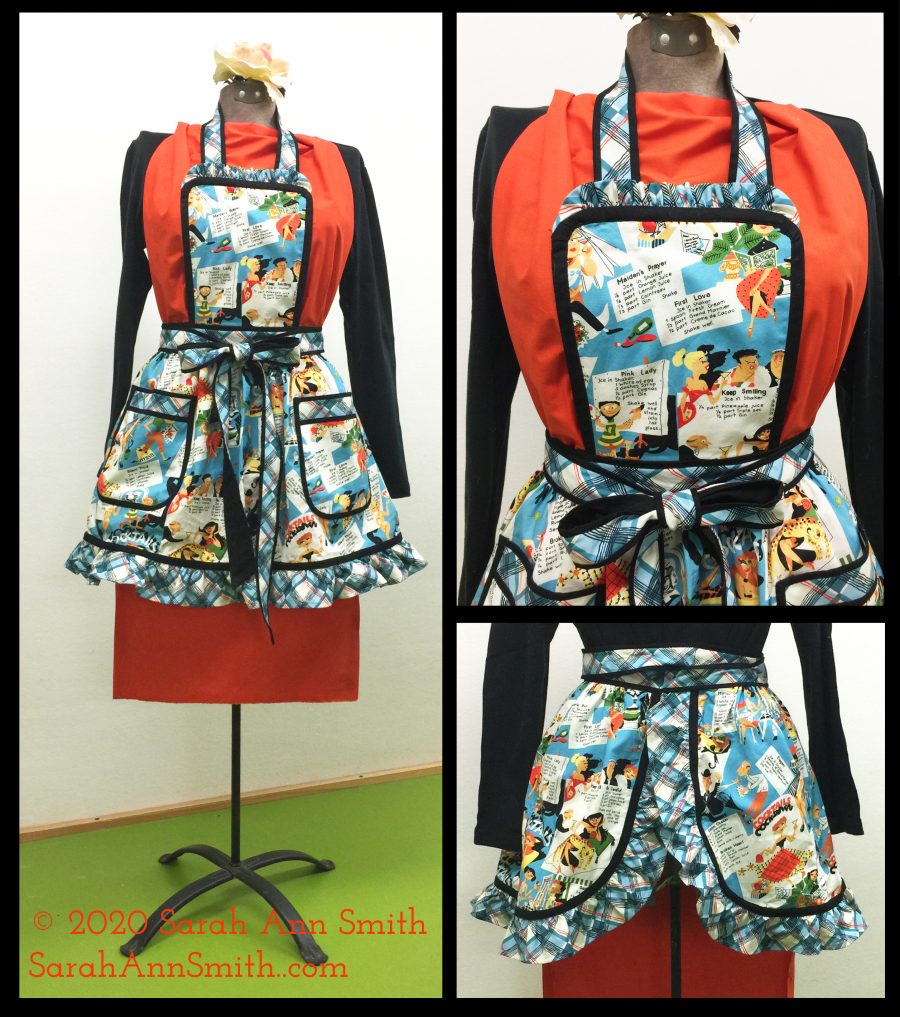
Rockin’ Retro Apron in Kitschy Cocktails, Part 2
For Part 1, go here.
Today we’ll continue constructing your fun and funky Rockin’ Retro Apron. Fabric requirements, layout/cutting instructions and making the apron skirt are all in Part 1, here. You can download a formatted and numbered pattern–free in 2020!–with ALL the instructions and requirements at Rockin’ Retro Apron in Kitschy Couture. The fabric was provided as part of the Michael Miller Brand Ambassador 2020 program, and my brilliant Janome M7 Continental is provided to me as a Janome Artisan. Thank you!
Make the Apron Ties and Neck Strap
- Spray starch the bias-cut plaid for the ties and neck strap. Stiffening this fabric slightly will make the following steps less fiddly.
- Sew an inch-wide strip of black to the short pointy end of each of the waist ties. Press as stitched, then press seam allowances toward the black.
- Sew the plaid to the black apron ties and neck strap only. Do not sew the waist portion, which is handled differently.
- Press as stitched. Press seam allowances toward the black. Turn straps/ties right side out. You can use a narrow pole/stick/curtain rod to make this easier: turn the first couple inches by hand, then slide onto the top of the curtain rod and gently coax the entire strap until it is all right side out.
- Press, centering the plaid and coaxing the seam allowances toward the black. Because the black is cut wider than the plaid, it wraps to the front to create an accent edge. The seam allowances should be underneath this accent edge. Leave the square end open. On the pointy end, trim to 5/8” from where the short black piece is stitched to the plaid. Turn under about 3/8” and press. You can machine or hand stitch this opening.
- Stitch on the edge of the black or in the ditch so the seam allowances stay where they are supposed to. This will help a lot once you start wearing and washing it—worth the extra effort.!
Make the Apron Bib
FITTING NOTE: Because of different body types, you will want to adjust the width of the bib and the length of the bib and strap to flatter your body. Cutting measurements are for my medium-sized build. I actually wish I had made the bib an inch shorter, so those with an average or larger bust size should be fine. Measure before you cut and before you sew.
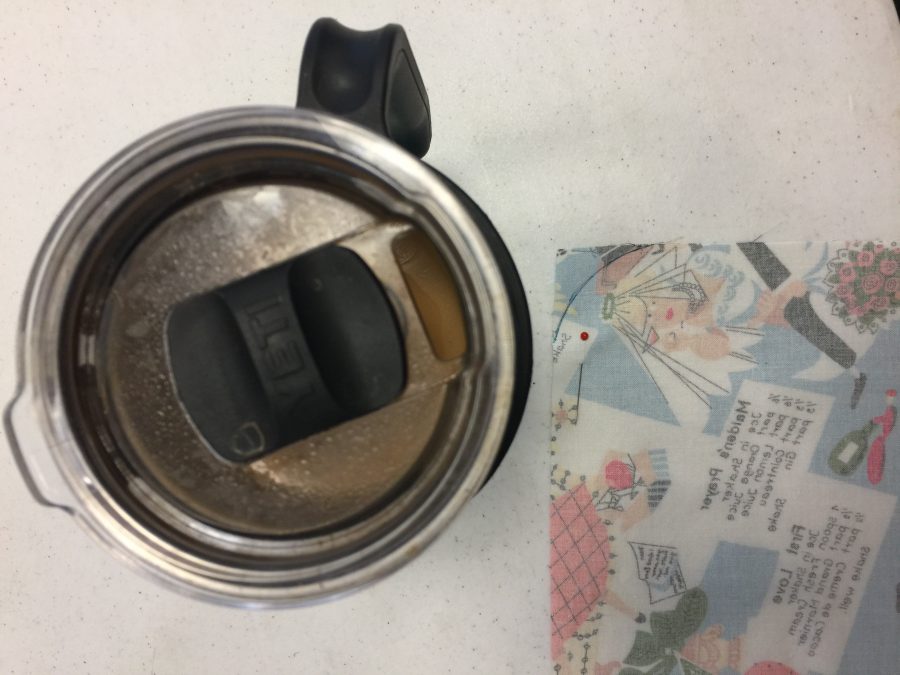
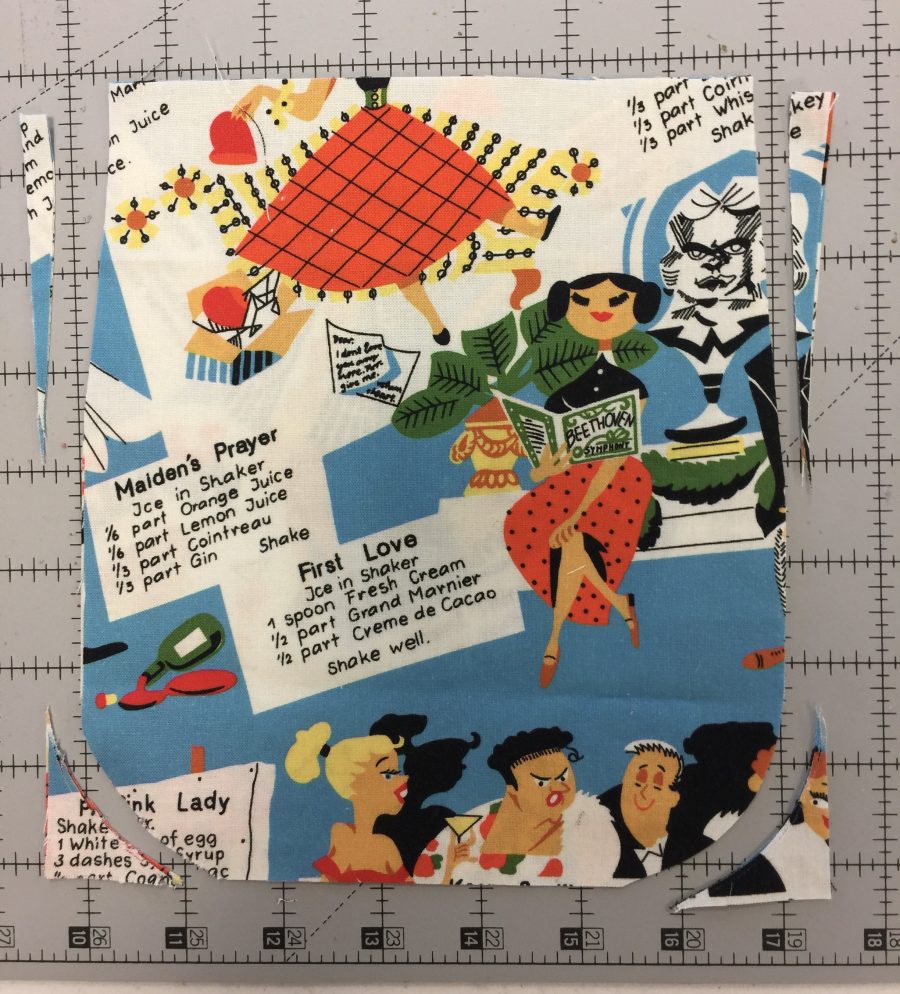
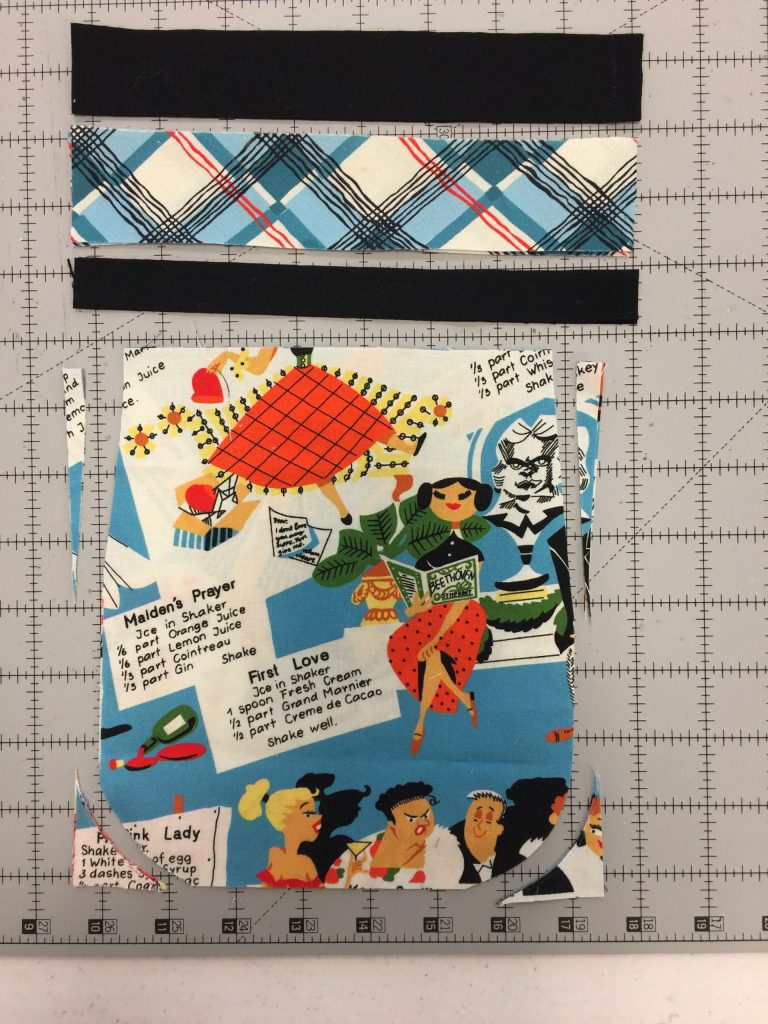
- Use something round to curve the top edges of the apron bib, see first photo above. I used the lid of my travel mug. Just draw a line around the curved edge, then trim off on both sides of the bib, second photo.
- Optional: taper the lower edge of the bib by trimming two skinny triangles off the lower edges. Mine were about 3/8” wide by just under 6” tall, center and right photos.
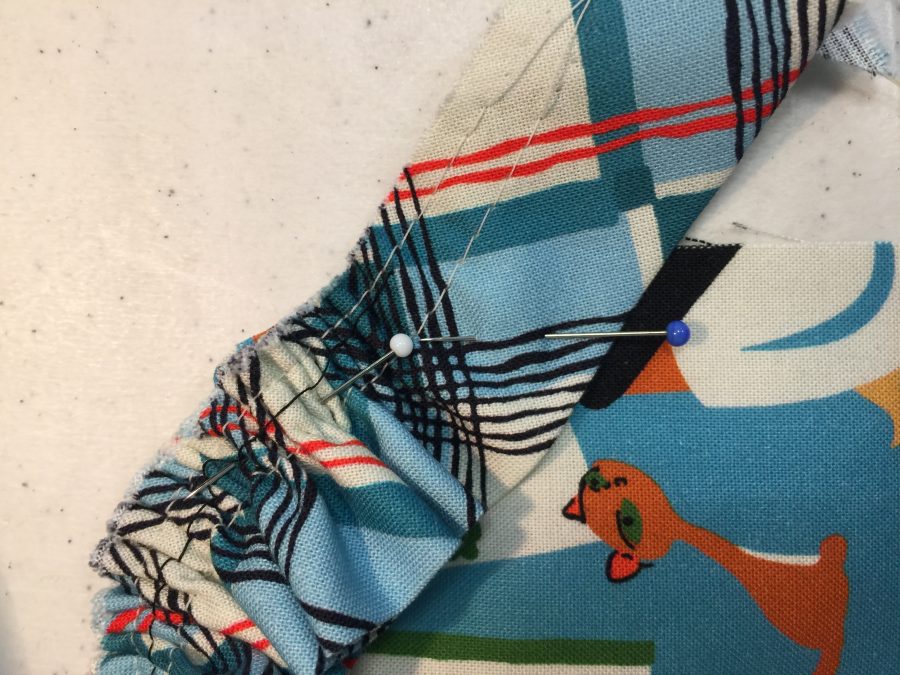
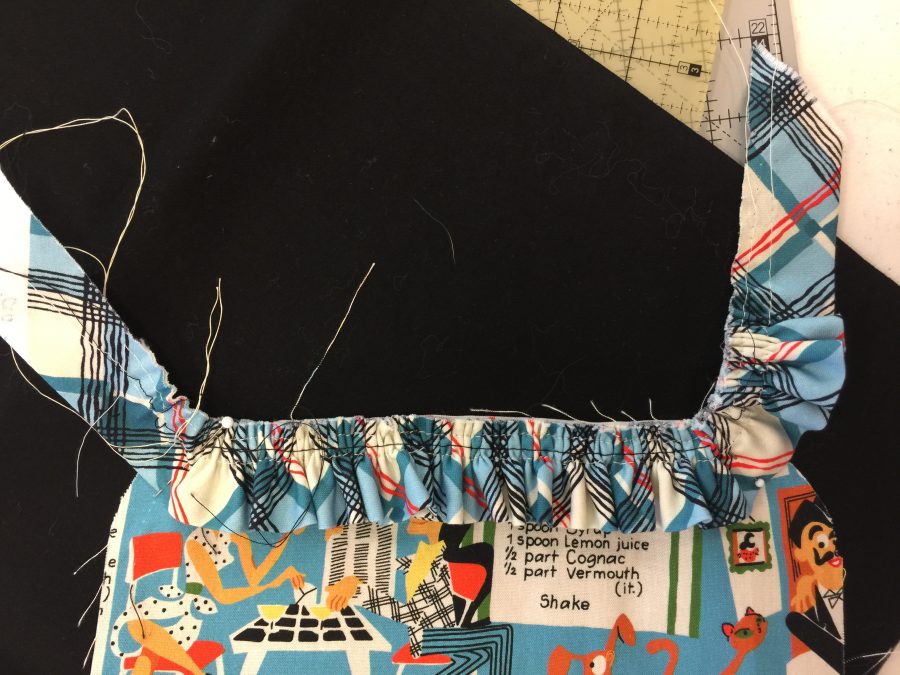
- Gather bib ruffle. Fold fabric in half, wrong sides together. Sew basting lines at ¼” and ½” and gather as before. This will be a very tight gather, which helps the ruffle stand upright. If yours is too long when gathered to your preference, trim as needed—see next steps.
- Pin ruffle to the bib lining (inside piece). See photos below.
- Curve the ends of the strip up, see second and third photos, below. Be careful (if this sort of thing bugs you) to make sure the curved ends are symmetrical. Ahem—guess which one I am.
- Tuck one end of the neck strap between the ruffle and the bib lining, photo on right below. Be sure the plaid side of the strap is as pictured so that it will face the correct direction when the bib is completed.
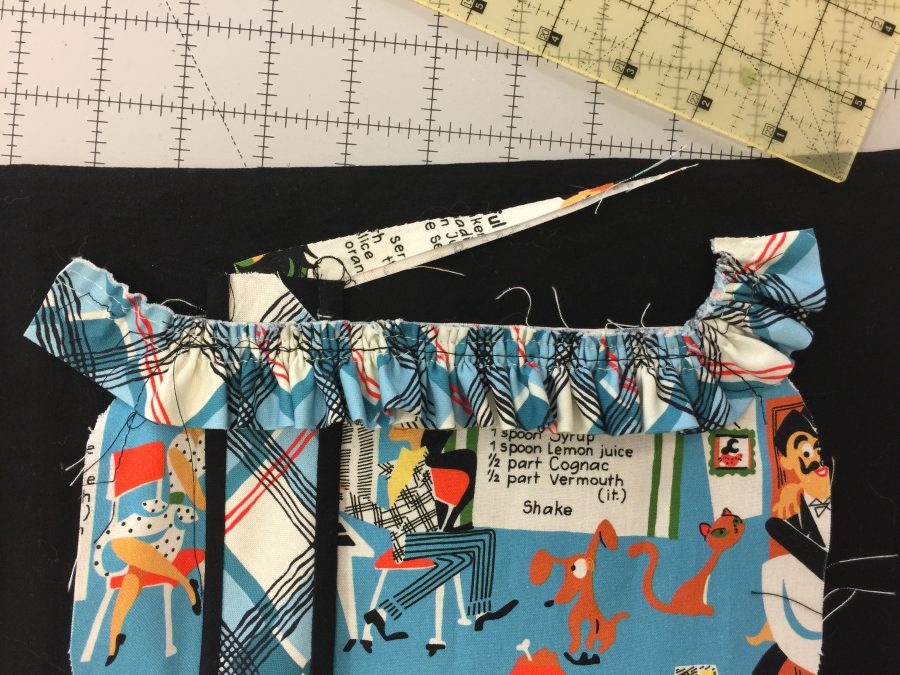
- BASTE by machine.
- Turn up to make sure it looks good. Adjust if needed, especially on the ends.
- Prepare front of bib.
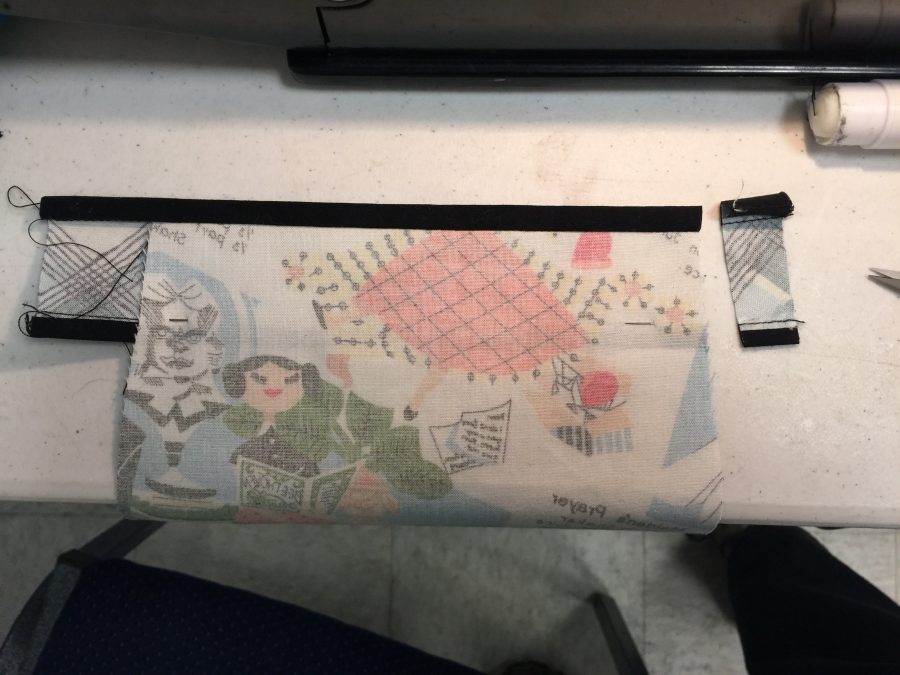
- Cut black bias the length of the outside edge of the front bib plus 1” just in case.
- Press ¼” under along one long edge.
- Pin to the right side of the bib front with the fold edge turning under towards the center of the bib.
- Baste on outside edge.
- Press towards the center, easing excess in the rounded corners.
- Applique/stitch the black trim to the bib. I used glue stick to “pin” the black in place and sewed used the edge-stitch foot/quarter inch foot with the flange and a straight stitch.
- Pin bib front and bib lining right sides together. Sew 3/8” seam. You may wish to sew a basting stitch seam first to make sure everything at the top is correctly placed and the corners and ruffle turn nicely. If you do, adjust as necessary, then sew the final seam.
Prepare the Pockets
- Create plaid-and-black band for the pockets.
- Sew a ¾” strip of black (straight of grain) to bottom edge of starched plaid strip. Upper photo.
- Sew a 1 1/8” strip of black to the top of the pocket. Upper photo.
- Sew wide black strip to the back of the pocket with a ¼” seam. Press as stitched, then wrap the strip around the seam allowance.
- Wrap the bias unit to the front and applique in place. Stitch in the ditch or on the edge of the black. Photo above.

- Press under ¼” on long side of 1 1/8” bias black edging that is long enough to go around the pocket. and extend about ¼” beyond the top edge. If making two pockets, repeat. Turn under top edge of black trim even with top edge of plaid section.
And that’s it for today! In the final post we will manage the waistband–it took some mental gymnastics to figure out the easiest way to encase all raw edges, have long ties, and have it look good, but I figured it out. Stay tuned!
Remember, you can download the complete Rockin’ Retro Apron pattern here. It’s also listed under Tutorials (lotsa good free stuff on there) on my Resources page.