email Youtube

Home
Galleries
Blog
Workshops & Calendar
Store
Resources
About
Contact

Author Archive

Quilts at Quarry Hill

Friday, October 24th, 2008

Wild Goose Chase at Quarry Hill

A few months ago, I did a trunk show for the Assisted Living unit at Quarry Hill, the retirement community near me and where my mom now lives.  It went so well, they invited me back already!   Patty took pictures this time, so I have a few to share of me in action.

I began with my very first quilt (photo above), from Quilts! Quilts!! Quilts!!! by McClun and Knownes, which is still one of my favorite beginners’ quilting books.   The quilt is a Wild Goose Chase variation…for those not familiar with traditional quilting, the triangles are thought to look like geese in flight.  This quilt was made TWENTY (shriek!) years ago, and is still in regular use in our living room.  It has a few rips and wear spots, some fabrics are more noticeably faded than others, but it’s still a good quilt.

I progressed through my journey as a quilter, sharing a 51×51 inch log  cabin I made for an exhibit (it didn’t get in!).  This quilt used four EXPENSIVE (but glorious) yards of Judy Robertson’s hand dyed fabrics (click here to visit her website, Just Imagination)

SAS with From Sea to Shining Sea

This fabric is why I decided to learn to dye my own fabric!  Tho, as Judy says, dyers are some of her best customers…they understand what it is that she does that is so special, and why it costs so much!

I also shared my two-sided quilt Koi:

Koi

The Coastal Quilters Chapter Banner, which I designed, our group made (I did the top border, a fair part of the center and the quilting), is a perennial favorite, with folks identifying various local landmarks…the person who spots Beech Hill preserve’s blueberry barrens wins brownie points!

Coastal Quilters Chapter Banner at QHill

Like my rudimentary PVC pipe quilt rack?  Very easy… two 90 degree elbows, three long pieces of pipe, two “T” Connectors and two more small bits of pipe (four would be better) for the feet….   It was fun to go and share…now, to get ready for Houston!!!! Festival starts next week!

Autumn in Maine

Tuesday, October 21st, 2008

No, I have not died, fallen prey to a disease (other than possibly slothfulness where blogging is concerned) or any other horrid thing…just been really busy working, getting ready for Houston, teaching, meeting with my Frayed Edges friends and other sorts of good things.  Today, I thought I’d share some of what I got to see on my way home from teaching on Saturday the 18th…glorious! (PS..photos are clickable for a larger view)

Autumn 2008 #1

This photo was taken from the driver’s seat, window down, in Hope, on Route 17.  Route 17 is a 2-lane highway (by-way) that runs from Rockland to Augusta and beyond.  I take Route 90 West to 17, then turn north/west to Augusta, the state capitor.  On the way home, at about 5, the sun was low in the sky and the air was golden……

Autumn 2008 #2 Rockport hills

Farther up the road, closer to Augusta,  the trees on my side of the road cast their shadows all the way across the road and into the open field bordered by these trees:

Autumn 2008 #3

And a closer view:

Autumn 2008 #4

And that hill from Hope down to west Rockport….

Autumn 2008 #5

Quilting Arts’ Embellishments e-newsletter–my leaves!

Thursday, October 9th, 2008

Hi all…have been working like a mad hatter this week, and HOPING to find an online link to the current QA Embellishments on-line, but not having much luck….that luck just changed…. this is what the top of the newsletter looks like…
eqa104.jpg

To see my article for them, click here!

Not long ago I shared some leaf printing…well in the October 6 issue, #104, this online newsletter featured my tips on how to preserve leaves for printing later…like in mid-winter when there are no leaves (but time to do the printing).

Since the newsletter is still current, I won’t duplicate the information here at this point….  In the meantime, if you’d like to subscribe to the QA newsletter, click here.

I’m actually in the process of quilting the fabric pictured… it is the LAST project I am making for my book / manuscript…. a collective HOORAY please….. at least the light at the end of the tunnel isn’t quite so dim!   Back in a few days I hope, Cheers, Sarah
Twilight Pond

Saturday, October 4th, 2008

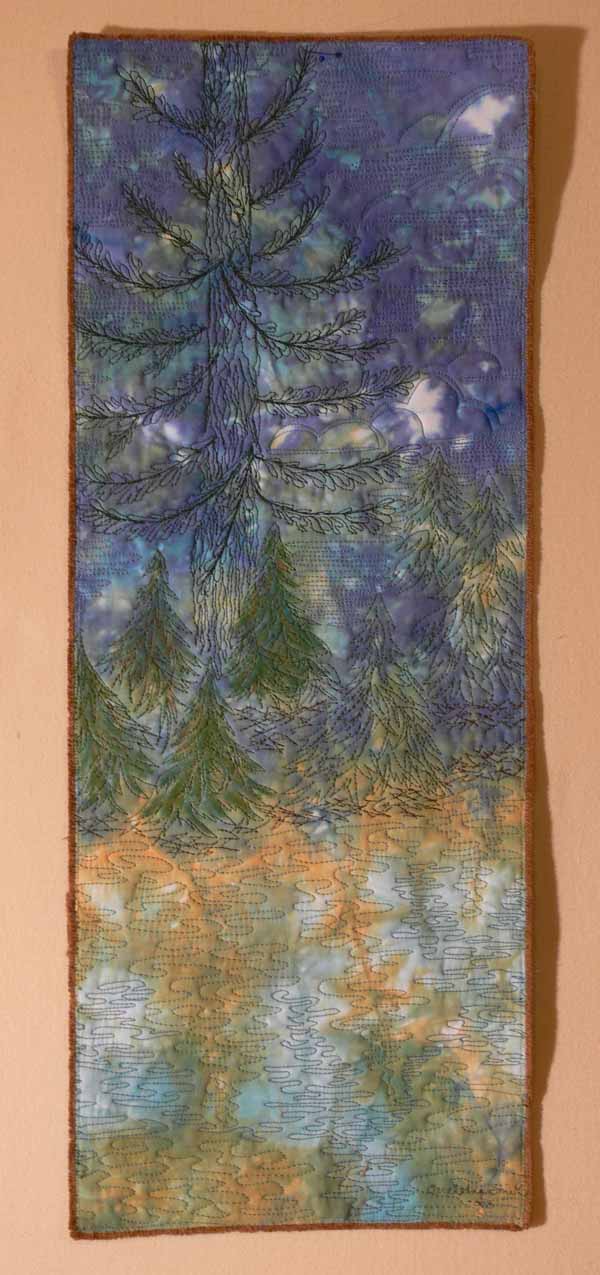
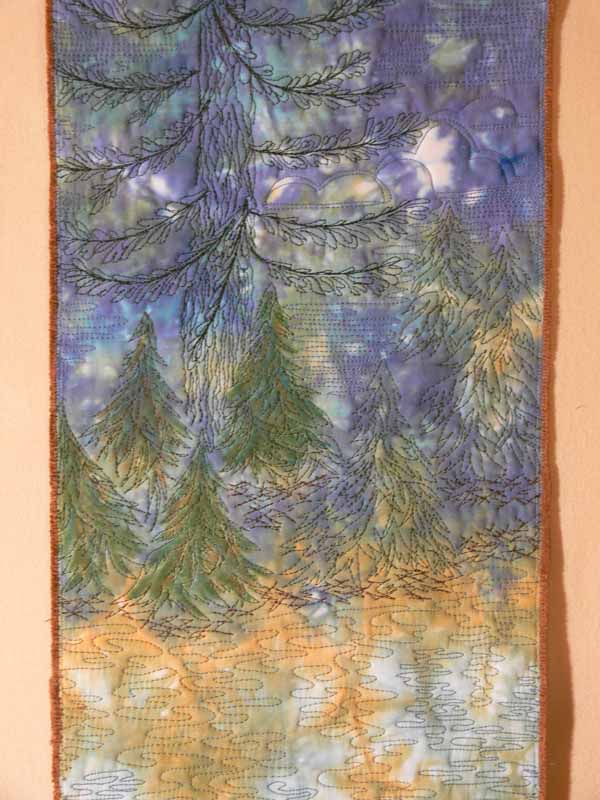
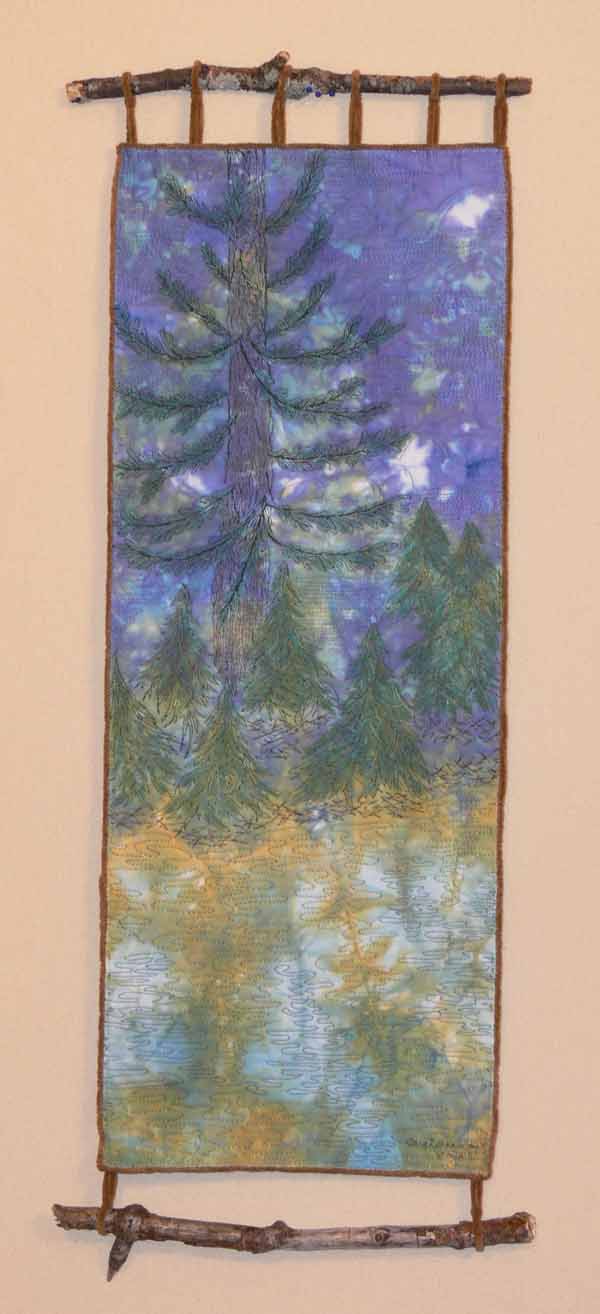
I swear it has taken longer to get around to writing the blogpost and take the pics than it did to quilt this little piece!  Well, not counting the nearly two years it has taken me to get around to quilting it either!  Only REALLY long-time readers will remember that in 2006 I did my first dyeing workshop with Carol Soderlund, which I blogged about here — there are actually three posts, late August and September 2006 I had this tiny bit of fabric… 9 x 22 inches or so… leftover, so one day at the end I grabbed a plastic cup, squished the fabric into the bottom and added some yellow dye or something (?).  Then I squished in more fabric and poured on blue dye.  My tablemate Debby Harwell took one look at it when it came out and said “OH, it looks like trees and a pond!”

Twilight Pond

(Note:  pics in this post are clickable to make them a bit larger.)

Of course I could never see the piece as anything else SINCE then!   Finally, I told myself I abso-positively HAD to get around to quilting something to take in to sell at Ducktrap Trading company, the gallery where I sell some of my work here in Camden, Maine.

My thought was to keep this a wholecloth.  However, when it was done, it kinda lacked OOMPH–the colored quilting helped, but not quite enough.

Twilight Pond, before most of the NeoColor pastels

So what does any self-respecting art quilter do?  Add paint! I had just begun in the photo above, when it occurred to me that I really ought to get a before photo (and should have gotten a before quilting, too, but too late now!)… here’s a detail:

Before, detail, adding paint

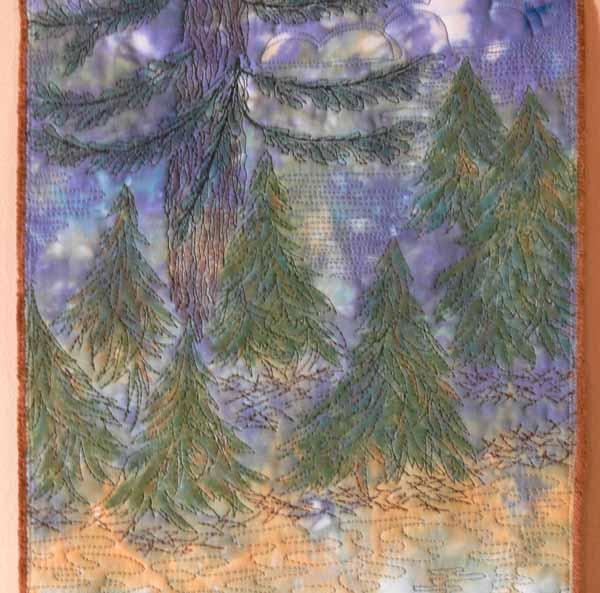
Then I went to town and colored all the smaller trees, the trunk and the boughs of the Maine state tree, the White Pine.  The branches reach out like arms, hands turned up to the sun….. here’s another detail to show what a difference a bit of color makes…MUCH better!

Painted….

Since I’m not too sure how water-soluble these babies are (very I think) I sprayed the painted area with spray fixative to keep it from running in case of accidental moisture.  I couched yarn to the edges (one of my favorite edge finishes for art quilts that are on the small side), then thought some wind-fall branches from the yard would be perfect.  Making the hanging loops and sewing them by hand was a bit fiddly, but it worked.  Now, to go in and do the miserable color editing behind the quilt so it merges with the background of my website, get it posted on to the site, listed for sale, then do an invoice for $250 and take it down to the gallery and pray someone in this sad economy is still buying art!

Demonstrating at Make It University’s Open Studios!

Wednesday, October 1st, 2008

I’m thrilled to be able to share that I will be demo-ing leaf printing at in the Open Studios part of the Make It University area( — more info is at Make It University (MIU)) at the International Quilt Festival in Houston, currently scheduled for 8-10 pm Wednesday on sneak preview evening!  MIU is sponsored by Quilting Arts, LLC, and is part of their mixed media branch of things (along with the magazine Cloth Paper Scissors which also has a cool article on sketching / journals in the issue featured on the current webpage).

leaf on cloth

For my I-hope-to-finish-it-in-this-lifetime-manuscript my last project to make is for a small quilt I’m calling First Frost.  It will be either a table runner, a wall-hanging or both.  Finished dimensions will be about 15×60 inches.  I wanted to offer a project that would entice folks to play with all the glorious metallic and holographic threads currently available….   so I dyed two-plus a bit-yards of cotton in these beautiful clear, light blues and lavender.   Then I collected leaves …..

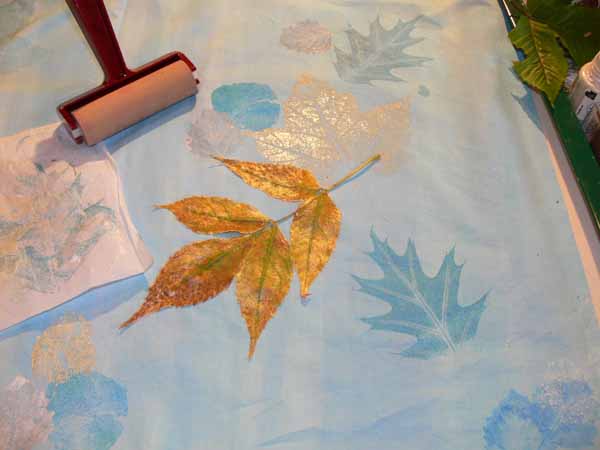
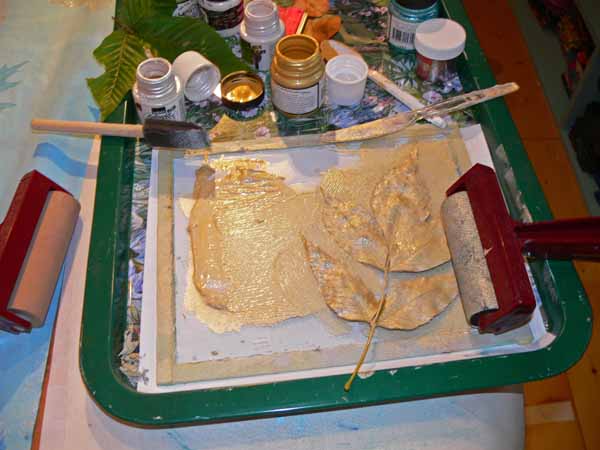
The first time I did leaf printing I simply used a sponge paintbrush, daubed on the paint, then pressed the leaf with my fingers.  This time I have better supplies and technique (I hope).  I wanted a smooth, clear print.  To get that, it works a lot better if you pour paint on a piece of glass, roll a sponge brayer, then  roll the paint onto the leaf.

roll the paint onto the leaf

Notice there are TWO brayers in this picture…the one on the right is actually a black sponge brayer with gold paint on it.  The one to the left is a “soft” rubber roller.  In the top photo, you can see a piece of parchment paper on the side.  Place the leaf on the cloth, paint side down.  Cover with the parchment paper, then roll with the soft rubber brayer to get a smooth even print.  It is important (ahem) that you not have wrinkles in the plastic underneath and not be on the crack in the table, else they will show up in the leaf print.  Guess how I remembered that one.  A couple of times.  Ahem. (grin!)

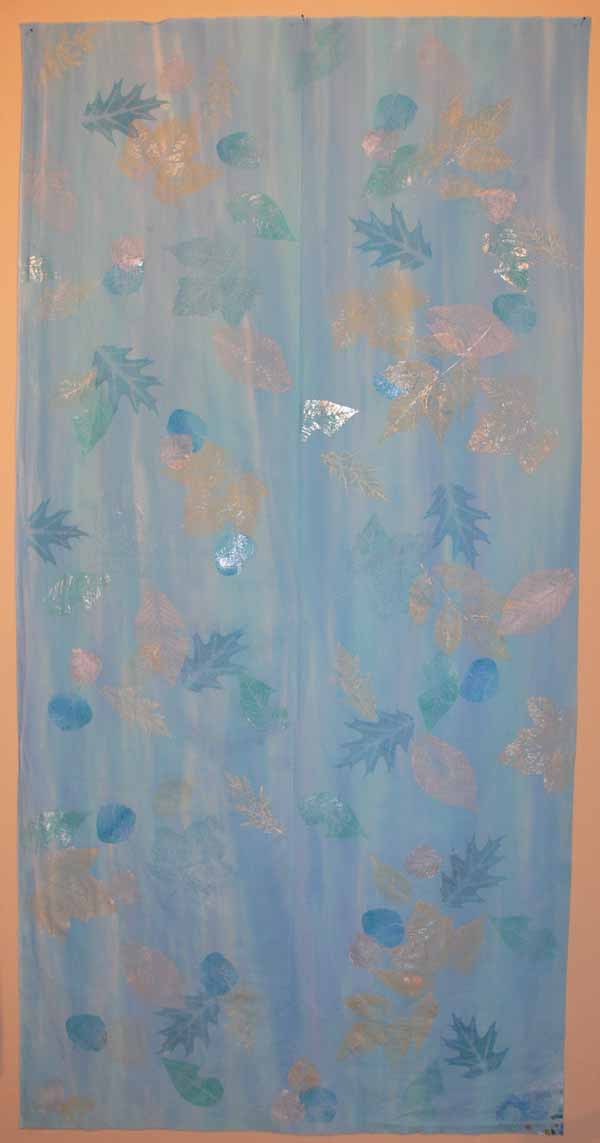
Here’s the 30×60 inch piece of cloth…I will split it down the center to have a two-sided runner/hanging:

Full length of cloth

The paints are all metallic…blues, silver and gold (mixed with pearl).  Then I plan to quilt from both sides…with metallic in the needle and a matching heavy poly in the bobbin… then when I outline the leaves on one side, it will make a skeleton “print” on the other side…. Can’t wait to see how (if?) this works!)

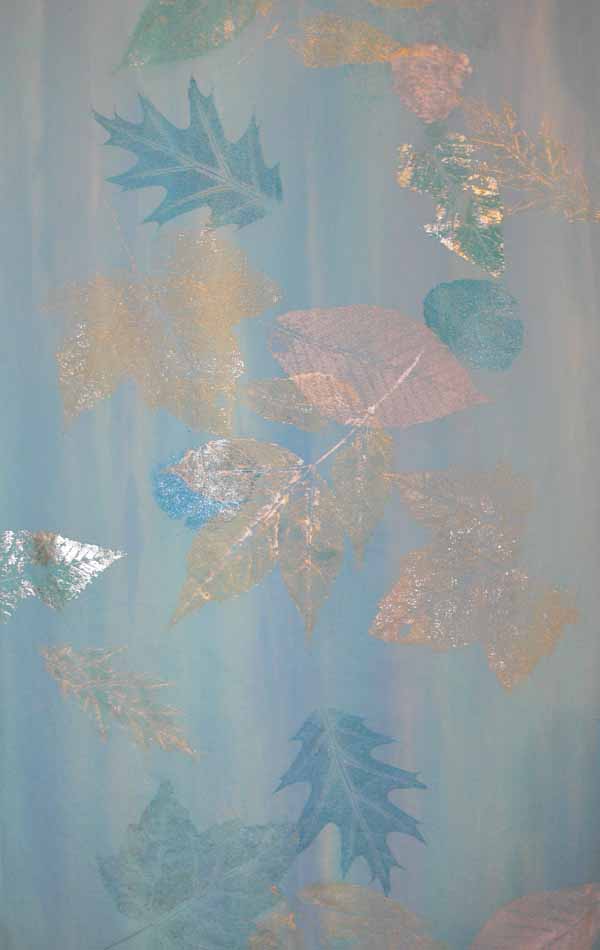
Here’s a detail:

detail

I’ll be demonstrating how to do this, how to preserve leaves for leaf-printing in winter when the trees are bare (I have just harvested leaves for this coming season!) and maybe some Shiva paintstik techniques as well.  Evening is not exactly my best time of day (think snooze) so I’ll bring some chocolate…please come and help me stay lively and say hello!