email Youtube

Home
Galleries
Blog
Workshops & Calendar
Store
Resources
About
Contact

Archive for the ‘Inspiration’ Category

Mt Washington–inspiration everywhere

Wednesday, September 24th, 2008

Creativity is like bunnies.  All you need is two and a little bit of time, and then you have LOTS, it just takes (ahem) practice.  Even in the few buildings and spaces of the top of Mount Washington and the observatory, I found lots of inspiration.  There is an OLD building half dug into the rocky top of the mountain that used to be an old hotel.  Inside were these gems….

An old lamp:

old lamp

Wouldn’t that scrollwork and fill-pattern be wonderful in an applique or a quilting design?

And the woodstove…the top:

woodstove 2 top

and the front…what a design!:

Woodstove 1

Then there are the converging lines of the observatory rooftop / pavers, with the guys at the railing:

converging lines

Then there’s that cairn of rocks….

cairn

Repeating lines in the stairs:

Going up the stairs from the parking area

And the stairs from the parking area up to the observatory from the side:

stairs, side view

A grate over that stream by the entrance (with part of my shadow):

grate

The screen in the Japanese (!!!) restaurant in Gorham:

Screen, Japanese restaurant
Repeat after me:  harmony, rhythm, repetition….  and again but in circles:

lanterns

I love that photo…the contrast of the red and black, the dark of the background/ceiling, the lines in the lanterns, the round shapes….

It all goes to prove that there are ideas for quilts, applique, piecing and quilting design EVERYWHERE…. once you get into the habit of actually SEEING what is there, instead of passively looking and absorbing, you can find inspiration all over the place…. the creativity breeds like bunnies….. the trick of course is weeding out the good ideas from the bad, but that’s another blogpost entirely!

The Frayed Edges, September 2008–parte tres: Mandalas!

Sunday, September 21st, 2008

square notebook

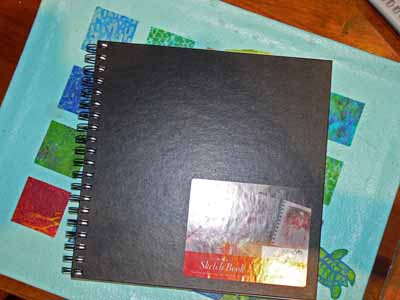
Earlier this year, four of us (Deborah was in Texas) were able to drop in and say hi to Natasha Kempers-Cullen (one of the early leading art quilters, been in Quilt National, website here), whom Kate, Hannah and Deborah know… I blogged about it here.  After that visit, we talked about how fun it would be to do a day workshop when Deborah said she would be able to come visit!  Our schedule and Natasha’s fortunately overlapped on just the right day, so on Monday, Sept. 8, we trooped on over to Natasha’s studio at her house.   Our supply list included a square sketchbook / notebook, and art pencils, pens, pastels, watercolors, whatever.  I brought my Prismacolors, some Aquarelle / watercolor pencils, a waterbrush, a few fine-point sharpies (and went to Target afterwards to buy a whole set….ahem!), some old magazines and papers for collaging, and a lovely Canson square notebook.

Natasha has some seriously cool books in her library, including these:

Book 1

book 2

book 3

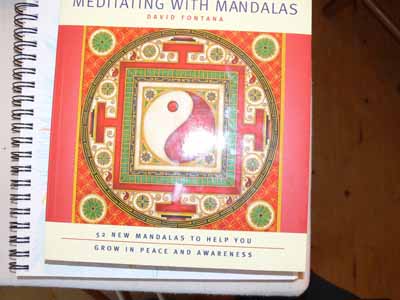
I LOVED the artwork in this last one…good eye candy….

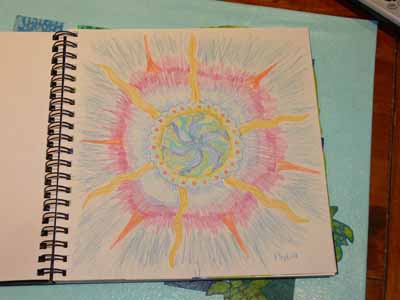
We worked quietly at first…which is of course hard for me.  I enjoy the camaraderie, but our first assignment was to take a half  hour and draw a mandala starting with a free-hand-drawn circle in the center.  Here’s my effort…so-so.  The center is OK, but I clearly rushed to fill in the outside.  Bleah. I don’t work well when rushed.

SAS first mandala

I liked my second one, a collaged piece, better.  Natasha had a selection of small “centers” from which we could choose one.  I deliberately chose one in colors and texture I don’t normally work with.   Here’s how it looks:

collage mandala

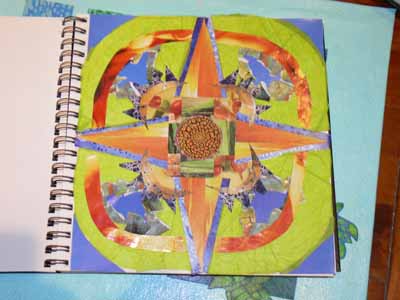
I think the green overwhelms (at least it wasn’t where I wanted to go with this one), but it’s not too bad… I really like the shrimp soup bowl I cut into quarter-wedges….Due to the papers I had on hand, it became more of my Caribbean colors and less of the earthy thing I had intended when picking the center….no gardening magazines around, so no good supply of leaf greens and browns!

Then my words mandala:

SAS words

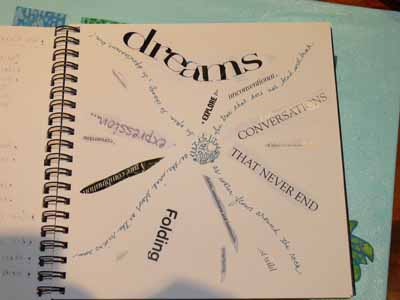
So for flexibility my words and phrases are:

(handwritten)

  • as water flows around the rock
  • the tree that does not bend will break
  • as the wind blows as the rivers run
  • be open to change, be spontaneous, live

(from magazines)

  • folding
  • wild
  • resurfacing
  • clarity, smoothness and luminosity
  • explore
  • unconventional
  • conversations that never end
  • of wisdom and knowledge
  • convertible
  • a rare combination
  • rejuvenation

Hmmmm….

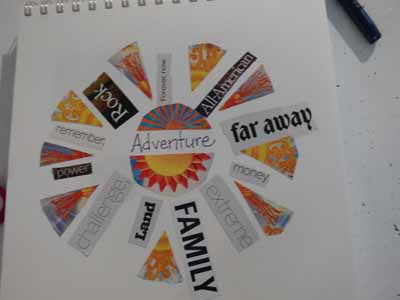
Natasha usually works with longer workshops, not one-day classes, so she had to abbreviate some of our projects, but gave us ideas to do for homework and exploration.  Then she had us pick a word…she has these angel cards with words like Freedom, Adventure, Flexibility, etc.   We had to write the word in the center of the page, then cut other words from magazines that interpreted the angel-card-word.  I got flexibility.  Hmmmm. So I used some very “expanded” definitions of flexibility!  Here’s that page:

Here’s Kate’s–seriously improved with color wedges

Kate’s words:

And I’m not sure who did this one…. ladies….help me out here–if I guess correctly from the handwriting, this is Deborah’s:

?? words

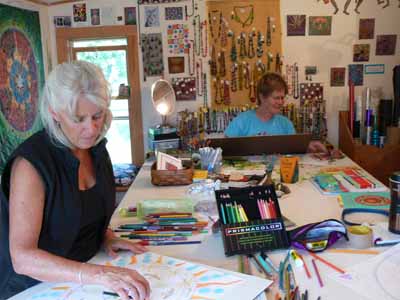
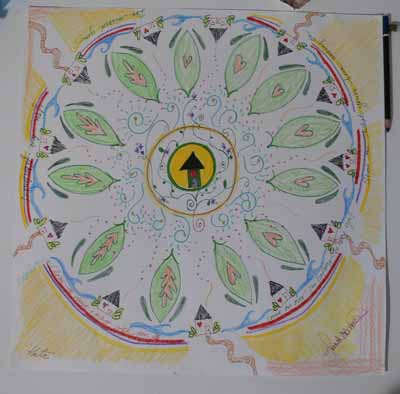
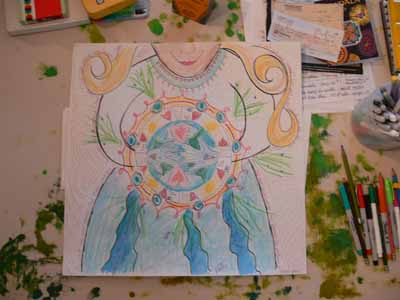
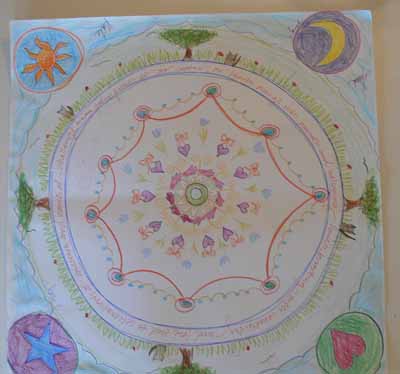
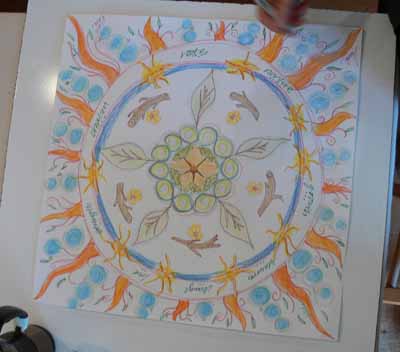
Our final project was a group exercise, with Natasha participating.  She gave each of us a large square of paper (about 20 or 21 inches).  We were each to begin with the center and draw something in our style and/or colors that interprets Friendship.  Then every 5 minutes we switched off the papers, doing two full rounds on each piece.  I think in the exercise book from which Natasha was working, they suggest 7 minutes or ten, but Kate needed to be home in time to meet her first grader at the bus, so we did the up-tempo version LOL!   at each round you pass your paper to the left, and then continue in the vein of the piece you receive.  The longer the process went on, the more freed up we became, working REALLY quickly to try to fill in and make the imagery or colors we wanted.  I was REALLY glad to have my watercolor pencils… I’d quickly scribble in color into a shape, then use my waterbrush to moisten and intensify the color.

I’m NOT good at translating abstract concepts into specific imagery, or at things like this.  Once I got the first part over, tho, it was easy to simply do a round that was a riff on what someone had done before….   For friendship, I fell back on a tried but true:  I made a circle with an acorn in the center, from which five trees (us, duh) grow.  Here we are working madly, towards the end.  This first shot is of Kate, Hannah and Deborah’s table:

Kate, Hannah and Deborah at work

And here’s the table I shared with Kathy and Natasha:

Kathy, Natasha

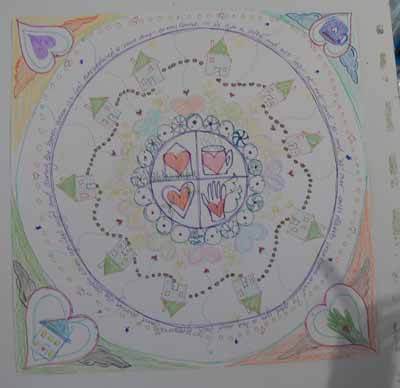
And here is what we had at the end…we all signed all of them…fun!  This one was Deborah’s; she began with the mug, heart, home, and hand:

Deborah’s

Hannah’s:

Hannah’s

Natasha’s—she began with the hands, Deborah added the arms, torso and chin, so I felt I had to add the skirt… it went from there!

Natasha’s

Kate’s:

Kate’s

Kathy’s:

Kathy’s mandala

And finally mine:

Mine

Then we all split to the winds, kids, families and real life

Mt. Washington

Thursday, September 18th, 2008

This is a brief interlude to the Frayed Edges fun to return to the summer vacation fun, then I have a ton of stuff I’ve quilted to share… for once!  It has been SO LONG since I’ve been able to make stuff, and it feels SO GOOD… anyway….   after visiting Niagara Falls, we had a full day’s drive to Gorham, New Hampshire.   The weather observatory there sees some of the most wicked weather in the lower 48 states, and the highest recorded wind speed on earth.  It is always fun on the evening local news to see what’s the weather atop 6000-ft. Mt. Washington.

NH Stream

This beautiful stream is just as you cross to the entry gate.  You are greeted by this sign, which I thought was hilarious in a dry-humor sort of way:

Entry shack

And entering the park/facility:

Entry

The road up was wonderful, and you passed from forest to alpine zone remarkably quickly…the treeline in the mountains of the western states seems to be at a much higher elevation.  Here’s the lower part of the road, with lots of deciduous trees:

Mt. Wash road, lower portion

First Scenic view, from passenger-side window:

First Scenic view

Second scenic pull-out…glorious…the sky went on forever…..

second scenic view

Then crossing above treeline…barren!  You can just imagine the winter winds here….

Above treeline

And the first view of the observatory–the low, hunkering, rounded building flat on the top of the mountain:

Mt Wash Observatory

Once you reach the top (we drove, obviously tho you can hike), you can get to the tippy top easily.  Here are the boys and Paul.. it was windy and nippy, about 60, when down at the base of the mountain it was about 80:

P and boys atop Mt. Wash

And rarely enough, a photo with me in it:

Paul and Sarah

Notice the tote…one of these days I’ll take pics and share… my summer sewing treat was to make it.  It’s not for a book, not for a class, but just for fun!  Anyway, back to the trip…. here’s a picture of Eli sitting next to a cairn of rocks someone had built, with the vista:

Eli, rock cairn, vista

And Paul and the boys looking at the signage and the view:

Paul and boys and signage and view

I’ll share some of the totally cool photos in another post… they just prove you can find inspiration anywhere… quilting lines, abstracts, designs…….

The Frayed Edges, September 2008–part one

Saturday, September 13th, 2008

This month was extra special:  Deborah came to visit from Texas!!!!!  So all five of us were together AND we got to have a sleepover AND we did a day workshop (on Monday) on Mandalas with Natasha Kempers-Cullen…Yippeee!  Here we are in the late afternoon…thanks to Kate’s hubby Andy for doing photographer duty…at one point he had five cameras dangling from neck and wrists!

The Five Frayed Edges

Back row:  Sarah Smith, Kathy Daniels, Deborah Boschert

Seated in front:  Kate Cutko, Hannah Beattie

We were going to bunk over at Kate’s house like we did last year, but Kate had a brilliant idea that made it better for everyone (including her kids who had to get up and go to school Monday morning:  she asked her generous neighbors, who let lots of friends use their summer house, if we could too…so we did!  The house is at the very end of Browns Point, and juts into Merrymeeting Bay (isn’t that the most wonderful name?  Merrymeeting?  I love it….).  Kate showed us one of the secrets of the point…a bald eagle’s nest (look for the tangle of sticks on the branch at lower left):

Eagles nest

As we gathered at the house, we took something to sip and something to munch on and went to sit under the trees, near the marsh and we heard this keening overhead.  We had apparently caused the two eagles some concern, so they took off from the nest, circled around the tip of the point, and settled in to some upper branches on a pine RIGHT OVER where we had our chairs!

Eagle

Kathy’s birthday is at the end of August, so we celebrated and shared gifts…here’s Kath looking delighted at Kate’s gift:  rust-dyed fabrics, plus more fabric and some very rusty nails to do her own rust-dyeing….only art quilters can truly appreciate how wonderful LOL!
Kathy’s birthday

While we sat and talked, Hannah relaxed:

Hannah

And Deborah helped Kate shuck some corn (which she picked from her garden THAT afternoon….YUM):

Deborah and Kate, corn

while I snapped pictures.

Deborah brought gifties as did Hannah…. but I was having so much fun relaxing at that point I forgot to take pictures…. you can see pics of the wonderful journal books Deborah made on her blog, here.

After our group photo, Kate took us to a spot where flotsam and jetsam…AND old shards of glass and pottery gather… Hannah found an old bottle (which of course I forgot to take a photo!).  This is a photo of the bay:

Merrymeeting Bay through the trees

and walking down to the access path:

Walking to the pottery spot

That’s Kate’s daughter on her back, a neighbor on the far right, and Kate’s son leading the troupe.

I’m always looking for patterns…for quilting, for design….so I got a nice shot of the water:

water

I’ll be back tomorrow with the evening fun, and the next day with our Mandala workshop!

Eli’s ropes, or The Spinster in action…

Thursday, July 10th, 2008

While working on some samples for my manuscript the other day, Eli–already bored with summer and having read a book a day for nearly a week–wandered in to my studio. Poking about he asked, “What’s this?”

The Spinster

Well known to a select few and a mystery to others… it is a cord winder! After a bit of internet surfing I found it here (please note, I have never ordered from this store… it’s just the first place that popped up on the google search) and it is, apparently, called “The Spinster” (yuk yuk…not!).

There are several approaches. If you want a cord of all the same color, make a loop of a yarn or, as Eli did in these samples, knot two equal lengths of two different yarns (or more!!!) . Slip one end around something stationary like a doorknob or bedpost–it has to be something you can pull against. Slip the other end of the loop over the hook (on the right in the photo below). Then, you just wind in the reel, like on a fishing rod. This action twists the cord. When it is as tight as you would like, stop. The cord shortens as you wind.

The next step is easiest if you have someone to help you, especially if the cord is LONG. Figure out the midpoint and have your helper hold it and move away from the doorknob (or whatever) as you take the hook end toward the knob. Hold the two ends together and have your helper release the midpoint. The cord will instantly twist up into a rope.Eli’s cords

Eli’s lower sample was made from a thick purple chenille and a thin gold yarn (about as thick as string). The second string is made of a sport-weight cotton yarn (the turquoise skein pictured) and a decorative / fancy yarn, the green. Isn’t that awesome? As a matter of fact, it perfectly matches some fabrics I’ve sorted out to make a totebag and some other goodies. Doesn’t it look delectable?

Eli’s cord on batiks

And, in the process of trying to find a website with the Spinster, I came across this fascinating site about making reproduction 16th and 17th century garments… I can see getting lost on that site for more than a few hours… I just love learning that kind of stuff! Happy surfing!