email Youtube

Home
Galleries
Blog
Workshops & Calendar
Store
Resources
About
Contact

Archive for the ‘Garments’ Category

Teacher makes a new vest

Saturday, April 17th, 2010

As this post goes live, I will be finishing up teaching for the Arizona Quilt Guild.  It’s pretty neat:  I fly in to Phoenix on Tuesday and teach at a shop in the greater Phoenix area on Wednesday.  On Thursday, my host/program chair drives me to San Manuel (north of Phoenix, south of Flagstaff) for teaching, then on to Flagstaff that night.  I discovered that our hotel there is literally right on the old Route 66!  I’ll be teaching there on Friday, and giving a lecture on Saturday.

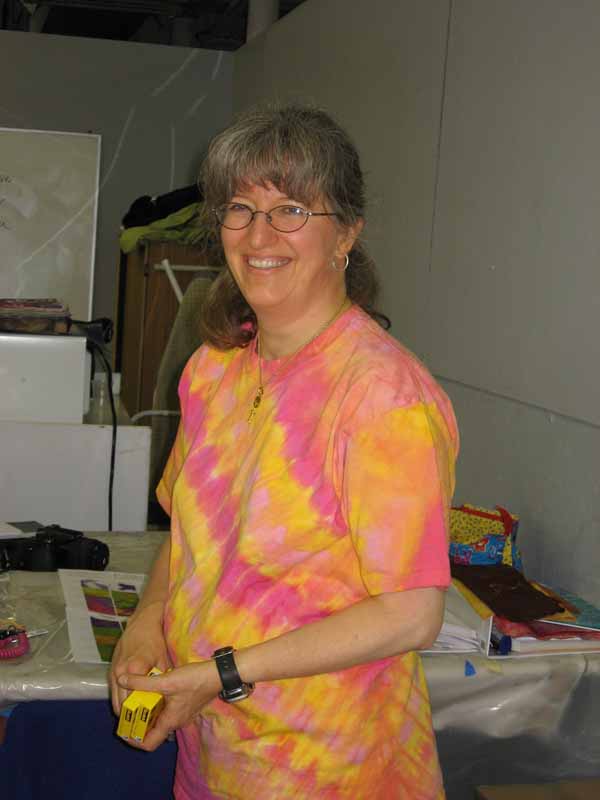
As a traveling quilt teacher, you need several things…above all compact, lightweight clothes because most of one’s suitcase is filled with teaching stuff!   And it helps if the clothing is bright so folks can see you if you are lecturing in a large hall or teaching in a crowded classroom:

I hadn’t made a new vest in years, and needed something.  Because I am on my feet going around the classroom all day, I need something not-hot.  I picked this pattern, Cosmopolitan 337, from Lois Ericson of Design and Sew.  The pattern  also has instructions for making a vest:

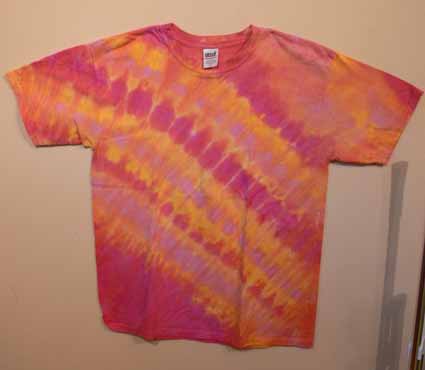
I found the pattern online here…I’ve never shopped there, but at least they have it!  I bought mine at Quilt Festival last year….it says Lois has retired, so I guess I’d better stock up on her patterns that I love and don’t have yet!  Here’s a full shot of the front (please ignore the chin that is succumbing to age and gravity):

The vest, it turns out, was a bit large—which makes sense since jackets are supposed to be roomy.  So I did quite a bit of down-sizing (yeah!), and reduced the drop shoulder by nearly two inches.  I added the coral inserted stripes (love the effect), but next time  rather than try to reduce the panels on both sides of the princess seam, I would take the stripe out of the center pieces, which are a bit wide to my eye–definitely OK and wearable (and don’t you LOVE that print … wish I had even more of it…sounds like a trip to Alewives Fabrics is in order).  I opted for in-seam pockets (yeah!  Pockets!), but there are also some really cool patch pockets… next one!  Here’s the back, with my hair only slightly frowzy:

I used a nice batik for the lining and was careful, sorry I didn’t take a picture, and can use it reversed, too!  I also like that it covers the tuckus (aka posterior).  I still haven’t done a closing…not enough time before getting on the plane.  That can happen later!

From kid’s pullover to mom’s vest

Friday, May 15th, 2009

About five or six years ago, I purchased this fleece pullover on sale at Hannah Anderson.  Once it arrived, Joshua wouldn’t wear it, despite the fact that I’d asked him about the colors before ordering.   So it sat until Eli fit into it.  Same response.  It was worn *maybe* twice.  Eli has now long since outgrown the sleeves.  So as I was getting too-small stuff ready for the rag bag or (if not too delapidated) for Salvation Army, I decided this top was just too nice to let go.

200905blogvest002

  1. So I opened up the sleeves and removed them from the body.
  2. I opened up the side seams.
  3. I cut a slice up the center of the front.
  4. Test fit with the sleeves inserted as side gussets.
  5. Cut one sleeve in half, trim to two rectangles.
  6. Sew new blue gusset into the sides to make the top large enough to go around my body.
  7. I found THE perfect batik in my stash, and used that to finish the armhole openings and the front.
  8. Once it was stitched, I decided it doesn’t need a closure.

Here’s me at the last Frayed Edges in it.and yes, it matches my glasses! And I also happen to have lime green pants (summer weight) and turquoise Ts:

200905blogvest001

This is how I spliced half a sleeve up the sides to make room for a mom-body (sigh):

200905blogvest004

And here’s a picture of the vest (on the same floor)

200905blogvest003

Refining the t-shirt–how to take a boring t-shirt to fitted and fine!

Friday, November 14th, 2008

Quite a long time ago, about a year in fact, I took my second dyeing workshop with Carol Soderlund (wonderful! highly recommended!  go here to find out more!).  I tried again to get my dream-colored t-shirt, and this time succeeded! Here’s a picture Beth P. took of me (weighing, sigh, less than I do now):

SAS at Workshop in t-shirt

I knew back then that I wanted to re-make the shirt into a nicer top, but ProChem only had t-shirts in stock, plain old T’s.  Here is what the shirt looked like before I took to it with pins, sewing machine and scissors in late October:

T-shirt, before

I used fuchsia dye, the other red that is MX R4 (Fuchsia is 8R), a warm yellow and a cool yellow… it was pleated on the diagonal with the lines running from upper left shoulder to right hip.  The dye was then poured – squirted – painted on in the opposite diagonal.

First, I pinned out what I thought I wanted to take in on the sides and underarm, then went into the bathroom (which has a low enough mirror) to see how long I wanted the shirt to be.  I ended up cutting 5 1/2 inches off the bottom, then taking a 1 1/2″ hem.  I used a twin needle, which gives the double-straight stitch on the top, a zigzag on the bottom, and stretches just a little bit.

Second, I took in the sides (alas, I am not blessed with a generous bustline, tho in summer I actually am grateful), leaving the extra room at the bottom my hips need.  I also took in the sleeves a bit.  This photo shows the taper…from about 3/4″ at the hem of the sleeves, to a smidge over an inch at the torso, tapering to a point like a dart. I used the stretch stitch on my machine…basically it looks like three stitches on top of each other.

Side seam

For those of you with a larger bustline, you can also take vertical darts in the waist area underneath the bust for a more tailored fit…just put the shirt on inside out and pin.  Carefully.  Then REALLY carefully remove the shirt, try it on right side out and if it looks good, take it off even more carefully and stitch.

At first I wasn’t going to trim and finish the edges, but the amount taken in was enough that the underarm seam pulled unattractively, so I trimmed to 1/4″ seam allowance,  and zigzagged the edges.  Serging would also work, but I don’t have matching thread and didn’t feel like setting up the serger!

Square neckline mocked up

You might (?) be able to see the blue washout pen markings on the top in the photo above.  I look good in square necklines, so had planned to trim off the neckline edging and sew a facing using the cut-off fabric from the bottom.  However, I wanted this to be a simple tutorial, and–on a whim while checking out the fit after stitching the sides –turned the collar ribbing inside.  I liked the look!  So, I simply stretched the ribbing so that it would instead function as a facing, and topstitched it in place with the twin needle.  Here t is without the blue pen!

with blue stuff washed out, neckline

And here is a so-so picture of me (with no make-up and messy hair… what am I thinking putting a picture like this on the internet?????) in the shirt–sorry about the partial lobotomy…that’s what happens when you set the camera on timer to take a photo of yourself:

Sarah in shirt, angled view

And an even less flattering photo (I decided to decapitate myself with photoshop…the fat sloping chin was just too awful LOL!), but straight on so you can better see (?) the final result:

SAS in shirt, straight on

Remember the original look of the shirt?

T-shirt, before

Here’s the finished outline:

Finished shirt on design wall

All in all, I think it is a vast improvement over the baggy shirt.  Even with trying it on about four times, it took easily less than two hours to do everything.