email Youtube

Home
Galleries
Blog
Workshops & Calendar
Store
Resources
About
Contact

Archive for the ‘Janome’ Category

Quilting Happened!

Saturday, January 5th, 2013

What a concept, I actually got some quilting done!
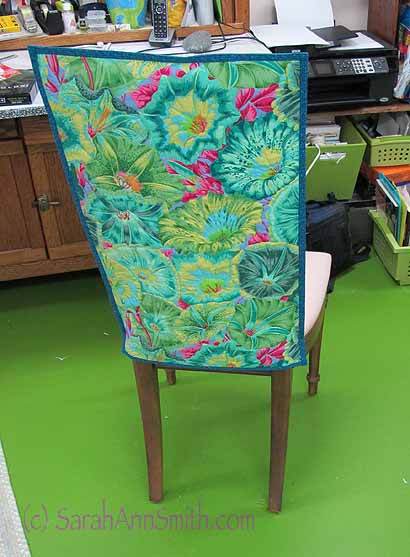
Chair, Improved with color and cloth!

Chair, Improved with color and cloth!

I do seem to be in procrastination mode, though.  I need to start a quilt for a juried invitational.  I did sketch out the idea and pull some fabrics.  I decided I need to dye some fabric, so I have washed the silk and hung it to dry, and plan on dyeing that cloth on Monday.  But did I do anything else on that quilt?  Nope.  Instead I had a tidy attack in the studio, then decided that after a year-plus of fabric hanging over the back of this chair (and falling off again, and again, and again), I needed to actually QUILT the fabric and turn it into the cover I wanted.
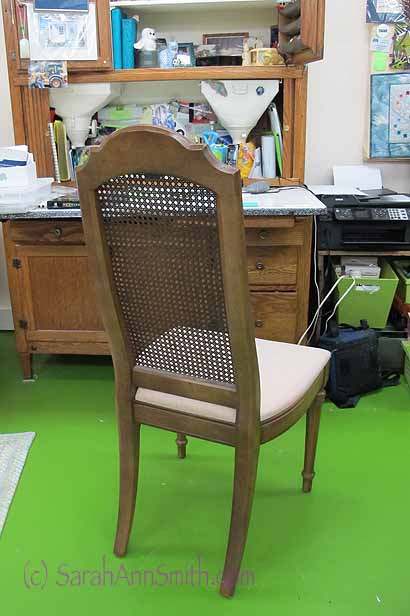
Mom's desk chair.  Well made.  Seriously dated.  And just blech.

Mom’s desk chair. Well made. Seriously dated. And just blech.

The chair came from Mom, after she died.  It didn’t sell in the consignment store and is a well-made chair, albeit one that looks exactly like what it is:  a chair an old lady bought in 1972.  Ugh.   I really don’t like chairs with cane backs.  The fruitwood finish is pretty dated and icky, too, but I’ll deal with that later.

And, Janome America (thank you!) upgraded me to an 8900 on their artist/teacher program, so of course I needed to take it for a test quilt-drive, right?   Turns out I am in love yet again with these Janome machines.  I have lots of playing to do with this one, but really like the cleaner view around the presser foot, the quiet operation, ease of use, fabulous tension… sigh!   Love these machines!  And so thankful that Janome-America has supported me these many years.

Perfect excuse for not working on that quilt.  So I took a length of this wonderful, cheery floral and quilted it.  I grabbed some teal fabric I’ve had for about 15+ years (bought to be a backing and then not used) since it would be on the inside and not seen.  As it turns out, the teal looked really good and I ended up using it for the binding!  I hadn’t planned on doing a binding; I was just going to turn the quilted fabric like a pillowcase and slip it over the back.  But the teal blue really added to it, so I added bindings.
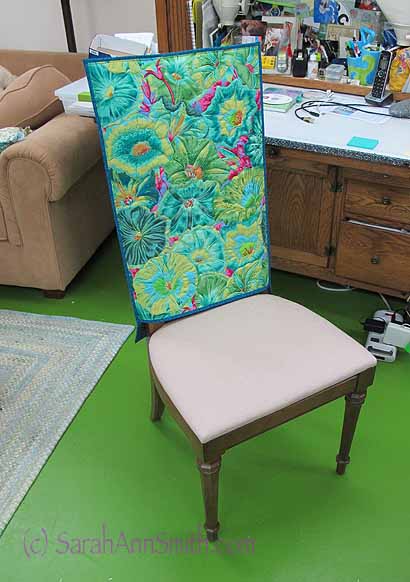
And from the front.  Next:  re-cover the seat with something that goes better than plain old cream.

And from the front. Next: re-cover the seat with something that goes better than plain old cream.

Also, about a month or so ago, someone on a list I’m on recommended a Martelli’s quilting ring and had a discount code to use if one ordered during a short window of opportunity.  The discount took the price from “are you KIDDING?” to”expensive but I want to try it and at least it is a business expense for me.”   So I ordered it.  About 2/3 of the way through quilting yesterday, I remembered I had the quilting ring (I bought the 11″/large version which you can see/order here) and should actually TRY IT.  I like it!   Some folks on the Yahoo Janome group I’m on (for 6500-8900 machines) had mentioned using two of Sharon Shamber’s red hoops, stacked, but said this was easier.  I agree!  Here’s the hoop just tucked under the foot (there is a cut-out that permits slipping under the presser foot).
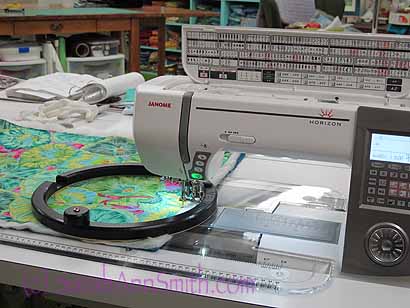
The Martelli hoop on the chair cover as I was quilting it.

The Martelli hoop on the chair cover as I was quilting it.  On the left of the hoop you can see the cut-out for slipping it under the presser foot.

And here it is moved all the way over to the harp, a large space, on the Janome 8900.
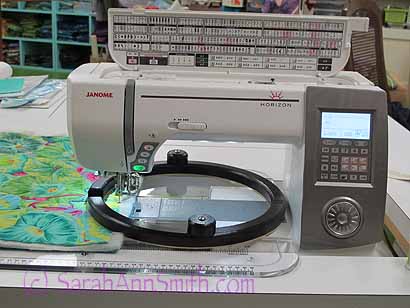
And moved as far right as it can go.  This is the large, 11" hoop on the Janome 8900.

And moved as far right as it can go. This is the large, 11″ hoop on the Janome 8900. Both knobs are visible, useful and don’t get in the way.  You can also gently grasp the hoop itself to maneuver it.

Even though I am VERY experienced at free-motion quilting, I can see that using this hoop will help me on some sorts of movements…longer smoother lines especially.  For small detailed work, like intricate quilting on a face or small space with lots of direction changes,  I think using my Machingers gloves may still be the best, but this hoop worked very well and was easy to adjust to using.  In particular, the knobs and the thickness of the hoop are friendly to arthritic hands.  Unlike the red hoops from Sharon Shamber and other hoop-type devices, the bulk of this one means you don’t have to use that pinching motion that hurts the thumbs.  I can rest my fingers outside the hoop, hooking my thumbs around the knob and move the quilt underneath easily.

When you get to the edge, the grippy stuff on the bottom of the hoop has a propensity to grip the machine/table surface when a segment of the hoop is off the quilt.  There are a couple of options:  pin some fabric/hand towel to the edge to give the hoop something on which to rest.  OR, as I discovered (photo below) the size of the hoop is so large that you can swing it up and let it hang over the center section of the machine until you are around the corner! You don’t have to break your thread and remove the hoop…just swing it up out of the way. Also useful if you need to change the thread and/or bobbin.
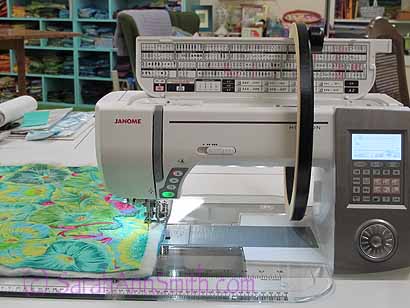
You can (at least on my machine with this large hoop) temporarily get the hoop out of the way just by swinging it up and hanging it on the center of the machine.  Useful for corners where too much of the grippy on the bottom is on the table surface instead of the quilt.

You can (at least on my machine with this large hoop) temporarily get the hoop out of the way just by swinging it up and hanging it on the center of the machine. Useful for corners where too much of the grippy on the bottom is on the table surface instead of the quilt.

Cool beans!  That’s it for today.  In less than two hours (I’m writing this a day ahead of it going live on the site, so it is Friday morning as I type) I head out for the next Wrestling Tournament, the second and last of the overnight trips for this season.  I’ll post to FaceBook if I can!
 

Teaching at Quilt Festival in Houston, 2012!

Wednesday, September 12th, 2012

Just wanted to dash off a quick note to tell you how happy I am to be teaching again at International Quilt Festival in Houston this coming fall!  I hope to see some of you there…perhaps in my classes!  To learn more about the classes, click here to go to the Quilts, Inc. website.  From there you can download the PDF class catalog, register (online–easy peasy) for classes and/or events.

I’ll be very busy; my schedule begins on the Monday of Quilt Market (a to-the-trade only wholesale show) and continues through the week of Festival!

October 29-November 2, 2012 – International Quilt Festival, Houston, Texas (click on images to view larger):

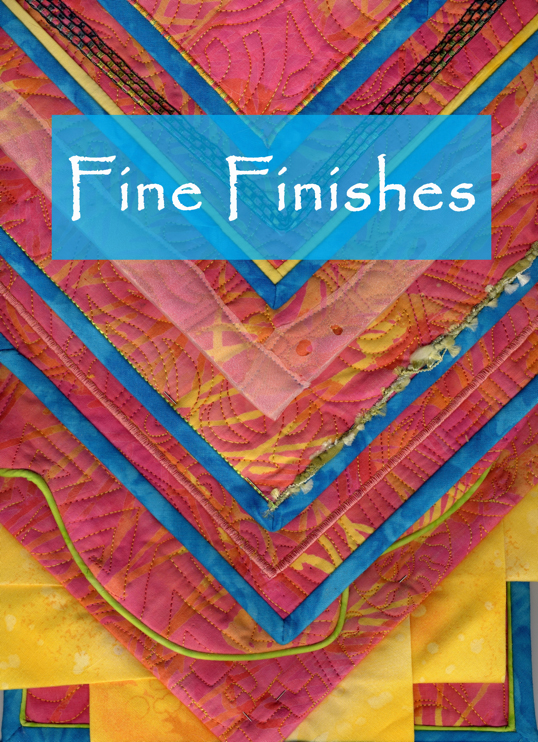
  • Monday: Fine Finishes(edge finishes including perfect mitered corners!)
    • Learn to make a perfect mitered binding straight grain bindings, double-fold bias bindings, piping, and couched yarns.  Time permitting Sarah will share how-to’s for  fabric accents, curved bindings, fused bindings, wacky raw-edge squares, and couched-yarn finishes! By the end of this class you’ll have a “swatchbook” of samples and notes including a wide assortment of styles and techniques to finish your quilts and quilted garments.  See a previous blogpost about this class here.


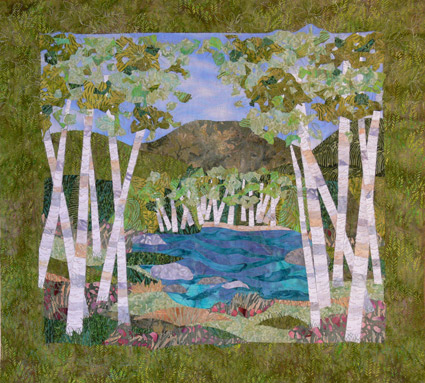
  • TuesdayBirch Pond Seasons(fusible applique)
    • Learn fusible applique, several techniques for “piecing” with fused fabrics, and how to make your own Birch Pond art quilt.  I’ll also cover facings as an edge finish and a range of fun ideas that will let you branch out on your own after class.  Kit fee ($20) covers the cost of the pattern and one package of white MistyFuse (except when taught in stores; then, please purchase these items from the store). See a previous blogpost about this class here.


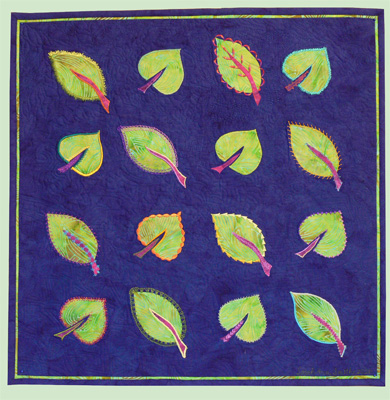
  • WednesdayDecorative Stitch Applique(use those fancy stitches on your machine!)
    • Make a small wallhanging or a selection of small blocks which take full advantage of all those decorative stitches on your sewing machine. Using fusible appliqué and an assortment of as many threads as you care to bring and use, you’ll see how versatile a single leaf pattern can be! The embroidery / decorative stitches you use in this class can be adapted to your choice of other appliqué methods; we will use fusibles in class so that you can make a wide selection of appliquéd leaves during the class. The project samples can be used for a quilt, a garment or home dec items. See a previous blogpost about this class here.


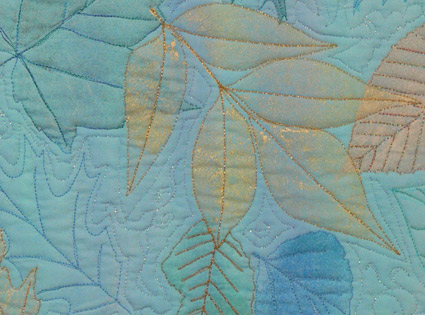
  • Thursday Morning Machine Quilting ForumFun with Fancy Threads
    • I’ll share some tips about using fussy, fiddly threads and how to master them with the right needle, the right bobbin thread, and a fun little project/demonstration.  This Forum starts with an overview and introduction to six machine quilting experts.  Each of us will give a 9 minutes (not one second longer!) presentation. Then we break out into 6 stations…think of it as speed-dating for machine quilters!  We’ll do a 20 minute presentation, then the bell rings and off you go to the next station/teacher.  A great way to see if you want to learn more or book a teacher for your group.


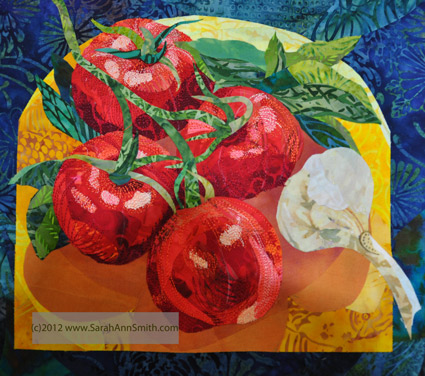
  • Thursday AfternoonMeet the Teacher,a free 30 minute demo on the show floor:  Collaged and Fused Art Quilts
    • I’ll show you my process for creating fuse-collaged quilts, with step-by-step examples of this small tomato-garlic-and-basil quiltlet.


  • Friday Morning: Friday Sampler–QuiltColoring with Thread
    • Think of your sewing machine and thread as a big box of crayons… more colors than you’ve ever had in a box of crayons!  Then learn to use your machine and thread to color your art quilts and bring them to life.  This Sampler is a ginormous room with 20 or more teachers giving quick demos.  Participants can move from station to station as they choose.  It’s a great way to see if you’d like to take a class with a teacher or even book them for your guild.
  • Saturday:  Sarah gets to relax and play today… I’m going on the bus tour to the Texas Quilt Museum in LaGrange.  Anyone want to go on the same bus?
  • Sunday:  I’ll be visiting the booths and quilts today…including one of mine that has been juried into the show (more on that later, after the judging is done and it’s safe to post pictures to the internet).

I’m so looking forward to Houston this year…hope you get to come play, too!

Artistic by Janome

Tuesday, September 4th, 2012

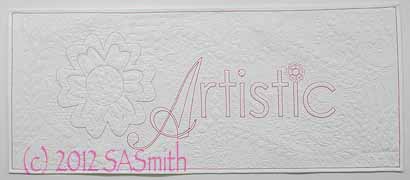
Janome has introduced a new longarm line/suite of products, the Artistic Creative Suite.  One of the items is a longarm (well,  a couple actually).  You can read more about them here.  Since Janome has been kind enough to include me in the artist/teacher program lo these many years, I in return make projects or write brief articles they can use on their website, blog or wherever they need.  In late spring I lent them several free-motion quilting samples for possible use in print media, and I decided one of this year’s projects I would make and just GIVE to them in return for their years of support:  a 17″ x 42″ banner with the Artistic logo (albeit made on my/their Janome 7700)!

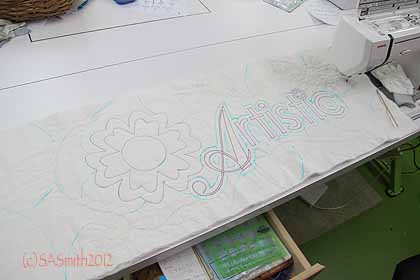
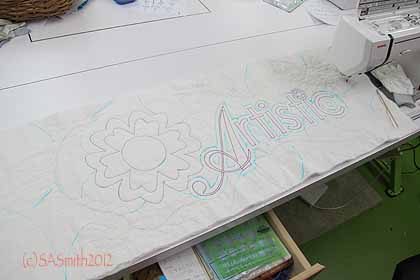
Here’s the banner while being quilted. You can see that I used blue washaway pen to mark the logo and segment the background for quilting into different filler patterns.

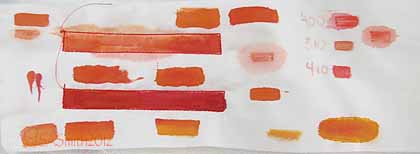
The logo is red, so initially I thought I would paint inside the lines to re-create the flower and lettering.  This was a test of various paints on the white cloth:

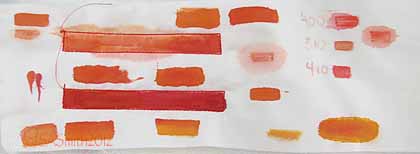
Testing the red color and paint for shade and for bleeding using acrilyc ink, inktense pencils, and textile paint. Ick. Some were too orange. The ones that weren’t looked like fresh blood spots. Ick. So I opted to outline with red thread only!

Here’s a close up view:

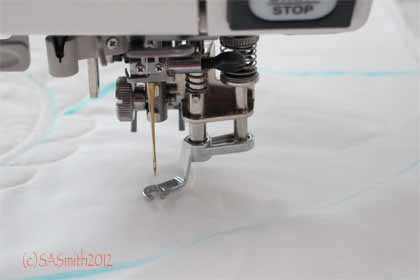
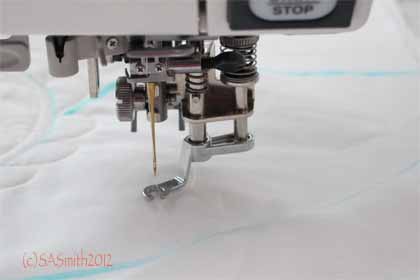
A close up of the quilting in-progress. I modified the convertible free-motion foot. It is a closed metal circle, which is perfect for some uses. But I wanted an OPEN circle (not a U shape, which is another of the convertible options, not a large clear plastic disc which is the third alternative). So I bought a second presser foot set, took out my trusty dremel and removed a small portion of the circle to improve visibility!

Here is the finished banner–I’ll do another post with close up pictures of the free-motion quilting!

Artistic logo banner made by Saran Ann Smith for Janome-America, with thanks for their ongoing support!

The perfect free-motion foot and a WIP

Tuesday, June 12th, 2012

Whatsa WIP you ask?  A Work-In-Progress!    In this case, one for Janome-America.  I have been incredibly fortunate to be associated with Janome since late 1983.  Usually as part of the artist/teacher program, you lend Janome things, but this time I decided I would make something to give them:  a quilted banner for their new Artistic line (longarms, software, embroidery, etc…..see all about it here).  I enlarged the logo from their brochure, then transferred that to some white fabric and have begun quilting.

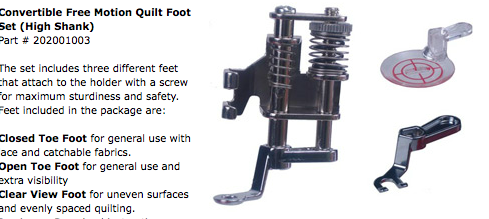
In preparation for this project, I bought a second “convertible free-motion presser foot set” for the Janome 7700 I use for my quilting (one of these lovelies is included with the machine–since Janome owns the one I’m using I didn’t want to cut apart *their* presser foot!). 

The set comes with three interchangeable “feet”:  the disc (for echo quilting), the closed circle (shown attached to  the presser foot deely-bob on the left), and the U-shaped open-toe.  The two metal feet are my favorite, but when I videotaped myself quilting recently (in hopes of having a “why do I need this? how would I use these?” video on here before too long that I can share here), I tried the disc for the first time and think that I will definitely use it now!

Anyway, the two metal feet are close but not quite perfect–what I wanted was a round circle with a small opening so I could see where I’m going (as with the U-shaped foot) but that would *also* let me echo quilt without having to change the end.   So I took my trusty Dremel tool to the front of the circle and removed a scant 1/8″ segment!

My new and improved free-motion quilting foot

I LOVE IT!  It did just what I want… I can see where I am going, but I can also echo-quilt around those feathers you see in the photo above with ease.  YEAH!

And a teaser…here is what I’ve done so far… I used red thread and a triple-straight stretch stitch (and the open-toe accufeed foot) to machine quilt/outline the lettering.  I then free-motion quilted the flowers using a single line of red thread.  I want the background quilting to be subtle, but seen, so I quilted some feathers using a soft peach color.  For the feathers, I marked the spine with blue pen, then stitched the spine followed by the feathers.

W.I.P. made for Janome-America, with thanks for their support these past 8-plus years!

Next, using a wash-out blue pen, I marked curved lines randomly but with thought and an eye to design and the shapes created.  I like to separate areas of the background into smaller, more manageable “chunks” and alternate linear and curved designs from one to the next.  I also marked an outline around the lettering.  I began the background quilting using a fine 50-wt So Fine matte-finish polyester thread in white and a very small stipple around the lettering to make the letters “pop.”  Then I did one or two small sections, one with a cross-hatch/plaid, another with a sinuous vine.

The next question is:  do I paint inside the lines of the letters and at the appropriate spots on the flower?  The thing is…. the color on the logo is a slightly orange-ish red.

To paint or not to paint????

I like the orange colors just fine, but they don’t match the logo.  The Inktense pencil (on the right, numbered) didn’t work so well for what I want to do.  That means the acrylic inks (used for all the other color) are the way to do.  BUT, the red looks kinda like blood on cloth.  ERK.  The large upper rectangle and the two smaller blotches in the center are the most accurate for color-matching, but look most like blood.  The “really red” long rectangle on the bottom looks OK, but is the “Janome” logo color, not the color of the Artistic logo.  So do I color it in?  or leave it be?  If I color it, do I take creative license and use an orange?  Think I’ll run this one by my contact BEFORE I add paint…. I’d hate to spend umpteen hours quilting and then have it not work because of a wrong color choice!   Stay tuned… I’ll share again when the blue is washed down the drain and it is all finished and pretty!

Teaching in Houston! Quilt at AQS Lancaster!

Saturday, February 11th, 2012

Hi all…great news this week:  I’ve been selected to be on the Faculty at the International Quilt Festival in Houston, Texas…as in: I’m teaching at the best show in the world! (I taught there are few years ago, and am thrilled and considerably less terrified now return… I know I can do it!)  I will have full-day classes Monday, Tuesday and Wednesday, will participate in the Machine Quilting Forum on Thursday morning, and may well do a 30-minute “Meet our Teachers” demo on the quilt show floor (schedules permitting)  and participate in the “Friday Sampler” from 10-Noon.  If the scheduling for the latter two works, I’ll be demo-ing my fused collage technique at the “Meet our Teachers” and on Friday will share/demonstrate free-motion quilting!  And as always, Janome-America will be able to lend me a machine for my demos…yeah and thank you Janome!

Here’s my Festival schedule:

  • Monday, October 29:  Fine Finishes–edge finish techniques; full day class
  • Tuesday, October 30:  Birch Pond Seasons–fused collage landscape; full day class
  • Wednesday, October 31:  Decorative Stitch Applique–learn to use all those fun stitches on your machine! Full day class
  • Thursday, November 1:  Fun with Fancy Threads–the trick to metallics, holographics an other fussy thread; 9-Noon
  • Friday, November 2 (tentative): Friday Sampler–free-motion quilting; 10-Noon
  • Thursday afternoon or Friday afternoon (tentative)–a 30 minute demo at the Meet the Teacher area on the show floor
  • Thursday afternoon or Friday afternoon (likely)–demo(s) at the MistyFuse booth again… love MF and Iris (the owner)!
  • Saturday:  PLAYTIME!

Not sure yet if I’ll stay and see the show on Sunday, too… I just may given how busy my schedule has become!

I sure hope to see some of you in Houston and, even better, in my classes! When the show/class catalog comes out, I’ll post to the blog with pictures from the classes and links to previous classes I’ve taught so you can see student work.  FUN!

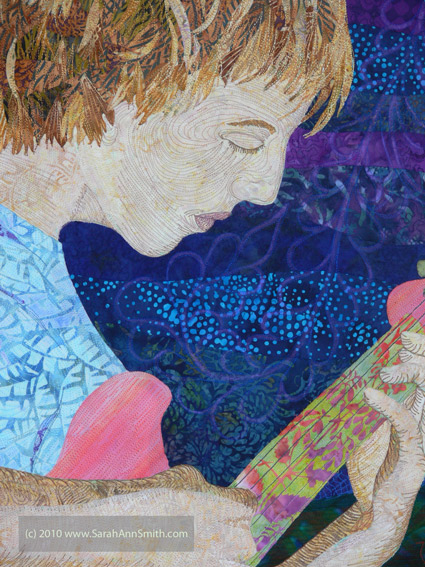
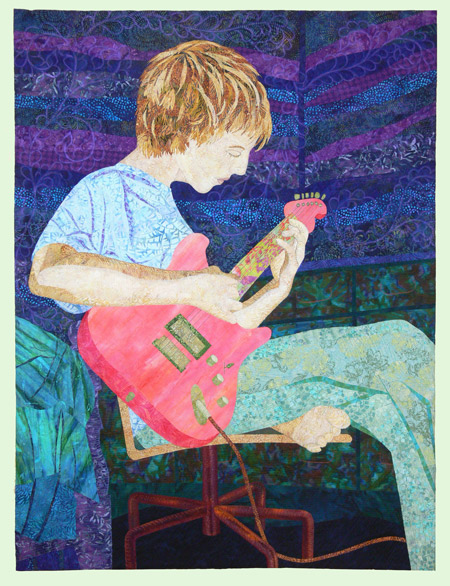
AND….. drum roll…. the portrait of my son, Joshua, has been juried into the AQS Lancaster show (March 14-17)!

The quilt is too small to fit into the categories for Paducah (must be 40 inches wide, and this one is 36 inches wide by 48 long), so this is the show for which it fits into a category.  I’m thrilled, as I think this is probably the best quilt I’ve ever made.

The Quilters Heritage Celebration show (now defunct) used to take place in Lancaster in March, and it was the first major quilt show I ever attended, driving up from when we lived in the metro DC area.  I love going there and hope some day to be able to teach at AQS Lancaster (which picked up the show-in-Lancaster after QHC ended/retire).  If I can just get my schedule clear for March then I can apply (currently there is a conflict with son’s wrestling season!).  Anyway, it’s been a good quilty start to the year!