email Youtube

Home
Galleries
Blog
Workshops & Calendar
Store
Resources
About
Contact

Archive for the ‘Frayed Edges’ Category

The Frayed Edges, June 2012

Monday, June 25th, 2012

We were a small but content twosome this month.  Deborah of course is far afield, and Kate is busy beyond belief, so Kathy and I got together at her house (OH how wonderful it is to have her living locally!) and we enjoyed her new screened in porch!   Last time, we managed not to get around to collaging, so I lugged WAY too many pounds of magazine clippings and STUFF (including the square and round paper punches I have) to her house and played!  Before that, though, Kathy showed me the progress in the garden, including the newly sunny spot where a tree is no longer.  There were two stumps, so I asked her what she was going to do with them…..heh heh!  But first…
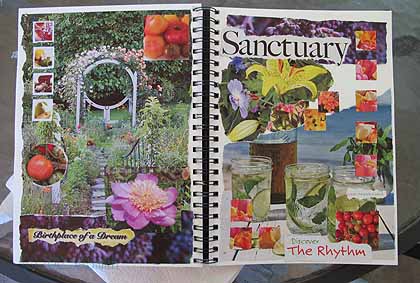
My collaged pages from my play day with Kathy. Yes, kindergarten for grown-ups in OH SO the BEST way! Pass the glue-stick please!
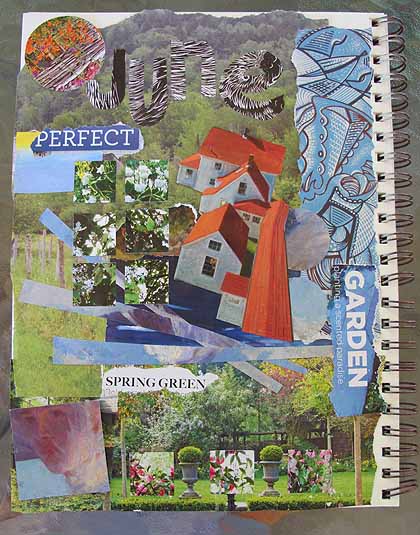
Kathy’s page–just love the cascading houses, and that blue on the right and and and… you can tell she liked playing with my punches, tho I must admit I’m not thrilled that several of the ones I’ve bought don’t seem to cut cleanly for me. I’ll try the aluminum foil trick for sharpening the one that was acting up. Not sure if it is uneven pressure by me (as in operator error) or if the punch isn’t quite so well machined… Anyway, thank you Kath for a PERFECT June day (and letting me share your page).

Then those stumps….Kathy was going to have someone come take them away, so I asked if that someone could be ME…YIPPEEEE!   Paul (hubby) didn’t even roll his eyes at me when I called to consult on their soon-to-be use….just said yes, he and Eli would come help me haul them away!!!!  Herewith:
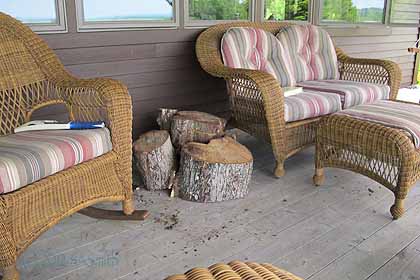
Our new end table for the front porch! Next time Max or True is over to chop some tree trunks into firewood, I’ll ask them to take the chain saw and flatten two of the tops of the stumps so the glasses won’t tip quite so much!
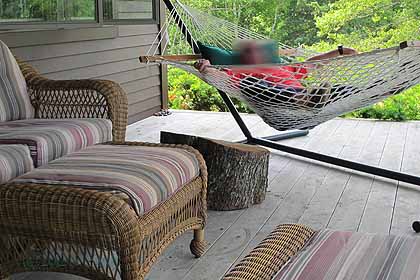
And the Hammock Step! At first I thought the multi-stump end table would be too low and I would use this piece underneath, but that wasn’t necessary. So we rolled it over to the hammock…. I’ve blurred Paul’s face as he doesn’t have a pic of himself even on his FB page (yes, we finally got him onto FB!). As you can see, he is engaged in his favorite summer passtime….

And because I couldn’t resist…. Eli and I went shopping for shorts for him (he keeps doing that eating and growing thing), we stopped to stock up on cat litter at the big-box pet store up in Augusta (the capitol of Maine, an hour west of here by 2-lane route).  I had been wanting since we moved early last year to get a doggie bed for Widgeon to use down in my studio, as the floor gets COLD even in summer, and he’s gonna squish/trash the settee cushions.  So I found this lovely one with zip-off/washable cover (from Martha Stewart no less…. is there anything left in America that she doesn’t have a line of product for? –to use some horrid diction).  Isn’t he ADORABLE?  He LOVES it!
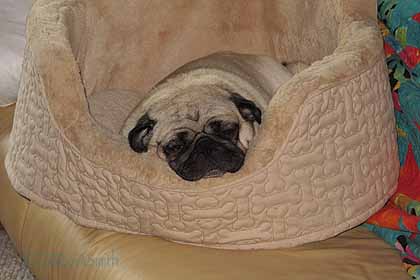
When you are a small dog of even smaller brain (with apologies to Pooh and Mr. Milne), it is simply too difficult to hold up one’s chin or keep the eyelids open…..Plus the doggie bed is quilted in dog bones like the background quilting I did on the portrait of him, AND he matches the color, so it won’t show how much he sheds!

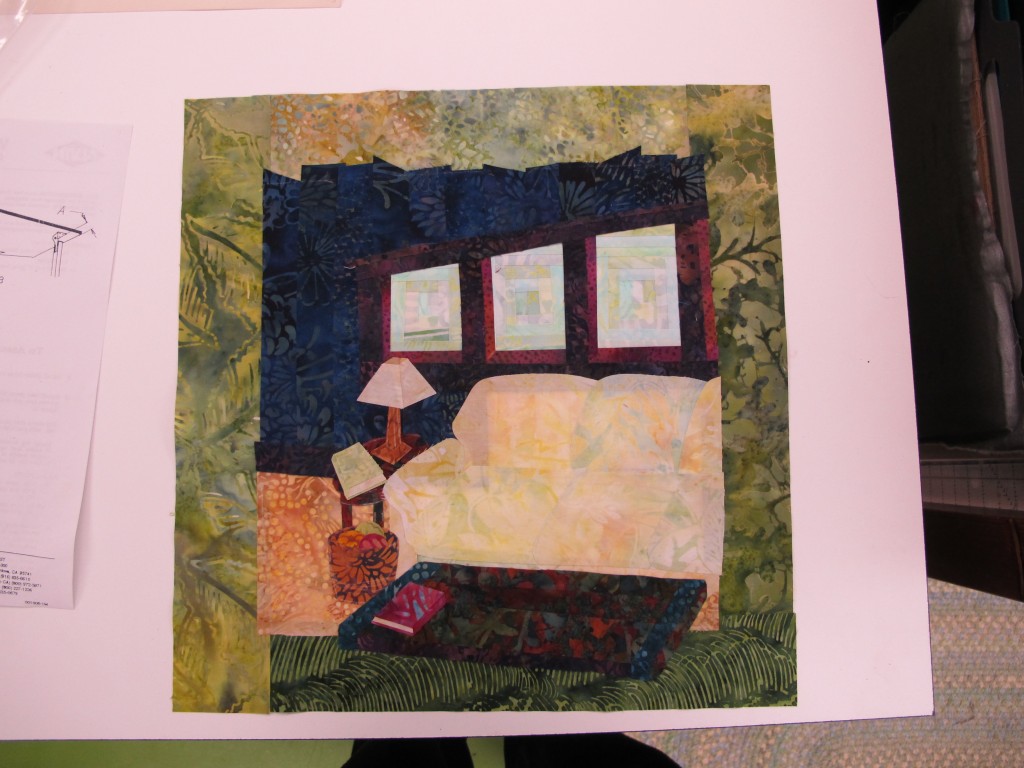
CQ 2013 Challenge, First quilt

Friday, December 16th, 2011

Coastal Quilters 2013 Challenge: Favorite Place

Hi all…yes, I’ve been seriously missing, and as usual, that also means BUSY.  Among other things (which I will blog about in the coming days), I made this small quilt (in this photo, not yet quilted….that tells you how busy…it’s done except for sewing down the facings now).  Among other things that keep me busy and happy, is Coastal Quilters, the local chapter of Maine’s Pine Tree Quilt Guild.  I’ve been active on the board doing this or that for, well….basically since we moved to Maine 7+ years ago.  At the moment I am co-Program Chair and co-Challenge Coordinator.

Every August, CQ has a picnic at one member’s camp cottage (a “camp” in Maine is usually a rustic, uninsulated building somewhere in the woods or on a pond or lake).  Like most camps, this one is reached by a dirt road which astonishingly now has a name, not jut R.R.  (rural road) or F. R. (Fire Road) plus number.   But the road is still dirt, still so bumpy you need to drive at a crawl, and has “camp tree”…. a tree at the fork in the road with boards nailed to it.  Each board has a name and some sort of arrow so you know which way to go.  Joan also kindly always puts out some cheater-cloth dresden plate squares as flags to keep us going to the right place:  the family cottage on the shores of Pitcher Pond.

Why this digression?  well, we announce the Challenge in December or October, so by August I am starting to think about getting things organized.  And for the past two years, I have deputized all present at the picnic to be my advisory committee!  Since it was rainy and dreary this year, there were only a few of us (five, plus Joan’s husband and their dog).  Eleanor had been greatly inspired by the Twelve by Twelve book and Challenge.  See, my friend Deborah Boschert is one of our mini-group as well as part of the Twelves (see their website here), and she came from her home in Maryland for our show this summer at the library (see here 1, here 2 and here 3).  Eleanor really wanted to do a challenge like that.  So we summarily decided that in addition to the 2012 Challenge (using a vintage block, inspired by Mary Kerr’s Vintage Revisited, here), we would ALSO announce the 2013 challenge! We came up with a list of themes, and will announce one every other month at the unveiling of the “current” theme quilts.

Our first theme was Favorite Places.  Eleanor also completed a quilt  (interestingly, I chose my spot on the sofa in the living room, and Eleanor did a site map of her home–totally unknown to each other), and since this challenge was her idea, I asked her to pick from our list of themes for the next one:  Cycles!  Try Googling cycles and you’ll come up with all sorts of cool possibilities.  I hope we get more participants; I hope to let others choose the themes.

So that my local chapter members have a place to look, I’m going to include the instructions right here, along with the themes.  Hope you enjoy–feel free to adapt / use these guidelines to set up your own challenges!

Themes:

  • Due December 2011:  Favorite Place
  • Due February 2012:    Cycles

The 2013 Coastal Quilters

Chapter Challenge!

In a nutshell:

  • Every two months from October 2011 to April 2013 we will issue a challenge theme.
  • Make a 13×13 inch quiltlet that relates to that theme and bring it to share two months later.
  • You do NOT have to make ALL the challenge themes.  You can make one, several or all.
  • For at least ONE of the challenges, you must incorporate a traditional quilt block pattern/design/something into the piece is some fashion.  You may do this just once, a few times, or for every challenge.
  • Please include a label on the backs with this information (see below for possible limits on display)

Your First Name Last Name

Date (May 2012 or whatever)

Coastal Quilters 2012 Chapter Challenge

Your address/contact info

More details:

At the 2011 Picnic at Joan’s camp on Pitcher Pond, Eleanor  said she was inspired by Deborah Boschert’s Twelve By 12 Challenge group and the book.  She wanted to do something similar.  Sarah deputized those present (Joan, Louisa, Louisa’s sister, Eleanor) as her Challenge Advisory Committee, and we came up with the general guidelines and themes for this 18-month challenge to be shown at Maine Quilts in 2013.  Here’s what we decided:

  • Quilt must be 13 x 13 inches to go with the year 2013
  • Puns are allowed/encouraged
  • Each quilt must have a front, batting, back and suitable edge finish
  • You must include a traditional block in some fashion in at least one of your challenge pieces
  • We will have 9 themes distributed over 18 months
  • The first three themes are decided; we have ideas for the rest, but participants may suggest additional themes and we might possibly revise the list

If we have too many 13×13 quilts, Sarah will figure out how many we can display, then set a maximum number that any individual can have on display.  Those with less than that number may display all their quiltlets.  Those with more than that number will select which ones they want to hang at Maine Quilts.  As has happened the past couple of years, Sarah will do up the entry for our challenge and arrange the display.

Please include a label on the back with this information

Your First Name Last Name                        Coastal Quilters 2013 Chapter Challenge—[theme]

Date (May 2012 or whatever)                        Your address/contact info

More information:


If you have any questions, contact Sarah Ann Smith at  sarah@sarahannsmith.com.

The Twelve by Twelve International Art Quilt Challenge book is available in many locations, including on Amazon.com.

ISBN-10: 1600596665 or   ISBN-13: 978-1600596667

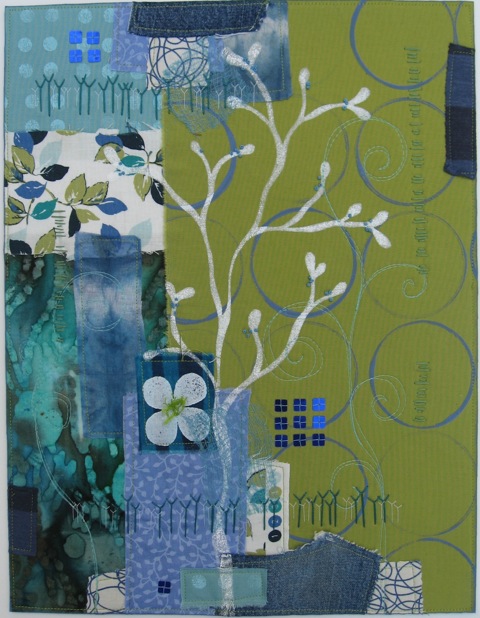
Buds, Branches and Blossoms with Deborah Boschert

Thursday, December 8th, 2011

I wanted to share with you that my friend Deborah Boschert, one of my Frayed Edges mini-group, is one of the artists teaching online through Alma Stoller’s Stitched!  STITCHED is a collection of 20 online video workshops by 20 talented fabric artists. Students have access to all 20 workshops and can choose to view and work on the projects any time of the day, any day of the week. Registration opens on Dec 1 and the workshops kick off on Jan 1 and run through June 1. Registration is only $89. Deborah is teaching a workshop titled, “Branches, Buds and Blossoms: A Botanical Fabric Collage.” She includes videos on selecting fabrics, adding surface design, composing and improvisational hand embroidery.

Deborah Boschert's Buds, Branches and Blossoms class is at Stitched!

If you’re interested, visit Deborah’s blog, here.  It sure sounds like fun!
And no, I have not dropped off the face of the earth…. when my blogging slows up it means I’m busy in real life.  Have TONS to share… just need time to write the blogposts and size the photos and whatnot…. I promise to be back with good stuff…Soon I hope!


Conversations, Part 3: the smaller pieces and fixing it…

Friday, August 12th, 2011

By the time I got to making the two small pieces, I had ONE week left, and lots of other stuff to do during that week.  Can you say work fast?  Under pressure?  SHeesh!  I really hope life slows down, because I can’t take too much more of this!

One of the architetural photos I took and used for the small pieces

The other of the architetural photos I took and used for the small pieces

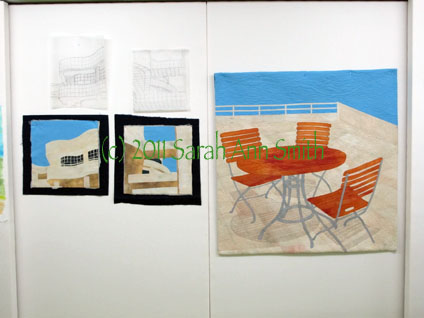
These two photos were the ones whose lines shadows most inspired me.  I love the interplay between straight lines and the curved, the grid of stone and the undulating shapes, the blue sky and the white stone, and the shadows.  I love how the architect used bands/lines of (metal?) whatever to create de facto louvers to shield the galleries and interior spaces from the bright sunlight, and how those bands create striped shadows on the pillars and walls.

Here are the two smaller pieces, with batting and backing sticking out, and their sketches/tracings above.

Due to lack of time, I quilted both small pieces at once… I’d thread up on say ivory, quilt those areas, switch to cream and repeat, then to tan, etc. on both quilts, working my way to the dark of the windows and the sky and, finally the facings!

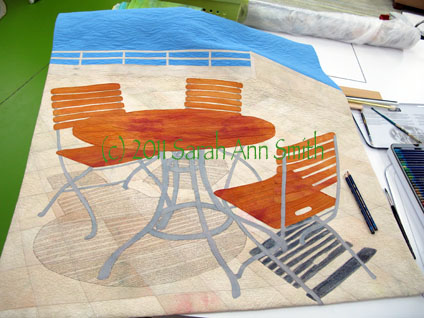
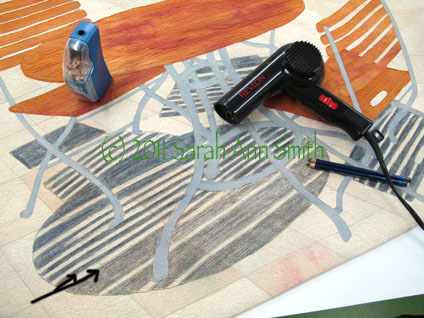
But I still wasn’t happy with the shadows from the table and chairs, so I went back to the now not-quite-done central piece.  In the next photo you can see the two pencils plus the paintbrush.

I still wasn't happy with the shadows (or lack thereof) on the main piece, which was ostensibly finished. Guess not. So I took out my Inktense by Derwent pencils (the Payne's Gray and a neutral gray) and took a deep breath

This picture shows the table shadows partially done....

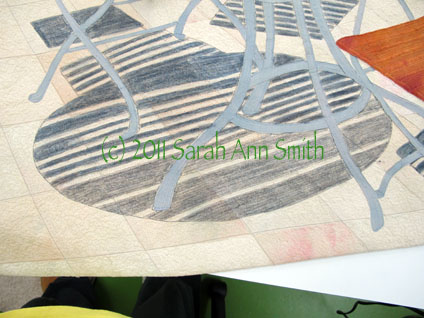
Using the pencils was a bit of a "thriller" moment: I used two colors of gray to get the shade I wanted. The lighter gray on the bottom is where I have colored over the gray quilting threads with the pencil (see black arrow marks on the photo). You can then dampen the pencil marks to create an ink and intensify the color. However, I didn't want the color to bleed into the sunny stripes that came through the slats of the table. So I took out the hair dryer! I used a damp paintbrush in my right hand to moisten the ink, and the hair dryer in my left hand to dry as I painted/wet the pencil-ink. I had very little bleeding into the sunny stripe as a result, and what I did have doesn't really impact the image much at all. PHEW...time for a nice glass of wine after that... I could have totally ruined the whole, finished thing...with just days to go before hanging the show!

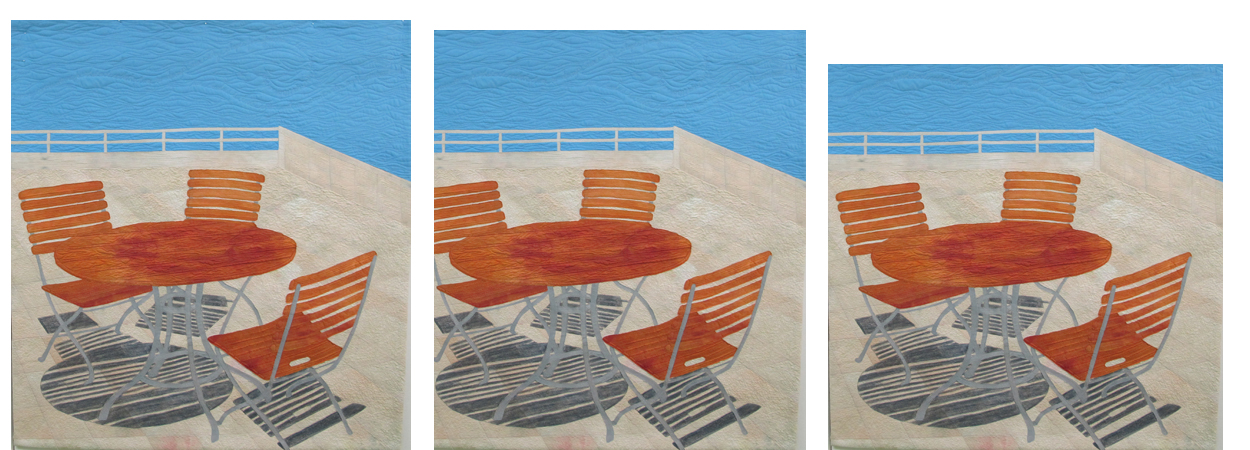
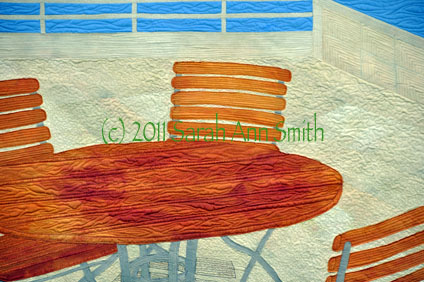
The quilt was getting better and I was disliking it less.  But it still wasn’t quite right to me.  There was too much blue at the top.  So for the show I “cropped” it by folding the top to the back… I’ll decide how much to trim off the top and re-do the facing and hanging sleeve after the show comes down.  So here is a question for those of you who have slogged through these blogposts:  how much should I remove from the top?  Here are three VERY similar versions:

So I do I leave it alone (far left), crop a little (center) or crop a bit more (right)? Photo is clickable to see it larger...

So do I leave it alone with lots of blue, crop a tiny bit, or crop a little bit more?  The photo on the far left is as made.  The way it is hanging is about where I photoshopped it in the center photo, and the one on the right is close to square (think symmetry with the proportions of the two small pieces).  So do I crop?  How much?

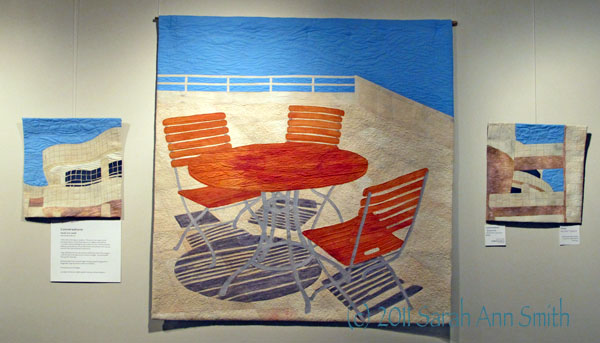
And just to remind you…here are the three pieces done and in the show:

Conversations by Sarah Ann Smith -- click to see larger

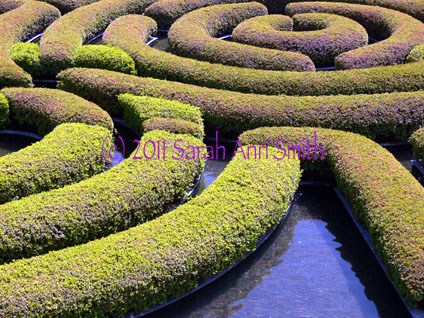
And yes….I might maybe do another quilt or two… I mean, look at this water-maze-garden-hedge…  how cool is that?  and the cropped version below?

the green is hedge, the dark in between is water!, and beyond are plants on the "bowl" shaped slope in the gardens that surround this water feature.

I just LOVE this rhythm and repetition....

Conversations, Part 2–starting the quilting

Tuesday, August 9th, 2011
The last time I wrote, I shared the ideas and dyeing the cloth and assembling the top to Conversations.  In this post, I’ll share the quilting, or at least the first part of i
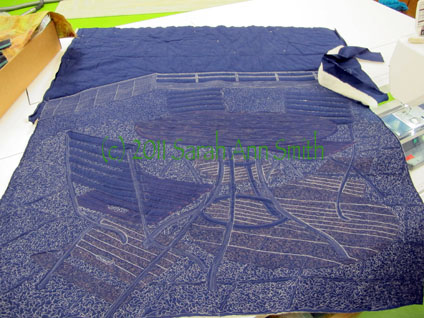
I guess you’ll have to believe me when I say that in the narrow channels on the table, where the wood goes down vertically, there is writing to create the “shadow”

The path to finished wasn’t exactly smooth.  I dyed the fabric…several times.  I was having a bit of a brain scramble, and not once but twice mixed up the proportions of red-yellow-blue.  At least I have some lovely browns, and fortunately I managed to make just enough of the creamy stone to make all three pieces!  The sky fabric is the first time I’ve tried a vat dye (versus low immersion) where you stir the fabric to get a smooth, even color.  But since the Los Angeles skies are screaming blue, I was so happy when this turned out just right, and on the first attempt (thanks to taking a few dyeing fabric workshops with Carol Soderlund).

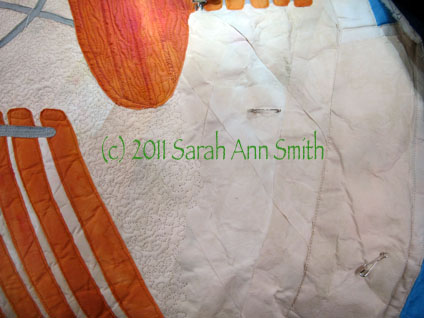
For this piece, I decided to try something different…instead of fusing the entire top, shifting my piece of non-stick press sheet as I work (I LOVE my Goddess Sheets from MistyFuse!), I thought I’d fuse everything to water-soluble stabilizer, often used in embroidery or thread  sketching.  What I didn’t think through is that because the top is FUSED, the stabilizer wouldn’t disintegrate when wet.  In fact, it ended up looking like a crumpled paper bag.  Erg.

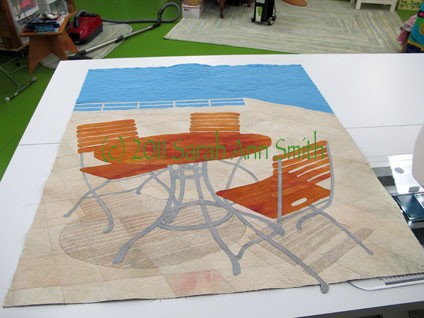
I used a small stipple on the paving stones to simulate the porous texture of the stone (usually I stay far away from a “regular” stipple!). As you can see from the unquilted part, the fused-to-stabilizer area looks hideous!
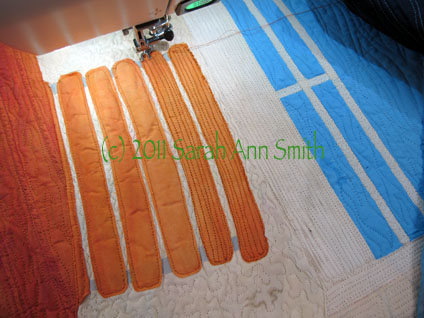
The slats on the chairs also just looked rumpled. I had wanted to leave them unquilted in the center so they would have more pop or loft to them, but they just looked icky. So when in doubt, quilt it to death! Here’s the in progress picture…


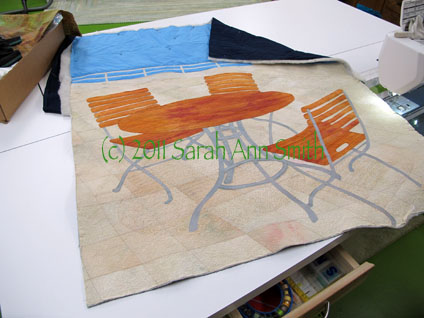
Some quilting done, but not all…yet.  Size will be 36 wide by about 40 tall….
And at the same stage, but the back. As you can tell, I haven’t begun work on the sky or the chairs/slats.  Why do I so often prefer the backs of my quilts?


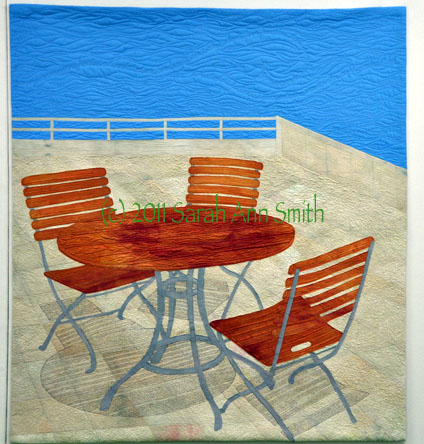
Shadows quilted, sky quilted, squared up.  I don’t really like it.  (Don’t worry…I made it better…at least I think it is better….)
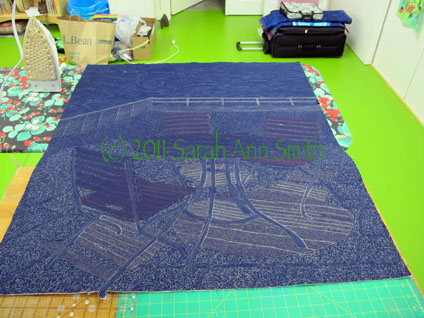
The back, with the quilting done.
Facings and hanging sleeve are on, and up on the design wall. Still not happy…the shadows aren’t bold enough. It was those striking lines and contrast that grabbed me, and that impact isn’t there.

In the next post on this series, I’ll share what I did to fix the quilt (well, I hope I fixed it and didn’t make it worse!) and the two smaller pieces.  More coming soon!