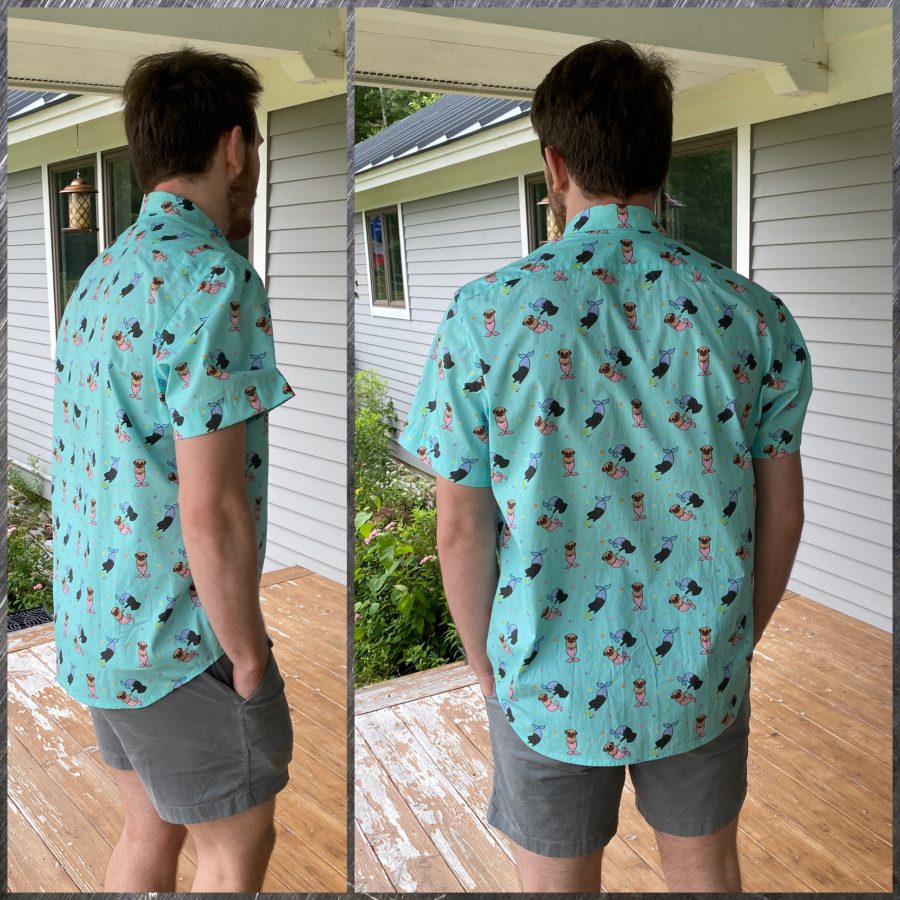
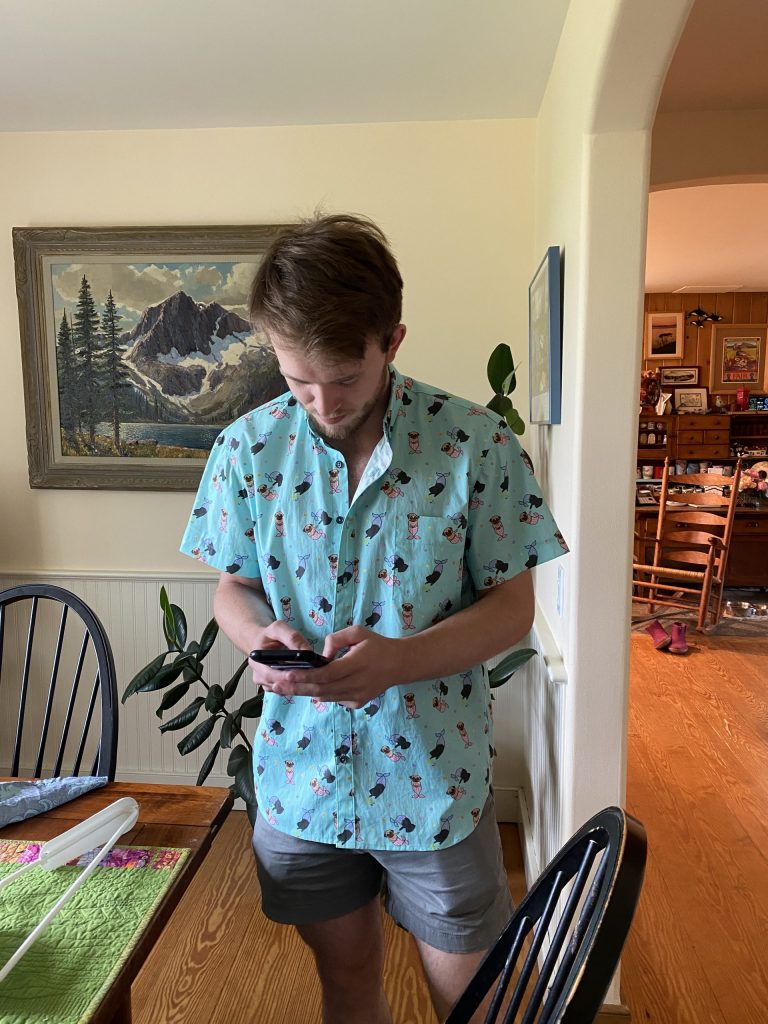
It’s a delightful feeling when your young adult son asks you to make a shirt for him. Since he lives about 5 hours away, going to a fabric store together wasn’t a good option, so I sent him to Spoonflower. LOVE it when his sense of humor prevails: he selected Mer-Pugs! Here’s the link to the fabric; I chose to print on cotton poplin as I’m not fond of their Signature Petal cotton. Needing to order 3 yards, it was a splurge, but it turned out great and he loves it!
Eli’s shirt fits perfectly!
The pattern is Liesl & Co.’s All Day Shirt Pattern. I used this earlier when I made Joshua’s donuts shirt (yes, they both have the same sense of humor!). Since Eli is a bit bigger, I was able to use what I learned making Joshua’s shirt in 2019 (blogpost here). I still had some issues getting the collar to be the size I wanted on the collar stand–I was careful to follow the instructions, but think the collar should be about 1/8″ longer on each side. Eli did not want any pleats on the back but did want short sleeves. He lent me a shirt that fits just the way he wanted so I kept that in the studio to compare as I made the merpugs shirt …much easier to adjust that way!
Earlier this year I showed on Facebook and Instagram how perfectly I was able to align and topstitch the pocket:
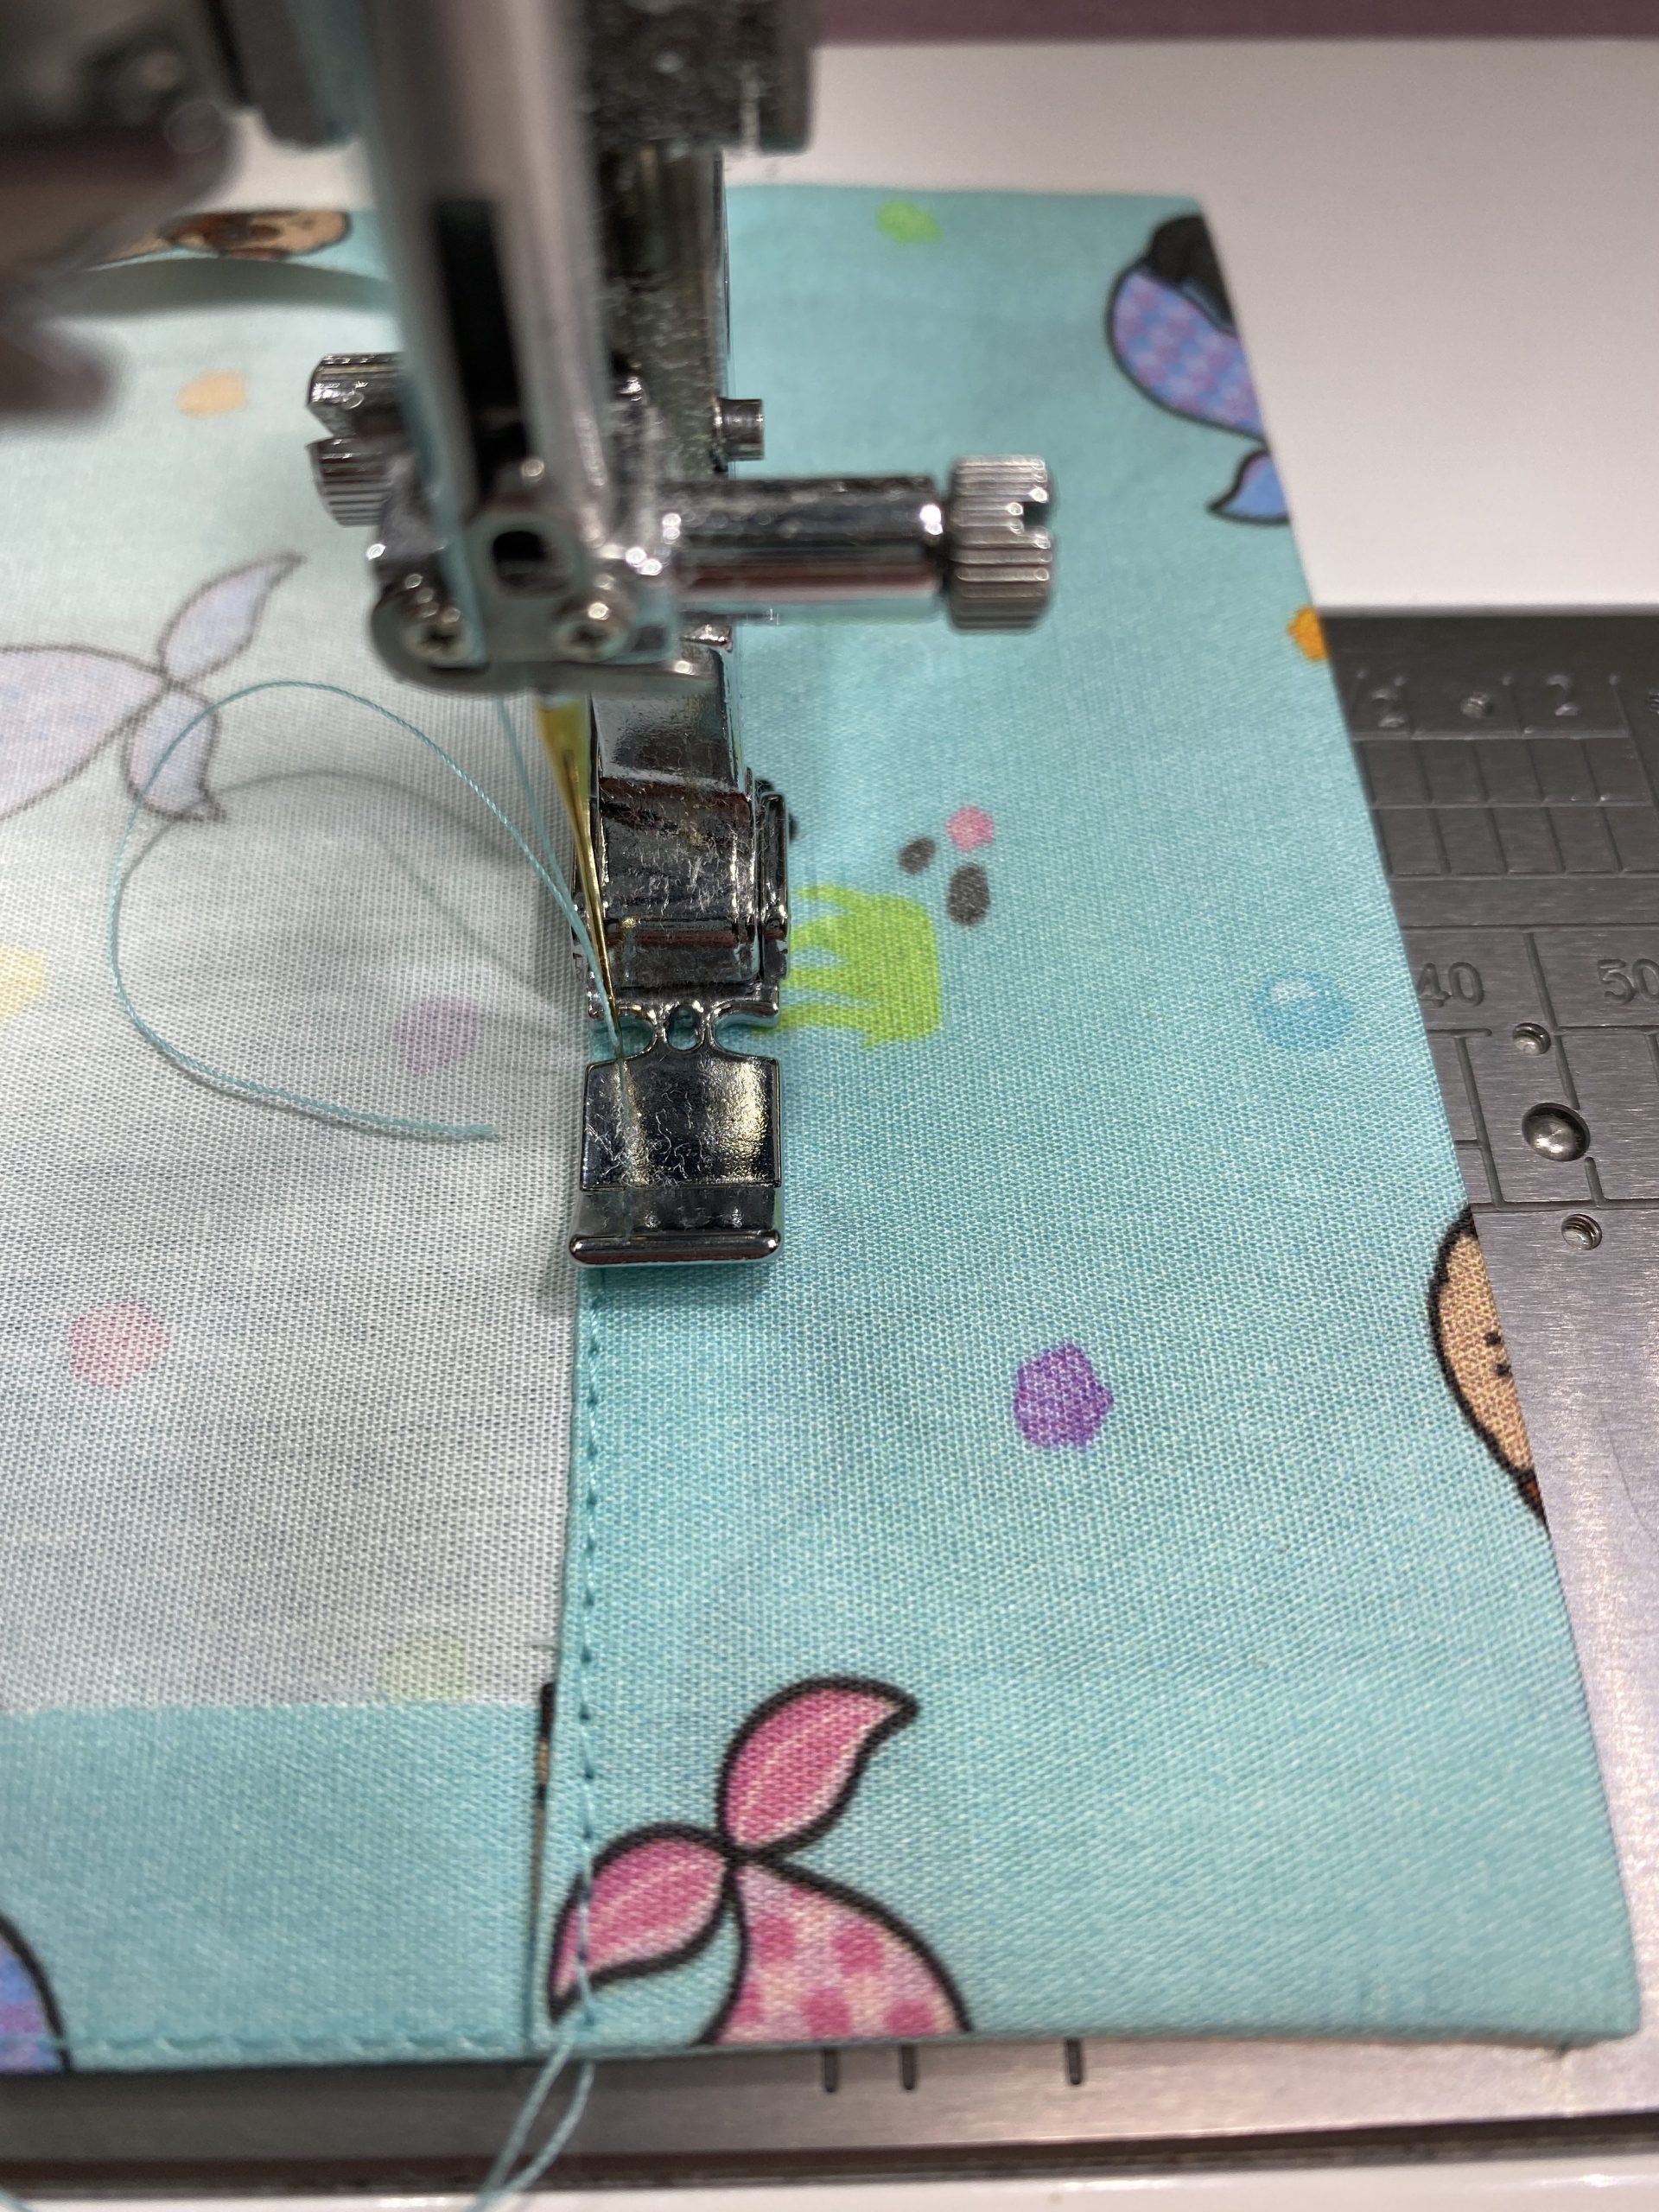
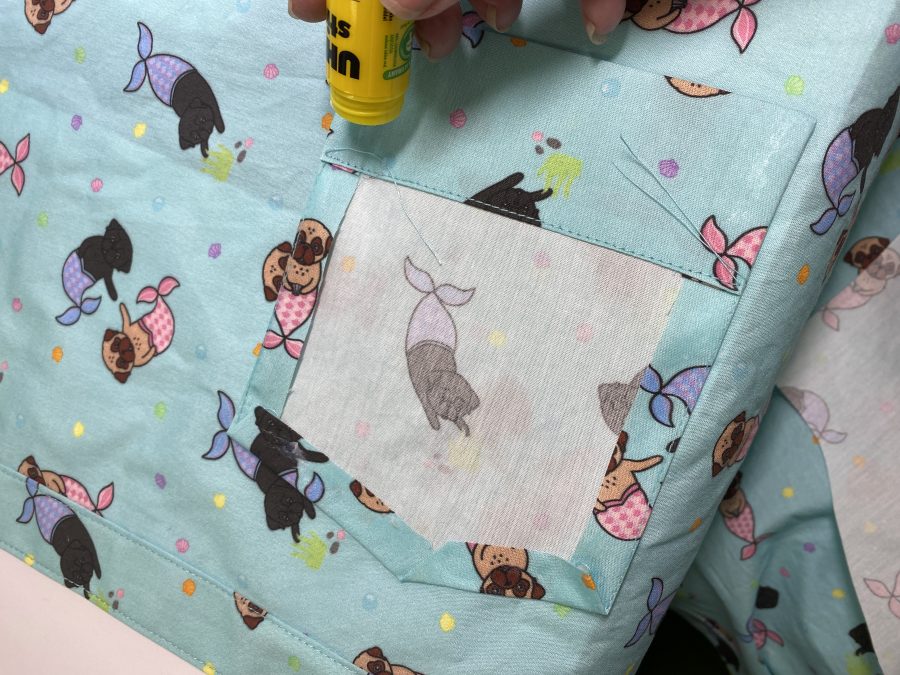
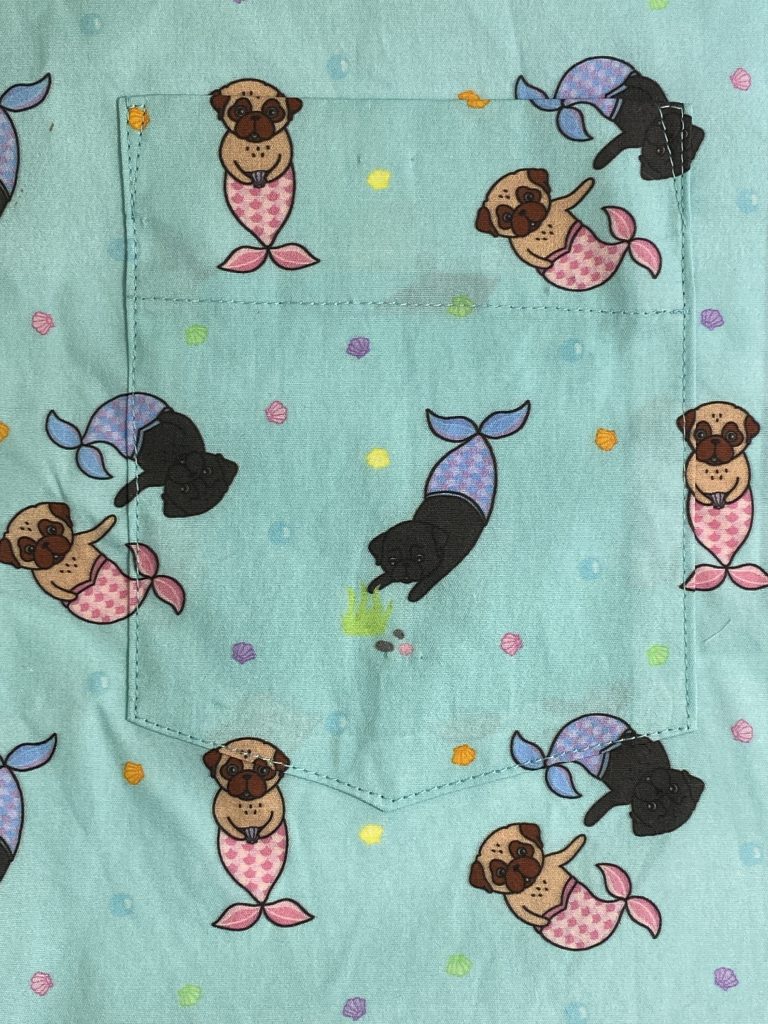
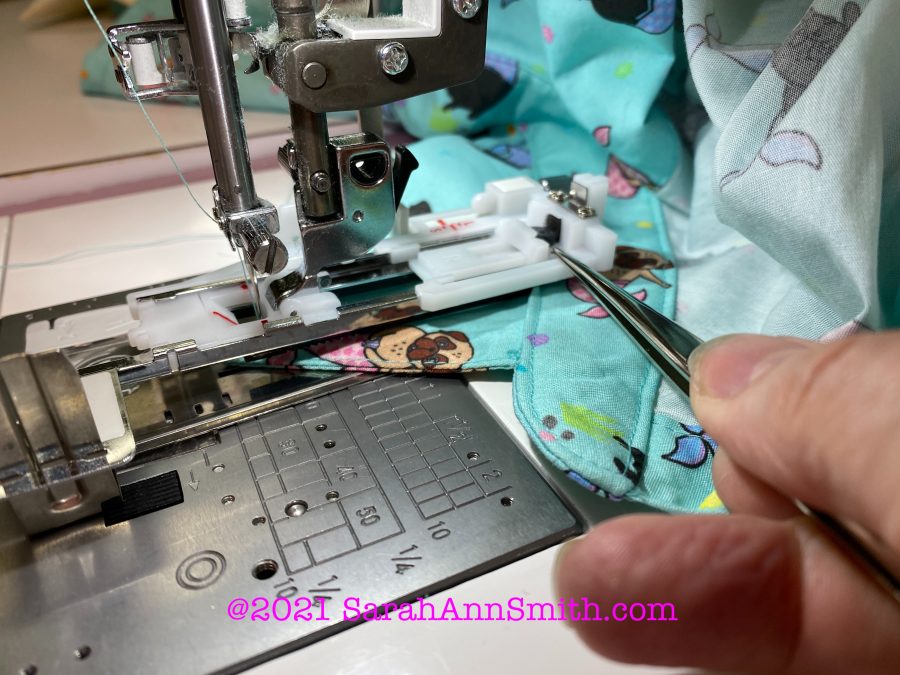
First, prepare the pocket. Turn under seam allowances; pattern instructions have you sew 1/2″ from edge, then iron under concealing the stitching. I did that, but having done perfect edges before without the bother of stitching, I’ll go back to my easier way next time. I love my zipper feet for all sorts of things especially perfect edge stitching. I just get better results than using the edge-stitching foot–try several ways and use what gives YOU your best results. I align the edge of the foot with the fold of the fabric, move the needle in the distance I wish, then keep my left thumbnail on the edge of the fold and foot to keep it straight. Next tip: GLUE STICK! Be sure to use a WASHASBLE glue stick, not permanent! Run a bit of glue along the sides and bottom.Glue stick the pocket so you have ABSOLUTELY positively PERFECT alignment. For me, this works better than pins and you get no ripples/distortion from the pins. As with the pocket hem, use the zipper foot, adjust the needle drop to the perfect spot, and sew in place. LOOKIT how those merpugs just swim from the shirt onto the pocket!Side and back views. Perfectly aligned the pugs from collar to yoke to shirt back! Having a machine with precision feed like the Janome M7 makes it easy!
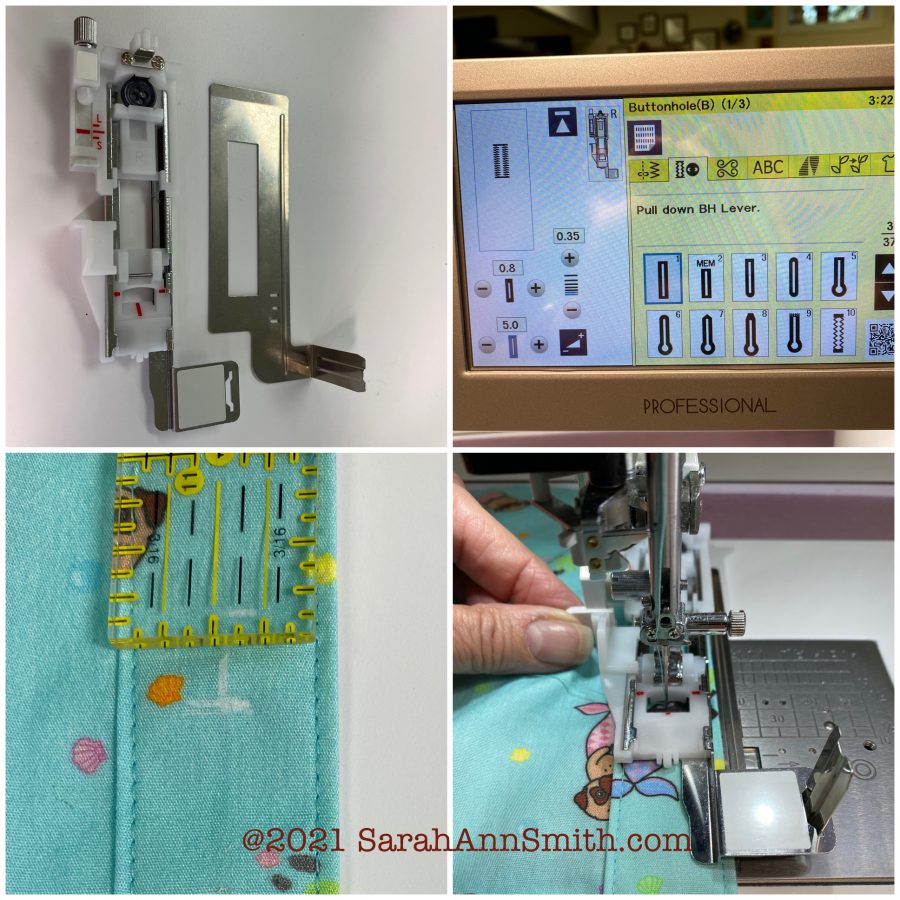
My voice sounds funny because I am getting over a cold! Anyway, here’s a quick demo of how FAST it is to do an automatic buttonhole! Next photo shows a side view of the automatic buttonhole foot
From top left, clockwise: Automatic buttonhole foot with stabilizing plate, buttonhole options on the Janome M7 Continental, pulling down the “stop” level on the buttonholer, measure and mark the start point and center line carefully
The tip of my awl is pointing to the small button in the back of the automatic buttonhole foot. This is how the foot knows exactly how large to make the buttonhole. It even worked with the teeny tiny buttons (about 3/8″) on the collar!What does a 20-something do as soon as one puts on a new shirt? Check the phone!
Hope you’ve enjoyed this! If you haven’t already, I’d like to invite you to sign up for my monthly (or thereabouts) newsletter! Just look in the right-hand sidebar on this page to sign up, or at the bottom of all the other pages on my blog. Thanks for stopping by!
I had been petrified of buttonholes for years, remembering how on my old singer (like 2-3 decades ago) if anything went wrong you’d ed up with a chewed hole in your nearly-done garment. This one is SO EASY! It truly takes a lot longer to re-position the foot than stitch the buttonhole! And thanks… the glue stick is my new BFF in the studio!

July 8th, 2021 at 11:00 am
GOOD job on all the matching! Yes, I’m shouting because I’m impressed. I know what a pain it can be. And that buttonhole foot. Quite the mechanism.
July 8th, 2021 at 12:10 pm
I had been petrified of buttonholes for years, remembering how on my old singer (like 2-3 decades ago) if anything went wrong you’d ed up with a chewed hole in your nearly-done garment. This one is SO EASY! It truly takes a lot longer to re-position the foot than stitch the buttonhole! And thanks… the glue stick is my new BFF in the studio!