email Youtube

Home
Galleries
Blog
Workshops & Calendar
Store
Resources
About
Contact

Archive for the ‘Machine applique’ Category

Teaching in Houston!!!

Tuesday, February 10th, 2009

A large envelope arrived from the International Quilt Festival folks in Houston yesterday; despite its size, I figured it had to be a sorry, no thanks.  WRONG!   I am teaching in Houston this coming Fall!!!!!!!!  I am elated beyond belief… it has been quite the effort to float down to be able to reach the keyboard LOL!

After I met yet another deadline I checked to see when applications were due…it was in six days!  So I quickly put together everything (I had last year asked on my blog for letters of recommendation and received several…thanks Betty, Jan, Mathea and Rebecca for your help!) and overnighted it ($16 well spent!) to Houston to make the deadline for certain.  Well, yesterday I received the results, and will have four days of teaching (I wanted 3 or 4):

Monday, October 12,
Fine Finishes (bindings and edge finishes)

Tuesday, October 13,
Machine Applique Three Ways
(the Blue Gingko pattern)

Wednesday, October 14
Tame Fiddly, Fussy Threads for Machine Quilting
(the More Machine Quilting class)

Thursday, October 15
Chunk and Jigsaw Fusible Applique–
total fun!  fabric postcards plus

    The classes will be in the Janome machine classroom (yeah!) except for the Wednesday class, which will be in the BabyLock classroom…better go find a BabyLock dealer and see how their machines are set up!

    I’ve set it up to do small kits for the classes, as that makes it a lot easier for both the students and teachers.  They get what they need that is unusual (they are asked to b ring their own fabric, batting, etc….usual items) like crisp interfacing, water soluble paper, fancy threads, that sort of thing.

    So, now I’m going to go eat breakfast (Irish oats and a banana) and float again!  THEN, after I finish a project to submit for consideration for the 2009 Quilting Arts Gifts issue (comes out before the holidays) and get that mailed off, I need to start getting my set-up done to use the video camera and digital projector in my teaching.  I actually signed up for a Jan Krentz workshop this may tho I pretty much never do traditional piecing any more just so I can watch how she teaches.  She’s coming to Maine in May at the invitation of the Pine Tree Quilt Guild, and I can’t wait!

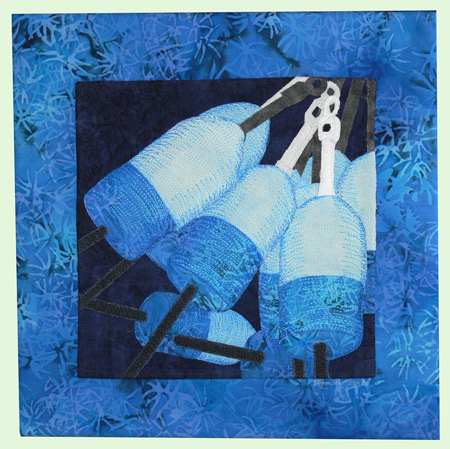
    Buoys 1 and 2… new work!

    Monday, November 24th, 2008

    Amazing… I actually got something done!  The quilted portions of these two pieces, Buoys 1 (Blue) and Buoys 2 (Pink-purple) were made for my local quilt chapter’s 10×10″ challenge.  The challenge was to make a piece based on guild-member Jan P’s husband’s photo.  Dwight’s photo is called Ropes and Buoys, and it was a delight to see the wide range of pieces.  (To see the challenge pieces as displayed at Maine Quilts this past July, click here then scroll nearly halfway down.)  I recently mounted my pieces on batik stretched over stretcher bars (with a base support and batting to make it look good).  They are for sale… directly from me until Wednesday morning then via Ducktrap Bay Trading Company, the local gallery that carries my work.

    Here is the Blue Buoys:

    Blue Buoys full

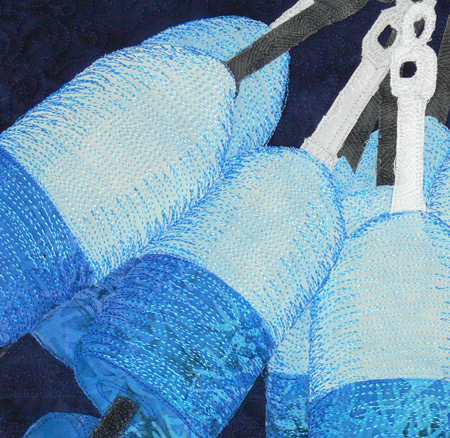
    and a detail shot which shows the intense quilting and shading with thread:

    Blue Buoys detail

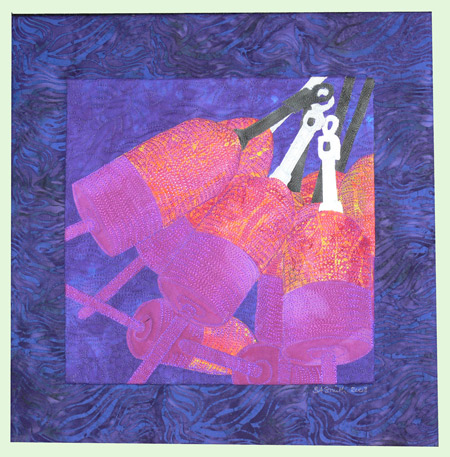
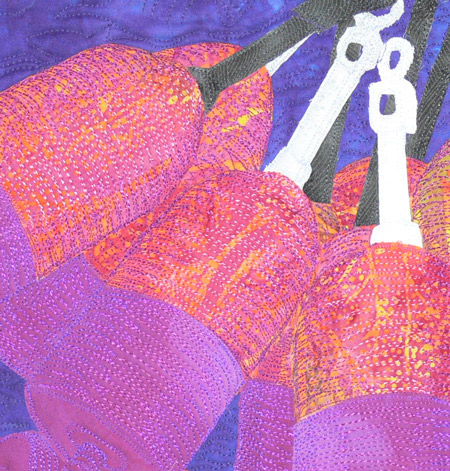
    I wanted to try doing the buoys in totally-not-realistic colors…the ones in the photo were mostly yellow and orange.  While blue and light blue might be a real combination, I can’t imagine I’d ever see any real buoys that are pink and purple (tho there are women lobstermen (???   that sounds weird, but I am pretty sure that they don’t call themselves lobsterers, maybe lobster fishermen, but that has the guy thing too… ???), but decided to try a really wild color combination to play with value and hue.  Here is Buoys #2 (pink – purple):

    Buoys #2 (pink-purple)

    And the detail of the pink one:

    Buoys #2 (pink-purple) detail

    Each piece is 10×10 inches mounted on a 16×16 inch frame (one inch deep); the background fabric  wraps around to the back which is clean finished and ready to hang.  The price for each is $250 plus shipping (if you order from me before Weds., shipping is included, otherwise it will be whatever the gallery charges).

    Bird in the Woods

    Tuesday, November 18th, 2008

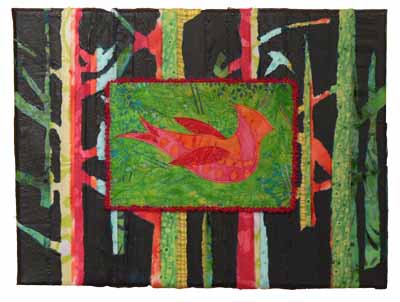
    So am I the only one, or are other folks trying to get their holiday shopping done EARLY!?   I have two new pieces that I’ve just (finally!) uploaded onto my website, but wanted to share them here, also.  The first is a modestly priced art quilt postcard mounted on a mixed media canvas, Bird in the Woods:Bird In the Woods

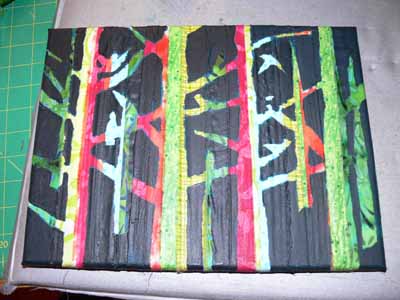
    The price is $60 (includes shipping by US Mail, within the US, write for other shipping options).  This began as just a canvas…at one of our Frayed Edges meetings.   Rather than simply create a silhouette of something and paint over a plain piece of cloth (Hannah was jazzed by a project on Martha Stewart), I decided to get clever and stretch strips of multicolored cloth over the canvas frame before slathering with Mod Podge (or was it Gel Medium?  same result….), letting it dry, then using torn masking tape to make the trees.  Well… I wasn’t so thrilled with the result:

    canvas, before postcard

    It’s OK, but no great shakes.  So I thought I’d just cover it all up with batting, fabric, and mount a postcard.  I tossed a lovely card Deborah Boschert had sent to me a few years back–yellow with a red bird, and Presto…. I  decided I’d make my OWN (very different) bird in fabrics because it looked great (except for the fact that her bird was red and the fabric is magenta…shudder!  color change necessary, but the idea worked).  SO, I rooted through my stash, made up a quick bird postcard (inspired by my Batiki bird, which you can read about here), and got to work.  I hope you like it!

    I’ll share the next piece in a few days… I also want to blog about Houston before it is ancient memories.  AND, I need to dash out, walk the dog, and meet Mom for lunch…. toodles, and back soon, Sarah

    Hawaiian quilting with the Backroads Quilters

    Monday, November 3rd, 2008

    On Saturday, October 18th, I was fortunate to be able to teach Hawaiian Quilting by Machine to the Backroads Quilters in Gardiner, Maine.  The Backroads Quilters are a wonderful, active and experienced group of quilters.  Similar to my local chapter, the Coastal Quilters, Backroads is a chapter of the Pine Tree Quilt Guild, Maine’s state-wide guild (which rocks!).

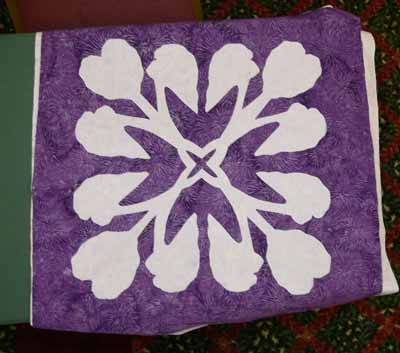
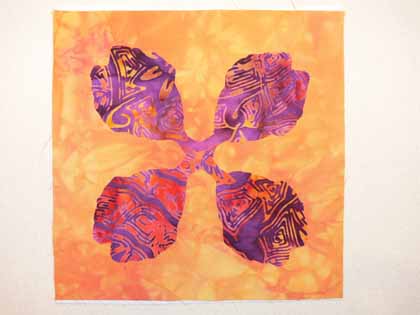
    Taro, 6 inch block

    I taught my paper-snowflake variation on the theme of Hawaiian quilting.  It is easier on the hands when cutting, lets you get stems and narrow bits that are equal (or nearly) in size (if you do the traditional fold the cloth into eighths the stems can range from narrow to blobby), and–if you do fusible applique and satin stitch–gives you two blocks from one fused-up square of cloth.  For this class, I did up a new 6-inch block.  Students get two choices of small blocks, turtle or taro plant, plus they can also select one of the five designs from Nourish the Body, Nourish the Soul–you can see that quilt here. Here is the taro block with two colors of satin stitching and assorted outlining stiches:

    I always love to see students take my patterns then reinterpret them in their own color choices.  The small blocks are offered because it allows a student to apply the adhesive web, cut the pattern, cut out the motifs, fuse and sew a block in one class.  Other students prefer to dive right in with a full size block, but often don’t get a lot of the satin stitching done during class because the larger blocks take more time to  pre

    pare and cut.  Here is a lot of eye candy!

    Ann’s block being cut out:

    Ann’s block, being cut

    and fused and ready for checking out thread choices:

    Ann’s Ulu / Breadfruit block

    Nena used a contrasting lavender thread for a nice bold outline on her taro block:

    Nena’s 6 inch taro block

    At first, this student wanted to use orange thread, but after doing several stitchouts, decided she liked the soft look of the navy.  By using the navy thread, she “popped” the small sprigged flowers in her print fabric and still gave a subtle framing to the edges of the pattern.  I LOVE this one! (OK..I love ALL of them….)

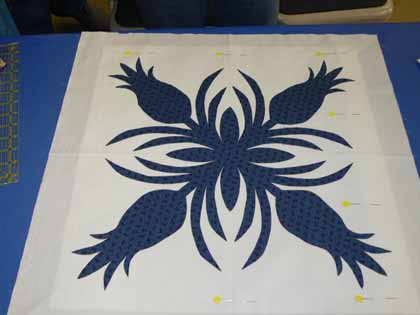
    Pineapple…the subtle navy stitching is PERFECT

    Here’s how that block looks straight on, before stitching–compare with the upper left pineapple in the photo above:

    Pineapple–the one with navy

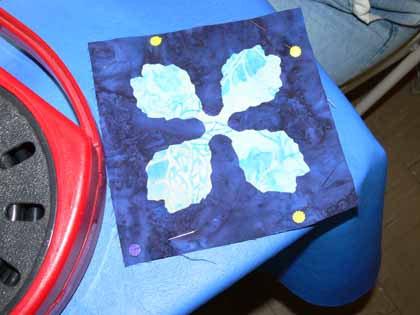
    Another small taro block ready to be stitched…this is reverse applique.  I like to fuse dark on top of light so the lighter fabrics keep their light, clear tones.  Her other block has a navy taro leaf on the aqua print.

    Another small taro

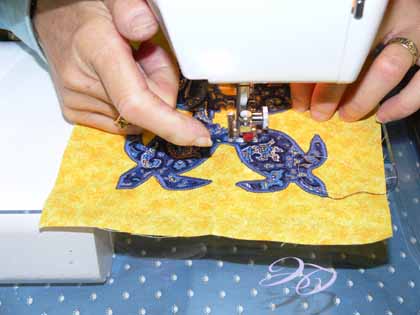
    Sometimes busy prints can be challenging in Hawaiian quilts, but this one works so well… the Wedgwood  blue  thread picks up the lighter color in the print, yet provides a solid line to separate the print from the background.  AND she managed a few PERFECTLY mitered points!

    A great paisley turtle, a 6 inch block

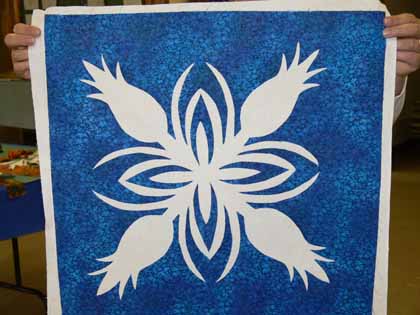
    Another pineapple block…this is the reverse applique…the bright blue is fused onto the white:

    Blue-white pineapple

    Often variegated thread doesn’t work so well for satin stitching unless you WANT a really striped look.  But this thread, Blendables by YLI, is a heavy cotton with longer, and more gradually blended, color changes.  I really like how it stitched out:

    Taro with variegated thread

    I hope you enjoyed the class as much as I did!  Thanks to the ladies of Backroads Quilters, and to Ann and Nena who invited me up to teach and made all the arrangements.

    Hawaiian-style quilting at Lowell Quilt Festival

    Sunday, August 31st, 2008

    One of the most fun classes I taught was Hawaiian style applique by machine.  Normally, this applique is done by hand using the needle-turn method.  It is beautiful, meticulous, and time-consuming.  Some years ago I saw a quilt made by a New Zealand quilter, Donna Ward, that was stunning… similar to Hawaiian quilts in style, and satin stitched!  The stitching became a whole new design element, and I was hooked.  And I must repeat… I love google!  Here  is a link to Donna’s quilt Jewel of the Pacific–scroll down a bit to the blue quilt.
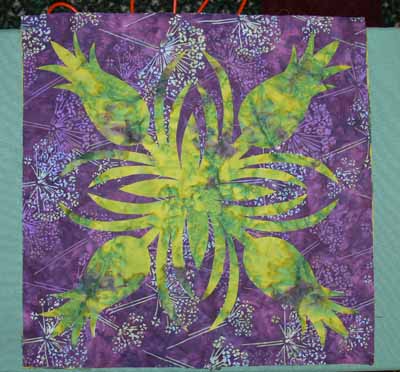
    Sally I.’s block, reverse applique

    For my book, Unraveling Threadwork, (hopefully due out Fall 2009) I’ve designed a quilt with nine 18 inch blocks using five different designs, as one of the main pieces.  I’ve also designed two smaller “practice” blocks, one of the taro leaf, another of the turtle.  This class was the first time I offered the smaller practice blocks as an option, and it seems to have been a good decision.  Sally was the one person in the class who opted to start with the large block, in her case the pineapple.  Her combination of deep purple and mottled green (above and below) was wonderful. I also recognized her name from the quiltart list…way fun to meet someone you’ve “seen” on line!

    A couple tricks to Hawaiian applique:  high contrast in your fabrics works well!  Variegated threads don’t always look so good…opt for a solid color. THEN you absolutely must:

    MAKE VISUAL DECISIONS VISUALLY!

    That means make a test, and try your threads to see how the look when stitched out.  Try adjusting width and length to see what looks best.  And if necessary (it probably will be) use a stabilizer under the background fabric to prevent unsightly puckers and uneven stitching.  Here is one student’s thread stitch-out sample.
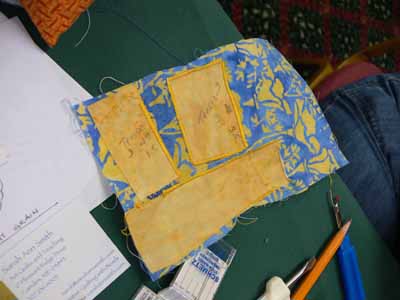
    Stitchout yellow on blue

    Her print fabric actually didn’t contrast a lot from the background–UNTIL she used the bright yellow thread to outline the design, at which point the subtle change in fabrics became awesome.
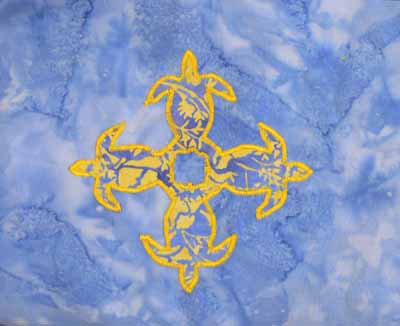
    Yellow on turtles

    Sally had brought a variegated that was PERFECT for quilting her pineapple, but when satin-stitched out, it really didn’t look so great, so a classmate lent her a perfect purple.
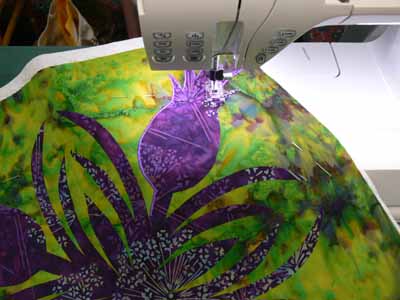
    Sally’s pineapple

    Another student opted for the traditional solid colors in very tropical aqua and yellow.  This simple choice is smashing!
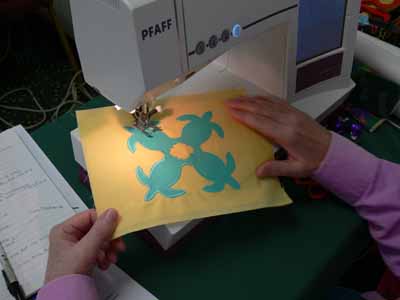
    Solids turtle

    One student brought some VERY bright fabrics which had a stripe, but they worked!  Here are her turtles (before stitching)
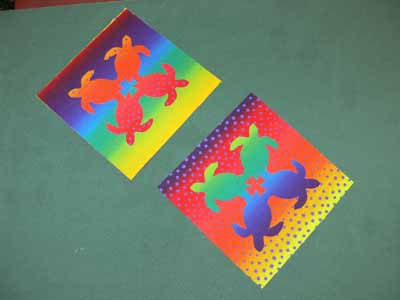
    Bright turtles with stripe fabric

    Since she hadn’t brought a varied enough thread selection, she opted to work on prepping a large block, also…talk about vibrant…wow!
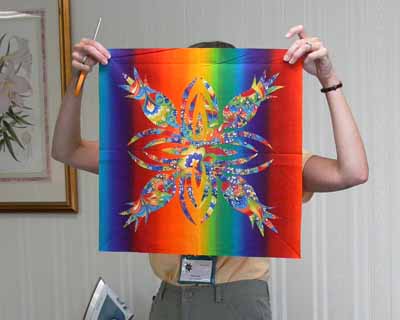
    really bright pineapple!

    When she uses a starkly contrasting thread, like a tangerine or orange-y yellow or turquoise, the bright line of satin stitching will help pop the busy fabric inside the pineapple motif…trust me, this one will work amazingly well!

    Other students preferred softer colors.  We were all surprised that this taupe-cocoa brown thread was such a good choice on the soft colors of the applique–sometimes the least expected selection works best:
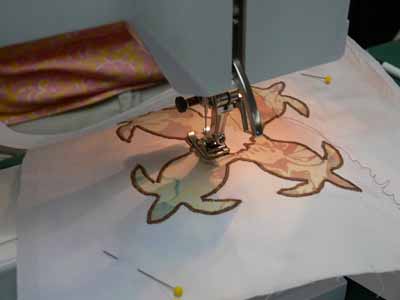
    Turtles with brown thread

    And here are her Taro blocks, in purple and soft lavender (which alas looks more white in these photos):
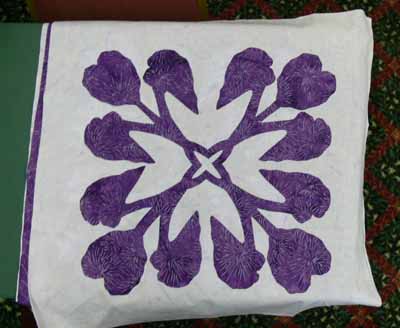
    Taro…purple on white

    and the reverse applique:

    Taro–reverse applique

    Here’s what I learned from teaching my class:

    • the small shapes on the turtles are a bit fiddly for beginners.  I need to make another, simply-shaped design, and have both turtles and taro leaf (or whatever) stitched out for students to see.
    • I should say on the supply list that variegated threads generally don’t work so well for satin stitching—be sure to bring plenty of solid colors
    • Also on the supply list, I should say to bring at least twice as many colors of thread as you think you will need!
    • Using the black Misty Fuse (adhesive web…a heat-activated glue for fusing fabrics) for demonstrating is perfect, since it is easy to see the bits that get left behind on the fusing sheets or baking parchment
    • I need to bring more Misty Fuse to sell….I ran out!

    So it’s off to update my class supply lists!  Hope you enjoyed this vicarious tour around the classroom.  I sure had fun seeing my blocks interpreted in so many wonderful ways.  I hope the students had as much fun as I did…imagine, I get paid to do this!  WOOHOO!

    PS:  I wanted to post a public thanks to the show organizers for the Lowell Quilt Festival.  The teachers were treated like royalty…. we had rooms to ourselves (weren’t required to share with another teacher), were presented with lovely welcome boxes with some snacks, little bottled waters, an a Lowell Quilt Festival badge holder in a color just for teachers…..   the hotel rooms were huge and comfortable, too.   It was a particularly nice experience, so thanks to all who were involved!