Two years ago I made my DIL Ashley a linen jacket for job interviews. It was a revelation! Working on another body (not mine) was SO EASY–I could see what needed fitting, figure out how to make changes, assess fit and lines. So I vowed to get a dress form. KaCHING! What I wanted was over $400! Nope. So I cast about for something less expensive. A local quilty friend had a friend with one to sell…done for $75. And it still mostly adjusted and wasn’t musty!
For your listening pleasure (you’ll need to read to the end to understand why), open this in a separate browser window.
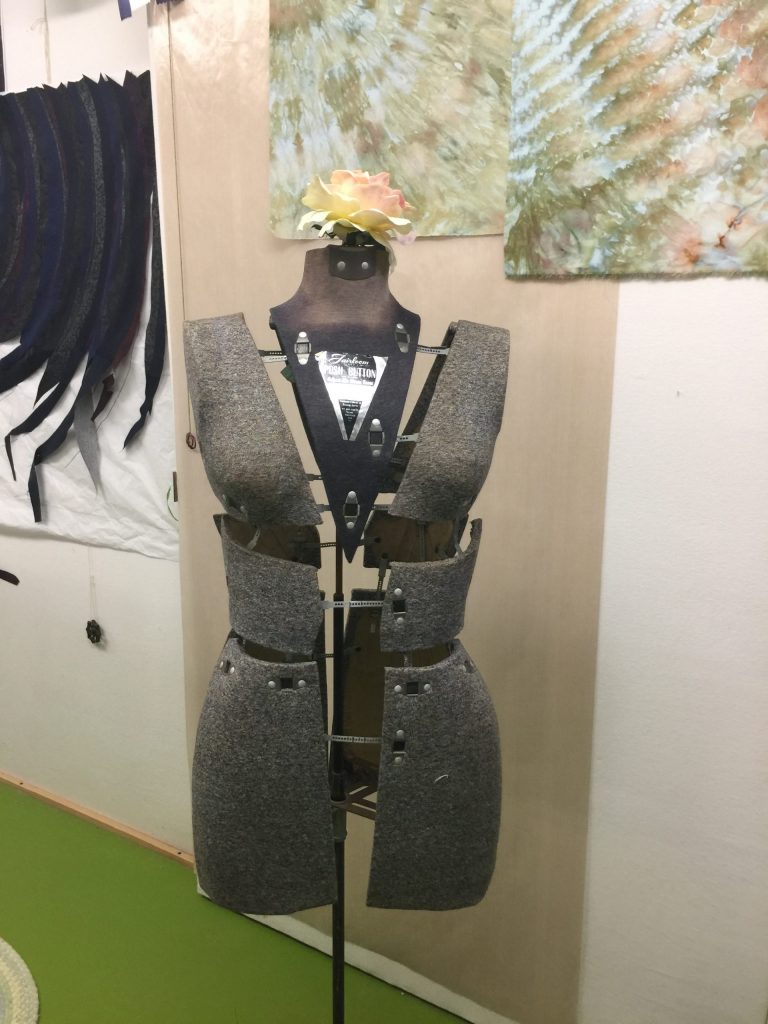
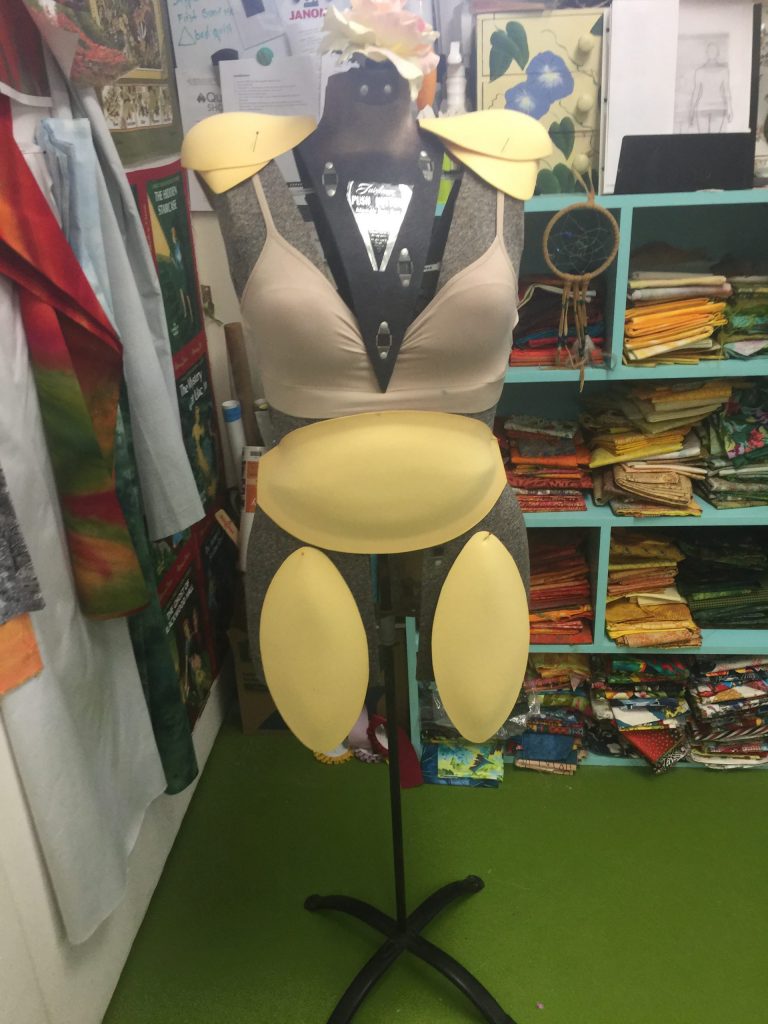
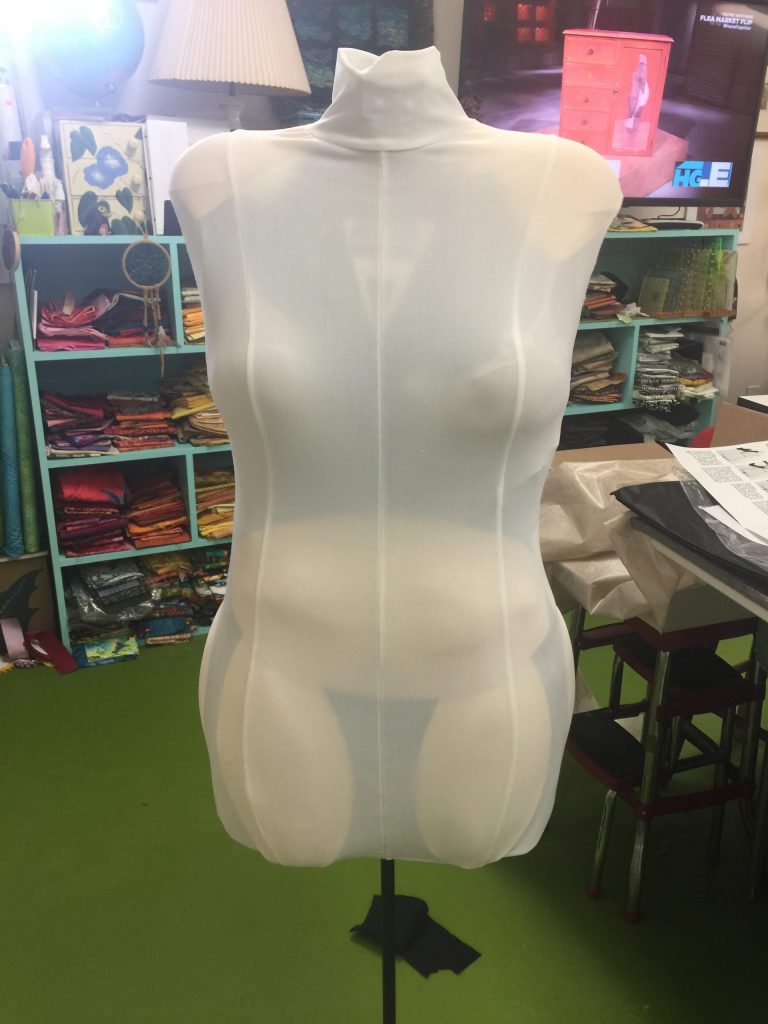
Front view: vintage dress form, not too rasty, sized out to replicate my measurements.
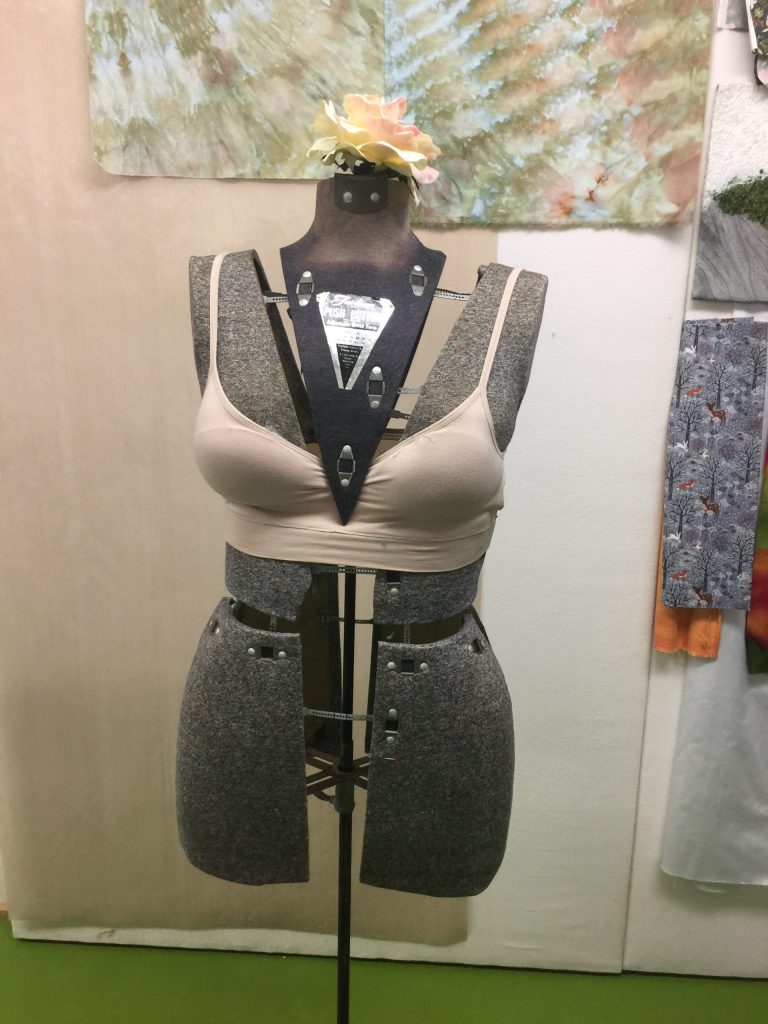
I began with taking my own measurements, adjusting the dress form to match, and then adding a bra to modify the shape of the bust to something resembling mine.First change: using an old bra to get the boobs into the right shape for me.
However, I discovered that the dress form and I were built on different molds. I honestly didn’t look as good as the dress form even though the measurements were correct. For starters, most dress forms start with a B-cup. The only time I was that large, I was nursing my sons! So I had to shrink in the torso to get a proper full bust measurement and shape, then pad out everything else to correct ribs, high bust, etc
But even that didn’t do it. Luckily I had long planned to get proper measurements done. Fiddlehead Artisan Supply (if you ever get to Belfast Maine, you MUST MUST MUST go there; quilt fabric, garment fabric, paint, art supplies of all sorts, crafting supplies….in other words, heaven!) has a classroom. Students can pay a VERY modest fee per hour for the teacher to come and help you. When I went, there was one student sewing and me getting measured. I figured I could try and explain to hubby what to do (but do I really want him to know my actual size? NO!) OR I could get someone who sews and would do it properly. Easy choice. The following is a chart I made to use at that session.
To prepare, I looked at patterns, sewing books and knitting books to figure out every conceivable measurement I might need, ever. And I put them into a chart. I have created this a PDF for you to use!
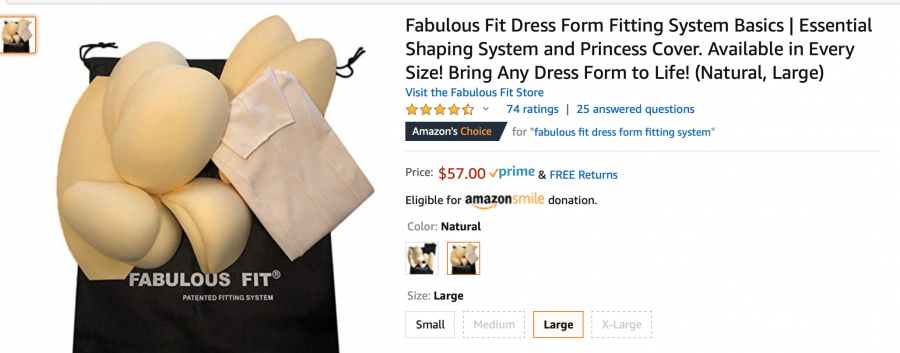
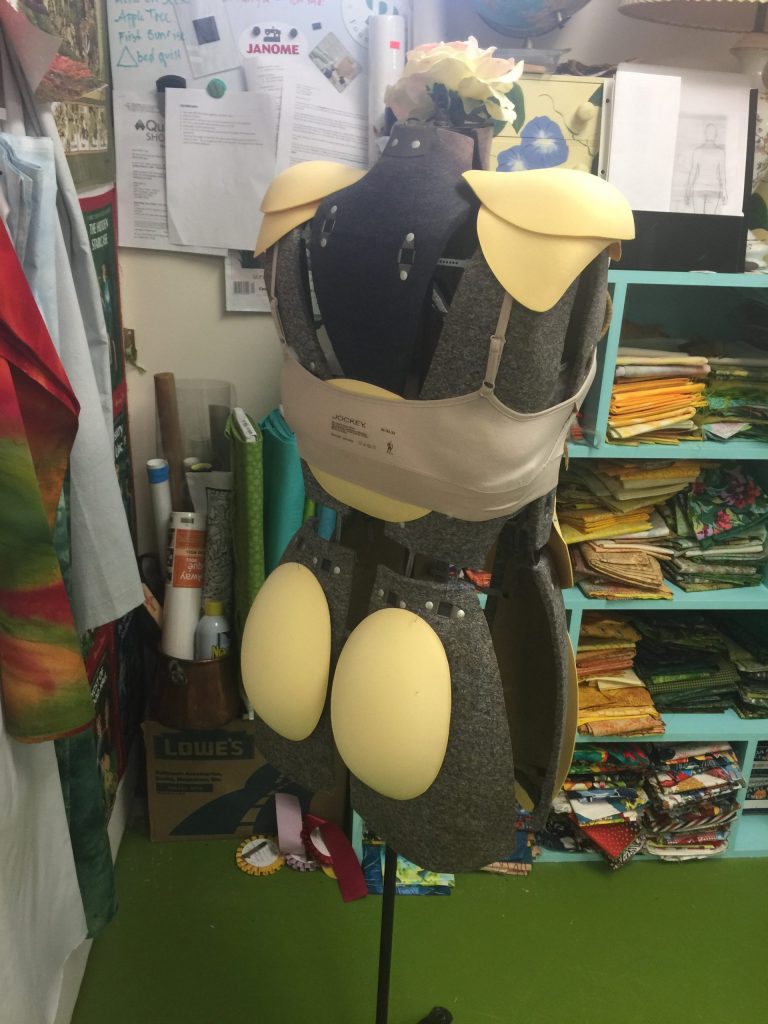
I tried using batting and whatnot, but decided to purchase this smaller set of Fabulous Fit Dress Form pads to make life easy AND give myself a surface that was more pinnable than the actual dress form which is a very dense molded paperboard covered in cloth. I didn’t understand why the slightly more expensive version of this set had TWO dress covers….I’ll explain below. Here they are on Amazon US.
Pads added, front
In having my measurements done, I discovered that not only were the bust shapes wrong for me, they were 2″ too close to the shoulders–I wasn’t that perky at even at 17! The fix for that (having surfed the internet to see how others modified dress forms) is to reduce the overall torso length until the apex of the breast is the right distance from the waist, then build up the shoulders. Revelation! Plus, that also meant I could make the shoulders wider and more square, like mine. However, there were still big gaps on the sides– hard to pin into those!
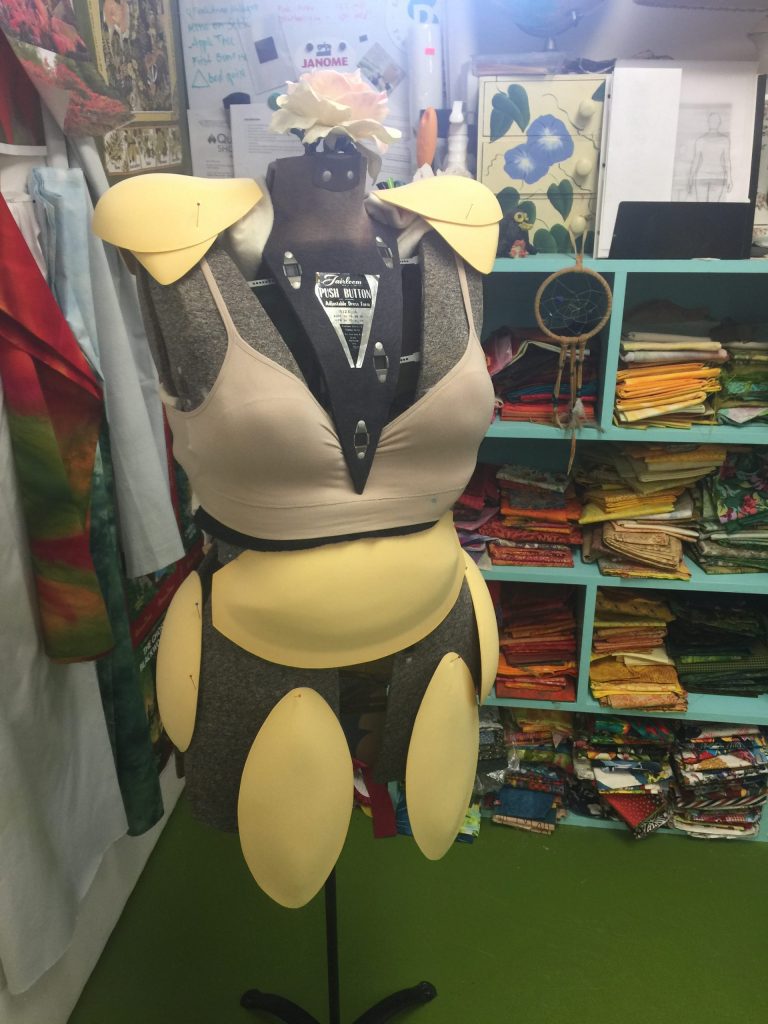
More pads added to the outer hip zone.
The second set of oval pads worked well to flesh out (hahahah) the hips. And because I needed the contract the torso to get the bust to work, I had to pad it back out to approximate my actual ribcage. If I ever get a modern dress form, I discovered there are “flat” dress forms for those with mastectomies or who are smaller than the industry standard patterns which are for B and C cups. Grump alert: Yet another blast from the fashion industry telling the smaller-busted amongst us that we are less than worthy (try finding an alluring bra in a small cup size–not!). Jerks. Anyway, at least I know that “flat” forms exist.
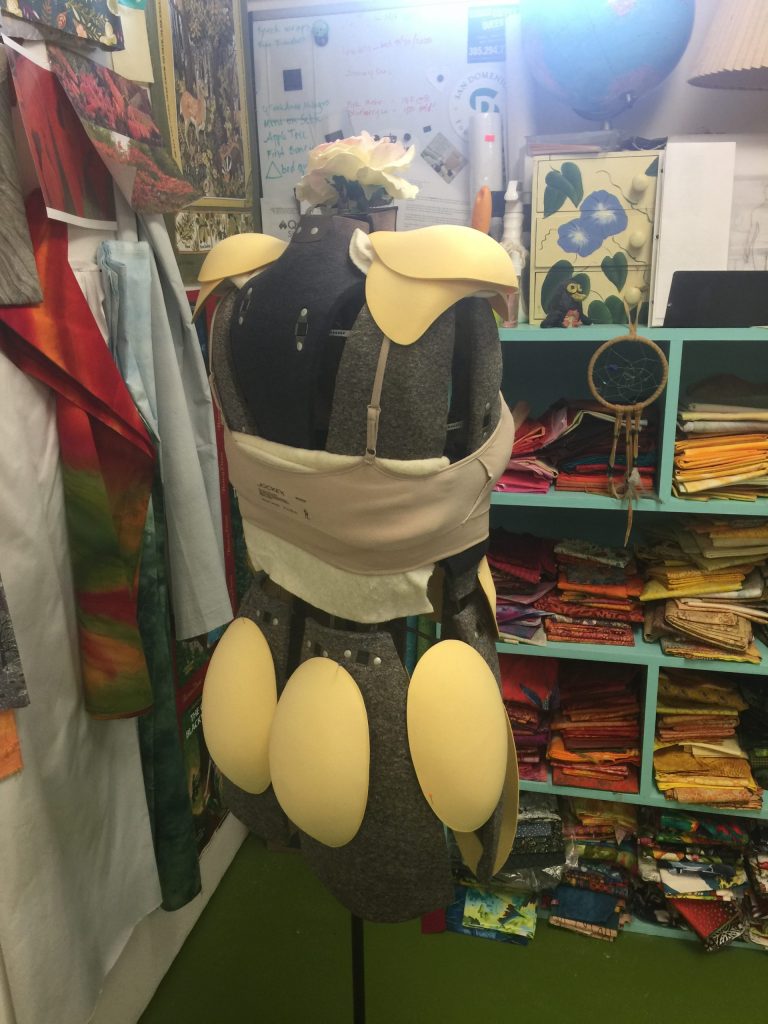
With the princess seam dress form cover added
This is pretty close to how I really look…definitely close enough to do fitting on a fitted garment and get it to work. The larger sized “kit” comes with two covers, and I couldn’t figure out why. Turns out you use the one with SIDE SEAMS as you “build” the pads–the lycra cover hold the pads in place and allows easy adjustments and fine tuning. Then you are supposed to put the princess seam cover on top of that for opacity. Having the seams, which you can feel under the fashion fabric, is a good thing. Next time I’ll purchase both covers so I can feel the side seams as well
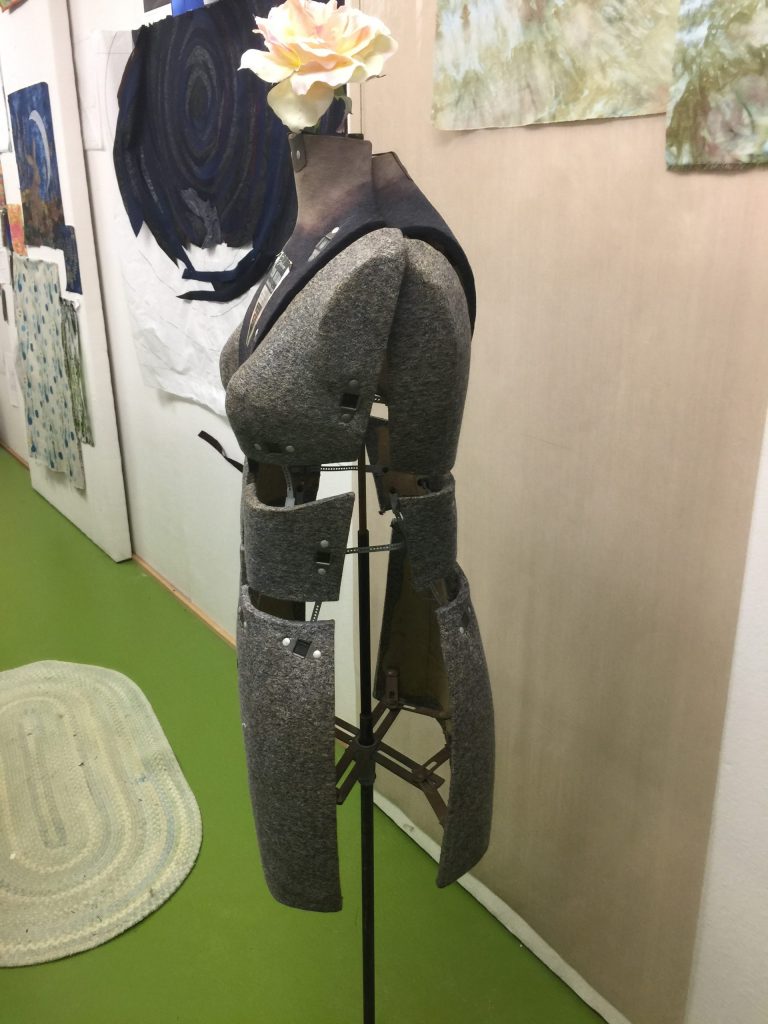
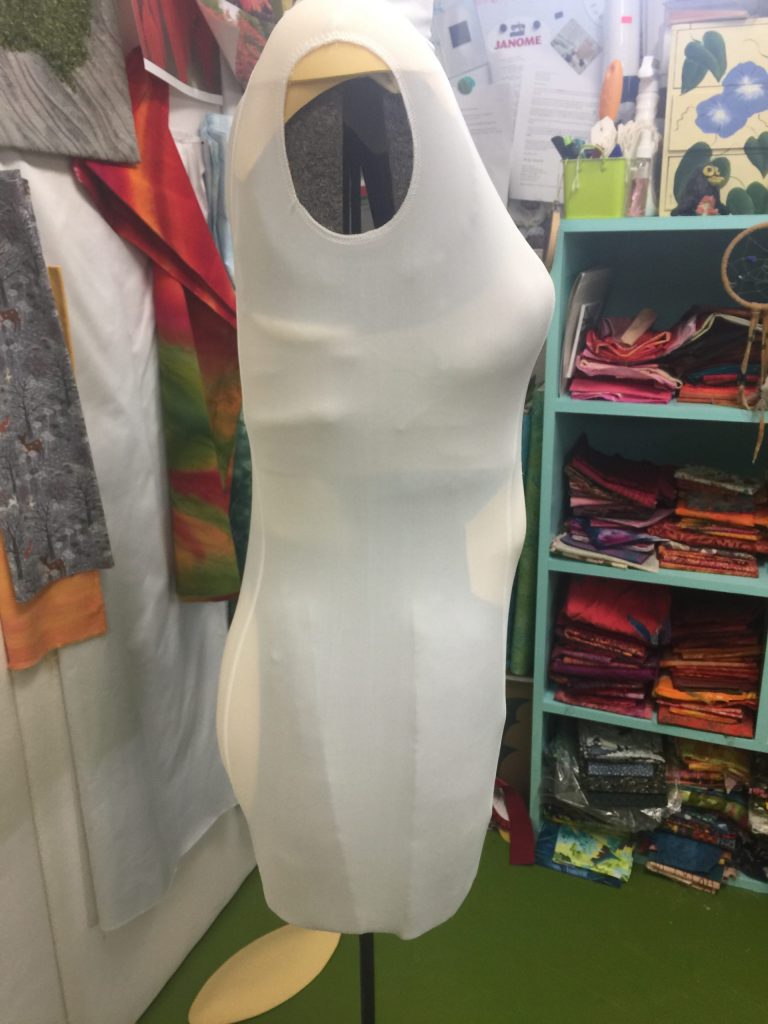
Side view before I got the hip and front thigh pads snugged in. Thankfully I am not as lumpy as the batting in the upper back.
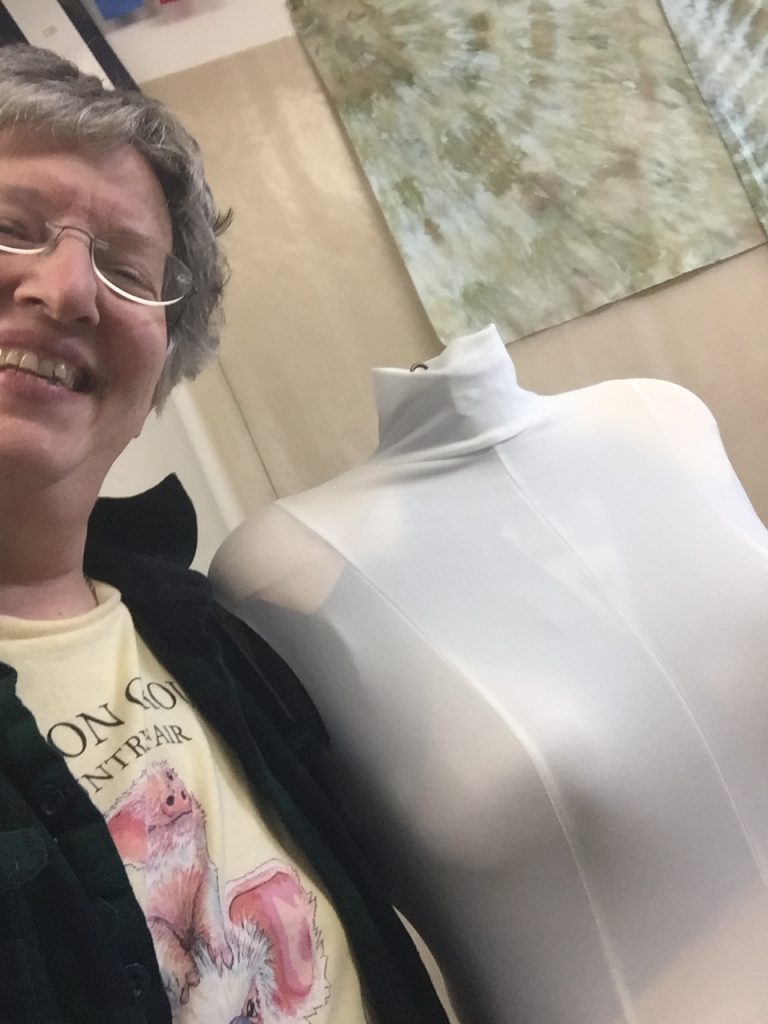
Me with Ailith Skye, my body double
I learned SO MUCH about the shape of my body in this process (and I’m fine with lumps…life is better with ice cream, although 10 pounds fewer lumps would be nice too….the 20 I need to lose ain’t gonna happen). And I learned about the pattern industry, the “blocks” (body shape bases they use) and fitting ease. I can now use my stand-by—measure a garment I have that fits the way I want and compare with what I measure on the pattern–along with the dress form and get a fit that I want!
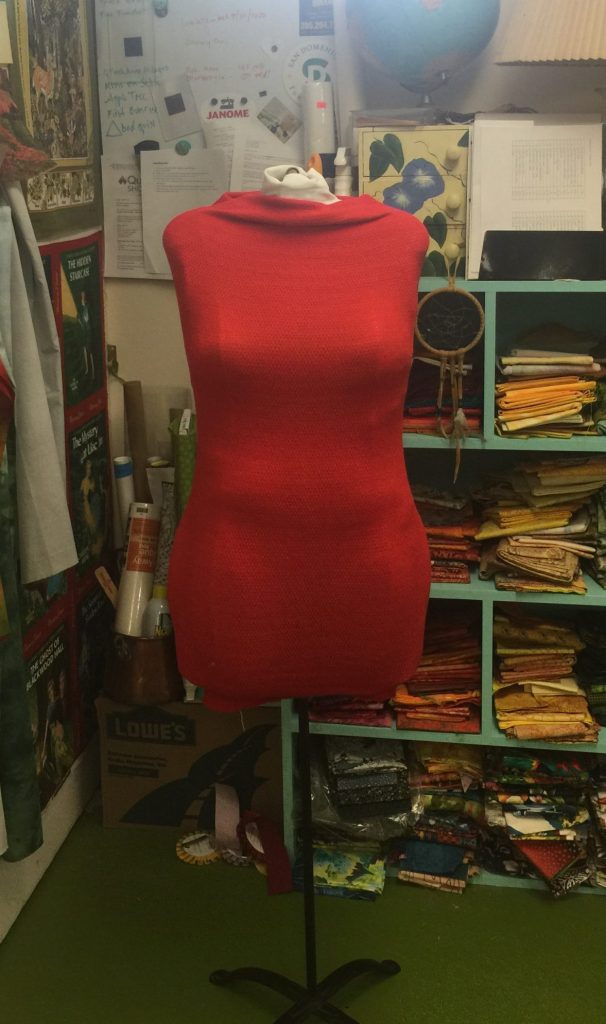
In the coming weeks I’ll have several garment making posts. I have made a top, a skirt, a tunic, leggings, have another pair of leggings on the cutting table, and a pinafore/jumper on the design wall. Ailith (traditional Scottish name meaning seasoned warrior–my paternal grandmother was Irish but born in Glasgow, I am named after her, so I liked Ailith) has been a great help already. Can’t wait to share. Oh…and why red dress?
Put on your red dress, girl, and have FUN! BIG thanks to Marty Ornish, who makes amazing art with old quilts and dress forms….check out her website, Marty-O, here. I asked her what she uses, and for some purposes she uses mannequins with stretchy fabric pulled over. She gave me a length, so now Ailith can put on her party shoes!
For a while now I’ve wanted to blog about irons, and why I love the ones I have. Yes, plural…..I have SIX! Three are “small” size, two are regular, and one is Sirius the Black Dragon. Yes, my Janome M7 sewing machine is named Albus (the second, he had a predecessor named Albus). There’s even a video at the end of this post about all these irons!
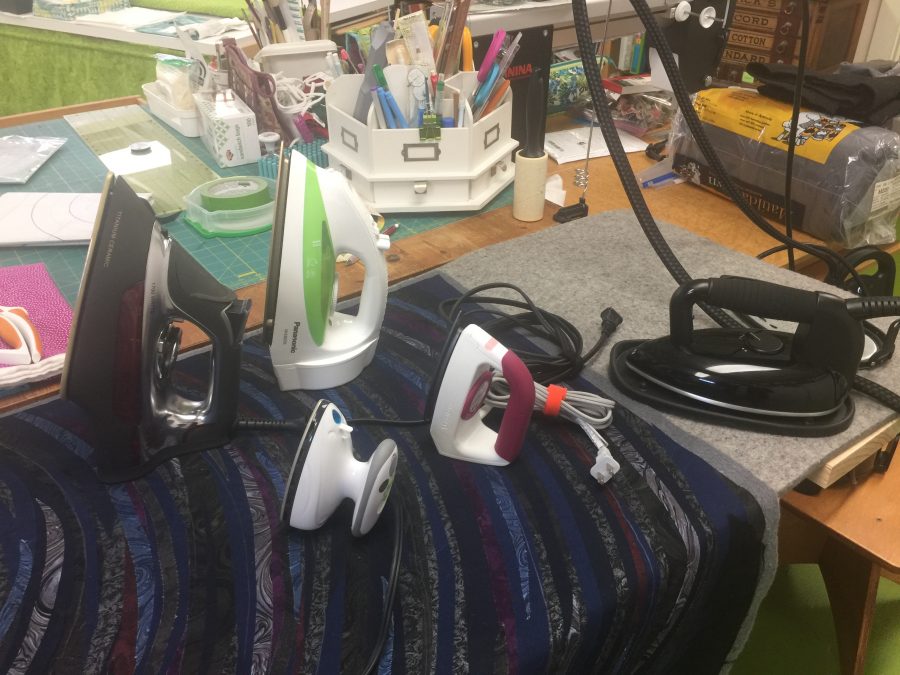
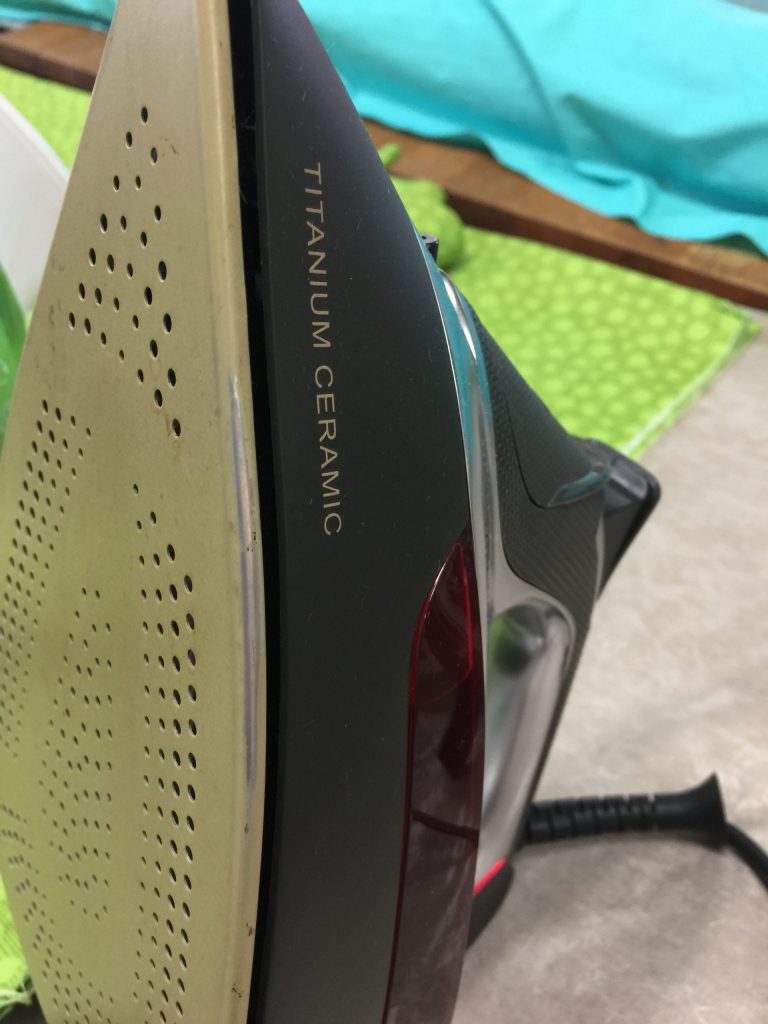
From left to right: the CHI, my beloved Panasonic Titanium Nonstick, the little mushroom style, the (SOB no longer made SOB) Clover, and Sirius, a LauraStar steam generator. I have a sixth sorta small iron, but it is too heavy/awkward for my hands and was upstairs for use steaming in the closet–not that I’ve actually ever used it for that. Sigh.
The Panasonic is my go-to iron for fusing. At 1200 watts, it gets hot and has acceptable steam, although I almost always use it as a dry iron. I love this iron so much I wore the finish off my last one! I always have one that is my working iron, and a brand new spare in the closet in case the cats or I knock it off the ironing board one time too many (studio is in the basement, cement floor…not good for falling objects). I can LITERALLY place this on Mistyfuse or other fusible web, melt it all over the bottom of the iron and WIPE IT CLEAN. No more hot iron cleaner fumes (which cannot be good to inhale–they set off smoke detectors)! For the price of four tubes of iron cleaner, you’re golden. This link takes you to the one I am currently using–I like that it has auto off because I am easily distracted. As of April 2020, it is a whopping US $27. Even if you only use it for fusing, it’s worth it!
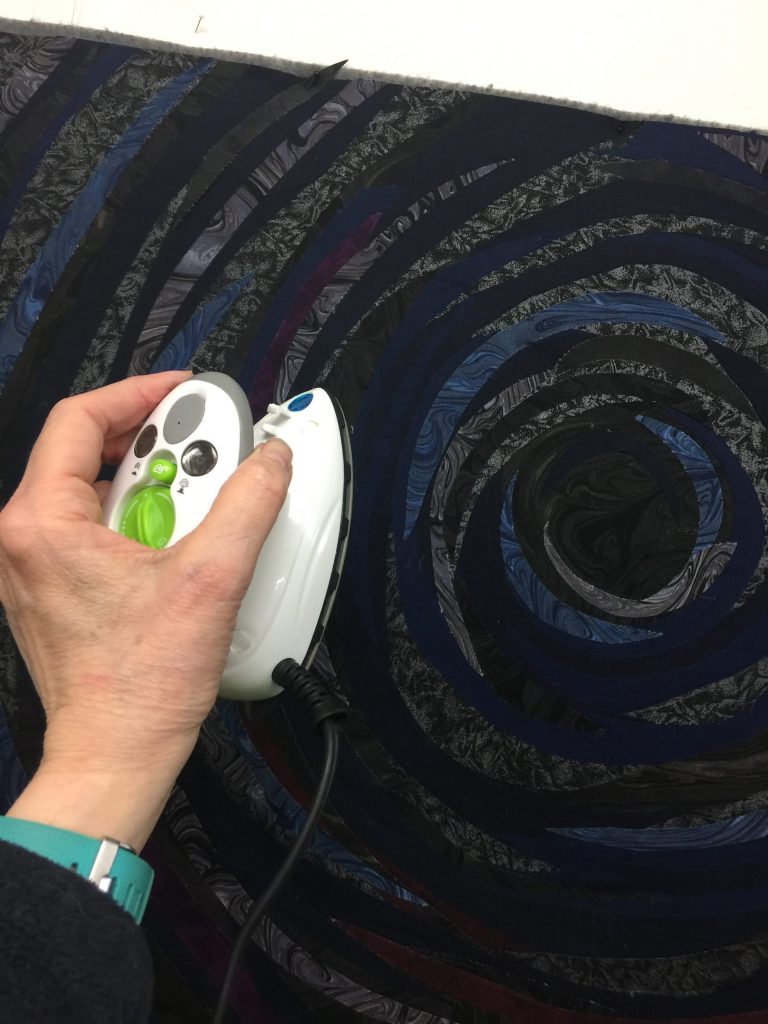
I fuse on top of my ironing surface, but also on the design wall. Holding the iron (which is relatively light) had gotten uncomfortable because I have arthritis in my thumbs and wrists. So I tried the little mushroom iron, the ones you see in classrooms and at retreats–many folks can plug them in and not blow the fuses. It is quite comfortable to hold when used on a flat surface, but on the design wall it requires you to bend your wrist, and that hurts for me.
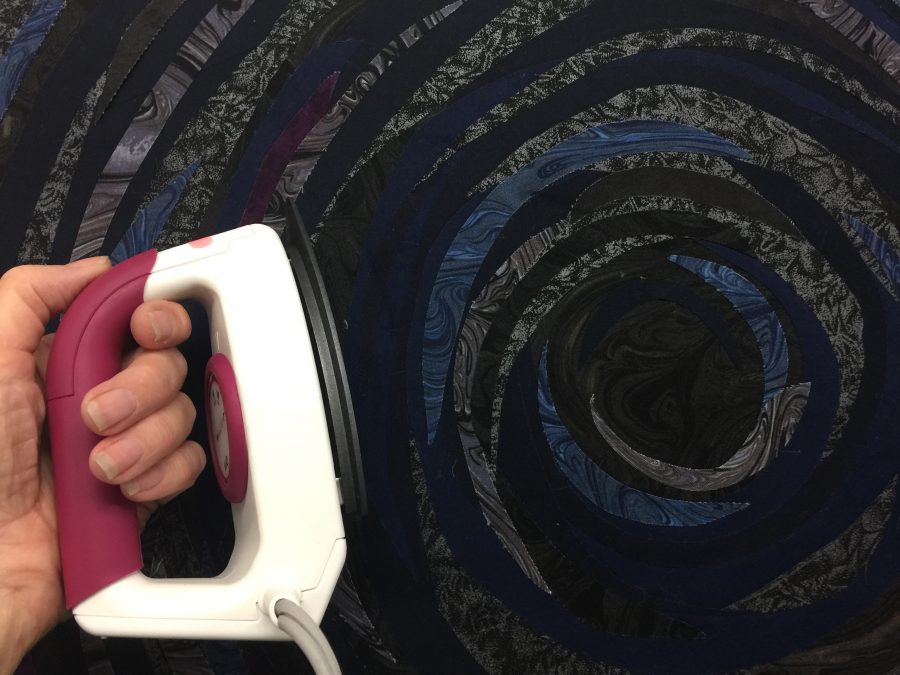
Here I am holding the iron on the design wall, and I have to bend at the wrist which causes discomfort. That’s why I really prefer the…SOB….not longer available Clover iron. Yeah, I’m sorry, I know that doesn’t help you very much. I haven’t included a link for the little mushroom style irons…there are a bazillion available on Amazon, at quilt shops and so on. From what I can tell they are fairly similar.The Clover iron is ideal for the design wall. The “mug” handle rests on my fingers, and I can see my hand and forearm in a single line–as if I were wearing a brace. That means I can tap it onto the design wall as I work with no pain at all. I don’t know if there are any models similar to this style out there….If ANYONE KNOWS OF SOMETHING SIMILAR, please TELL ME! I’d love to test one out and see if I can recommend it to my students. And if anyone knows someone at Clover that we can all write and beg them to make this again, tell me that, too!The 1200 watt Panasonic Titanium non-stick iron is on the left, the CHI 1700 watt is on the right, and that glorious fabric is Meadow color of HashDot by Michael Miller Fabrics.
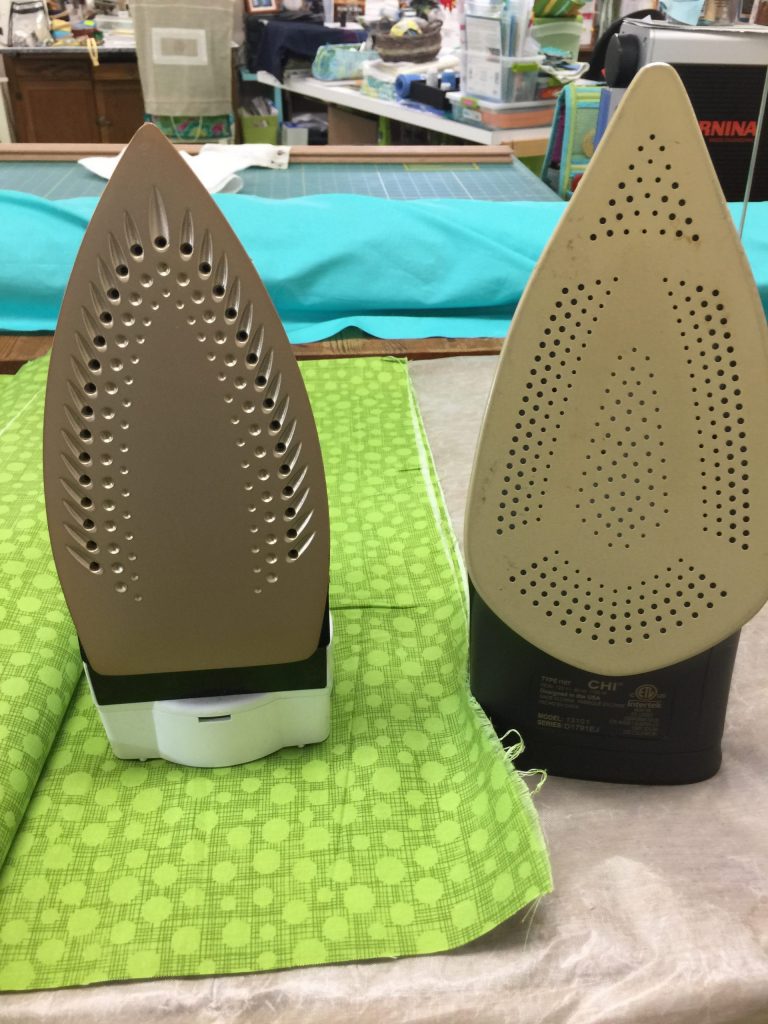
For years I have recommended the Panasonic Titanium nonstick iron to students–Panasonic should give me free irons for life I’ve sold so many for them LOL! But I had (note the past tense) suggested that the gold-ish colored titanium appears to be the key. Not so much. First, my “in the closet” iron-in-waiting is a Panasonic Titanium ordered earlier this year, but is now a silvery color instead of gold-ish, but still works the same. Second, not all Titanium non stick is the same. I decided to give the CHI Titanium Ceramic, below, a try. It costs more, about $59, and has 1700 watts so lots of heat and power and good steam. It’s great for steam ironing, but not so great at the non-stick–it really doesn’t wipe clean the way the Panasonic does. Here’s what happened:
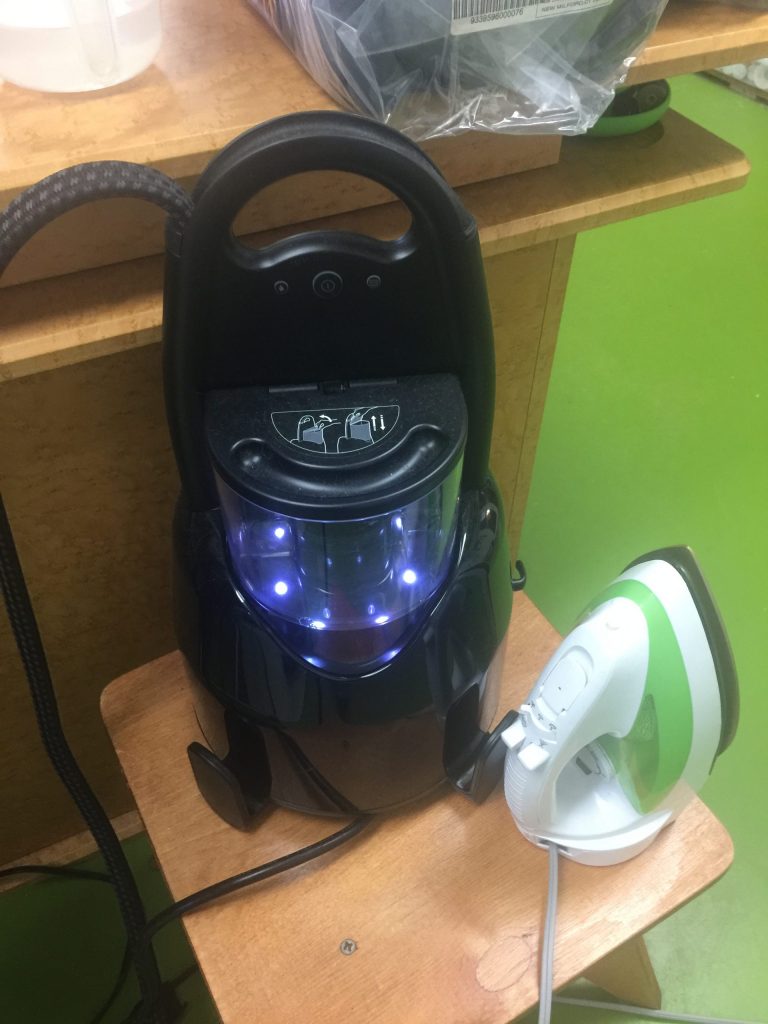
I needed to (yuk) get out the hot iron cleaner. This surface just doesn’t wipe clean well. I use Faultless Iron Off hot iron cleaner on a soft white terry towel. And look what happened: I rubbed off the finish on the gunky edge!!!!!! It’s still a good iron, and I use it, but not for fusing. It has quite a large capacity water reservoir which is good in principle, but again that pesky arthritis poses a problem: it’s heavy. That’s where Sirius the Dragon comes in. Keep reading. ANYway, if you don’t use fusibles (or even if you do) this is a good, hot iron with good steam. The LauraStar steam generator is a grand indulgence! Please be sure you are sitting down when you see the price on this black beauty…they are expensive. But OH MY! I had been lusting after a steam generator for a long time, but (to repeat myself in a short space) they are expensive. And this is on the expensive end of expensive. But I’m sure glad I indulged–nothing beats a great tool.
The model I purchased is the same as this one (minus the soleplate cleaner, which I wish I had). The steam is IMPRESSIVE…literally, it sends out a jet about six feet….watch the video below! It comes with a cord stand (which I don’t point out in the video. There is the power cord and, wrapped in cloth, the line that powers the iron and brings the steam to it. Unlike a regular steam iron that produces steam constantly (if you set it to do so), you need to push the button, but that is easy to do given the location on the handle.
The steam cord is a bit stiff, which is why having the clamp-on cord guide is so helpful. You also get a silicone mat so you don’t have to tip the iron on end, just set it on top of the mat. That is comfortable for my arthritis. So is the light weight of the actual iron. AND you can steam things that hang, like curtains and garments!
When I have a lot of ironing (like yards of dyed fabric, or just washed fabric), the steam generator is a DREAM. Also excellent when doing a final fusing of the finished art quilt top and when blocking a quilt. Many steam generators if the tank runs dry, you have to turn it off, wait for it to cool, then add water. Not so this one–just open the lid to the easily accessed tank and add water (shown in video). BINGO! WINNER! Just be sure not to send a blast of steam in the direction of your other hand. Guess you don’t need to ask why I advise you of that. Ahem. Only did it once! If you are also a garment maker, you’ll love this. I will grant you, it is *expensive.* But in my case, worth it.
Bottom line: I use the Panasonic for all fusing. For smaller ironing jobs, I use the CHI. For working on the design wall, I use the Clover. And when I need STEAM or have a lot of ironing to do, the LauraStar. So there you have it…why I ned at least FOUR irons! What are your favorites, and why?
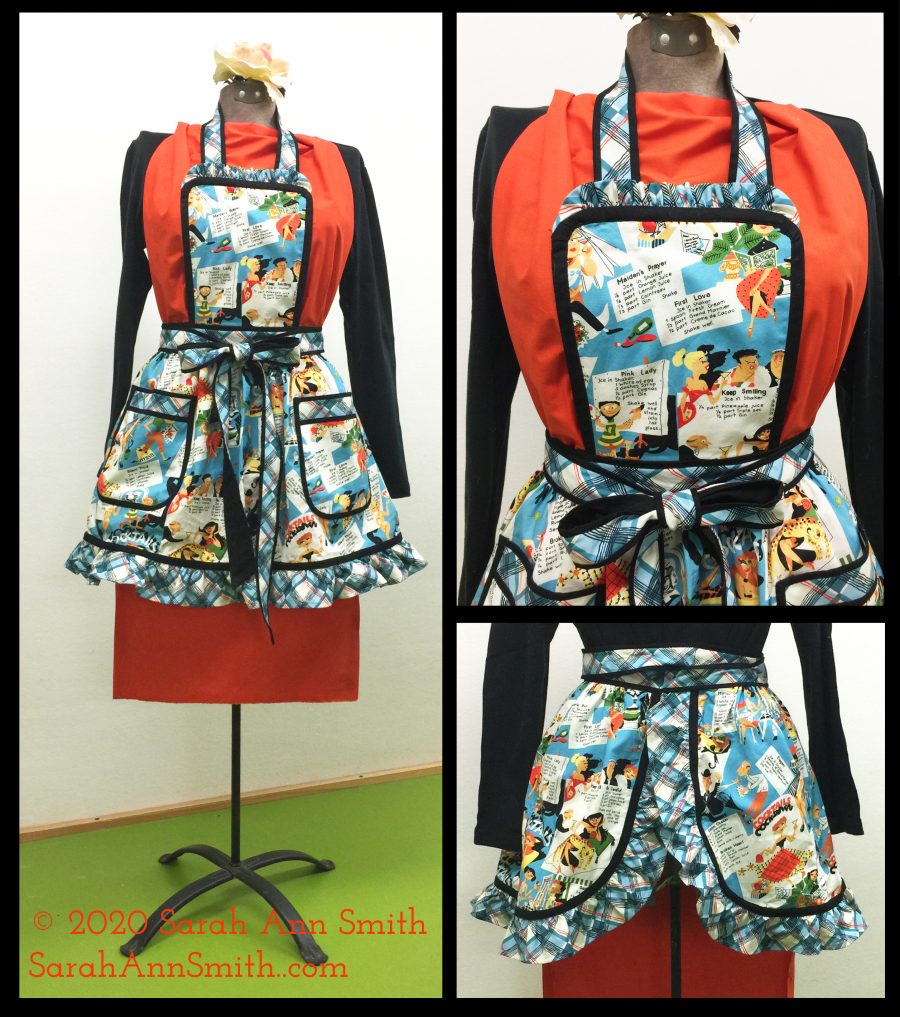
Today we’ll wrap up the last steps in this fun apron. Get ready to make a Kitschy Cocktail wearing the cutest apron ever to cover a frock. Enjoy a nice sip, preferably with a little paper umbrella! Make mine a pina colada, please! For the blogpost for Part 1 of this pattern, click here. For the blogpost for Part 2 of this pattern, click here. To download a Free-in-2020 PDF pattern with ALL the instructions and images, click here.
The Rockin’ Retro Apron in Kitschy Couture by #MichaelMiller Fabrics. The fabric was provided as part of the Michael Miller Brand Ambassador 2020 program, and my brilliant Janome M7 Continental is provided to me as a Janome Artisan. Thank you!
Sew the waistband and finish neckband
Administer chocolate or wine as needed—you’re near the end!
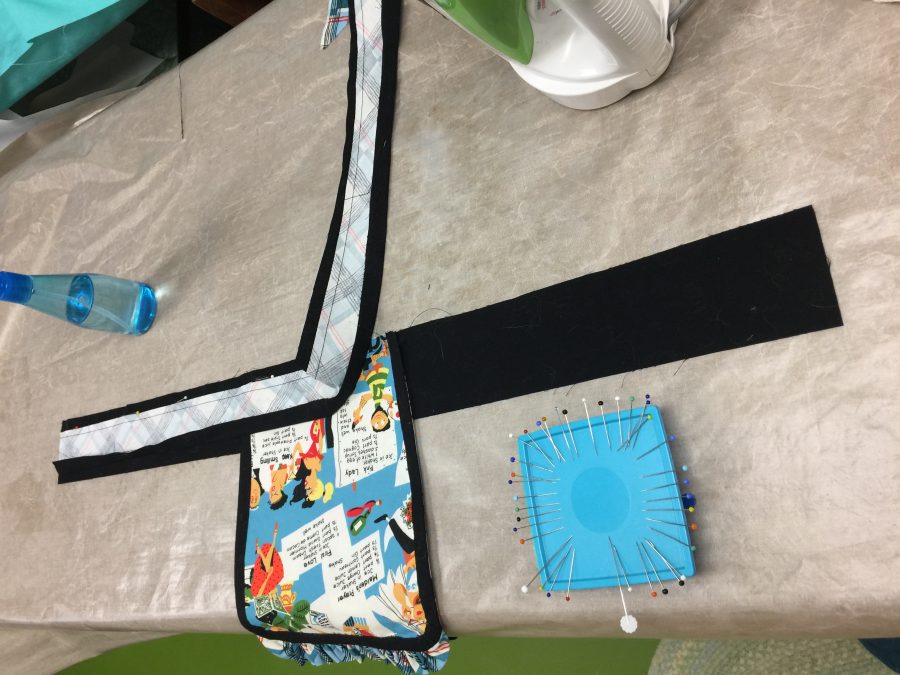
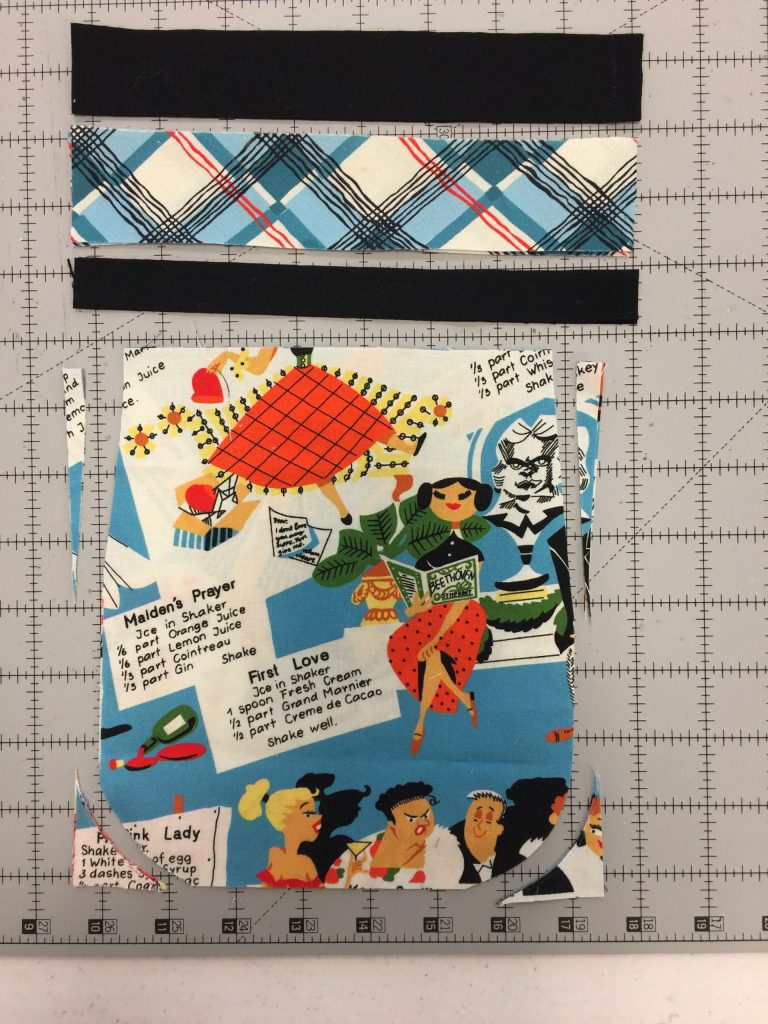
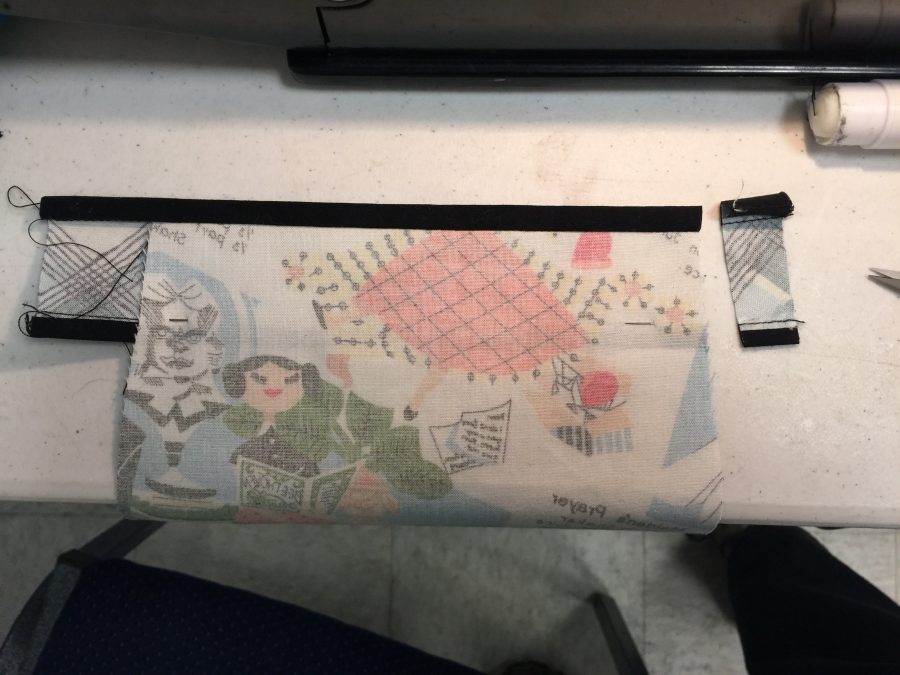
Sew 1” strips of black to each side of the starched plaid waistband piece. Press seam as stitched, then press seams away from plaid. On top edge, wrap fabric around to the back and press. See photos below.
FITTING NOTE: this is where you get to alter the size to fit you. I wanted my apron to come around my hips to the back. This is your apron, so make yours the way you like best! It can come just to your sides, be almost all on the front, or wrap well around you. I’m messy, so far around was my choice!
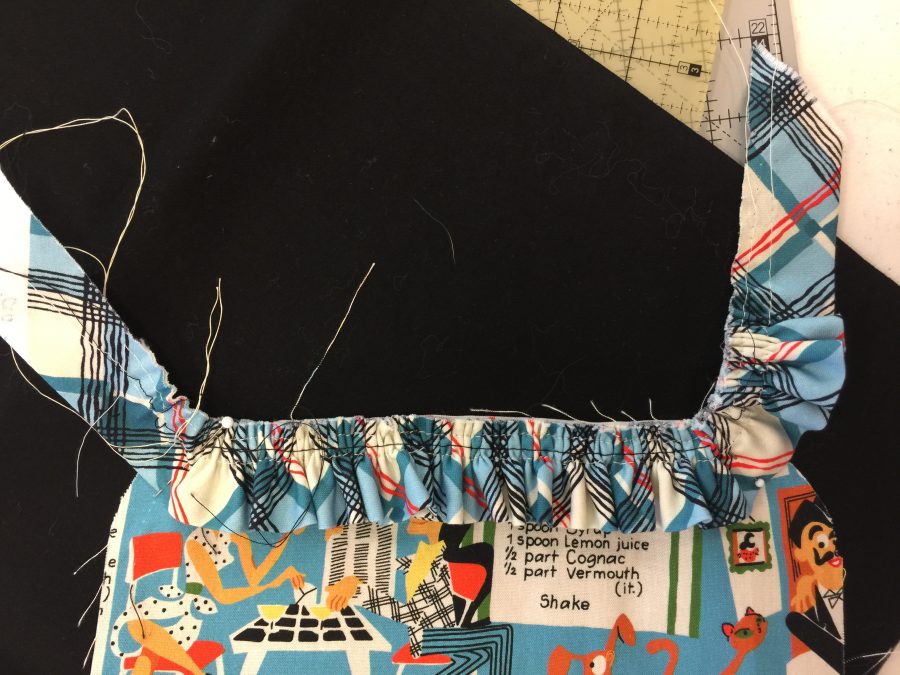
Sandwich the lower edge of the bib between the back and front of the waistbands. Optional: baste the bib to the center of the solid black waistband (back side). Photo below.
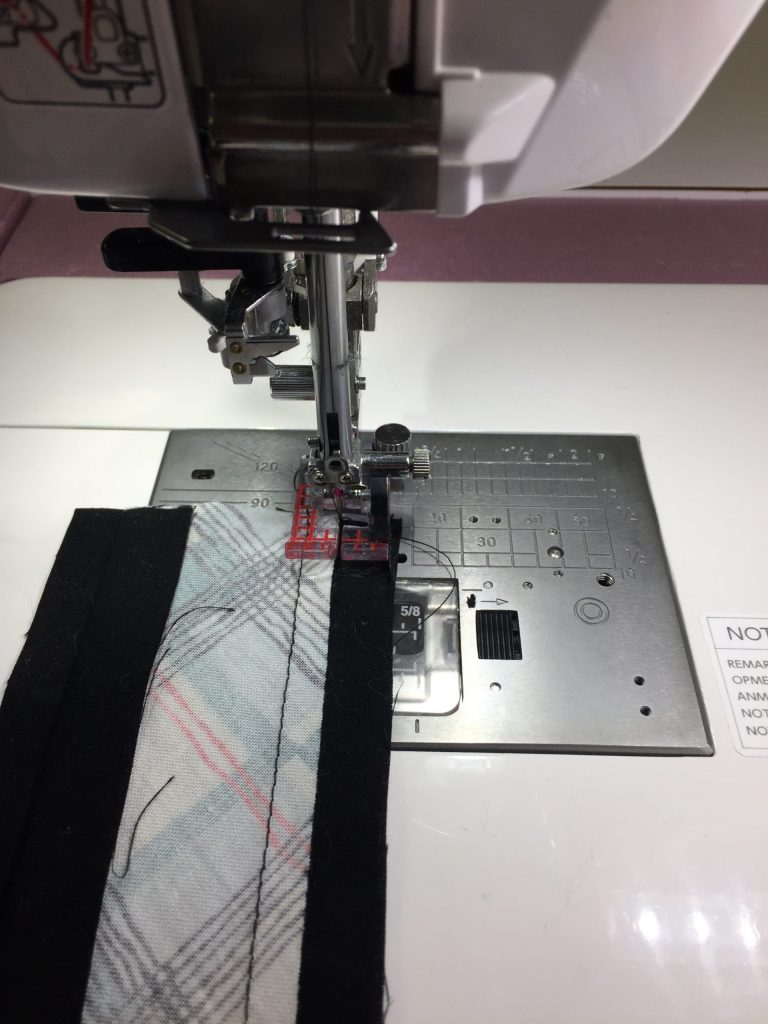
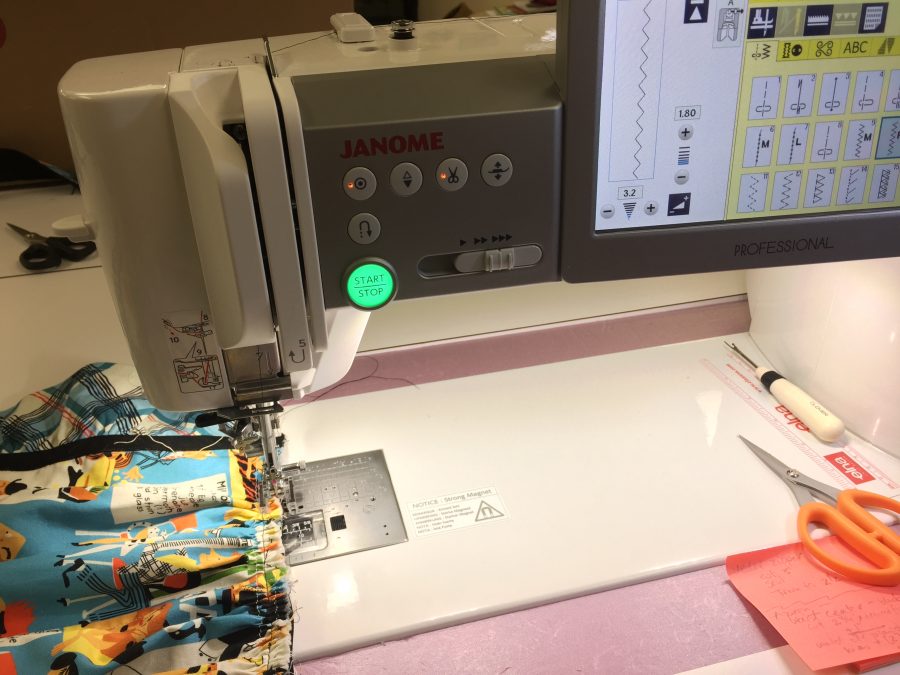
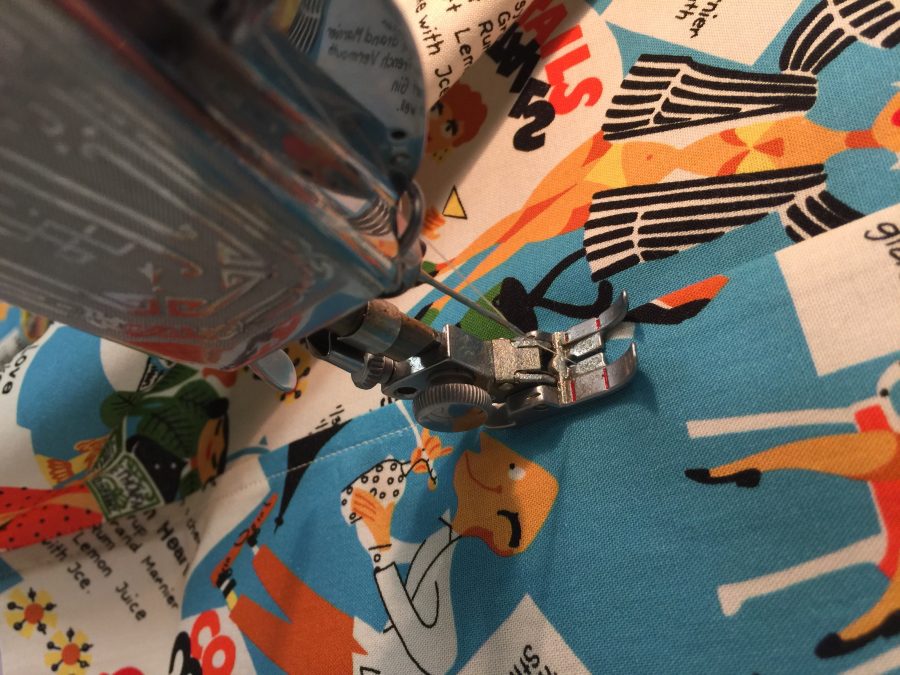
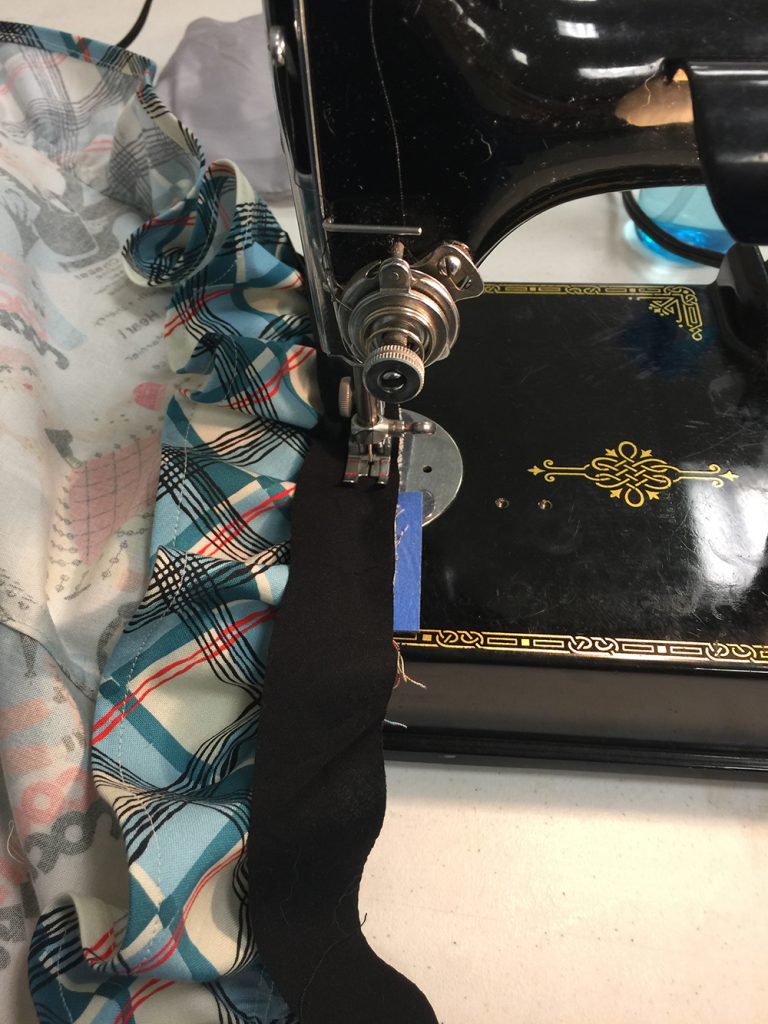
Pin the plaid waistband front and sew. In the third photo below, I aligned the right side of the presser foot with the edge of the seam and positioned my needle just below the seam edges.
After making the center waistband (plaid edged on both long sides with black) sew the waistband front and waistband back together, sandwiching the bib in the center.Close up of waistband/bib.Use your presser foot and move the needle to get perfect placement for the seam. The Janome M7 Continental and many of their other fine machines give you a wide range of needle-drop positions which makes perfect alignment easy peasy!
Press seam as stitched, then press all fabrics away from the bib portion. Photo below.
Press seams as stitched, then press the front and back waistbands down.Next, you pin the black back waistband to the skirt and sew with a 3/8″ seam.
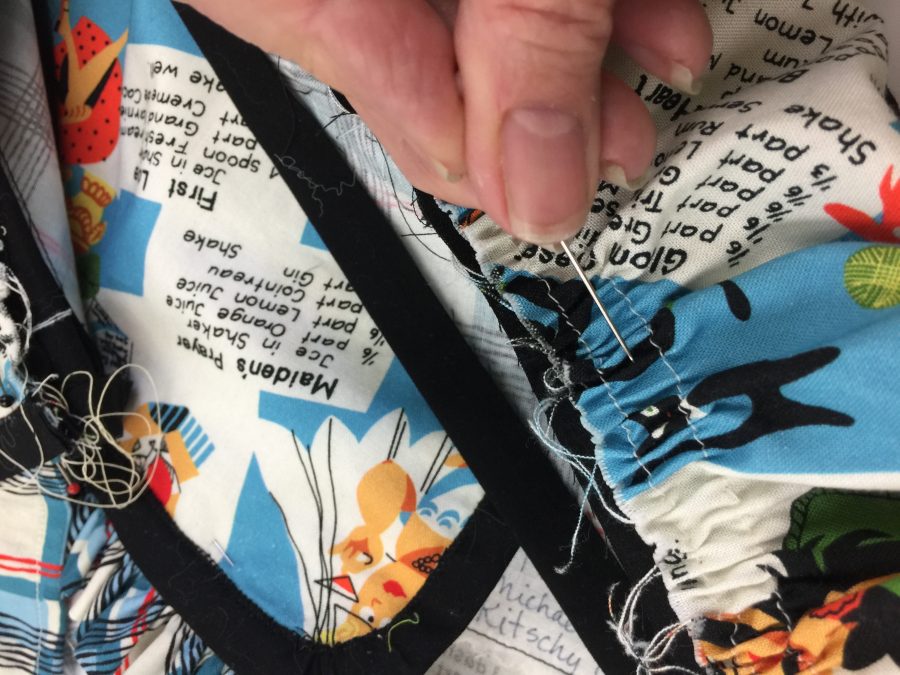
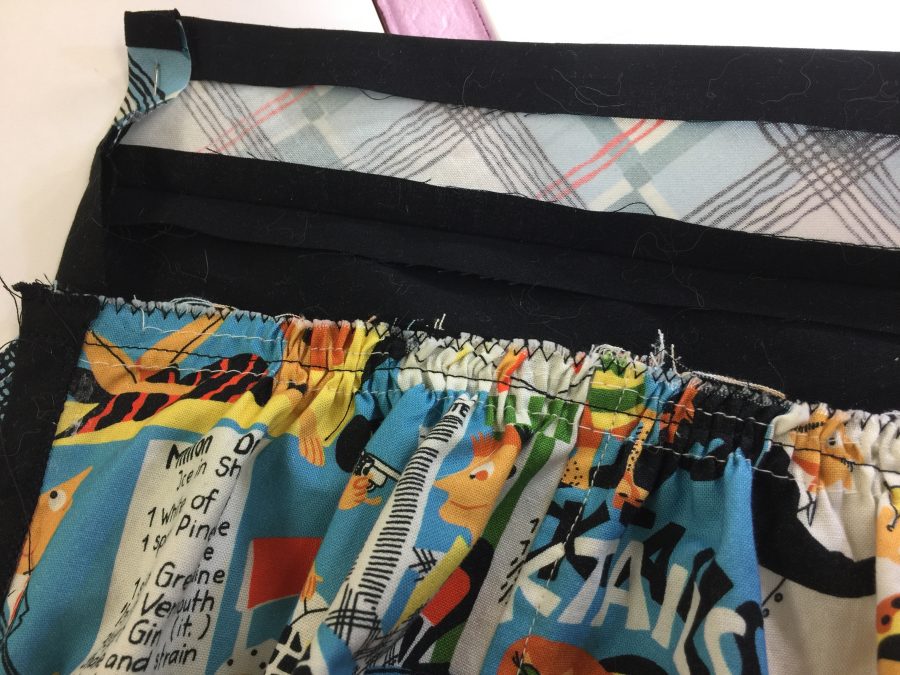
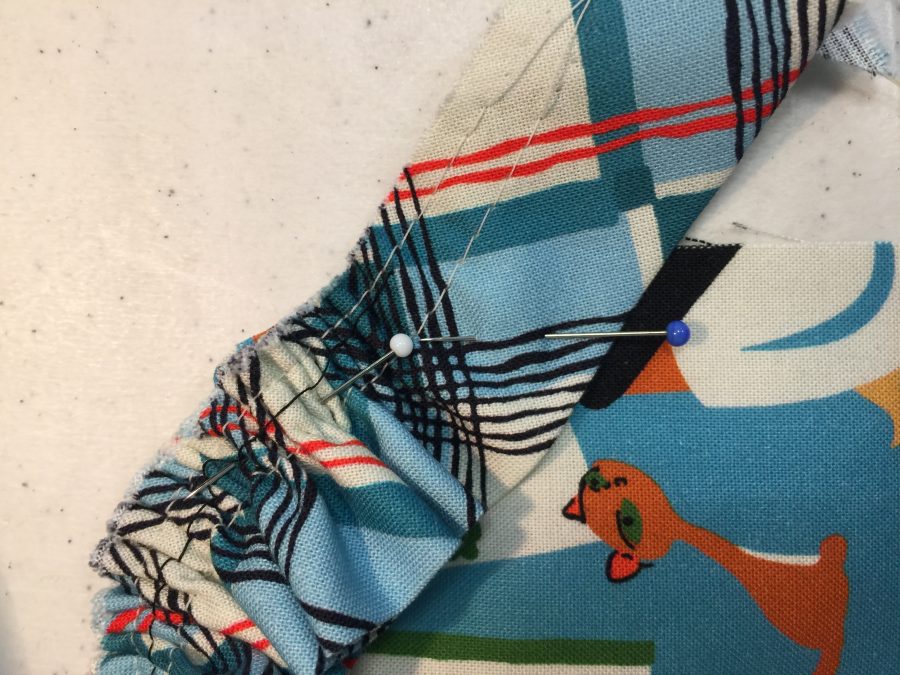
Pin apron skirt to black portion of waistband, wrong side of apron to the right side of the black leaving ½” extra on each end (see step 43). Distribute gathers as desired/evenly. You can use the tip of a pin to scrape the gathers into place, photo below right. Sew.
Use the tip of a strong pin to help adjust the positioning of the gathers. For me a pin works better than fingers or stiletto.
Sew apron skirt to black waistband back with a 3/8” seam. Use the pin to prevent tucks from forming as you stitch. You may wish to decrease the presser foot pressure so the bulk travels more smoothly under the presser foot. Remember to change it back when done.
I cannot tell you HOW MUCH I LOVE THIS MACHINE. All the Janome machines I’ve sewn on have been really good, and I keep thinking they can’t get better but they do. But this M7 is just a whole ‘nother world. Color me in love! Here, I’m using a simple zigzag to seal the seam edge together. Even though it will be fully encased within the waistband, stitching like this controls the bulk and makes it look better once all is said and stitched.
Check to make sure you like the way it looks, then zigzag the edges, see right photo above. This will make the next two steps easier.
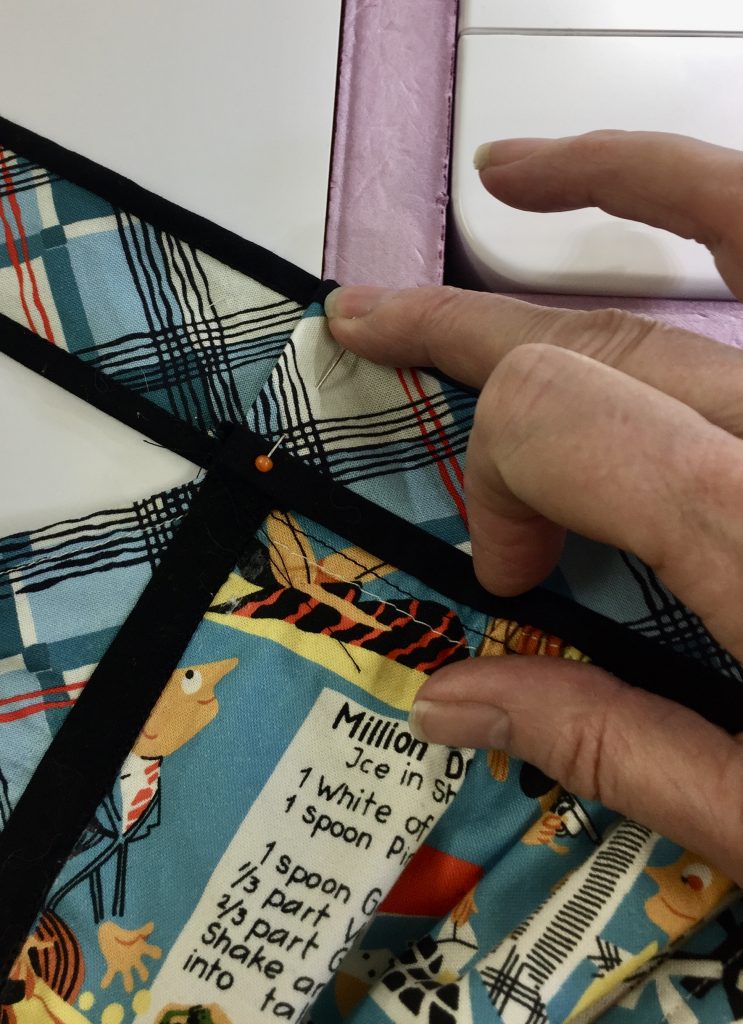
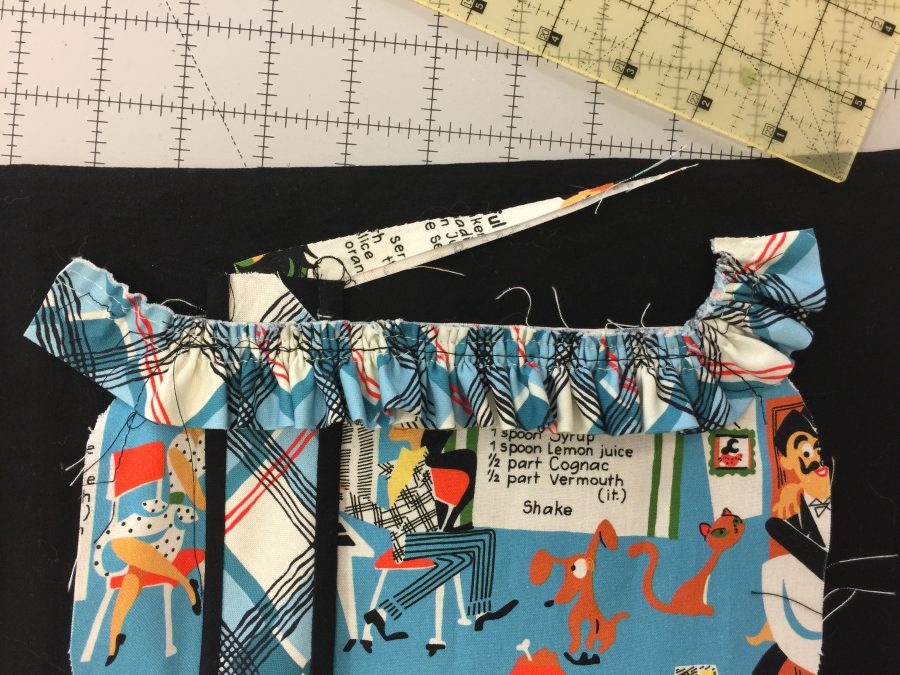
Fold under the extra 1/2″ on either end of the waistband.Tuck the tie inside the waistband, then line up the black edging as close to perfectly as you can.
Fold in the ½” extension on the waistband upper photo above. Tuck the square end of the waist band ties into either end of the waistband, lower photo above. Fold the waistband front over the seam you just stitched, being sure to cover the seam line. As best you can, get the skinny bits of black on the waistband and ties to line up.
Stitch on the edge of the black waistband front to secure the waistband to the top of the apron.
Stitch in the ditch or on the edge of the black of the waistband as well as along the ends where you tucked in the ties.
Tie the apron to your waist. With the unfinished end of the strap behind the bib, adjust the length of the neck strap to suit you. If it is long enough to pull over your head easily, trim with about an inch of extra length. Tuck the ends in and stitch closed. Pin the strap to the bib at the desired spot and machine stitch in the ditch next to the black trim near the top ruffle. If it’s awkward to pull on and off, use Velcro or snaps instead
HALLELUJAH you’re DONE! Put it on, wear it with gusto! Grab some bubbly or mix yourself a Kitschy Cocktail and celebrate a party apron made with the finest of details and finishing—not a raw edge to be seen anywhere. (And if need be, give it a wash or wipe to remove any visible glue stick—it’ll come out in the wash.)
THANK YOU for following along this intricate project. Yes, you could have overcast edges and make it faster, but this way you’ve learned some fine finishing techniques to apply to garment and home dec sewing AND made yourself a Rockin’ Retro Apron!
And of course, Thank you to Michael Miller Fabrics for selecting me as a 2020 Brand Ambassador and to Janome America for having me as a Janome Artisan since 2003. I am honored, humbled and grateful for your support.
Today we’ll continue constructing your fun and funky Rockin’ Retro Apron. Fabric requirements, layout/cutting instructions and making the apron skirt are all in Part 1, here. You can download a formatted and numbered pattern–free in 2020!–with ALL the instructions and requirements at Rockin’ Retro Apron in Kitschy Couture. The fabric was provided as part of the Michael Miller Brand Ambassador 2020 program, and my brilliant Janome M7 Continental is provided to me as a Janome Artisan. Thank you!
Make the Apron Ties and Neck Strap
Spray starch the bias-cut plaid for the ties and neck strap. Stiffening this fabric slightly will make the following steps less fiddly.
Sew an inch-wide strip of black to the short pointy end of each of the waist ties. Press as stitched, then press seam allowances toward the black.
Sew the plaid to the black apron ties and neck strap only. Do not sew the waist portion, which is handled differently.
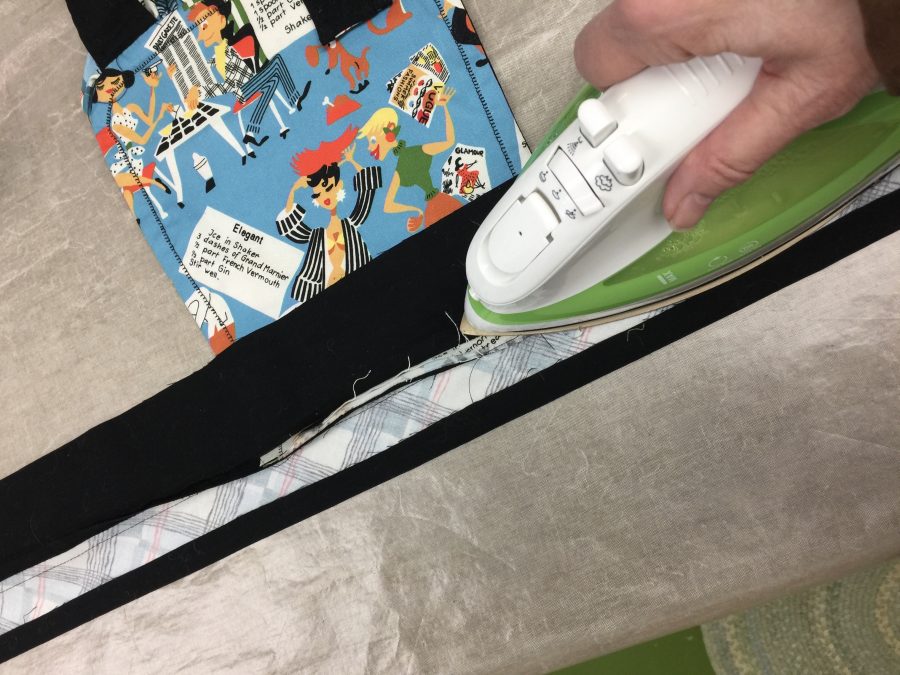
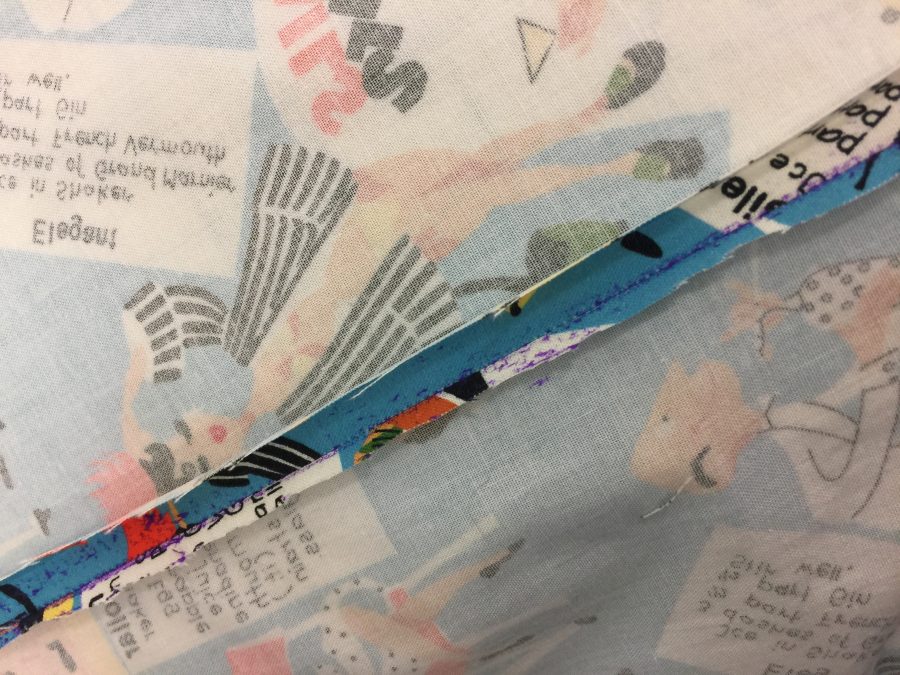
Press as stitched. Press seam allowances toward the black. Turn straps/ties right side out. You can use a narrow pole/stick/curtain rod to make this easier: turn the first couple inches by hand, then slide onto the top of the curtain rod and gently coax the entire strap until it is all right side out.
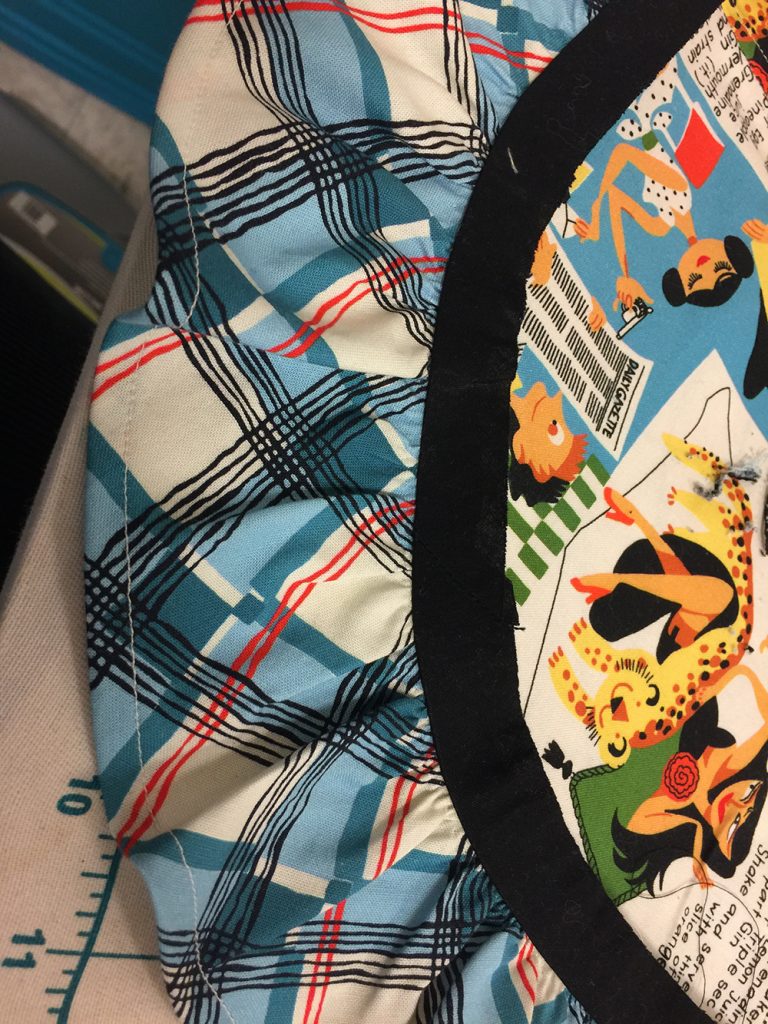
Press, centering the plaid and coaxing the seam allowances toward the black. Because the black is cut wider than the plaid, it wraps to the front to create an accent edge. The seam allowances should be underneath this accent edge. Leave the square end open. On the pointy end, trim to 5/8” from where the short black piece is stitched to the plaid. Turn under about 3/8” and press. You can machine or hand stitch this opening.
Stitch on the edge of the black or in the ditch so the seam allowances stay where they are supposed to. This will help a lot once you start wearing and washing it—worth the extra effort.!
Make the Apron Bib
FITTING NOTE: Because of different body types, you will want to adjust the width of the bib and the length of the bib and strap to flatter your body. Cutting measurements are for my medium-sized build. I actually wish I had made the bib an inch shorter, so those with an average or larger bust size should be fine. Measure before you cut and before you sew.
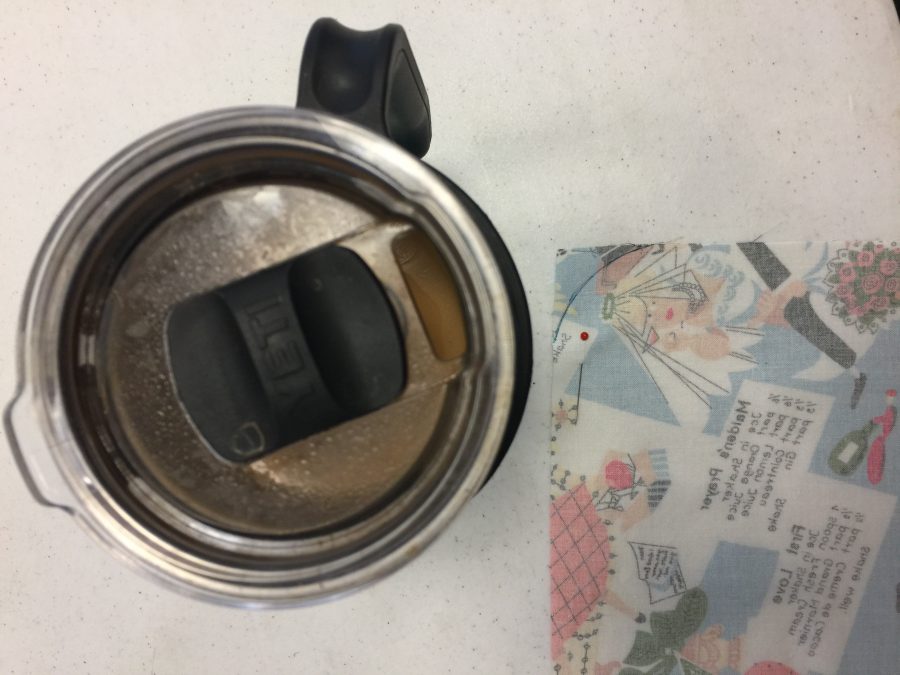
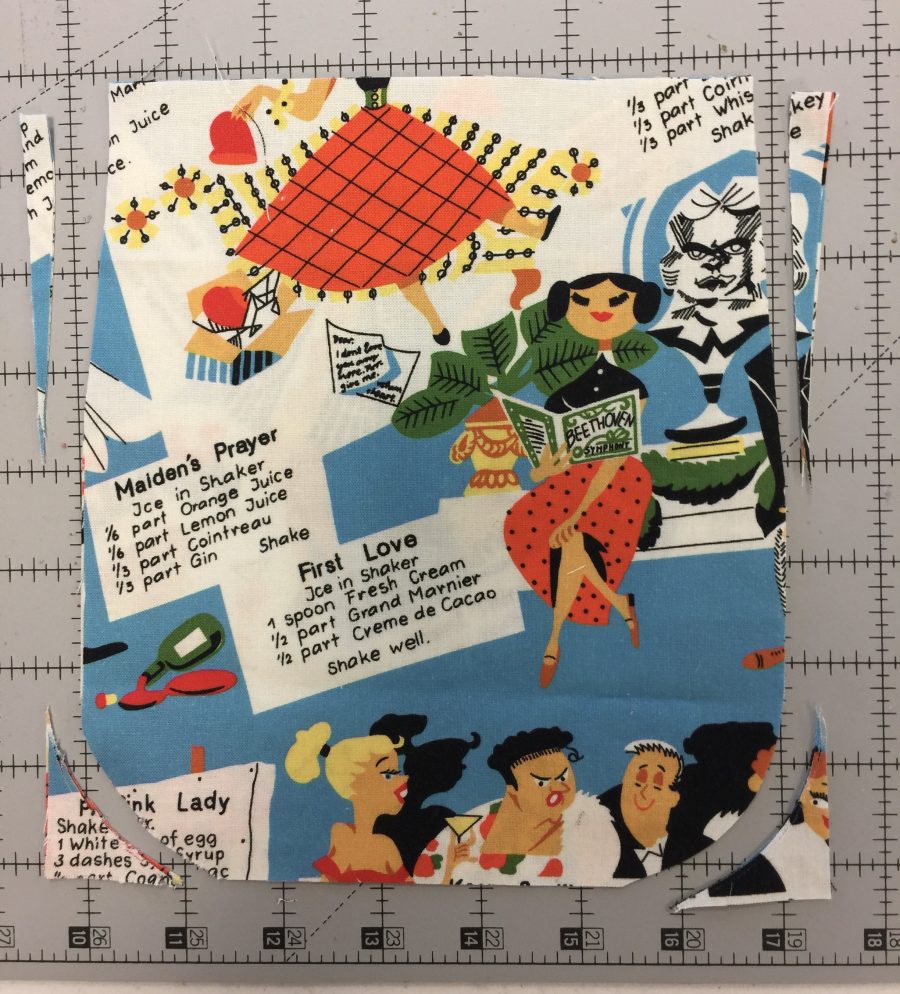
Use something like a mug lid to round the upper corners of the bib.Trim slivers off the bottom edge of the bib (optional). This photo is of the pocket, where you do the same thing.
Use something round to curve the top edges of the apron bib, see first photo above. I used the lid of my travel mug. Just draw a line around the curved edge, then trim off on both sides of the bib, second photo.
Optional: taper the lower edge of the bib by trimming two skinny triangles off the lower edges. Mine were about 3/8” wide by just under 6” tall, center and right photos.
Gather bib ruffle. Fold fabric in half, wrong sides together. Sew basting lines at ¼” and ½” and gather as before. This will be a very tight gather, which helps the ruffle stand upright. If yours is too long when gathered to your preference, trim as needed—see next steps.
Pin ruffle to the bib lining (inside piece). See photos below.
Curve the ends of the strip up, see second and third photos, below. Be careful (if this sort of thing bugs you) to make sure the curved ends are symmetrical. Ahem—guess which one I am.
Tuck one end of the neck strap between the ruffle and the bib lining, photo on right below. Be sure the plaid side of the strap is as pictured so that it will face the correct direction when the bib is completed.
BASTE by machine.
Turn up to make sure it looks good. Adjust if needed, especially on the ends.
Curve the end of the gathered bib ruffle up–see the overall photo at the start of the post to guide you.The top of the bib lining will look like this once you have basted the ruffle in place. Don’t be like me…remember to tuck in the neck strap so you don’t have to pick out some stitches. Ahem. See next photo.Insert the neck strap as pictured and baste along with the ruffle.
Prepare front of bib.
Cut black bias the length of the outside edge of the front bib plus 1” just in case.
Press ¼” under along one long edge.
Pin to the right side of the bib front with the fold edge turning under towards the center of the bib.
Baste on outside edge.
Press towards the center, easing excess in the rounded corners.
Applique/stitch the black trim to the bib. I used glue stick to “pin” the black in place and sewed used the edge-stitch foot/quarter inch foot with the flange and a straight stitch.
Pin bib front and bib lining right sides together. Sew 3/8” seam. You may wish to sew a basting stitch seam first to make sure everything at the top is correctly placed and the corners and ruffle turn nicely. If you do, adjust as necessary, then sew the final seam.
Prepare the Pockets
You’ll need a wider black band, the plaid strip, and a narrower black band. These strips are sewn together, then sew the right side of the strip to the wrong side of the pocket top. Press, then fold the strip to the front and topstitch in place.
Create plaid-and-black band for the pockets.
Sew a ¾” strip of black (straight of grain) to bottom edge of starched plaid strip. Upper photo.
Sew a 1 1/8” strip of black to the top of the pocket. Upper photo.
Sew wide black strip to the back of the pocket with a ¼” seam. Press as stitched, then wrap the strip around the seam allowance.
Wrap the strip to the front, trim, and stitch in place.
Wrap the bias unit to the front and applique in place. Stitch in the ditch or on the edge of the black. Photo above.
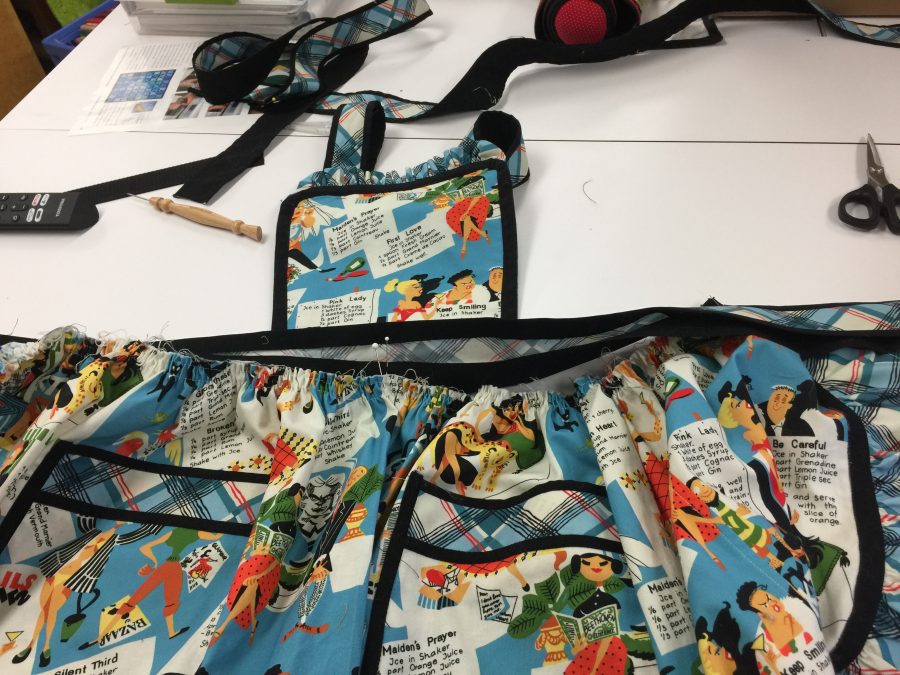
Pockets are positioned 6″ to either side of the center, but the black edging has not yet been applied.
Press under ¼” on long side of 1 1/8” bias black edging that is long enough to go around the pocket. and extend about ¼” beyond the top edge. If making two pockets, repeat. Turn under top edge of black trim even with top edge of plaid section.
And that’s it for today! In the final post we will manage the waistband–it took some mental gymnastics to figure out the easiest way to encase all raw edges, have long ties, and have it look good, but I figured it out. Stay tuned!
Remember, you can download the complete Rockin’ Retro Apron pattern here. It’s also listed under Tutorials (lotsa good free stuff on there) on my Resources page.
Welcome to my first Brand Ambassador project for Michael Miller Fabrics, a fun and funky Retro Apron featuring Kitschy Cocktails and Mad About Plaid in blue (available starting February 2020). For all of 2020 this will be a FREE pattern available using this link and in a link on my Resources page titled Retro Apron. The plaid fabric just grabbed my attention and demanded I use it, on the bias…total fun! In this and a subsequent blogpost or two I will share the entire pattern and the included images. But you can download and print the illustrated pattern at home.
I’ve tried to teach fine finishing details throughout. I love nice clean, finished edges, so there isn’t a raw edge in this apron…everything is tucked behind trim or finished to hide the raw edges. These techniques can be applied to all your sewing, so read on and learn! Using good fabric and my brilliant Janome M7 Continental machine made it easy to produce such a well-made garment.
Today, I’ll start with the fabric and supplies needed, cutting instructions and the first steps in the construction process. Subsequent steps will be posted over the next week, but the ENTIRE pattern is available in the Rockin’ Retro Apron PDF. Apologies for any formatting inconsistencies in the blog…it’s not wanting to play nicely with me today.
FABRIC AND MATERIALS--Preshrink all fabrics!
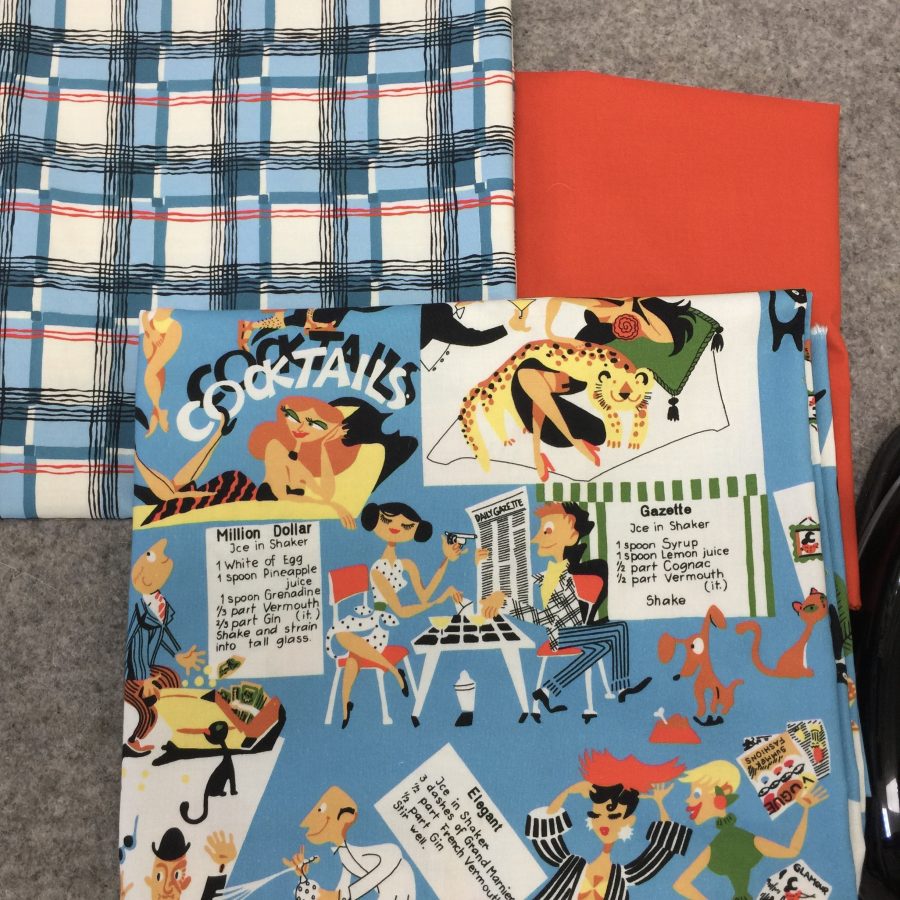
Close up of the Kitschy Cocktails focus print and Mad About Plaid coordinating print. I ended up going with the Jet Black instead of this vibrant orange for the accent color.
Ask your local shop to order!
FITTING NOTE: Please read through ALL the instructions for FITTING NOTES before cutting, since you may wish to adjust the cut sizes to better suit your build. If you are larger or smaller than my average height and Medium-Large frame, you may wish to add a bit more yardage.
Focus Fabric 1: Kitschy Cocktails, blue 1 1/4 yard
Focus Fabric 2: Mad About Plaid, blue 1 yard
Accent: Cotton Couture Jet Black 1 yard
Matching thread (I used off-white and black)
Glue stick—washable! A school/craft glue stick is fine.
Spray starch
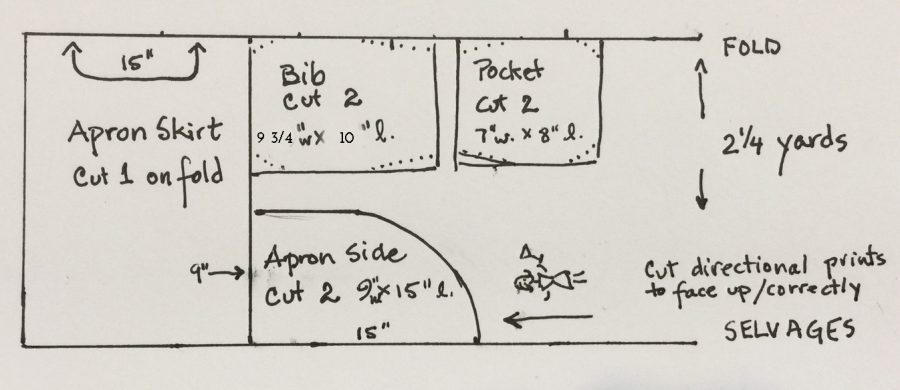
FABRIC LAYOUT & Cutting
TIP: Use sticky notes, removable file folder labels or painter’s tape to label pieces. Check each box (on printed pattern only) as you have cut the pieces.
Focus Fabric 1 / Kitschy Cocktails: Be sure to cut pieces with the design facing the correct direction.
Be sure to cut pieces with the design facing the correct direction.
Apron skirt front: Cut ONE on fold, 15” by 40-44” (width of fabric)
Apron skirt sides: Cut TWO 9” wide by 15” tall
Apron bib: Cut TWO 9” wide by 12 tall”, see FITTING NOTES and instructions for shaping
Apron pockets: Cut TWO 7” wide by 8” tall
Focus Fabric 2 / Plaid:
Cut on the bias:
Hem ruffle: Cut THREE — 4 ½” across the full width of fabric, about 45”
Bib ruffle: Cut ONE — 2 ½” by 24” long
Pocket trim: Cut TWO — 1 5/8” by 9” (will be trimmed later)
Waistband: Cut ONE — 1 5/8” by 30” (see FITTING NOTES above and below)
Long ties: Cut TWO — 1 5/8” across the full width of fabric, about 45”
Neck band: Cut ONE — 1 5/8” by 24” long (will be trimmed later)
Accent / Michael Miller Jet Black:
Cut on the straight grain before cutting bias strips:
Long ties: Cut TWO — 3” by 40-45” (can be pieced if necessary; make shorter/longer ties as desired)
Next, cut on the bias:
1 1/8” strips for edging the skirt/ruffle edge, bib and outside pocket edges. You will need a total of about 180.” Sew strips together as you would for a quilt binding. I used the 1 1/8” width strips to make turning the ¼” under easier and still have enough left to cover the bulk of the gathers and finish at about 3/8 – ½” on the apron-to-ruffle seam and the front of the bib.
Finally, cut on the straight grain:
End of long ties: Cut TWO — 1” x 5”
Waistband: Cut ONE — 2 ½” by 30” (adjust length to match desired size, see FITTING NOTES)
Cut ONE — 1” by 30” (ditto) for top edge of waistband
Cut ONE — 1 ¼” by 30” (ditto) for bottom edge of waistband
Pockets: Cut ONE — 1 5/8” by 9” for top edge of pocket trim
Cut ONE — ¾” by 9” for lower edge of pocket trim
NOTE: If you are using a print instead of a plaid or stripe, you can cut these on the cross-wise grain. You will need a bit less yardage overall.
NOTE: I had enough black in my stash to cut on the lengthwise grain which is more stable. You can just as easily cut the straight-grain pieces on the cross grain so you don’t need to buy as much fabric.
NOTE: Seam allowances are either ¼” or 3/8.” Please follow instructions for each section.
NOTE: Ties were designed to be long enough to wrap around to the front. Depending on your measurements you may need to shorten/lengthen these ties, or you can cut them shorter and tie the bow in back. Figure out your waist, how much you need to wrap the ties to the front and, if needed, cut additional strips of black and of plaid.
CONSTRUCTION:
I’ll admit it…there are a lot of steps to this apron. Lay in a supply of nibbles and remember to take breaks to re-focus your eyes and move your body!
Due to the blog formatting, numbers for each step are omitted on the blog. In the PDF Rockin’ Retro Apron pattern, use the numbers and check off each step/number as you work along so you can find your place after a break.
Make the Apron Skirt
FITTING NOTE: This apron was designed to be about 28-30 inches along the waistband/top edge, which wraps most of the way around my body. Decide how long you want the top gathered edge to be and adjust accordingly (this comes into play when attaching the waistband in a later step). For those smaller than I am, just gather your skirt more or make the center panel narrower. For those who are larger, gather less; or you may (or may not) wish to make your side panels wider.
Length: With a ruffle that finishes at 3”, this apron skirt is about 17” long. You may wish to adjust for your height and preferred length.
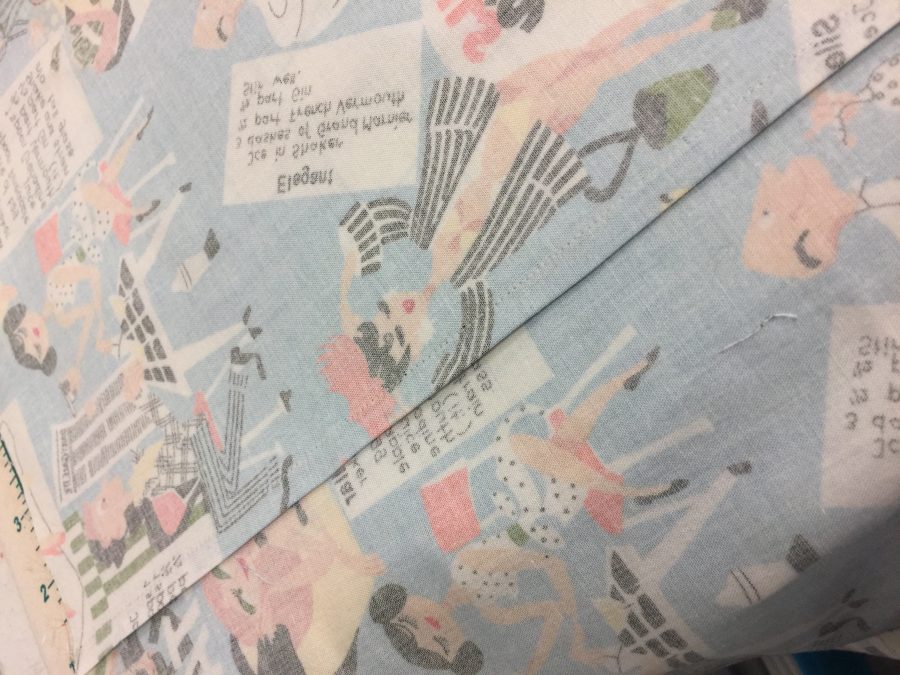
Sew apron skirt side panels to center panel. I created a mock flat-felled seam: sew wrong sides together with a ¼” seam.
First photo: Trim underneath seam allowance. Press second seam allowance toward center. Use glue stick to “pin” second side of the seam allowance in place. Second photo: glued seam allowance. Now stitch in place.
Press as stitched, then press open.
Trim seam allowance on side panels to 1/8” (first photo above).
Fold other seam allowance in half so the raw edge nearly touches the seam. Apply glue stick to the 1/8” side. Press down; heat from iron will set and dry the glue—way easier than pins! Second photo above.
From the right side, stitch seam allowances in place, above left. I prefer to use an edge stitch or quarter-inch-piecing foot with the blade in the ditch/lower side. Move your needle to the left so that it is towards the left side of the seam allowance. Stitch. See first photo above.
Hem lower edge of skirt ruffle.
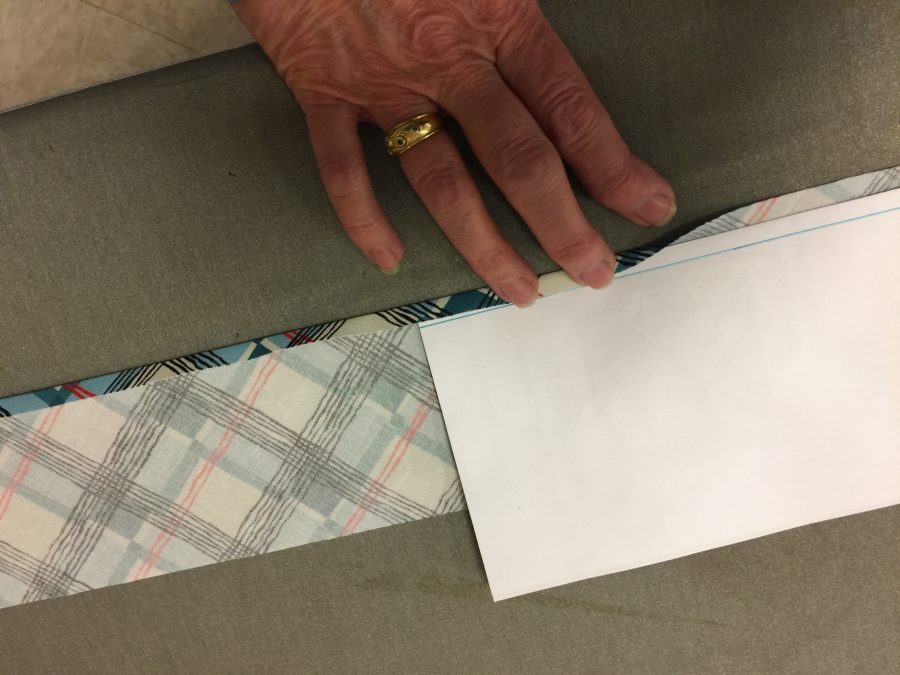
Fold a piece of copy paper in half lengthwise, or use a file folder or piece of poster board. Mark a line ¼” from the long edge. Use this as a press guide to get a perfect ¼” turn. Second photo above.
Repeat so that raw edge is inside the hem. I call this a “turn-turn” hem.
Stitch, again using an edge stitch foot and moving the needle to keep the sewing line a perfect distance from the edge.
For the ends, I retained the 45-degree angle and hemmed it the same way. You could also choose to round off the corner. Make sure the angles will curve / bend up to the gathered edge of the ruffle.
Gather hem ruffle:
Mark center of ruffle on the with a pin!!!! Do not sew over the pin! You can put the pin on the hemmed side.
Hem the ruffle **before** gathering. Sew basting/gathering stitches at 1/4 and 1/2″ distances from the raw edge.
Run two lines of basting stitches ¼” and ½” from raw edge of ruffle with bobbin thread on the wrong side of the ruffle. If desired, loosen tension a bit to make the bobbin thread easier to pull.
Holding both ends of the bobbin threads, pull to gather. The gathers will be fairly dense, so you’ll need to stop and move the gathers towards the center periodically. I worked the gathers from both ends.
Place the ruffle along the lower edge of the apron skirt and adjust gathering so that it fits.
Place a pin at either end and wind the bobbin thread tails around the pin in a figure 8 to secure them while you work.
Sew ruffle to skirt WRONG sides together with a 3/8” seam, photo at right. Photos below.
Black bias trim: Sew cut strips together as you would for a quilt binding, using a ¼” seam allowance. Press seams as stitched, then press seams open.
Cut a length of black trim the length of the lower apron edge plus a couple inches just in case. Press under ¼” on one edge.
First photo: sew the black bias to the same seam line that joined the ruffle to the skirt. Second photo: press black to the skirt, tucking under the seam allowance. Sew.
Sew the black trim to the seam that joined the ruffle to the skirt with a 3/8” seam allowance. Photo at near right. The folded edge is on the left; when you turn the bias strip toward the skirt in the next step, the fold will be on the inside of the seam. See first photo above.
Press the seam as stitched. With the right side up, press the seam allowance and black bias strip toward the apron skirt.
Use your glue stick and iron to “pin” the black strip in place, covering the raw edges of the skirt/ruffle. Press The ¼” seam allowance turns to the inside. See second photo above.
Sew the black strip. I began using a narrow buttonhole stitch for my applique, but switched to a straight stitch which I think looks better. Again, the edge-stitch foot or quarter-inch foot is perfect for getting precise seams and stitching lines. Remove any visible basting/gathering thread. Refer to second photo.
YEEEHAW! You’re made it about halfway! In the next post we will work on the ties and bib, then finish things up in a third post. Once they are all live, I’ll add the links following this paragraph.
And once again, here’s the PDF for Sarah’s Rockin’ Retro Apron, free to download in 2020. Thank you to Michael Miller Fabrics for selecting me as a Brand Ambassador for 2020 and to Janome America for having me as a Janome Artisan since 2003! Good fabric and brilliant machines make it so much easier to do a brilliant sewing project!