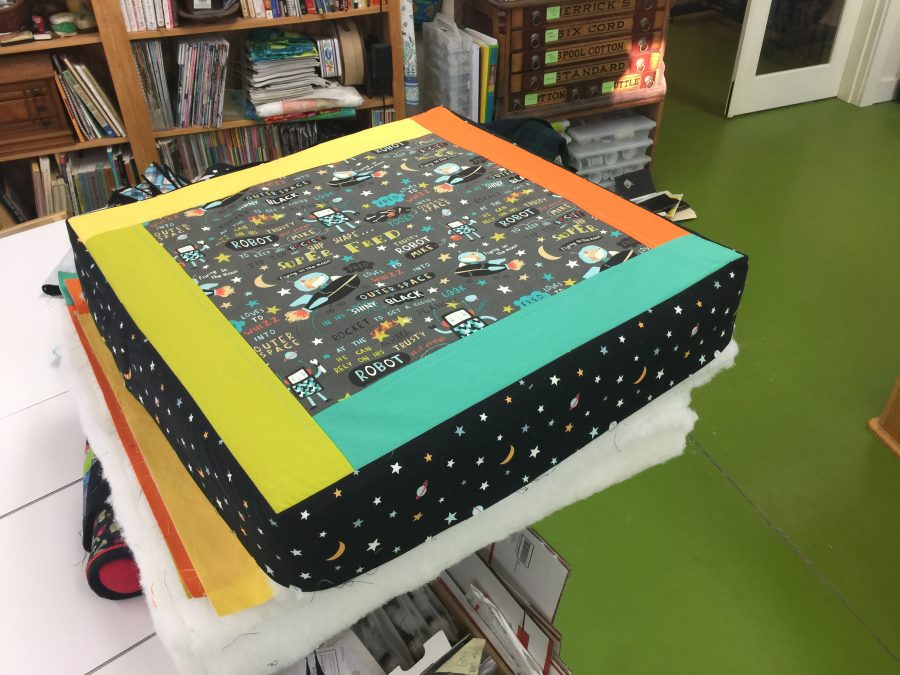
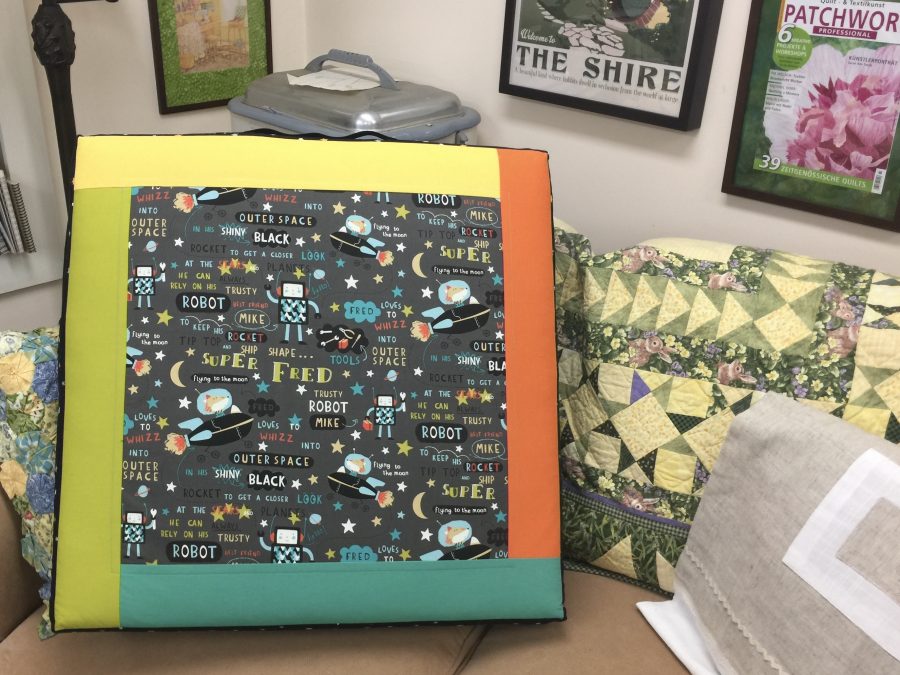
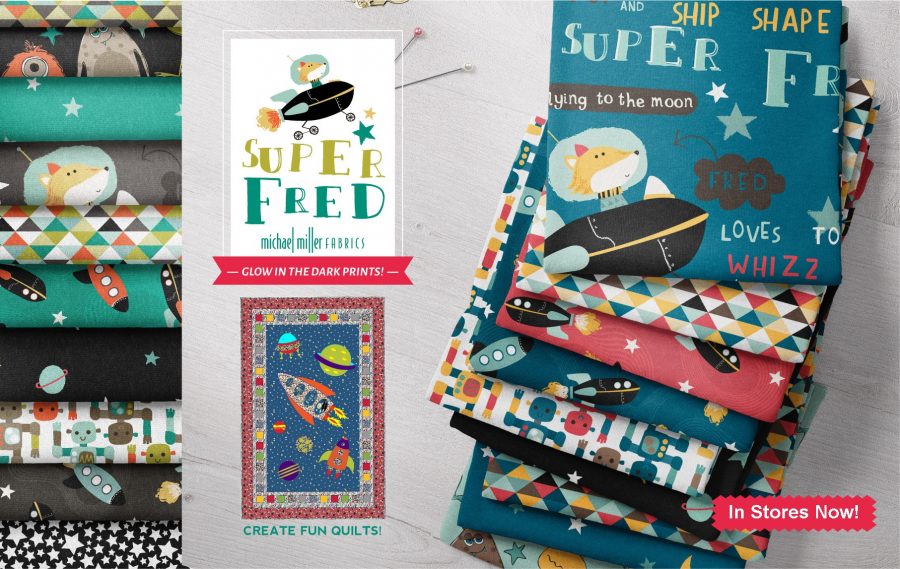
Today it’s time for part 2 of 2 in the “how to make cushions” tutorial! In this image, I’ve sewn the boxing strip–the bit on the edges/sides (black Galaxy fabric from Michael Miller Fabrics, Spring 2020) to one of the squares (top and bottom) to make sure I’ve got the fit right. Looks pretty good! The top on this one is the SuperFred fabric in gray (with this fun fox named Fred and a robot named Mike). Those glorious solids (SWOON) are part of the Cotton Couture collection. Colors are Acid (left), Yellow (top), Apricot (right), and Lilypad (bottom). Like I said, SWOON!
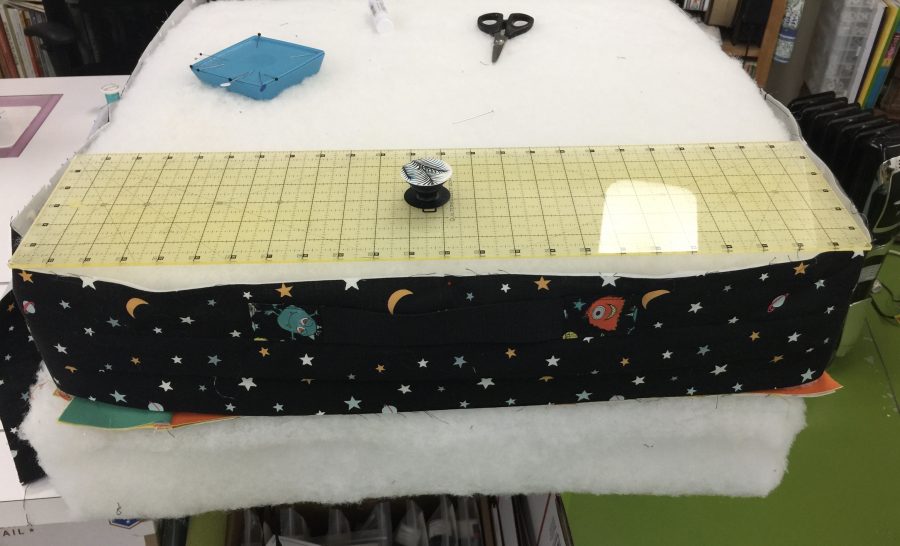
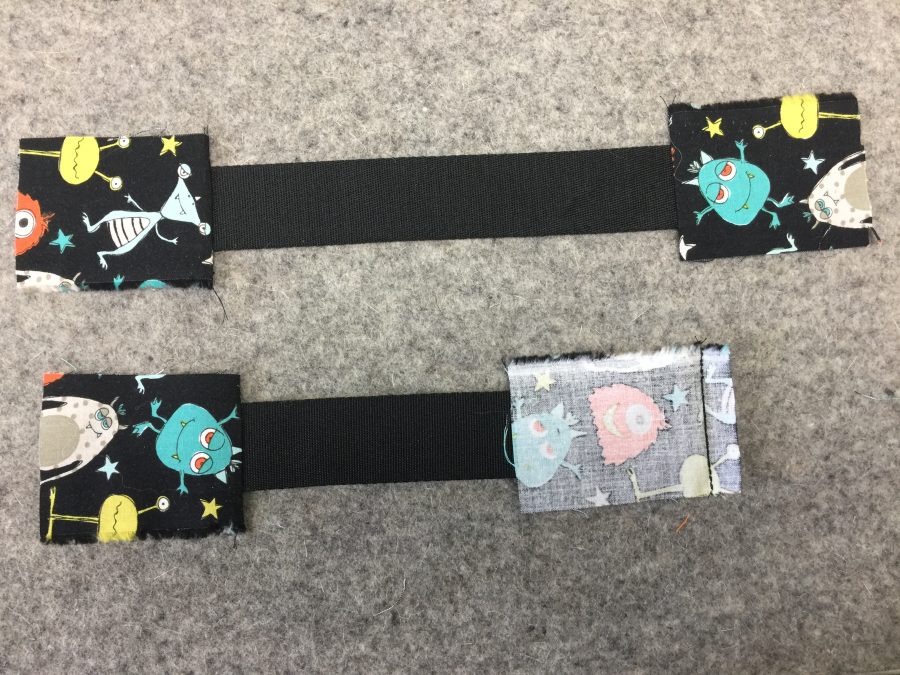
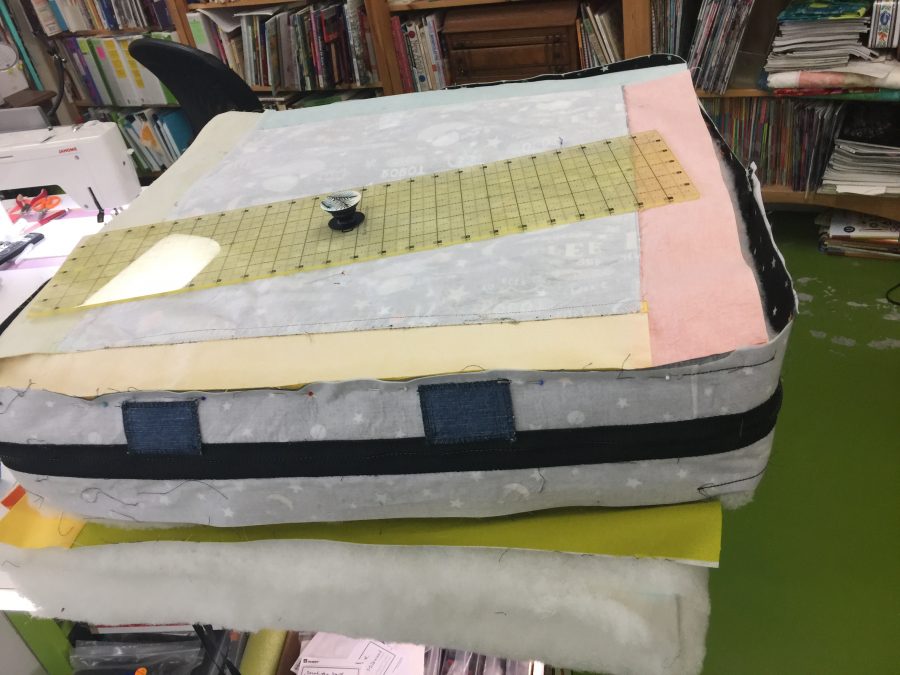
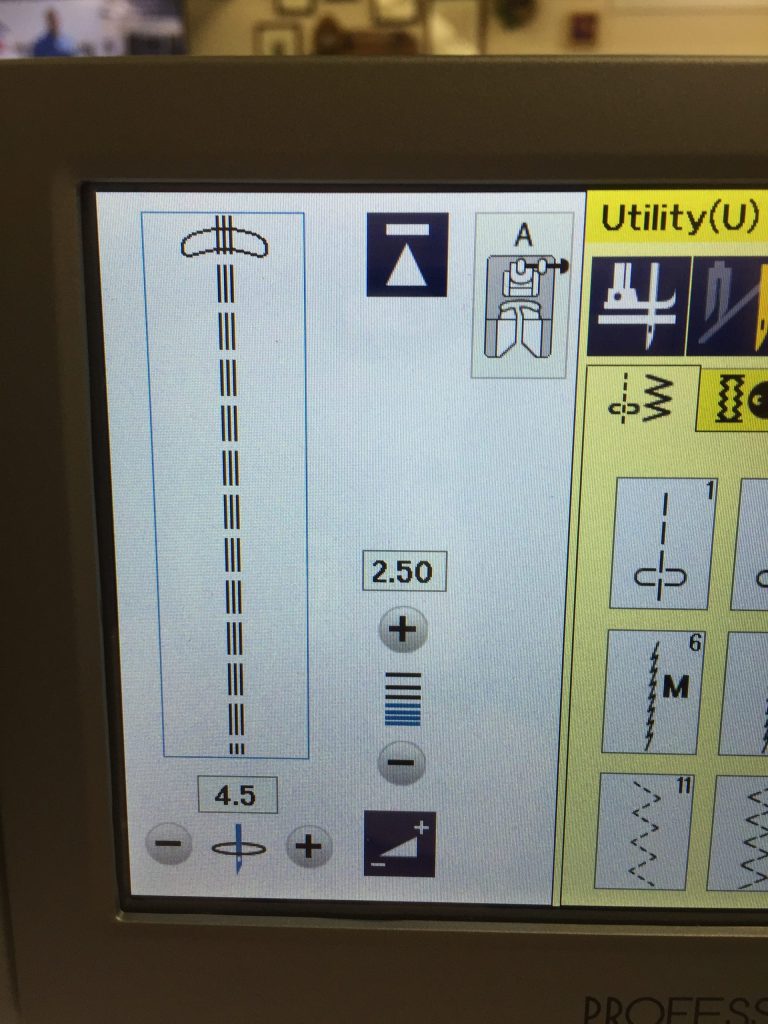
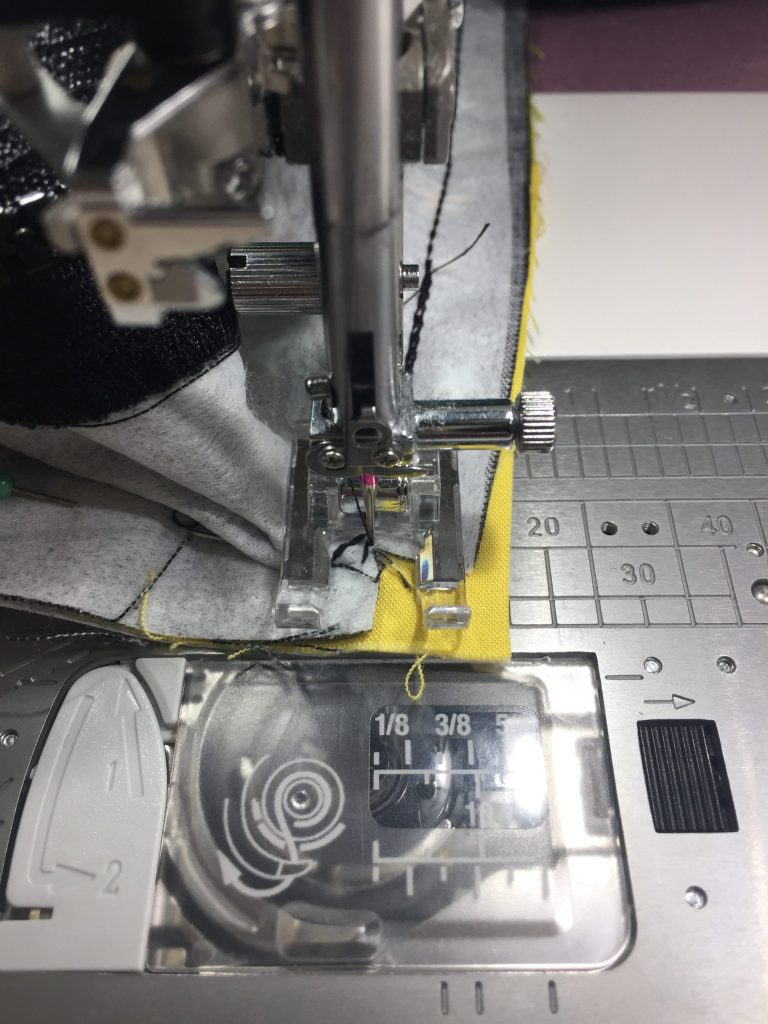
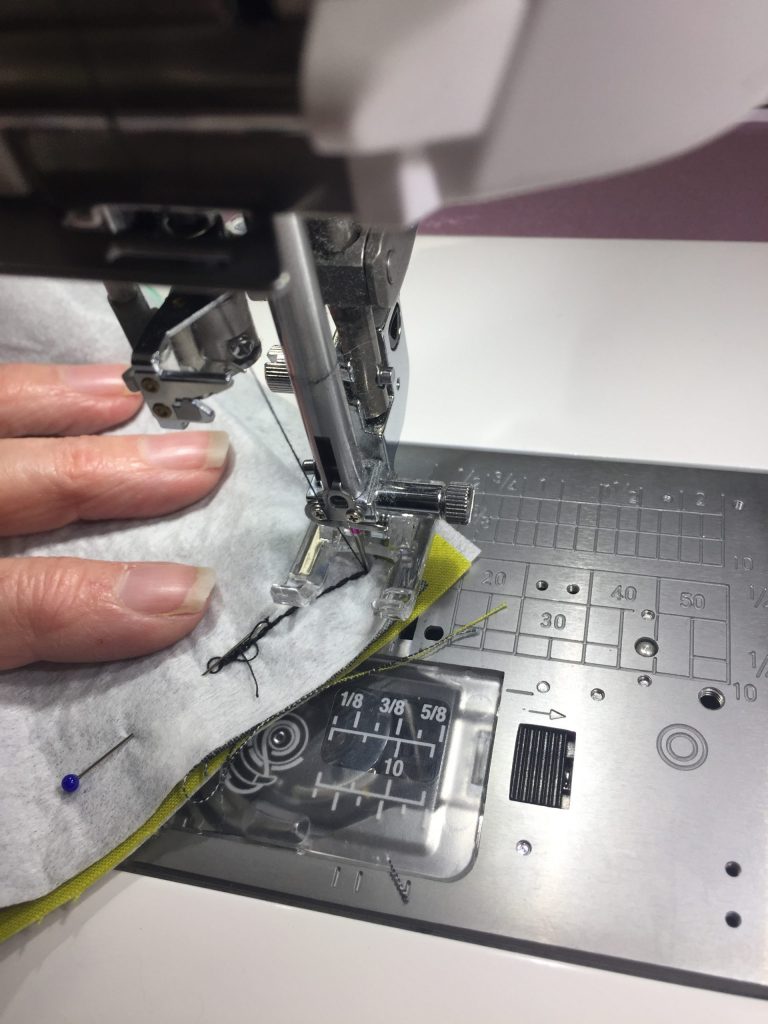
I shared this photo before, but didn’t point out the very hard to see black strapping handle which is in the center of the side facing us. If you look at the pop-socket on the ruler, come down to the cloth. Then look and you’ll see two Space Aliens, fussy cut from that fabric, at the ends.My dear DIL is a kindergarten teacher, and these cushions and pillows are headed to her classroom for wee people to flop upon and read. Or just flop upon! She’ll need to be able to move them about easily. As she is TINY, we need to make this easy (not a bear hug thing just to move a pillow). I cut some of the Space Pals fabric into rectangles, centering one of the Pals so it would show. Sew the rectangle to the end of some webbing. I could only find 1 1/2″ wide locally in rural Maine. It works but I think 1″ wide would be better if you can find it. Sew the rectangle to the end of the webbing, then fold and press the side edges in, turn under the remaining raw edge, and sew. I use–get ready for this–washable glue stick instead of pins. When doing your folding and pressing, use a swipe of glue. Presto. Stays put. When you fold things together into a nice little package, a little dab of glue will do ya! (Who else remembers Dippity Do?) Center the handle exactly over the zipper and sew. I put some squares of old denim on the inside to reinforce the fabric. See next photo.Next step: sew the boxing to one side. Start by finding the center of the zipper. Here, you can see those rectangles of denim (with overcast stitch to prevent raveling) I used to reinforce the handle which is on the right side of the fabric. Mark 12″ to the right and to the left of the zipper’s exact center. Then measure 24″ to mark the other corners on the boxing strip. I chose to put some reinforcing stitching (triple straight stitch–see below) at each corner–about an inch to either side of th marking pin. I sewed about 3/8″ from the edge. If your overall gusset/boxing length is a little off, you may need to remove the stitching for one of the zipper garages and adjust the overall circumference of the boxing strip/gusset so it is snug.
Put the boxing strip (now a loop) on the cushion inside out. It’s much easier to assemble and pin with the fabric held upright (and not floppy on the table)! Place the top fabric face down. If you use a print that is directional, as I did, I put the top of their heads on the zipper side of the cushion. Pin all the way around.
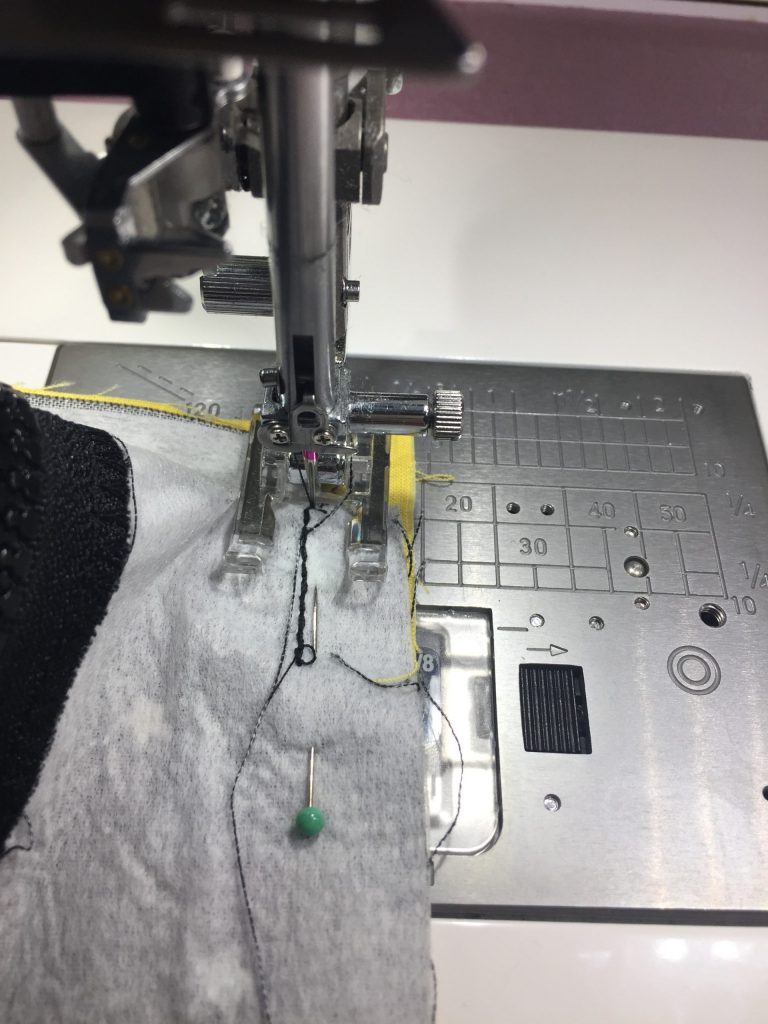
You’ll want to clip each corner about 3/8″–so to the reinforcing stitching / almost to the very seamline in each corner. I clip right before stitching. I like to use the triple-straight stitch when I need a strong seam with some flex. This is on my Janome M7 Continental, but almost all machines other than straight-stitch only have something similar. This is what I used to reinforce the corners AND sew the seams. Since the corners are clipped, this provides a little insurance against tears, especially in the cushion stuffing/wrestling stage. Or when anticipating wee people thumping their little bodies all over the place.With the top of the cushion on the bottom and the boxing/gusset on top, sew together with a 1/2″ seam. I sewed this with the triple straight stitch, again because I expect these cushions to see some enthusiastic use in a classroom. Sturdy is wise. Sew RIGHT UP to the CORNER and stop with the needle down. You can see some of the reinforcing stitching just to the left of the needle. You can also see that clipping has allowed the boxing strip to make a 90 degree turn at the corner, and that a bit of the boxing has folded over and is pushing into the next side to be stitched.With the needle still DOWN, lift the presser foot. Ease the boxing to the left to remove that little pushed bit you see in the photo above. Notice the reinforcing stitching that goes down to the pin. I will sew on or just a thread’s width to the left of that when I sew the seam. Make sure the raw edges are aligned–you’ll see a perfect little square of the fabric on the bottom as the boxing strip pivots around the corner/needle. Sew the next side. And here we are, corner turned, ready to roll. Or sew. Or have a something rewarding. Wine? Pina Colada? Nap? Chocolate? Anyway, Repeat until you have reached where you began!
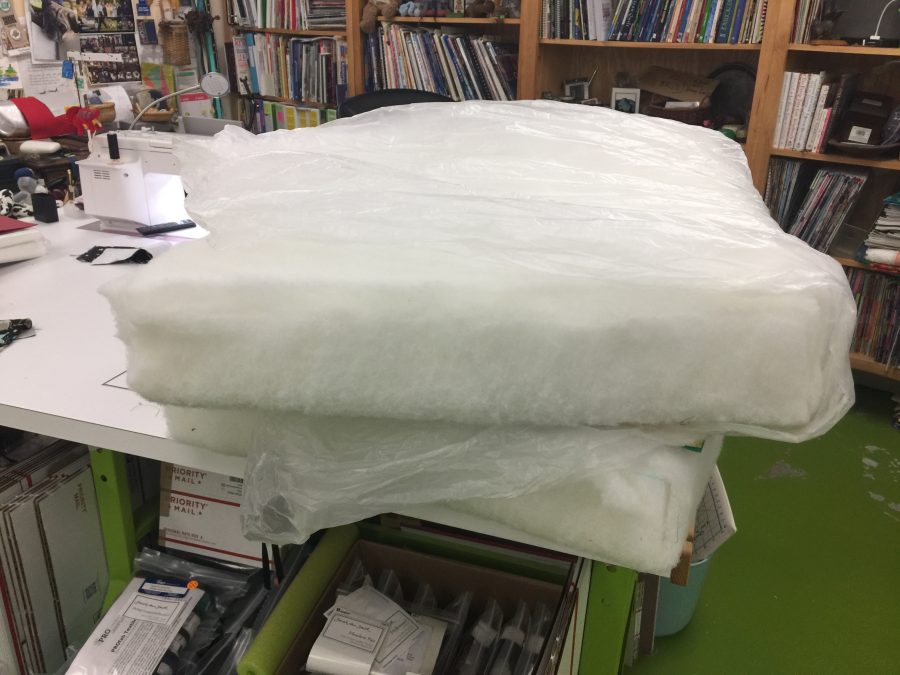
Then do it again with the other side. REMEMBER to leave the ZIPPER OPEN just enough to reach your arm inside. Makes turning the cushion right side out a whole lot easier. Ahem. Yeah, didn’t do that when I first began working for that interior designer. I was able to fiddle the zipper pull and get it open. Trust me, gap is better. OMG–almost done!!!!! Most furniture cushions are foam wrapped with dacron (outdoor cushions are the exception). There are different grades of foam. Softer ones are generally used for seat backs, firmer foam for seat cushions. There is even this miraculous “outdoor” flow-through foam–instead of being sponge-like and holding water, it drains out. The foam is kinda very firm, but think about it…no mildew! Anyway…back to this program. Upholsterers then use a spray glue to adhere the Dacron wrap (like quilt batting but fluffier, scratchier, cheaper I think, I had leftover, only partly mouse-munched in the shed). I had a vintage can of the spray upholsterers use but I think an artist’s spray glue **might maybe** work–check the label to see if it says anything about eating/eroding foam. And test. You can also just hand baste the edges. When using spray glue, I just spray the surface, pat the one huge, long and wide-enough-to-cover-the-edges Dacron in place and then trim it to the edges.
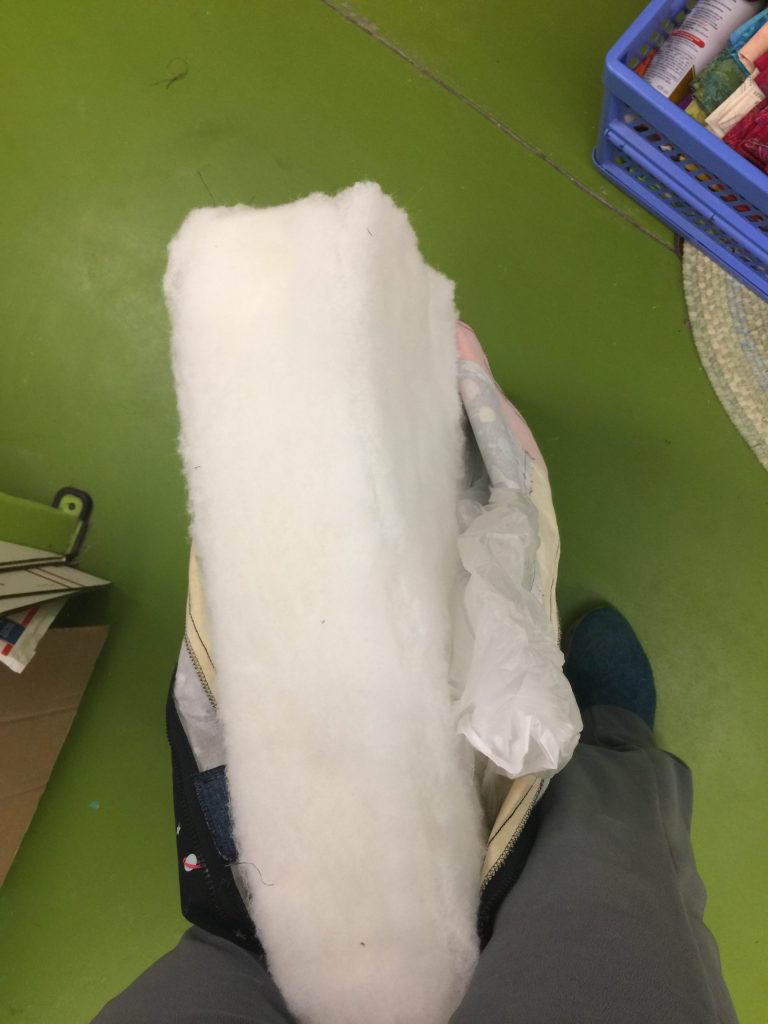
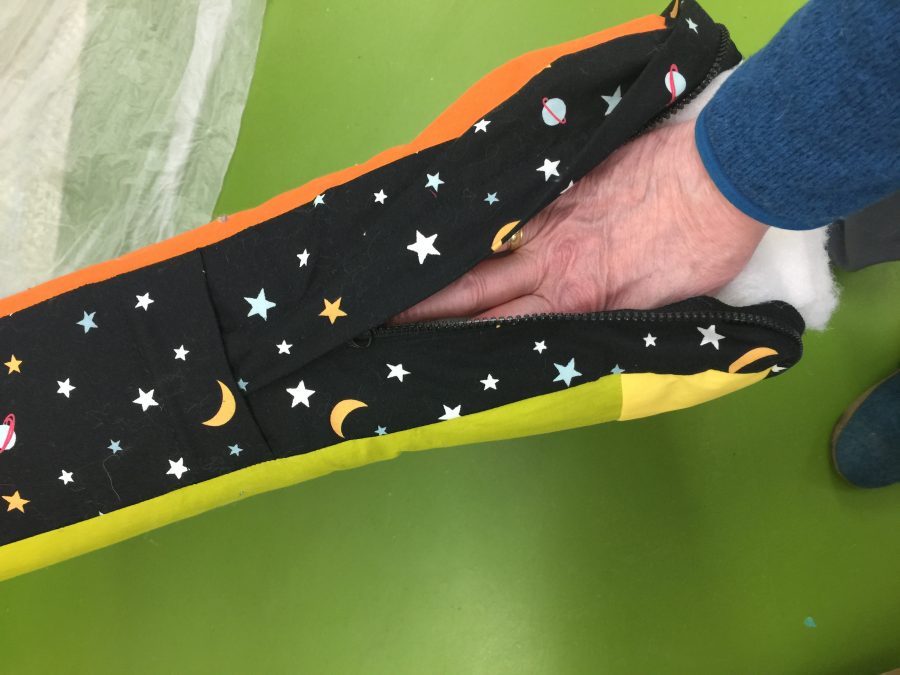
Next: Stuffing the cushion cover you just lovingly made. In the above photo, notice that I have used a dry cleaner bag (a big leaf bag works too) that I wrapped around the bottom of the cushion to facilitate wrestling it into the cushion cover. Do NOT put the cushion inside the bag–wrap plastic-something around the bottom. You need to be able to remove the plastic bag easily, and trying to tear a bag off the innards while stuffed inside the cover is not workable.By having zippers that come halfway around the sides of the cushion, you have made this part–stuffing–a whole LOT easier. Place the cushion inside like you are putting a pillow inside a pillowcase. Then place the cushion on the floor, using your legs to hold it upright. Smooth and pull the cushion up the sides. Pull the plastic out, then slide your arm inside and coax the seam allowances toward to boxing on all sides. Tuck the corners of the foam on the top edge under the zipper, and zip closed . See next photo. Here I’ve got the cushion on its side…see the zipper garage on the left? Use one hand to squish the foam/dacron down, and pull the zipper up over your hand (prevents getting dacron in the zipper). Slide your hand back, repeat. When you get to the corner, nudge the innards into the corners and continue until done. Park the zipper pull in the zipper garage on the other end. You may wish to fine tune where the seams are–straighten them, etc. Wearing quilting gloves or rubbery kitchen gloves gives your fingers a bit of grip and allows you to ease the fabric into perfect position.
DRUM ROLL PLEASE!!!!!!!
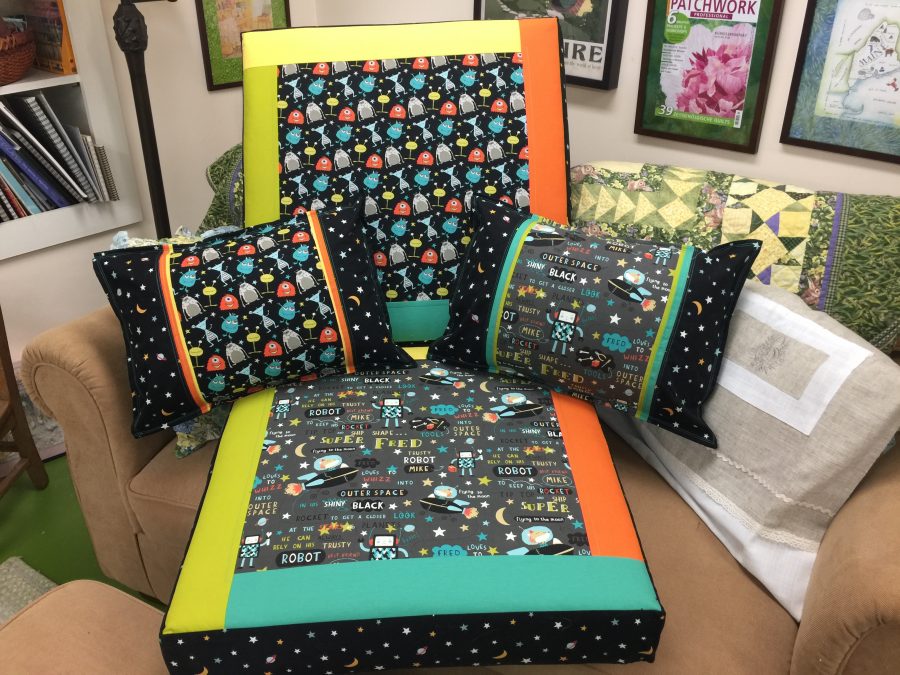
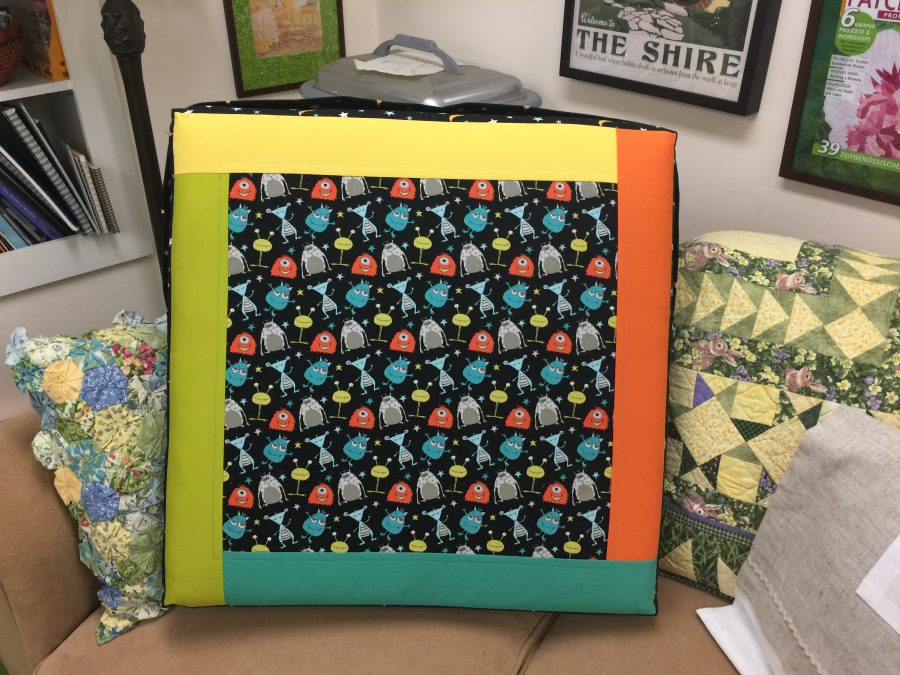
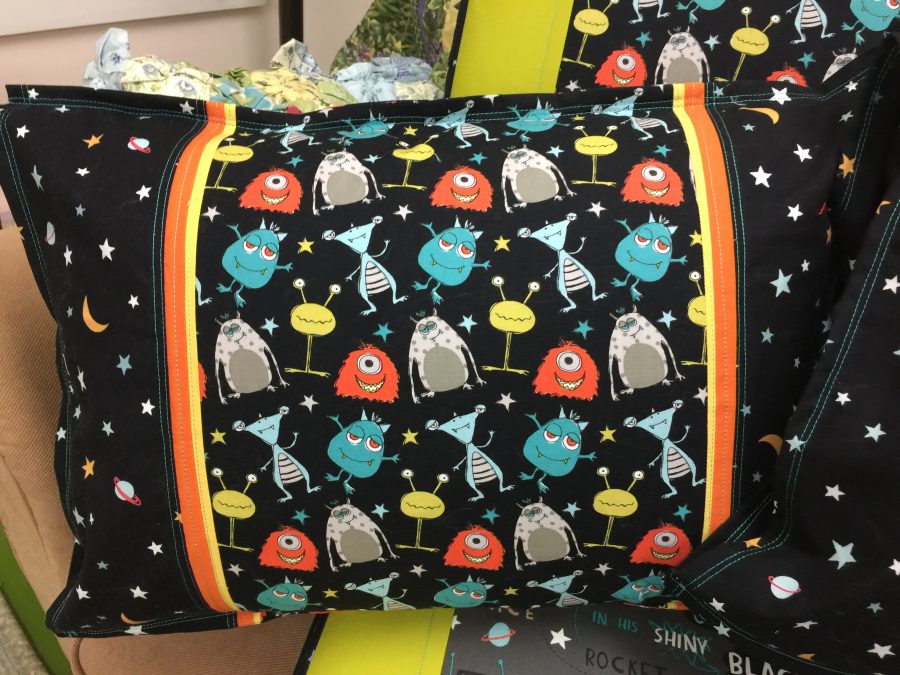
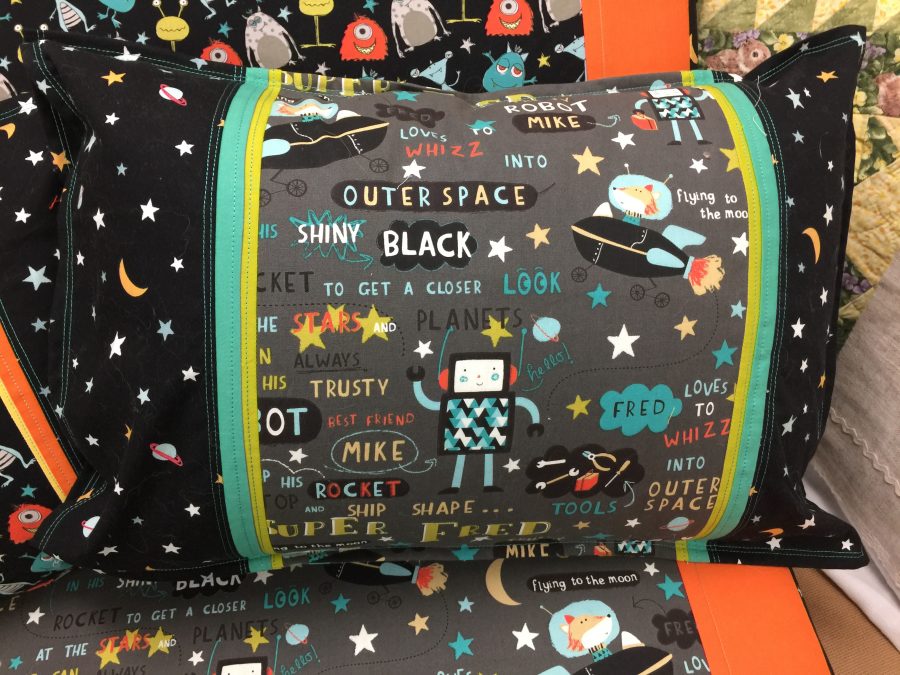
Ta DAAAAA! DONE! Celebrate! Feel a bit chuffed (great Aussie word meaning proud or pleased).The Space Pals in Gray side of the cushion. I put a different feature print on each side, so the kids can have Super Fred up on both cushions, or Space Aliens (next image), or one of each. Notice on the top of this one that black ripple? That’s the carry handle so the kids and DIL can tidy up! AND these cushions stand up on their edges, better for stashing in a crowded classroom. And yes, that’s my one and only (so far, I hope for another) magazine cover behind the love seat..my pink peony on Germany’s Patchwork magazine.Are those Space Pals in Black not the cutest things ever? I think some pillows made in their image need to happen…Close up of the Space Pals toss pillow. I got my pillow inserts from (Sigh…I go there sometimes…no one else within an hour’s drive has some of what they carry) WalMart for cheap. And Super Fred in gray. Adorable. Although I think we need some gender equality…It’s gonna be Super Freddie, short for Frederica! for me.
Thanks for sticking with me this long. I know these have been long and detailed posts, but sometimes when you’re essentially teaching a day-long workshop in two blogposts, that happens! I hope you’ve learned something and enjoyed the visit. THANK YOU!
This is a wonderful tutorial Sarah.. I hope many sewers will utilize the information.. Thank you for the work that goes into pattern writing,and the photos are right on!
Thank you, Susan! Yes, patterns are a ton of work, but worth it. I wouldn’t have gotten to where I am without the generosity of those who came before me, writing books, sharing knowledge. As for the photos, I’ve learned to take pics as I go, and that really helps me write the patterns (reminders of exactly HOW I did something!)
March 9th, 2020 at 6:07 am
[…] to make some floor cushions for my daughter-in-law’s Kindergarten classroom! You can find part 2 here as of March 12, […]
March 12th, 2020 at 9:00 am
This is a wonderful tutorial Sarah.. I hope many sewers will utilize the information.. Thank you for the work that goes into pattern writing,and the photos are right on!
March 15th, 2020 at 6:24 pm
Thank you, Susan! Yes, patterns are a ton of work, but worth it. I wouldn’t have gotten to where I am without the generosity of those who came before me, writing books, sharing knowledge. As for the photos, I’ve learned to take pics as I go, and that really helps me write the patterns (reminders of exactly HOW I did something!)