Making an overhead camera stand for online teaching
As I transition to holding online classes to supplement live and in person classes, I needed an overhead view of my work table. The traditional way to do this (outside of a fancy filming studio) is with a “C-stand” that is sturdy/heavy, stands on the floor next to your work table and has a boom arm that extends over the table. Then you hang the camera/iPad/iPhone from the boom arm. Cue COVID delays in shipping. I tried the one I could get in time for this week’s Perfect Bindings class at the first ever Mancuso online shows. The accessories didn’t fit the boom arm. Back they went!
Cue: Mama’s brainstorming, Mama and son’s (Joshua) creativity, and Joshua’s awesome tools (Band saw! drill! Random bits and bobs) and construction experience and help, and a stand using leftover stuff and $5 in supplies.
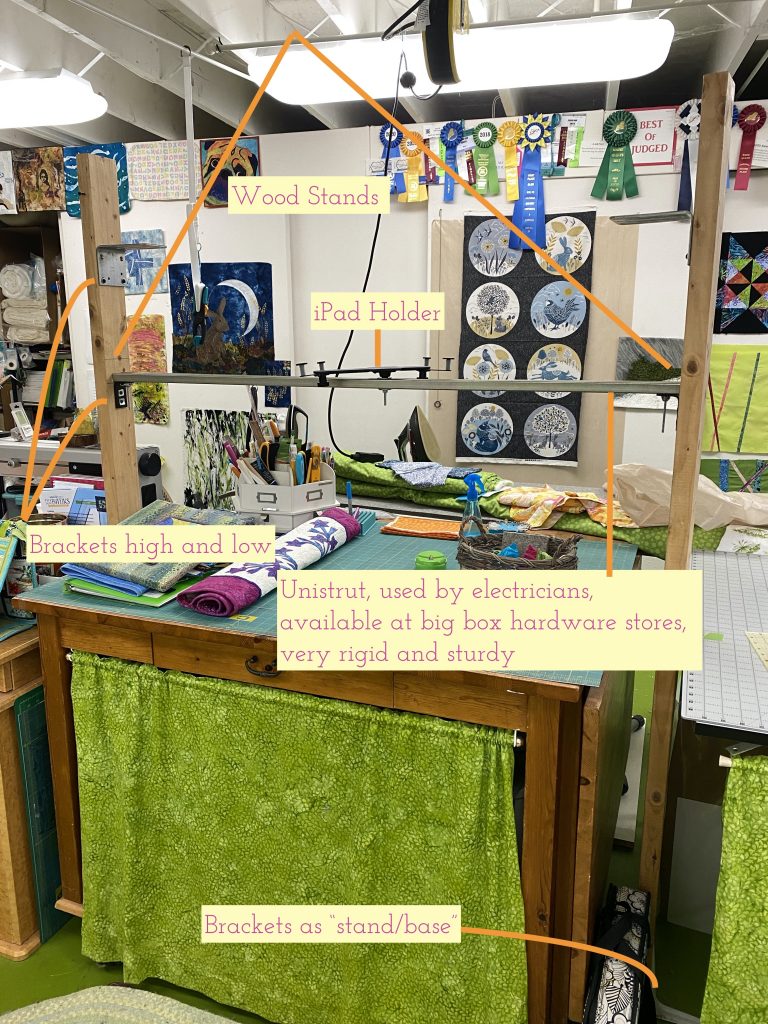
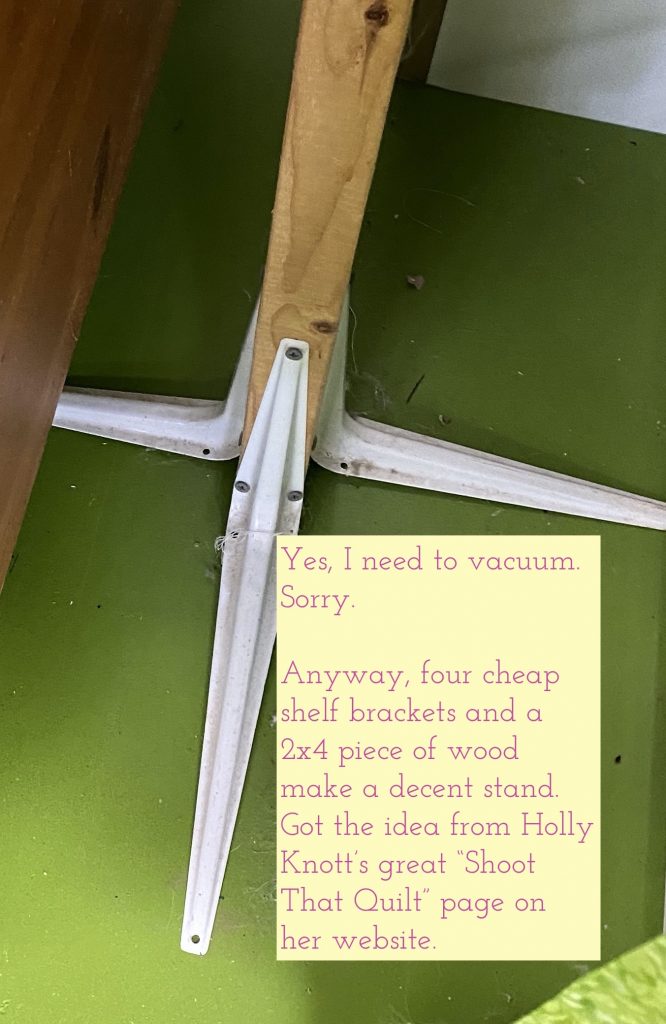
The wooden “light stands” were built based on information from Holly Knott’s wonderful “Shoot That Quilt” section on her website about taking great photos yourself of your quilts to enter in shows and magazines: two pieces of 2×4 lumber and four cheap shelf brackets for each stand.
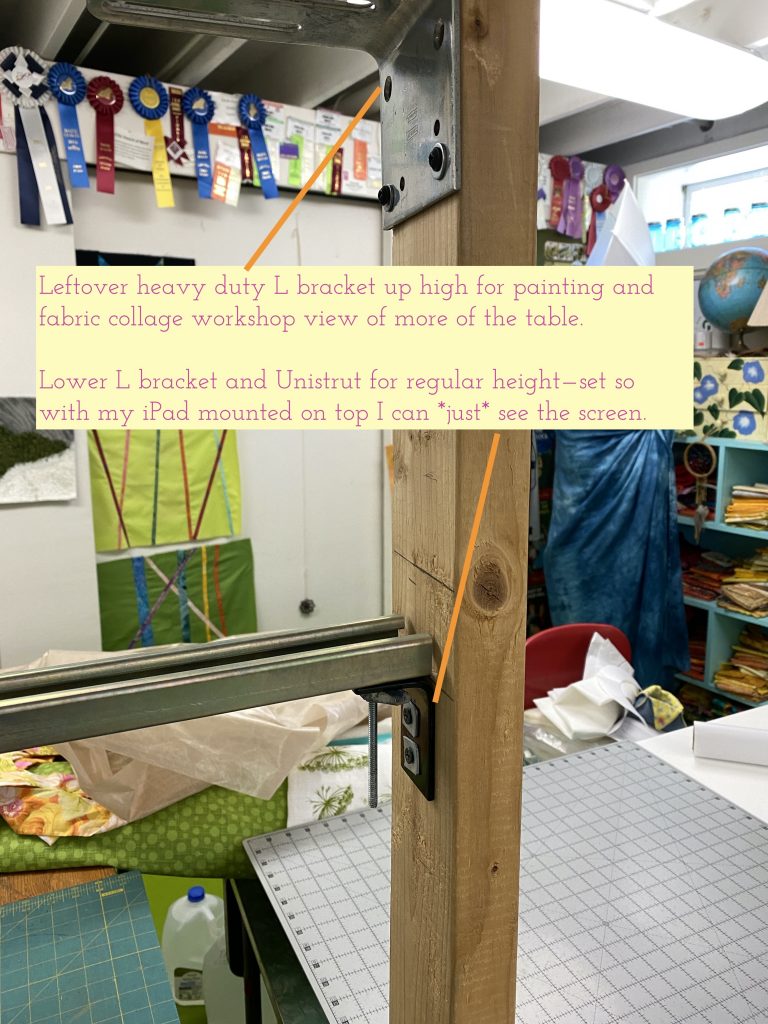
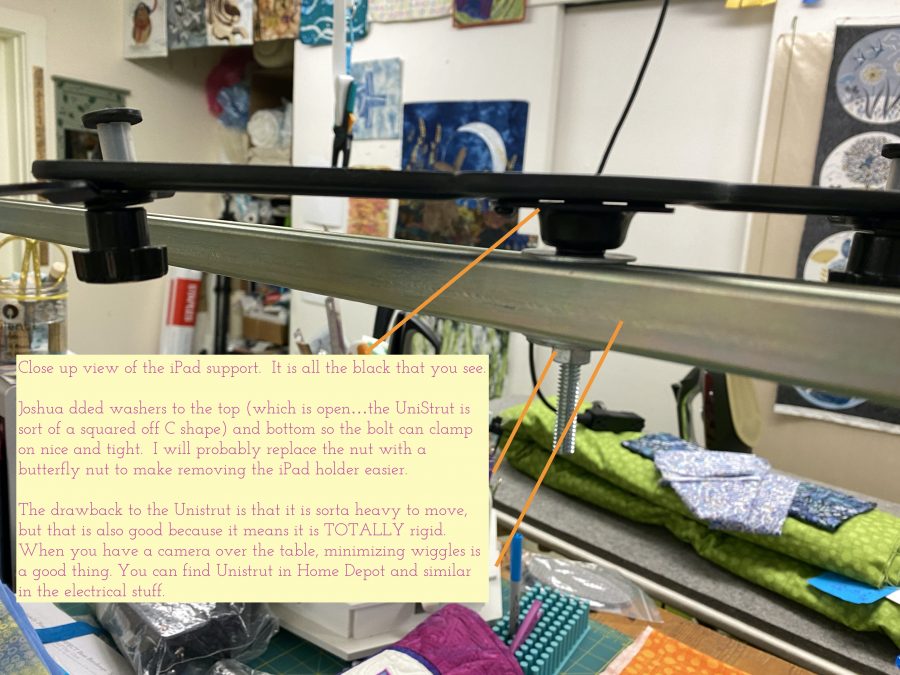
Joshua, our older son, did some electrical work for Mom and Dad (us) a while back, and introduced us to something called Unistrut. Link here. It is a bit heavy, which is why I looked at C-stands to begin with, but that is also its virtue: it is totally rigid. Rigid helps keep your camera (in my case my iPad) stable.
I CAN’T WAIT to have a MASSIVE TIDY ATTACK!
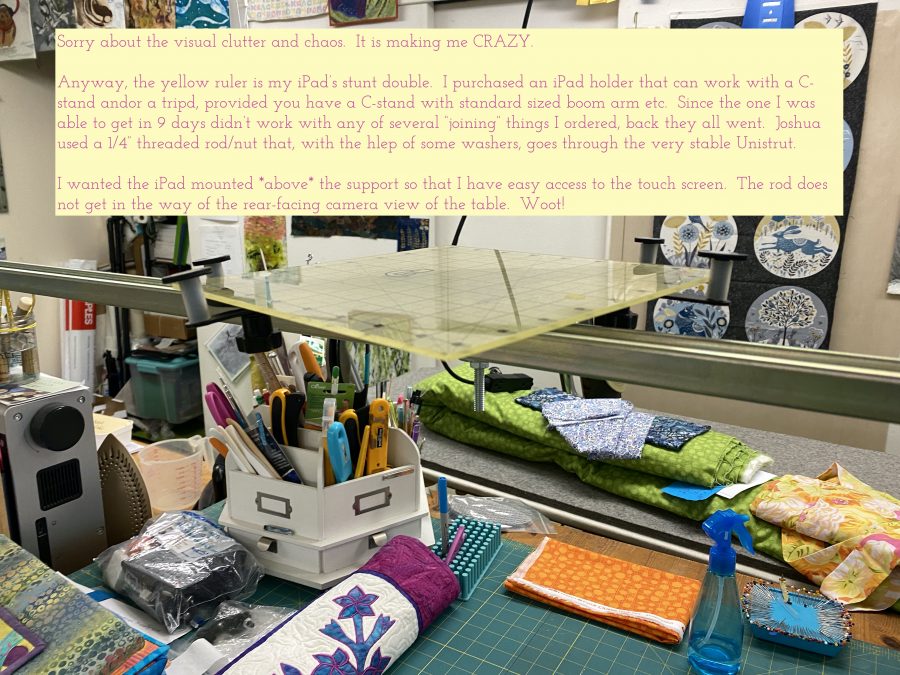
I wanted the iPad above the bar for added stability and so I could have full access to the screen while teaching live online workshops.
SO if you are wondering what your teachers does to get ready for you, this is just one small but vital component. If you are going to TEACH online, I hope this helps you–please feel free to ask questions! MASSIVELY HUGE thanks to Lyric Kinard for her help on so many things on the technical side over the years, and to Lee Chappell who gave us newbie online teachers for the Mancuso show a studio tour by Zoom to share with us how she set things up. And THANK YOU to my wonderful, creative son who comes home and always wants to do some sort of “fix up” something for his mom and dad. Joshua, you ROCK!
June 29th, 2020 at 7:23 pm
Wow, Sarah! Good instructions! One question: will that table now be a dedicated to this task? Seems daunting to disassemble and re-assemble each time you need to use it.
June 30th, 2020 at 9:44 am
It is already disassembled until the next time. The whole rigamarole is why to intrusive and bulky and annoying to leave set up! The white umbrella diffusers for the lights are the most claustrophobia-inducing, but the overhead camera set up is like working with overhead cupboards in front of your nose LOL! So yeah, it’s a fuss to set up and take down, but that is way better than living with it set up!