email Youtube

Home
Galleries
Blog
Workshops & Calendar
Store
Resources
About
Contact

Home Improvement–from Dungeon to Mo’ Bettah!

July 16th, 2012

In addition to being busy with stuff, errands, making step-outs for  a demo-lecture and whatnot, I took some time to spruce up the basement.  Long time readers may (dimly) recall that I posted when we moved in early in 2011 about the unfortunate colors and finish (or lack thereof) in the basement.

When you go down the steps from the main level (there is just an unfinished attic, ground floor, and basement in this house), you enter a “room” with several smaller spaces walled off on three sides of the “center” area.  One currently serves as storage, one for the utilities (water heater, water pump, water filter, furnace, heating oil tank, electric panel), one is a sort of storage and workroom (the previous owner kept tools and building stuff in here), a wood room which stores a winter’s worth of wood to heat the house, and the two rooms that were joined to become one large studio for me (if you put State of the Studio in the search box those posts will turn up).

Here are the “before” photos of the center area:
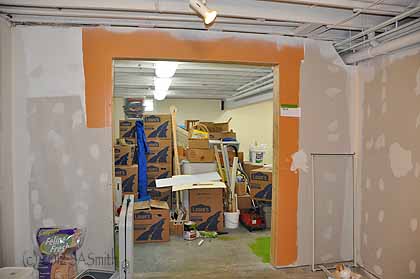
Shortly after moving in…the dark brown in my studio (beyond the doors) had already been covered by soft cream. The entrance, however, was still an open hole with some raw drywall edges with “roasted pumpkin” paint used in the remainder of the center part of the basement.
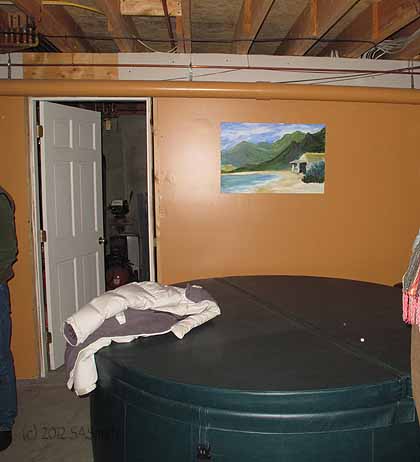
And part of the area on the right, with that icky-for-a-basement pumpkin and the large green hot tub. A hot tub in a basement area with NO windows? Getting it out was almost impossible–they must have taken it down before finishing the stairs–it was like popping a cork out a small hole, except the “hole” was the entire staircase up, and required removing door trim etc. to get the extra inch needed to get it out without cutting it into parts….

When we moved in and worked on my studio, I had the painter also spray primer/white on the ceiling of the center area, making it much less gloomy.  Last summer, our builder added the doors to my studio, and baseboard and door trim to all the doors to those little rooms.  I then painted over the pumpkin in August of last year with a lovely sky blue.
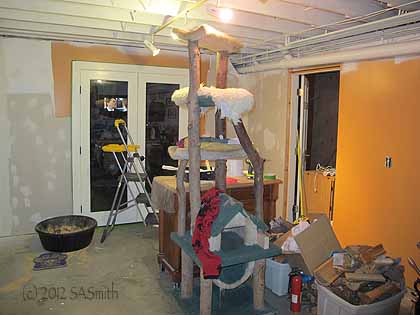
Doors to my studio installed
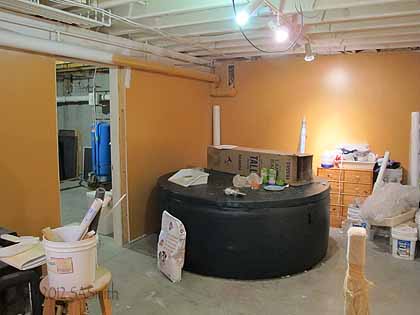
Ceiling primed…that big foam hot tub and pumpkin. Bleah. Really NOT my colors!
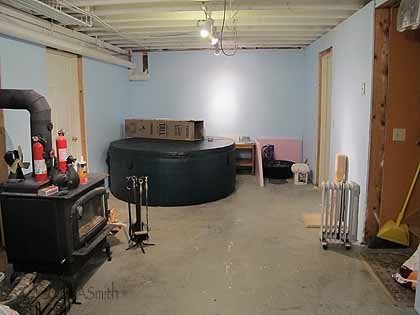
Blue walls…seriously better than pumpkin!  Eventually I got rid of the last of the pumpkin (on the stairs up–on the right where you see the broom), using a lovely sunny yellow and repainted the stairs’ ceiling from dingy gray-white to warm “Gardenia” white

This summer’s chore:  paint all the pre-primed trim and the floor, in the same wonderful grass green as my studio!
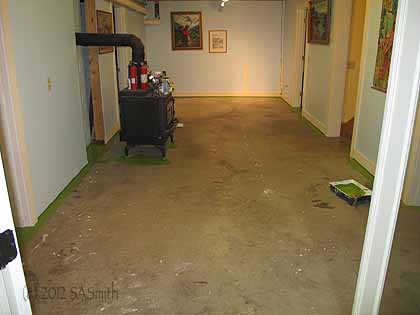
Pre-primed trim installed, and have just “cut in” the green at the edges of the floor. As you can see, the cement was ugly, splotchy and just …well…. UGH.
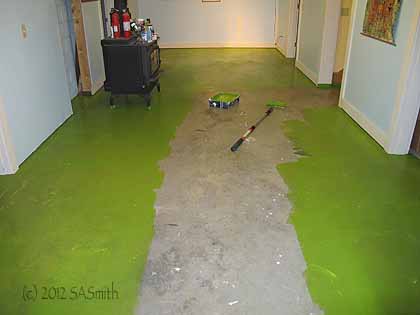
The first coat of green—minus my escape route to the stairs–is down. You can see (maybe?) in the photo that when wet it is fairly transparent… I ended up putting down four coats of Floor Paint.

Drum roll, please:
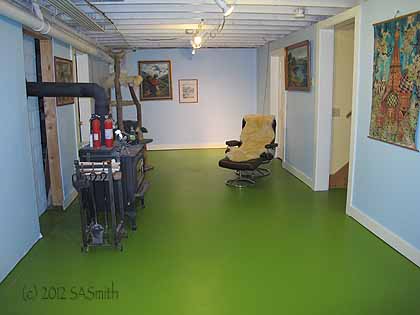
Is that better or what??? Hot tub GONE. Trim on all the doors and at the bottom of the stairs. Ceiling primed/white. Walls sky blue (not pumpkin).  Stair walls warm sunshine. Floor green (not grungy cement). BETTER!

I tell you, even with just the first coat on it made so much difference to go down through a fairly nice space to get to the studio–it felt for a while like I was going down to my dungeon!  Now the route is lovely.  And the chair?  Hubby likes to read and snooze by the fire in winter.  And the other day, when it was hot and muggy (and we have no air conditioning), he was down there reading in the COOL of the basement!

Yippee!   Summer painting chores reduced by a lot!  Still want to do the inside of the closet where the washer/dryer are and the kitchen (which has so little wall space I will probably be able to cover it all with just a quart of paint!

Next: off to Boston to retrieve No. 2 son from wrestling camp, then home!
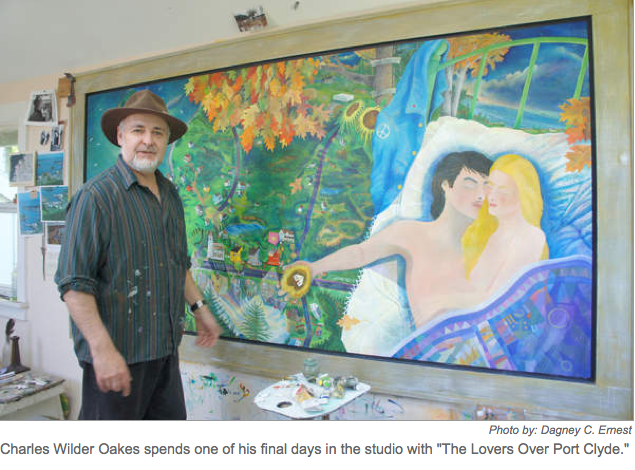
Wilder Oakes at Assymetrik Arts in Rockland, Maine

July 12th, 2012

Hi all…just a quick note for any of you who are lucky enough to find yourselves in the Midcoast part of Maine.  In our online newspaper, Village Soup, I read an article about a local guy who is an artist:  Wilder Oakes (alas, the article requires one to either pay to view or have a subscription).  His work sounded intriguing, and the photo included intrigued me enough that I asked my Frayed Edges friend Kathy if she wanted to meet me and go to the show. BOY am I glad I did! You can’t read the article, but you can get a glimpse of the image here.  The show runs through July 27.

Wilder Oakes at work on The Lovers; click to see larger.

Oakes’ oil paintings, some with mixed media, are at Assymetrick Arts in downtown Rockland at 405 Main Street (about a block away from the Farnsworth Museum).  The centrepiece of the exhibit was The Lovers Over Port Clyde, which was the painting in the article.  On the bench beneath the painting were a couple aerial photos of the area where Oakes lives, so you could see how he has portrayed his home town, the buildings and inlets…. Some of the houses (just to the left of the man’s outstretched hand) were small bits of painted wood affixed to the large canvas (apparently he had to take a window out of his home to get this big piece out!), giving a great bit of literal dimension to the work.  As a textile artist and quilter, I loved the colors on the quilt on the bed, but also the colors worked into the paintings of the houses…an amazing blending of small brushstrokes of pink, blue, goldenrod,  mauve, green… just fabulous.

On the gallery website (here) you can see some of the artwork as well as a shot of what one sees as you walk in the door.  One piece is A Portrait of the Artist a Neil Diamond.  Oakes is only a bit younger than Diamond, and the two looked amazingly alike in photos of them from when they were younger (tho no resemblance today).  As we were preparing to leave, Kathy and I were chatting with the gallery owner when ever-alert Kathy noticed that Oakes himself had come in.  She went over to introduce herself, and as the owner went to greet a new person, I joined them.  What a treat….

Oakes chatted with us, telling us about his work, answering our questions (yes, things like:  how did you make those shapes in the frame?  answer:  carved them, then dipped them in several layers of gesso).  He then showed us the *back* of the self-portrait, which has an album by Diamond (yes, the entire disc!) plus  more of the story of this painting.  Oakes told us that he included a note written to him by his first love (which he still had in his high school yearbook) because she was as much a part of the story as he was.  And –goosebumps– she still lives in the area and came to play music at the show opening! On the front, where you see part of an album (painted) in the lower left corner, he has written in paint part of the story of who he (Oakes) was then, the songs, about his life then.  I noticed that the house behind the figure looked like a house in the Lovers, one where an angel is in the street, so I asked, and indeed it is the same house, where he grew up.

It was a totally cool visit—I left wanting to dash home and make art!  Instead, sigh, I stopped at Home Depot, came home, cooked, etc.  But just had to share with you all.   DO drop in to the show if you are in the are.  You can also see a bit of Oakes on his Facebook page.

May all of you have a moment like this, that inspires you and gets your creative juices flowing…. it was just wonderful!

Vermont Quilt Festival, Part 2

July 7th, 2012

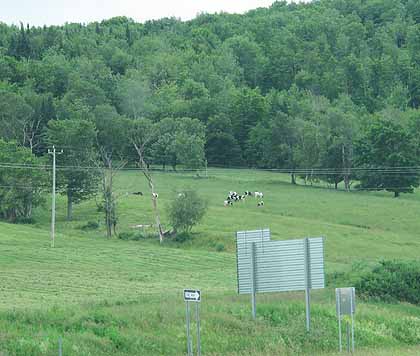
To begin at the beginning: as I entered Vermont, what else would I see but COWS, the kind on the Ben and Jerry’s label! Of course I had to pull over and snap a picture!

It always amazes me how rapidly time evaporates.  I got home on Monday, it is now Saturday, and I feel like the week simply disappeared in errands, exercising, painting (of the baseboards and trim variety), preparing to paint (the basement floor variety), and a thousand other things.  I’ve JUST this past hour tossed the laundry from the trip into the washer!   So while it is stewing and getting clean, I thought I’d start at the beginning and attempt to catch up!

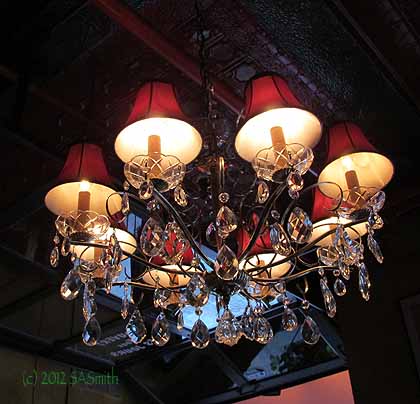
From the last post, you know I was able to meet Dana B. from an online class with Jane LaFazio (at Joggles.com) and friend Susan Brubaker Knapp and have dinner the first night.  Susan and I were snapping pictures from the get-go…. she spotted this light fixture (and got a much more artistic shot through the entryway):

Lighting at Leunig’s Bistro on the Church Street pedestrian mall in downtown Burlington, VT. Dinner was so good I returned several nights later with other teachers after the show ended!

I was rushing a bit so didn’t get the photo quite centered, but with cropping in Photoshop, like this view of the same fixture:

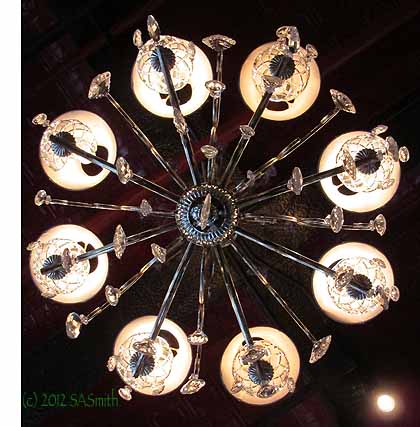
Holding the camera directly under the fixture….

As I told my quilting design students on Saturday/Sunday in class, design ideas are EVERYwhere!

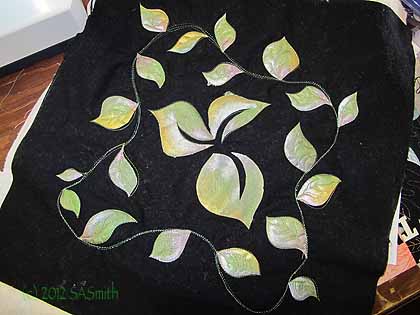
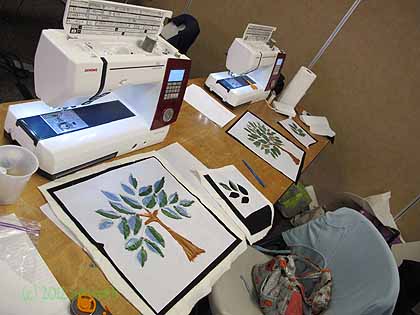
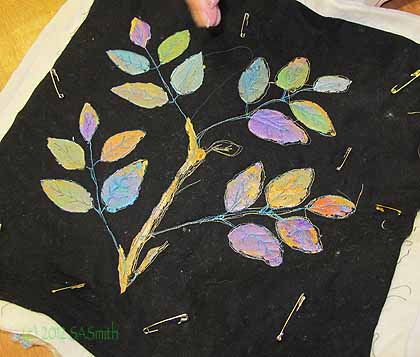
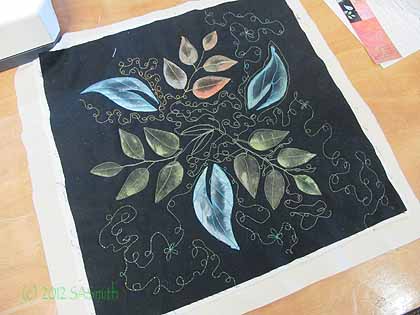
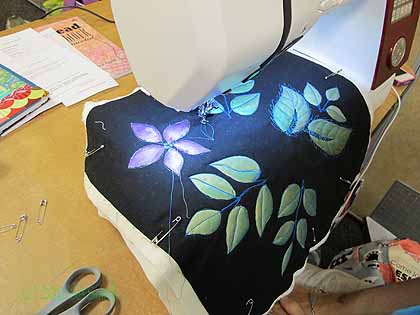
My first class (Thursday) was Tame Fussy, Fiddly Threads.  We were lucky to be in the room with Janome provided machines, all 7700s, and I know at least two of my students went HOME with ones they got at an amazing show special from Bittersweet Fabrics (that owner, Dave Lavallee, and his company gave some AWESOME prizes including machines to at least six lucky youth quilters!).  I always encourage students to cut loose and make their own designs and color combinations with the paints for stencilling their black cloth….

Lovely and delicate coloring on this piece, which she had just begun quilting.

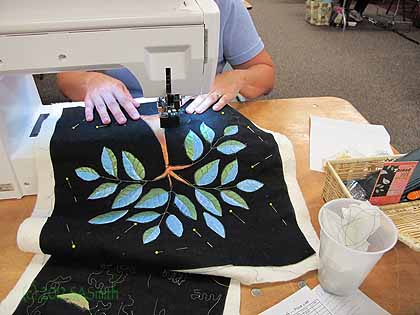
The class teaches how to use the threads so many fear:  metallics, holographic, heavy poly, multicolored.  The trick is getting the correct needle and tension.  I begin class by having students prepare their freezer paper stencil and painting. (PS–the paints used are Jacquard Lumiere textile paints, available at various art quilty places and at online retailers such as art supplier dickblick.com.)  While the paint sets up, we review the things you need to know, then by late morning (ish) sewing begins!   This time one student decided to make a tree, and her friend and tablemate followed suit:

Trees…with freezer paper stencil still affixed while the paint dries

And in the back, Cricket (LOVE that name, and how totally cool that her parents named her that–it’s not a nickname!) did some spectacular color-work…just love the look and color of these leaves:

Crickets colorful leaves

One interesting thing–she was having some issues with the machine/quilting despite having experience with free-motion quilting.  We changed her seating to something with the seat higher up–closer to correct position (you know how in classes the machines are ALWAYS too high up on the table for the usual classroom chairs?) and presto, problem solved!  So if you are having difficulties controlling your Free-motion quilting, try adjusting the height of your chair (pillows, whatever!).

This student wanted a more airy look to her stencils, not filled in heavily the way I made mine. Love the soft look, and the fun she is having quilting!

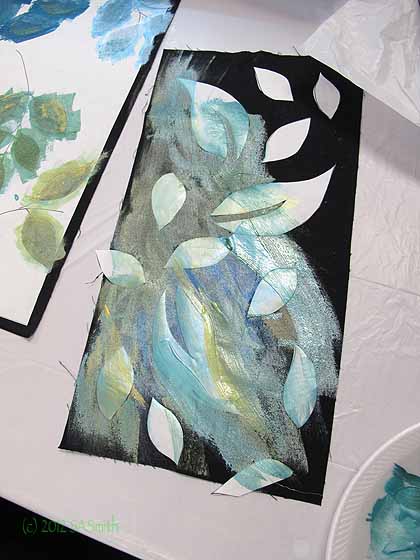
I had encouraged students to bring a scrap–that way you can test drive threads and tension and don’t have to pick it out if things are off.  This student used her cut-out leaves as a mask and painted the background…this turned out fabulous.  Here it is in progress:

The sweep of metallic colors on black was FABULOUS!

The 30-wt So Fine (formerly Brytes) from Superior Threads makes an awesome color statement…here she is using the blue.

And remember those trees…here is one later in the day:

Love the way this turned out!

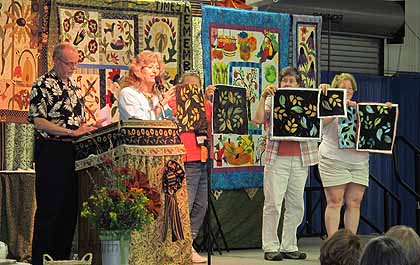
At Show and Tell Saturday night. The gentleman at left is Richard Cleveland, the founder of VQF. Part of show and tell is each teacher gets to go up, and if there are any students there they come up and share their projects. I’m holding my version, and you can see my students to the right, including that wonderful “sweep” of color over the leaves, the “test” piece held by the lady at the far right. GREAT students, fun class!

There was a VERY special moment for me at the Sharing, but I’m going to be evil and make you wait to hear about it!  I had two more classes:  Fine Finishes and Quilting Design.  I was so busy with a full 20 students in a BUSY class that I didn’t take a single (SOB) photo for the Fine Finishes bindings and edge finishes class, but got some great pics of the design class (small but superlative), and some photos of some of my favorite quilts from the show.  More soon!


Vermont Quilt Festival–Part 1

July 1st, 2012

After 3 1/2 days of teaching, Judy Woodworth, Bonnie K. Hunter and I went into downtown Burlington for dinner to relax and celebrate. We had dessert at—where else of course (we’re in their home state)–Ben and Jerry’s Ice cream!

Just a quick note to check in and say hi and share pics of a few of the highlights of the days here in Colchester/Essex Junction, Vermont, where I’ve just taught 3 1/2 days of classes at the Vermont Quilt Festival.  WOW–what an amazingly run (by volunteers!) quilt show, with some stunningly beautiful and top-notch quilts from traditional to modern.   I’ll do several more posts, but Burlington is a charming small city–I am enchanted with the bike lanes and all the folks from college age to seniors riding bikes to and fro, parking for bikes in the downtown core (just a couple blocks up from the shores of Lake Champlain).  I had an absolute blast and would SO love to return to teach again, and know for sure I’ll now come as a “tourist” quilter, too!  It is about 6-7 hours from my home in Maine, so a day visit requires two nights away from home, but it is worth it!


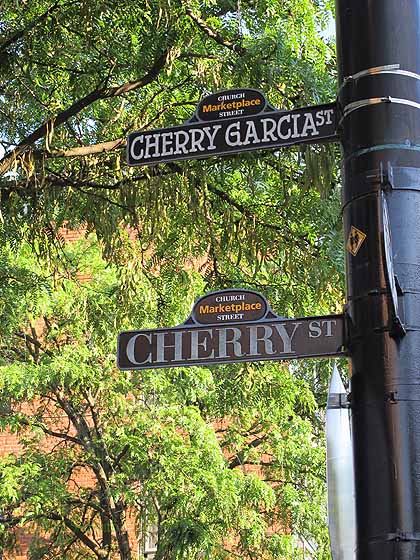
Ben and Jerry’s is on Church Street at the corner of Cherry street…. Look at the sign! I TOTALLY love a town that has a sense of humor!

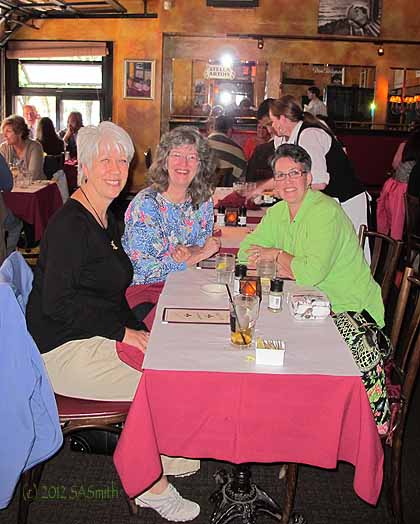
An internet friend, whom I met in one of my online drawing classes with Jane LaFazio, Dana B. came up to Burlington to meet me for dinner on Wednesday, the day I arrived.  Susan Brubaker Knapp, whom I initially met over the internet as well was also teaching, so the three of us had a most fanatabulous dinner at Leunig’s.  I’ll share more pics of the restaurant in a future post.

Wednesday with Dana B. and Susan Brubaker Knapp at Leunig’s restaurant on Church Street.

And the classes…OH MY did I have fun, and my students were so wonderful!  I won’t share any pictures now because there are just so many that I need to do a post or two just on those!

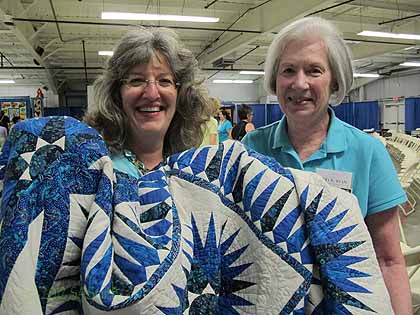
And one of the highlights for me was being able to share at Saturday night’s Show and Tell–I’ll post the whole wonderful story, but here’s a picture of me with my Oceans Alive quilt, made from Mary K. Ryan’s Mariner’s Compass pattern, WITH Mary K. Ryan!   It was just such a thrilling, wonderful thing, and I think you can tell by how happy we both look!

Me and Mary K. Ryan, with my quilt made (pieced in 1990-91, hand quilted and finished in about 2000) from Mary’s Mariner’s Compass pattern.

Tomorrow, I’ll drive home with a couple hour detour to the south to visit my dear friend Jacquie Scuitto, the Quiltmuse (I did a post on her book of light verse, here and blogged about her visit to Camden here and her verse in A Black and White Tale here), and hope to have more pictures and blogging for you later in the week.  Cheers, from a very happy and not-nearly-as-tired-as-I-expected me (tho I may collapse once I get home!)


Vermont Quilt Festival

June 27th, 2012

Just a quick note:

I’m teaching at Vermont Quilt Festival this weekend…leaving this morning (Wednesday) for classes Thursday through noon Sunday.  If you are there say hello if you spot me… I will likely have frizzy hair and a happy smile!   I’ll try to blog from there or when I get home with class pics.  I have SO MANY things I’ve done that I want to share with all of you, but I’ve been so busy DOING them that I haven’t had time to blog.  Will try to remedy that as soon as I’m home!   Hope to see some of you in Vermont!