email Youtube

Home
Galleries
Blog
Workshops & Calendar
Store
Resources
About
Contact

Pretty Little Mini Quilts

March 11th, 2010

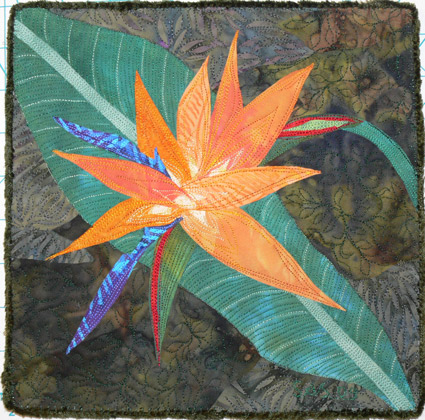
up front admission:  I’m a cover girl!   Yes, the quilt on the cover is the Elusive Batiki Bird designed, patterned and made by me!
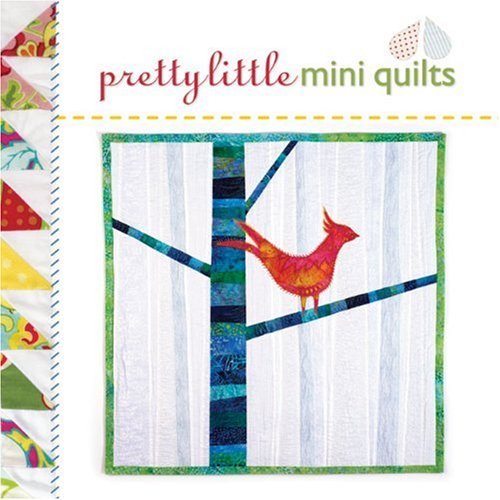
Pretty Little Mini Quilts is the latest installment in Lark Books’ successful “Pretty Little” series, which is an 8 x 8 inch format book, in this case with 31 projects to make. The projects range from paper-pieced hexagons, to a nearly mixed-media house-shaped piece on stretcher bars, pieced quilts, appliqued quilts and quiltlets, and more all 36 x 36 inches or smaller.  Some are variations on traditional patterns such as the nine-patch (and would make great table toppers as well as wall art), others are contemporary abstracts, and others are whimsical or contemporary applique.  I liked that there is a wide range of techniques and ways to present the quilts.

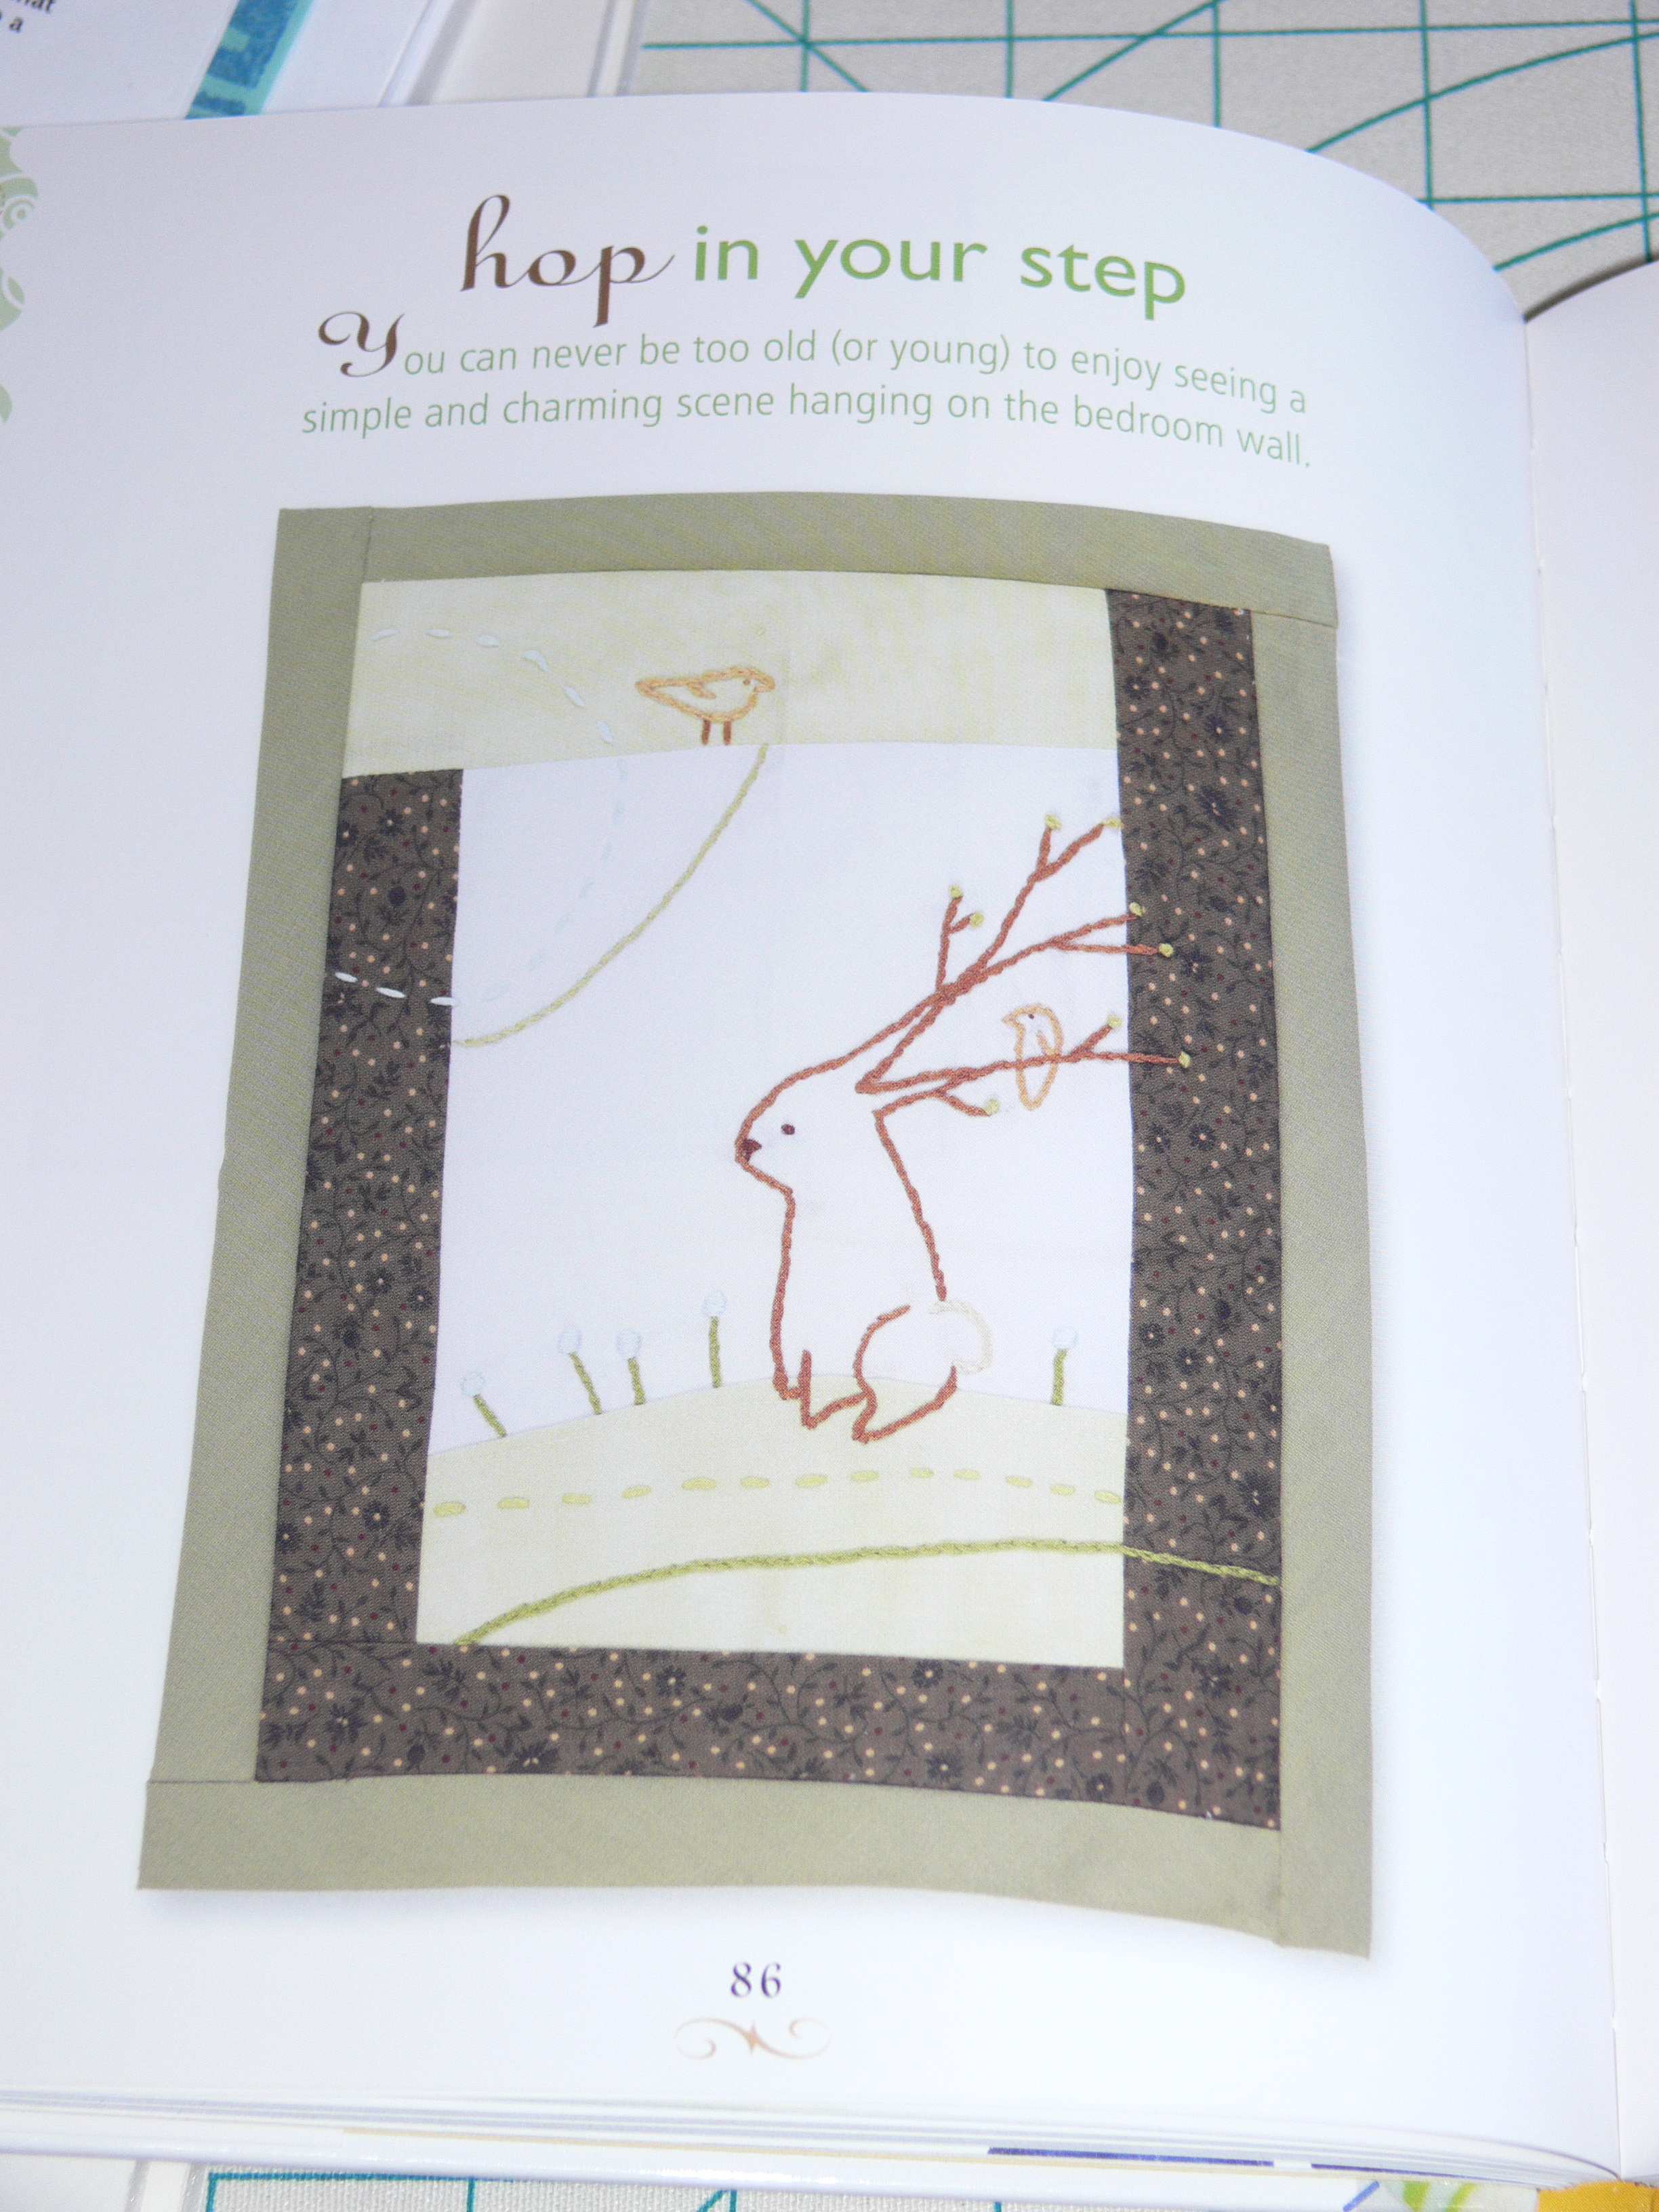
I am TOTALLY in love with the bunny, by Aimee Ray, who appears on p. 5 (pattern on p. 86), with a birdie perched on his antlers/ears/branches! This piece is small, embroidered, with limited piecing.  It is just adorable!
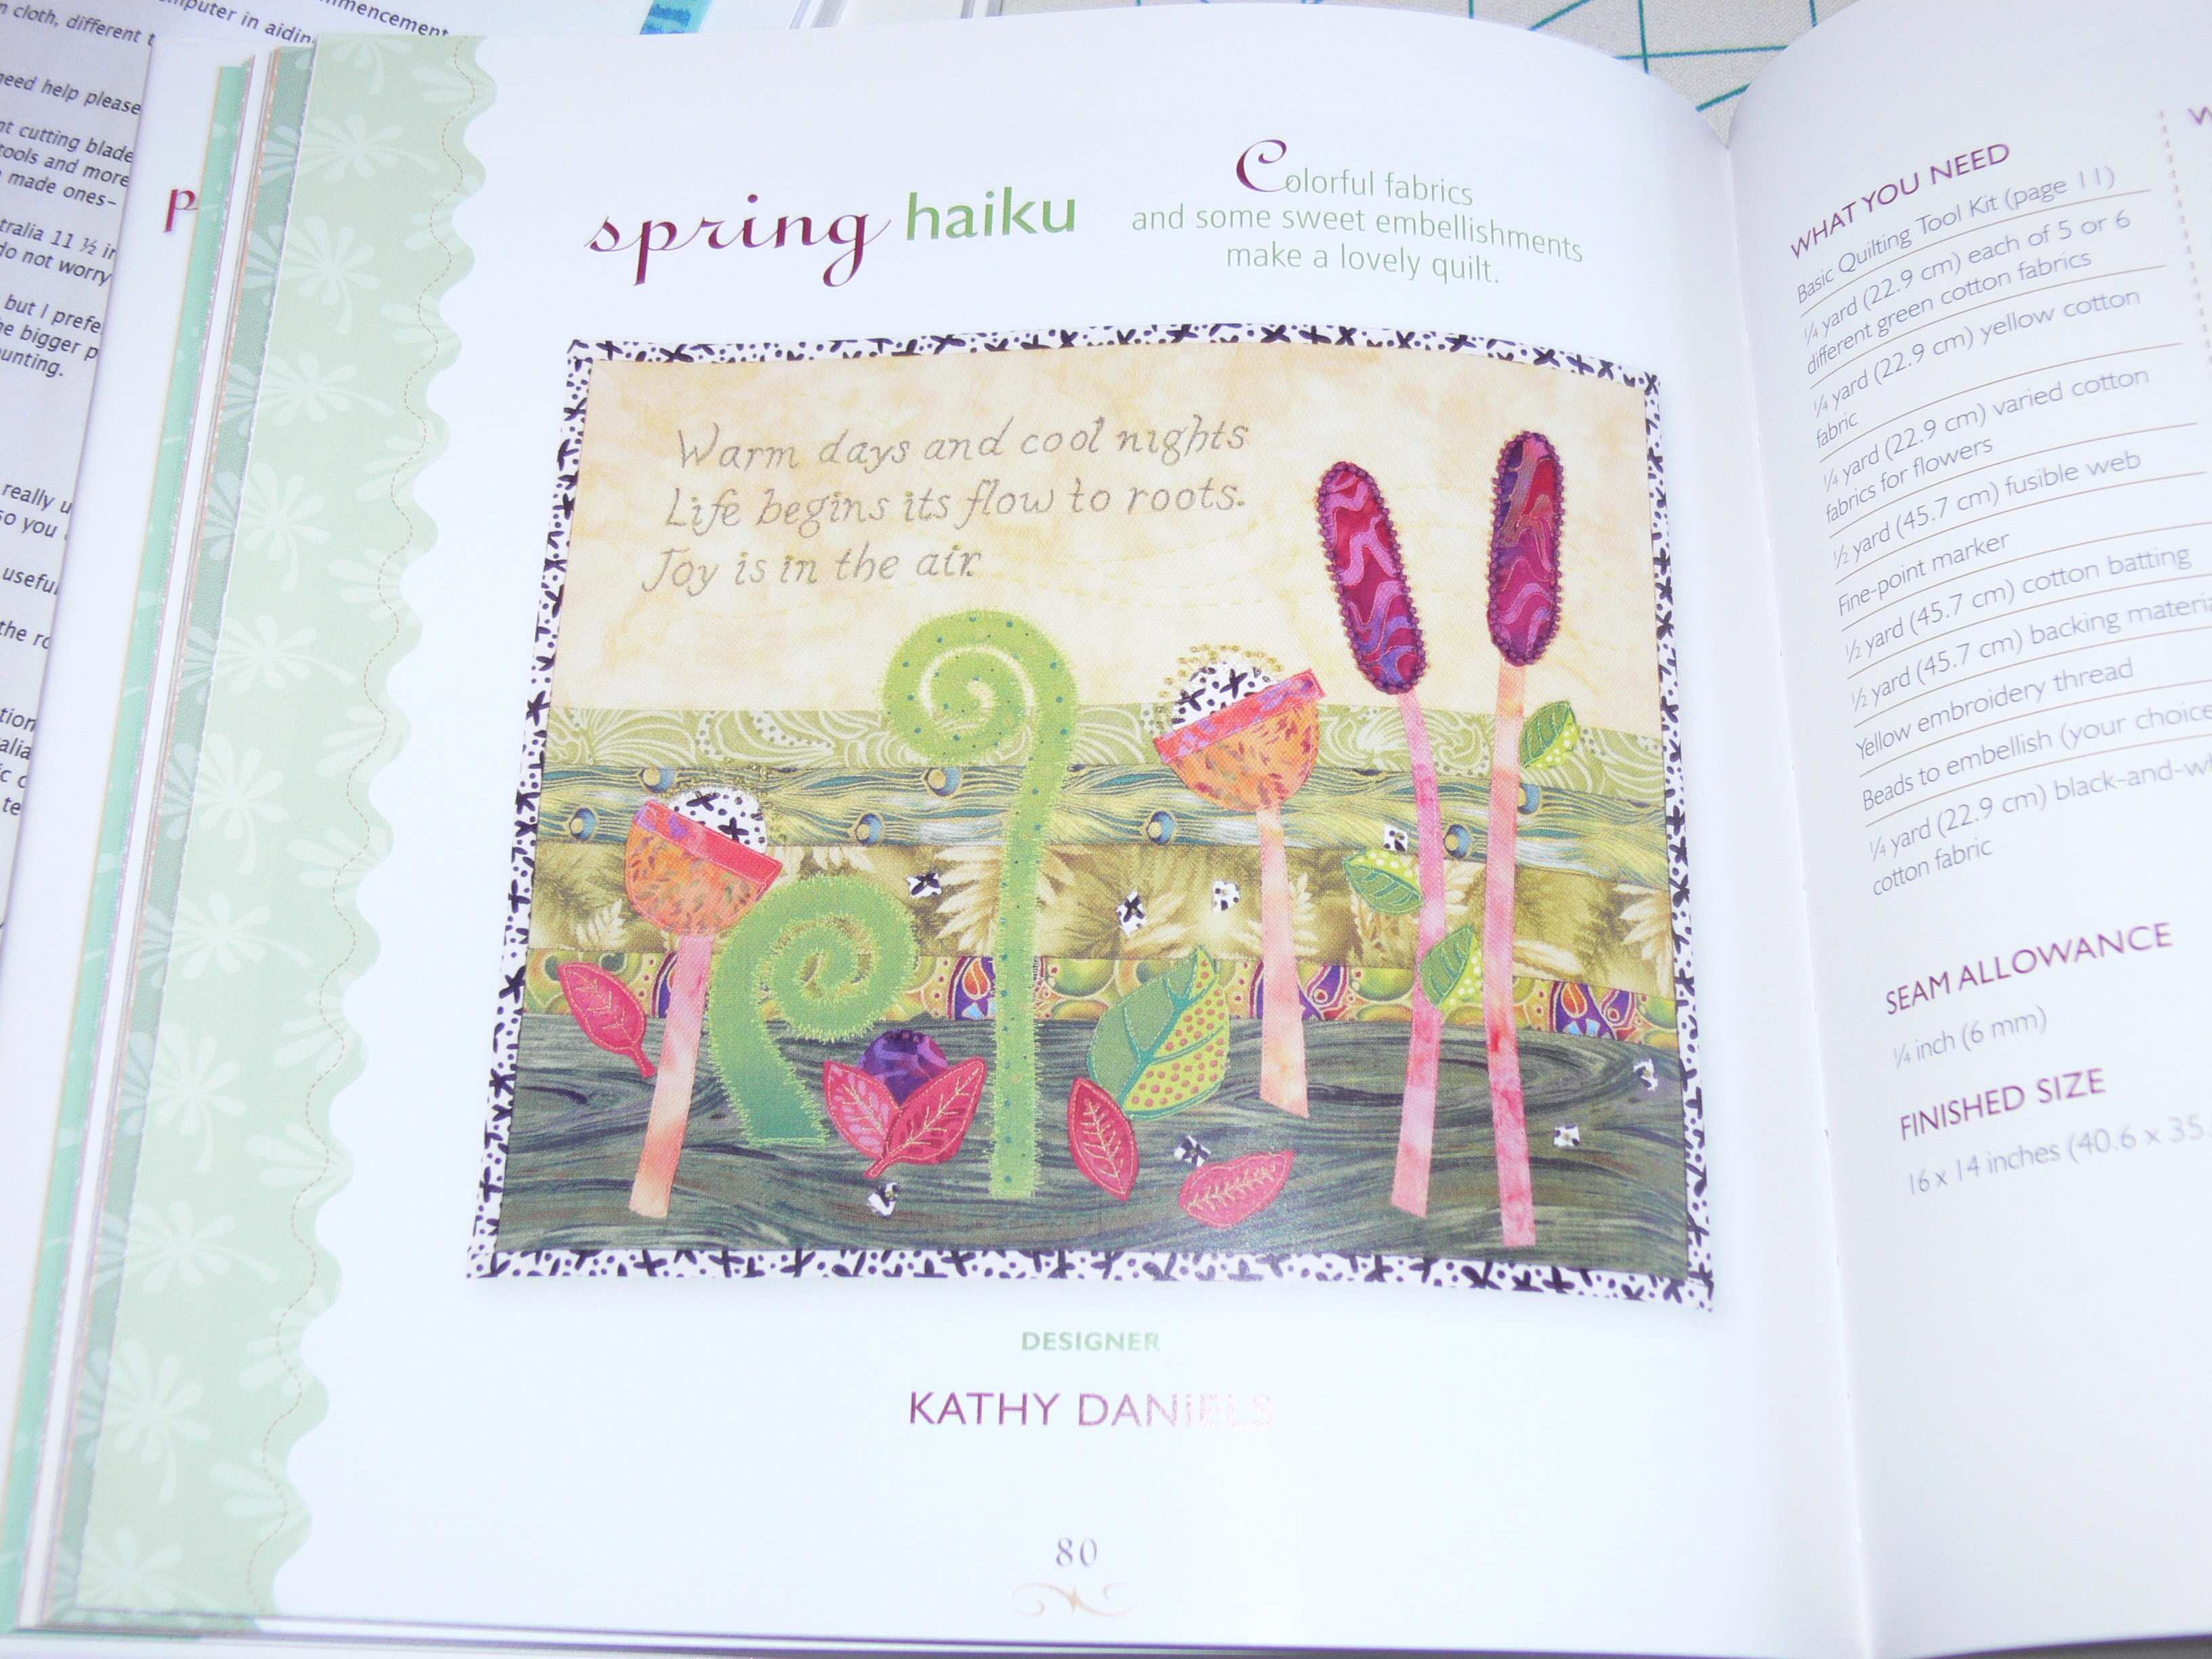
Not only do I love the bunny, but also my friend Kathy Daniels (blog here) has a lovely piece called Spring haiku that, at 16 x 14 inches, would make a lovely accent on a small wall anywhere in the home. Pattern on p. 80.
My quilt, seen on the cover, p. 31, and patterned at p. 118, is 26 1/2 inches…just the perfect size to be the front of a Euro square pillow for the bed or a decent size on the wall.

The book begins with a quick (p. 11-27)  review of some quilting basics, followed by the 31 projects.  As you might guess from the size of the book, the instructions are not in-depth, as you might find if you spent $10-12 for a single pattern.  As a result, total beginners might find some of the instructions a bit spare.  However, if you are at the confident beginner stage (or have a nice quantity of gumption even if you are a total beginner) or up, or have garment sewing skills, you’ll be able to follow the instructions.   If you want in-depth coverage of some techniques, such as crazy quilting embroidery stitches or painting on fabric, you’ll want an additional book that provides the in-depth instruction, but I think it’s a good thing to expose folks to the range of styles and techniques out there.

One reviewer commented she couldn’t figure out who would be the intended audience for this book.  My guess is the 20- and 30-somethings who are relatively new to sewing and quilting, are setting up their homes, sewing for children and friends and personal satisfaction, but that doesn’t mean the projects don’t also appeal to the rest of us who are looking for something fun, fresh, and that won’t take forever to make.  I expect that someone will buy this  book for a single project–with the $17.95 cover price, it isn’t too expensive–but may then find themselves tempted by something else, too.   Like that bunny.  I LOVE that bunny!

PS–Thanks to Lark Books for making me a cover girl again…. I was also on the cover of Creative Quilting with Beads… I think I like Lark!  I blogged about that one here.
Student work

March 8th, 2010

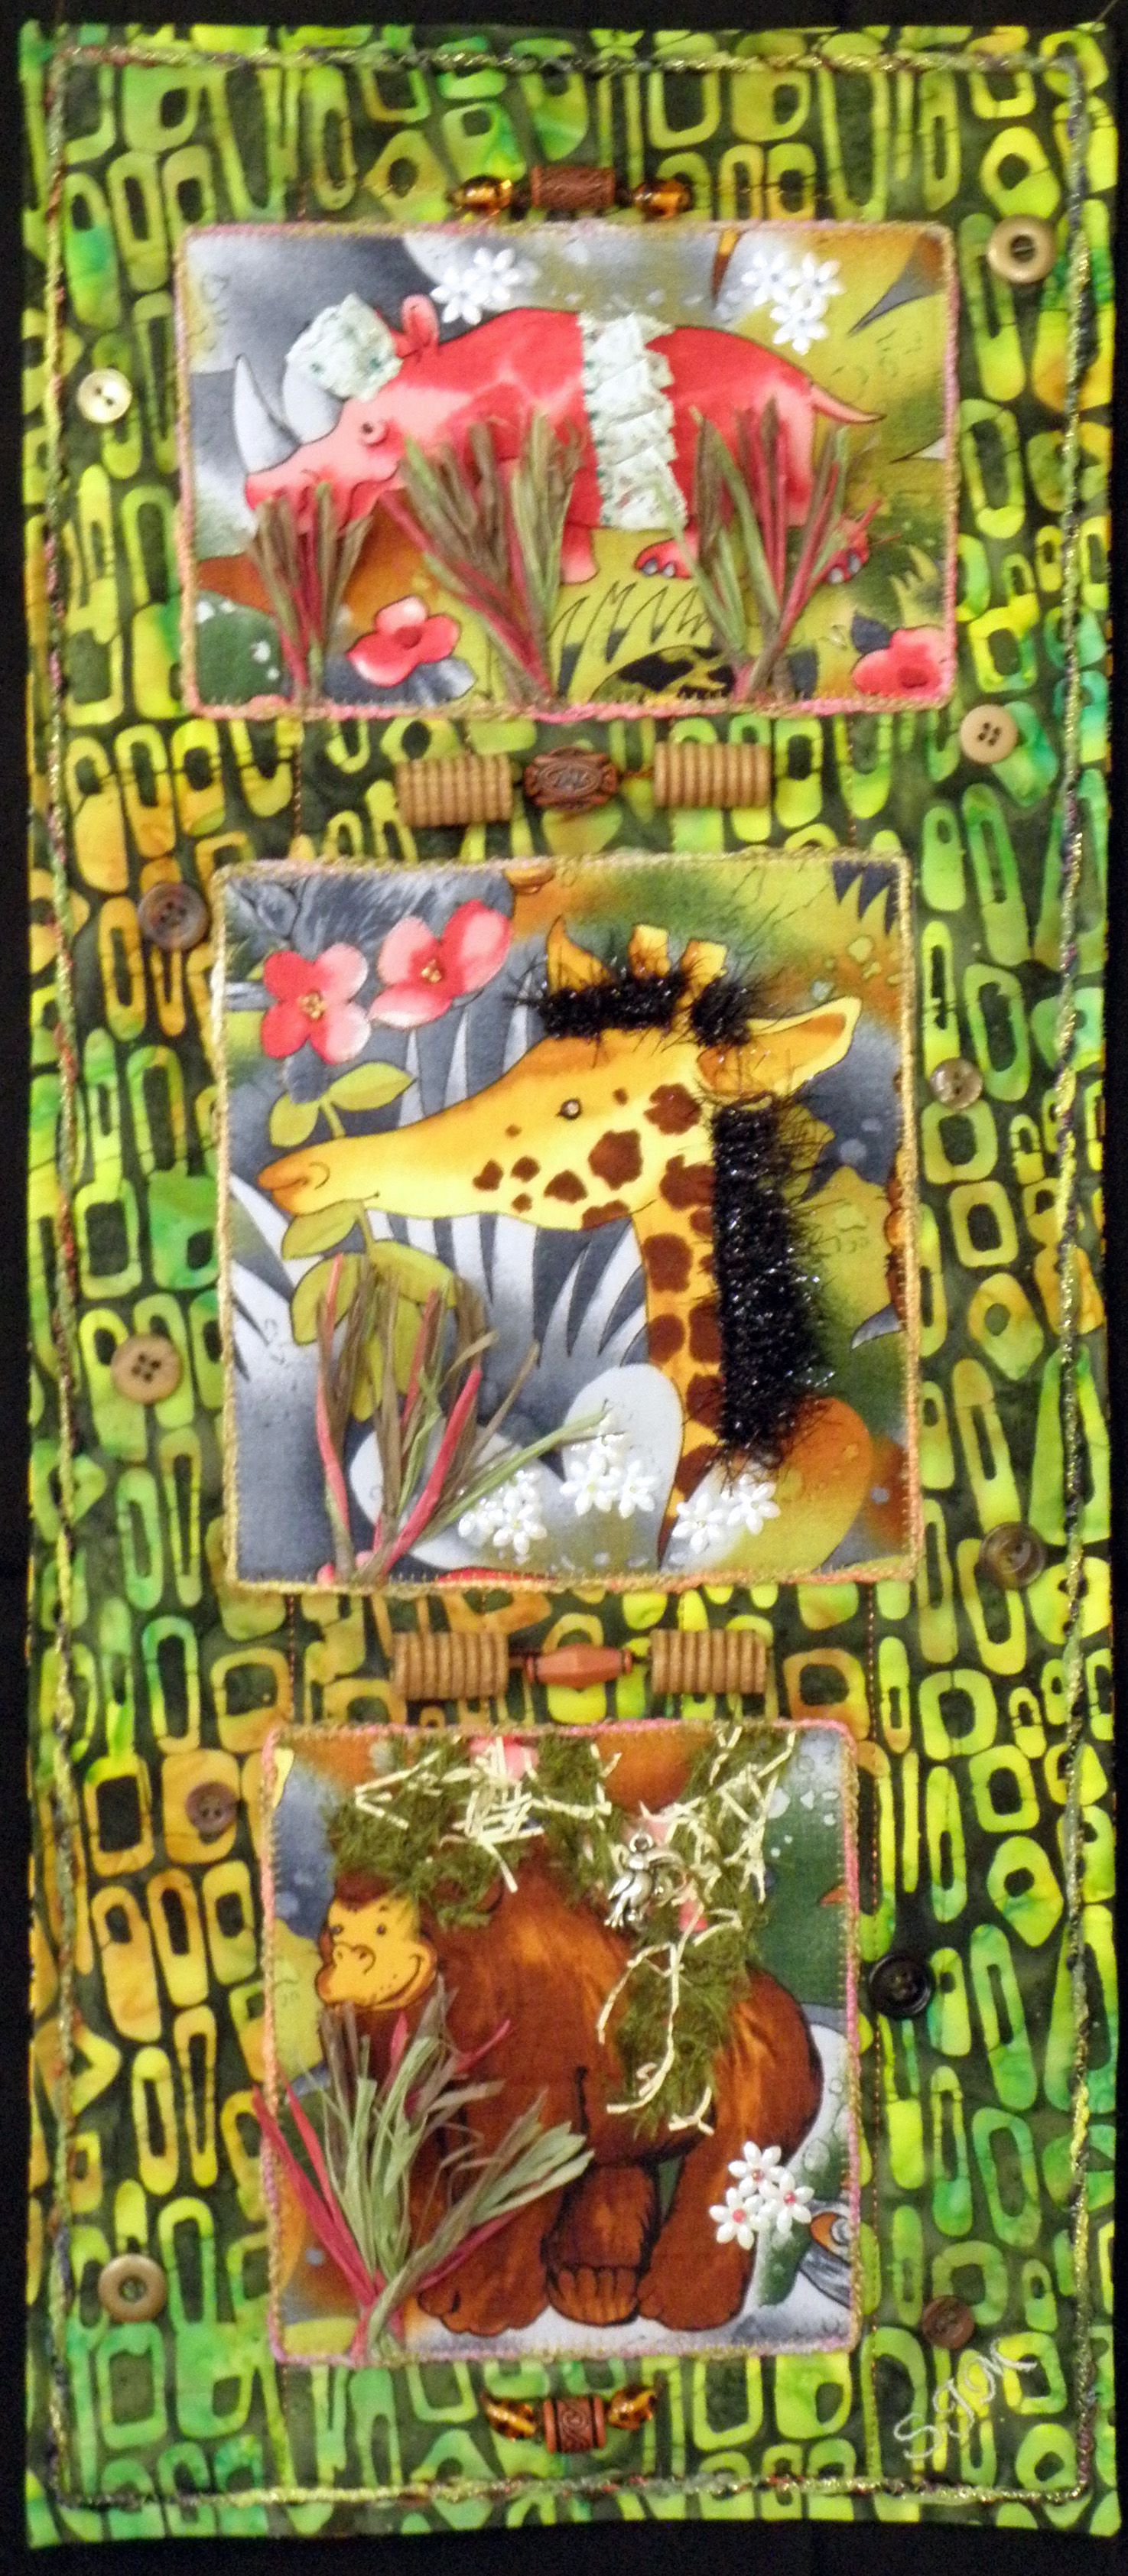
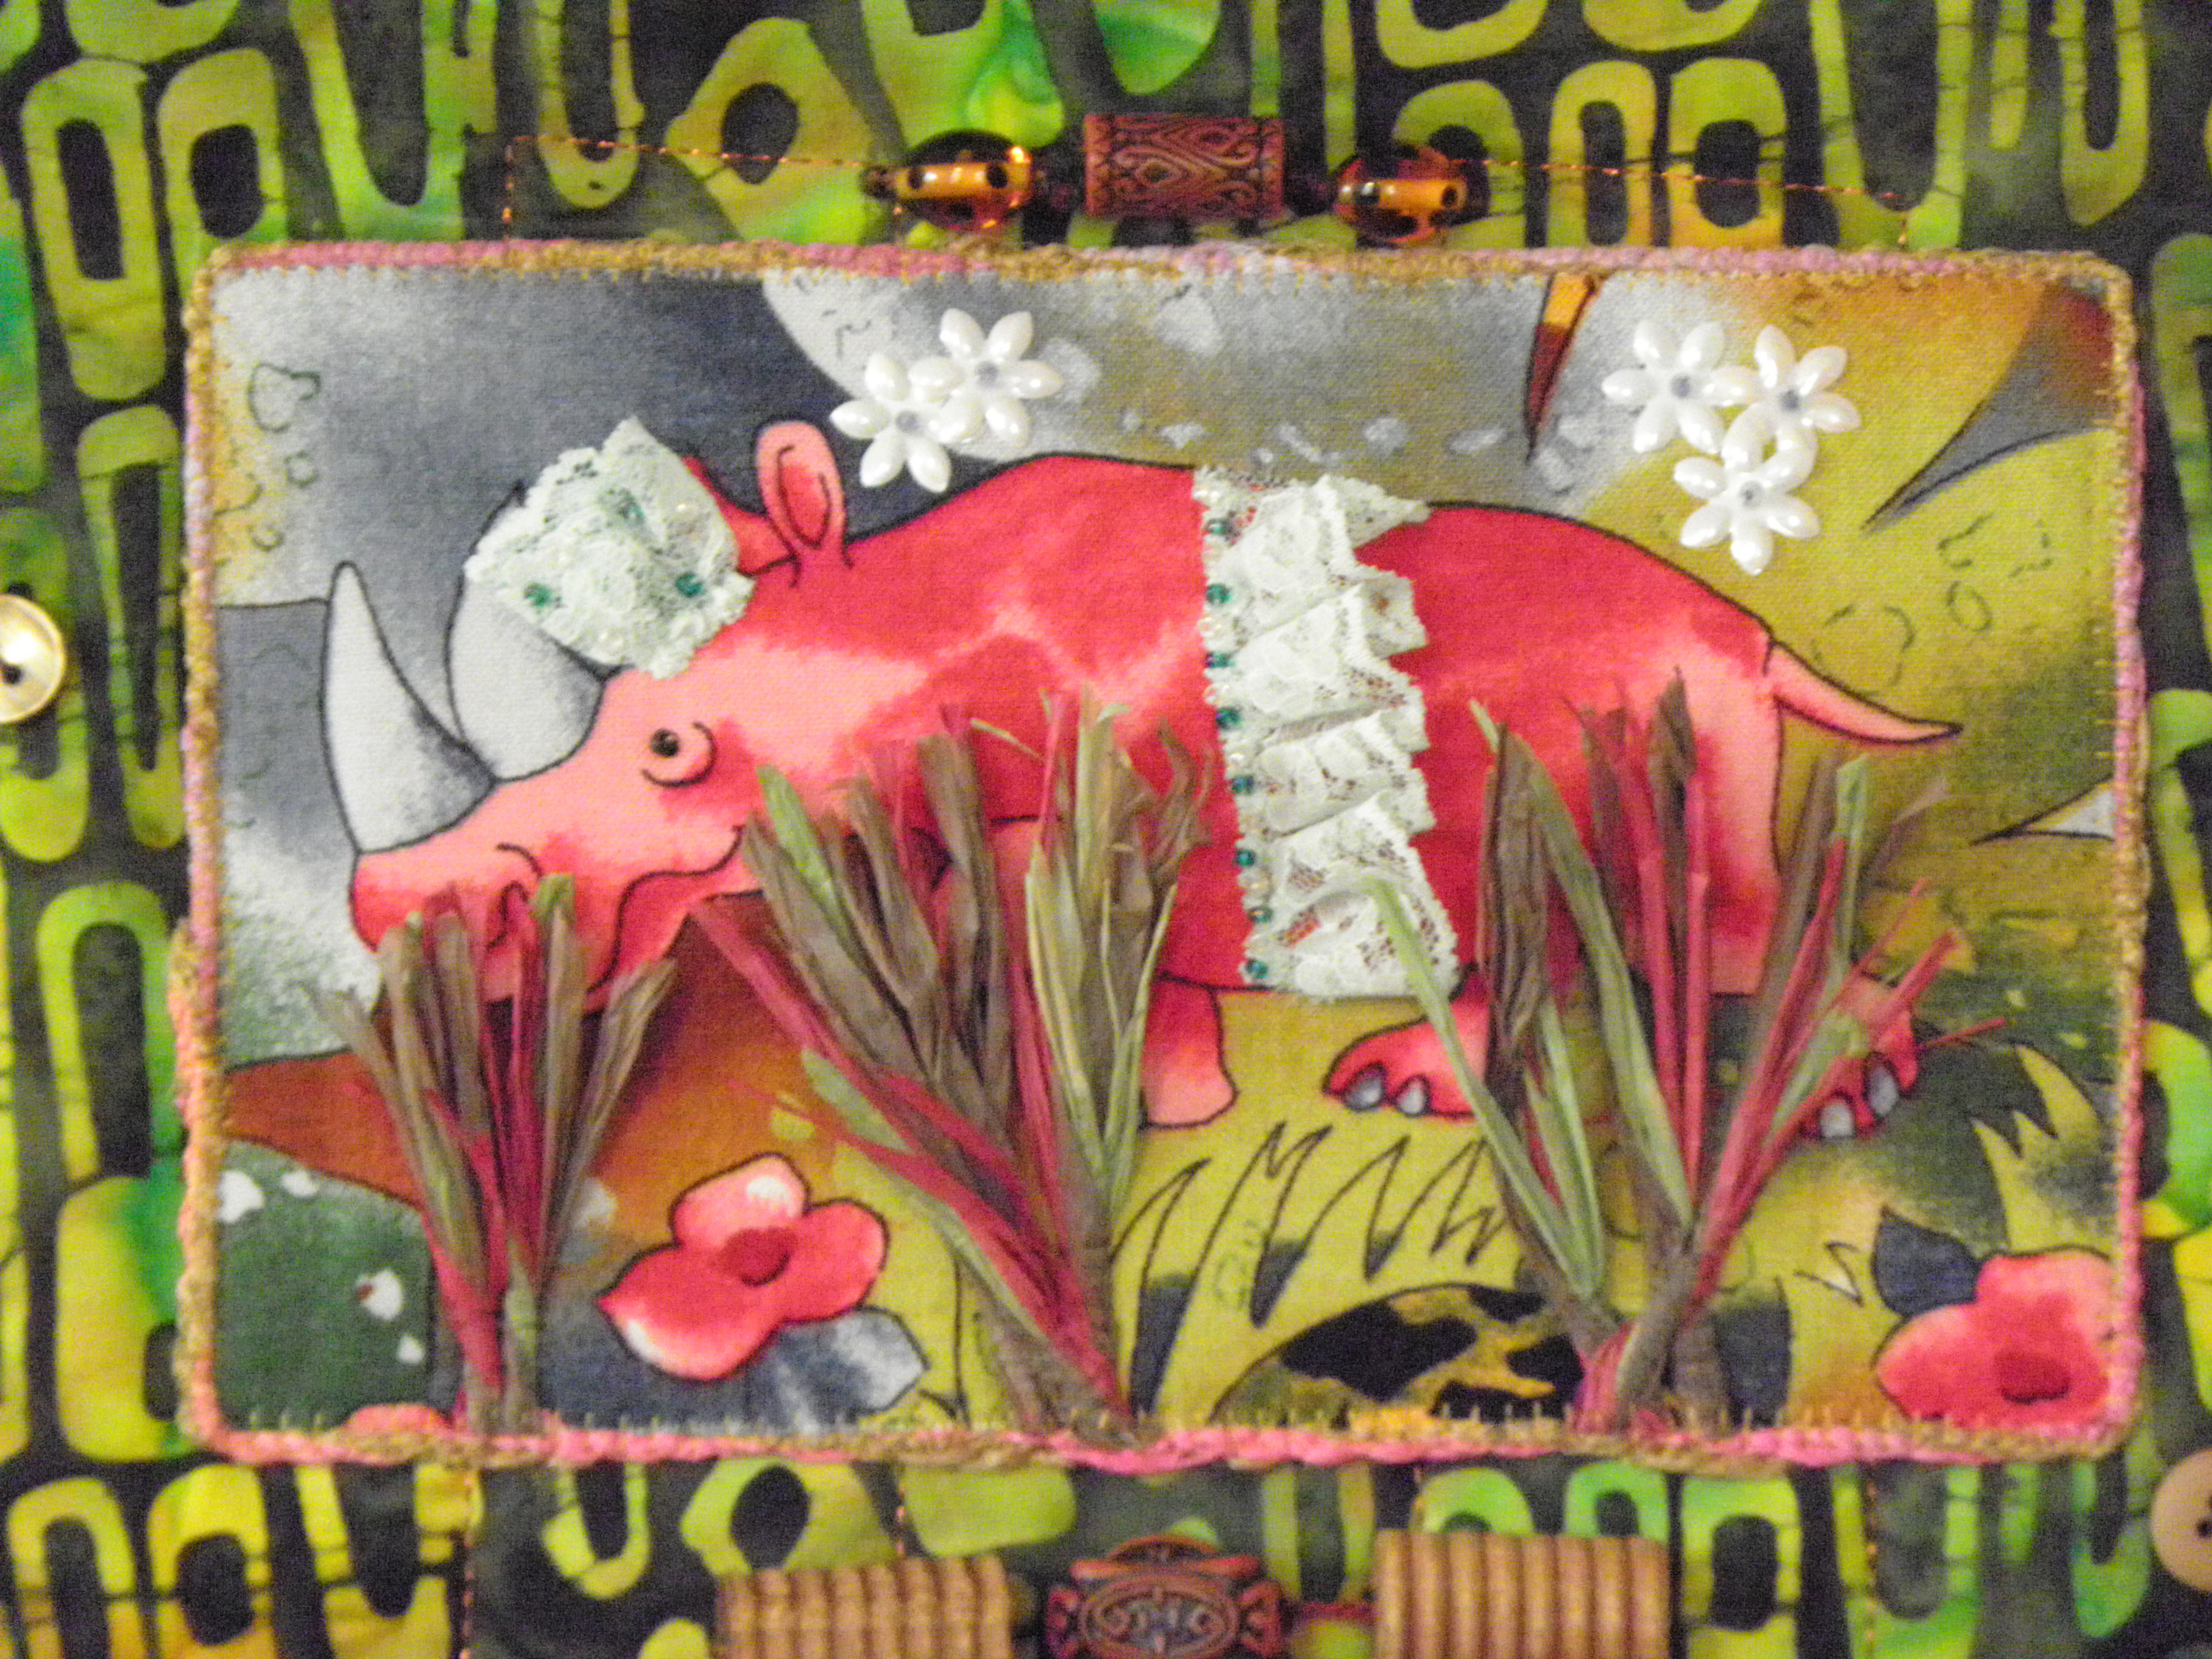
One of the coolest things when you are a teacher is when a student writes to you with what she has learned and used from your classes.  Last week, I was tickled pink to receive an e-mail from Susan Molin who took my Fabric Postcards class at the Merrimack Quilt Guild in New Hampshire in late January.  The first picture I saw was this wonderful rhinoceros…doesn’t he just make you grin?

I think Susan did a fabulous job using the printed fabric, the yarn-edge finishing technqiue, and creative embellishments.  I had shared a piece or two that I did where I made the postcards first, then applied them to a quilted background (for example, the Mountain Seasons pattern in my book, ThreadWork Unraveled, is made that way).  The photo of the overall quilt, Jungle Play,  is a tad blurry, but I’m including it anyway so you get the feel for how she has done the piece:

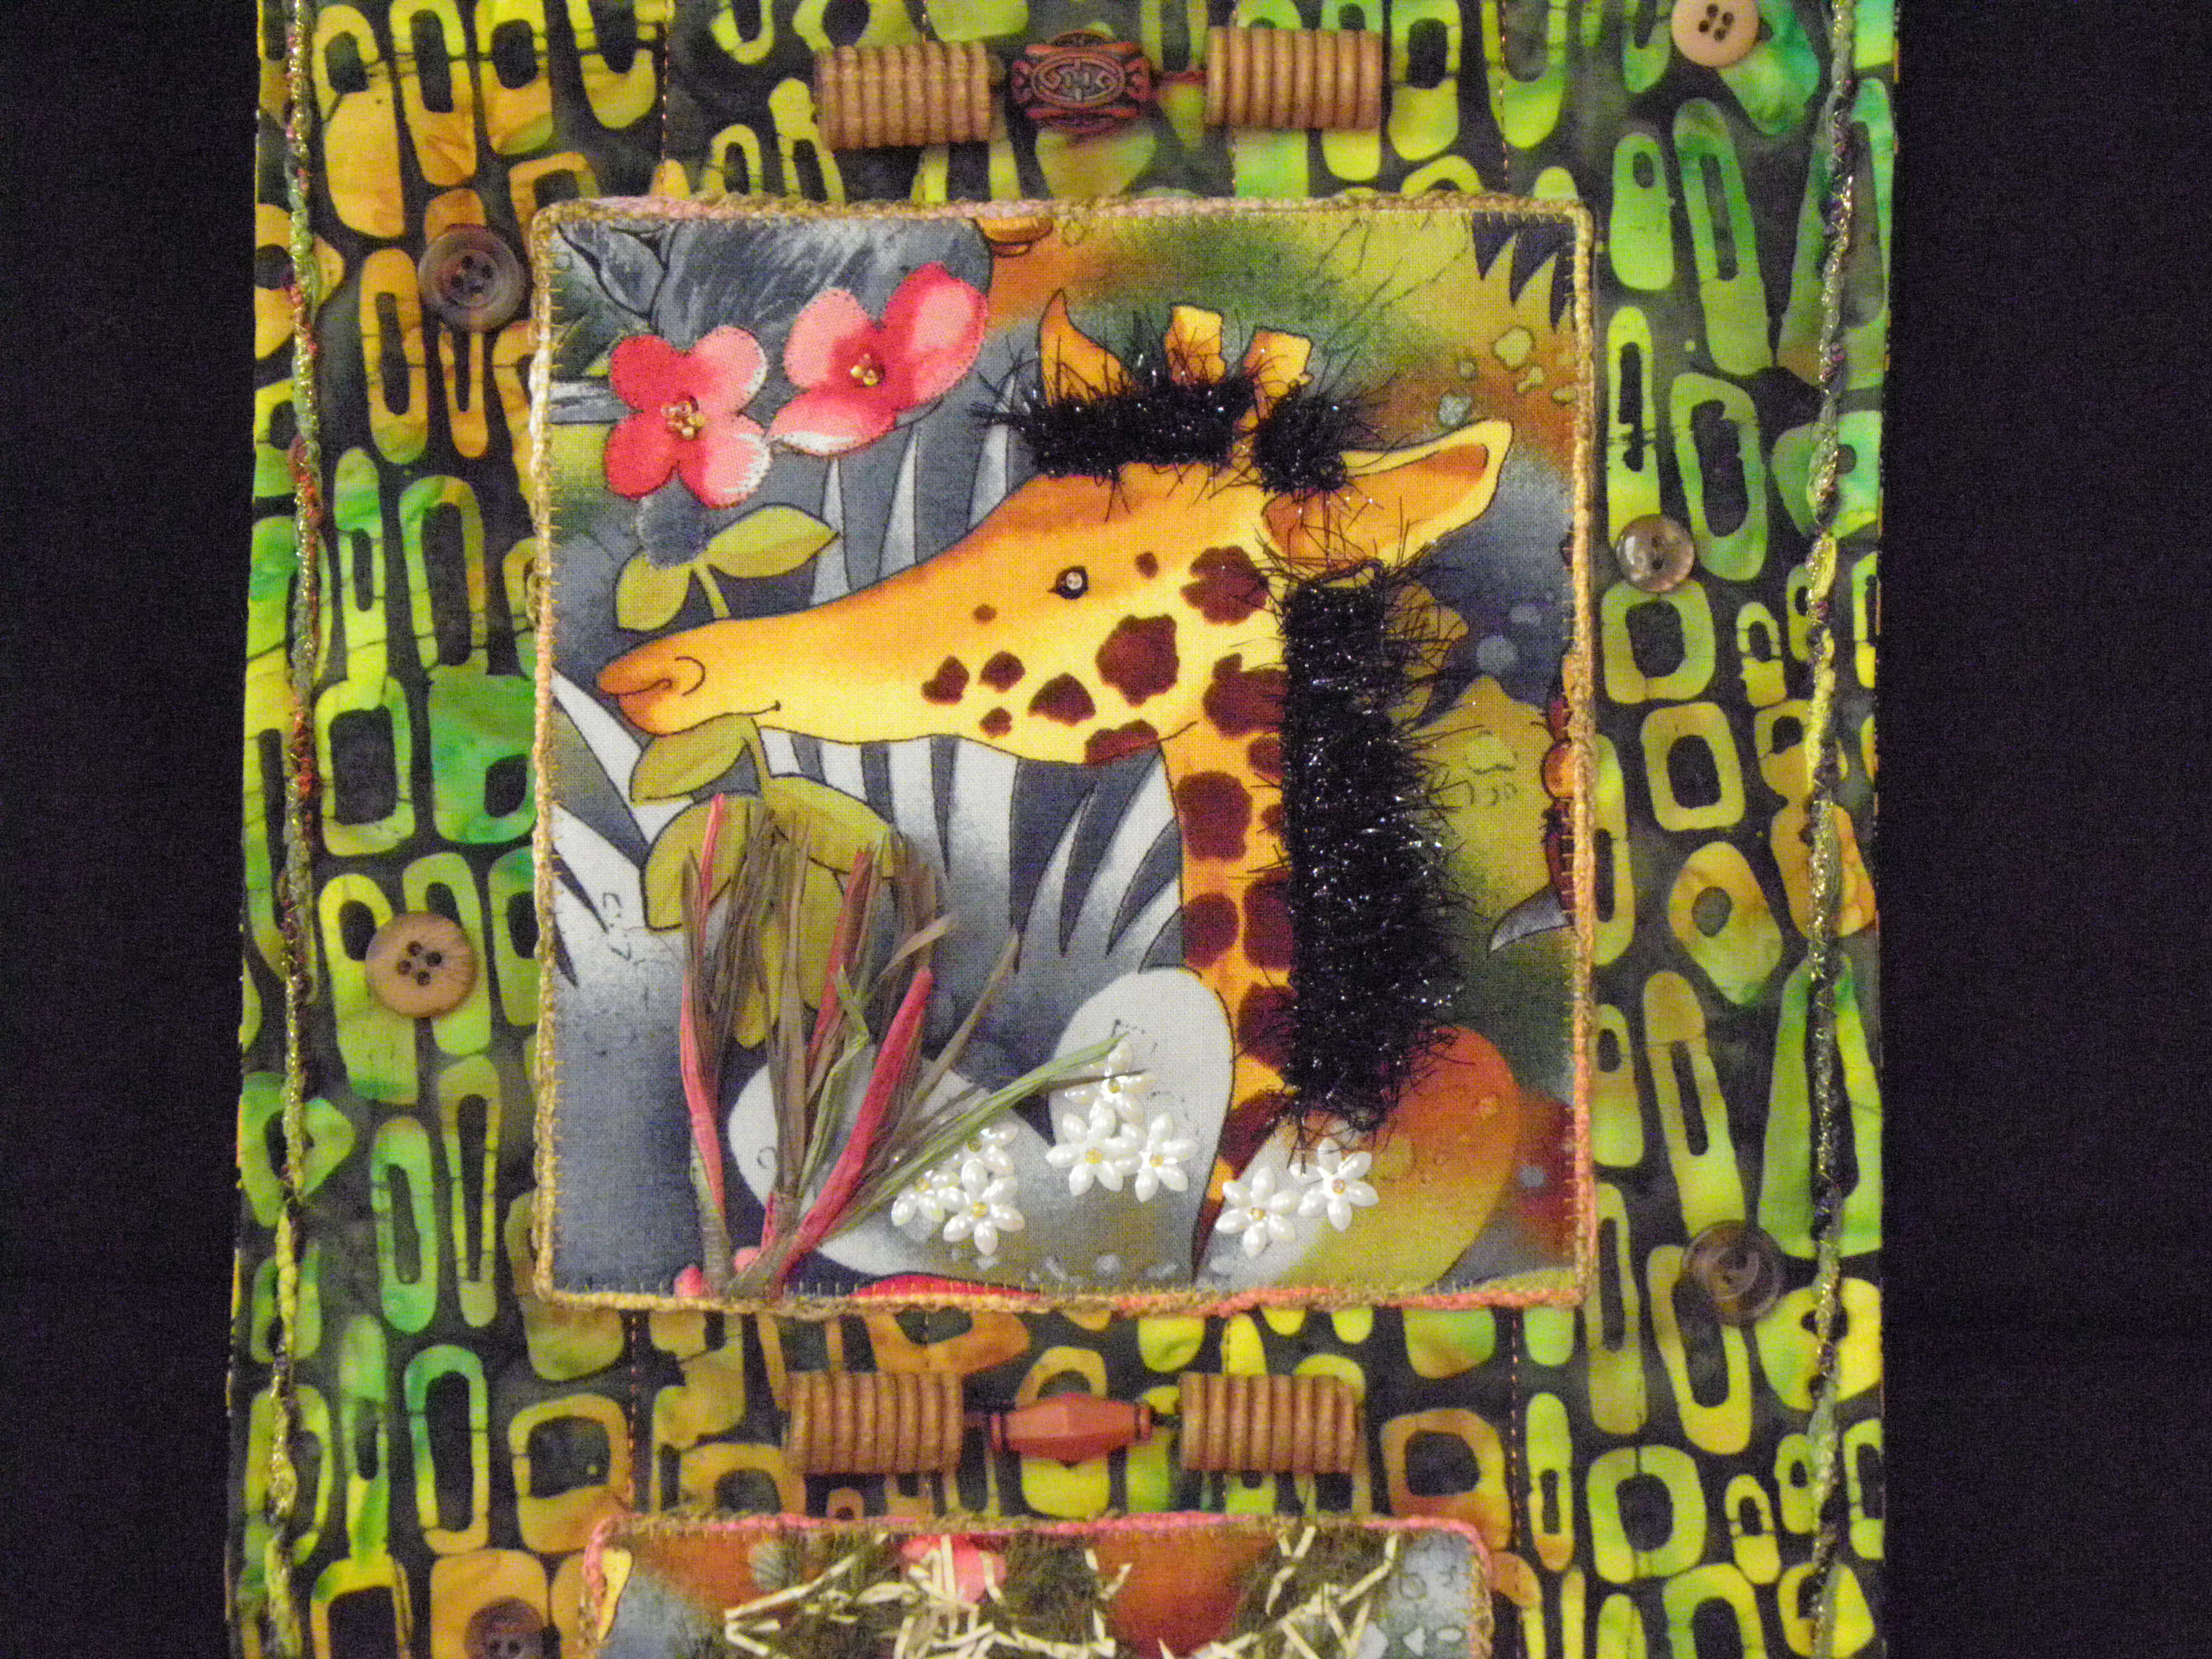
Here is the giraffe–the “hair” for the mane is PERFECT:

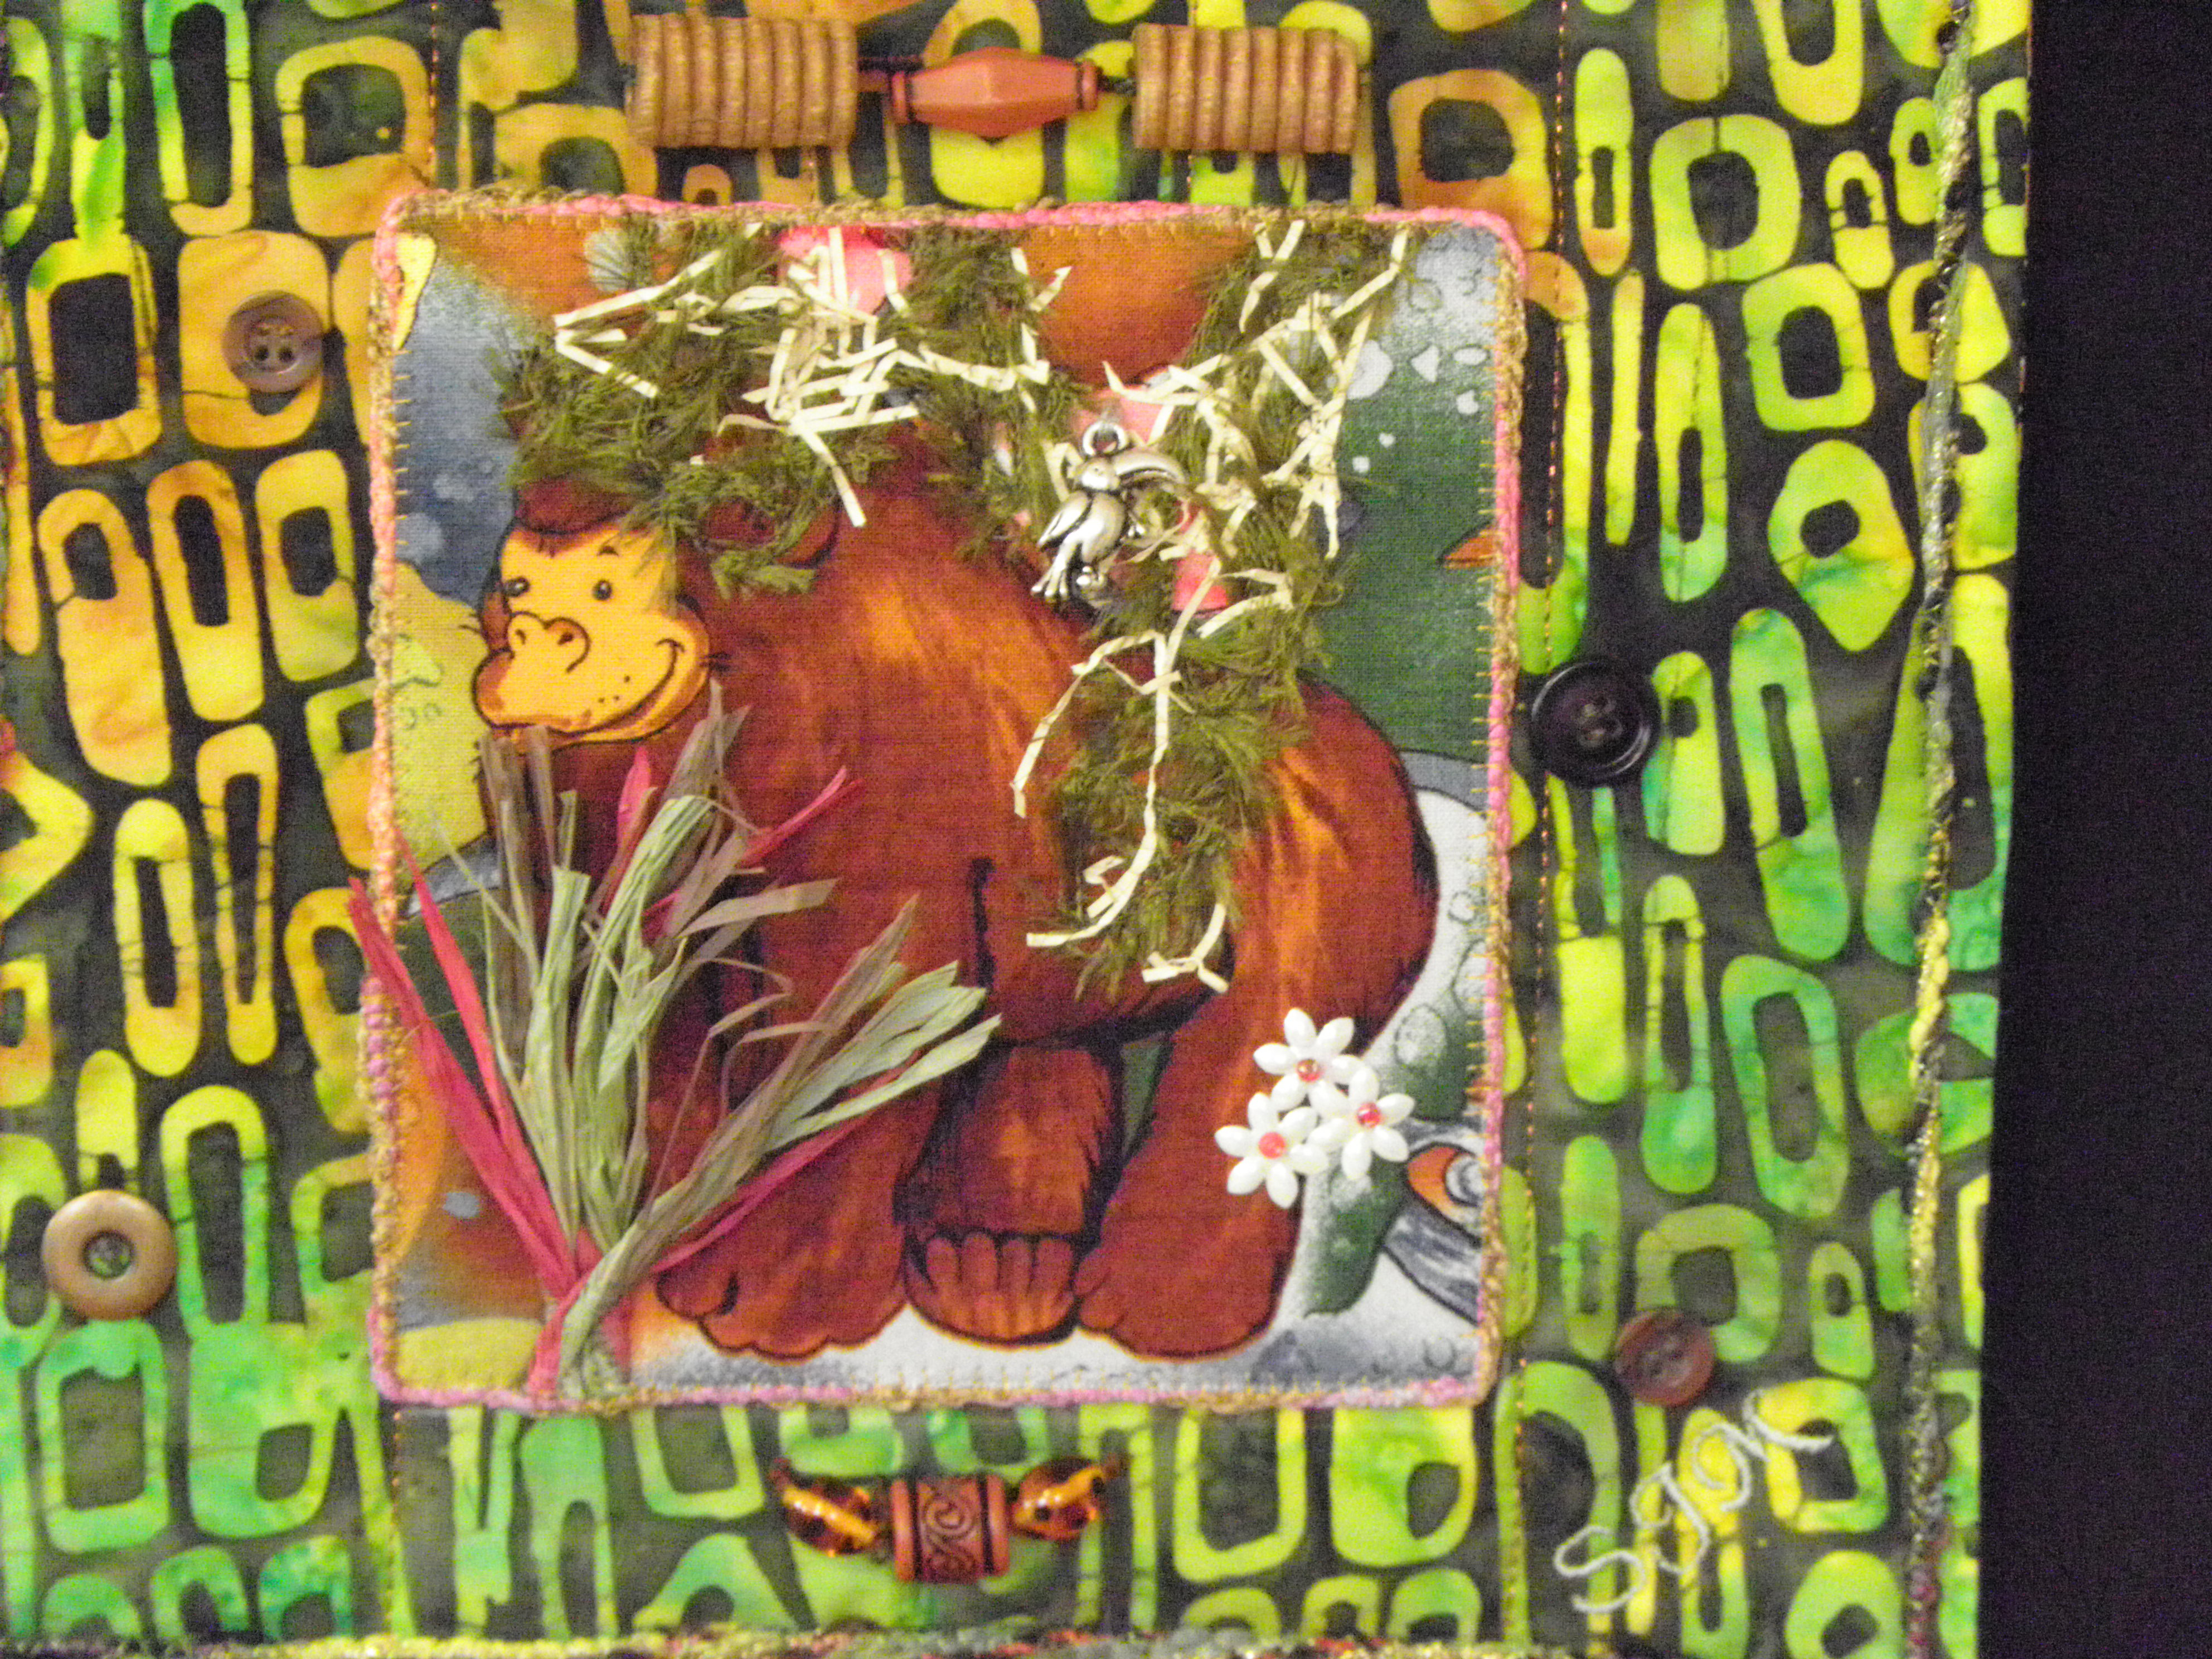
and the gorilla–love those hanging-down branches:

I like how Susan has used understated quilting, creative beads and buttons, and couched yarn to the background quilt.   Very effective!  Thanks so much Susan for sharing with me and letting me, in turn, share here on my blog!

More lino-cutting

March 6th, 2010

Heads up!  Dijanne is beginning a new lino-cutting class on March 8th! To sign up, visit her blog and contact her by clicking here.

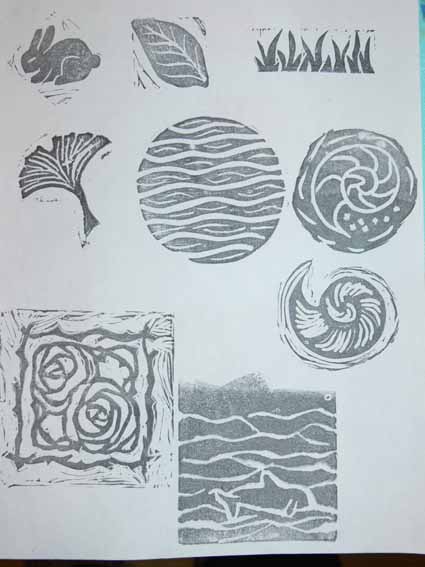
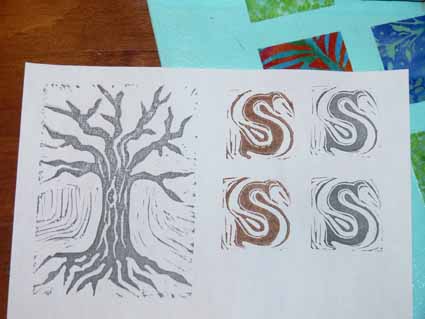
I’ve been trying to work on my online lino-cutting class with Dijanne Cevaal during the Olympics and breaks from working on that quilt I can’t tell you about yet.  I’ve been having FUN! One of the exercises was to cut a monogram / initial.   As part of that, I decided to print up some stamps I had carved in the past and share with the class, so thought I’d share them here, too.  The older stamps are all done in either Speedy-Cut (a somewhat soft, rubbery material, or a generic version of same), an art eraser (the grass)  or the cuts-like-a-hot-knife-in-butter MasterCarve (the bunny and leaf in the top row are on opposite sides of the same block).  The sheet below is an 8 1/2 by 11 inch (about A4 size paper) piece of paper.  The rose block is about 3 1/2 inches square, the bunny maybe 1 1/4 inches across (printed on point).

Here are the carvings for class (the “S”) and an older tree of life design printed onto paper with textile paint (brown) or stamp pad ink (black):

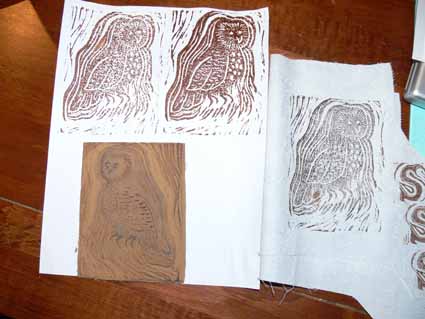
I also did an owl in Dick Blick (online purveyor of art supplies) Wonder Cut, a type of linoleum.  It is about 1/4″ thick, and feels like tightly compressed sawdust.  It is harder to cut than the rubbery stuff, but easier than the Golden cut or battleship gray linoleum.  Since I have (I think) incipient arthritis and other issues with my hands, I used that first:

I didn’t really like the three echo lines to the left of the owl, so I subsequently removed them.  I’ll share prints made with the revised version a few blogposts down the line…..The lino cut is at the bottom, the paint on paper prints at the top, and paint on cloth to the right (along with a few attempts with the “S”).  I need to get a better print on cloth… I think I figured out the trick.  It is called buy MORE paint supplies, the kind suitable for lino-printing! More on that later, too….. you get the same exploring and learning curve I had!

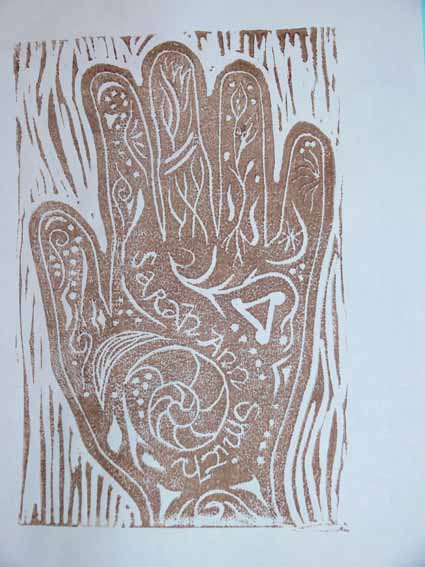
Last, a stamp I made a while ago to use on labels.  It is large… 5 1/5 by 8 inches (half a sheet of paper).   I traced my hand then drew inside it, then carved the whole shebang into the soft-cut rubber.  I had thought I would need to make this into a Thermofax screen for screenprinting, as I was not having luck getting such a large surface colored up with textile paint and printed before the paint began to dry.  However, with my buy-more-stuff discovery, maybe I don’t.  Hmmm….I’ll have to go try the new stuff with this stamp….hmmmm……

Anyway, hope you like my total collection of stamps, which will be growing!  I like the lino-cutting!

In the IQSC Permanent Collection

March 4th, 2010

I received quite the lovely e-mail a few days ago from Vou Best of the Studio Art Quilt Associates (SAQA) about the piece pictured above.  It said:

“Congratulations!  Your piece in “Meet the Artist: SAQA 20th Anniversary Trunk Show” has been chosen to be one of the 55 pieces archived in the permanent collection of the International Quilt Study Center at the University of Nebraska – Lincoln.  It will be available to researchers and students as a record of the art quilt in 2009.

“Sandra Sider selected the works for the IQSC collection.  “One of the best parts of the 2009 SAQA conference was the three hours I spent in my hotel room, with the 20th Anniversary Trunk Show spread out over beds, tables, chairs, and floor.  What an explosion of creative energy! My curatorial task was to select approximately fifty pieces that would be donated in 2010 as a SAQA collection to the International Quilt Study Center. This collection documents the various techniques, processes, materials, and artistic styles in quilt art during the early 21st century, and the SAQA Board envisions these quilts as research tools, far into the future.  Your quilt was selected because it represents a particularly distinctive or original approach. Congratulations! Sandra Sider SAQA Vice President.”

“During the past year, many people have viewed the Trunk Shows in venues across the United States and in several other countries.  They have been shown at SAQA Regional meetings, to Quilt Guilds, in Gallery shows, at IQF receptions, and I’m sure to neighbors and friends wherever the trunks have visited. Everywhere they’ve traveled, they have received an overwhelmingly positive reaction.

“The SAQA Exhibition committee and I wish to thank you for supporting this endeavor during our 20th Anniversary year. Each and every piece represents the outstanding artistic quality present in the membership of SAQA today.

Vou Best

SAQA’s 2oth Anniversary Trunk Show Curator”

To say that I am thrilled is a serious understatement!  When I saw the names on the rest of the list, here…wow!  I am humbled, pleased and utterly astonished to be in such good company!

AWOL, and done!

March 3rd, 2010

A.W.O.L, for my non-US readers, is an acronym that comes to us from the military meaning Absent WithOut Leave (i.e. going off without permission).  So, I have been AWOL a bit.  What have I been doing?  Alas, I can’t tell you, well not much anyway.  I was invited to submit a quilt for a juried invitational exhibit.  That means you make a quilt to theme and size, and it may or may not get in.  Anyway, the past 2 1/2 weeks I’ve been quilting like a madwoman!   I’m thinking my entry will get in, but if it doesn’t, I’m OK with that because honestly I think this piece may be one of the best things I’ve ever done (so it is KILLING ME not to share it!).

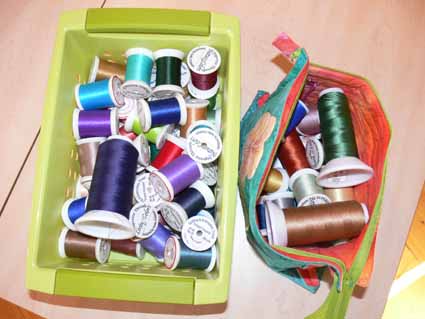
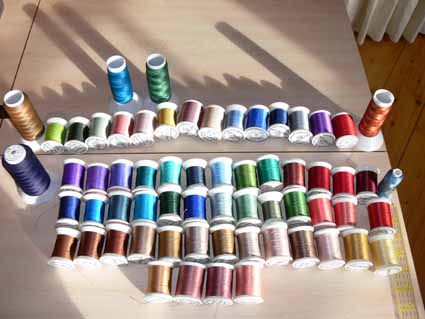
What I can share, is the thread.  On a quilt that measures 12 square feet, I used 46 threads on the top (in the green bin) and 16 threads on the bottom (in the bag on the right…also one thread was used both top and bottom), for a total of 61 threads.  Here they are all laid out nicely, with the 16 bobbin threads in the top row (including four cones), and 45 of the 46 top threads below; the repeat was the lime green bobbin thread–aren’t they pretty????

and as always, I like the line drawing on the back side of the quilt almost as much as the front.  I will have word in about a month about the exhibit, and can share (either way, whether I get in or not) then…..
In the meantime, I hope to be a bit more regular at blogging.  You can always tell when either I’m slamming on a project OR too much life is happening…blogposts become scarce! Will try to do better,

Cheers, Sarah