Plaid Top Tutorial: Lesson 5-French Seams
Please note: I am affiliated with Janome as a Janome Artisan and am compensated. However, my reviews are honest and I would say what I say whether affiliated or not. I’ve also chosen to be affiliated with Janome since 2003 (!!!) because their machines are so good and they are so responsive to the interests and needs of their customers.
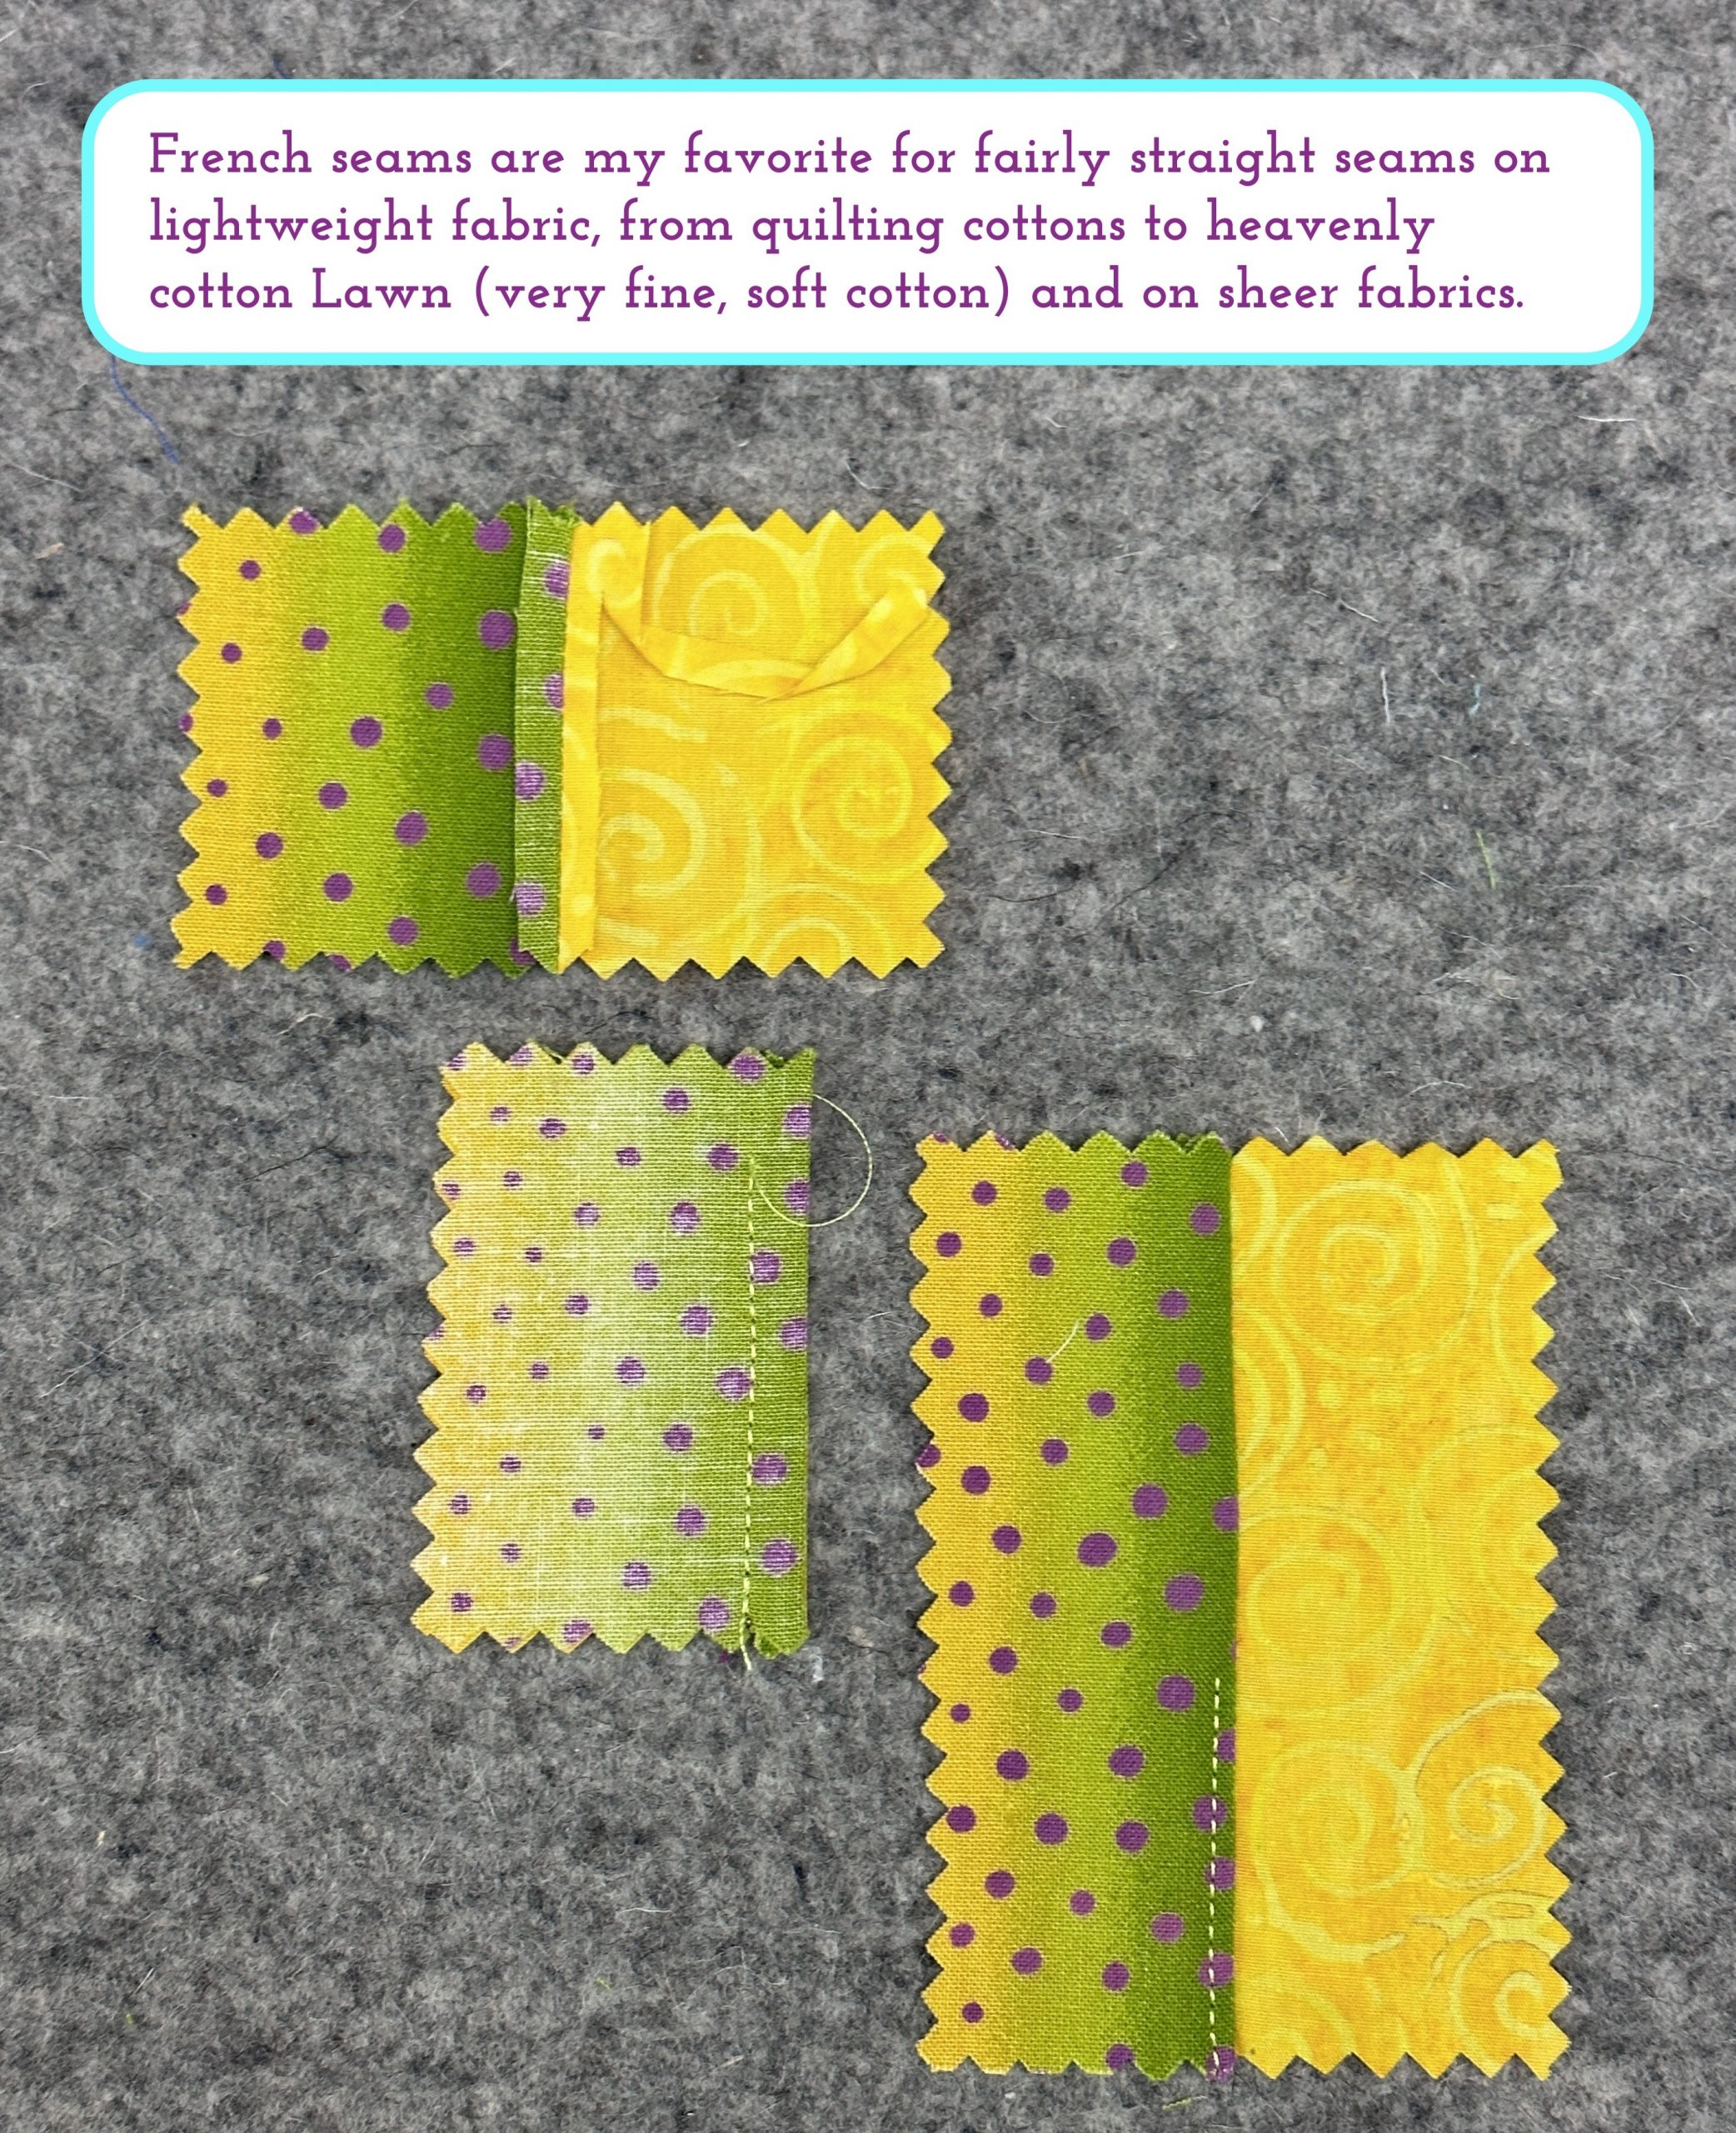
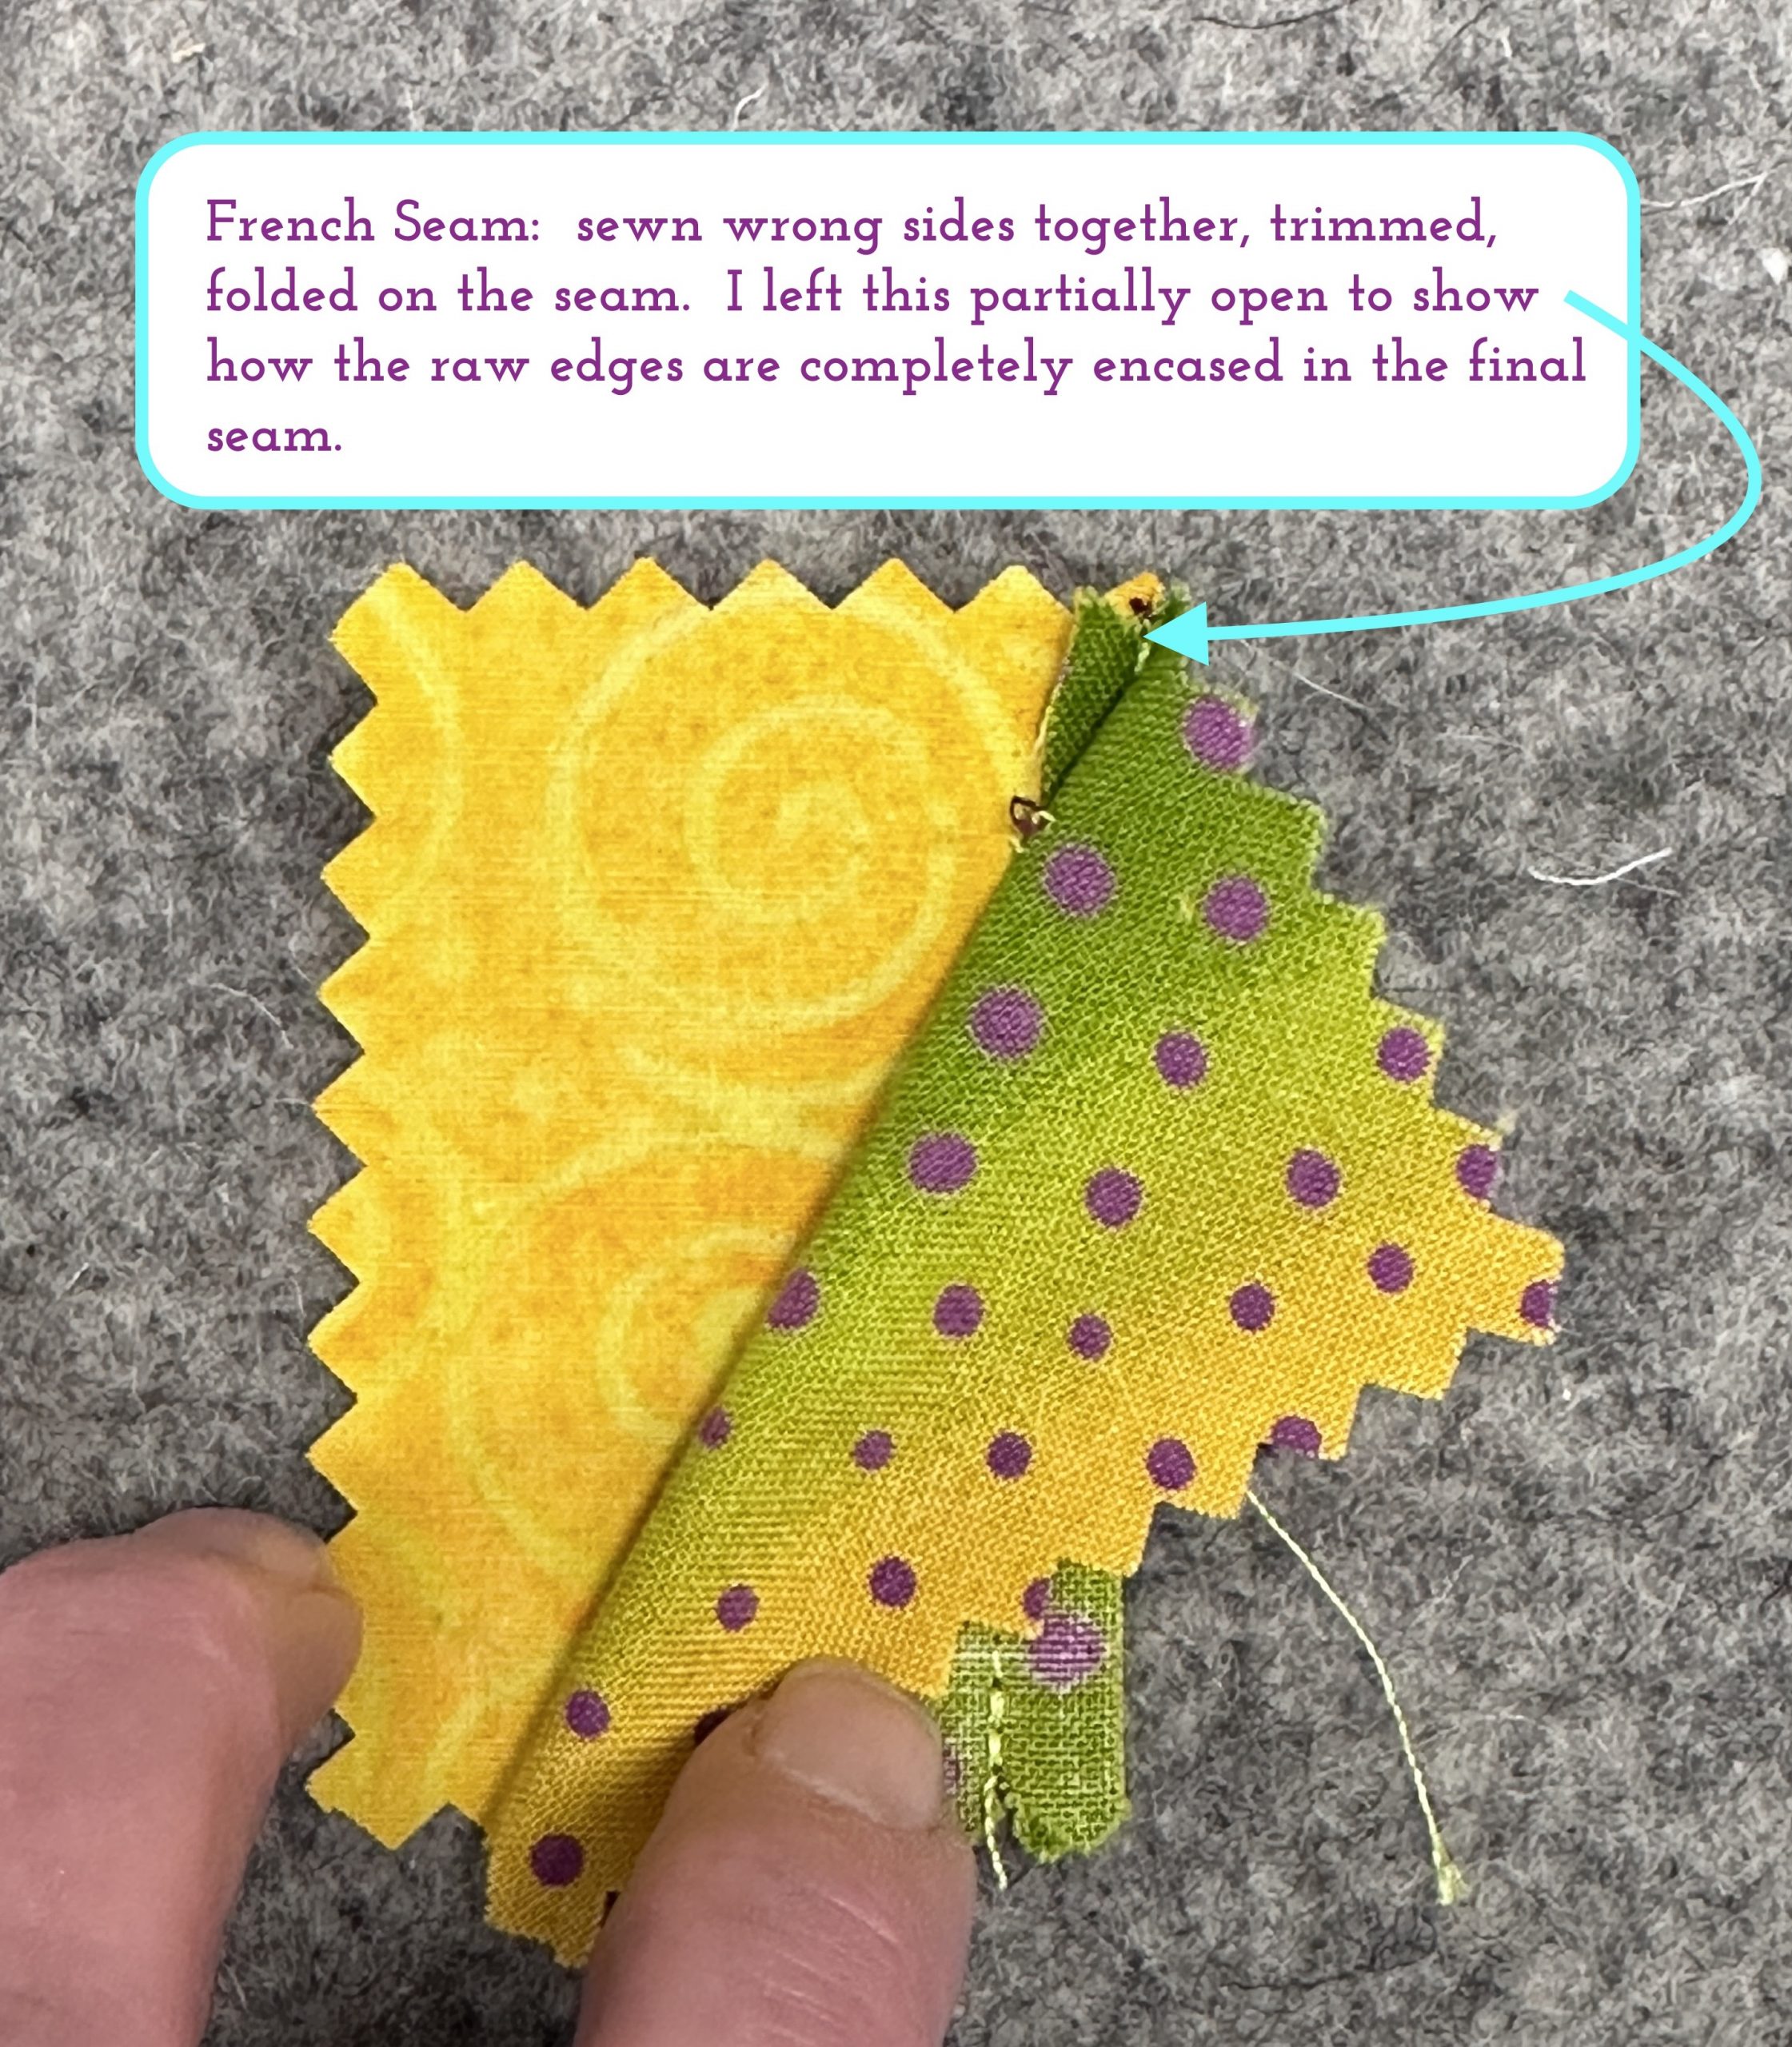
To make a French seam you sew the seam twice. My example is on a 5/8″ seam which is standard in the US. Please adjust accordingly for your pattern and practice.
First, sew the seam with the fabric WRONG sides together at 3/8″ wide. Yes, wrong sides together.
Second, press the seam as stitched. This will set the seam and sink the threads into the fabric. Then, open up the garment and press the seam open. This will encourage the fabric to fold perfectly on the seamline and create a crisp “knife-edge” (this pressing technique is ideal for making knife-edge pillows). See the illustrative photos just below and, beneath them, photos at the machine.
Third, trim the seam allowance to 3/16 to 1/8″ and fold on the seamline so that right sides are together. Be sure to trim any pesky whiskers and threads–they’re obnoxious to try to trim later. If you are using a particularly ravelly fabric, a little starch or temporary (washable) gluestick daubed on carefully to keep the wanderers tucked inside is a good idea.
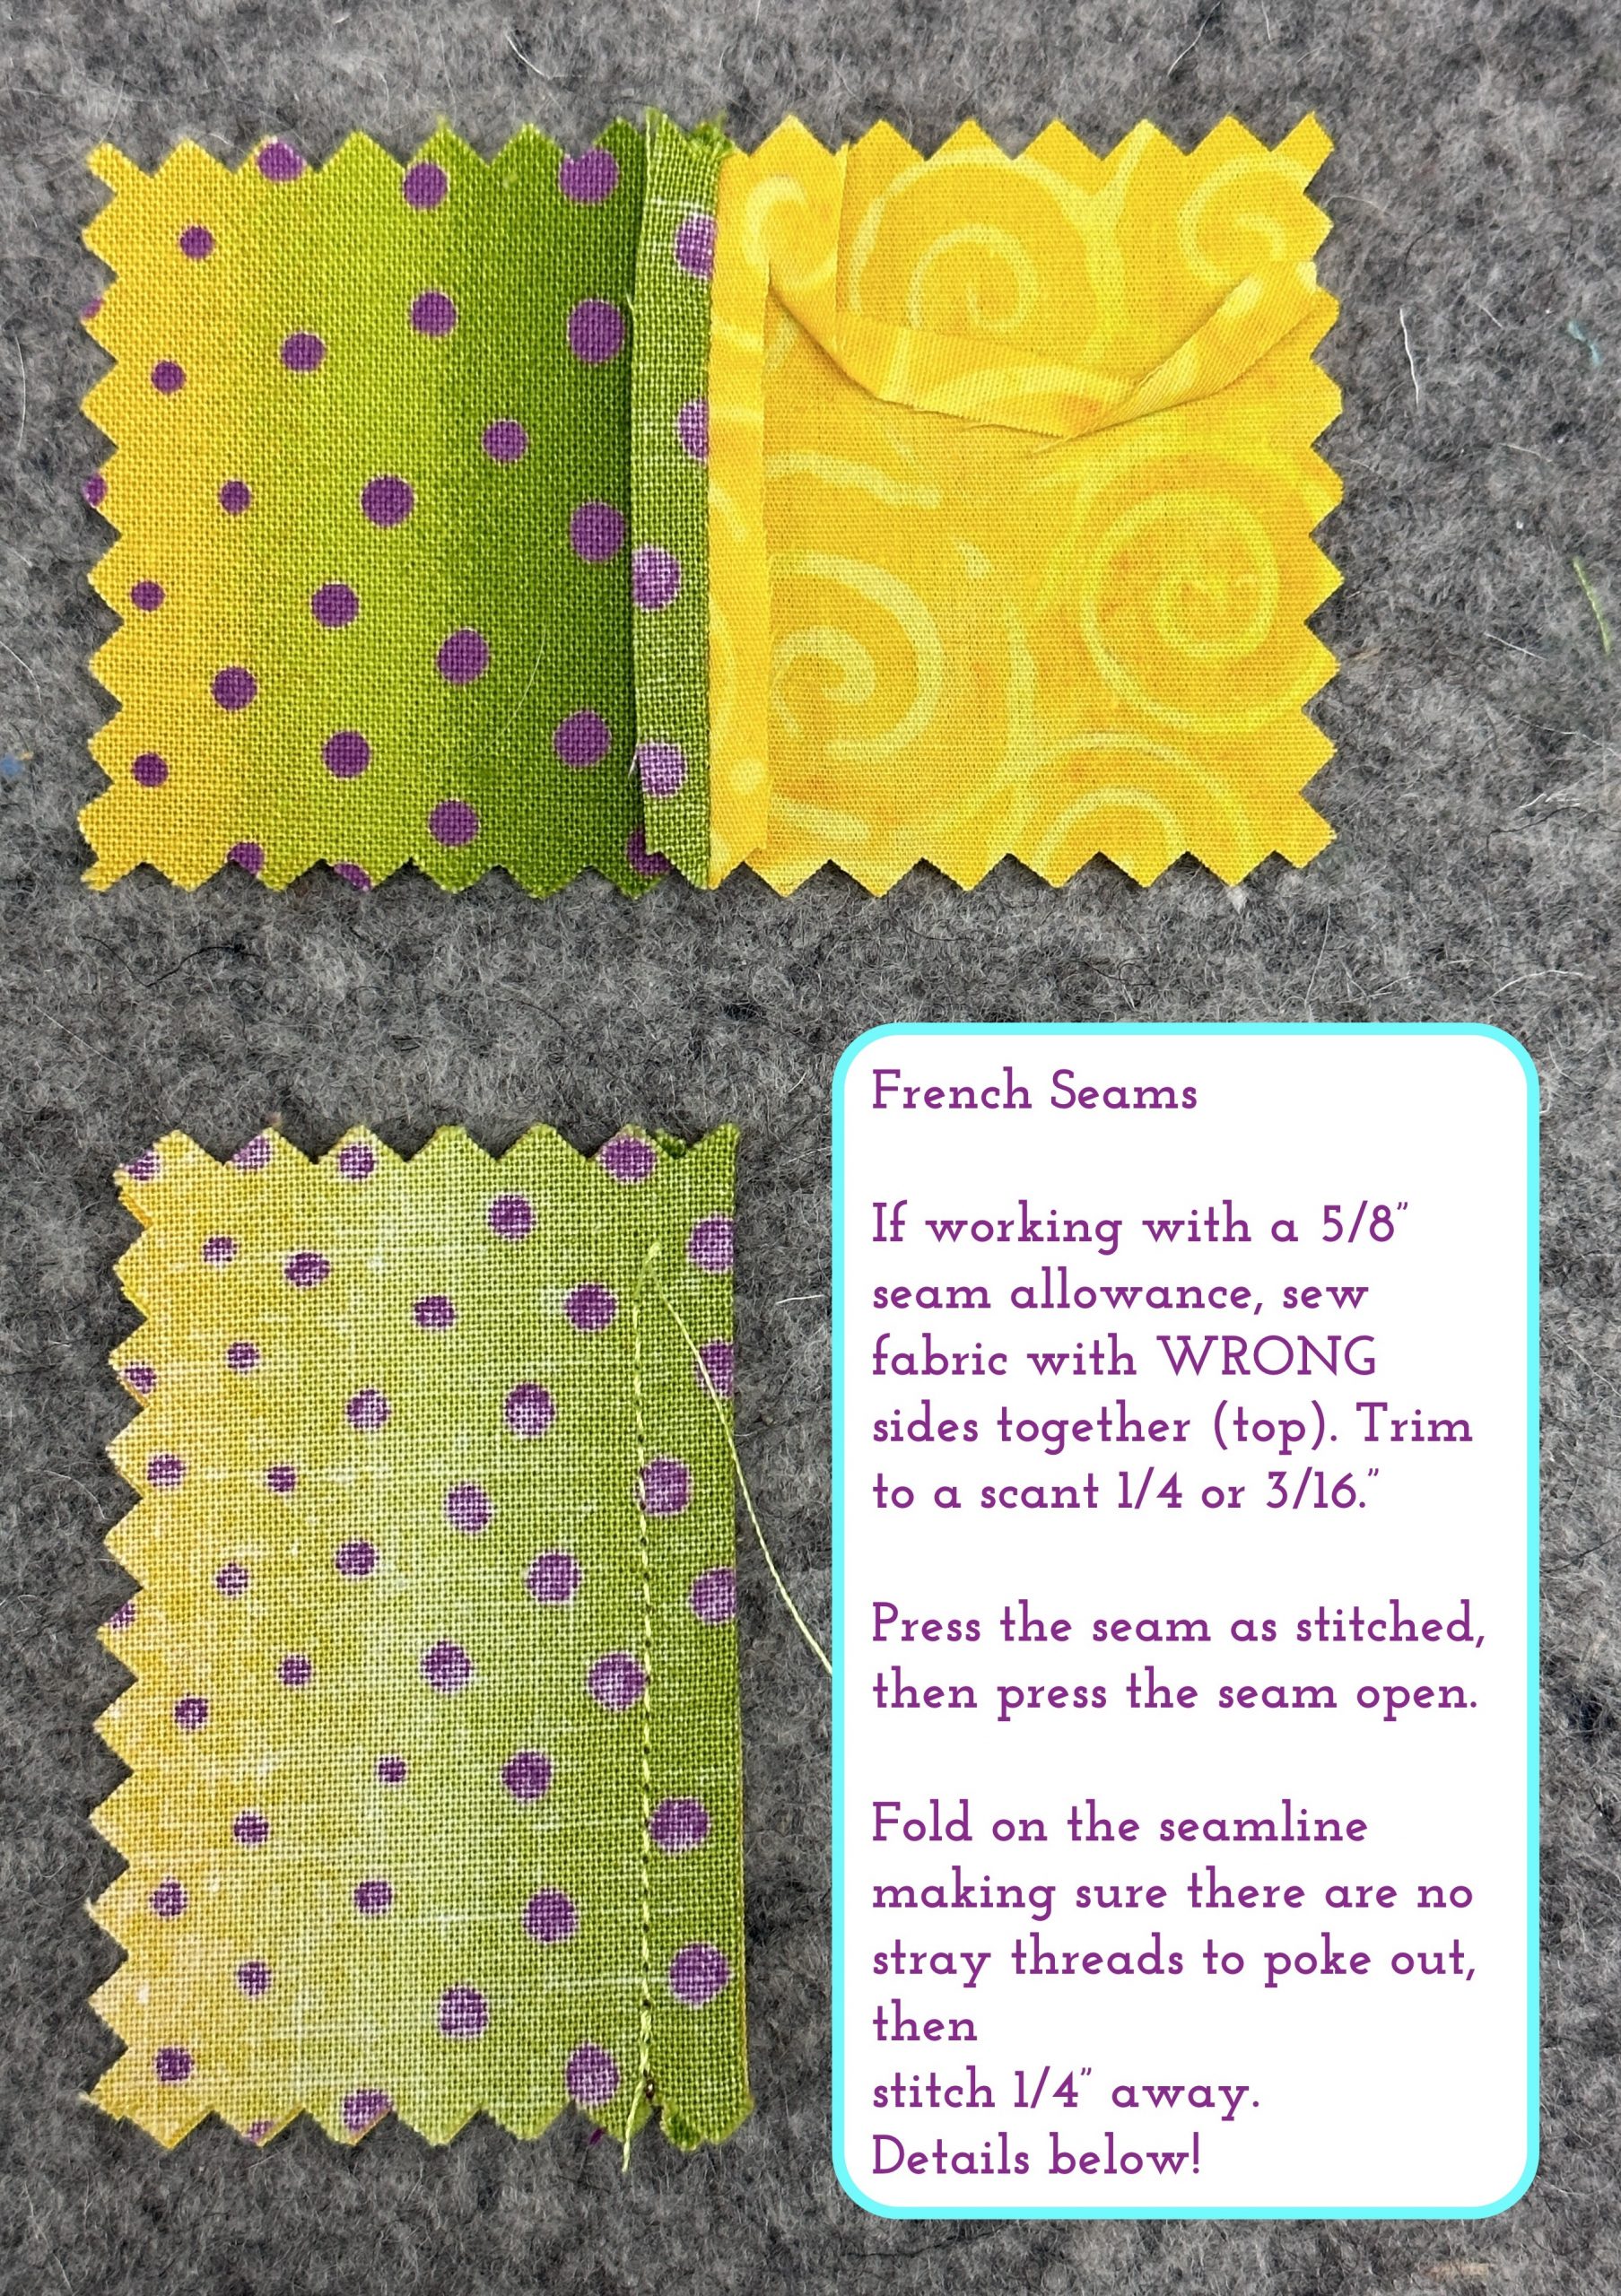
Finally, sew the second seam 1/4″ from the folded edge and give it a final press to neaten things up.
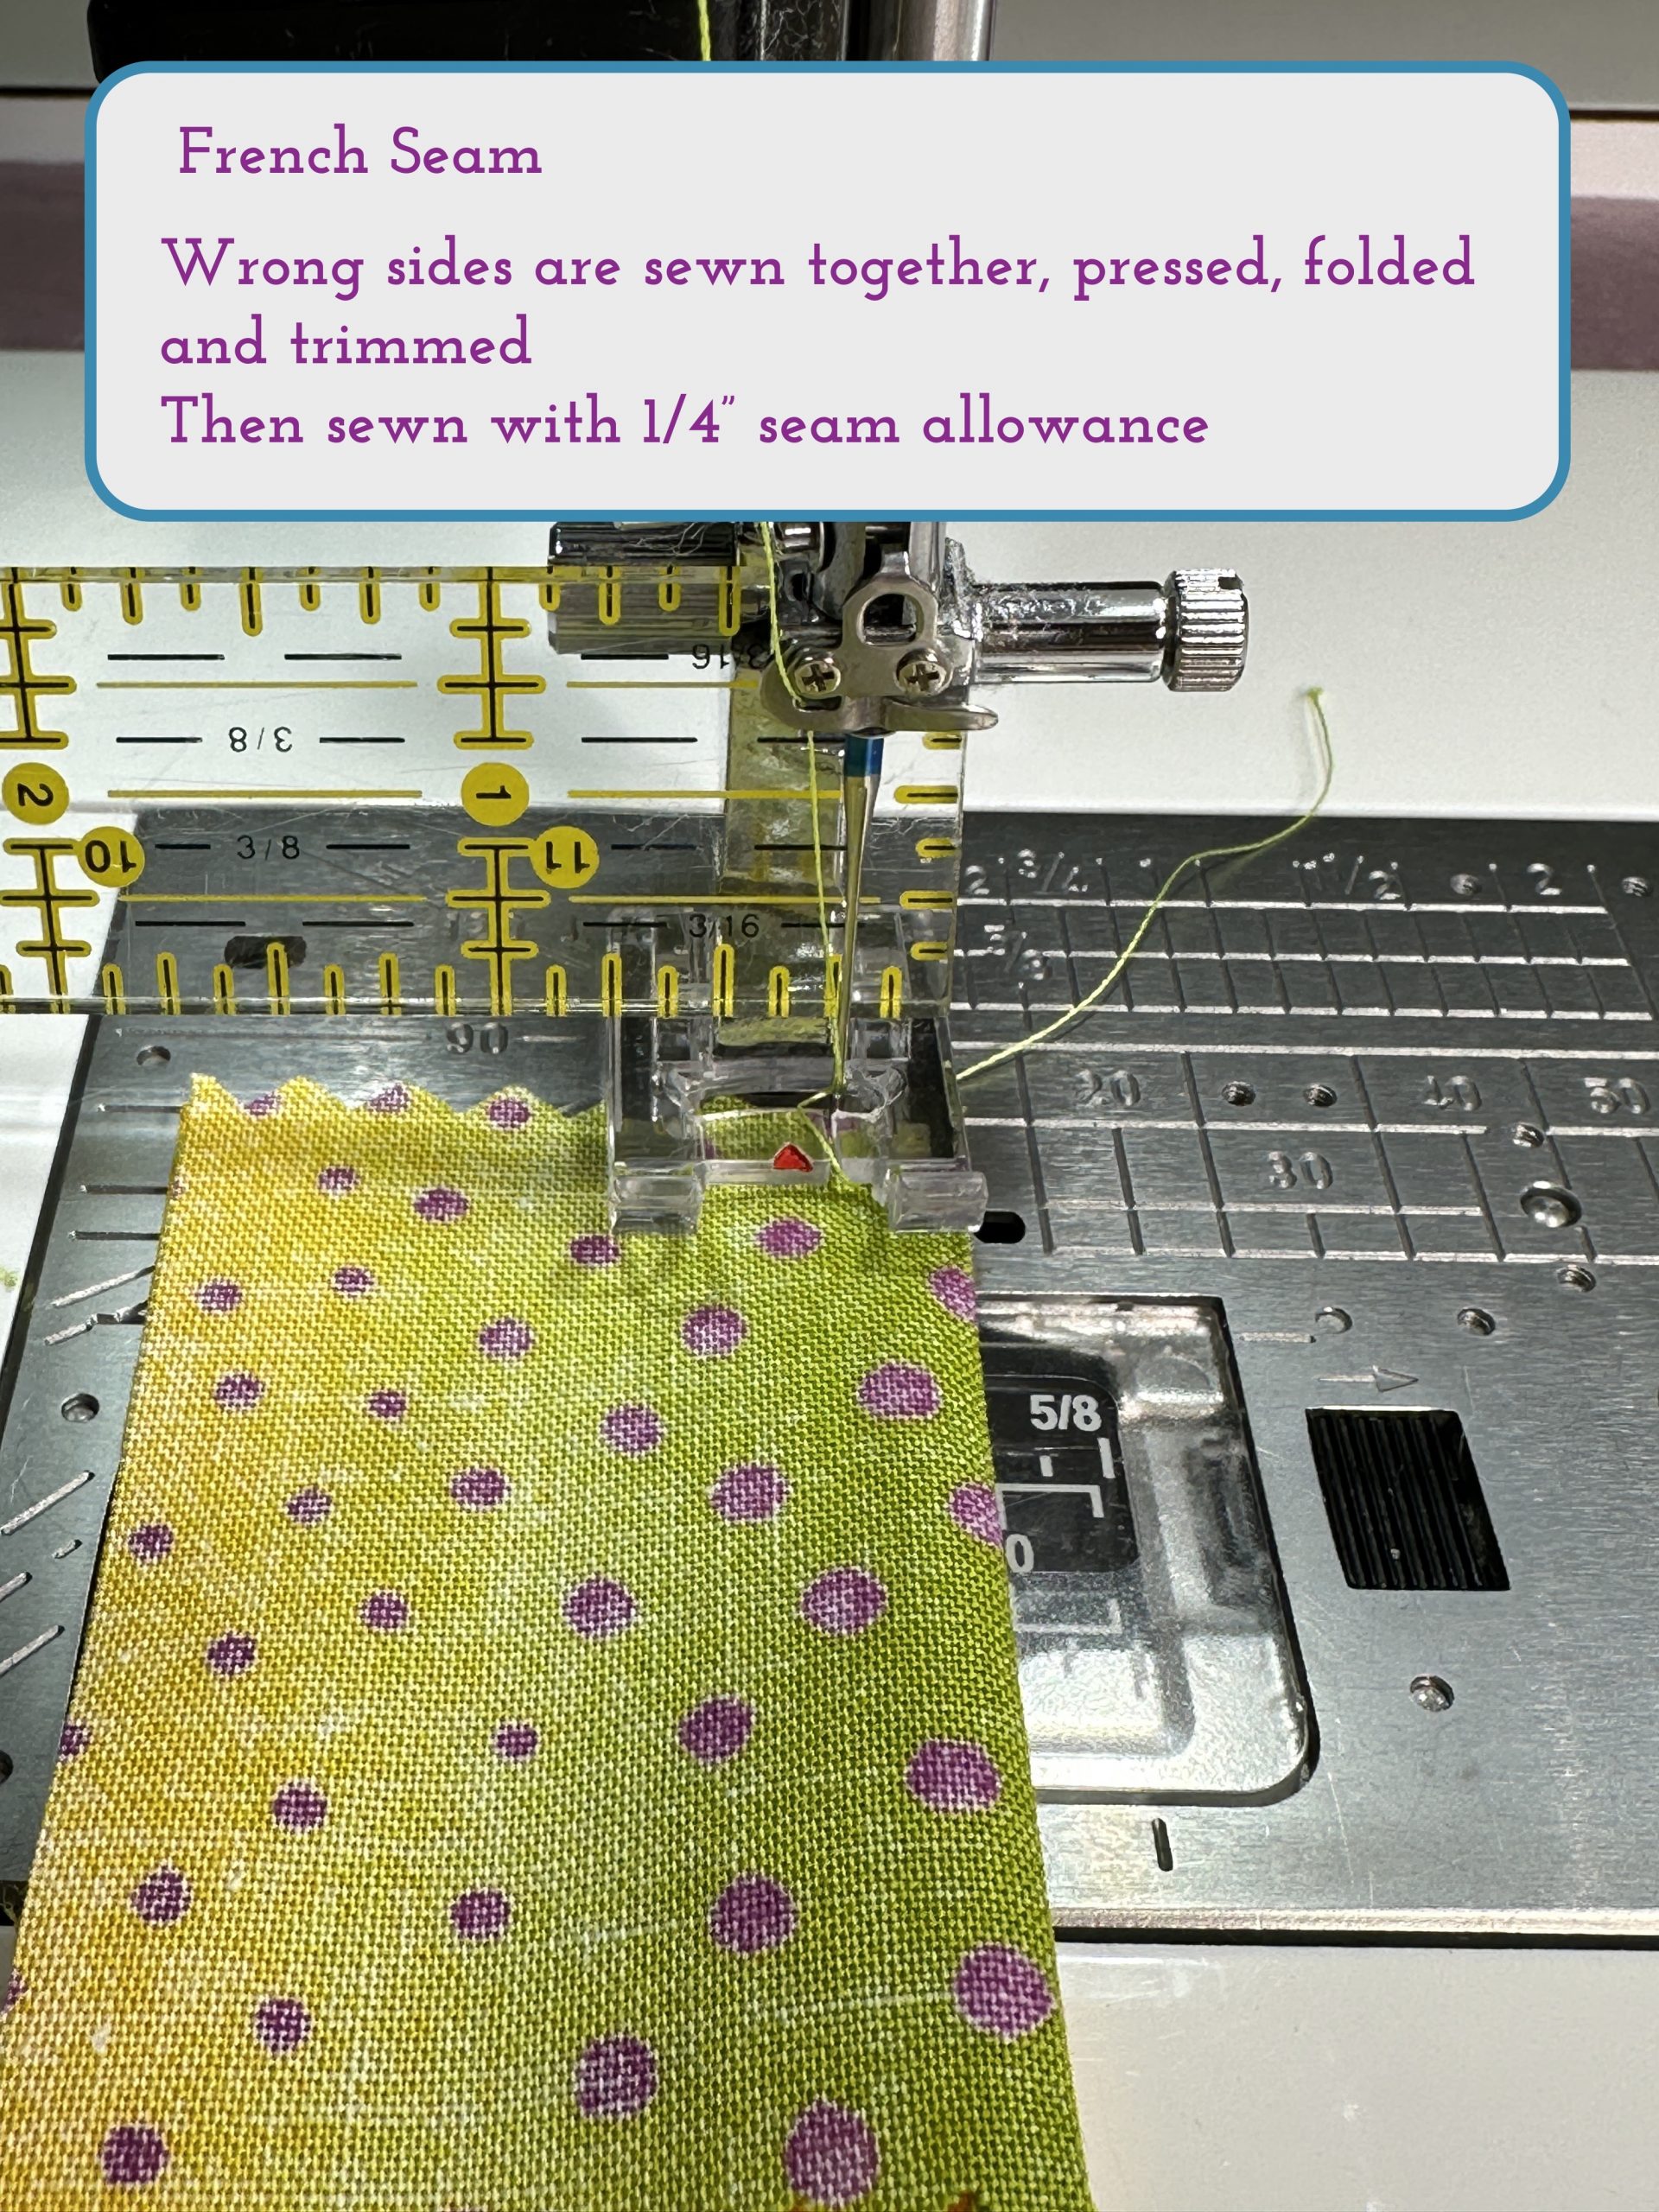
Here I’m using the F clear foot. I can move my needle to the right to achieve a perfect 1/4″ from the edge when the right side of the presser foot is even with the folded seamline. You could also use the quarter-inch piecing foot, but for some reason I get my best results this way. Use what works best for you!
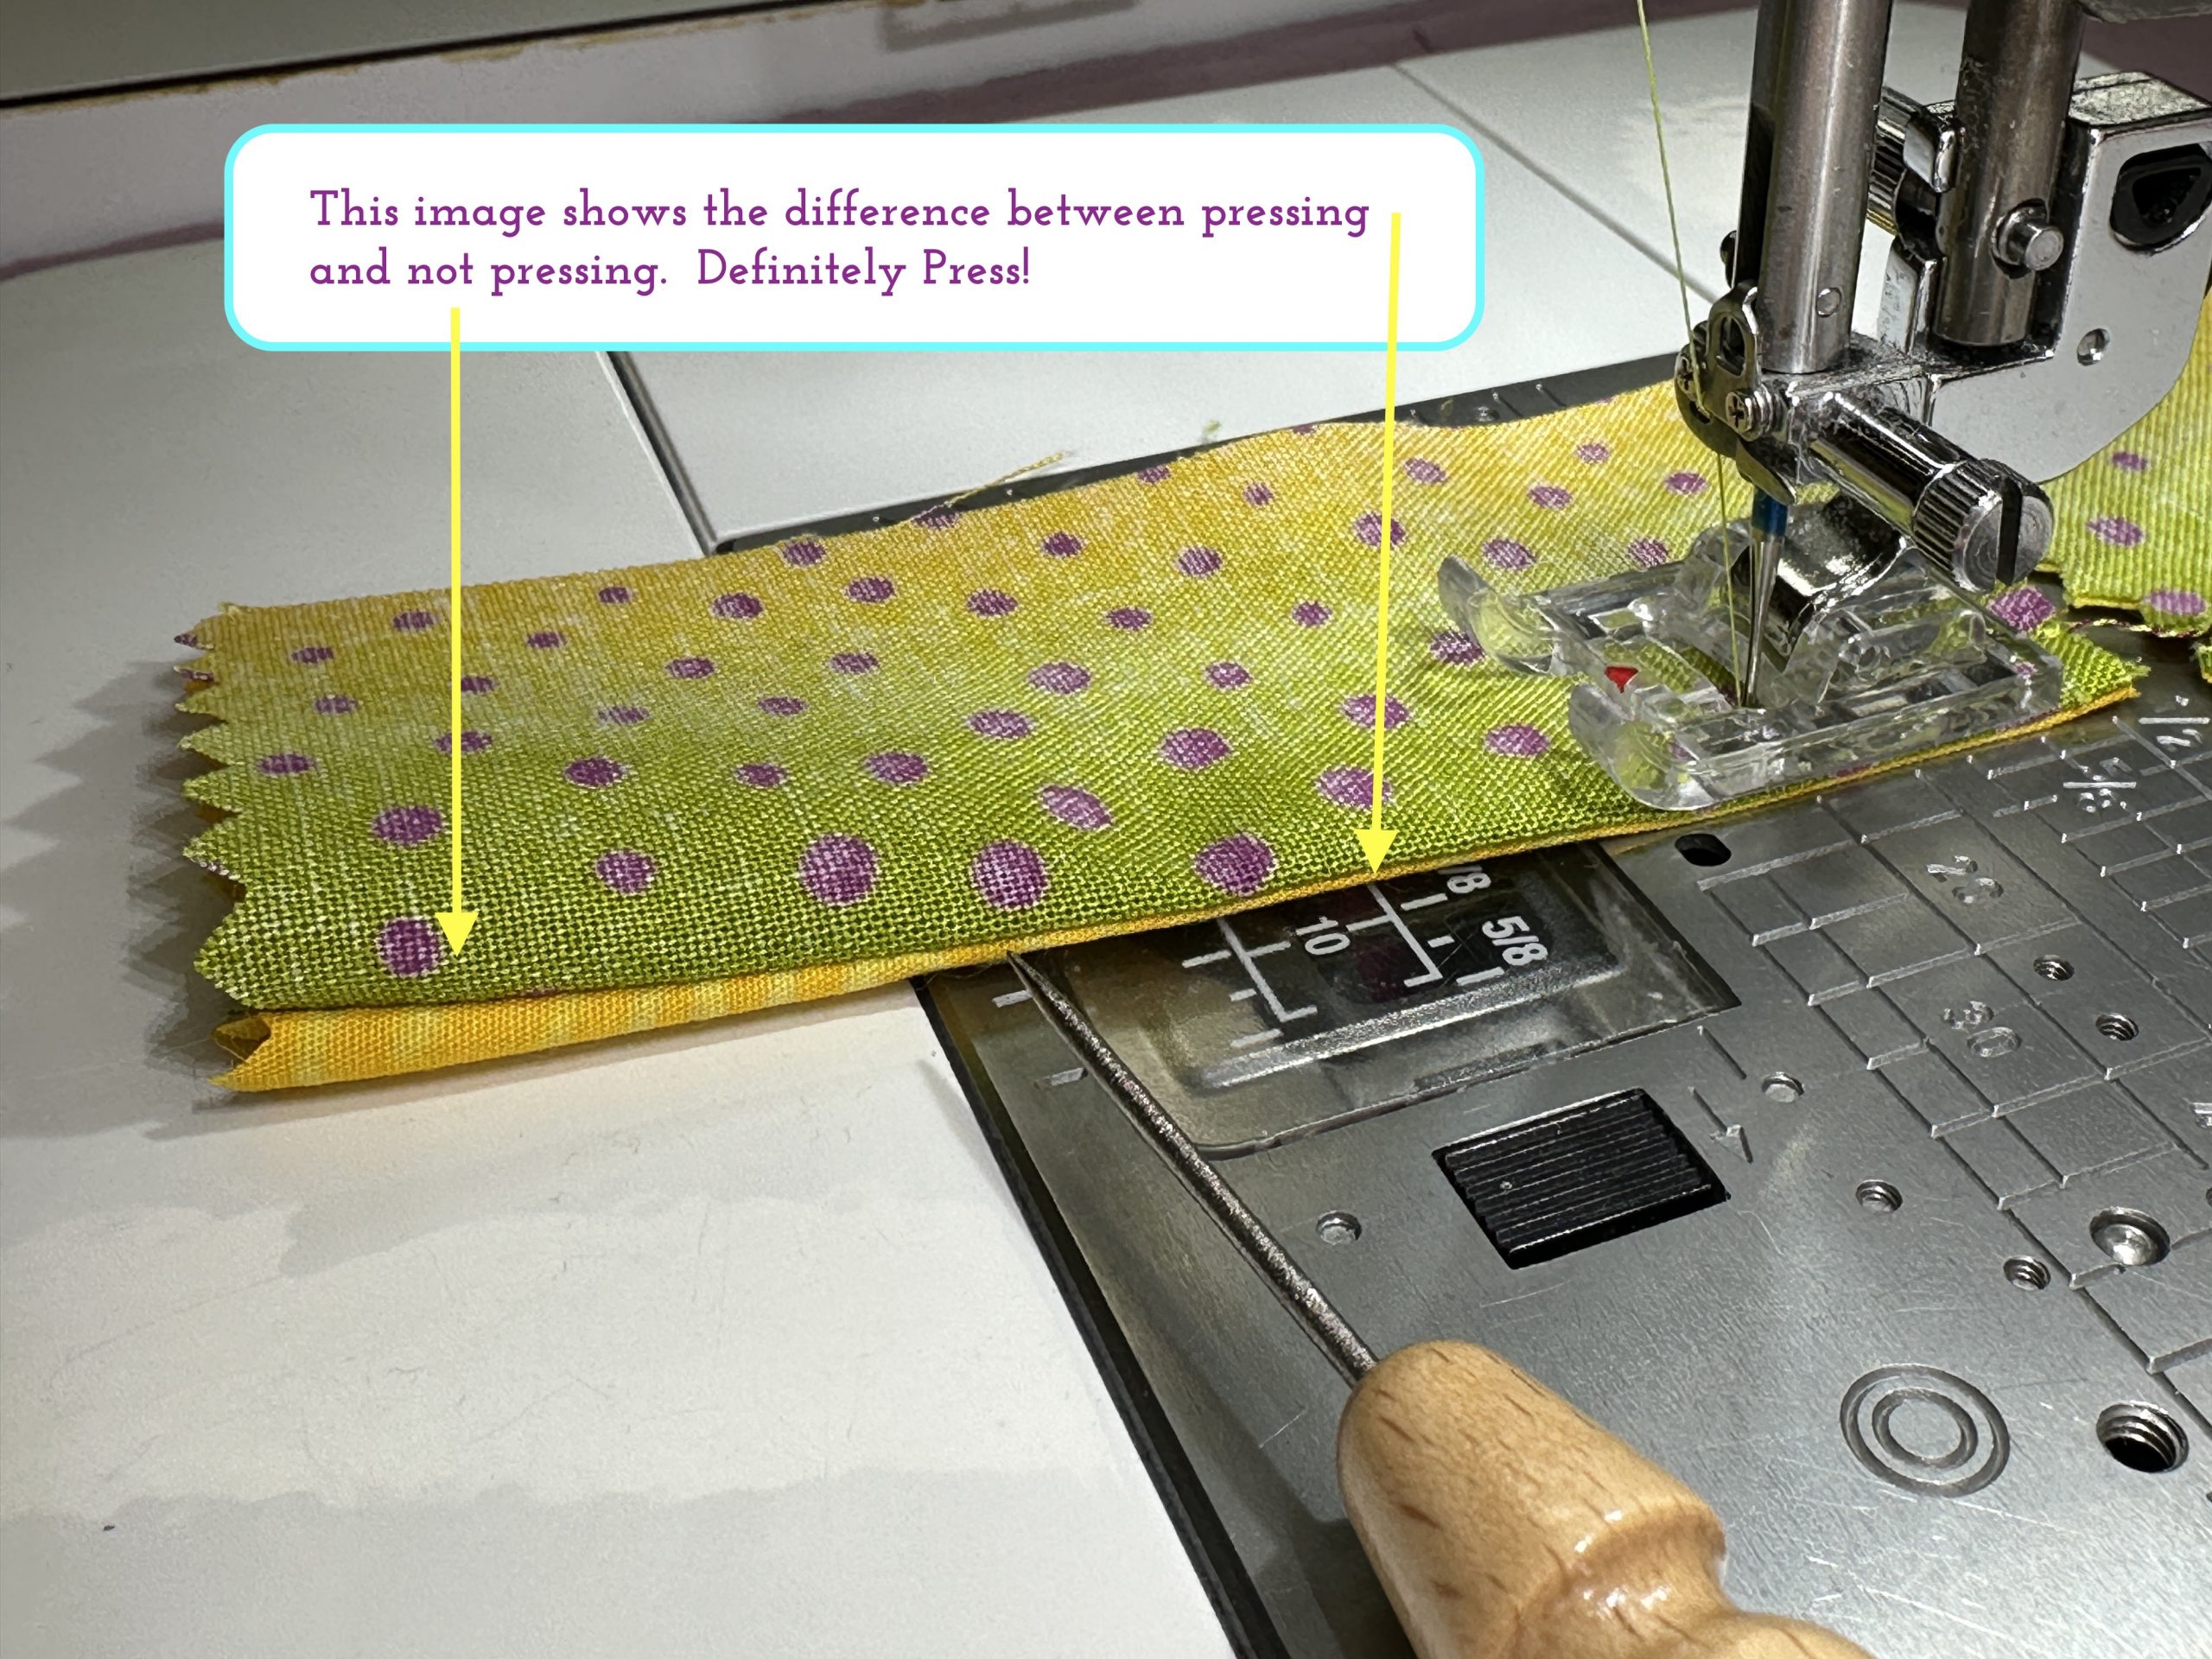
On this sample I deliberately did NOT press the seam open all the way. Look how nicely the part at the right, under the foot to about halfway), makes a perfect “knife-edge” fold, and how the part of the seam that was not pressed open wants to curl and roll. It’s worth the short extra bit of time to press your seams open! Makes like at this stage easier and the end-result nicer!
Raw edges are fully enclosed. There are no “thread whiskers” poking out of the finished seam!
Because of the luscious thickness of the flannel, I didn’t use this technique on this top. But I DID use it on my Anthea Linen BlouseAnthea Blouse in Sky Blue Linen which I blogged about here. This is a picture of the side seams on 5.3 oz (middle weight) linen in that blouse.

The Anthea Blouse from Anna Allen.
USAGE: This seam works best on lighter weight fabrics from chiffon to lawn to quilting-weight cottons and sheeting, and light to some mid-weight linens. It makes a beautiful finish on pillowcases, summer blouses, shirts and dresses, and sheers.
In a garment, the French seam isn’t suitable to really thick or stiff fabrics UNLESS you want to make a point of the bulk. I have actually used this “inside out” on throw pillows: Sew wrong sides together, trim, turn, and sew the second seam about 1/2″ away. This creates a stiff outside edge that adds structure to the pillow and acts like cording!
Next up: Lapped seams!
Here are the links to all the posts in this series of lessons, techniques that can be applied to virtually any garment and many home dec projects. Let me know what you’d like to learn and see here on the blog. Cheers and thanks, Sarah
Lesson 1: Choosing a Pattern and Starting Tips
Lesson 2: Making a Muslin, Fitting and Sleeves
Lesson 3: Matching Plaids, Cutting out Your Garment Pieces
Lesson 4: Overcast Seams, just like Serged Seams
Lesson 6: Lapped and Flat-felled Seams
Lesson 7: Hong Kong Finish for Seams
March 17th, 2023 at 9:36 am
[…] Lesson 5: French Seams […]