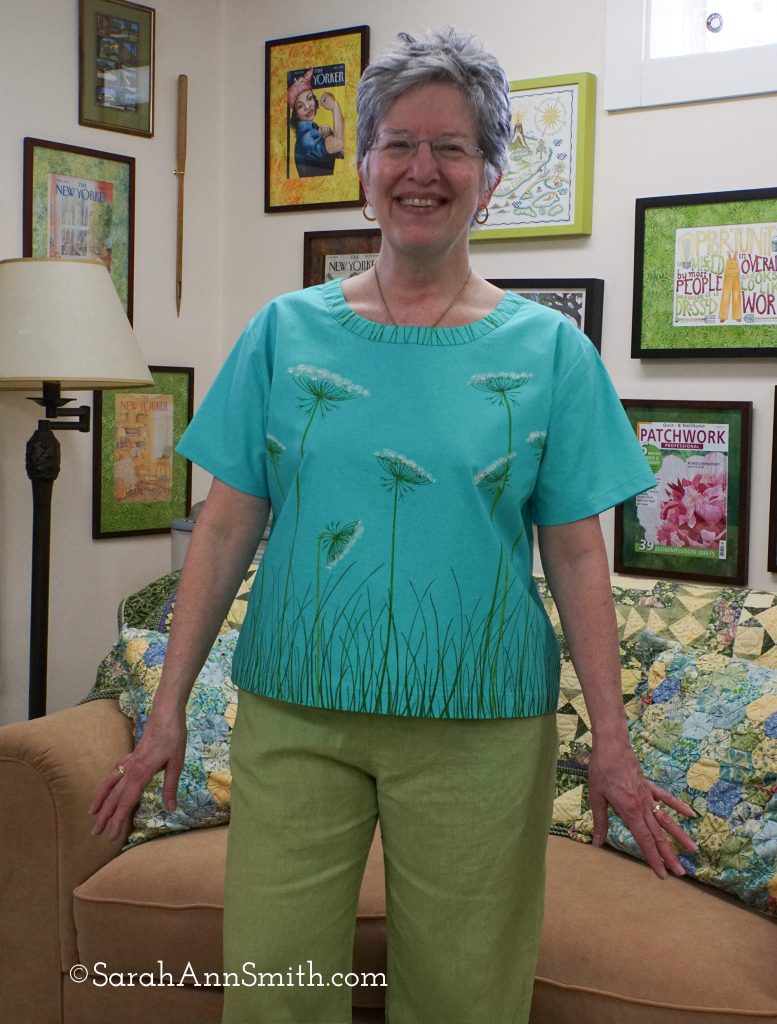
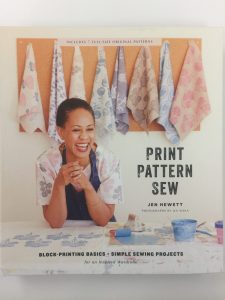
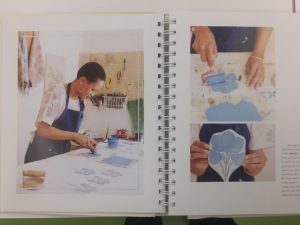
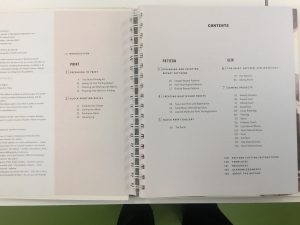
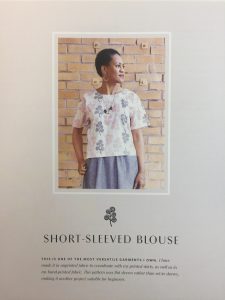
My new Queen Anne’s Lace top. I screen printed my custom designs onto Cotton Couture solids (courtesy of Michael Miller Fabrics), this color is “Luna.” In the summer of 2020 I saw Print Pattern Sew by Jen Hewitt somewhere online and ordered it immediately. It’s FAB! is available many places including Amazon . DO check out Jen’s site, here. Of course it took until April to start playing and until now to post. For the workshop and this post I wanted to use a pattern currently available that is similar to two vintage (circa mid 1980s) patterns that I still make over and over because I love them so much. There are LOTS of great photos and step outs in the book.Table of ContentsSince my favorite patterns are decades out of print, I selected this one for this project in case anyone wants to buy the book for further instruction. It comes with the pattern included.
I’ve been developing some new classes using paint on cloth and I thought as part of being a Michael Miller Brand Ambassador and a Janome Artisan what better thing to do than combine all these things I love in one! Some of you may remember this post from when I did a DIY improvement to my hall sconces; one of the lampshades was Queen Anne’s Lace screen printed on linen. I used the thermofax screens I made for that again for this top.
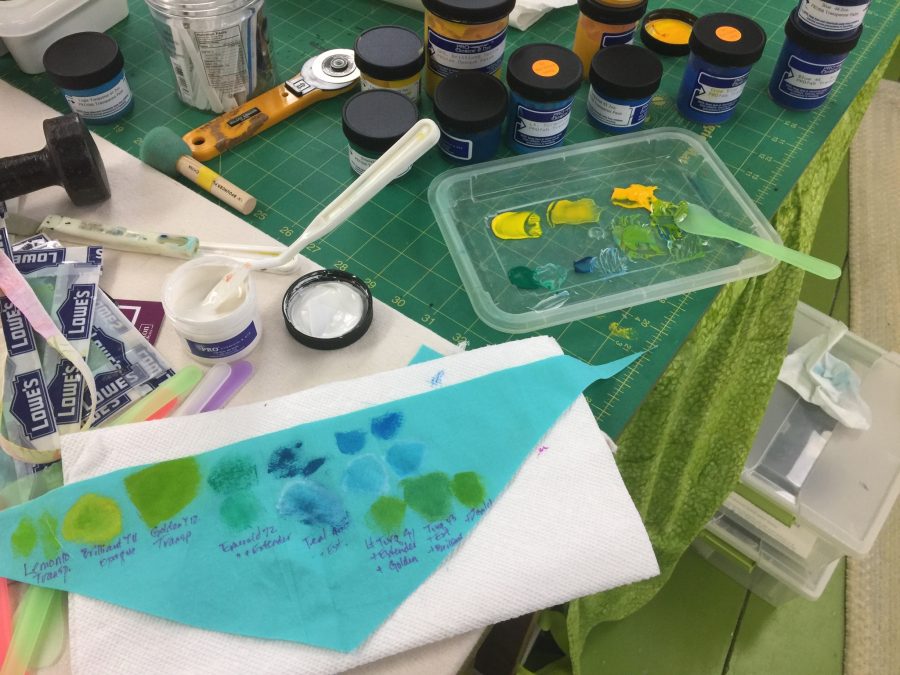
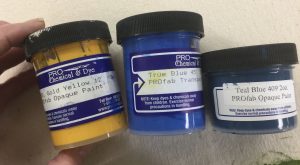
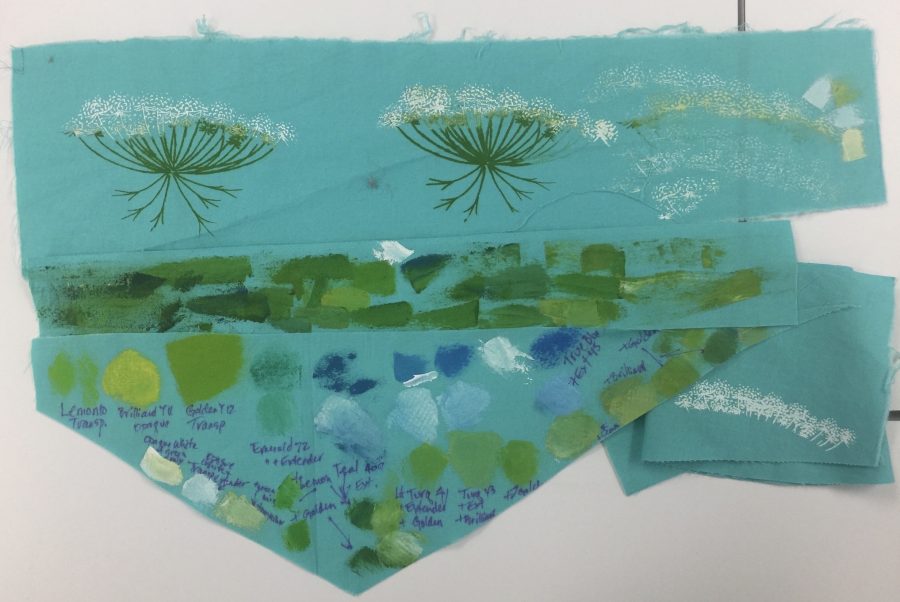
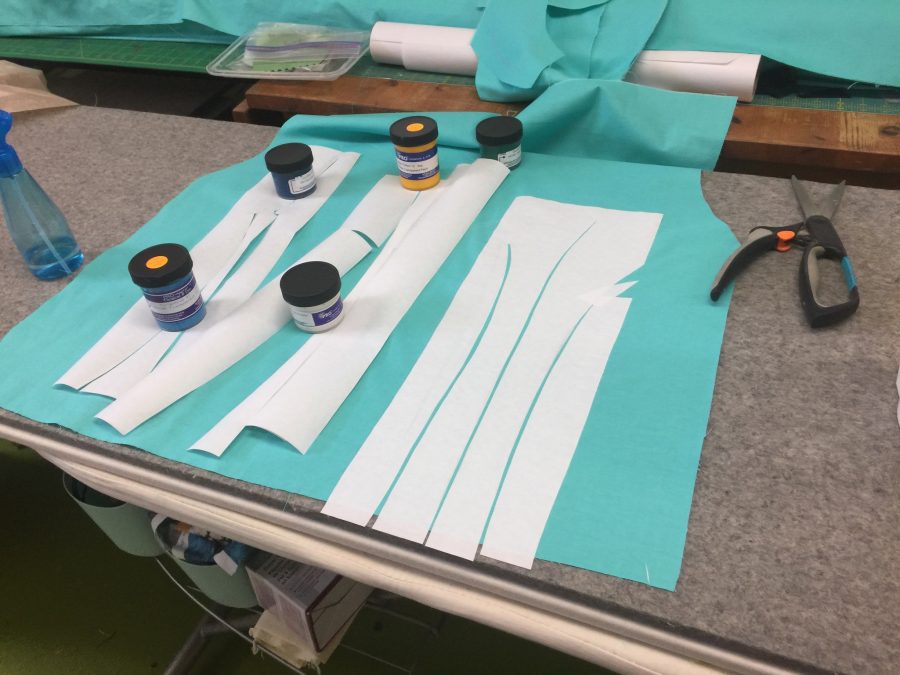
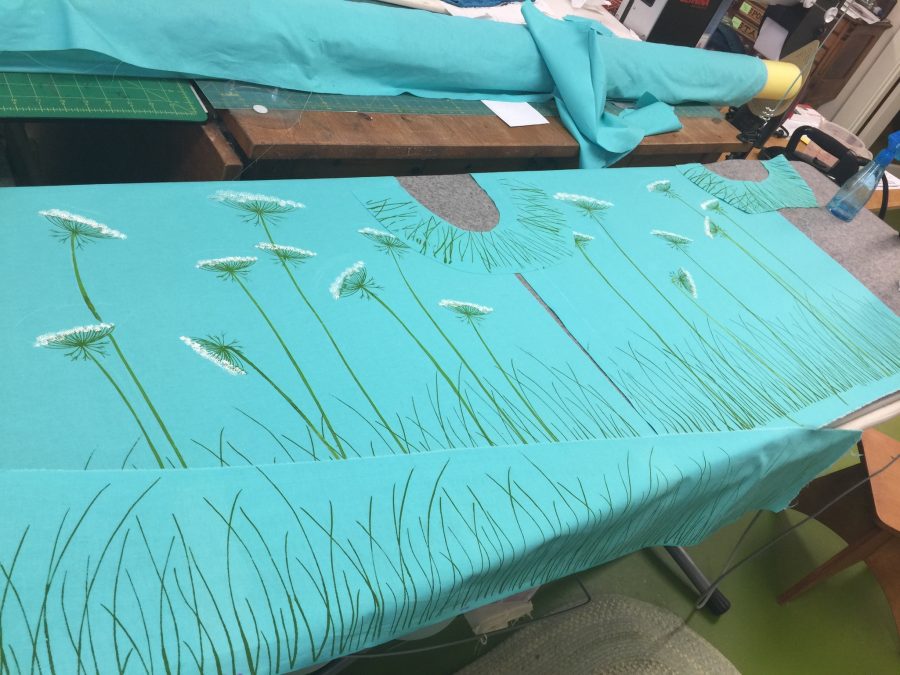
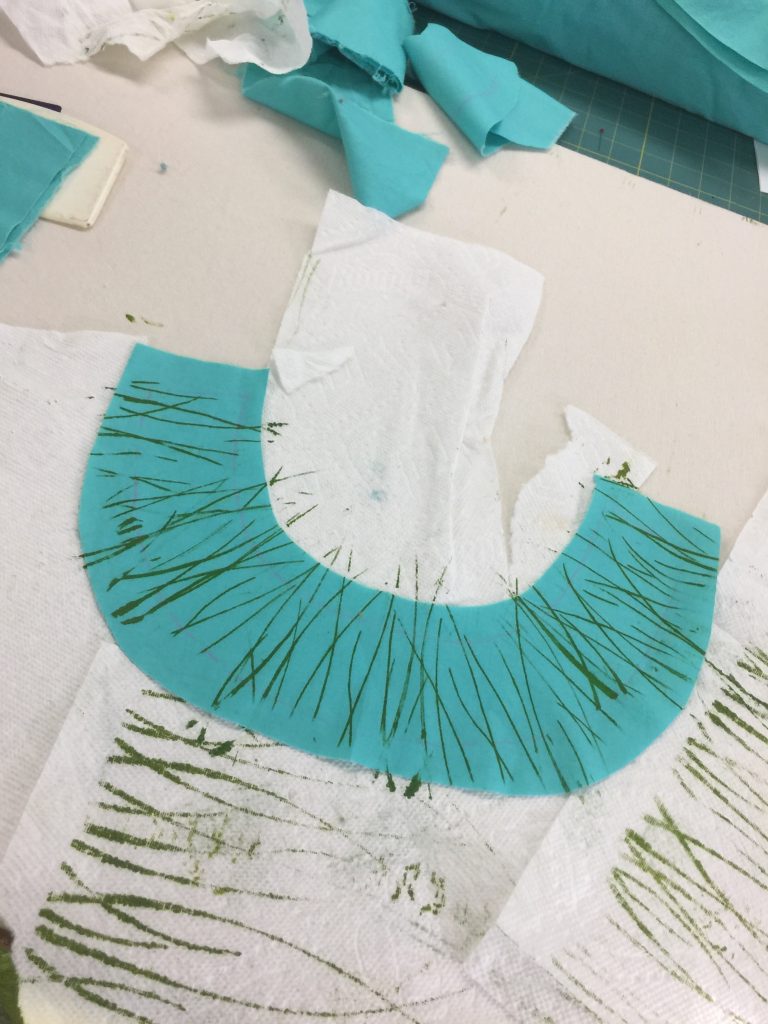
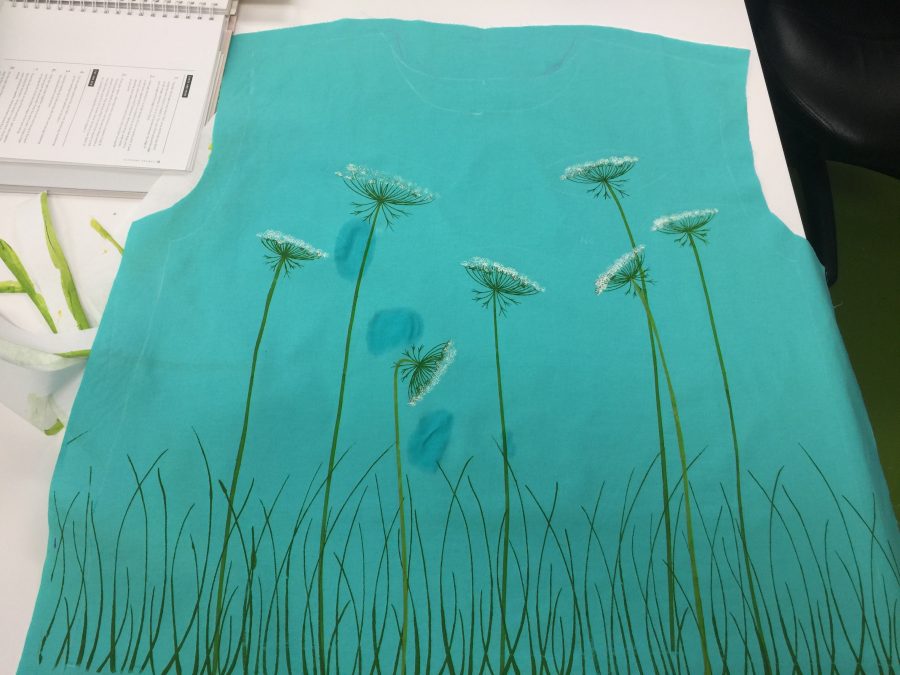
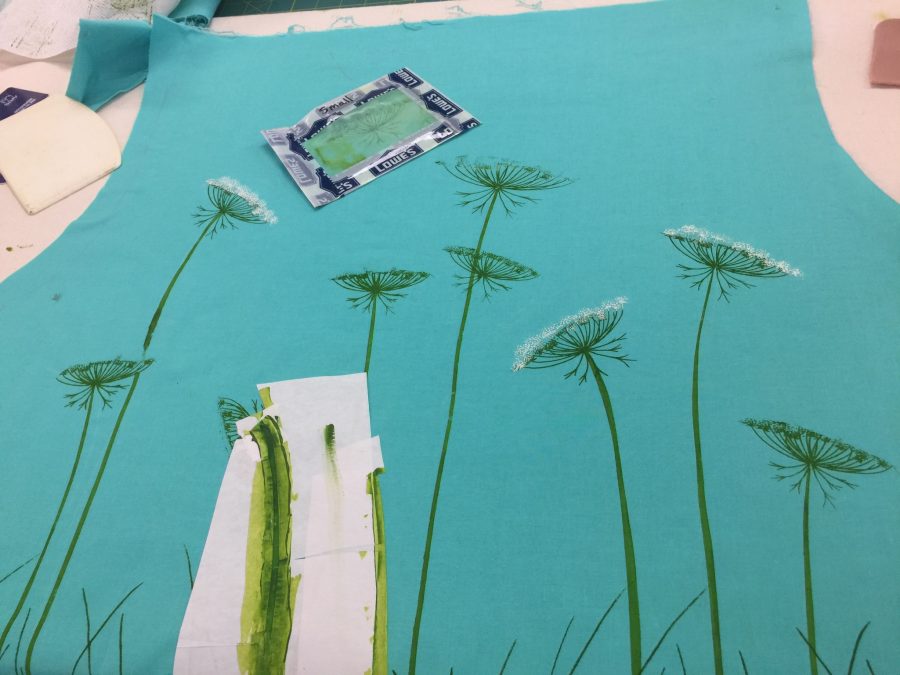
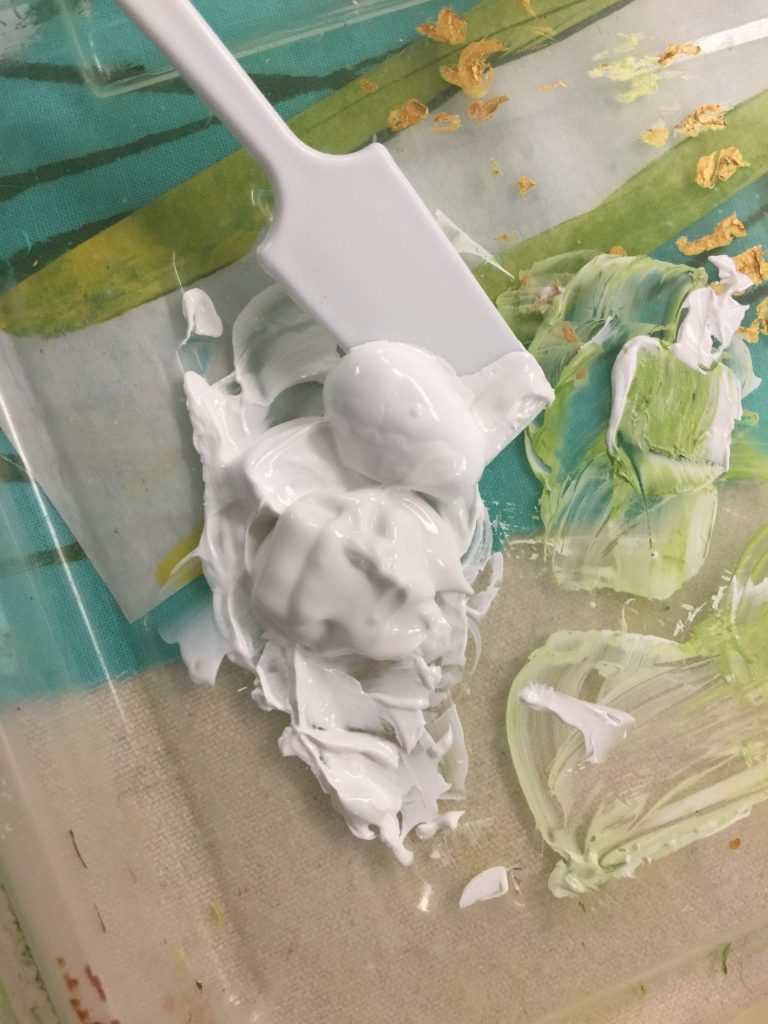
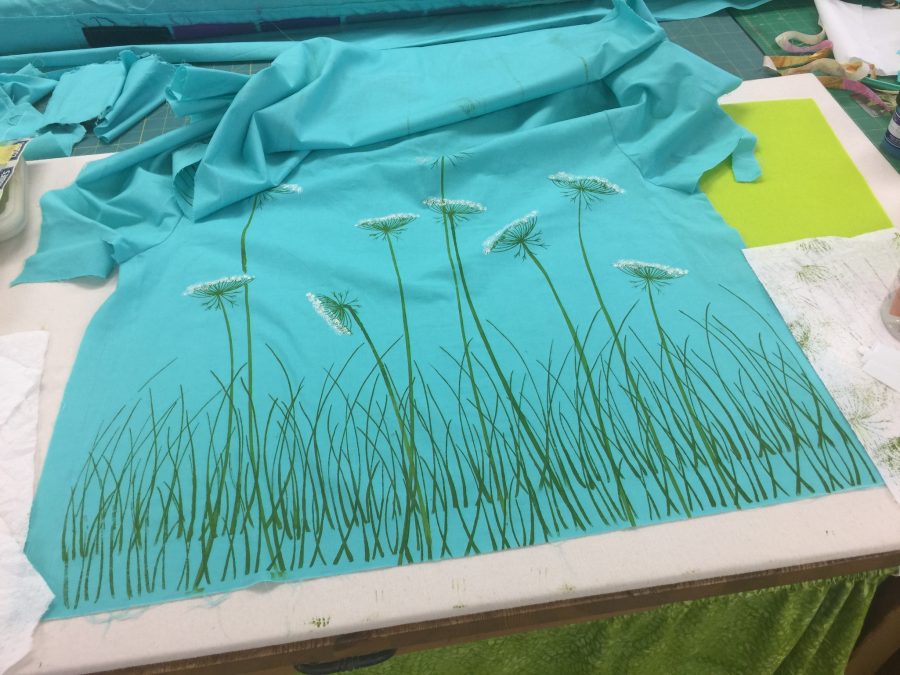
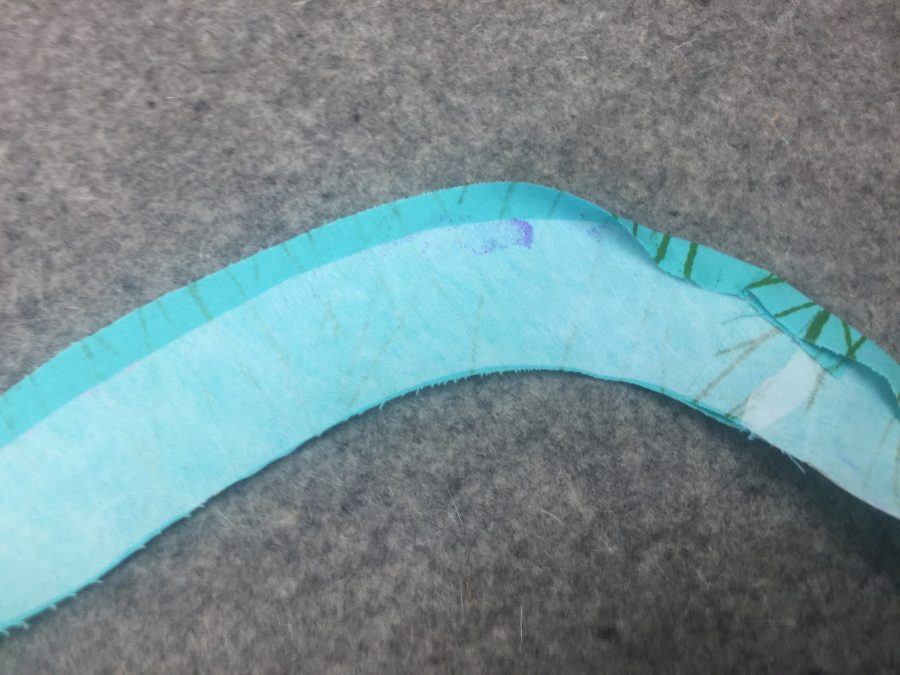
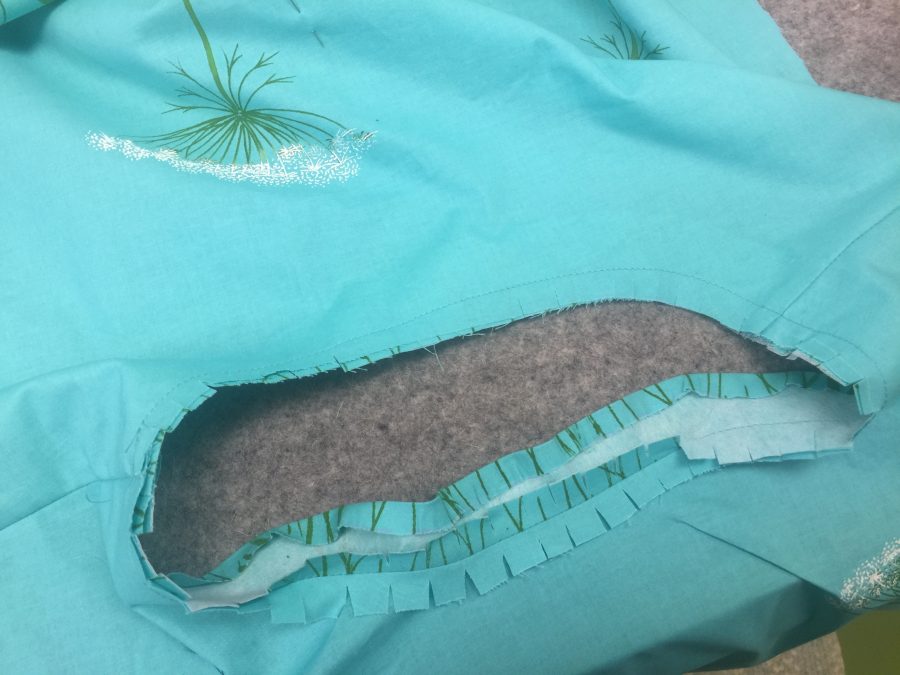
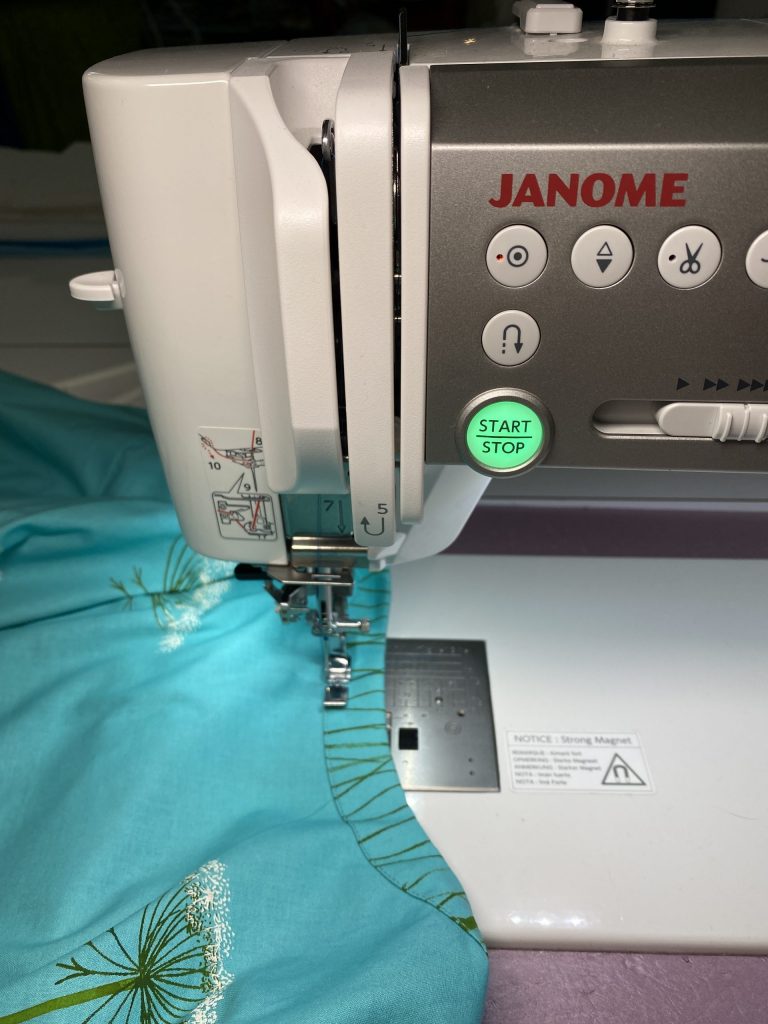
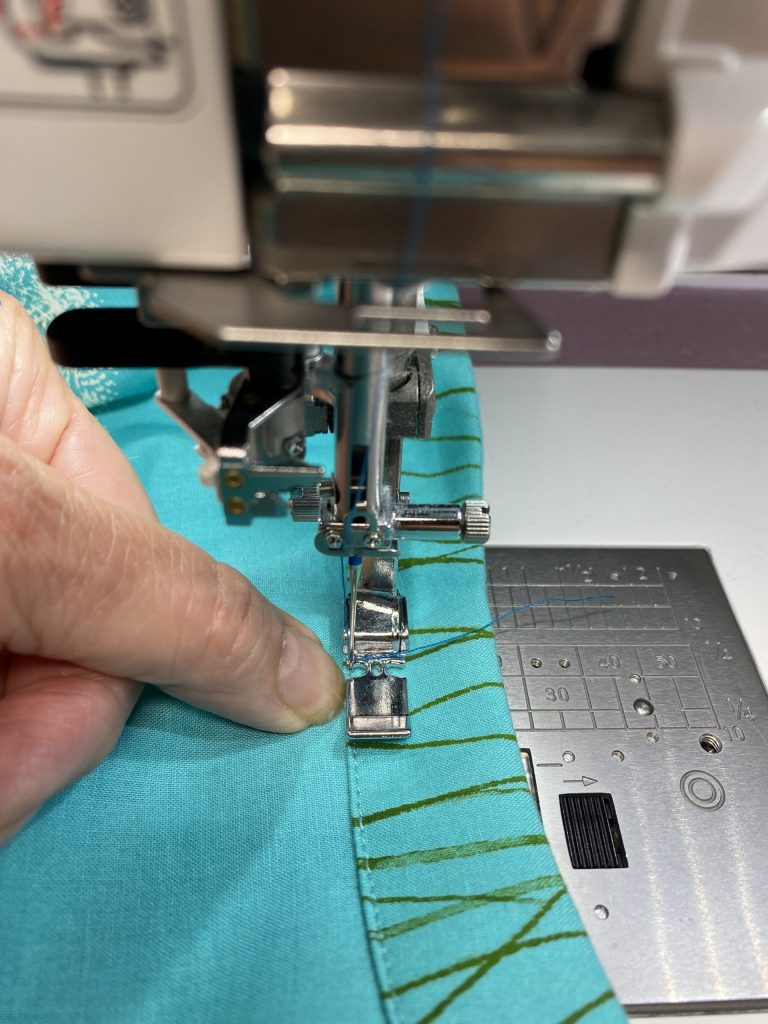
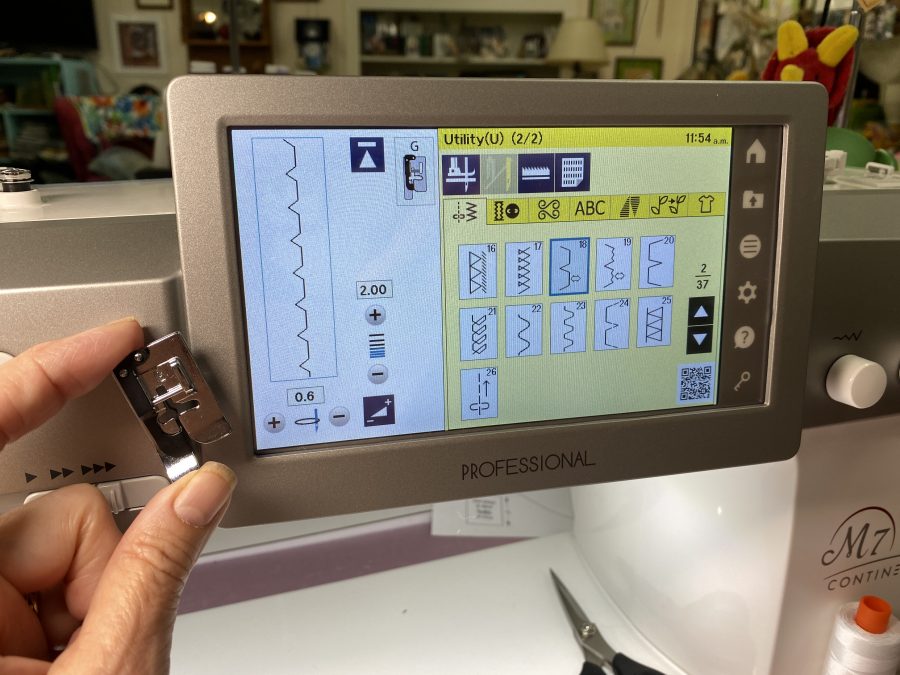
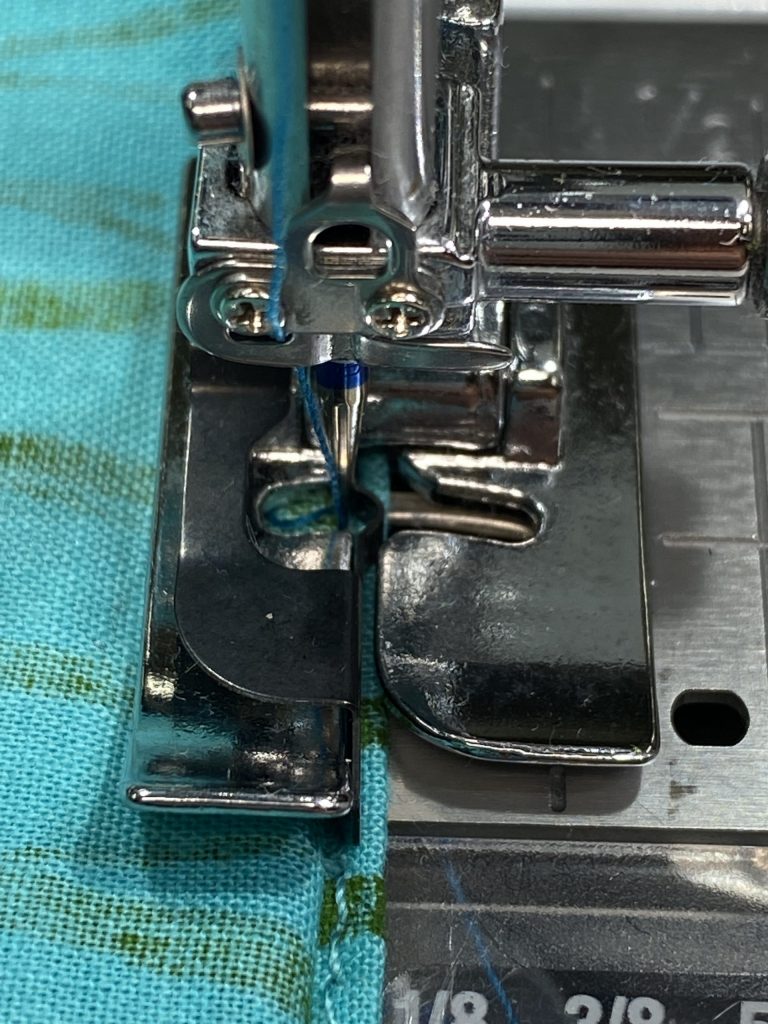
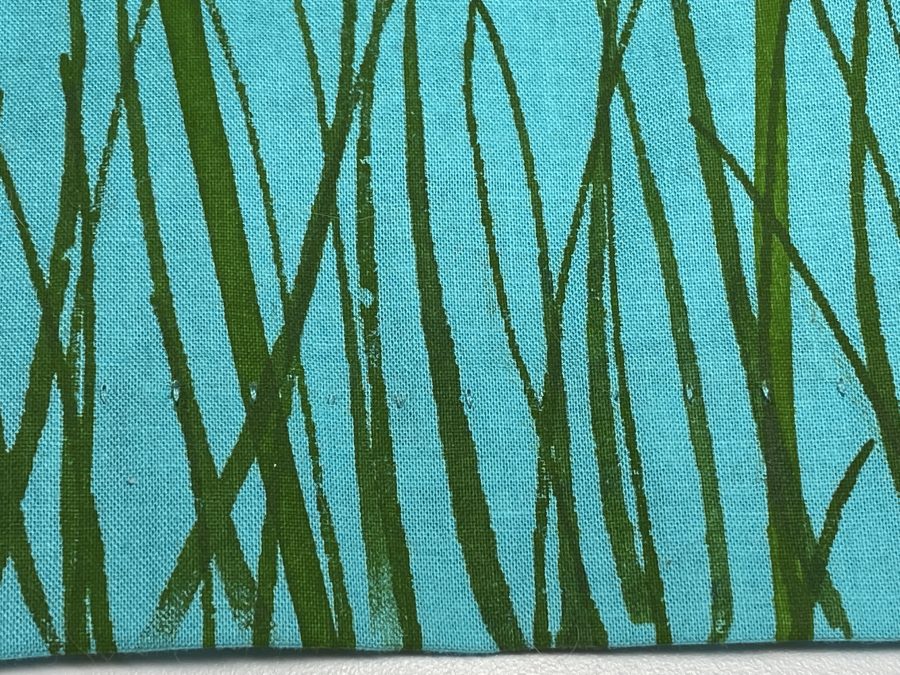
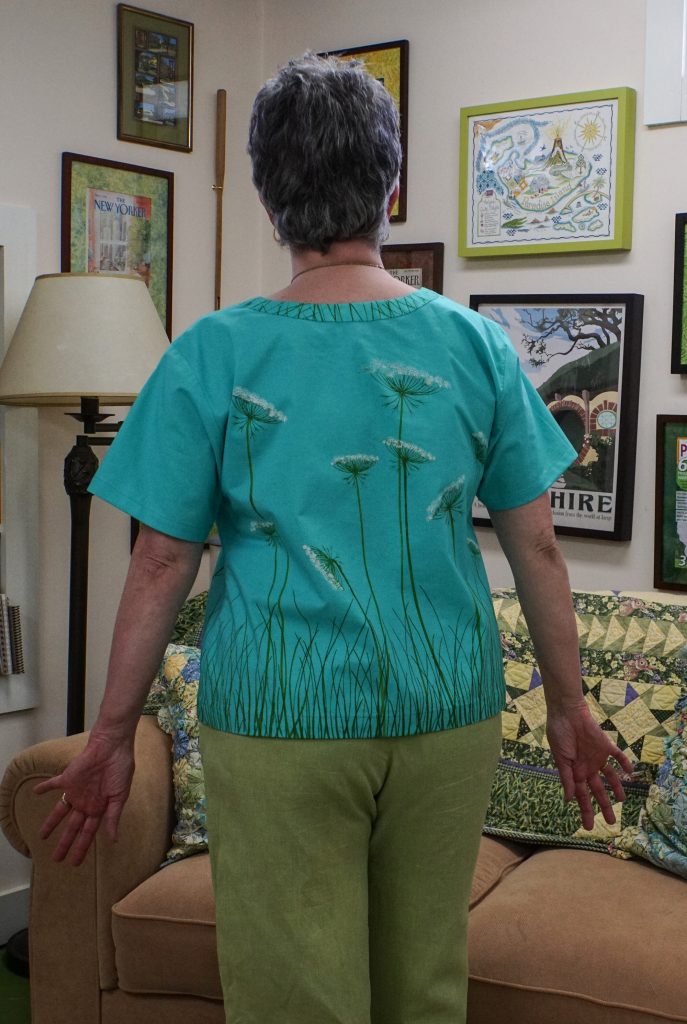
Step one is testing various mixes of color to get just what I wanted. You can see a colorful little plastic “flat not-a-spoon”–that is a make-up paddle, available in packages on Amazon for about $5 for 100 (more than a lifetime supply). They are great for getting into small paint jars. I used to use some Gelato spoons a shop gave me, but the flat paddles are better for scraping off (and not wasting) excess paint). The paints I used are ProFAB Transparent paints from ProChemical and Dye, but most textile paints will work. These have a particularly soft hand to them. Starter kits are a great and cost-effective way to try them out (I have a pair of kits available here; also available in just one or the other types of paint).LABEL what you use, what base paints are in the mix. I can promise you, with three yellows and three blues in 15 minutes I will forget which one is which! I keep these test-scraps for future reference. I used freezer paper to make stencils for the stems. I could have made a thermofax screen, but the mesh is expensive and Freezer Paper is cheap. I used a thermofax screen of grasses I had used for my lampshade for the bottom of the garment. I cut oversized pike for the front, back, and what I thought would be a trim for the sleeves. I later decided to leave the cuff/bottom of the sleeves plain. I used the grass screen to decorate the “facing” piece. Instead of putting the facing on the inside of the garment, I turned it to the outside as a decorative element. Ooops! Sometimes goobers happen. Any unwanted random little smudges of paint are quickly wet and scraped away. Or you just live with them.The printing was done in four steps: 1. Print stems over freezer paper stencil and let dry. I ended up adding another flower later on, so had to add another stem as seen here. 2. Print grass with thermofax screen. Let dry. 3. The thermofax screen for the Queen Anne’s Lace was made from my pen and ink drawing. My lampshades were all green on white linen. For this blouse, I wanted the flowers to be white, so I **carefully** screen printed the stems through the screen (seen above left) and let them dry. 4. Then I went back in with a creamy white (mixed from white with a dab of yellow) to do the flowers. This is the point where you pray you don’t mess up!When mixing light colors, start with a larger amount of the lightest color and put in just the TINY-est touch of color…it takes surprisingly little yellow to turn that glob of white into a softer white or barely-green. After purchasing the multicolored make up paddles, I discovered these square cornered white ones. They are great for applying small amounts of paint carefully through a thermofax screen and for getting into the bottom edges of the ProChem jars.Once I had the front and back printed, I pinned them together and tried them on. The grasses on the bottom looked sparse, wimpy. And I wanted the shirt a bit shorter. So I went back in with the same screen, offsetting it so the same shapes weren’t repeated too closely, and did a second layer higher up. I didn’t care if the printing didn’t follow all the way up what would become the hem on the inside. And that way I could just use the same screen instead of making another one.For the “facing” on the outside, I cut the outer edge of the interfacing very carefully so I could iron the seam allowance over it and create a lovely, smooth outside curve.If you are new to garment making, be SURE to clip your curves well so that the facing turns and lies nice and flat.My favorite way to get a perfect edge stitch is old school: using the zipper foot!Place the edge of the zipper foot against the edge where you want to stitch. In this case I need to use the left side of the foot. Move the needle so that it drops a few threads away from the folded edge. I use a fingernail or thumbnail as an edge guide and don’t sew too quickly. There are indeed “edge feet” for this purpose, but I find that the blades can bend or not be as precise as I want them to be (not to mention visibility isn’t as good as doing it this way). I’d already completed the top when I took this shot, so you can see how perfectly my Janome M7 stitched!For the hem, I decided I would use a blind hem stitch instead of hand-sewing it. The blind hem stitch I selected is for woven cloth, with straight stitches in between the zigs (#18…on the yellow part of the screen you can see that stitch 19 is a blind hem stitch for knits). Over on the white, it shows the settings and to use the G foot which I am holding up It has an “ice skating blade” (i.e. guide) in the middle.You can see the metal guide in the center of the foot. As above, I set up this photo after the garment is complete, which is why you see stitching at th bottom of the image. To prepare for blind hem stitching, you fold the hem up with the raw edge pressed to it will be inside the hem. You then fold back the outside of the garment so that the soon-to-be-hidden part of the hem is barely visible, about 1/8″. The body of the garment folds away to the left. The straight stitching on the hem is done with the needle in the curvy part of the “blade” where it stitches on the inside of the hem. The flat part of the blade snugs up against the folded back fabric, and the “Zig” part of the stitch takes a little nibble of the outside of the garment. My thread matched the Luna Cotton Couture perfectly. It is challenging to see those tiny hem stitches on the right side of the garment.Back viewSide view–I love how the design goes all the way around. I hope you’ve enjoyed this mini tutorial! Thanks again to Janome for their 16+ years of sponsorship and to Michael Miller for having me as a Brand Ambassador this year!
BTW, did you ever run across the Charlie Harper bird patterns that I think I recall you mentioned a few months ago. I saw your CH quilt in the background of one of your class photos. I ha e a friend who wants a CH quilt.
Thanks for sharing your skills with all of us!!
Diane
Thanks Diane! I do know who Charlie Harper is, but I have not made one and don’t have any of his fabric…. I wonder what it was you saw in the pic????? I do have a panel of fabric from the local store pinned up (blue-gray, ochre and cream with country and barnyard animals but not CH)……
Thanks so much for writing! Hope you and all of yours stay well,
Wow. I thought I was doing something today coordinating 3 fabrics, making and inserting piping after nothing like that in about 30 years. You, madam, are an artist. I’ve got a special needs grandson who runs amok while I sleep after night shift so this would not work at my house, but I really wish I could go to YOUR house and try it! So beautiful!
First off..PIPING! WOOT! Do it again! If you haven’t seen my friend Susan K. Cleveland’s Piping Hot Binding tool and booklet DO… I teach her tool and a variation on her method and it ROCKS. Her website is Pieces Be With You. And good for you for caring for that grand-boy! I wish you could come play, too. I was going to do a workshop at ProChem this year but we cancelled it. I am debating trying to do a class online. The benefit to in person is the cost of “stuff” is so much less because we can share supplies…… If you like the idea of playing with paint, I was always kind of intimidated by the “proper” “high art” books on the subject. I’ve become friends with Lynn Krawczyk and her book about Intentional Printing is still one of my favorites. Honestly, if GrandBoy can sit still (my older son couldn’t), it could be something to do together… use TP tubes and other stuff around the house–you can even use inexpensive craft paint from the big box store to try it out, buy a few colors that go together that you like. Anyway, THANKS! And if you’re ever in mid-coast Maine…… oh, duh, add the link: https://smile.amazon.com/Intentional-Printing-Simple-Techniques-Inspired/dp/1620330563/ref=sr_1_2?crid=28XJI69MKOELC&dchild=1&keywords=lynn+krawczyk&qid=1595424366&sprefix=Lynn+Kraw%2Caps%2C141&sr=8-2

July 20th, 2020 at 2:38 pm
Now *this* is my kind of shirt! Thanks for the clear, concise tutorial!
July 20th, 2020 at 7:49 pm
Very cool! Thanks for the detail tips.
July 20th, 2020 at 8:45 pm
I love the detail of sewing the printed facing on the outside.
July 21st, 2020 at 2:25 am
Very nicely done!! It’s very attractive on you.
BTW, did you ever run across the Charlie Harper bird patterns that I think I recall you mentioned a few months ago. I saw your CH quilt in the background of one of your class photos. I ha e a friend who wants a CH quilt.
Thanks for sharing your skills with all of us!!
Diane
July 21st, 2020 at 8:32 am
Thanks Diane! I do know who Charlie Harper is, but I have not made one and don’t have any of his fabric…. I wonder what it was you saw in the pic????? I do have a panel of fabric from the local store pinned up (blue-gray, ochre and cream with country and barnyard animals but not CH)……
Thanks so much for writing! Hope you and all of yours stay well,
July 21st, 2020 at 8:32 am
Thanks…every once ini a while a get a good idea LOL! Stay safe, S.
July 21st, 2020 at 8:32 am
Thanks Vicki!!
July 21st, 2020 at 7:22 pm
Wow. I thought I was doing something today coordinating 3 fabrics, making and inserting piping after nothing like that in about 30 years. You, madam, are an artist. I’ve got a special needs grandson who runs amok while I sleep after night shift so this would not work at my house, but I really wish I could go to YOUR house and try it! So beautiful!
July 22nd, 2020 at 9:27 am
First off..PIPING! WOOT! Do it again! If you haven’t seen my friend Susan K. Cleveland’s Piping Hot Binding tool and booklet DO… I teach her tool and a variation on her method and it ROCKS. Her website is Pieces Be With You. And good for you for caring for that grand-boy! I wish you could come play, too. I was going to do a workshop at ProChem this year but we cancelled it. I am debating trying to do a class online. The benefit to in person is the cost of “stuff” is so much less because we can share supplies…… If you like the idea of playing with paint, I was always kind of intimidated by the “proper” “high art” books on the subject. I’ve become friends with Lynn Krawczyk and her book about Intentional Printing is still one of my favorites. Honestly, if GrandBoy can sit still (my older son couldn’t), it could be something to do together… use TP tubes and other stuff around the house–you can even use inexpensive craft paint from the big box store to try it out, buy a few colors that go together that you like. Anyway, THANKS! And if you’re ever in mid-coast Maine…… oh, duh, add the link: https://smile.amazon.com/Intentional-Printing-Simple-Techniques-Inspired/dp/1620330563/ref=sr_1_2?crid=28XJI69MKOELC&dchild=1&keywords=lynn+krawczyk&qid=1595424366&sprefix=Lynn+Kraw%2Caps%2C141&sr=8-2