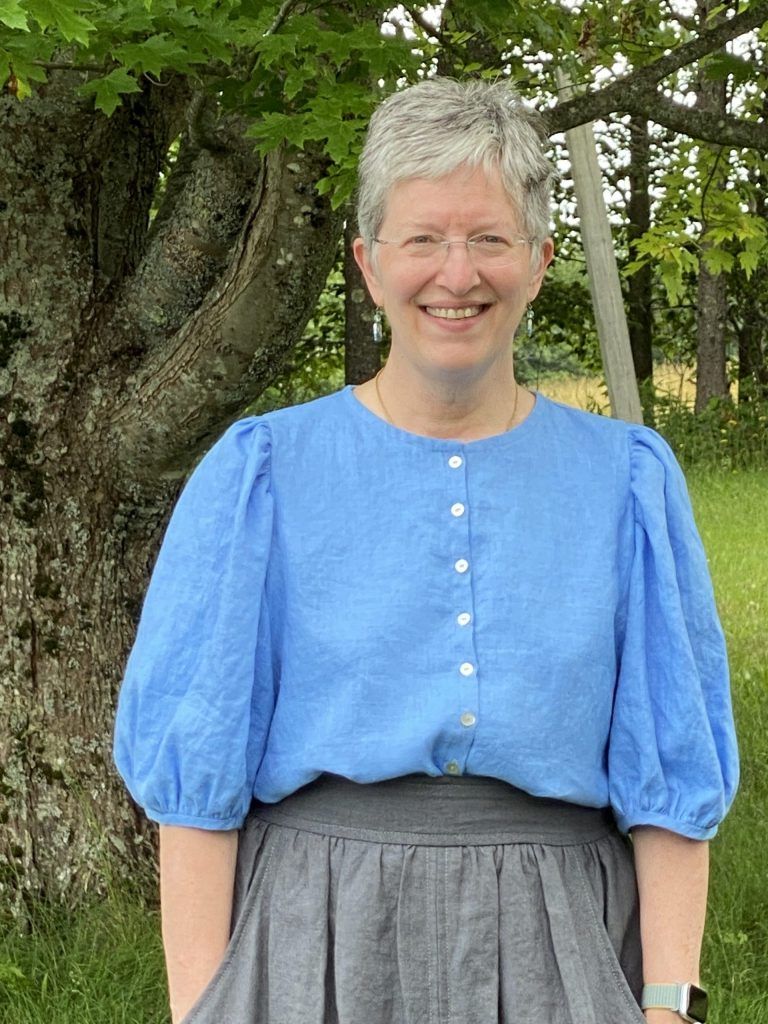
While visiting my favorite local shop, Fiddlehead Artisan Supply, one of the young women working there had on her version of this blouse. Asked the pattern name–Anthea by Anna Allen–went home and ordered it! The colors I’m wearing are Maine Summer and it is so flattering to many body types and comfortable.
Today’s blogpost takes you through making an entire blouse, which presser feet I use on my Janome (I’m a brand ambassador and compensated, but I’d say all this good stuff anyway…they rock!) m7Continental, why and offer tips and tricks for garment construction. Pretty much all Janome machines have or have available these presser feet with the possible exception of the automatic buttonhole, which many but not all of the Janome models have. Comment and let me know what more you’d like to know and what you’d like me to feature on the blog! I’m scaling back travel teaching and hope to have more time for this sort of thing.
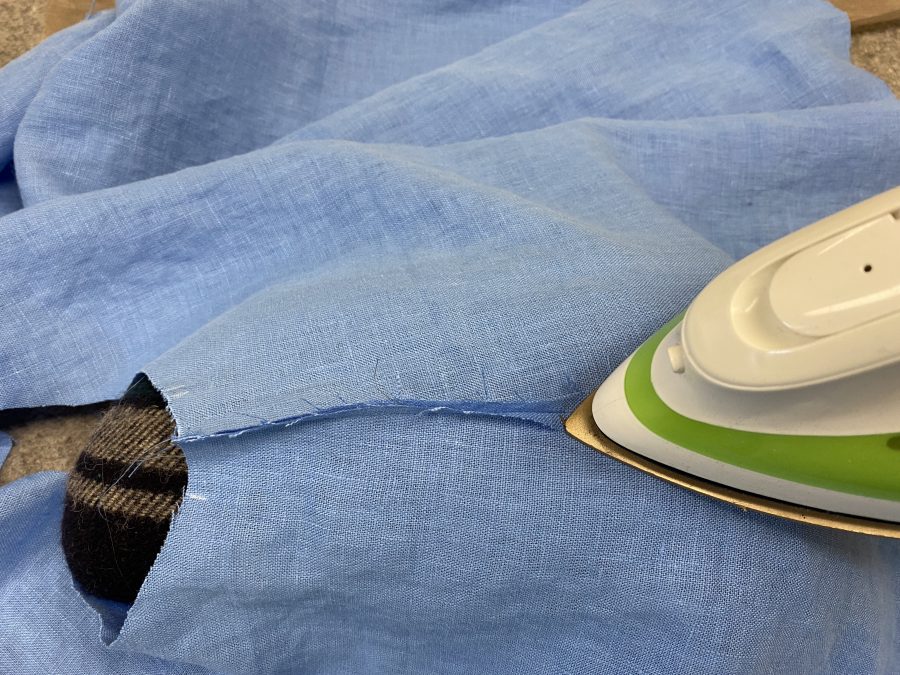
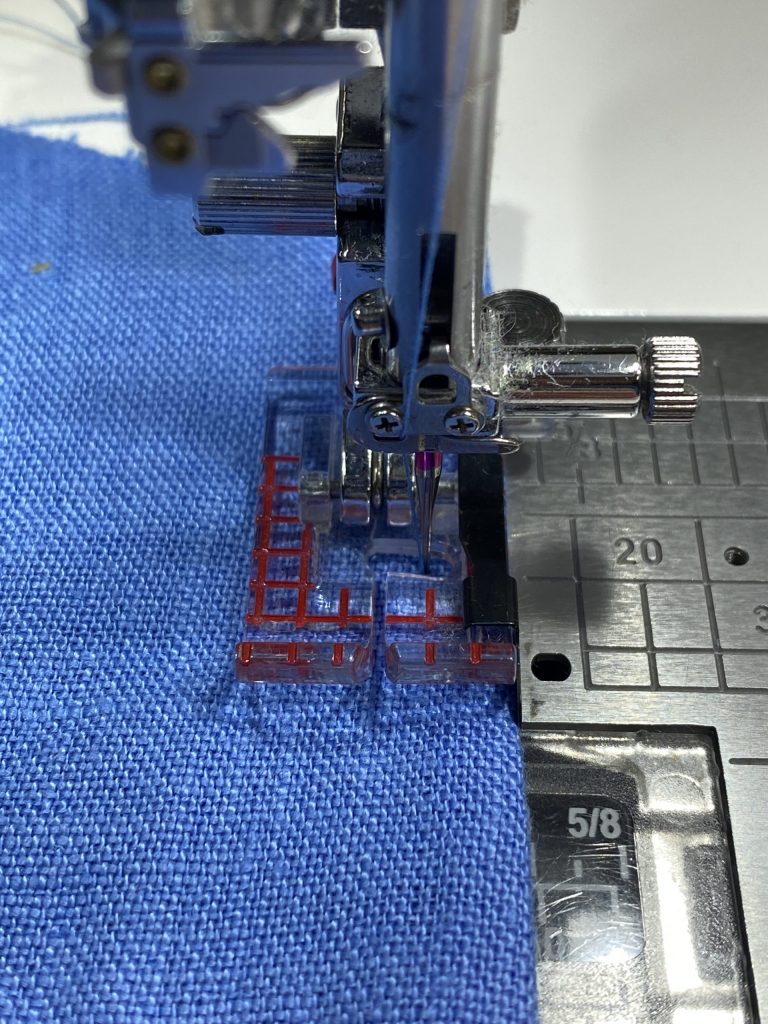
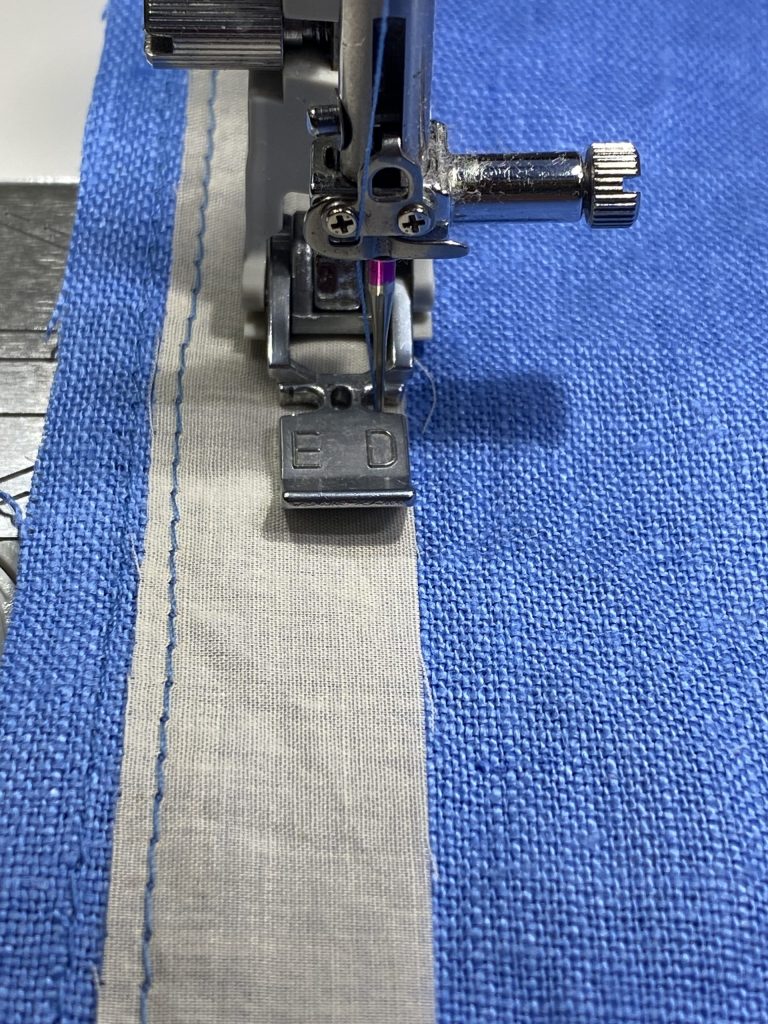
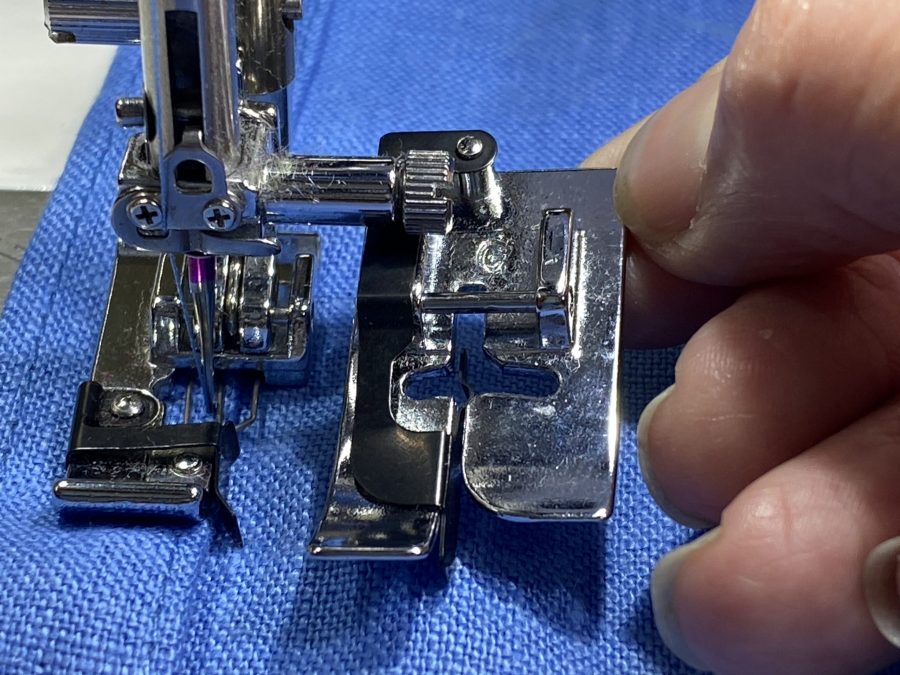
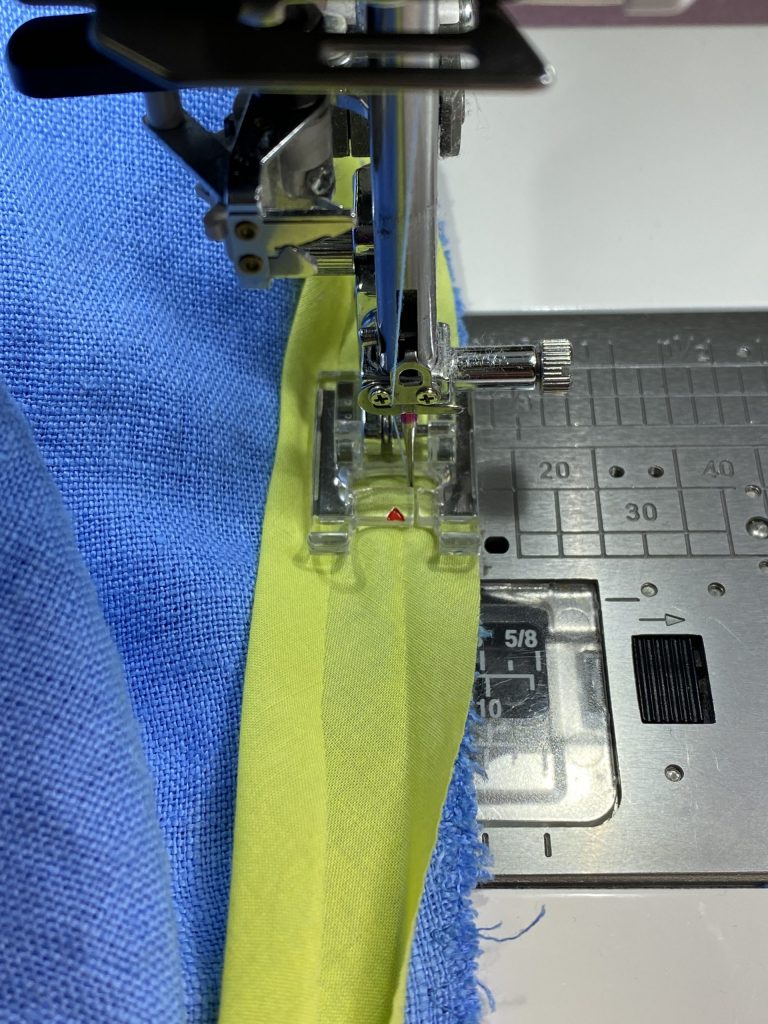
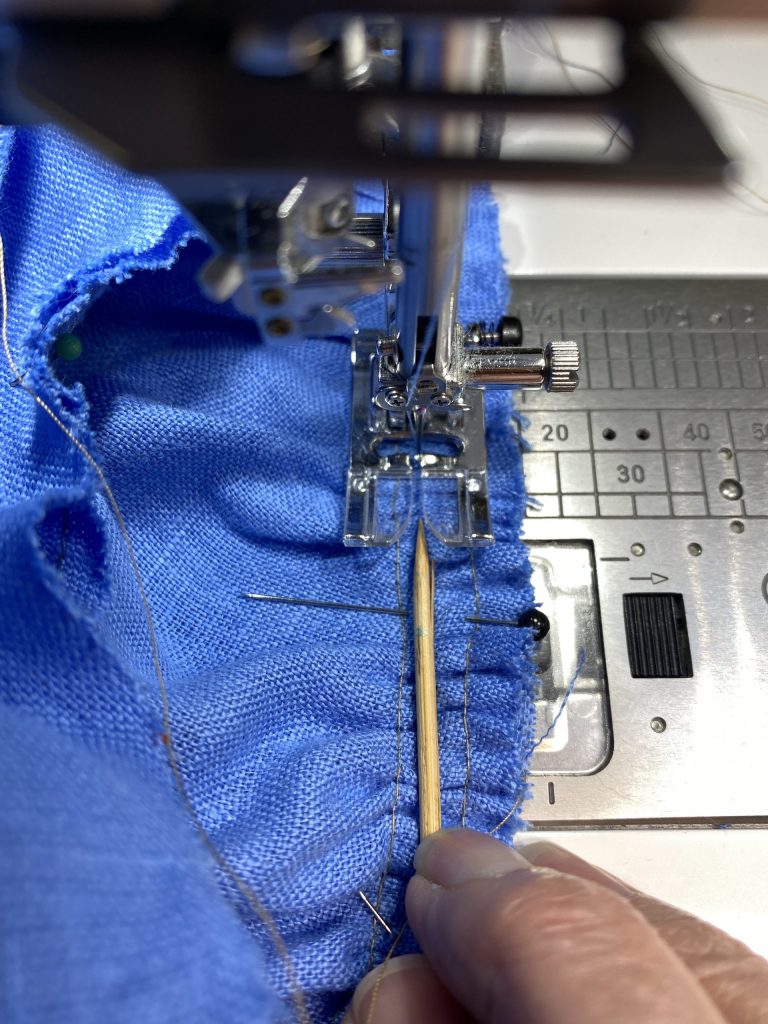
The first thing to do is sew your side and shoulder seams. I opted for French seams for a clean, no-fraying finish. With a 5/8″ seam allowance, I sewed with the WRONG sides together at 3/8.” First press the seam as stitched (flat), then trim to a scant 1/4″ and press the seam allowance open.Be sure to trim off the whiskers–you won’t be able to coax them inside the enclosing seam and trimming them later.is a headache.This shows me holding the fabric with right sides together; the fabric is folded EXACTLY on the first line of stitching. You then sew 1/4″ away to enclose all the raw edges. Sew the second part of the French Seam at 1/4″. If you’ve trimmed any stray threads/whiskers, you’ll have a beautiful clean seam. Press to one side (for my blouse I pressed to the back). Notice that the edge of the fabric/seam is on the 3/8″ line but the needle is moved right of center to be at the 1/4″ seamline.Next, I am stabilizing the button band by using cotton voile (preshrunk) as my interfacing. Unlike the polyesters or fusible we are used to using, it provides strength without bulk and retains a soft, fluid hand to the garment. I sewed the edges in place (so the strip won’t wiggle and wad up during use). The zipper foot is one of my favorite ways to get a perfect, consistent edge: set the side of the foot on the edge of the interfacing and move the needle toward the center. Be sure it won’t hit the foot but also doesn’t ride on the very outer edge of the interfacing and chew it up. ON the left you can see stay stitching.I’ve folded the cut-on button band to the inside and am now stitching it to the front. When I have a “lip” or folded edge and want to edge stitch, I use either the edge stitching foot (on the right, which I think of as the Ice Skate with the metal guide in the center) or the over cast foot (on the left, in use). Using a straight stitch, place the foot so the blade is snug against the fold and move the needle to make a nice, narrow topstitch. Be sure the needle won’t hit the wires in the presser foot by hand-walking the needle for one or two stitches.Next up: applying a bias binding to enclose the seam and act as a facing on the neckline. Here I’m using what may be my favorite presser foot, the F2 appliqué foot. The wide open toes and clear visibility help me sew more carefully and precisely. This photo applies to both facing the neckline and covering the edges of the set-in sleeve seam.Buying a GOOD quality tailor’s ham and base to hold it has been one of the best, most useful purchases of the year. After 50 years of using my mother’s horrid old ham, I’m ready to sew! Here I’m pressing the bias in place on the neckline. You can see the narrow French seam on the shoulder in the center of the photo. As I press, I am easing the bias so that it lays nice and flat. I used my seam gauge to make sure the depth is even, then edge-stitch all the way around the neck.Once the body is complete (except for the hem), it is time to start the sleeves. Although I have sewn garments for almost (GULP) 60 years–yes I started very young–I’ve been taking an outstanding online course with Philippa Naylor, Garment Makers Question Time. The price is phenomenal for the amount of instruction you get each of the 12 months. More projects coming up! Anyway, I learned to set the gathering stitches at 1/2″ and 3/4″ and sew down the middle at 5/8″. Philippa’s way works better: sew your gathering stitches one thread into the seam allowance from the final seam line and 1/4″ closer to the raw edge. Gather, distribute the gathering appropriately, and then sew the seam just barely to the left of the left-side gathering stitch. I like using a thin bamboo skewer to coax and ease the gathers as I stitch. Again, I love that open visibility foot!
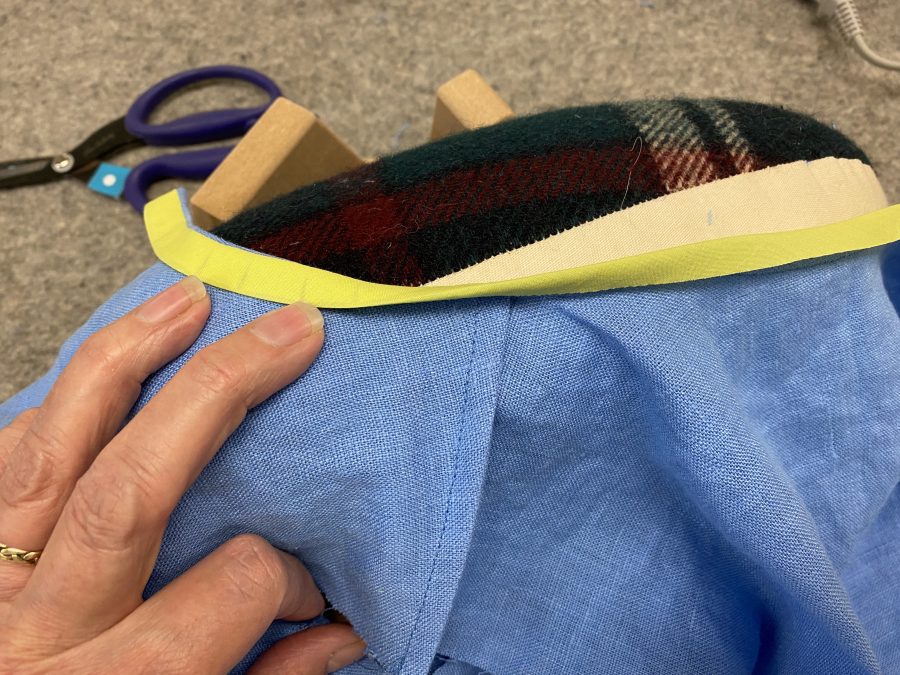
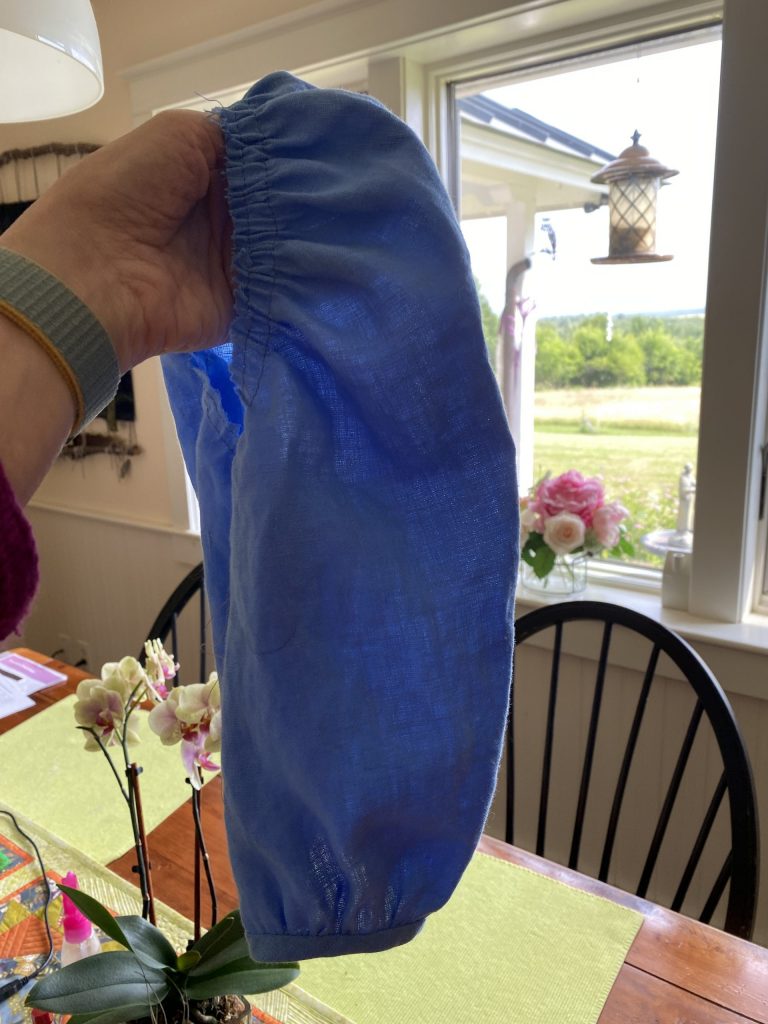
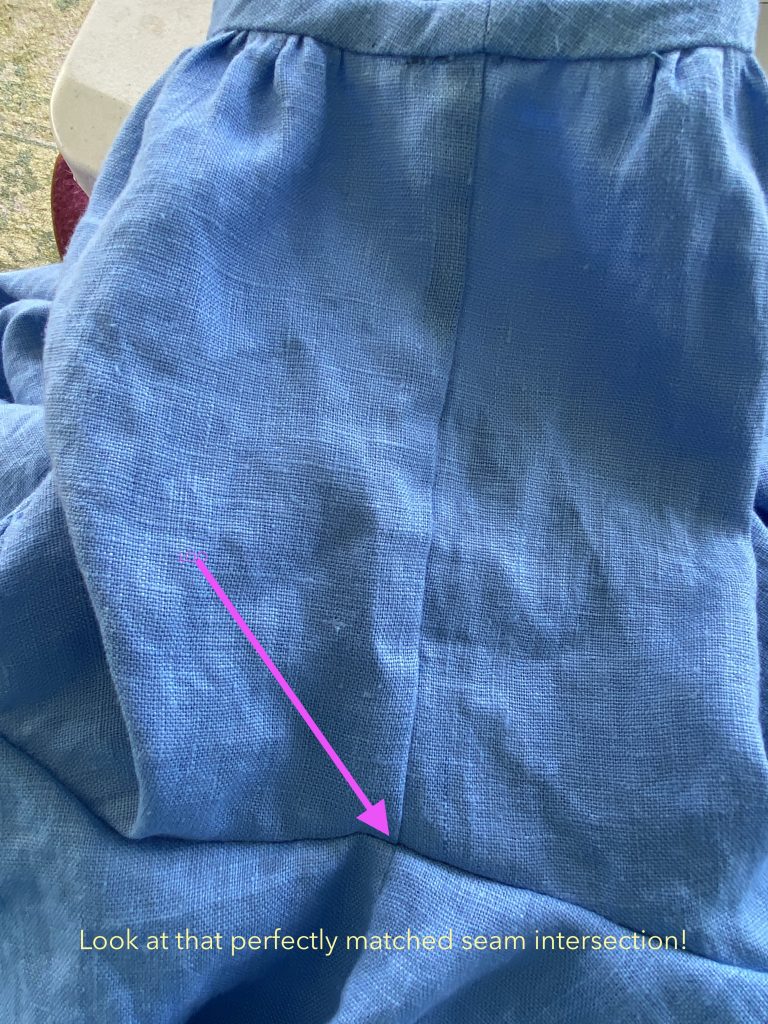
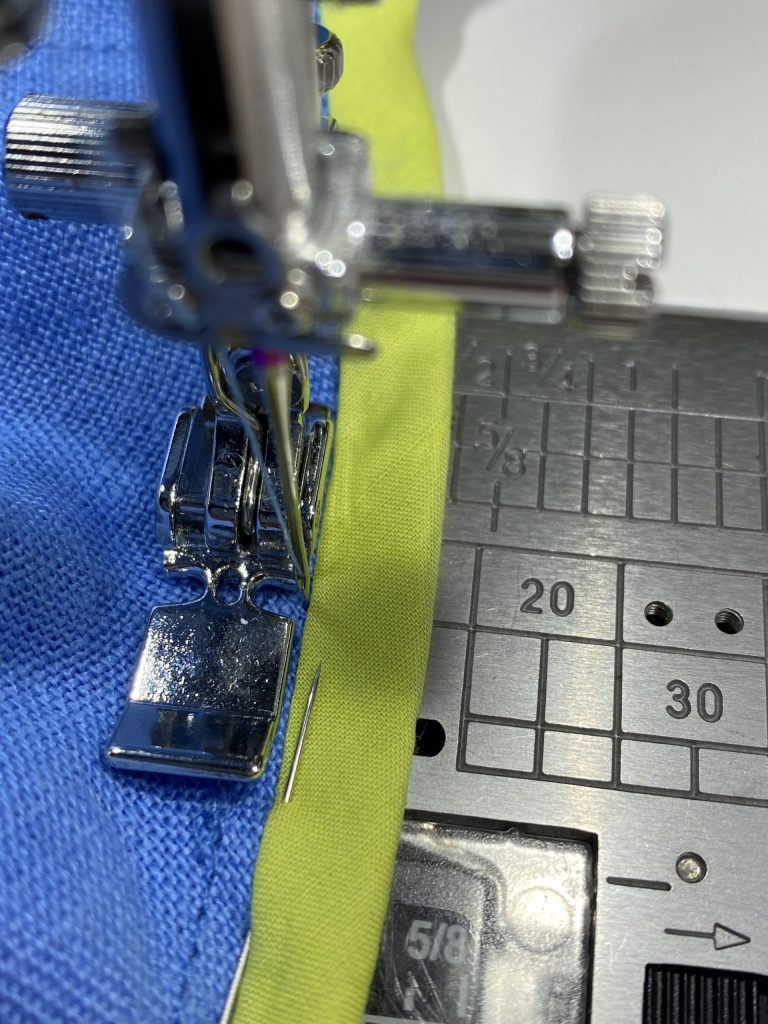
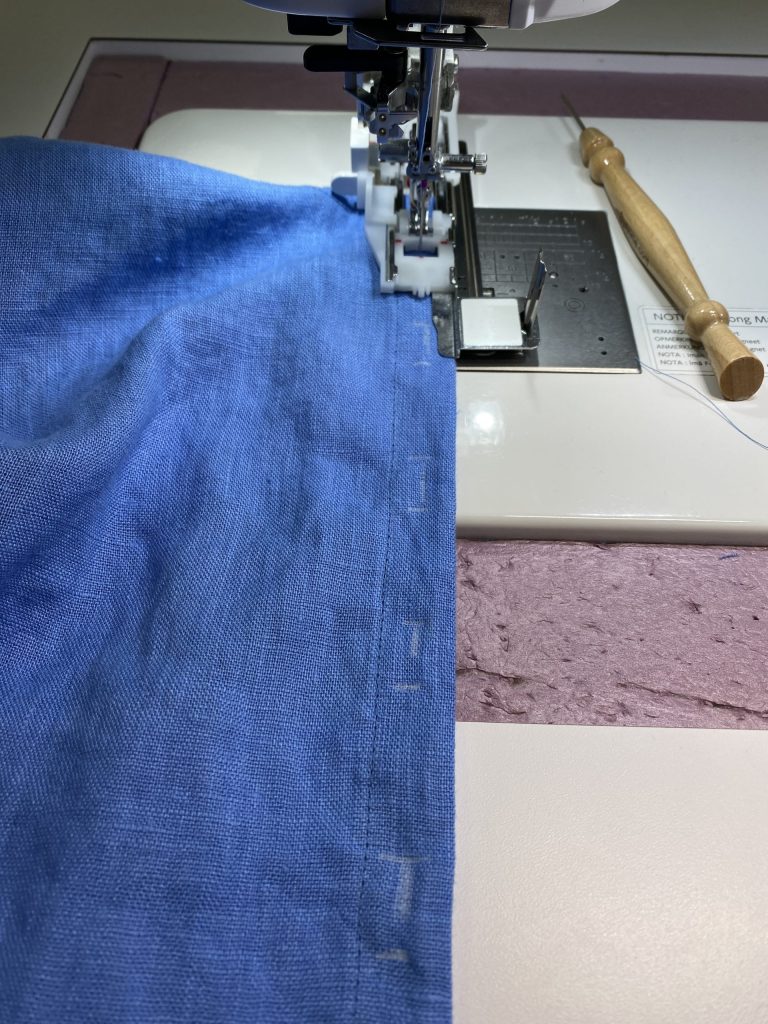
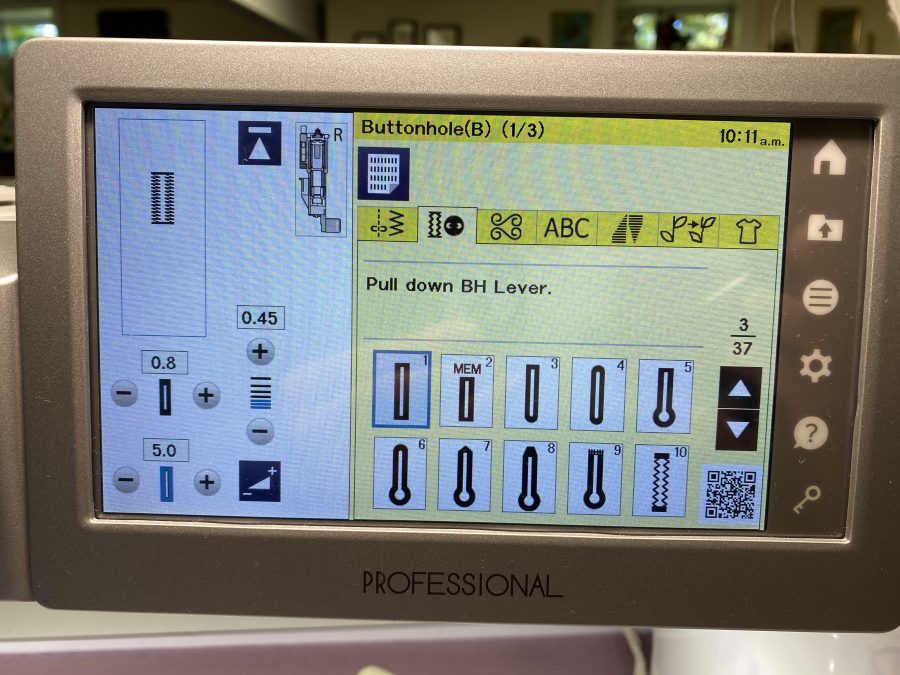
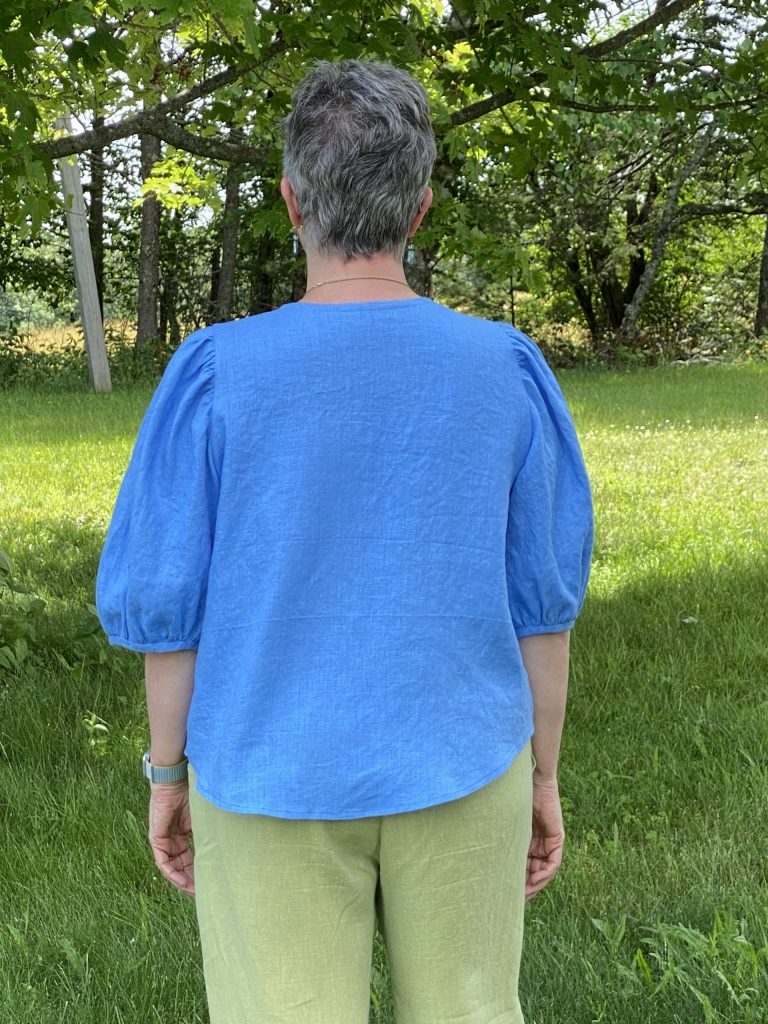
Here is the sleeve with the seam sewn and gathers gathered. I was a tad leery that the shoulders would be too narrow, but I did the right thing and made a toile (practice garment) out of cheap cheap cheap white fabric, and the sleeve seam is indeed set in from the shoulder point–this helps the gathers get that nice rounded puff! For the hem, at the top of the next photo, I sewed a linen bias strip to the right side, turned to the inside, and hand-sewed it into place. LOOKIT that perfect match! On the first try no less! Once the sleeves are sewn to the bodice, you’ll need to finish the raw edges. The gathers in the sleeves make it too thick for a French Seam, so I chose to use I used a bias edge finish similar to a single-fold bias binding on a quilt. On the neck, the bias was entirely folded to the inside of the garment. Here, you stitch the bias strip of fabric–a lightweight cotton lawn in lime green–to the seam, wrap it around the raw edges, then stitch in the ditch to secure it. I also managed a perfect join on the bias for the “cuff.” Note that the pattern has a wide opening for the bottom of the sleeve–way too wide for the size of my arms. I gathered it up more, making sure it still moved smoothly over/around the elbow, and just made mine narrower.Covering up the raw edges where the sleeve joins the body. Again I’m using the zipper foot. For the way my eyes and brain work, I get the needle closest to the edge of the bias using the zipper foot and moving the needle as far right as it goes. Keep a hawk eye on your stitching because it is all too easy to wander and veer onto the bias.Janome’s automatic buttonhole foot (available on select models including the 9450 and M7) is amazing. You set the button into the back and it picks the perfect size. You can fine tune it if the button is thick or thin. ALWAYS to a test-stitch on a scrap (using the same interfacing and number of layers). You can see I have carefully marked the center of the button holes plus the start and stop lines. The Janome foot has a metal base plate that keeps everything flat and feeding perfectly. Here’s a video of it in action!
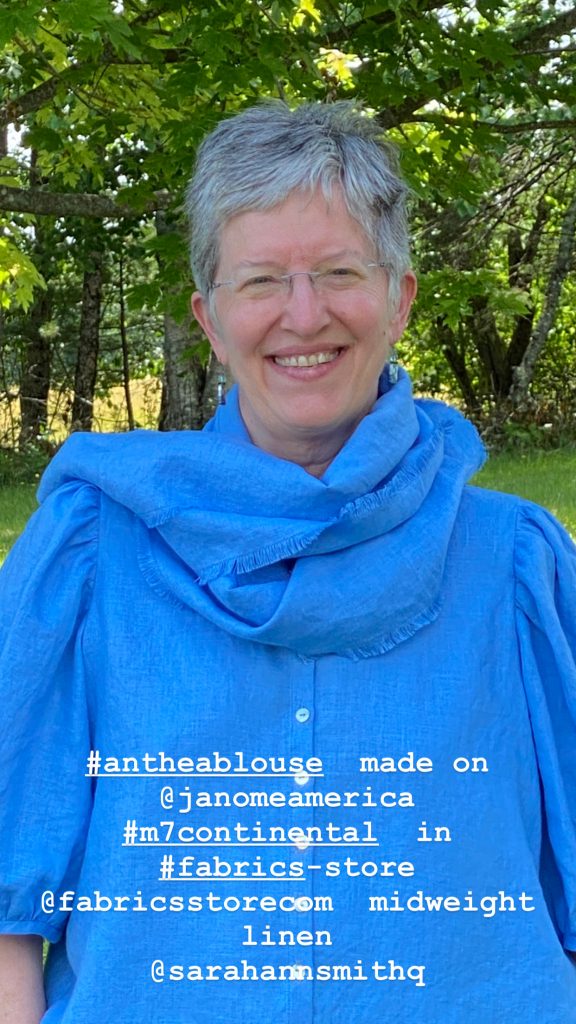
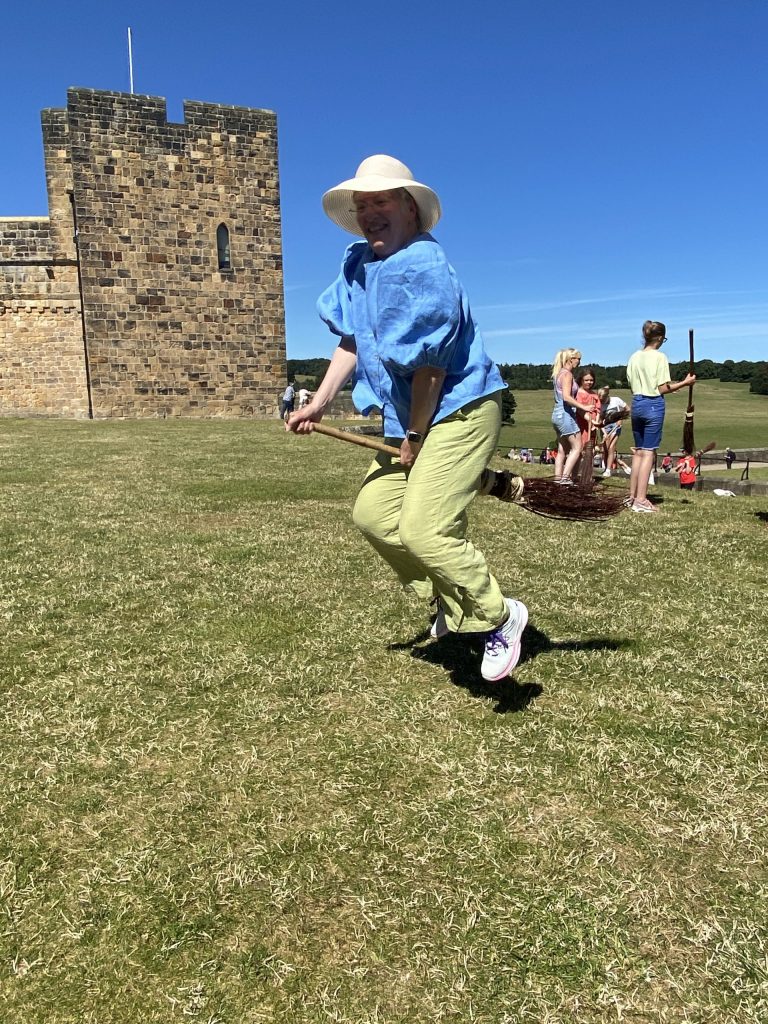
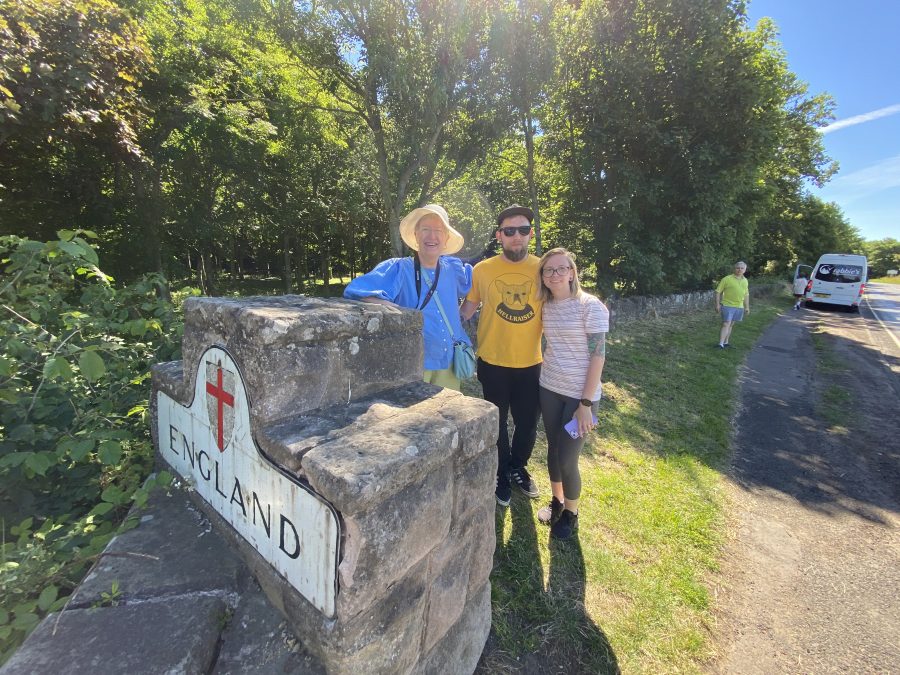
You can subscribe to my YouTube channel by clicking on the YouTube link (bottom left) and then following the subscribe button on that site, I don’t post often, but there are some useful videos there. Or just click here to go to my YouTube home page. This is the setting I used.Worn tucked in with a linen skirt in gray. Blouse fabric is the IL-19 5.3 oz linen from Fabrics-store.com. Skirt linen is the Driftwood Linen from Fiddlehead Artisan Supply near me in Belfast, Maine; I bought the Brumby skirt pattern there, too. Yes, they do online / mail order!I had some leftover linen, so I made a scarf, too. I sewed a narrow zigzag on all four sides, then carefully frayed the edges. Here’s the link to the pattern again: Anthea by Anna Allen.You can also wear the blouse out–it has a narrow 1/2″ hem. You can even wear it to Broomstick Riding Lessons (at Alnwick Castle this summer)! Funnest photo and time ever! And you can also wear it after you have walked from Scotland to England—all the way across a 100 foot long bridge! With my oldest son and DIL on a trip of a lifetime.
Well I can’t believe it has been half a year since I blogged… that tells you how crazy busy this summer has been. All good stuff, but all at once. I am looking forward to being HOME for three straight months once I return from Houston / International Quilt Festival where I’ll be teaching again. I will try my best to be back before the end of the year…like maybe even in a month?
Hi again! A friend showed me a photo of a quilt from another online group and – coincidence! – I said Oh, I know who that is! Because there you were, wearing your pretty blouse! Truly the world is a small place.
Enjoy Houston, I’ll look forward to hearing all about it!
Thanks so much and yes… the internet has been great for bringing like-minded creative souls together from all over the world! Thanks for writing, Cheers, Sarah
[…] flannel, I didn’t use this technique on this top. But I DID use it on my Anthea Linen BlouseAnthea Blouse in Sky Blue Linen which I blogged about here. This is a picture of the side seams on 5.3 oz (middle weight) linen […]


October 8th, 2022 at 2:30 am
Hi again! A friend showed me a photo of a quilt from another online group and – coincidence! – I said Oh, I know who that is! Because there you were, wearing your pretty blouse! Truly the world is a small place.
Enjoy Houston, I’ll look forward to hearing all about it!
October 8th, 2022 at 3:41 pm
Thanks so much and yes… the internet has been great for bringing like-minded creative souls together from all over the world! Thanks for writing, Cheers, Sarah
March 3rd, 2023 at 10:10 am
[…] flannel, I didn’t use this technique on this top. But I DID use it on my Anthea Linen BlouseAnthea Blouse in Sky Blue Linen which I blogged about here. This is a picture of the side seams on 5.3 oz (middle weight) linen […]