email Youtube

Home
Galleries
Blog
Workshops & Calendar
Store
Resources
About
Contact

Author Archive

Wupatki

Friday, September 10th, 2010


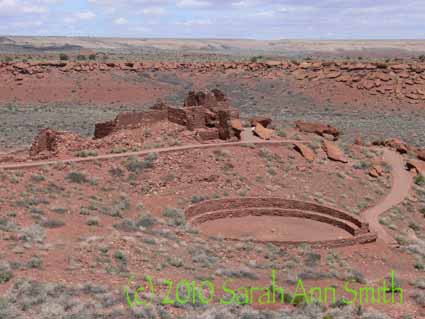
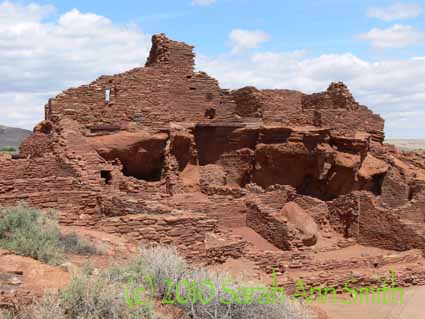
The ruins and ball court as seen from the short trail from the visitors center.

At long last, this is the final of my Arizona posts.  There was so much to see on our family vacation after teaching there…LOTS of fodder for quilts, quilting designs and color inspiration.  My husband loves to research things on the internet, plan vacations, and do all that sort of thing.  (I’m more the sort that would plan about half of it, get the hotel reservations, then rely on serendipity about where to go and what to do.)  Well, while waiting for Paul and the boys to arrive in Flagstaff, *I* got on the internet to see what was there to see (yes, late in the game I know).  I read about the Wupatki ruins, which are in the middle of a fairly large, empty space northwest of Flagstaff. Fortunately, they were near Sunset Crater which Paul wanted to see, so we were able to add this stop, which ended up being one of the highlights of the trip for me.

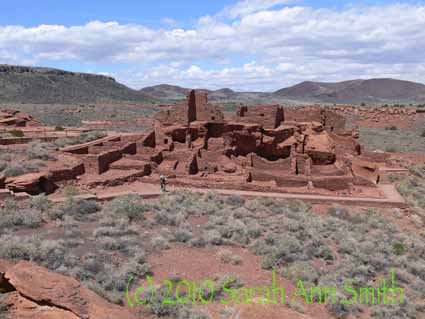
The view of the ruins as you walk from the visitors center; to the right are a ball court and another outdoor facility probably for games and rituals.

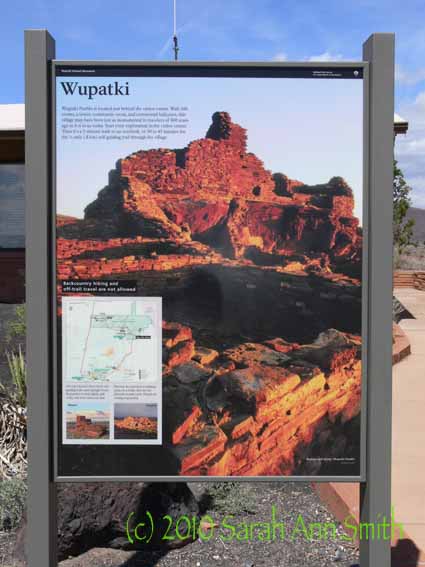
The National Park Service summarizes it this way:

Less than 800 years ago, Wupatki Pueblo was the largest pueblo around. It flourished for a time as a meeting place of different cultures. Yet this was one of the warmest and driest places on the Colorado Plateau, offering little obvious food, water, or comfort. How and why did people live here? The builders of Wupatki and nearby pueblos have moved on, but their legacy remains.

and:

The people who built Wupatki and other pueblos here were ancestors of the Hopi, Zuni, and other puebloan peoples of today. Archeologists recognize different cultural traditions based on differences in pottery styles and architecture. According to these classifications, most of the monument’s sites are called Kayenta Ancestral Puebloan; others are Cohonina, and Sinagua. But these are modern terms.  We don’t know what people called themselves or how different groups related to each other.

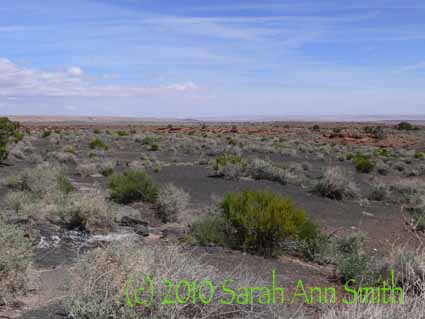
The NPS website tells us that there was more water then than today, but it still sounds as though it was a challenging environment.  We were there in late April, and it was already hot and dry:

The landscape as seen from the back side of the ruins: wide open and arid.

It was absolutely fascinating to see there ruins…with only a little bit of modern reconstruction and re-inforcement.  Imagine….these buildings have been there fore EIGHT HUNDRED YEARS!  Europe was in the Dark Ages… Columbus hadn’t “discovered” the North American continent… WOW!

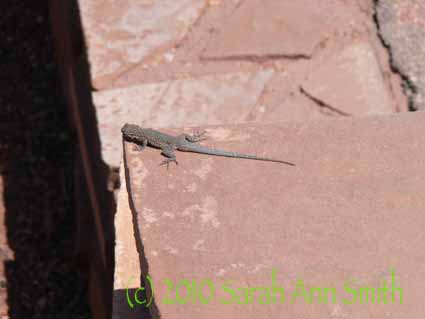
The boys wanted me to take a picture of the lizard:

Then more about the desert creatures:

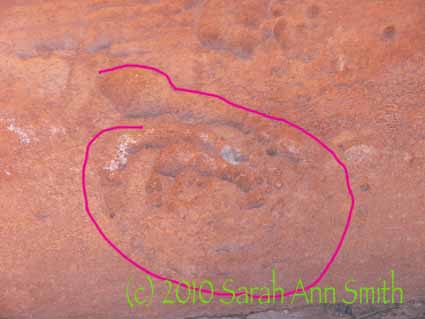
On the path down there was a petroglyph, a carving of a snake in the red stone.

The buildings fascinated me, along with the shapes and patterns in the stone:

a closer view

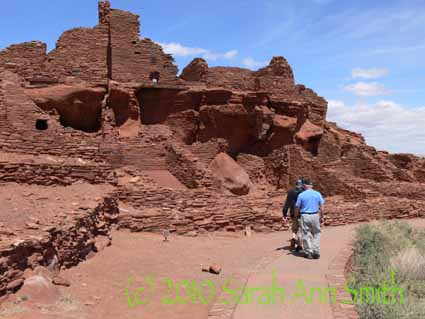
Paul & Joshua on the near side...

Look at the quality of the stone cutting, wall construction, shapes... and then think about quilts and design...oooh!

Bins for your pins are good, too

Wednesday, September 8th, 2010

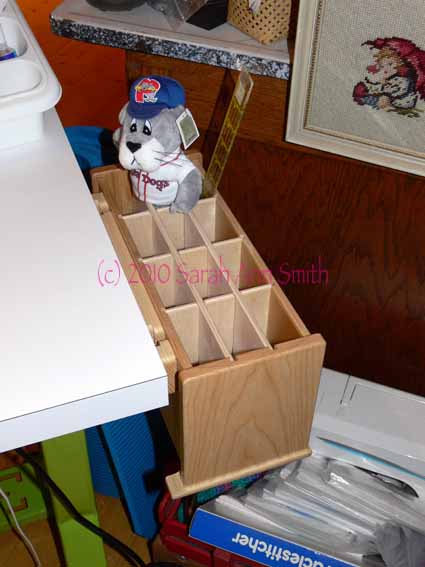
In addition to the new table and drawer unit, I added one other small but wonderful detail:  a portable caddy for my tools!

Slugger the Sea Dog (local minor league team mascot) keeps watch over the tool bin

If you don’t “do” the drop-down flaps on your Perfect Caddy, there are options for a number of bins that you can attach to the outside of your caddy.  Now, I have been using a 99-cent white plastic cutlery caddy from the local drug store to hold things like my seam ripper, brush (for cleaning lint), ruler, skewer, etc.  You can see the corner of the caddy on the top left corner of the photo above.  I knock it off the table WAY too often, spilling the contents that then roll hither and yon, leading to much swearing on my part while crawling on the dusty floor looking for errant sharp things.  Ahem.

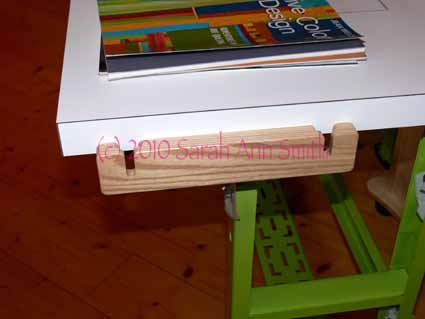
When I saw the Large Portable bin, I realized I had a solution, and one that looks really nice!  I called up The Perfect Caddy folks to add the bin, and yes, they could indeed sell me a second mounting strip:

To the right of where I sit at my new tables, I used some “L” brackets to secure this wood mounting strip to the edge of my table.  Notice those two “U” shaped things?  That’s  where these well-designed, secure pegs go; they stick out from the back of the portable bin (also with customizable inserts, just like the drawers) and fit snugly into the slots.  I can then MOVE the caddy depending on where I am sitting/which machine I use!   I can take the caddy over to the other machine (the one that I’ll buy next year), or set the caddy on my work table or by my spot on the sofa.  Perfect!

Well…almost perfect.  The Small Portable bin is too shallow to hold pencils, the large is so deep that they go down to be almost hidden.  I’m going to make inserts for some of the compartments for shorter items like the seam ripper so that they are above the surface, not down in the hole.  I’ve asked if they will make a “medium” bin which is a height between the two currently available.  They are thinking about it, but no plans.  Yet.  When they DO make a medium portable bin, I’ll buy one, re-assign the large one to paintbrush duty, and use the medium with the machine tools.  NICE!

Drawers are a good thing

Sunday, September 5th, 2010

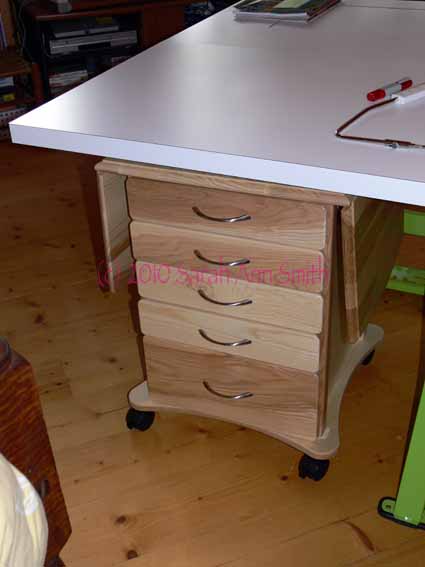
The one drawback to moving from a full cabinet to the K-base tables was losing my four small drawers.  I looked at the plastic things on wheels from the big box stores, things at Target, things at Ikea, and the GORGEOUS “Perfect Caddy” from the folks at Hinterberg…you know them, the ones who make the beautiful quilt frames and hoops.  I decided that thanks to many folks (you know who you are out there..>THANK YOU!) buying my book, since I could actually afford something nice, I was going to GET something nice!  A little nudge from friend and quilter extraordinaire Pat LaPierre MacAfee didn’t hurt, either LOL!

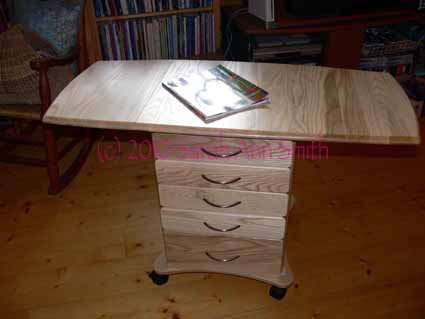
I didn’t see exactly what I needed:  something that would fit UNDER my new tables.  I figured that including the wheels, the entire unit needed to be 27 inches or a little bit shorter.  I called the 800 number, explained what I was after, and the nice woman looked at their units and said that I could fit one with six tiers in that space.  I selected four shallow and one medium-depth (takes up two spaces) drawers, then added the drop-down flaps on either side.  More portable horizontal surfaces … yeah! The quilting book on the top gives you an idea of size.

If I unlock the casters and pull the drawer unit out, I now have (presto!) a nice extension for working on very large quilts just under my elbow!

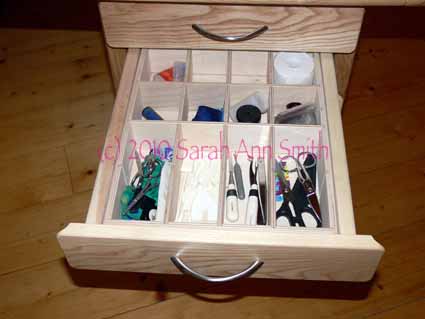
These pieces are SO beautifully made, and for a modest $10 you can add customizable inserts to organize everything.  Why do plastic when you can have wood?

These are HEAVY–my main unit came in a large box that was over SEVENTY POUNDS!  Had to enlist my strong hubby to get it upstairs!  Thanks Pookie! The assembly took a while, but was as easy as could be.  The holes are PERFECTLY drilled and the instructions clear.

Sigh.  Contentment!   Pretty things, useful things, a nice studio.  How nice to find a good company with a good product willing to customize for you–here’s to supporting industry in your own country and rewarding folks who do good work!  Thanks Hinterberg/Perfect Caddy!   Now…to find TIME to quilt!

New Sewing Table and Janome Horizon 7700!

Thursday, September 2nd, 2010

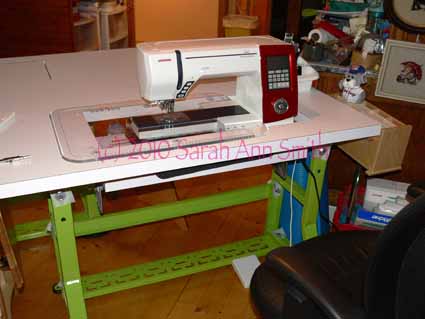
Wowie zowie!  Having a little bit of income and a  wonderful sponsor is, well, WONDERFUL!   Janome has come out with an upgrade to my beloved Janome 6600, and they were kind enough to send me a Horizon 7700!  Plus I had two new sewing tables built…what a way to start the new school year!


To backtrack a bit, when we moved to Maine in 2004 and I lost my home-dec-sewing name-recognition and income base, I decided if I was going to try to make a “go” of it and earn some income from quilting, that was the time.  Shortly before that, as an utter unknown with maybe ONE publication credit to my name, but three things in Houston in 2003 (the Journal Quilts, a quilt in the juried show and another in a special exhibit), I approached Janome because I really wanted the 6500 but couldn’t afford it.  I asked if they had a teacher/artist loan program, and if so if they would consider me.

To my utter astonishment and delight, Janome America said YES!  It has been a great relationship ever since, and they have generously upgraded my machine first to the 6600 then the 7700!  So MAJOR THANKS to Janome America for their continued support…. I’d say all these great things about the machines if I had paid full-price—they are a lot of value for the quilting dollar!  So here it is:

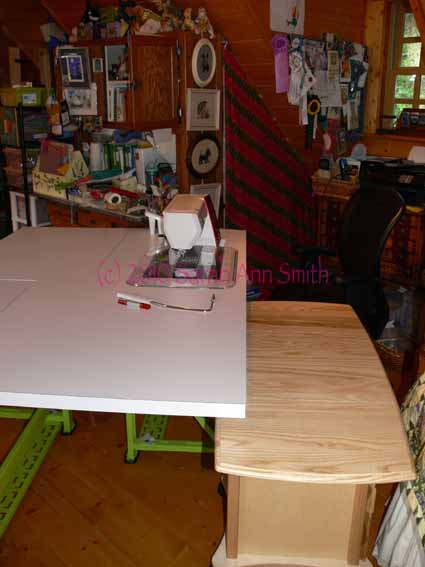
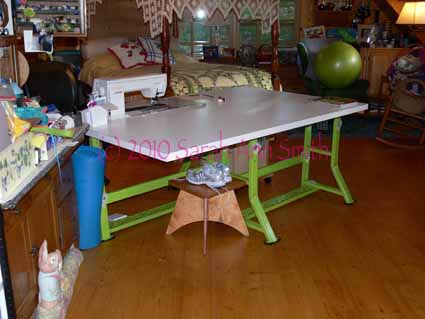
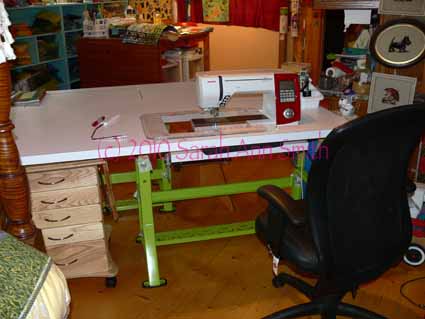
Yes, that’s a NEW table!  I had a Sylvia 1500 cabinet that I loved, but the opening was too small for the extended harp of the 7700 and couldn’t be enlarged without re-making the entire cabinet.  My friend Kate (THANK YOU!) wanted to buy my cabinet, so I decided to get new tables.  At first I thought I’d buy something from Tony at Sew Perfect Tables, but it turned out I’d lose a lot of length to the left of the needle compared to what I was used to.  So I asked Tony if I could purchase just the K-base (so-named due to the shape of the legs) used on his tables and industrial sewing machines.  He said yes, so I bought two (I’m hoping to add an HQ16 sit-down mid-arm to my arsenal next year) and had them painted lime green at New England Motorworks (I think there was a Ford Pick-up  years ago that came in this color!).  Thanks to Tony and NEM!

Then I had John Bailey of JB Builders (dad to a friend of my older son’s, builder and carpenter…and the guy who build those great shelves for my fabric, here — in the third photo down, on the left, in aqua!) make the tops to my specification.  Each tabletop is 24×60 inches, with a 12 x 27 inch opening for the machines.  The shelves for the machines are adjustable and can be raised to flush with the surface of the table (to collect more piles of stuff?).  The opening is so large because the HQ16 sit-down is a smidge over 25 inches long, so this leaves room for plugs, etc. I wanted the tables to be white, so white formica it is!  The two tables latch underneath when pushed back to back, giving me a ginormous 48 x 60 tabletop.  Eventually, there will be a machine in two of the corners, acting as a “stop” for a quilt sliding off the far corner.  Perfect!

Here’s a wider angle view of the sewing side of the table (more on the drawer unit in a future post):

You can just barely see the second sewing machine shelf on the far left corner as it is raised even with the surface.  The total cost for all this custom work ended up being just about $200 more than if I had bought two smaller tables from Tony–I am THRILLED!  So thanks to Tony, John B., NE Motorworks and Janome.  I am SO looking forward to sewing and quilting with my new set-up!

Liberation Day!

Tuesday, August 31st, 2010

Moms across Maine are celebrating:

It is Back To School Week!!!!!!!!!!!

Every year I take a picture on back-to-school day.   They are getting less and less cooperative each year.  Here is the older one, this morning–looks thrilled, eh?

And the younger one, who started yesterday (he cooperated a bit after stern words from his dad):

And this morning they couldn’t even stand on the rock next to each other for a nanosecond…this is all I got (notice the death-glare from the teenager LOL!):

I waved goodbye, wished them a wonderful day, and punched my fist into the air in elation as I entered the garage…WOOOT!   I am taking the WHOLE DAY off (after I finish this blogpost and one for the next post) and sewing! WOOT WOOT WOOOOOOT! Normalcy (well, what passes for it in this house) returns!