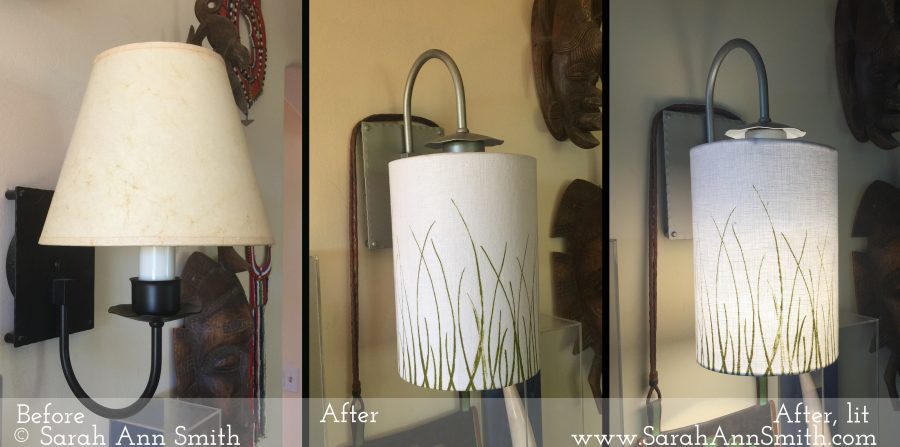
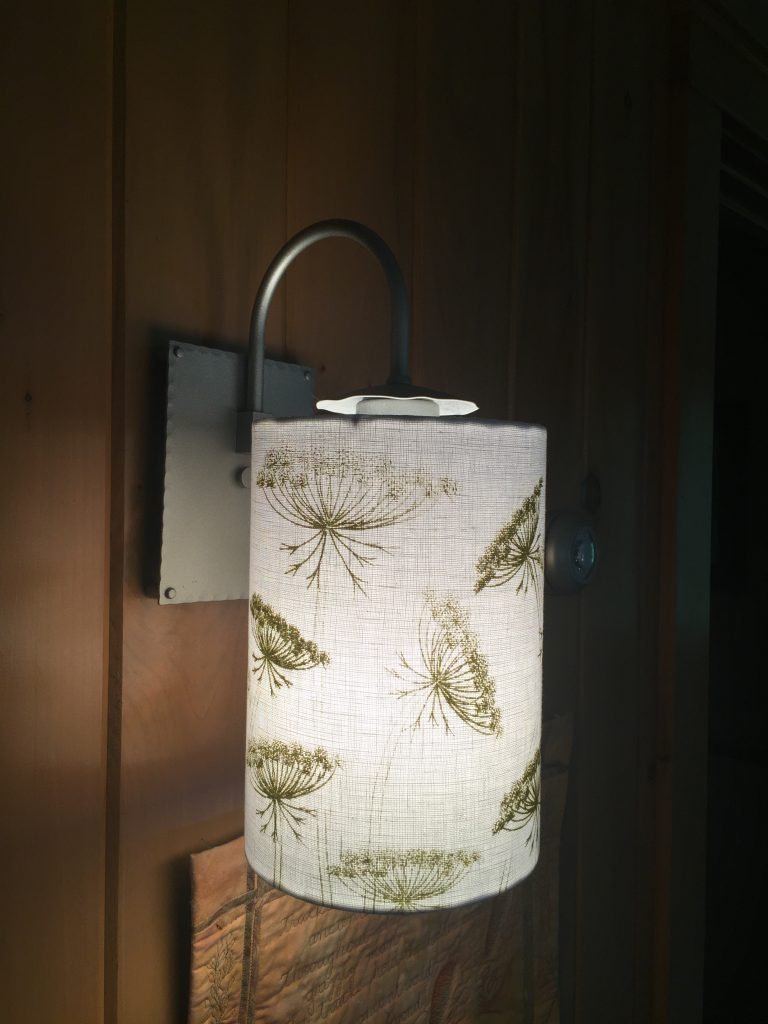
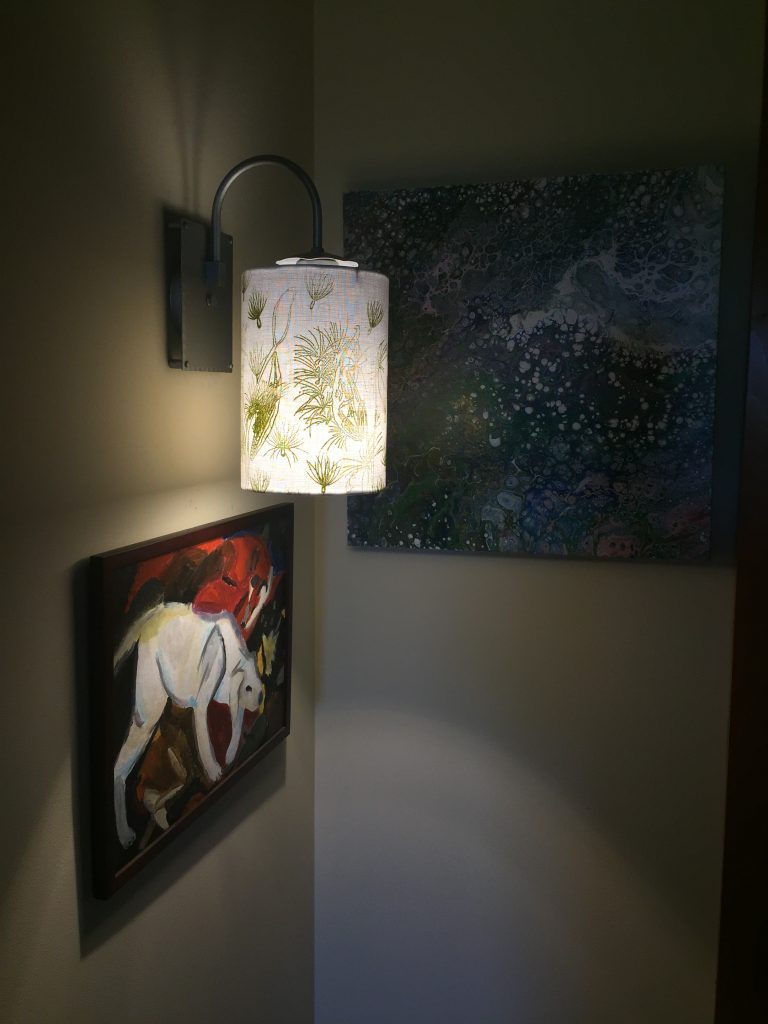
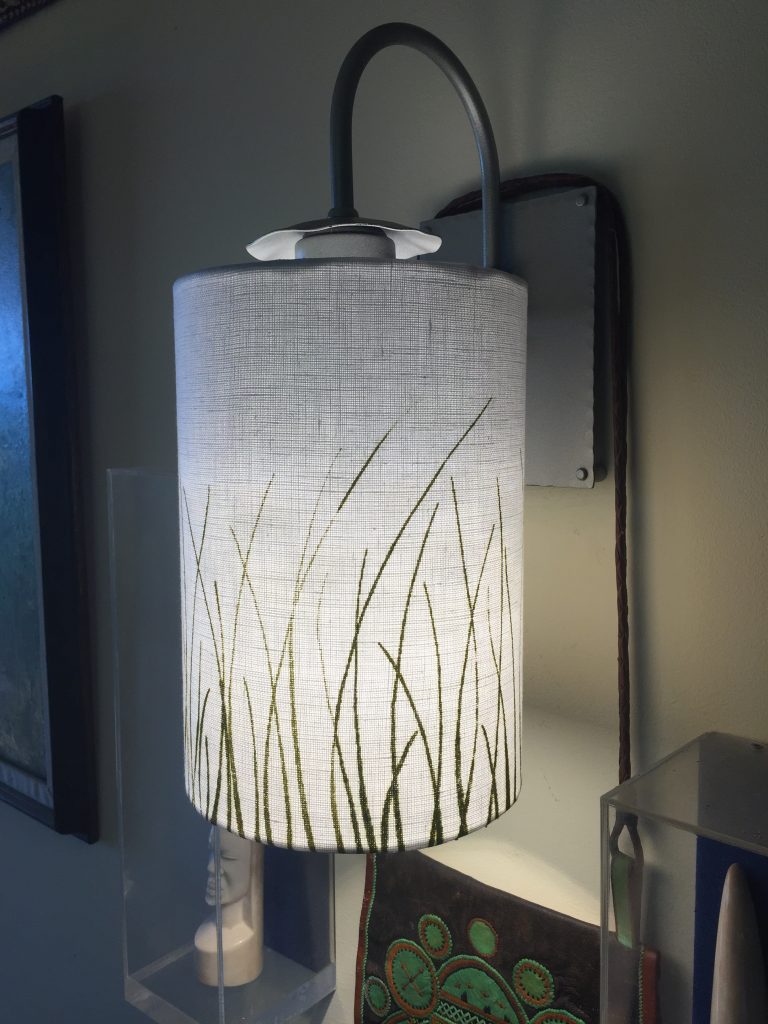
From old to fabulous! Look what a little spray paint, thermofax screens and textile paint, linen and ingenuity can do! Yes, those are the SAME fixtures!
The sconces in our house have made me crazy for years. The shades were made to fit on the old rounded incandescent bulbs…the ones you can’t find any more. The wires didn’t fit well on any of the smaller bulbs that suited the size of the shades and the fixtures–they were always tilting and crooked. And the “old West” look was SO not me! It was Candy Glendenning of Candied Fabrics who got me on the right track. Last year, Candy posted some lamps and shades she made using her wonderful indigo shibori fabric and blogged about them here and here. So I plotted and thought about it. I knew I wanted white, green paint mixed to my favorite shade, my own thermofax screens, and NOT black.
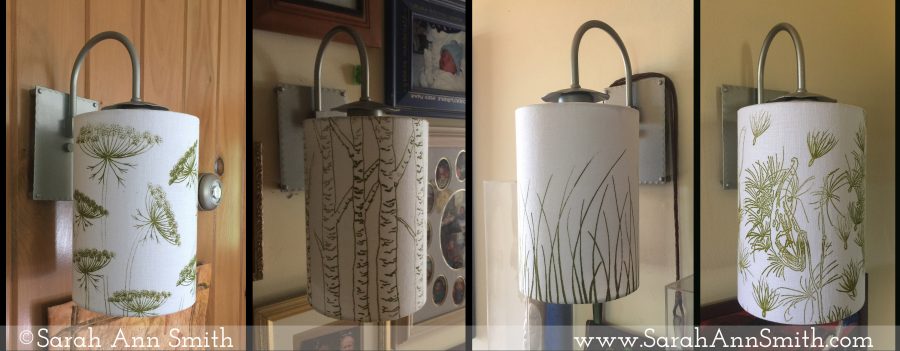
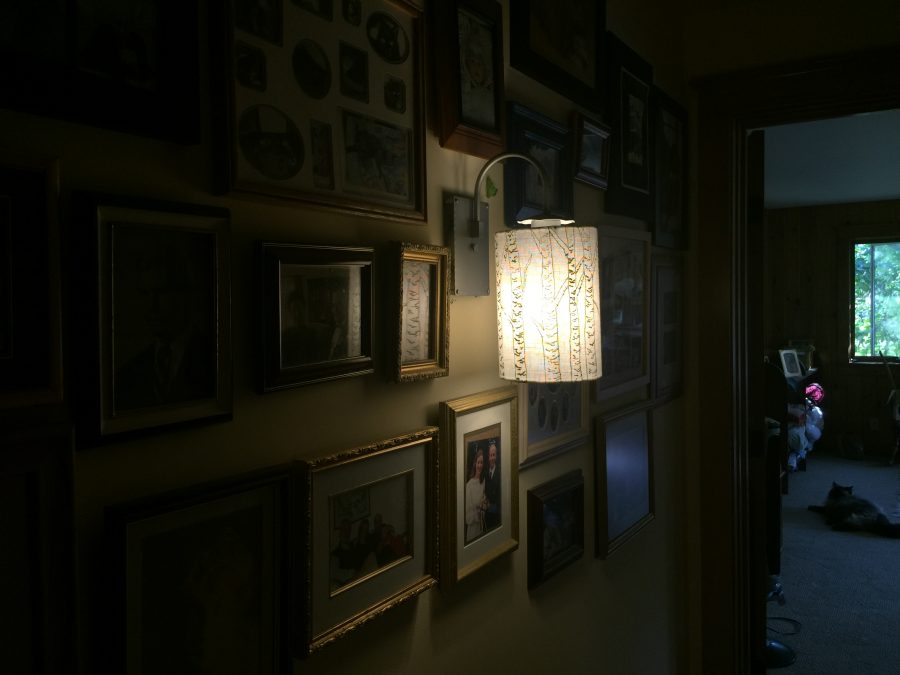
Here are the final shades, then I’ll share the process:
Left to right: Queen Anne’s Lace, Birches, Grasses, and Milkweed
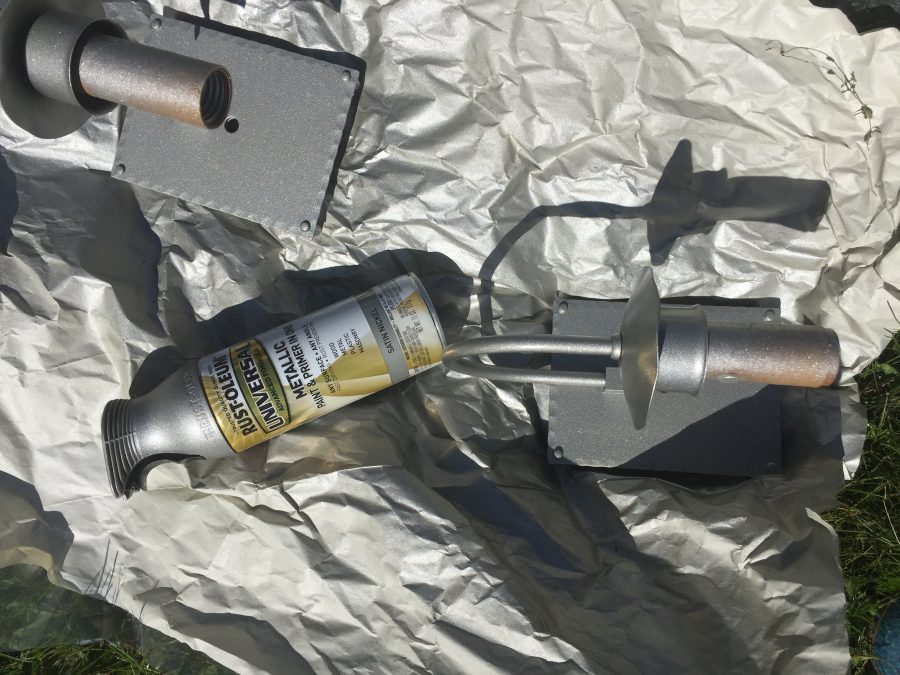
First thing I needed to do was see if I could spray paint the fixtures. Before we moved into the house, one had been damaged and removed (but kept in the basement). I bought some Rustoleum in Satin Nickel and it worked! I didn’t even have to sand!
I was delighted at how good the fixtures looked as Not Black. Once they were on the ground, I also realized I could turn the fixtures upside down and that fluted frill on the bottom looked sort of like a Japanese temple roof line. Sort of. But at least better than as a candle holder!
I had planned on using a cotton-linen blend for the shades, but when I went to Fiddlehead Artisan Supply (quilt and art shop to die for and only a half hour away!) they were temporarily out of the blend, so I bought some coarser weave pure linen to try. Then I started searching out stuff to make new shades, starting with Candy’s source, I Like That Lamp website. I ordered the styrene–the rigid stuff to which you adhere the fabric–and glue from that site, but her rings only go down to 8″, and I wanted a 6″ for my sconces in the hallways. I found some 6″ size here, on Etsy.
Next, I needed to see how the linen would print. Using my existing printing board, the prints were blobby–the surface had too much squish in it for the somewhat more open weave of the linen (as compared to quilting cottons). So I made a new printing board with less padding, and learned that using paper towels under the linen did not affect the quality of the print and prevented less of the ink from soaking in to my new board.
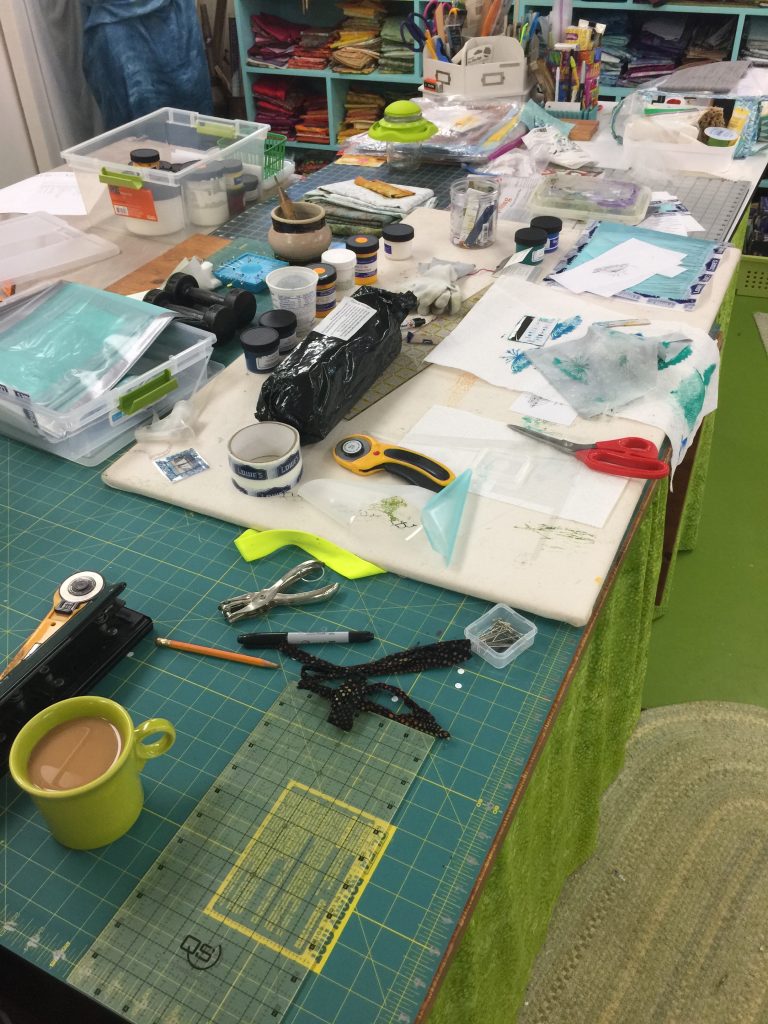
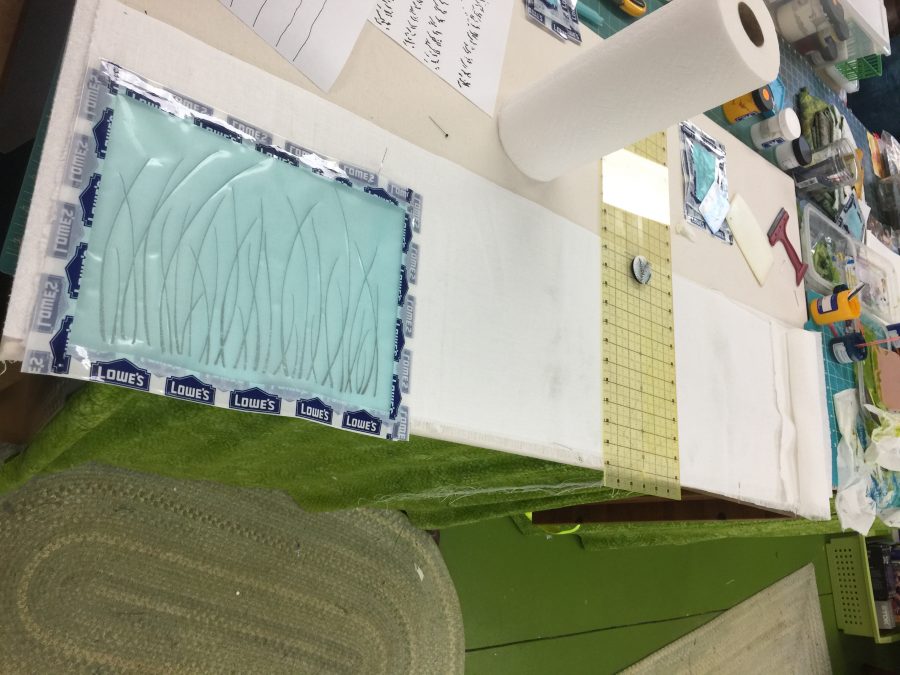
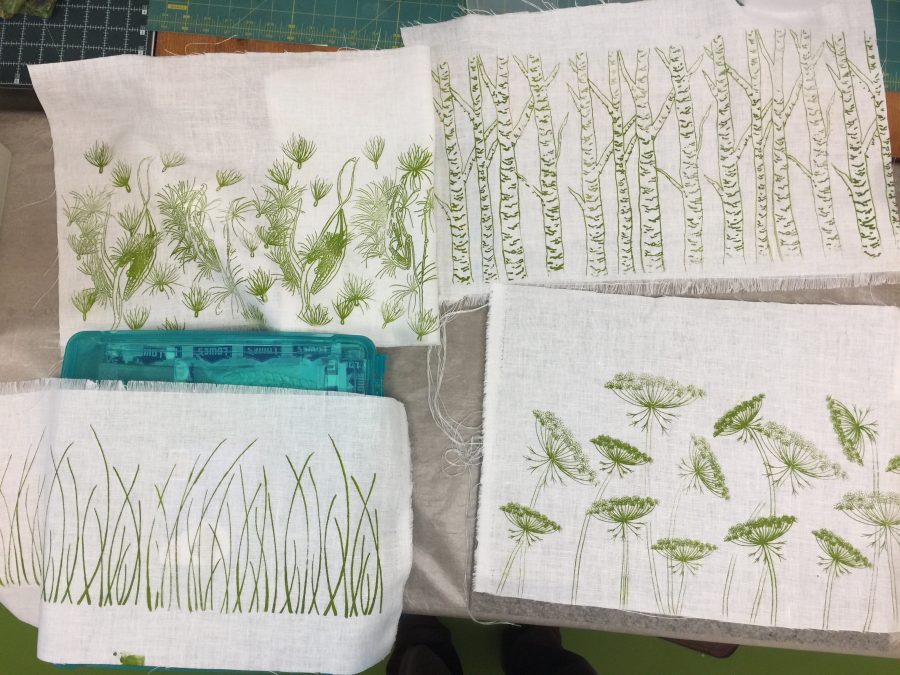
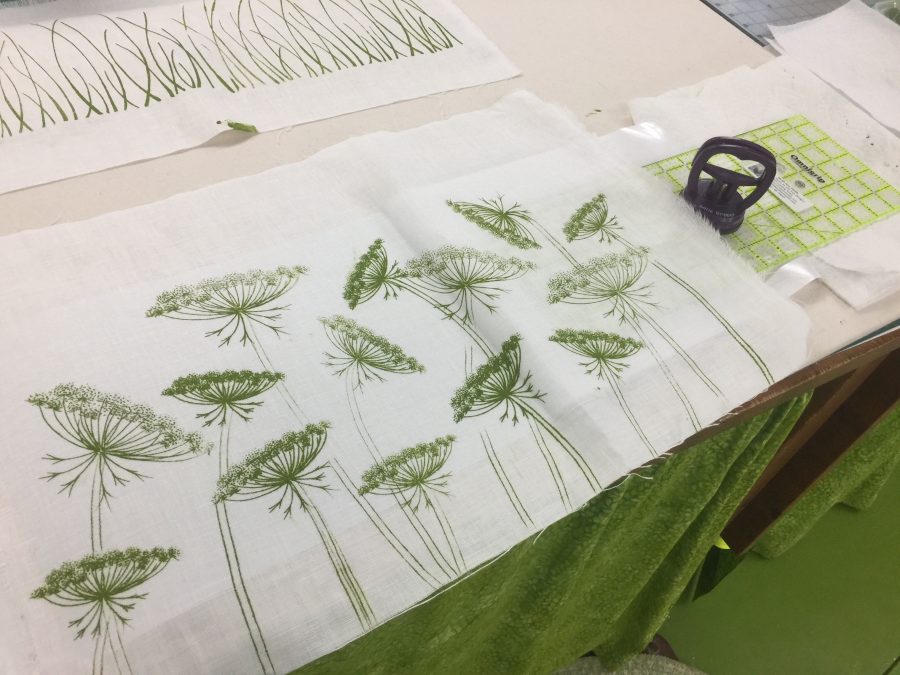
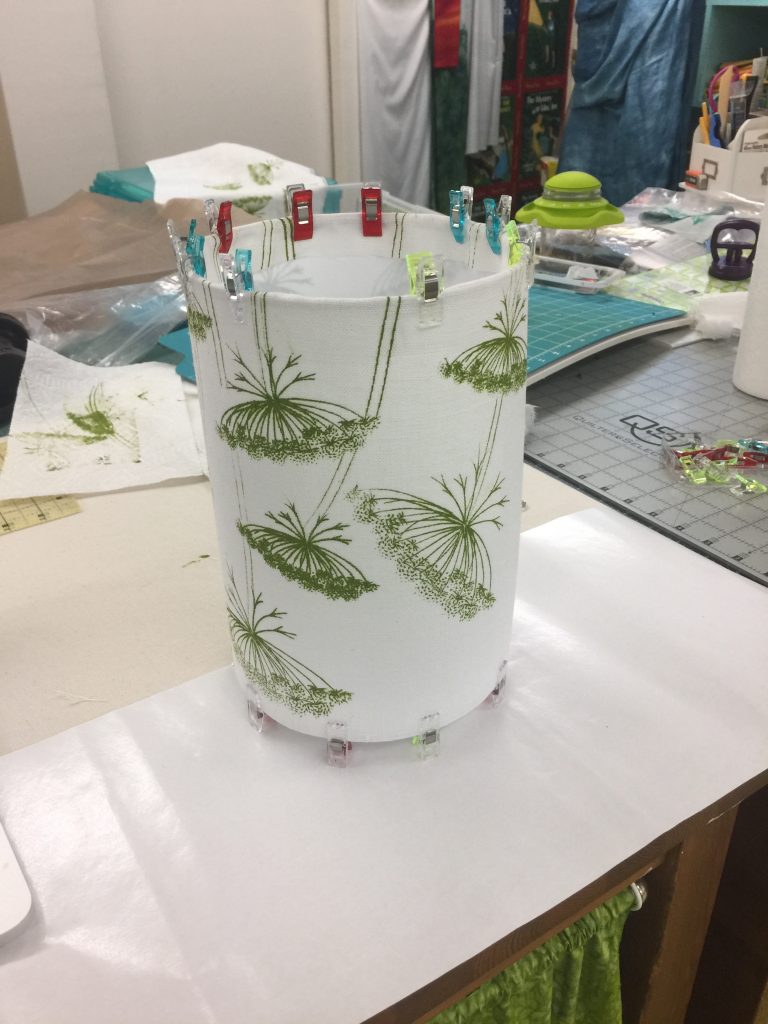
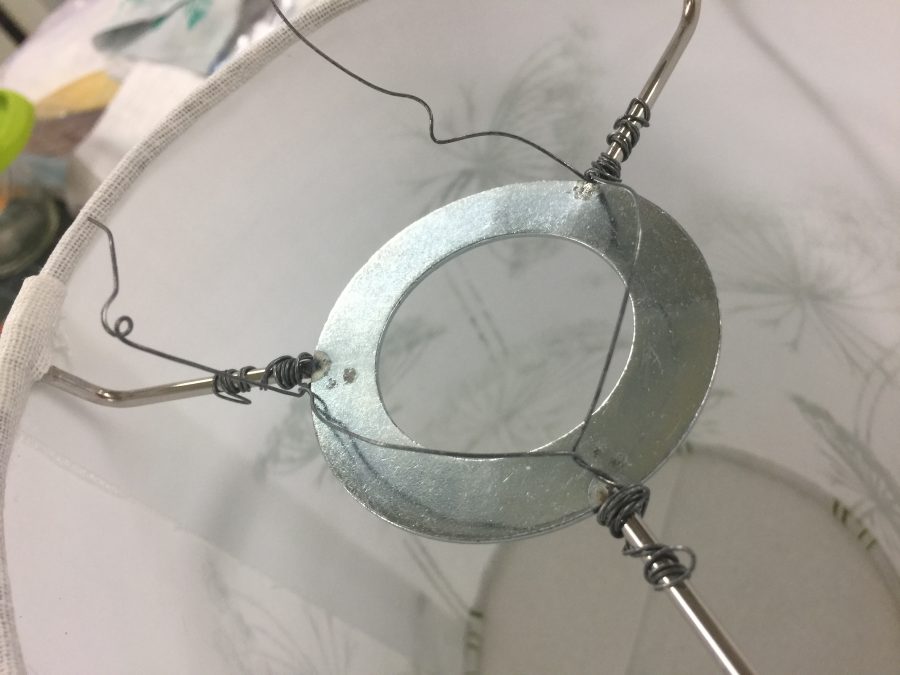
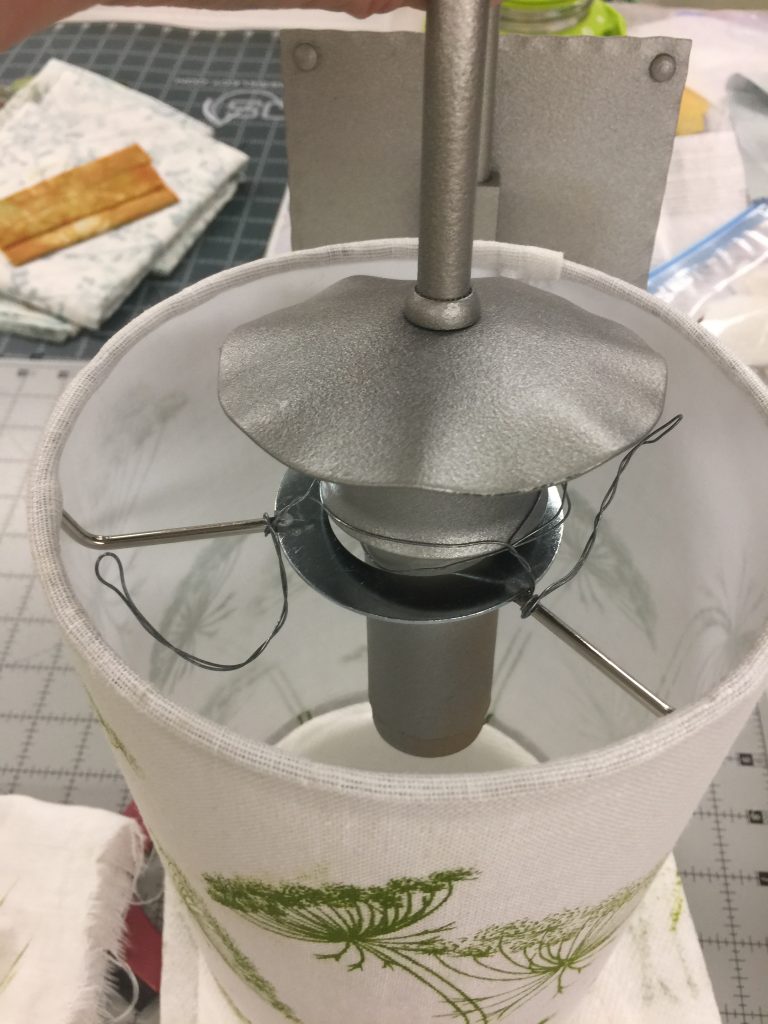
Mess-making in process. I used ProChemical and Dye Opaque and Transparent textile paints. I sell some sets in my store (just scroll down) plus you can buy larger quantities and more colors directly from ProChem. The screen/design for grasses is new and I can tell I will use it often. I cut my linen into lengths from selvage to selvage, then marked how long I needed with a pin. If I goofed, I could keep printing and avoid an oops spot. The Milkweed thermofax screens used in the upper left piece I had already made, but the others are new. All are drawn, not a manipulated photo (which is another process I use). So far I am only selling the milkweed screens (here), but if anyone is interested in the others let me know.At least in my universe, printing always involves an oops and some “letting it go”, but I did end up re-doing the grasses because I had printed them too high on the strip–the bottom of the blades of grass needed to be at the bottom edge of the lamp. I also made some real mistakes on the Queen Anne’s lace, so re-did them, too. But I will use the not-bad parts of those for something else!I Like That Lamp website has some excellent tutorials. Instead of using binder clips, I used Wonder Clips the same way and they worked beautifully. I did have some fuss and bother getting the glue to hold as I wrapped the edges around the wire rings, probably because the glue oozed out between the weave. However, once set, you’d never know. They look well done if I do say so myself.Because my fixtures are OLD, and I didn’t want to have them as candles with the ring sliding down around the tube to rest on the metal, I needed to get creative with how I would suspend the shades. Wire!It’s not the prettiest solution, but it works. And it doesn’t show, best of all. Because the wire fitter is recessed down below the top of the shade, the wires that hold the shade to the fixture are hidden (unless you are really, really tall). Those tails were wrapped around the spider-legs of the ring. The Queen Anne’s Lace is in our bedroom.The birch trees are in the back part of the hallway, in the “Rogue’s Gallery” (aka family photo wall) The milkweed is in the front portion of the hallway, with Eli’s middle school art project underneath and a pour painting by my friend Deidre Murphy on the right.The simplest is perhaps my favorite and is the sconce we see from the living room, the waving grasses. When we first moved into the house there were shrubs that grew up and blocked the view out the windows at the far end–not great. But in the afternoon light they cast lovely shadows on that wall, which inspired me to make this shade.
Some good news: in August 2020 I will be teaching a 3-day surface design workshop at ProChemical and Dye in Fall River, Mass. (about an hour or 90 minutes south of Boston, minutes from Rhode Island) and we will cover the thermofax and paint technique.
The whole thing worked SO WELL that I am thinking I would like to make a set of seasonal shades for the floor lamp in the living room…one for Christmas/Winter, another for Spring, Summer and Autumn. I need to do some patterning as this lamp looks best with an angled shade, not a drum shade, and they are harder to make. I need to learn if I can do it with standard 44″ wide fabric given the flare on the shade. Stay tuned for more house fix-ups! Hope you’ve enjoyed this detour from the usual art quilts and family life.
Hi folks…a blogpost that is short in length for once! I took this quick video on Saturday before the Mancuso World Quilt New England Show closed so that those of you who don’t live in the vicinity could enjoy the exhibit. The idea is to show my growth and development as an artist, so the quilts you see at the start are before my style and artistic voice have emerged and refined, all the way up to my most recent big quilt (well, 36″ square) Rose Hip.
Here’s the link to the book I mentioned, The Art of Sarah Ann Smith…so far. I put the book together in 2017 for my Rising Stars exhibit at International Quilt Festival Houston. It has all but the 2018 and 2019 works in it, additional quilts, some tidbits and tips, and a bit about me. It’s available as a softcover book or a pdf.
There is a chance that this exhibit will be traveling in early 2021, so stay tuned. Once I have a signed contract, I’ll share the where and when details!
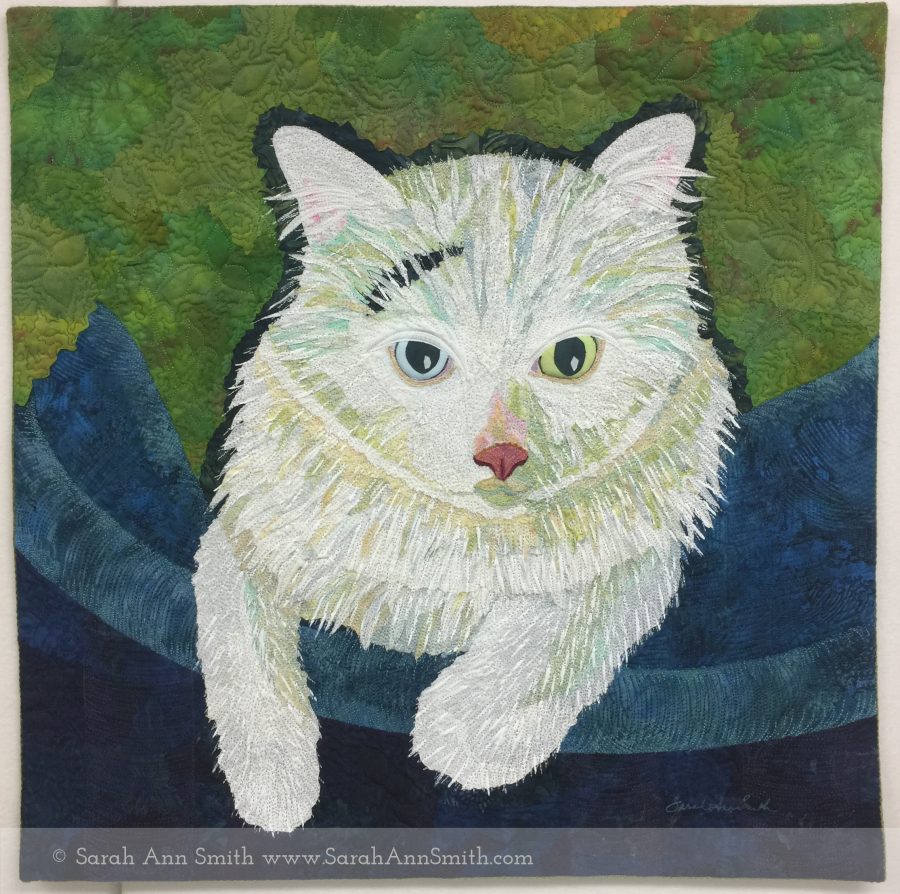
Boo’s portrait is the third part of this trio of quilts. I had considered doing a self portrait, Sarah and her muses, with the selfie for my local Coastal Quilters challenge due next May. But then hubby, who has never ever asked me to make an art quilt, said when he saw the ones of Yoda and Widgeon, “you should make one of Boo, too.” Boo, you see, is his Very Special Cat. So I did that instead. Much nicer than a selfie! And it turns out the portrait challenge doesn’t have to be a selfie, and can be a critter–way better!
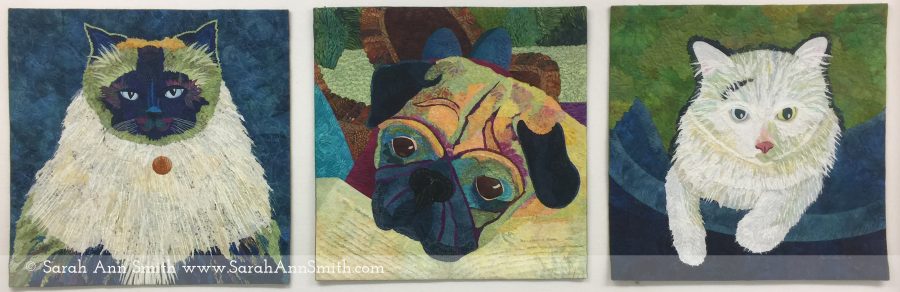
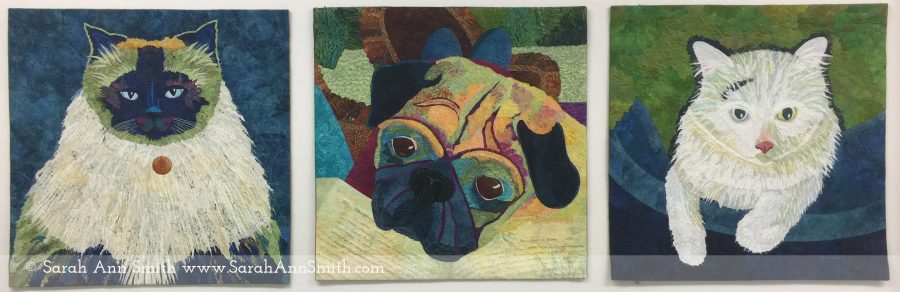
Just to remind you, here are the three portraits in this series on La Familia Smith (furry edition). Each is a 20″ square and they are debuting at the Janome Institute this week! I made them in thanks for over 15 years as part of their Janome Artisan program. I love their machines and would say all the good things I do even if I weren’t affiliated and paid full MSRP!
I prepared blurbs for Janome to use for each of the quilts, in the “voice” of each of the critters. Here is Boo’s:
Boo, J. D.
“Emperor Yoda! Hah! What does he know? And why do they call me the Juvenile Delinquent? Can’t they see that I am going to be KING of this realm? I am young, I am strong, I speak, I jump, I am growing into being the largest and strongest in the realm, not like that tub of lard who is rightfully dubbed His Immensitude. Stay away from my kibble, tubbo. The humans love my chirpy voice and sleek, silky fur! Now I will deign to let my human pet me and feed me my favorite wet food and pet me more. All others, including the ostensible Chief Minion, be forwarned: you are subject to attack!” (Boo is a 10-month old Turkish Van. I am the ostensible Chief Minion.)
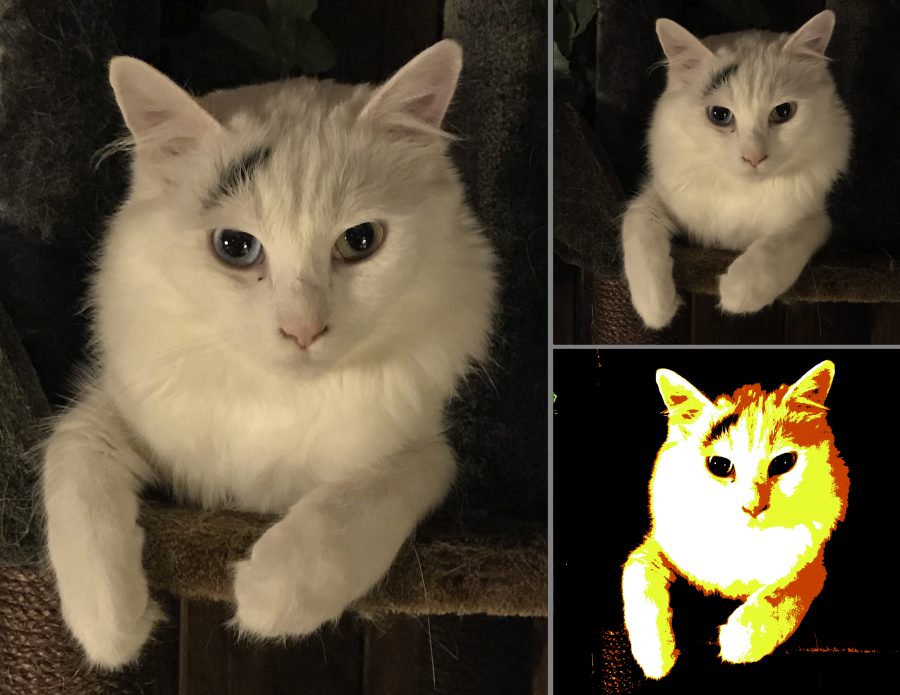
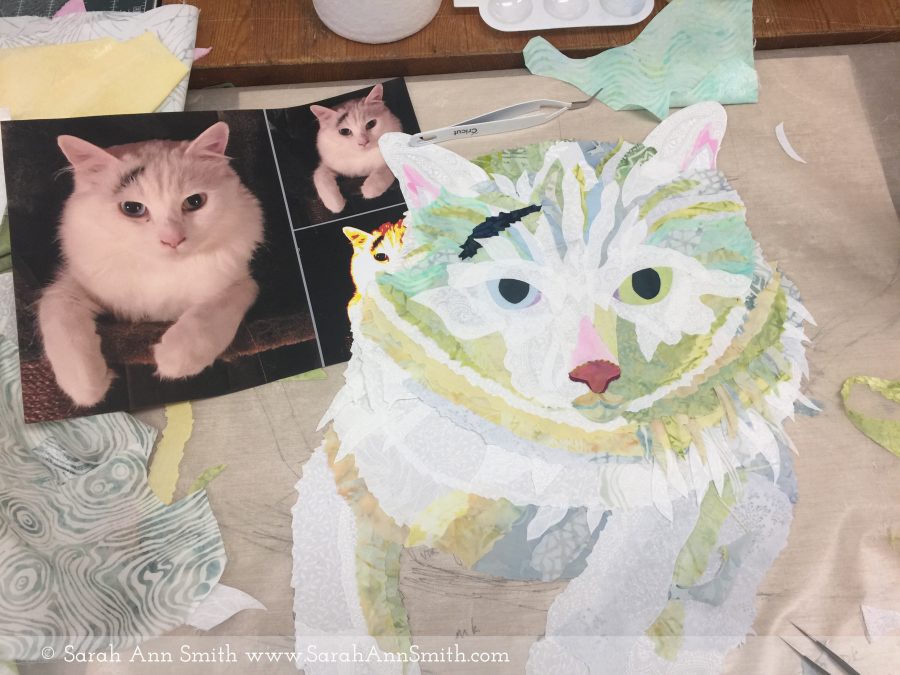
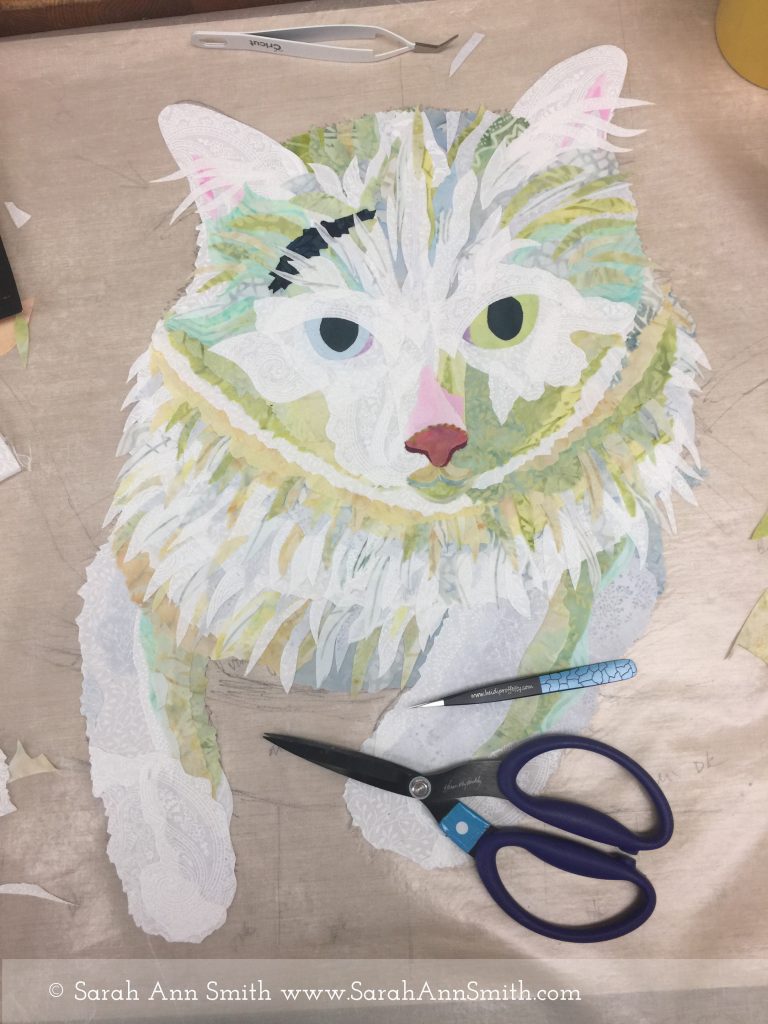
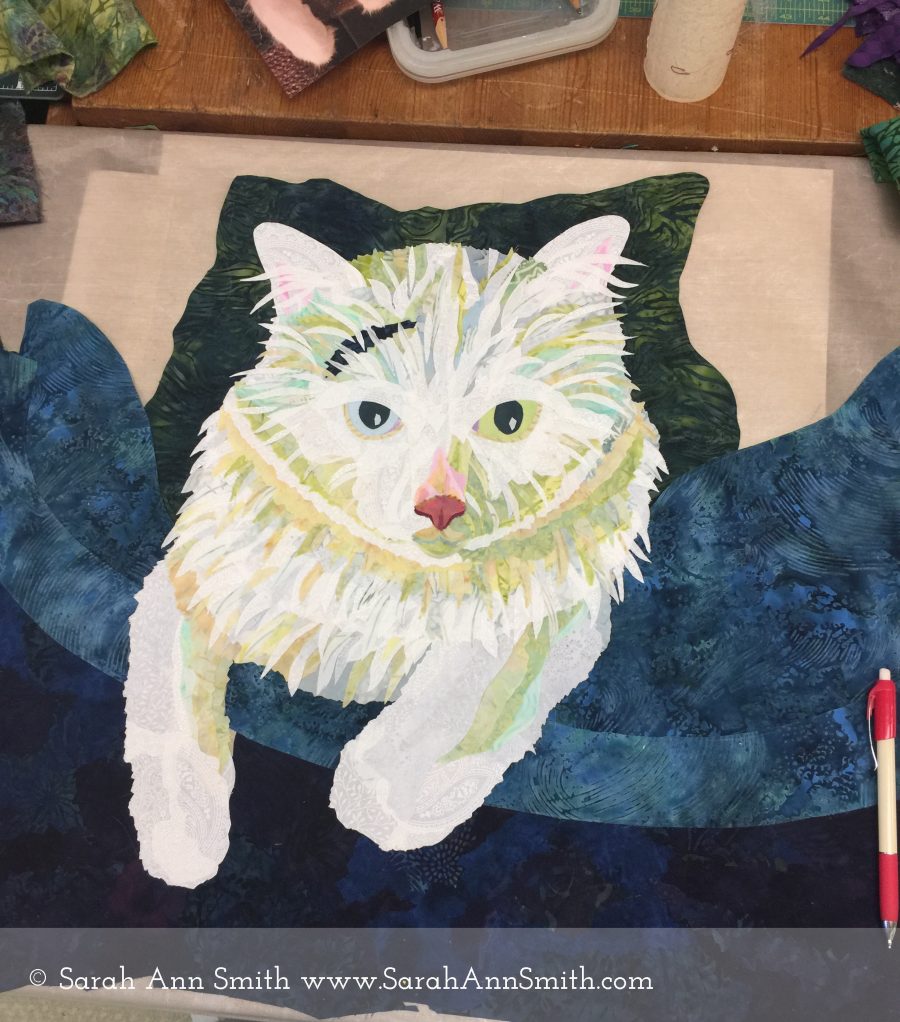
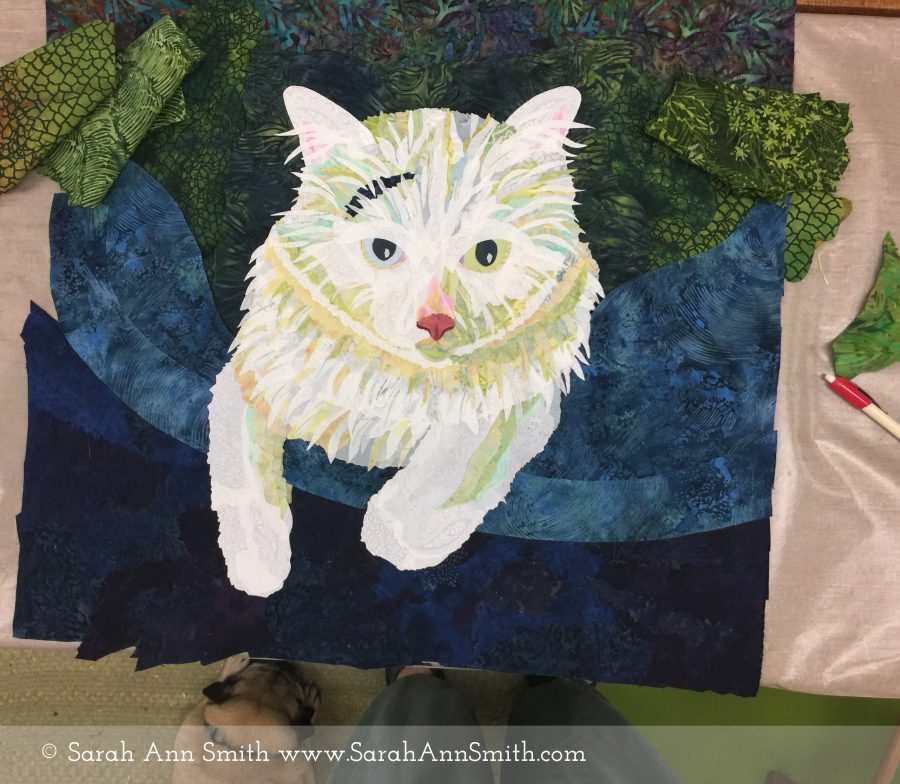
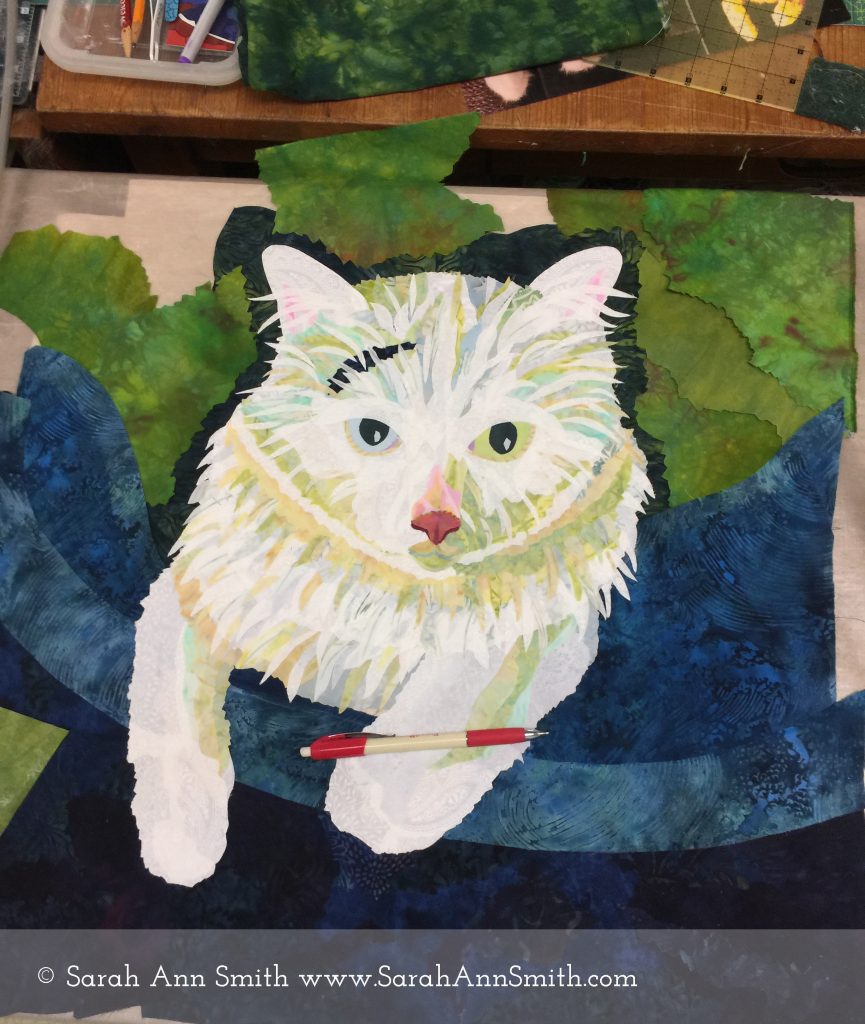
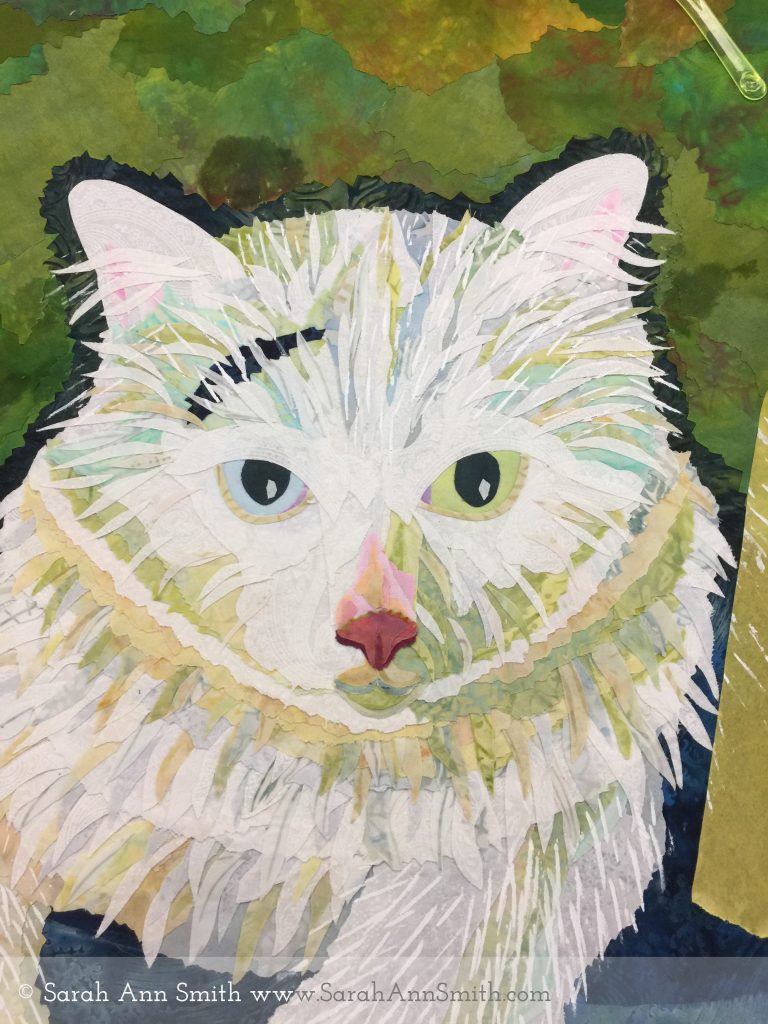
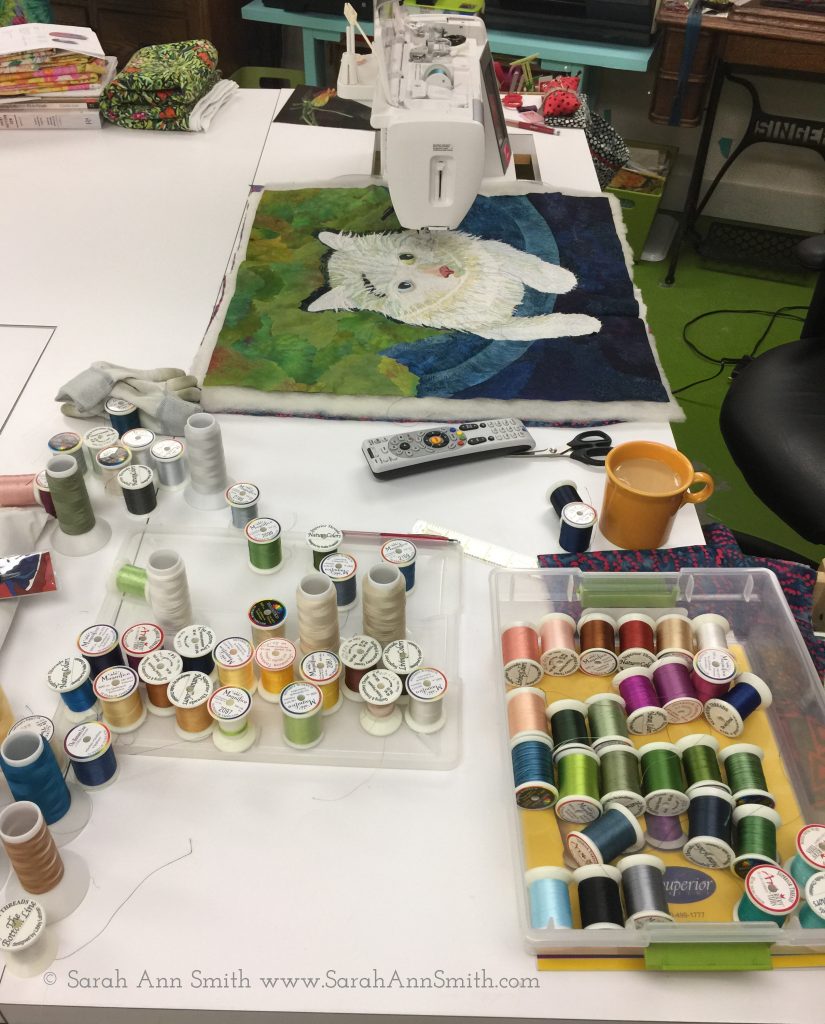
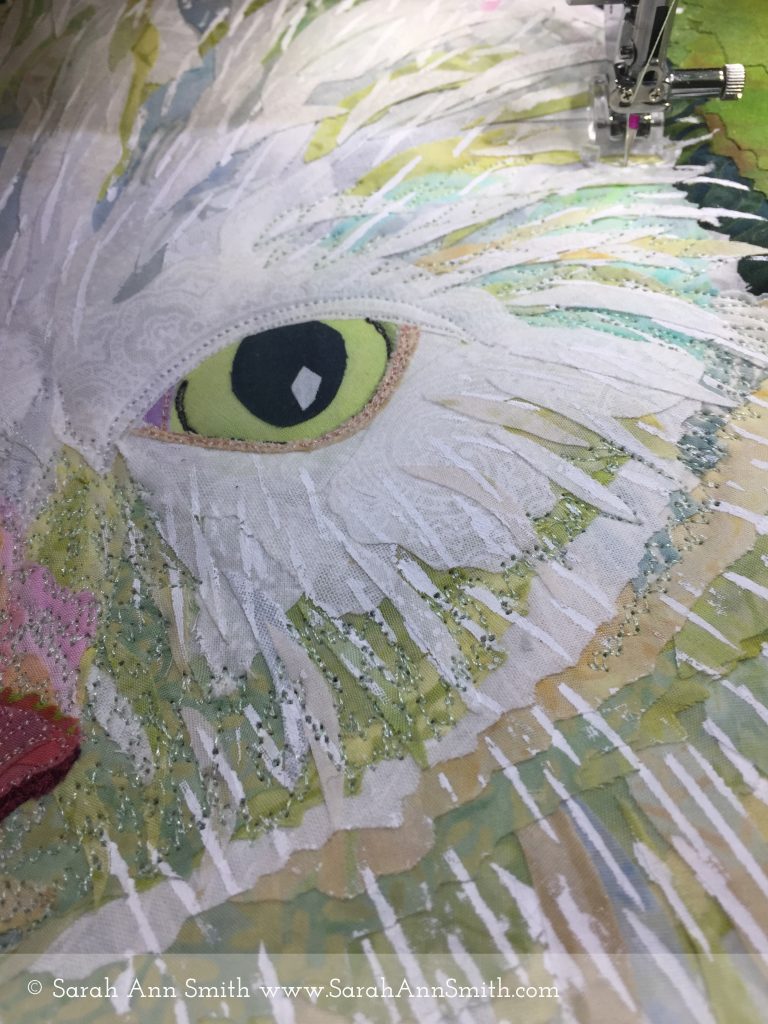
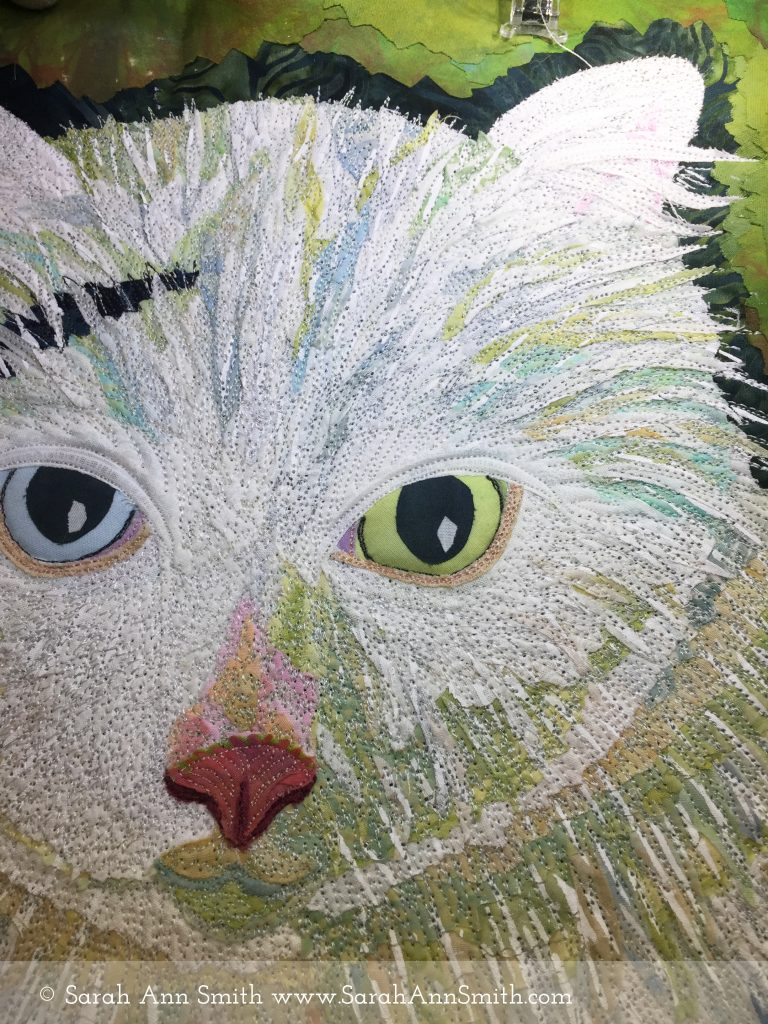
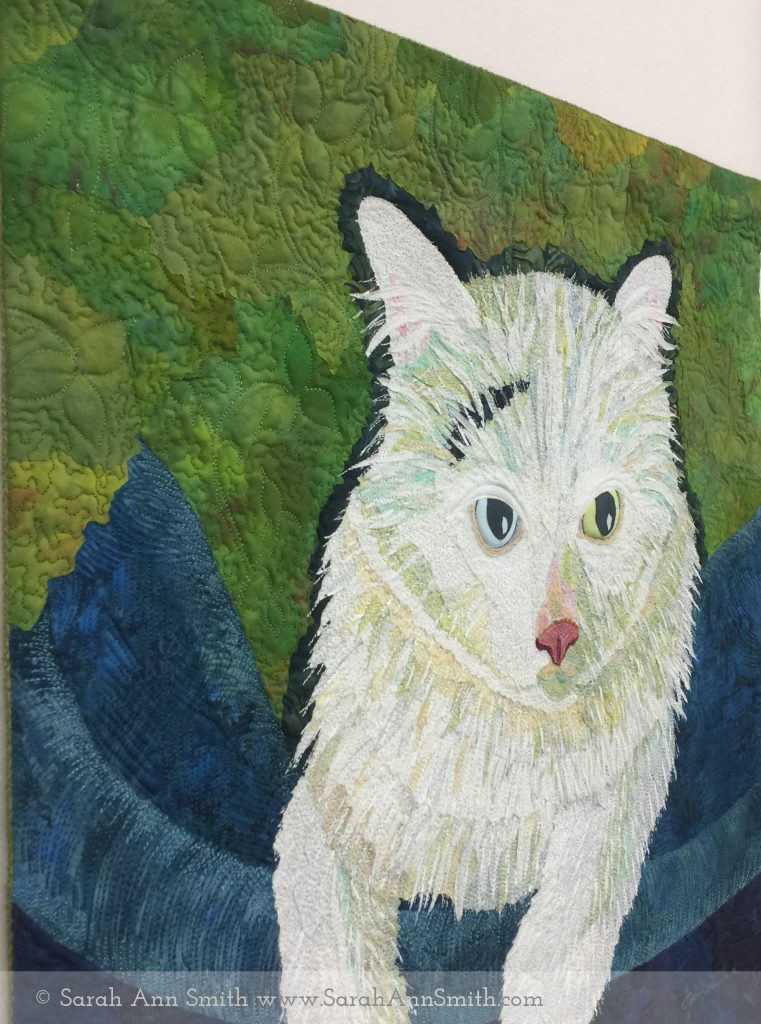
When I start a new project, I look usually at photos I have taken as “reference” photos. This time, hubby Paul’s photo was a better shape to fit into a square than what I had, plus Boo loves to sit with his paws hanging over the edge of stuff. I rarely use Photoshop any more to identify areas of light and dark, but I was curious to see what it would do. Meh. I like making the decisions as they are more nuanced than someone else’s software.Step 1 is working on the collage with my reference images close by. I use Mistyfuse (my preferred fusible by far) and prefuse all my fabric, then cut the shapes I need, usually freehand but sometimes with other techniques that I share in my workshops. At this point the base layers just looks blotchy and blobby. It gets better.Once the base layer is down, I start adding slivers of fur. Notice two of my favorite tools (and I’m not affiliated, just a fan-girl): Karen Kay Buckley’s purple-handled micro-serrated scissors (here) and Heidi Profetty’s awesomely pointy tweezers (here). The tweezers are new to my process and SO much easier than my old way of fingers, pins, skewer etc. Much easier and more accurate to place than to nudge! I like them so much I sell them in my workshops.To tie the three quilts together, I took out all the fabric I would use for all three quilts at the start of the first one. The blue ocean-like batik plays a major role in all three: in Widgeon’s face, the background for Yoda, and here as the “bed” in Boo’s cat tree in the living room, and the other fabrics repeat. I liked the dark green in the background to pop Boo’s silhouette, but it was too much and boring as the entire top of the quilt, so I trimmed to have a “halo” of dark (no, that is not a commentary on the cat’s personality LOL!).I selected assorted greens from my stash of prefused fabrics. I just didn’t like the way these looked–made the whole piece too heavy and dark for a rambunctious kitten.So the dark greens, other than the “halo,” went away and my much-loved yellow greens (mostly my hand dyes in this set) came in. The next step, as with Yoda, was adding paint via thermofax screens to refine the fur. Did I mention (another gratuitous self promotion here) that I’ll be teaching a 3-day workshop August 5-7, 2020, at ProChemical and Dye in Fall River, Massachusetts, on using paint on cloth? Sign ups open on October 2nd and I’d love to have you join me. Here’s the link to the Workshops at ProChem–details on the 2020 workshops will post on or about September 3rd. Anyway…. you can see the difference between the right where I have screened to the left where I haven’t, also up on the upper vs. lower parts of his face. I used a temporary mask of painter’s tape to avoid getting paint on parts of the background.Final phase: quilt it to death! This is the Janome 9450–I began on the 6500 when the Horizon series debuted back in 2003 and every time I think they couldn’t possibly make the machine better, yet they do. This is pretty much my PERFECT MACHINE! I pick more threads than I think I will need for a project. Since I was doing three quilts at once, that was a lot of thread. Luckily, the most labor intensive one was Widgeon because of so many different colors. The quilting on Yoda (a beige cat with some dark) and on Boo (a white cat with just a tiny bit of black on him) was easier in some ways, though finding six shades varying from white to cream was interesting….ended up using a very very pale green for example, which reads as a mostly white/gray for the under layer. Then the stitching begins! Here I’m putting in the first of three layers of thread used in each area. I teach a workshop on this, too (Thread-Coloring the Garden, but the process is the same for flowers, pets, people, landscapes, etc.). I really love this new open-toe free-motion quilting foot. It was designed for free-motion zigzagging, but it is awesome visibility. I’m not sure but I may possibly like it as well (or even better? is that possible?) than my all-time favorite thin metal open circle foot. In this photo, I’m up to about the third layer of threads. Compare how it looks to the previous photo. Also, I do minimal stitching on eyes!An angled shot always shows up the quilting best. I used the same leaf/vine motif on this that I used in the background of Yoda’s quilt to tie things together.
So that’s my process and all three of the quilts. To read the blogpost about Yoda’s quilt: His Immensitude Yoda, Emperor of Minions and all He Surveys, click here for Yoda . To read the blogpost about Widgeon’s quilt: I Love, Therefore I Am, click here for Widgeon. Thanks for coming along on my summer quilting extravaganza!
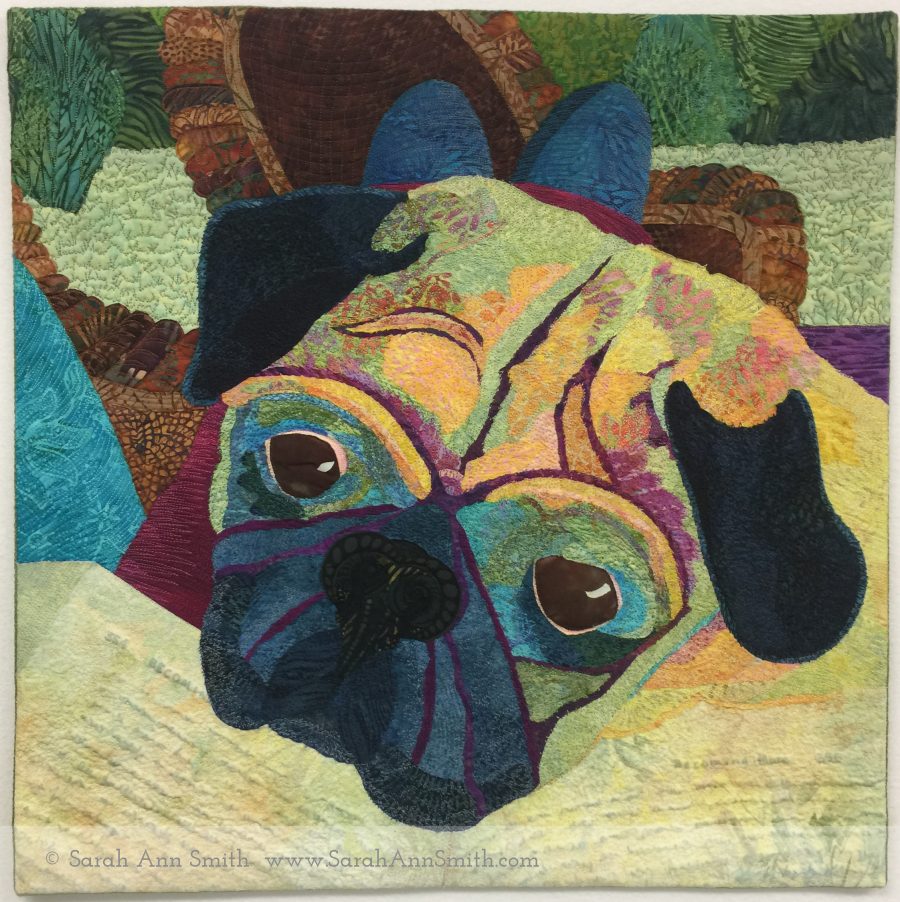
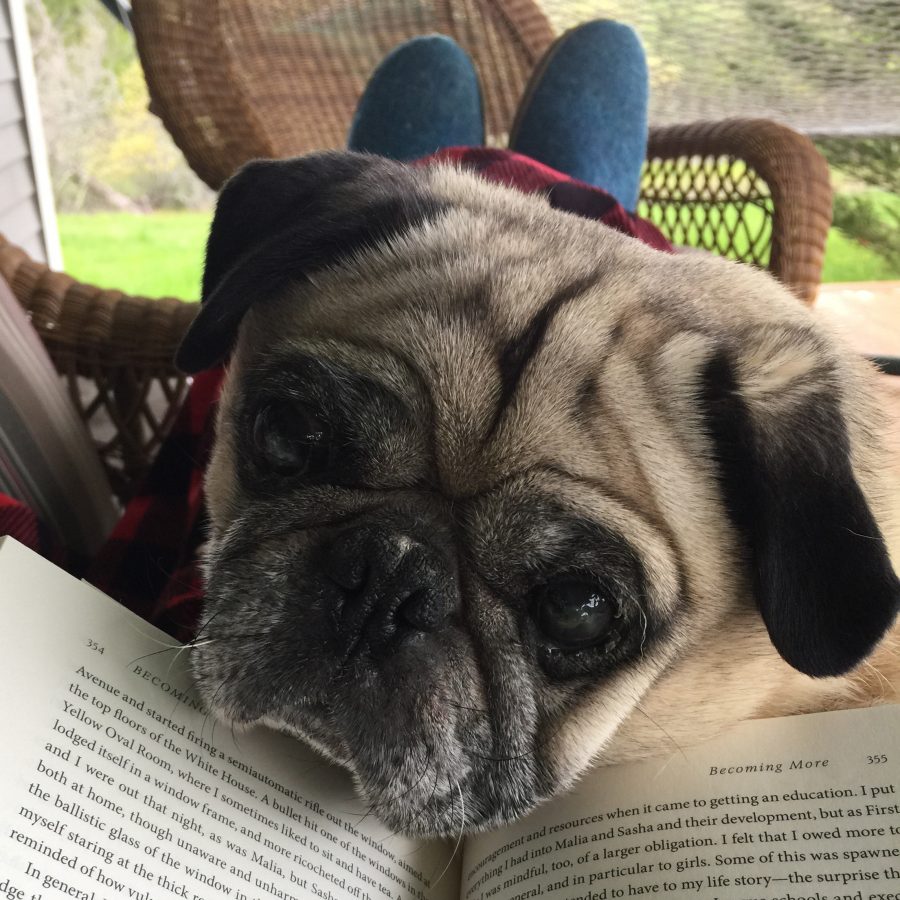
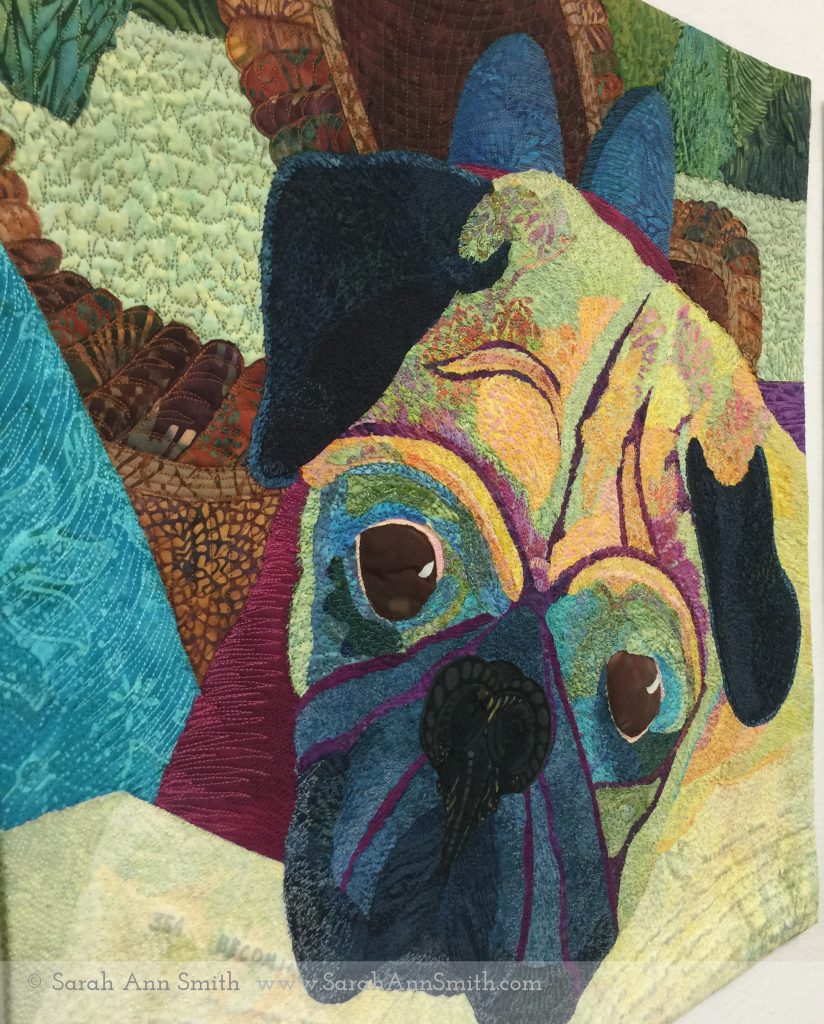
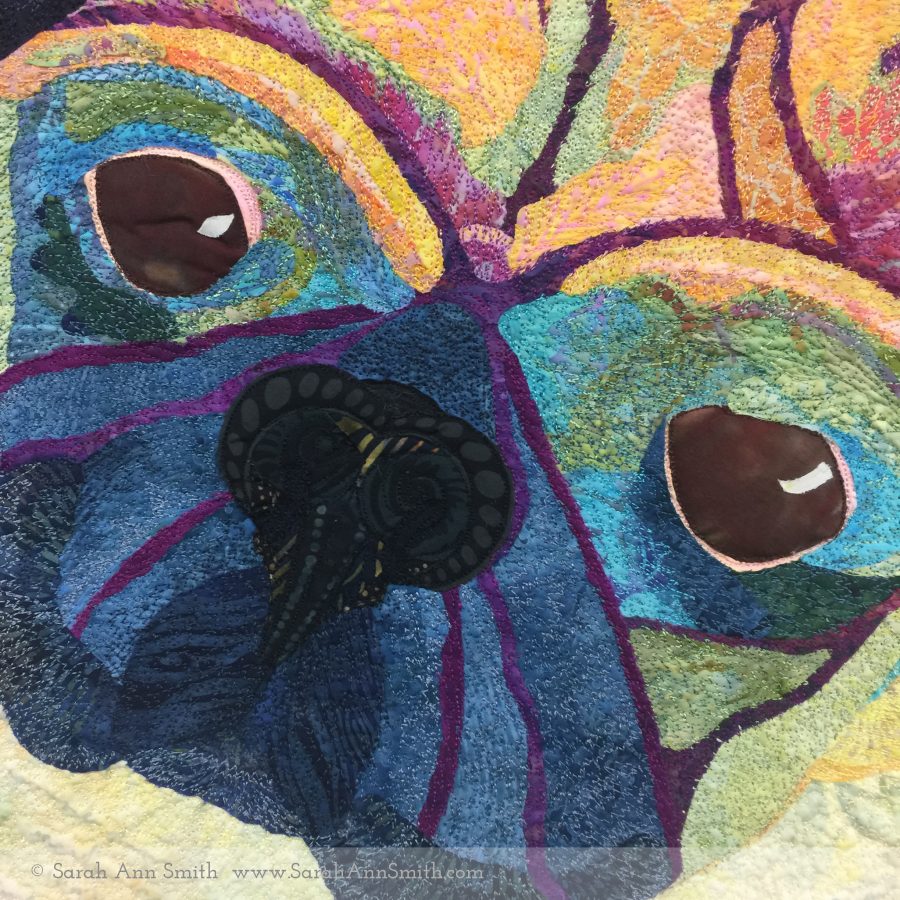
“I Love, Therefore I Am” is the perfect title for this quilt of our beloved pug, Pigwidgeon.
Earlier this summer I made three quilts for Janome America to share at the upcoming dealer conference in Florida this week. Janome has generously sponsored me with a machine and included me in their Artisan program for over 15 years!!!! THANK YOU (yes I’m shouting)! I was delighted to make these in appreciation. Here is the blurb I wrote to go with Widgeon’s quilt.
I Love, Therefore I Am
“Yoda, the love of my life, tells me that Mom has done a good job on my portrait. Mom and I were sitting on the porch in late Spring even though it wasn’t quite yet warm enough, so I snuggled under the blanket and kept her company (and warm) one afternoon. I don’t see or hear very well any more, but Yoda tells me the picture shows how much I love everyone in the whole universe, especially him, my boy, Mom, the rest of my family, and well, the whole world.” (Pigwidgeon is a 12 year-old industrial-sized pug.)
My Facebook friends know Widgeon because of my dog walkies posts and other photos. My friend Rachel Parris commented on this photo that it was the best one I had ever taken of him, and the idea for the quilt was born! Often I end up working too much during summer and don’t get my “Porch Time” to relax, read, and enjoy life in Maine. So this year I started early, in our long, late, cold Spring, wrapped up in warm fuzzy clothes with a two-layer fleece blanket on my lap and the dog snuggled underneath.
This post will be mostly photos and captions (because we all know photos are better). They show the sequence of how I work, and towards the bottom if you keep going you’ll be rewarded with a mini-tutorial on couched and faced edges. And yes (gratuitous self promotion here) I TEACH classes on how to do this –my Bindings and Facings and Piping, Oh MY! class, and also my collage and thread coloring process: Collage the Garden and Thread-Coloring the Garden–just click the link. Have students (and contract) will travel (hint hint).
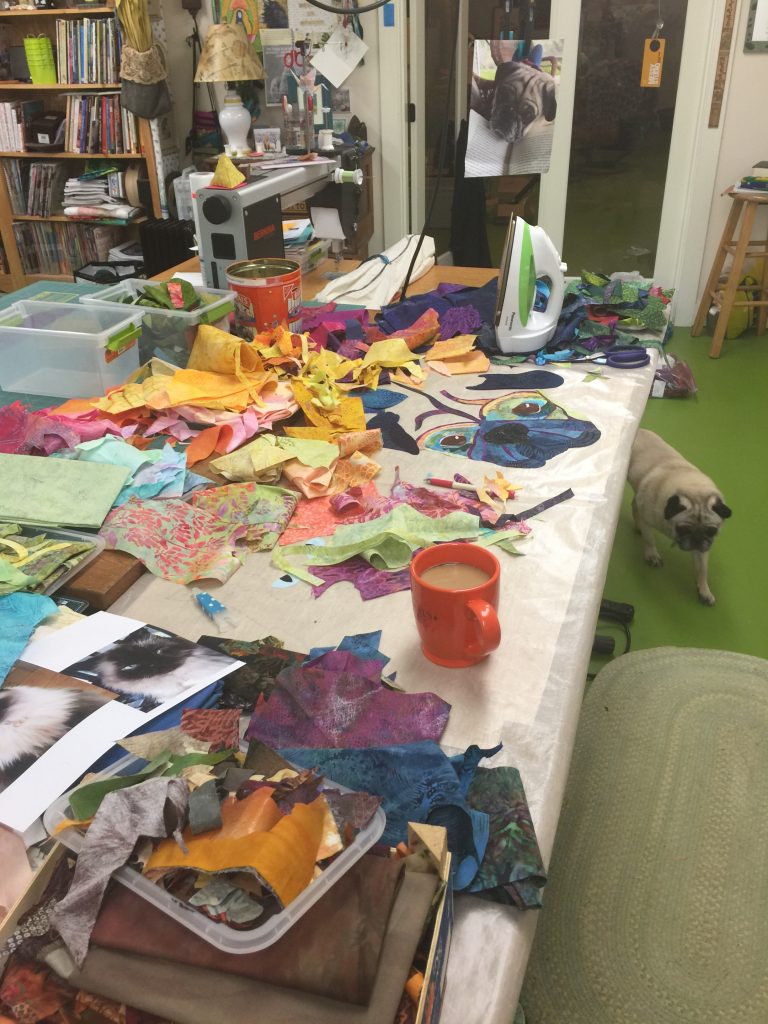
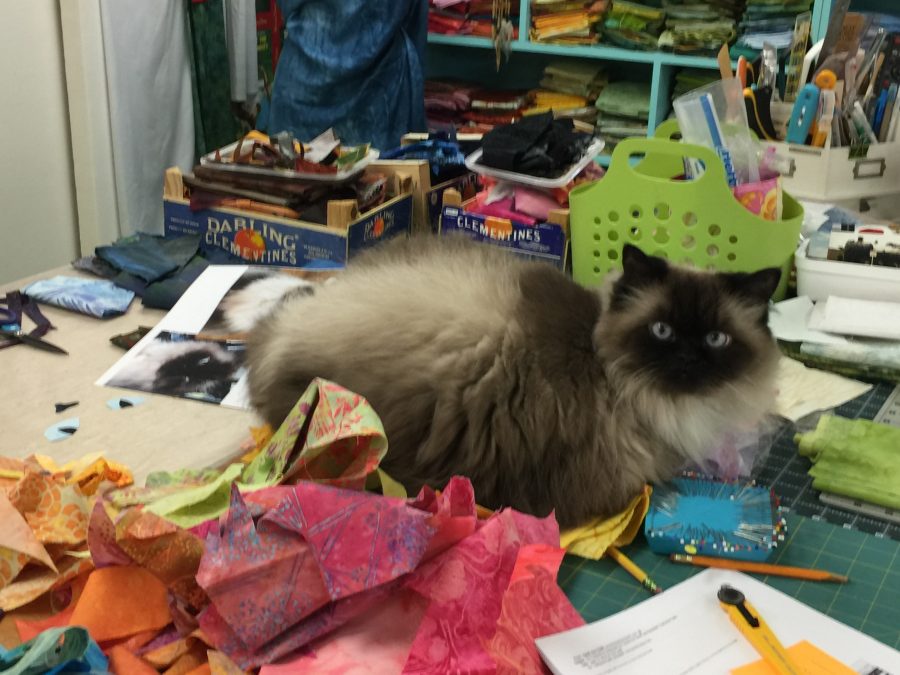
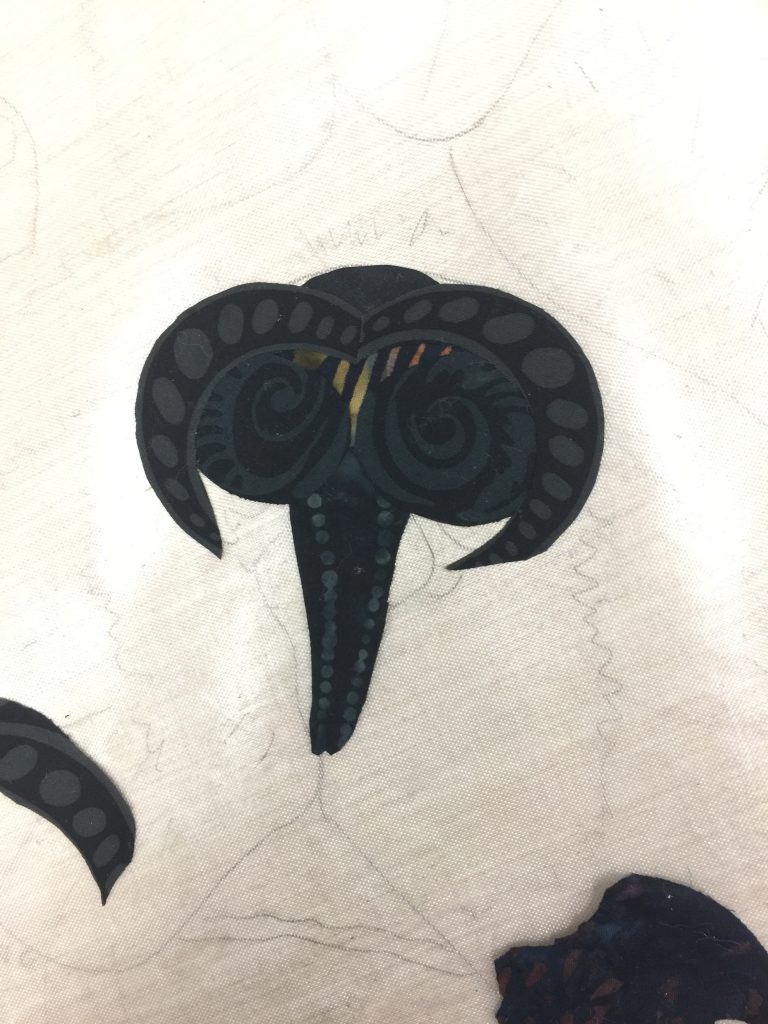
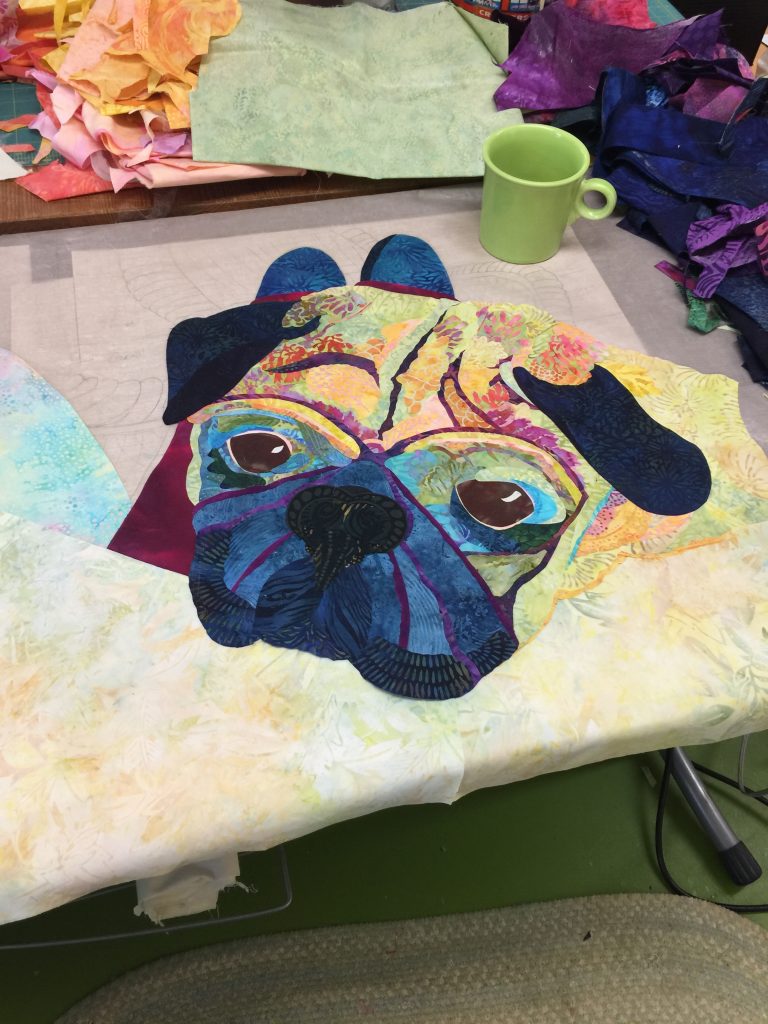
As you can see, the work area ends up just a bit messy! I tend to sort prefused (Mistyfuse ROCKS! It changed my life!) fabrics by color and value, then start working. The heaps are the “sorted” stuff (ha!). Widgeon is coming to lay down right under my feet so I can trip over him. He likes to stay close to his beloveds.Sometimes Yoda supervises…..Folks say “Oh that’s the perfect fabric for the nose.” Sorta. This is seven pieces of fabric, and that’s about half of the fifteen or so tiny bits that eventually created his nose. You can see the sketch under the non-stick mat (check out Goddess Sheets at Mistyfuse.com). Here I’m looking at what to use for the background. I used pale yellow (on which I used a pale gray pen) for the book in my lap. The pale aqua for the pillow on the left got changed for a darker value.
Now it’s time for that mini tutorial on couching yarn for quilts with facings.
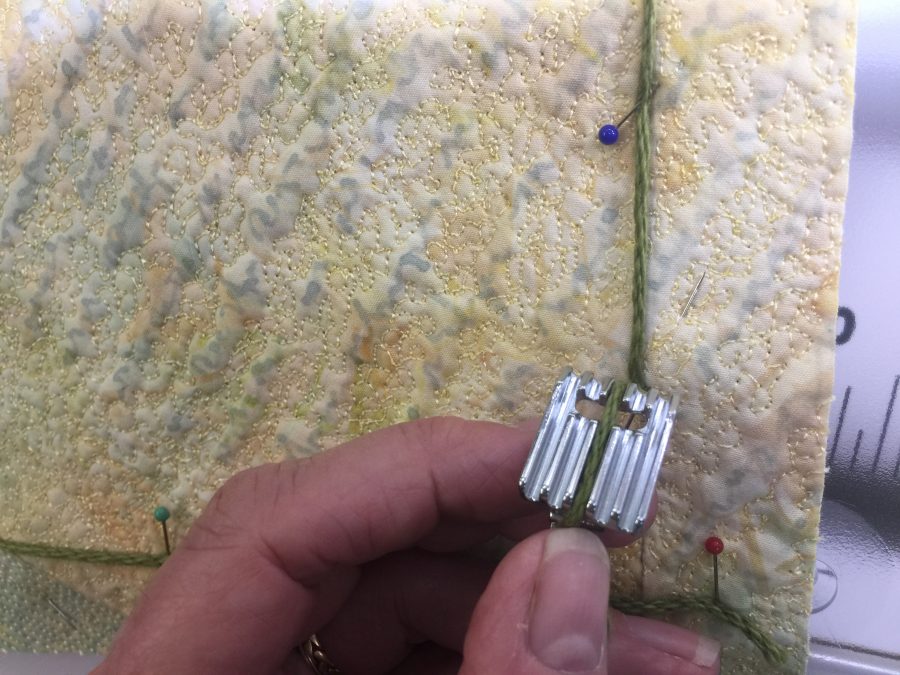
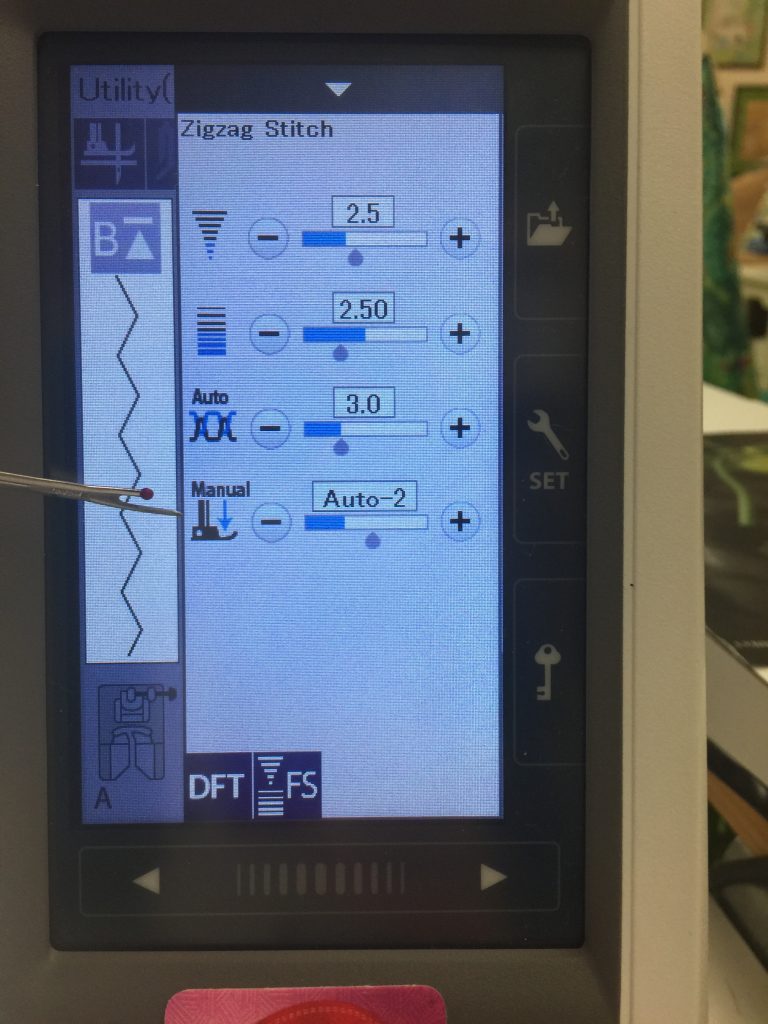
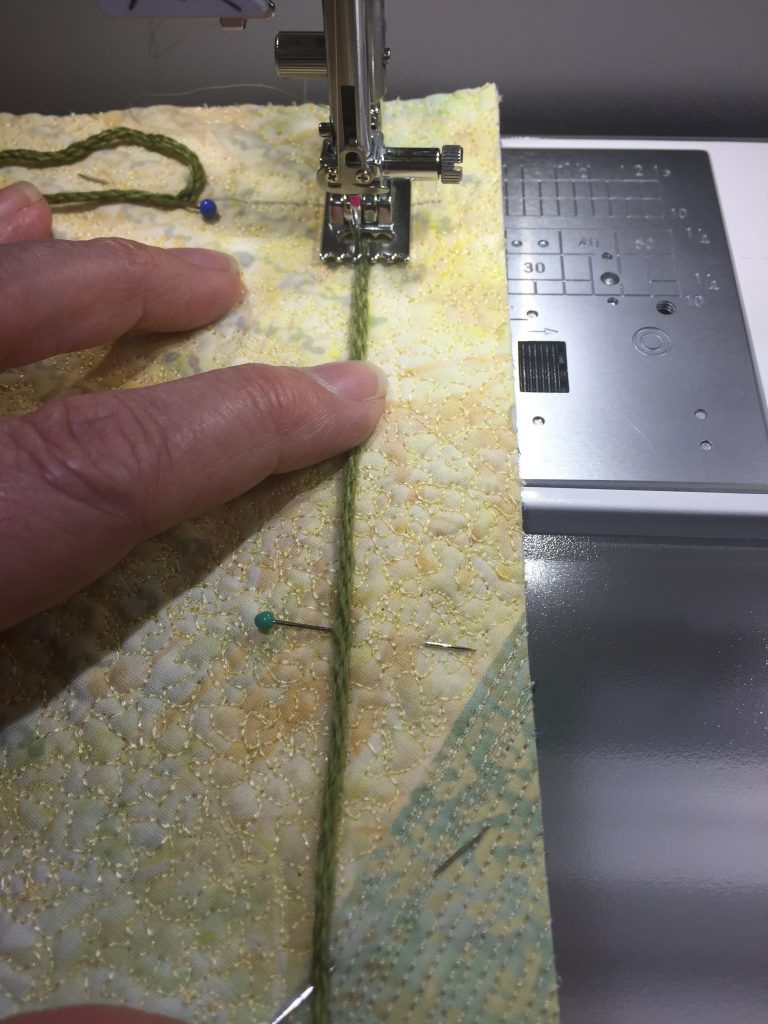
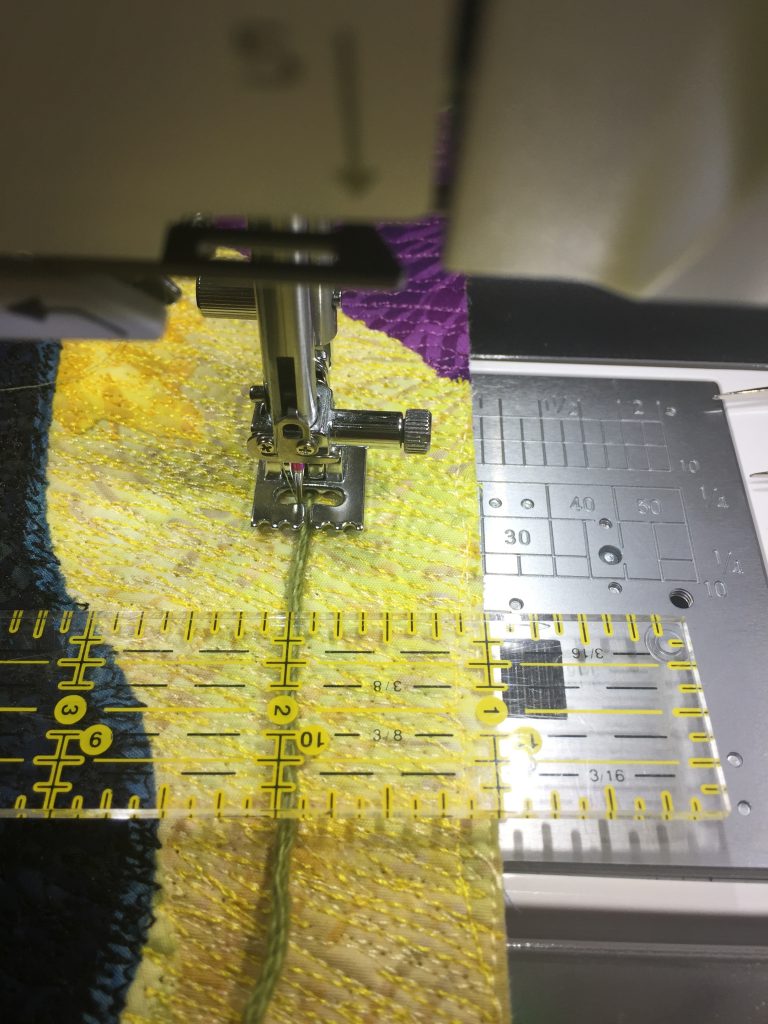
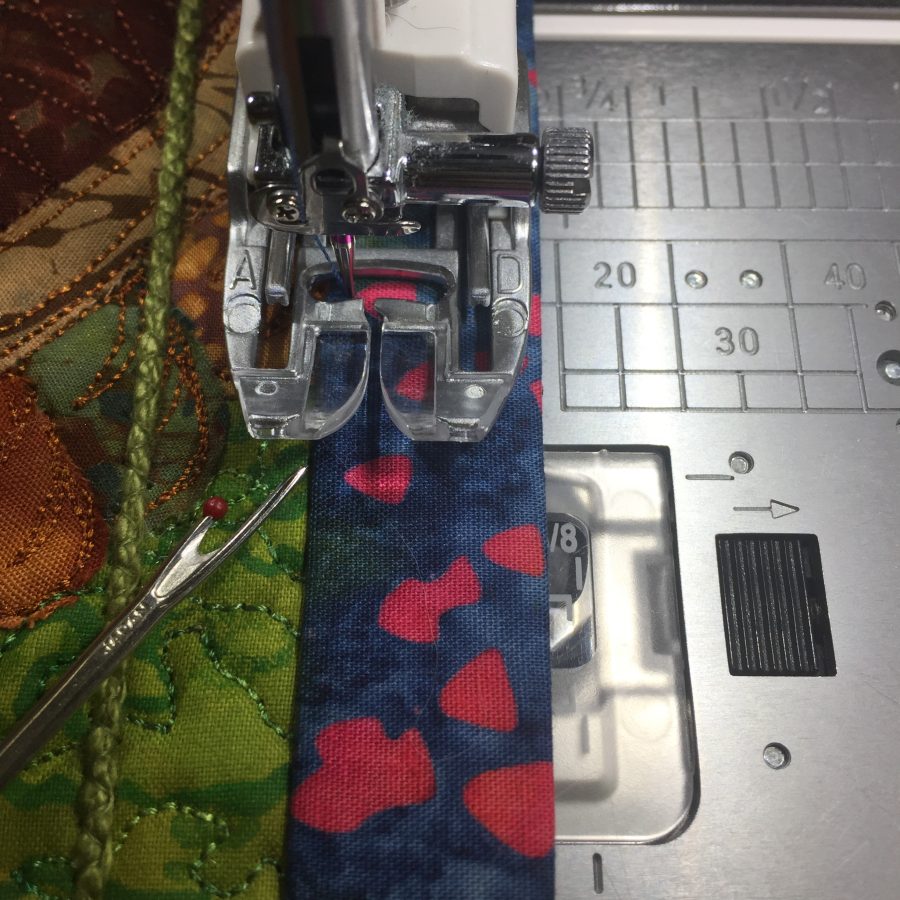
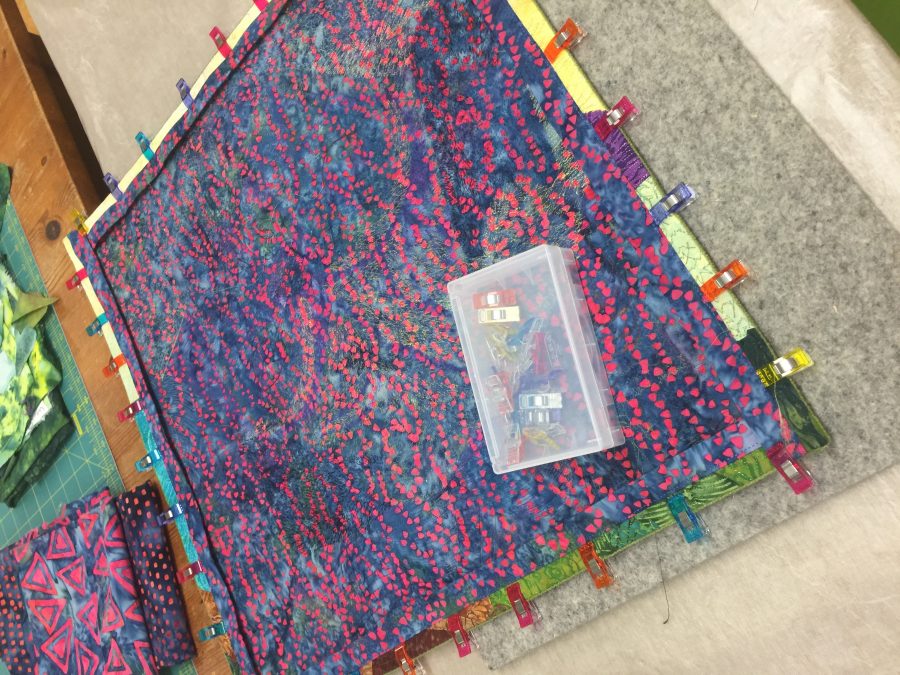
Most of the time, my quilts have facings, and some of the time they *also* have yarn couched on the edges. This makes the edges more crisp and makes it WAY easier to turn the edges in a perfect straight line (provided the yarn is sewn ON in a perfect straight line). This is what the bottom of the pin tuck foot looks like. Mine is a five-groove. There are other sizes (seven I think, and maybe three), which I prefer to the usual “couching” foot because I can fit the yarn to the groove that will best control placement. See how the yarn fills the groove…not too big, not too little, but just right. I used 2.5 stitch width and length, then reduced the presser foot pressure (how much it pushes down on what is going under the needle) to couch the yarn that ends up on the edge of the quilt.You can see the yarn is in the center groove of the 5-groove pin tuck foot. It is the perfect sized groove for the cotton yarn I favor for sharp edges on quilts with facings. I always used to chalk-mark where I wanted the yarn to go and then hold it in place with pins and my finger. But even then it would sometimes wobble, requiring picking out the stitching and fixing. Then I discovered a much better way on this quilt! Drum Roll! Sound the Trumpets! A Better Way!!!! Using a ruler, Janome’s pin tuck foot, and a narrow open zigzag makes couching yarn on what will be the edge of the quilt easy! It worked best for me if I let the ruler hang over the edge and use the 1″ line. If I used the end of the ruler it was actually harder to see if it was perfectly aligned with the trimmed edge. And yeah, lookit all that threadwork!Gotta love Janome’s great presser feet and plate markings, which make it possible to create a perfect facing. In my class I explain some of the extra stuff I do that makes my facings behave so well. Wonder Clips by Clover. Buy them. Buy a whole lot of them. SO MUCH BETTER than being skewered by pins. If you buy the big set from Clover, they come in a well made reusable box.I Love, Therefore I am. A view of the quilting from an angle which shows the stitching better.And a close up of the Beloved.
To see Yoda’s quilt, go to this post. Next, I’ll share Boo’s. He is the Usurper. The Delinquent. Chirpy.
For many years now I have been so lucky to be affiliated with Janome America. As a Janome Artisan for over 15 years I have been thrilled to be able to sew on some of the best machines in the world. When they asked if I would make something special for this year’s Dealer Convention (later this month) I was thrilled to say yes! I ended up making not one, not two, but THREE insanely densely quilted 20 x 20 inch quilts…in about seven weeks!
The mischief makers: Yoda, Widgeon and Boo
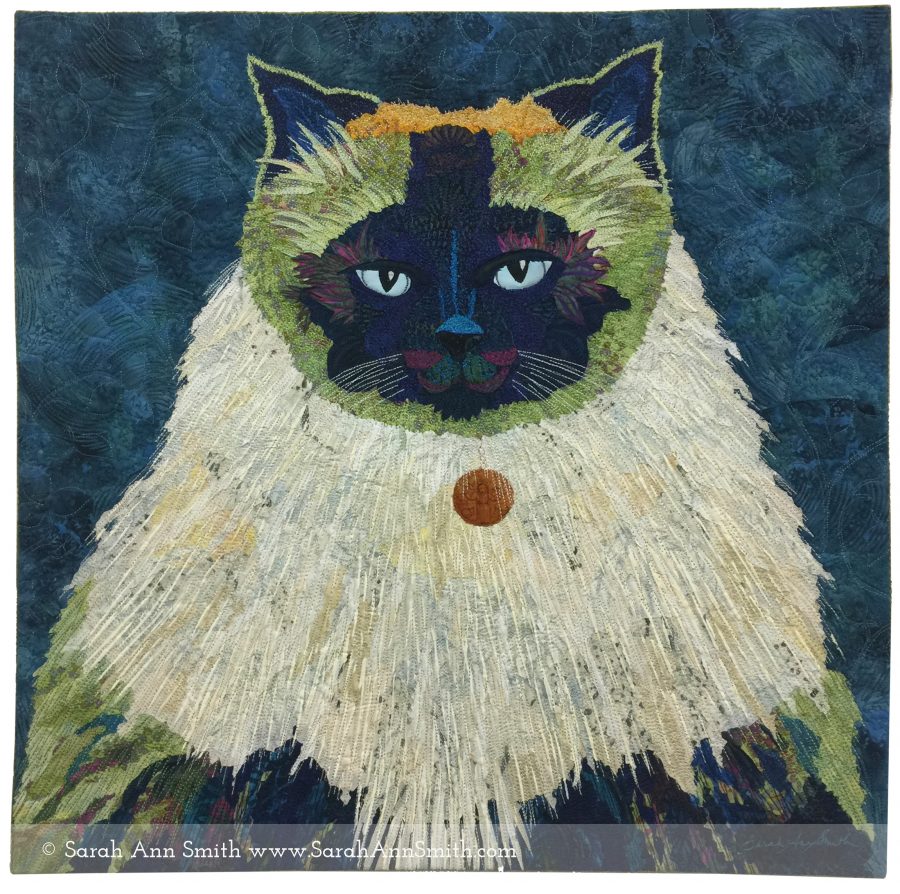
Here’s what I wrote as my official “blurb” about Yoda’s quilt:
“At last my superiority, dignity and rank have been recognized appropriately! The Chief Minion has done an acceptable job at capturing my likeness and the essence of my wonderfulness. I have given her permission to scritch my chin. She has also captured the spirit of my Beloved, the Dog, who is my one true love. For this, the Chief Minion may pet my tummy. The Usurper shall be dealt with appropriately for thinking that he stands a chance—he is so foolish that he does not understand an Emperor always outranks a King. I shall seek out my Beloved for his love, comfort and as a comrade in fur.” (Yoda is about 5 years old, Himalayan from the shelter.)
I started out with the idea of two quilts: Yoda and our pug as my muses, then for a local group challenge next year added a self-portrait. Luckily, I veered off and ditched the idea of the selfie and did out other cat, Boo. I’ll share the process for each of these quilts over the next few days just in time for the start of the convention.
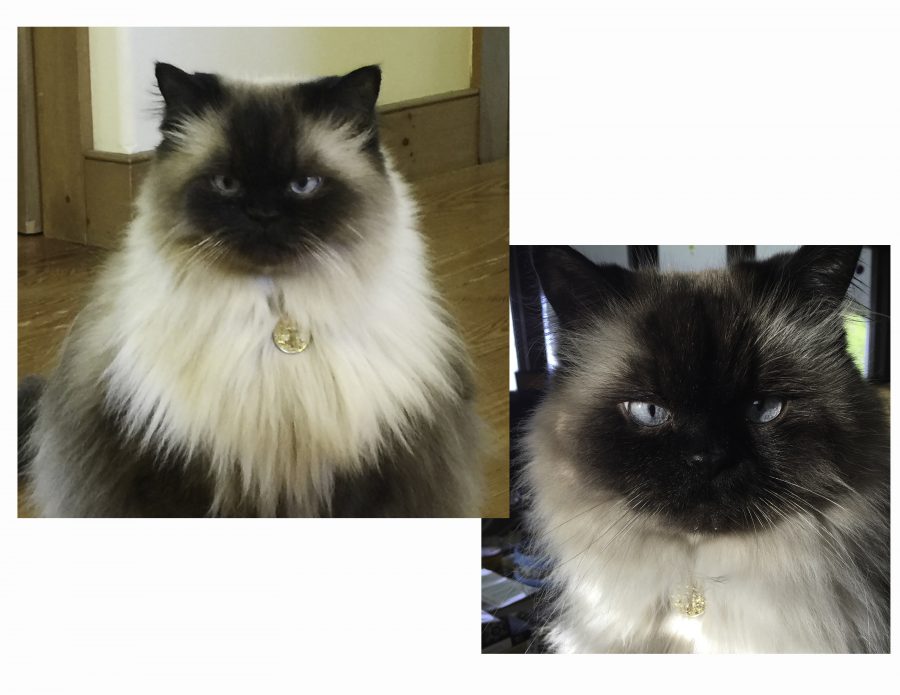
These are the two photos I took to use as my reference images.
The fusing process–as always using Mistyfuse which is BY FAR my favorite and only fusible!–began in early July. I was so worried about getting finished in time actually took Widgeon’s quilt with me while on a teaching trip, took my iron, fused stash and worked on the hotel room ironing board!
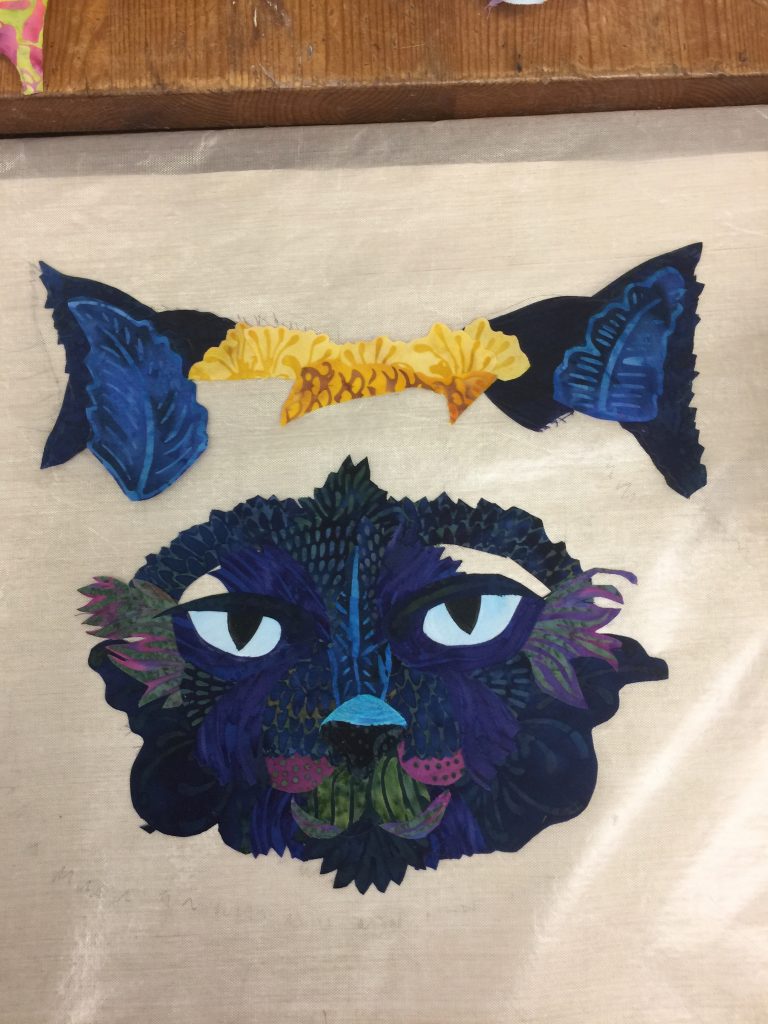
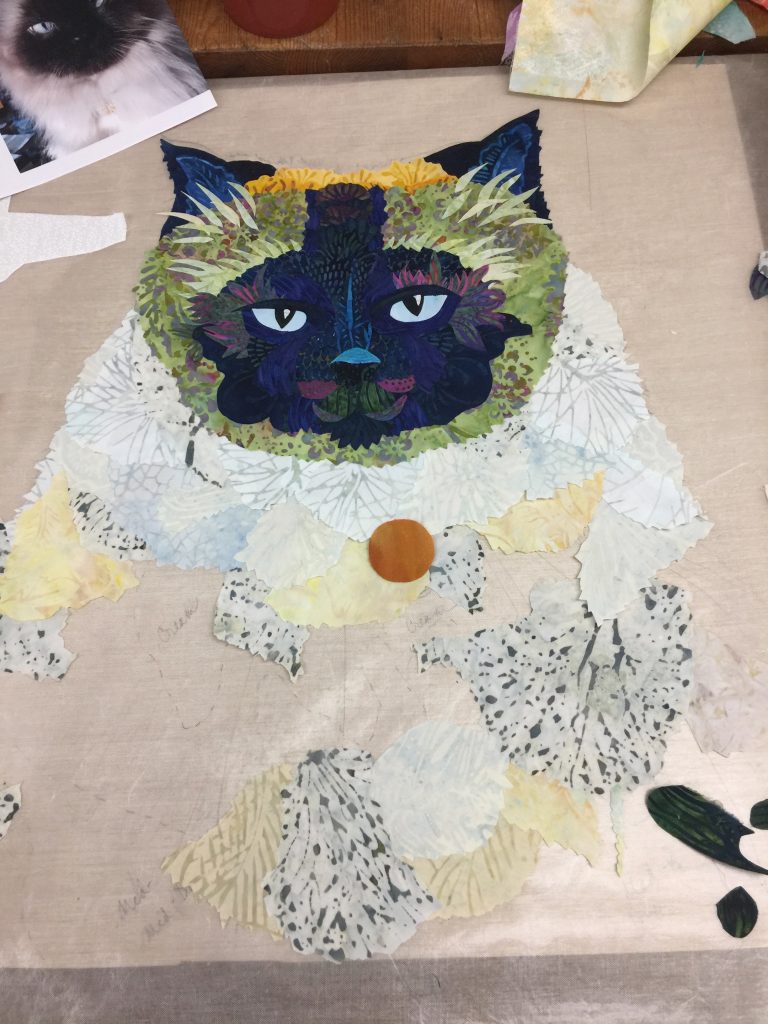
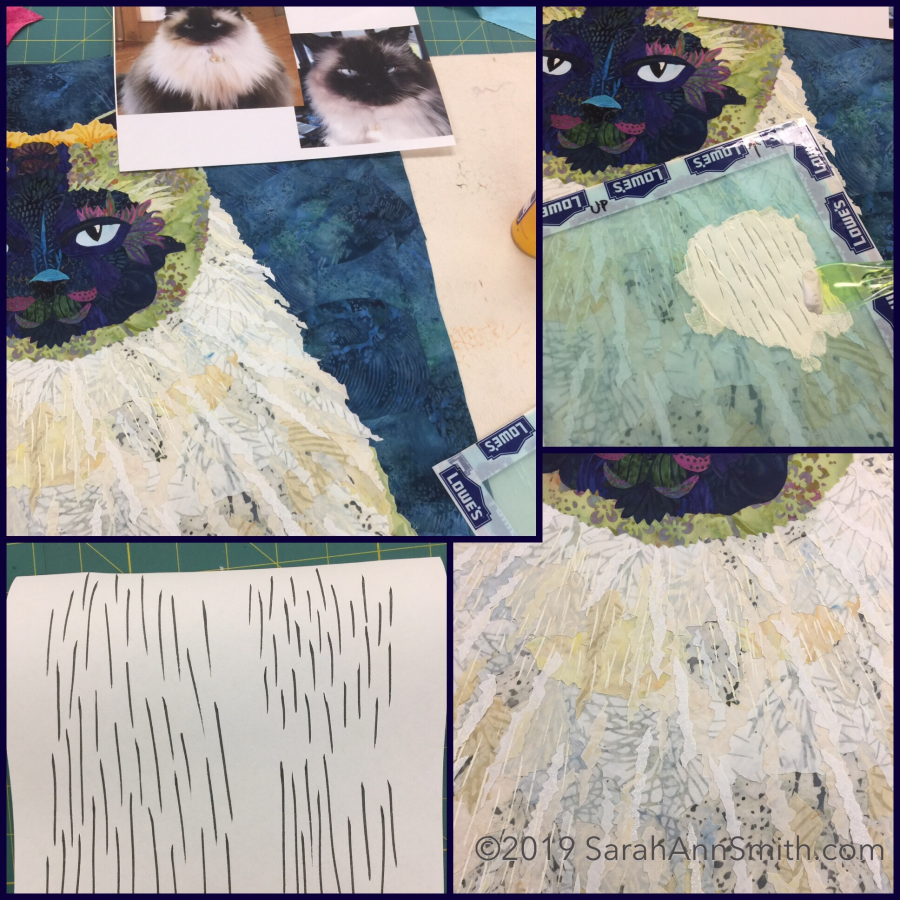
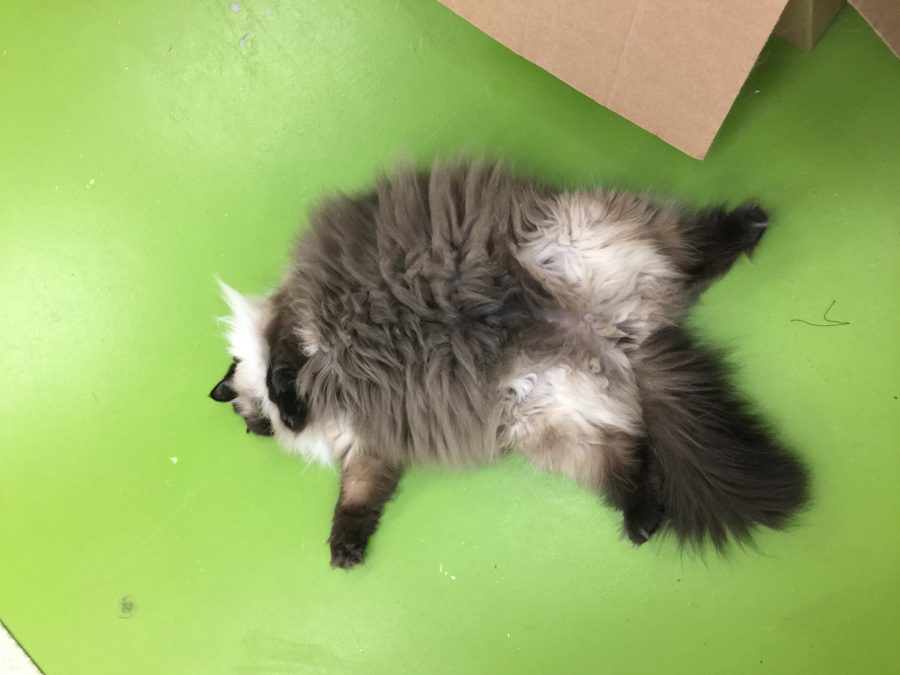
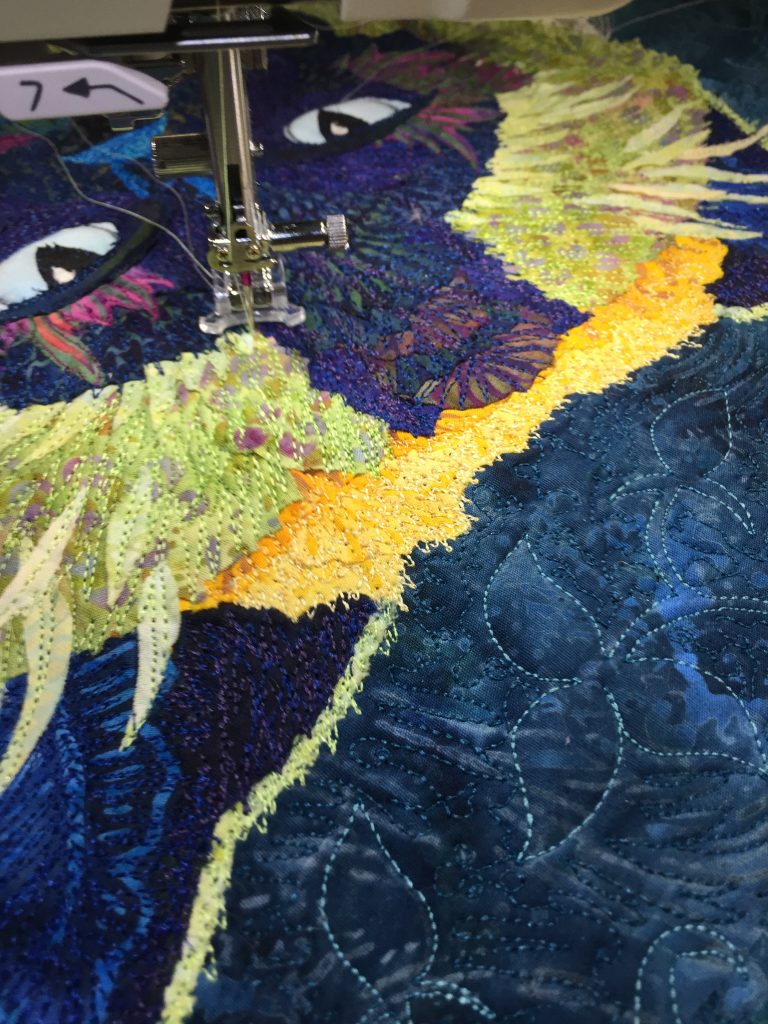
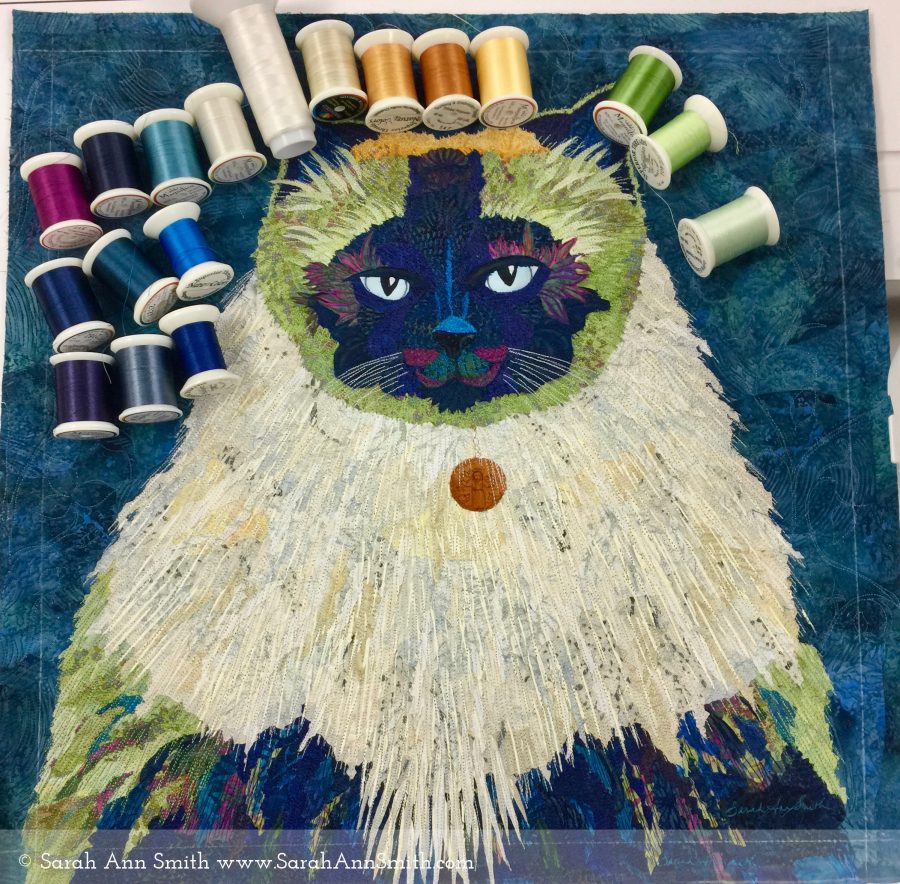
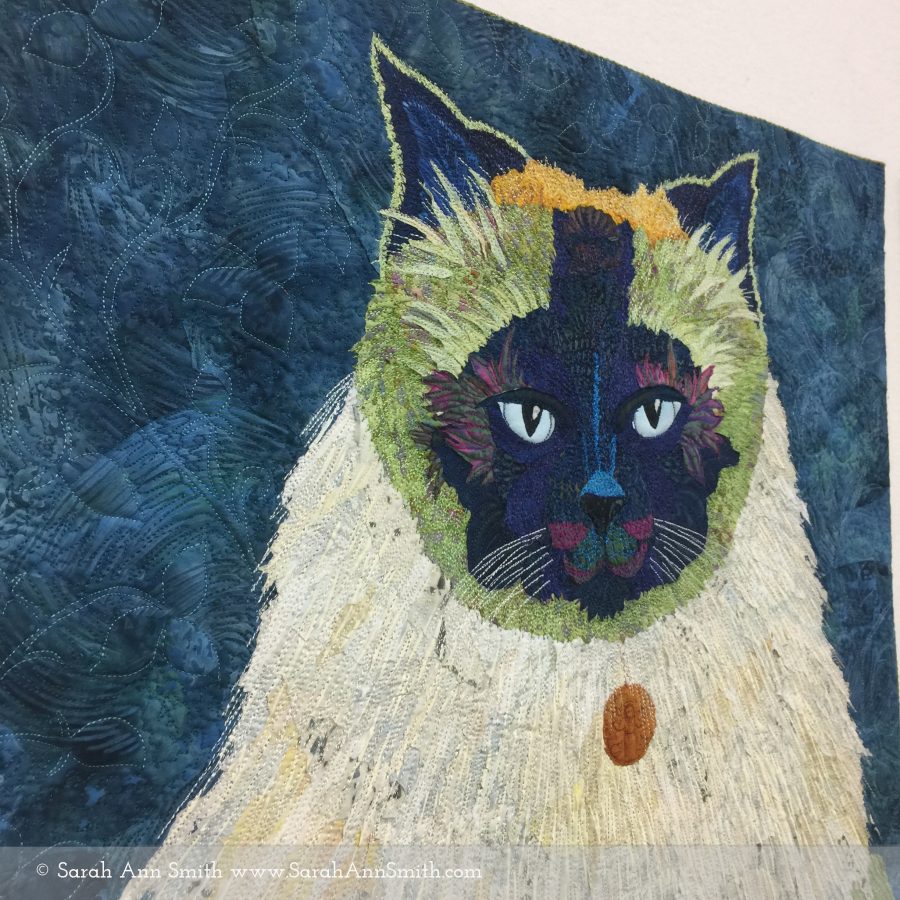
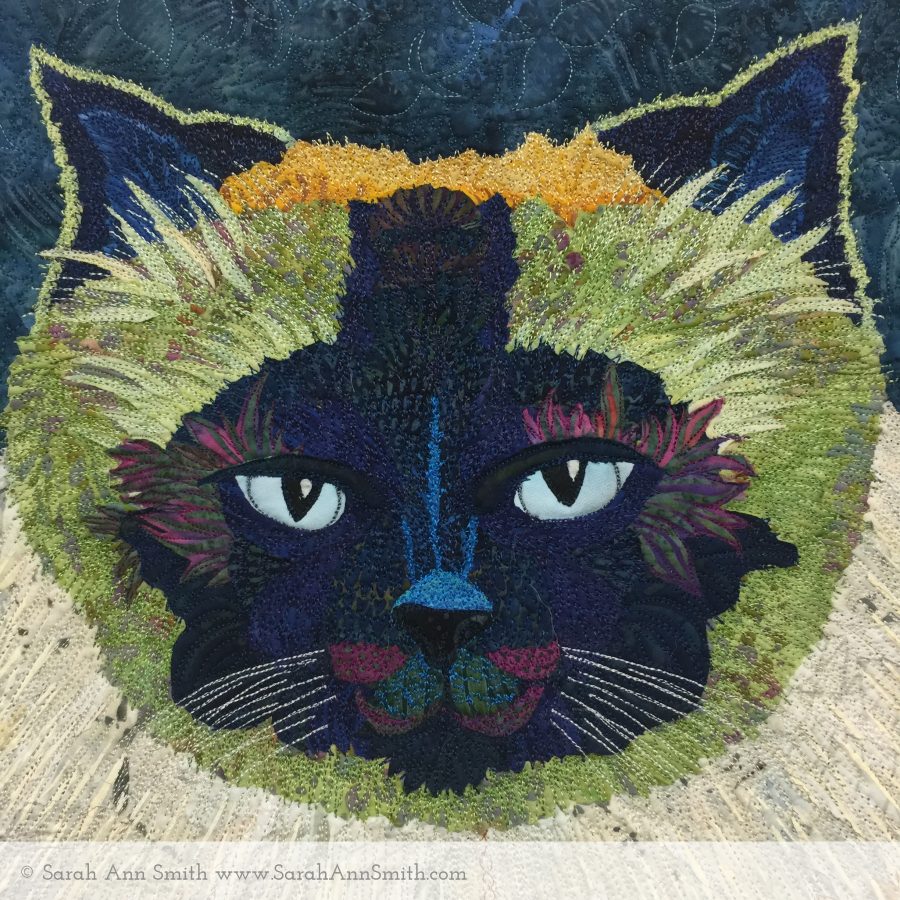
This collage shows how I created a design for fur (lower left), then made a thermofax screen to print over the collaged fabric to add depth and complexity. I mixed a couple colors of cream–I’m actually going to teach a workshop on this and other techniques with paint at ProChemical and Dye in Fall River, Mass. in August 2020–hope you might join me! Anyway, if you look at the upper left and lower right photos you can see the difference between the painted and unpainted areas. There’s a reason why I call him His Immensitude…there’s a lot of meat (and flub) under that fur and dignity. Plus he makes me LAUGH!Quilting on His Immensitude on my Janome 9450–LOVE the new FMQ foot.For me, this is relatively few colors of thread! That golden circle that you see under his chin, by the say, is his St. Francis medallion and name tag. The pale white chalk lines will be the finished edge of the quilt.A view of the quilting done on my Janome 9450. The design was inspired by a photo of ironwork on a door that is on my Designs board on Pinterest (follow me! Links at the top of every page on my site).Mr. DeMille, Emperor Yoda is ready for his close up….
Check back in a couple days for the story about Widgeon’s quilt, then a couple days after that for Boo’s quilt. See you soon!
(1).png)
.png)
.png)