email Youtube

Home
Galleries
Blog
Workshops & Calendar
Store
Resources
About
Contact

Archive for the ‘Maine’ Category

Moments, Hours, Days, Autumn, a Book of Hours

Sunday, December 23rd, 2018

Happy Solstice to one and all…at last the days no longer get shorter! To celebrate and as a Christmas gift (whether you celebrate it or not, it’s a gift of the season) to one and all, I thought I’d share a video I recently uploaded and just shared with those on my Newsletter List. (To sign up for the newsletter, go to my home page and fill in the blanks—about once a month I’ll pop in with this ‘n that.)

Those who follow me on Facebook (here) will recognize this pond and view which is down the driveway and onto Ludwig Road, between two neighbors’ houses.

Recently, I’ve been taking some journaling and watercolor classes. Then, the Mid Coast (Maine) Book Arts group had an exhibit at the Camden Public Library. I was inspired by a book of hours on display, so BFF Kathy D. and I decided to make our own small accordion books. Below the still photo you’ll see my a video tour of the book, which I have titled “moments hours days autumn” to chronicle my life this past Autumn.

Beginning at 3:11 a.m. through to my evening ritual of sitting in my chair near my hubby’s chair, with the dog and a pile of books. You can see still shots of each page in my new Mixed Media gallery.

The left page is a quote, some by me, most by someone else. The right page is a watercolor, 5 x 5 inches. I figured I would mess things up, so it was better to do each separately, then glue them to the accordion “base” pages. On the back, I painted a single LONG (80 inches!) view that runs from winter to spring, summer and fall, back to winter, with the sky running from night, through morning, noon and afternoon, back to night. I used a dip pen and acrylic ink to write Strider’s Poem, by J.R.R. Tolkien, which has been a favorite since high school and whose meaning goes far beyond the Lord of the Rings saga.

I used Daniel Smith Watercolors, Stonehenge Aqua 140 lb. watercolor paper, Yes! paste glue, and both acrylic and fountain pen inks and a dip pen for all the lettering. The cover is made from my own hand-dyed fabric fused to mat-board from Kathy with Mistyfuse.

Here’s to hoping you all have friends (which can include family!) and joy around you throughout your lives, not just this season. I hope you enjoy my first ever made-by-me book. I think I will do more! Let me know what you think, and what you’d like to see in my new Newsletter. (And to sound like a broken record, sorry, sign up here.) MERRY MISTLETOE!

The Common Ground Fair

Saturday, September 22nd, 2018

You know the seasons have begun the swing to winter when it is time for the Common Ground Fair in Unity / Thorndike, Maine.  Put on by the Maine Organic Farmers and Garderners Association, it is the best of a country fair.  Because this is just a lot of pictures, I’ll just add captions and let you enjoy the day vicariously!

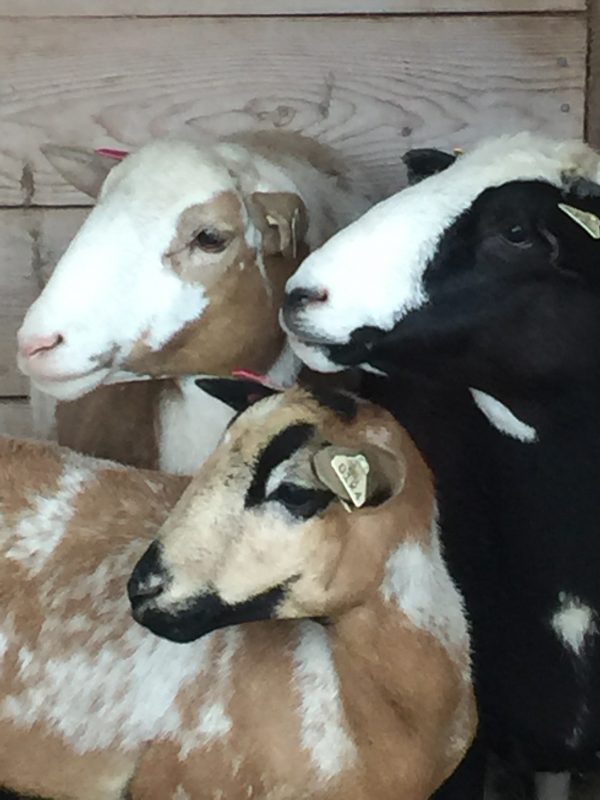
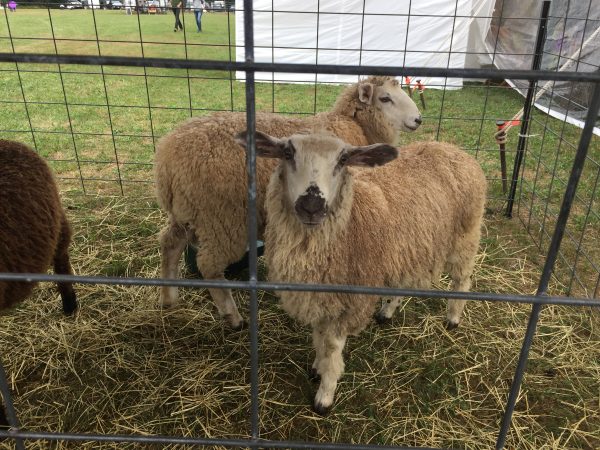
Some new buddies — two sheep and a goat in a lovely blended family!

The only daunting part is the long, sssslllooowwww wait to get in and park!

A fair isn’t complete without little kids getting to pet the animals

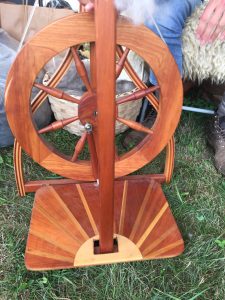
The handspinners have been to this fair for 31 years, what a beautiful spinning wheel!

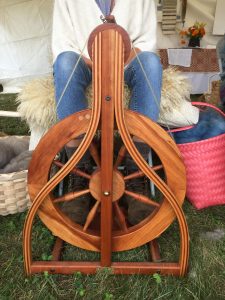
And the other side of the same wheel


I was lucky to see some of the dog agility/herding demonstrations

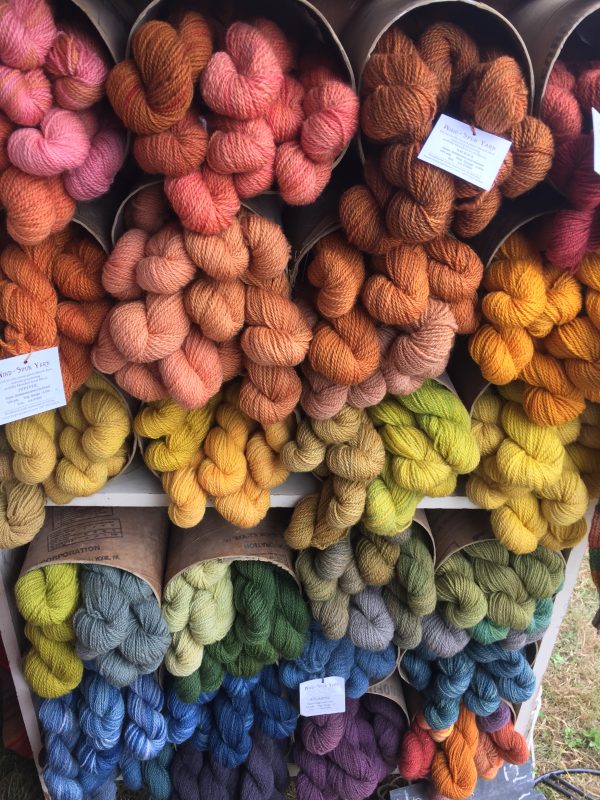
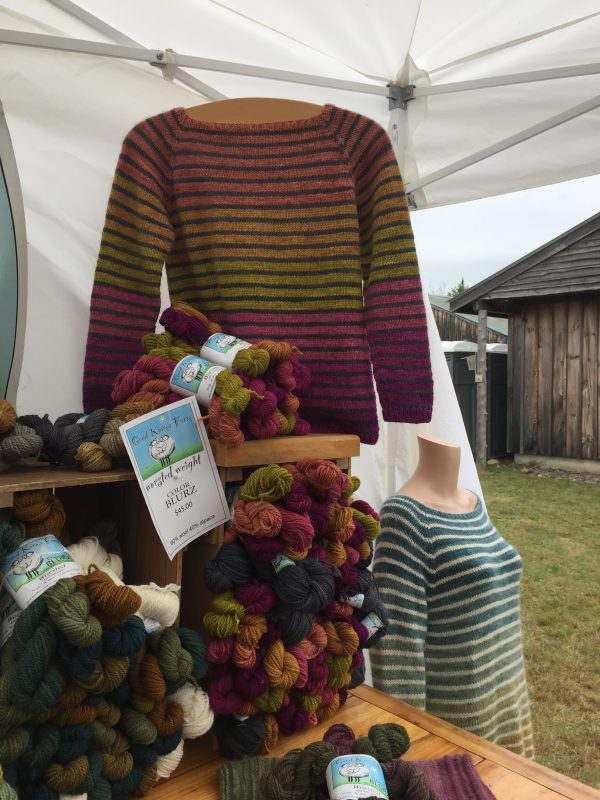
Good Karma Farm is near me, up in Belfast, Maine. They had a booth and I am SO IN LOVE with this yarn, and blend of Alpaca and sheep’s wool.  Find them at GoodKarmaFarm.com

I’m at a point in life where cardigans (on, off, on, off) are a must, but I found a pattern on Ravelry while there. I forcibly restrained myself from buying the bundles for these sweaters, but know I will knit one up as a cardigan before too long. AND I can go visit their farm! Yes, they have a website, yes they are on Ravelry, yes, they have a pattern for these sweaters (but it’s not on Ravelry…just write them)

Applies equally to quilts

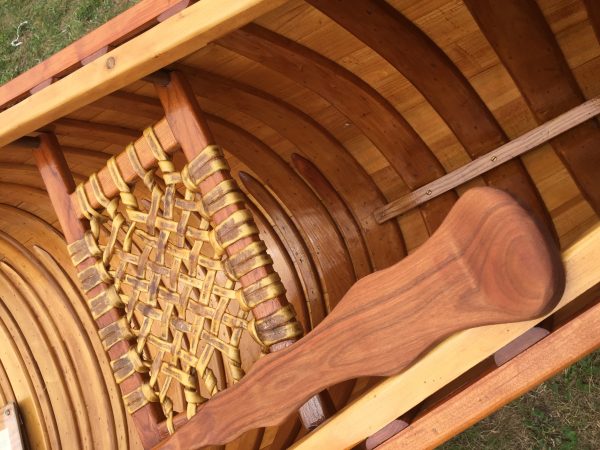
An EXQUISITE hand made canoe

inside the spinner’s tent

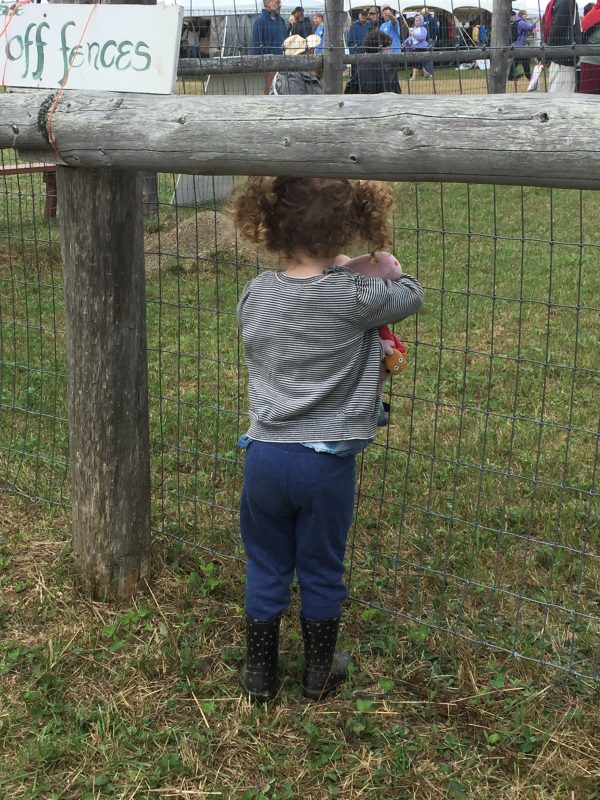
Random too-cute-for-words kid

More new friends…was trying to sketch but rain was incompatible with paper!

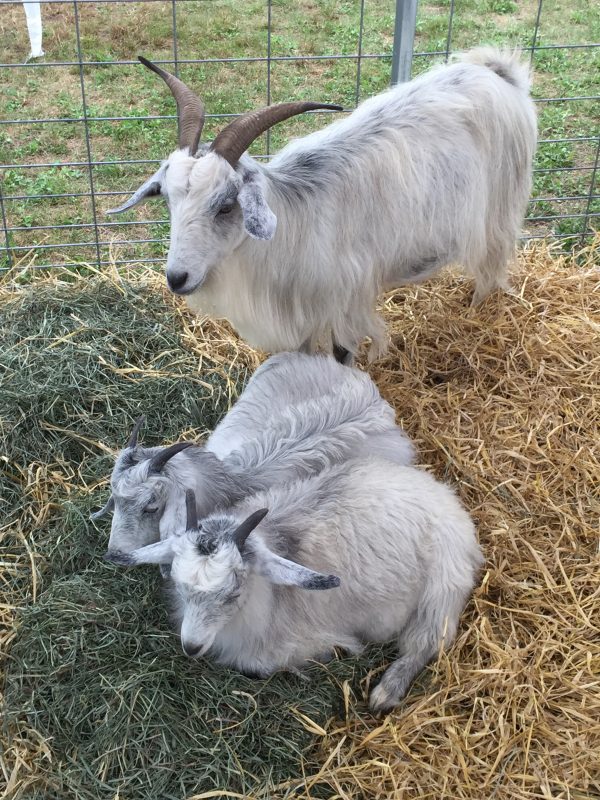
Cashmere goats

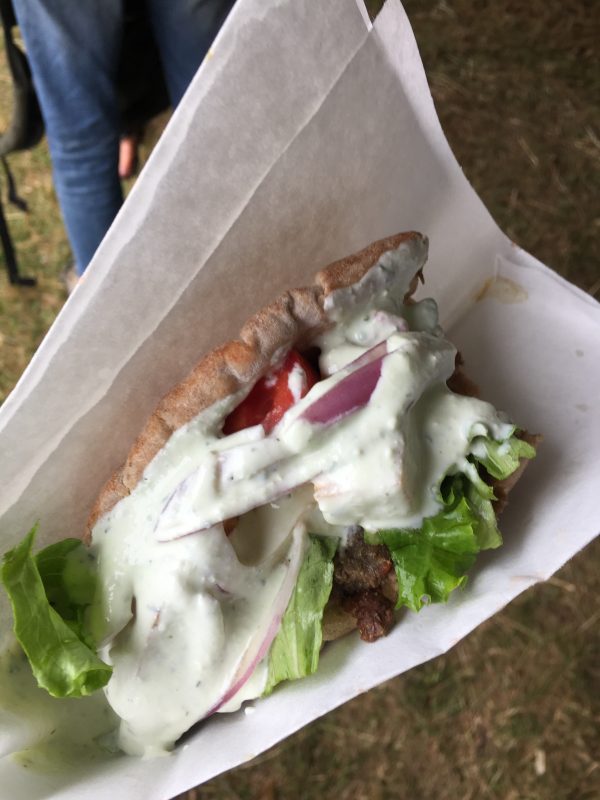
a REAL Gyro, meat on spit, heavenly!

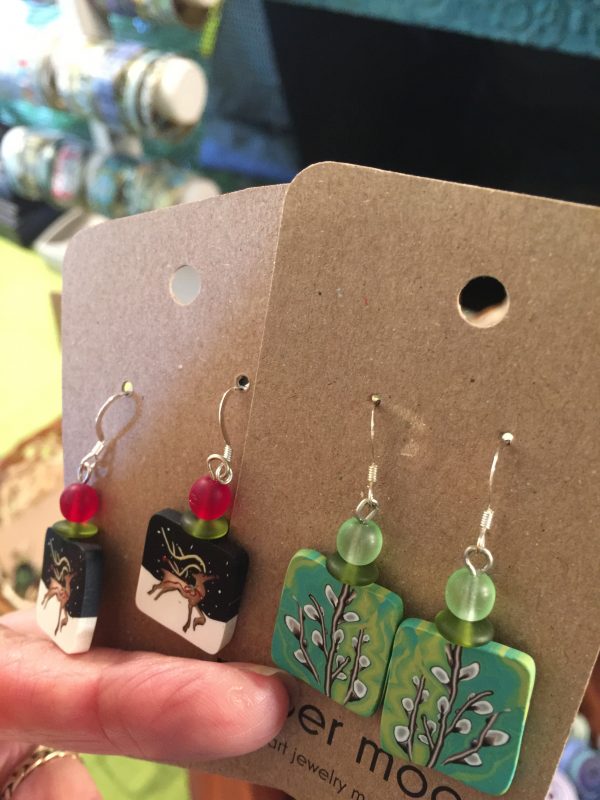
Love these earrings, have several pair. Now have the reindeer. Love the pussy willows, too….my colors…maybe next time! You can find her work here at papermoonjewelry.com.

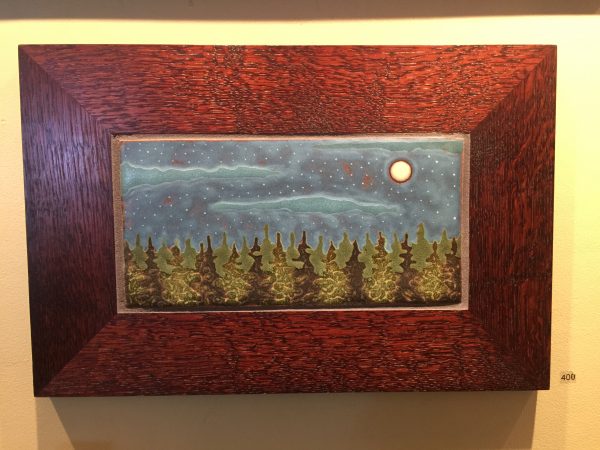
Stunning tiles…made by Jon White of ODD INQ, www.oddinq.com, and kinginq on instagram (ends in a Q)

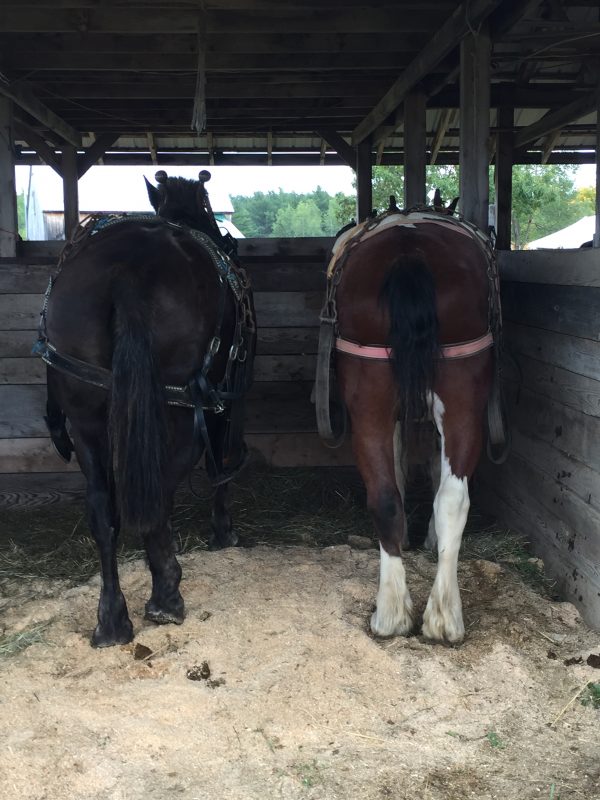
Immense horses for pulling large wagons

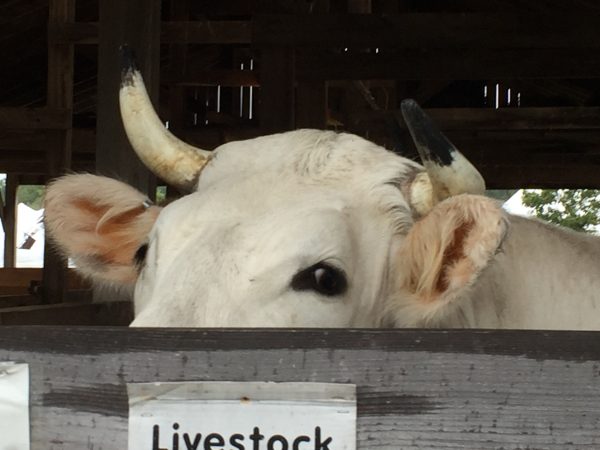
Even more immense Oxen. I mean HUGE… the hips were well above my head!

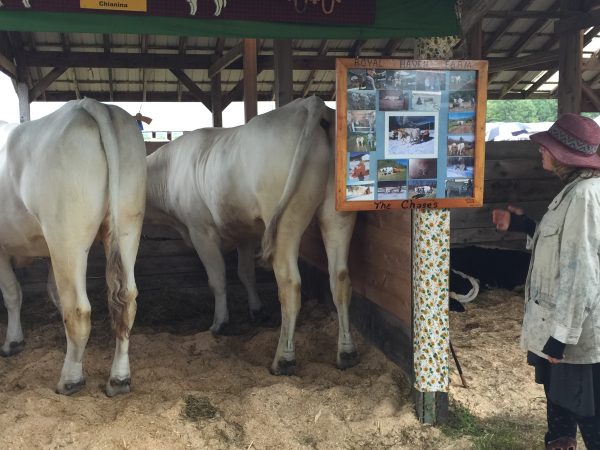
Perhaps my favorite photo of the day!  The other end of the IMMENSE Oxen…the size of a small elephant!

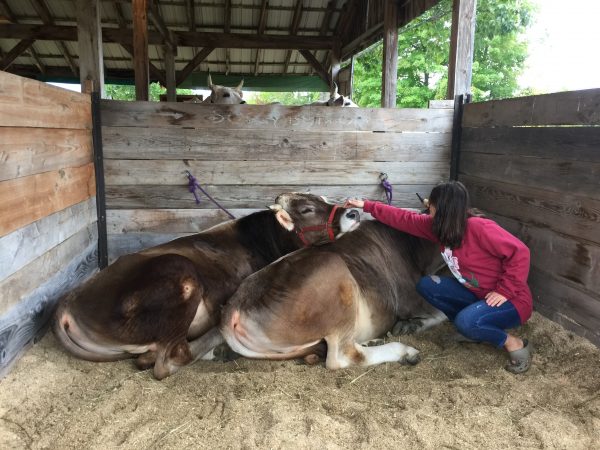
It appears some cows like to get scritched as much as cats. This lady was petting the one nearest her, and the other one wanted equal time LOL!

I had a thoroughly wonderful day, walked my feet off.  Combined with dog walkies about 14,000 steps today!   Perhaps tomorrow I’ll sketch from photos!


So stoked! Dishwasher repair and rehab! Complete kitchen re-do!

Thursday, September 13th, 2018

Warning:  no art or quilty content whatsoever LOL!   So I have shared on Facebook about my kitchen re-do, thanks to the wonderful folks at Pine Ridge Carpentry of Hope, Maine.   GOSH…I didn’t blog about it I just discovered.  OK, this just turned into a comprehensive kitchen re-do post.  It’s lotsa eye candy and inspiration, not much reading…just scroll!  At the very end I’m putting some of my favorite things / details from the re-do so be sure to go down to the end for the best bits.  OK, it’s all good stuff!
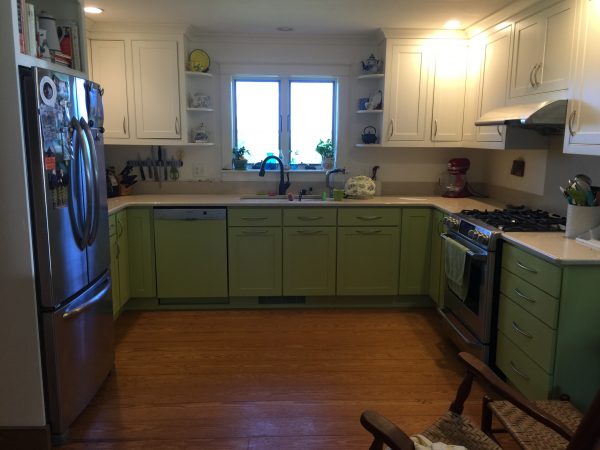
The FINAL, all-fixed-up version… read on for more!  Today I finished the last bit:  repairing the handle on the dishwasher and painting the black metal front in green to match the cabinets.  I am THRILLED with how it turned out.  I can’t believe I semi-took-apart the dishwasher, changed out the front control panel and switches, re-did the door and it looks good!  Some day I may replace the totally-functional faucet with one that matches the new decor and maybe convert the recessed can over the sink to a small drop light, but that will wait.

Here is what the icky “before” kitchen looked like:  DARK.  In 2011, when we moved in, the fridge and stove were black, and there was no dishwasher at all.  So we removed a cupboard (well, the carpenter did!  Thanks JB for a great job back then!) and inserted a dishwasher to the left of the sink.  JB had to reduce the size of the corner cupboard–when he was done, you’d never know it hadn’t always been like that.  Just found this photo from our first walk-through before buying the house:

The kitchen at the very beginning…dark counters, dark cabinets, grayish white on the ceiling, black appliances…ugh.

Then, this past late spring/early summer, I took out the dark old ick which included a lot of fading of the color, down to shadow marks!.
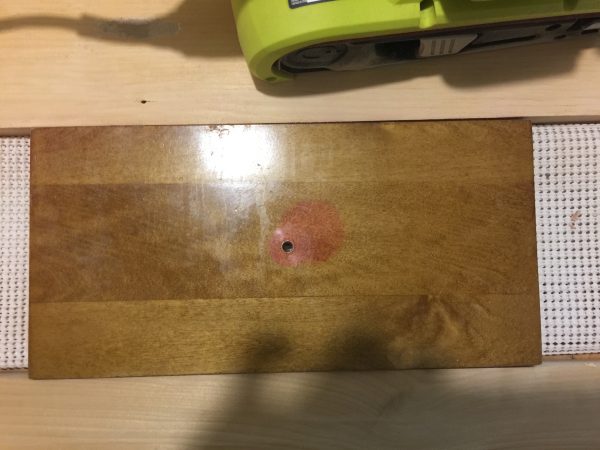
The reddish color was the original cabinet color. The spot is from where the knob cast a shadow and prevented the light from the window distorting the color. You could actually see a diagonal (blurry) across the upper cabinets where the sun bleached it. Yuck!

I couldn’t afford to re-do the whole kitchen.  Shortly after we moved in, we got rid of the dark green formica counter (which showed every single grain of salt, mote of flour, dried drop of water) and put in quartz counters.  I wanted to get rid of the claustrophobic feeling at the sink where the upper cabinets closed in on me, and love the old fashioned whatnot shelves.  I figured (correctly as it turns out) that having these on the ends would open up the window area.  Some of the lower doors were also starting to warp…not good.
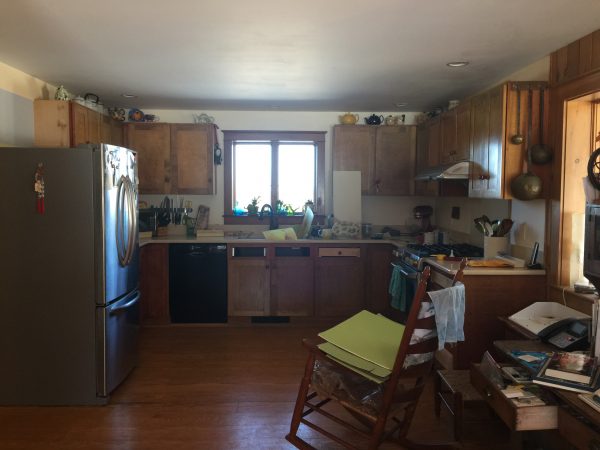
This is what the kitchen looked like for most of the past 7 years (I had already taken the drawer fronts off to start sanding in this photo). Dark. Ugh.

I looked and looked for years, and found some great semi-custom at EBS, the local hardware store.  Finding an installer that would show up  however was an issue.  One guy came out, gave a bid, shook hands on it (how business is done in Maine), then decided it was “too far” for him to come (25 minute drive!).  So I stopped in to Pine Ridge Carpentry a few miles from our house.  They asked to bid on the project instead of installing the pre-fab cabinets.  Their bid was $1000 above the cost of the pre-fab, but agreed to match the price because they had a sudden opening (in a week!) in their schedule and wanted to keep the crew working.  So I got CUSTOM, exactly everything I wanted, for the same price.  AND I ended up ordering new doors for the lower cabinets, sanded the frames and painted them myself, sanded the drawer fronts down to wood, and they painted the drawer fronts and new doors to my custom color.  So for about $2000 more than the initial cost I got an almost entire new kitchen!
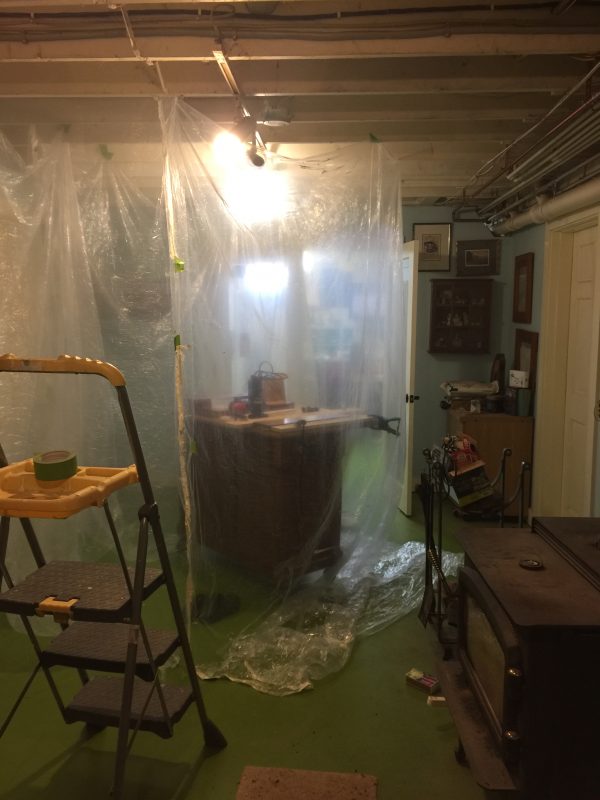
I hung plastic drop cloth in the basement to contain the dust when I sanded down the drawer fronts, which Pine Ridge painted along with the new lower cabinet doors.
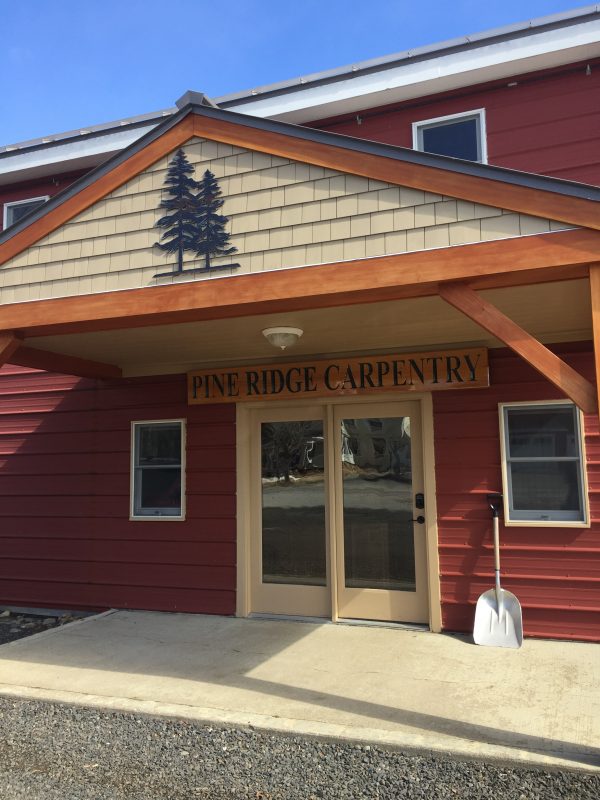
What a lucky day when I popped in here on the way home. I had driven past it for 7 years, but didn’t realize they build entire houses and are master carpenters. I LOVE that I was able to “buy local.”
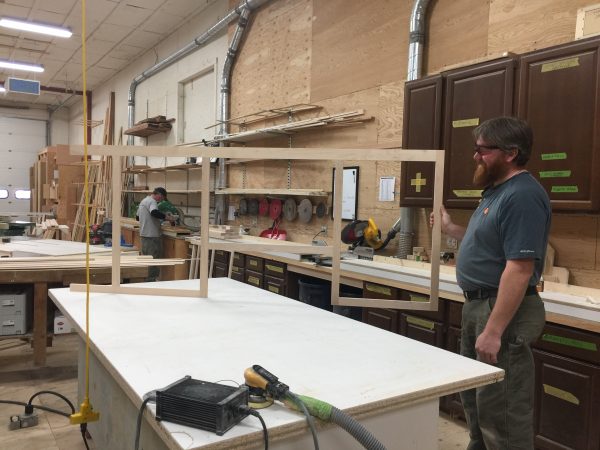
Pine Ridge is so cool–I stopped in to drop off a check, and got to see the workroom, and Nate showed me some of my new upper cabinet fronts–these are the ones over the stove. This place is so clean you could eat off the floor!
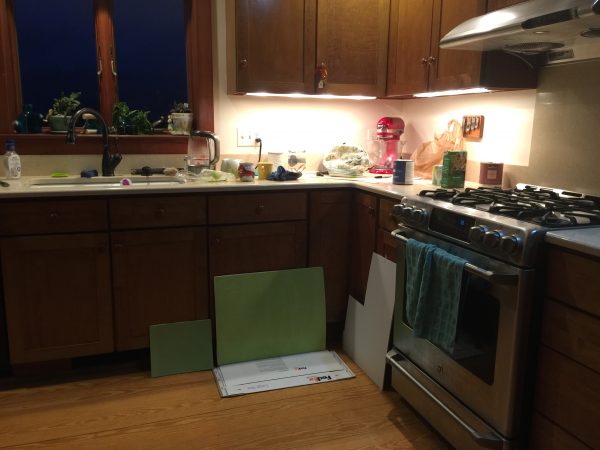
Test-driving various greens (painted on primed cardboard so I could move them around to see the colors at different angles/in different light)
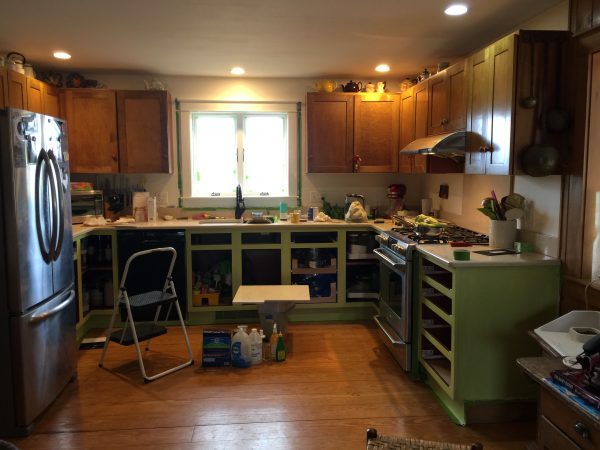
I sanded the lower frames down to bare wood, then primed and painted with the same paint Pine Ridge used for an exact match. And boy did I test-drive a lot of samples to get the perfect-for-me green!
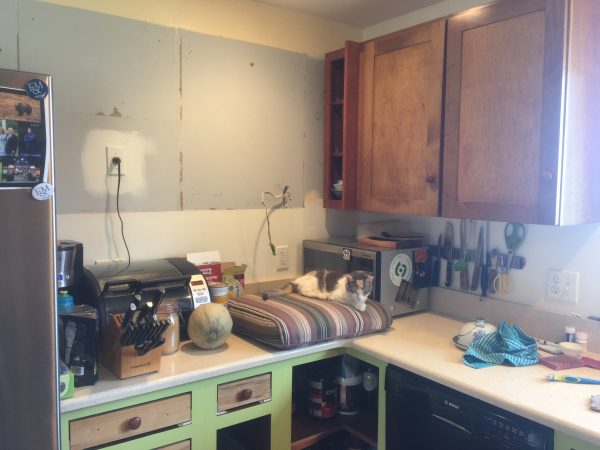
De-installation, by me with muscle from Paul. I wanted not to rip off the old cabinets. They are currently in the garage for future use out there, with a couple in our store/work room in the basement.  Note the large bulky microwave plus toaster on the counter.  The cushion was knee padding as I removed screws.
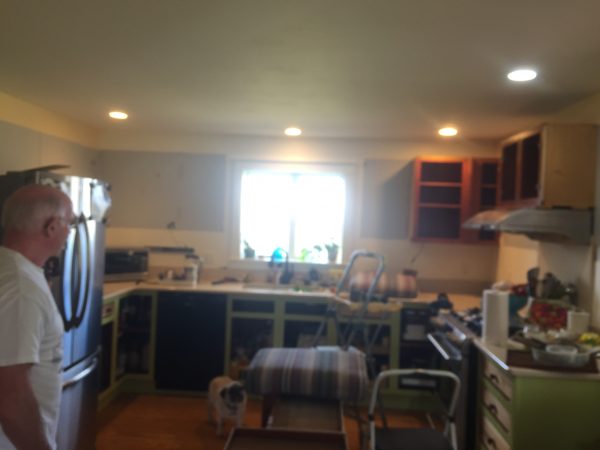
LOOK how much better it is without those awful dark cabinets closing in on the window!
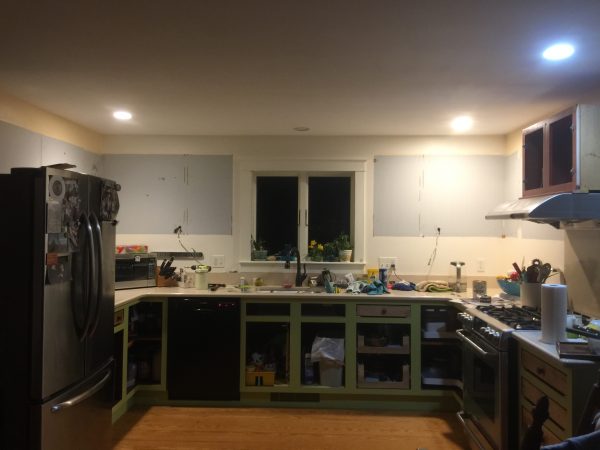
Voila! Mo’ bettah! Paul even admitted the kitchen looked SO much bigger and lighter already.
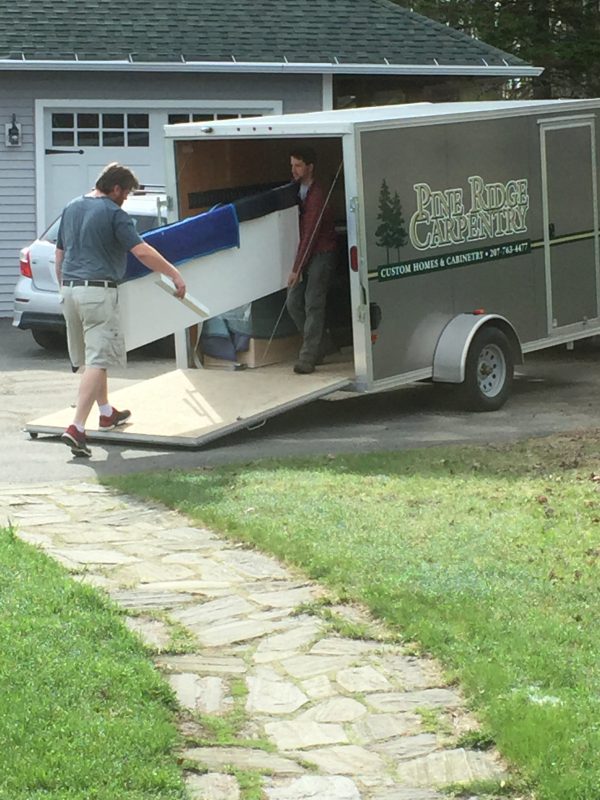
Installation day!
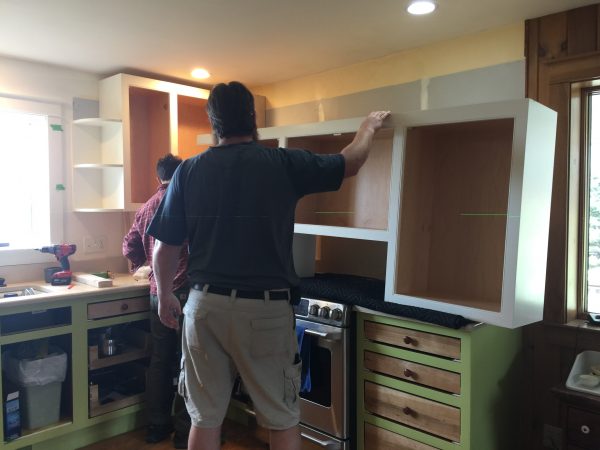
Nate really is that tall, about 6’5″…he could reach the crown moldings without a stepstool!  He can also make ANYTHING.  Impeccably!
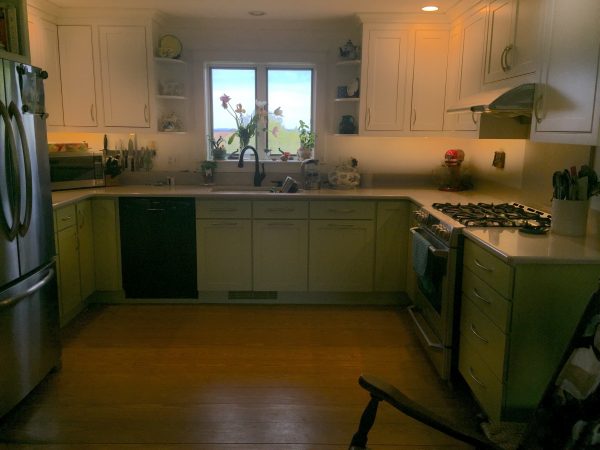
Finished by Mother’s Day. I cannot tell you how pleased I am with the results, my design, and Pine Ridge Carpentry’s outstanding responsiveness and quality. They aren’t inexpensive, but they are worth EVERY SINGLE PENNY. I told them if I win the lottery, they are building my dream house!

The only thing left to do once I had **finally** selected the hardware and they installed it was to do the dishwasher.  Thanks to Bosch and YouTube, I was able to repair the cracked handle and get the door panel off.  Thanks to my friend Deirdre Abbotts for helpful hints on painting metal. I was disappointed that on a quality brand like Bosch the handle / panel cracked to the point of needing to be replaced, but glad that you could actually replace JUST the handle (not the whole door) and that they told me about good video tutorials on DIY on YouTube.  As I was about to order the new handle, I realized I could order silver, not black!   AND that I could order a new stainless steel full door panel.  But that panel cost $180.  Leftover paint:  free.  Help from Deirdre:  free and appreciated!
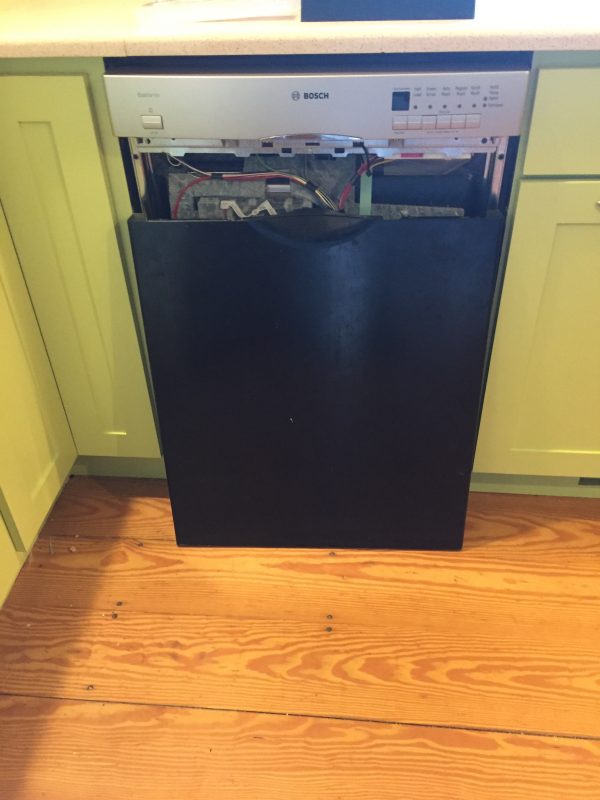
New handle and buttons installed, black panel removed for painting. It was literally plug and use!  Like clicking in Legos!
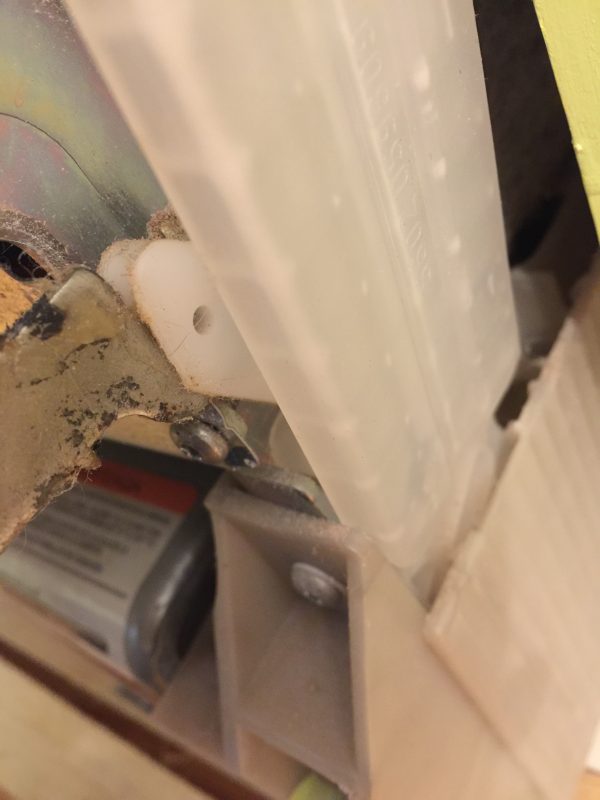
Before removing little stuff like this plastic panel, TAKE PICTURES so you can get it back exactly. The videos don’t do close-ups of all things.
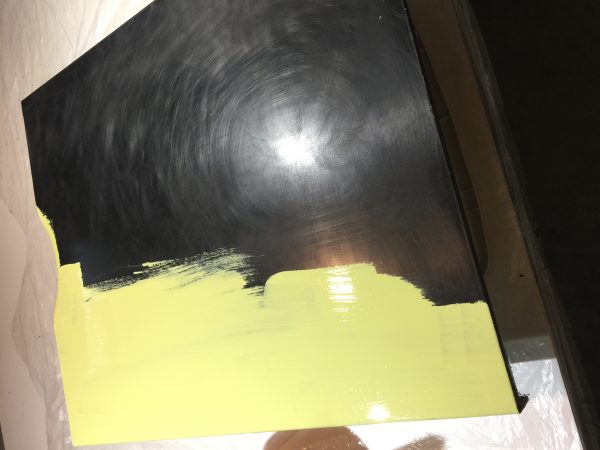
Painting the door panel in my utilities room, where I dye fabric. I figured it was the least dusty part of the house, but the floor joists permit air from the rest of the basement in. It is IMPOSSIBLE to paint in a dust-free, pet-hair-free environment in this house. Oh well. I did my best!
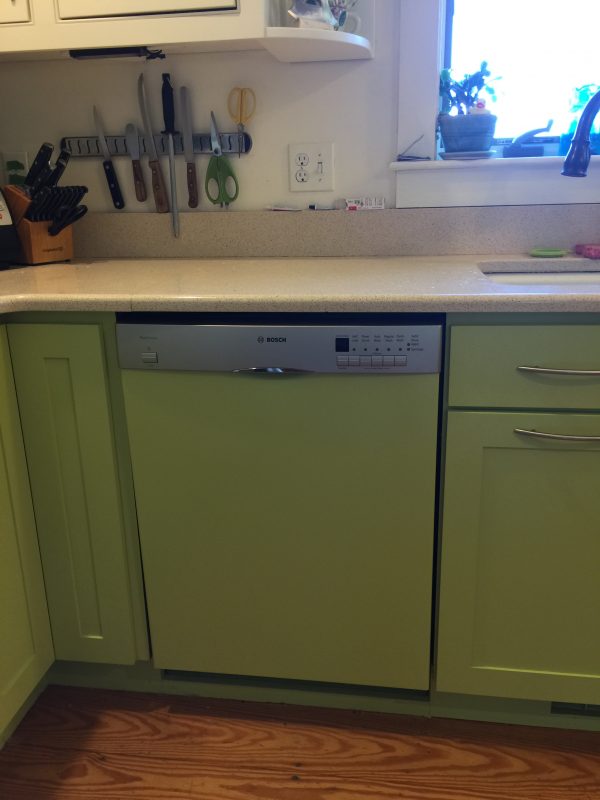
Installed this morning…I just about squealed I was so excited!  The finish isn’t perfect, using Floetrol in the paint (thank you again Deirdre) was essential, and next time I will buy cheesecloth and strain the paint.  But it is as good as I can get it in this environment, and I am thrilled with the final results.

The FINAL, all-fixed-up version… one more time.

Here are some of my FAVORITE things in the new kitchen:
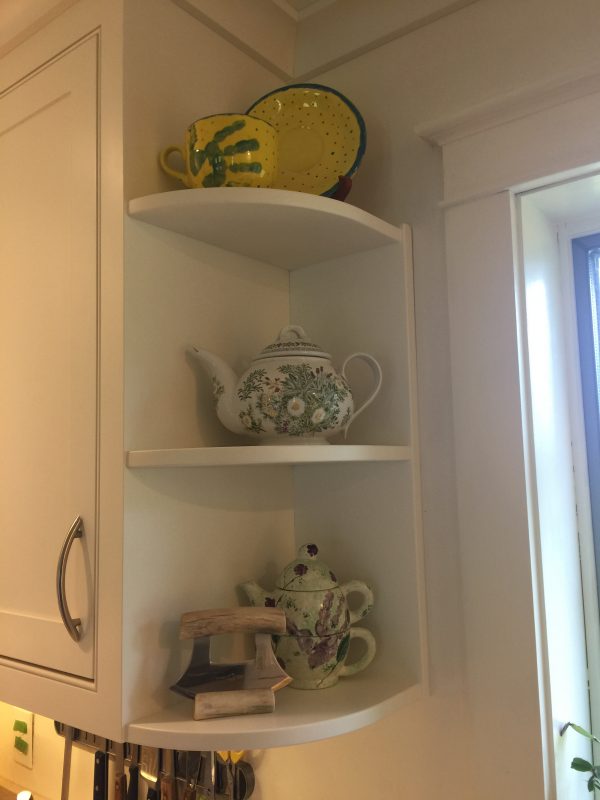
I LOVE these rounded shelves. My gramma had them in her Southern California bungalow home. I designed them into our dream home in Friday Harbor and loved them there. And I love them here. That is Joshua’s about 8-year-old hand on the yellow cup, a UK National Trust Teapot on the middle shelf I ordered while living in Gabon circa 1990, and Eli’s about age 4 hand on the cup/teapot thingie on the bottom shelf, with the Ulu bought in Alaska last year and used often.
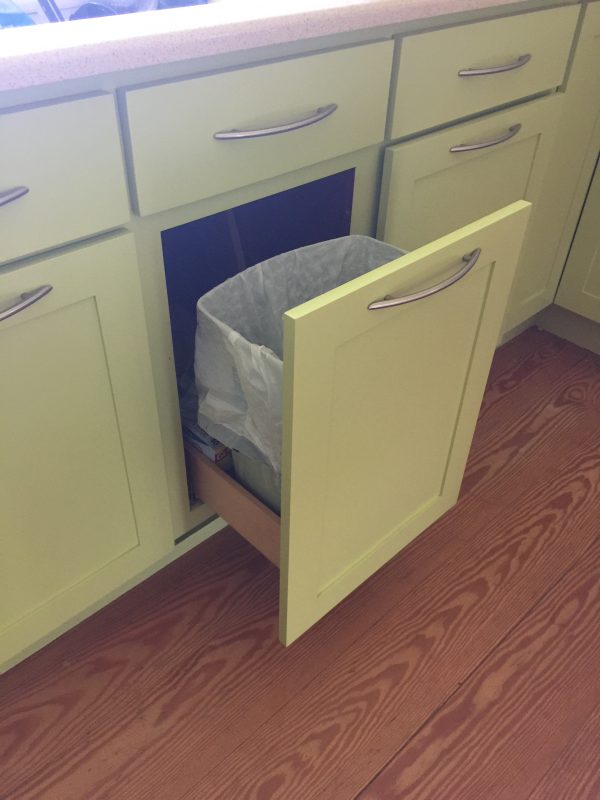
The Pine Ridge guys asked if I wanted a pullout for trash. Um yeah!  I had initially looked at DIY options, but they wouldn’t work with the old cabinet base. They made a box to fit and installed bump out glides. I can use my toe or leg to open the garbage–ya know how you crack an egg then realize you didn’t get out the trash can? No longer an issue! Because of this feature, we opted to put the pulls horizontally on the three doors under the sink.
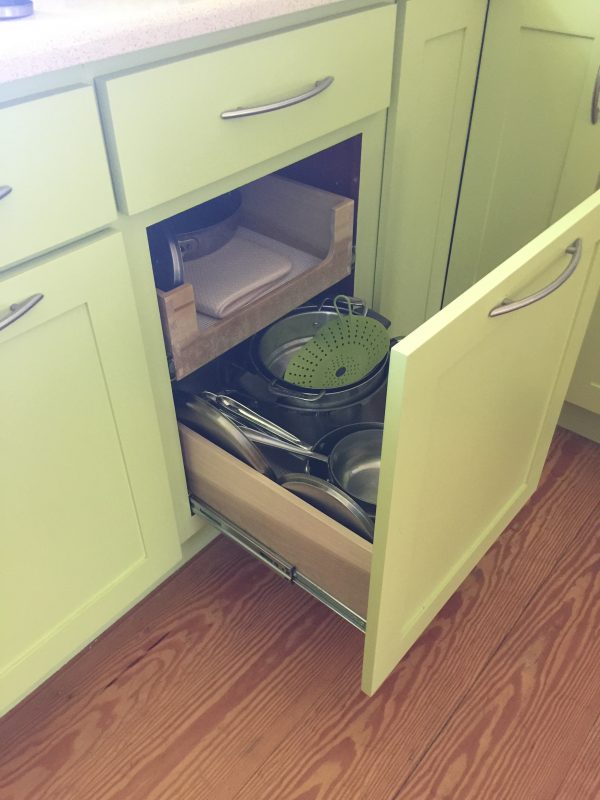
When JB retrofitted the cabinets to install a dishwasher in 2011, we had him build two pull-outs for the pan cupboard. We decided to screw the new door to the pull-out so it functions similarly to the trash, but because we used the existing hardware you pull it (not bump)…which you can do with one finger!

Speaking of retro-fitting….
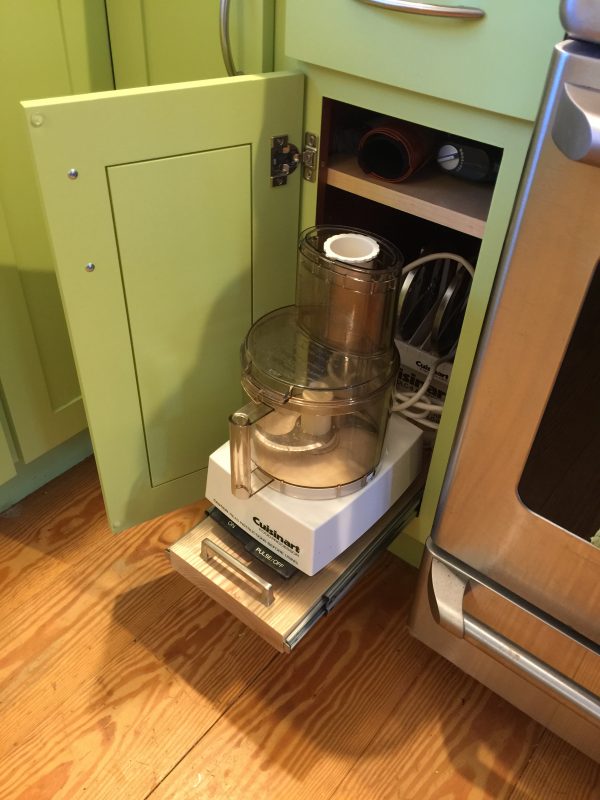
This cabinet opening is a skinny 8 1/2″. Useless for almost anything other than cookie sheets (which are on the other side of the kitchen in the mirror image cabinet). It originally had a half-deep shelf. Useless. So I asked them to make a pull-out for the bottom and a full depth shelf. The shelf is installed at the very top and my rolling pin, stick blender and rolled-up non stick cookie mats are in there. Easy to pull out and return. The guys found a slab of wood and installed it on the bottom with glides. We used a handle I had ordered but decided wasn’t the right style to pull it out. Now I can get the Cuisinart in and out easily without knuckle mashing.
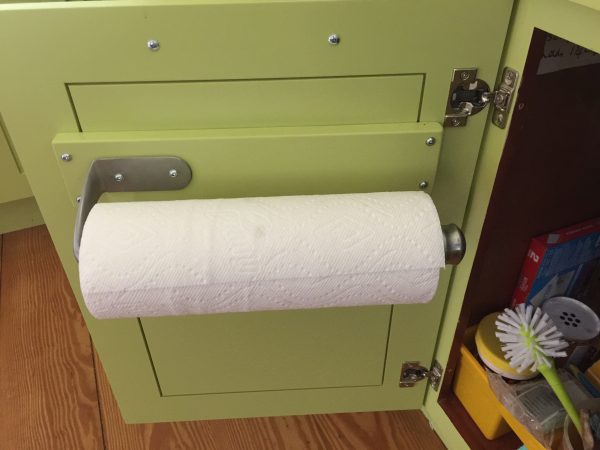
Hidden, accessible, perfect! You’d think I would want to take on something as easy as a paper towel holder installation. But I was leery of screwing through my new doors. Nate has a brilliant way to help with that: a brace of wood that extends to the thick frame part of the door, then apply the holder. The latter I ordered from amazon and has a ratchet so you can pull and tear off a single sheet one-handed. It really works. Link here. I painted the wood green to match before Nate installed it. LOVE!
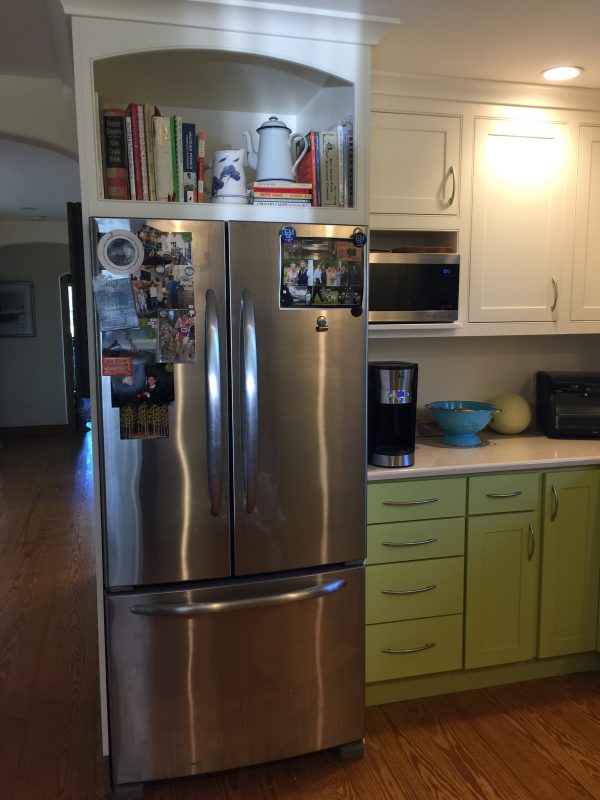
A “leg” on either side of the fridge makes it look like the fridge is built-in, extends the hallway visually. Before, it was just the side of the fridge next to the hall–not so attractive. Pine Ridge milled baseboard trim to match, I stained it, they installed it. I did drywall mud to join the new panel to the existing hall and when I painted this summer, it looks seamless.
I LOVE that they were able to match the curve on the top of the cabinet that I requested to the curve on the top of the hallway. We planned to ditch the old big microwave (which died shortly after installation of the cabinets), so had a smaller opening made to get a small microwave OFF the countertop.  Cereal goes in the cupboard on top.  And OH…all the hinges are soft-close.  Didn’t think I needed them, but it is what Pine Ridge does standard.  LOVE them.

So what was going to be a short post on painting the dishwasher panel has turned into a long, LONG post.  But I hope that you find some ideas that you could use…some of the last “my favorite” bits especially can be done to an existing kitchen without too much fuss.  To my local peeps, I can HIGHLY recommend Pine Ridge.  They are fair in their pricing, honest, hard working, superior quality, responsive.  Like I said:  If I ever win the lottery, they are getting some of the proceeds whether I build a new house or do “pie in the sky” upgrades to this one.  I am a HAPPY CAMPER!


Lupines: the quilting begins!

Sunday, July 22nd, 2018

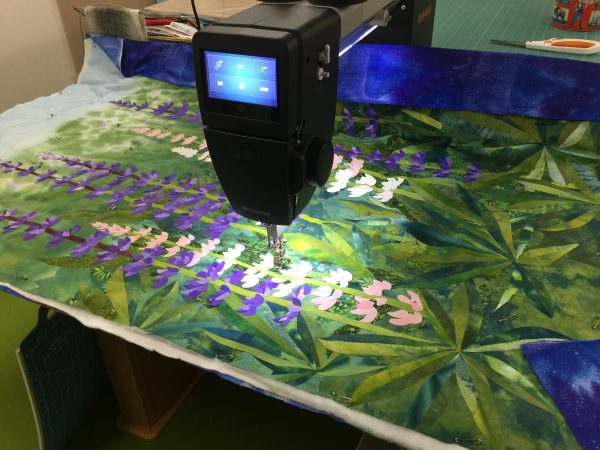
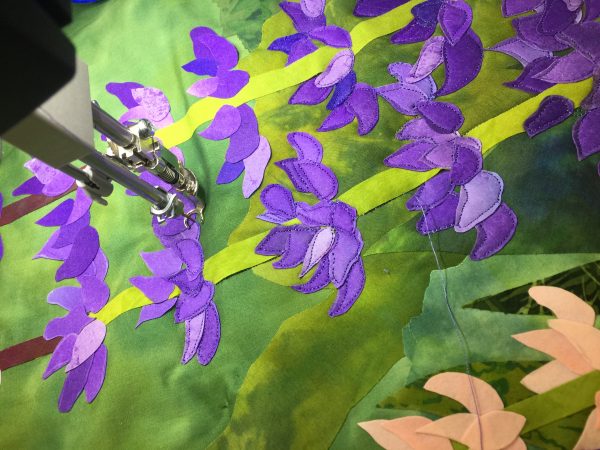
Ever so slightly ahead of schedule, I have begun quilting on the Lupines. Luckily (and one reason I chose this imagery) this will be easy quilting.  And yes, once again, I LOVE MY BERNINA Q20.  Crazy expensive and worth Every. Single. Penny.   Lots and LOTS of pennies.

This morning I finished basting the Lupines quilt.  I decided to try something I haven’t done before:  a double batt.   I definitely wanted to use wool, but I haven’t been able to find a source for my favorite Matilda’s Own Wool-poly blend batt in the US recently, and I’m hoarding my last batt.   So I used  Quilters’ Dream Wool which is much fluffier; I fused my top to that.

BUT I was concerned about distortion because of the fluffiness–it just didn’t feel like it would hang well and be stable.  Dreamy (pun intended) in a bed, lap or snuggle quilt, but by itself on a densely quilted wall quilt?  Not so much.  So I took the only cotton batting I had, Quilters Dream Select, and layered that underneath the wool.  If I had had Request, the thinnest, I would have used that instead.  Finally, spray basted the backing and safety pinned intermittently.  I am using up long lengths of print fabric in my stash when they suit the quilt–time to move them along.  Will have to dye something to match for facings and hanging sleeve.

I also selected thread yesterday afternoon and this morning.

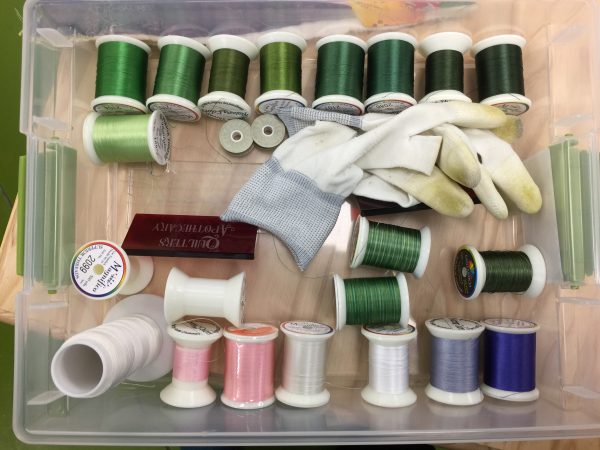
When I choose thread for a quilt, I “test drive” it by drizzling on the surface. If it works, it goes in the shallow box. I probably won’t use all of these, but will use most of them–about half the solid greens and almost all of the rest. And I added a medium purple this morning and will likely not use the dark purple in the box at all.

Things I have learned so far:

  • Painting a nonwoven is a good thing.  But if that nonwoven is Pellon 65 heavyweight interfacing, it is somewhat like using construction paper.  Will do the non woven thing again, but will look for something softer yet still dense (so no shadow through).
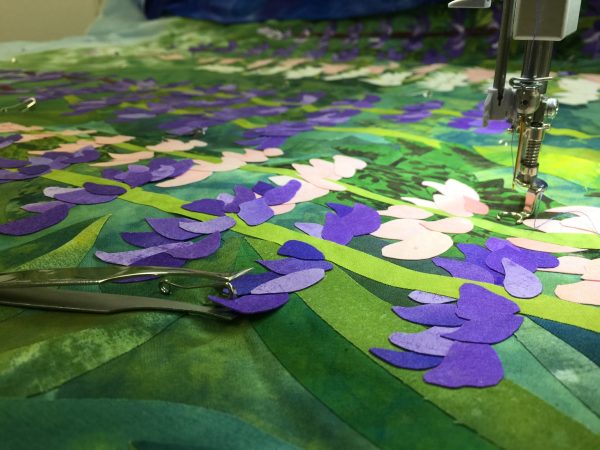
  • Mistyfuse is by far my fusible of choice.  But it behaves differently on the interfacing than it does on cloth.  If I fuse this particular interfacing again, I will use TWO layers of Mistyfuse–it is plenty fine and easy to stitch, and it will help this painted interfacing stick better–see photo.

Because of the difference (in porosity maybe?) between fabric and interfacing, my fusible isn’t sticking quite as well as usual. So I have re-fused various spots, and in a couple of cases tucked snippets of Mistyfuse under the stubborn lifting petals. I found, luckily, that if I am careful I can still quilt those lifting petals because the interfacing doesn’t wobble around like fabric.

And to my astonishment, I quilted almost five of the six purple lupines today.  I have a couple of the tops where I will use pale lilac or cream unstitched as of this evening, but I am definitely farther along than I thought I would be.

Quilting in progress…done on the right, not done on the left. Using just one purple thread to stitch down the petals/quilt down the petals is working out OK despite the value changes from petal to petal.

That means the “after Eli goes back to college” period may be less frantic than I had feared. YIPPEE!  Barring catastrophe, I will be one and able to take photos and submit then ON TIME.  Stay tuned!


SaveSave

SaveSaveSaveSave

Getting ready for the next quilt….the herald of summer in Maine

Sunday, July 1st, 2018

Before I can start in on the fusing and collaging process, I find that I now need to dye fabric specifically for a project.   While working on my Lilies of the Valley Quilt, I used up most of my good “summer” greens.   My next piece is for Explorations at the New England Quilt Museum (in Lowell, Mass.), a regional SAQA (Studio Art Quilt Associates) show.  I’ve had several ideas I wanted to try for this piece, and really wanted to push myself to do something different and unexpected.  Unfortunately, those ideas are just not wanting to fit into the required vertical orientation and size required!   So I’m going to do a large piece on something I’ve been wanting to do for a while:  Maine’s lupines that bloom in late May and early June and herald the summer.

SAQA members from Massachusetts, Rhode Island, Maine, New Hampshire and Vermont were invited to submit a body of work.  If selected, artists would then make a 30×50″ art quilt featuring a specific technique.  We were advised to submit several techniques, so I suggested dyeing, fused collage and machine quilting/threadwork.   I am delighted that I am one of 24 artists selected!  There will be two exhibits of 12 artists each.  We won’t know whether we will be in the Oct-Dec 2018 exhibit or the Jan-April 2019 exhibit until the works are completed and submitted August 1.  That means I need to work FAST!

I was chosen to showcase fused collage.  The exhibit is about techniques, with in depth information and supplementary materials.  From the acceptance letter:

In the exhibit, your piece will be accompanied by a number of items, including your artist statement, a brief bio, a photo of you in your studio, and materials which explain your technique. Each artist has a 20″ x 50″ area that they can use to explain their process. You can use process photos, sample pieces, written materials, even video presentations if you can figure out how to make it work.

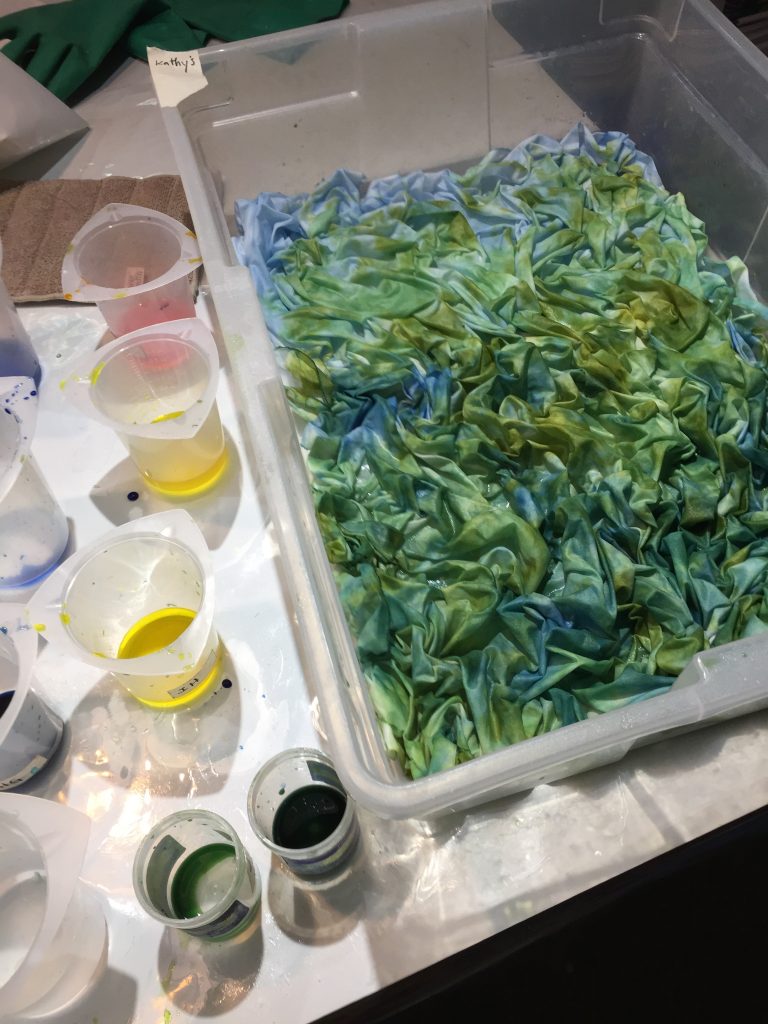
But before I can fuse, I need the right COLORS to fuse.   Some years ago I made some cloth that I gave to my friend Kathy, who used it is a fabulous portrait of her granddaughter.   I thankfully kept notes of which dyes I used, and I call this combination “Kathy’s fabric.”  This time, I decided to make it not as dark—summer meadow greens instead of piney woods greens.

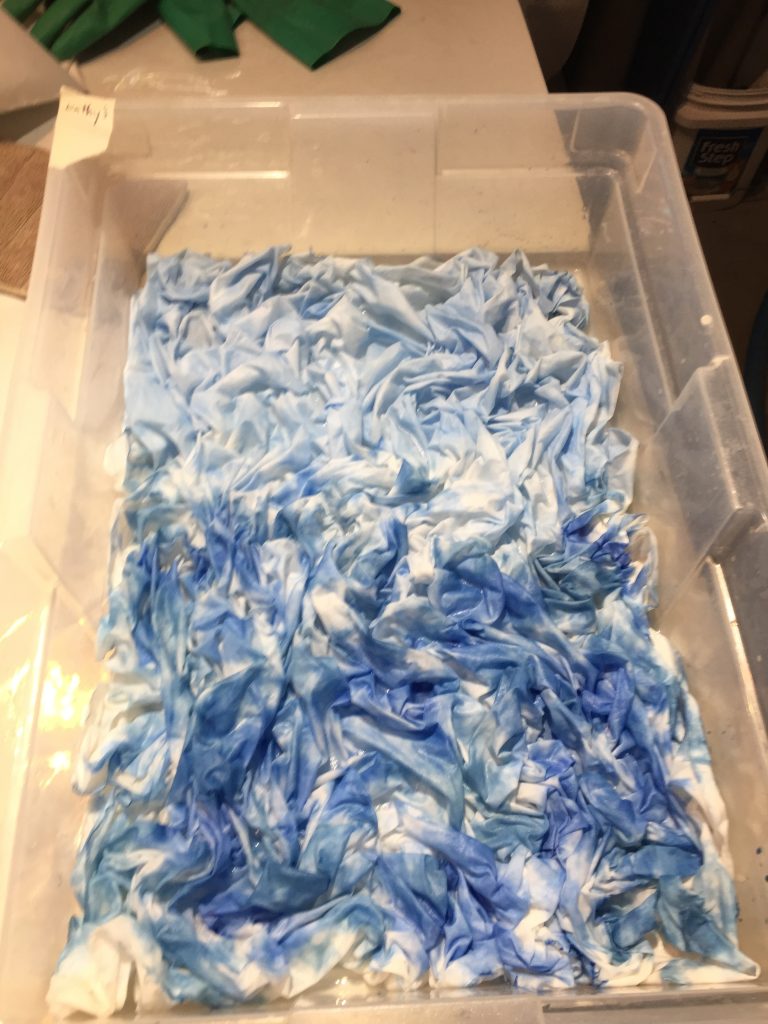
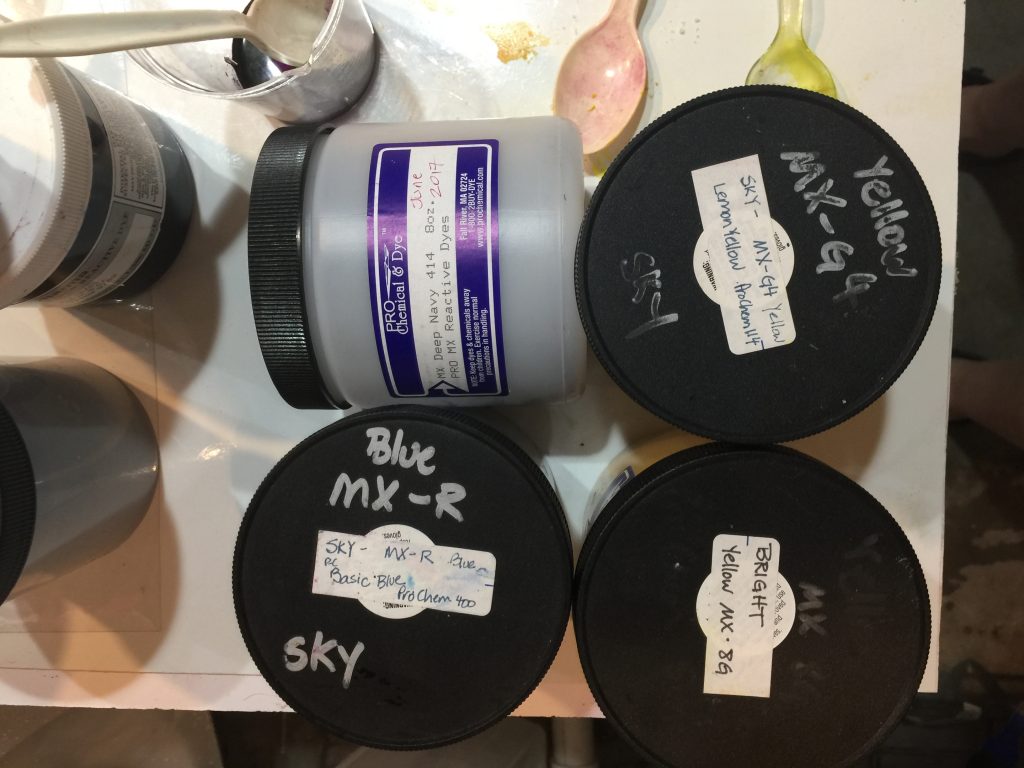
I start by dotting dye on, both navy and basic blue. I literally stick my latex-gloved fingers into the dye and daub it on. MANY classes with Carol Soderlund and many MANY yards of fabric and miles later, I can begin to predict what I will get because I tend to refer to my notes and books from the workshops, then go improv.

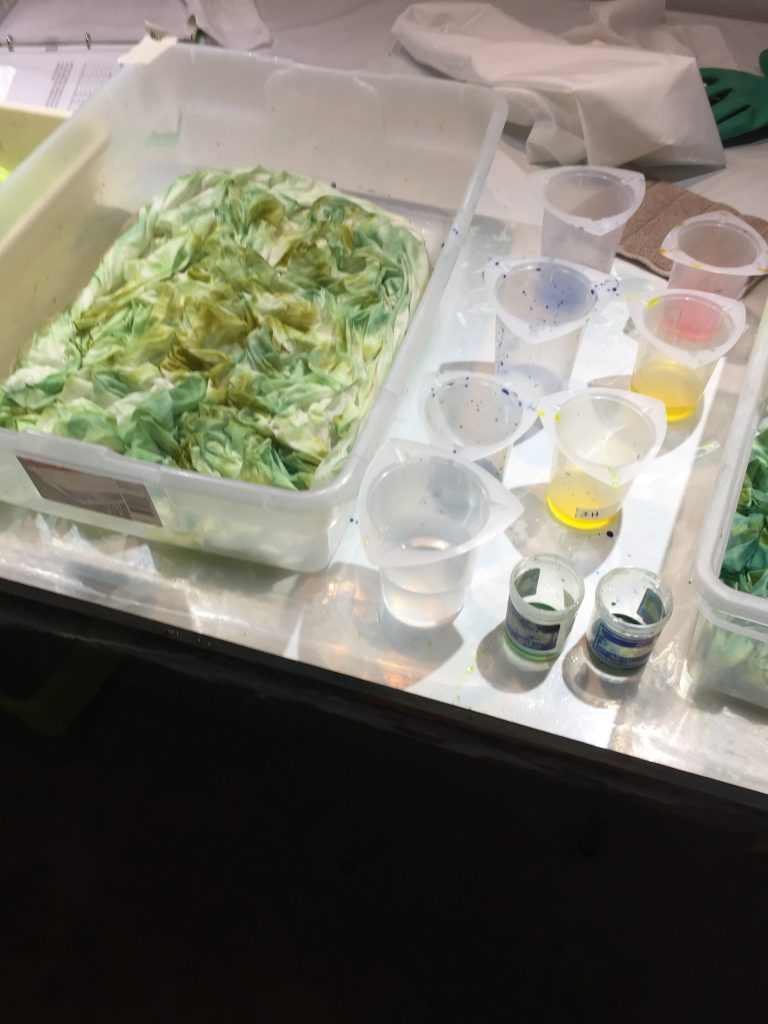
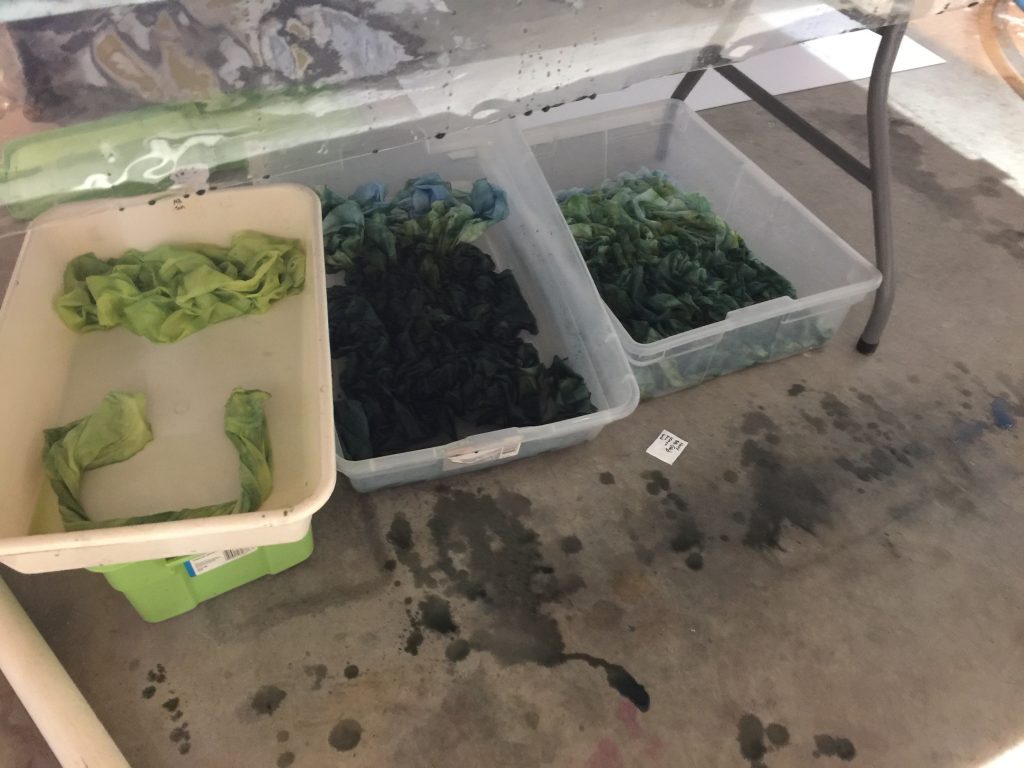
Then I add two or three yellows, because not just one will quite do what I want. Sometimes, I do a second cloth, as here, where I have actually mixed some greens instead of just doing yellow on blue.

For dye geeks, most of the time I prefer to paint dye onto cloth, then paint soda-ash/fixer solution on top, but this time I soda-soaked first, then daubed on the color.  When I want significant patterning, it’s soda-soak first.

The photo at the top of this post is the one which began with blue dots, then yellow, then greens.

Once I’ve gotten the color on, the fabric needs to batch so it moves under the table for several hours before washout, sometimes (as this time) overnight. Had to make some of my bright spring greens, too.

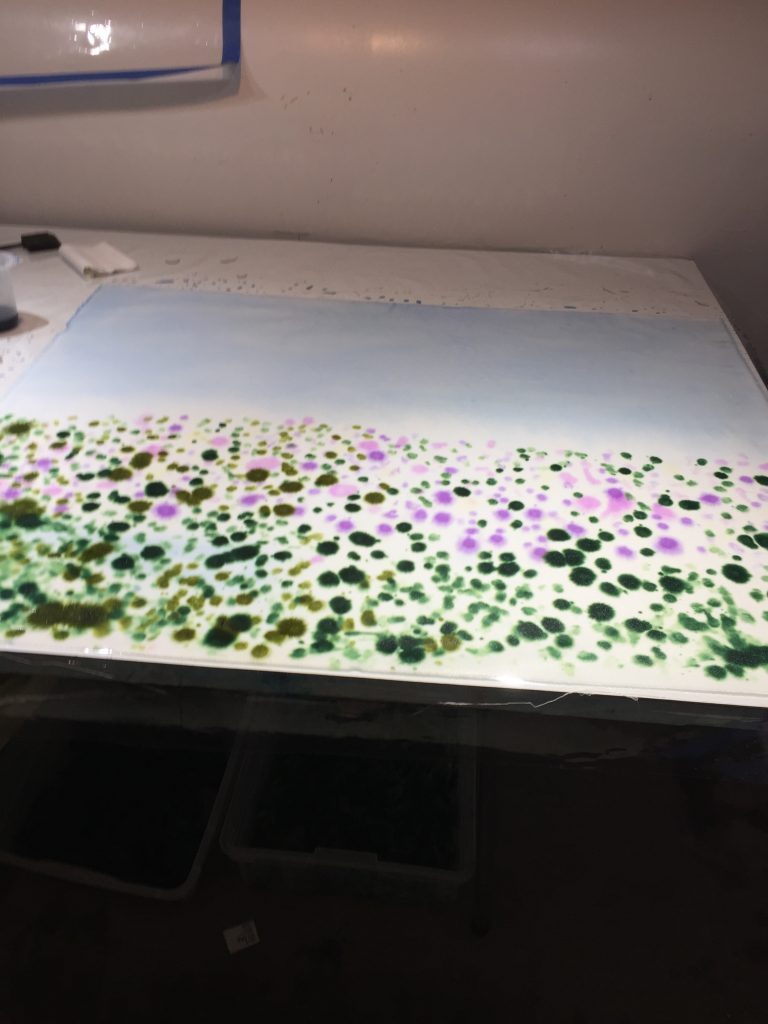
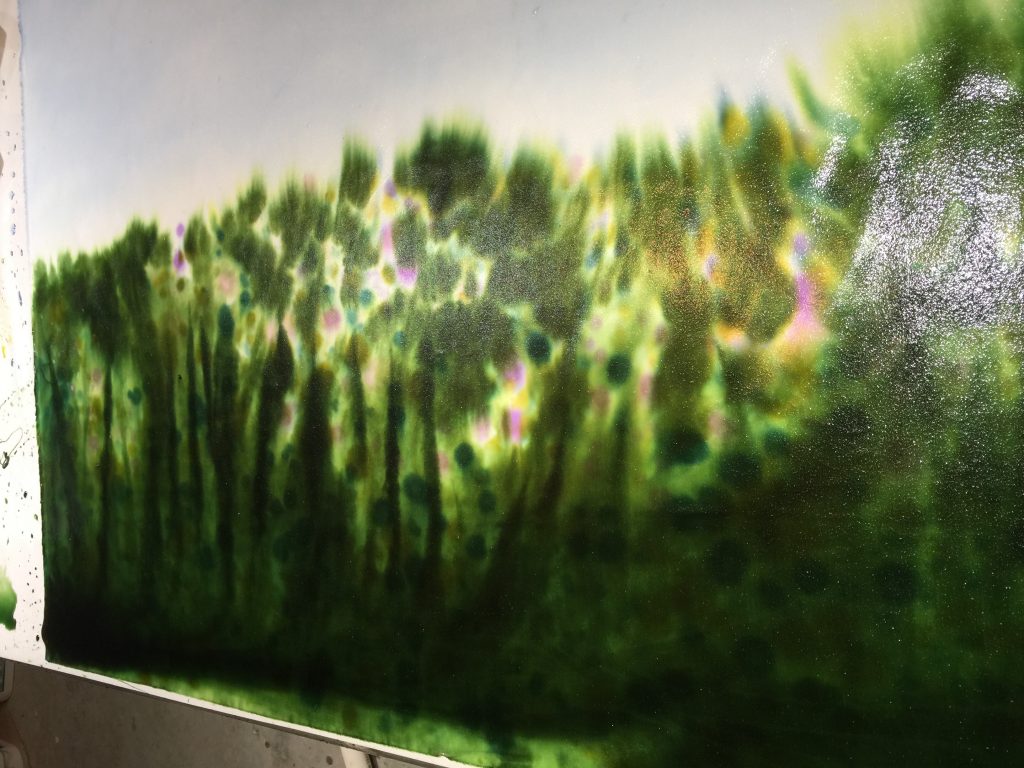
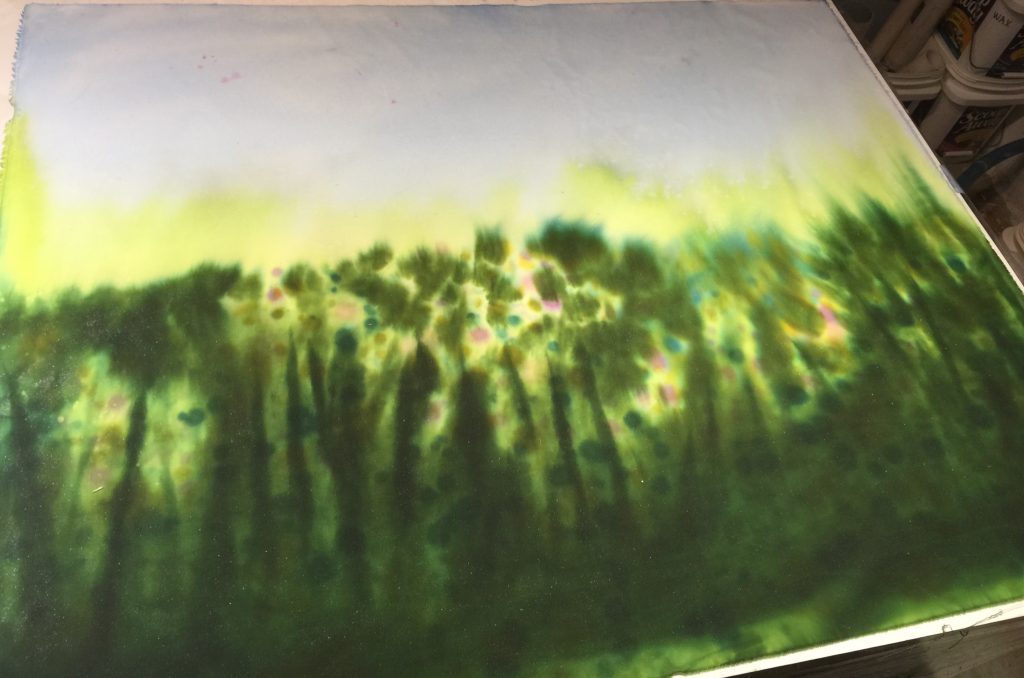
Then I decided to try to make a field with lupines in it, but blurry, to use as background at the top of the quilt.  I may have messed this one up…..

Sky at the top–good until I put some plastic over the top to batch it overnight. Apparently SOB there were stray dots of dye that didn’t get washed off properly last dyeing session. SOB.

This is what it looked like about six hours later. I like the way the dye is seeping up into the sky. This is when I covered it. SOB.  And most of those dots got covered up. 

This morning when uncovered. SOB. Random specks of pink in the sky. SOB. Will have to see after washout what remains.  Cover it up with tall lupines perhaps.  SOB.

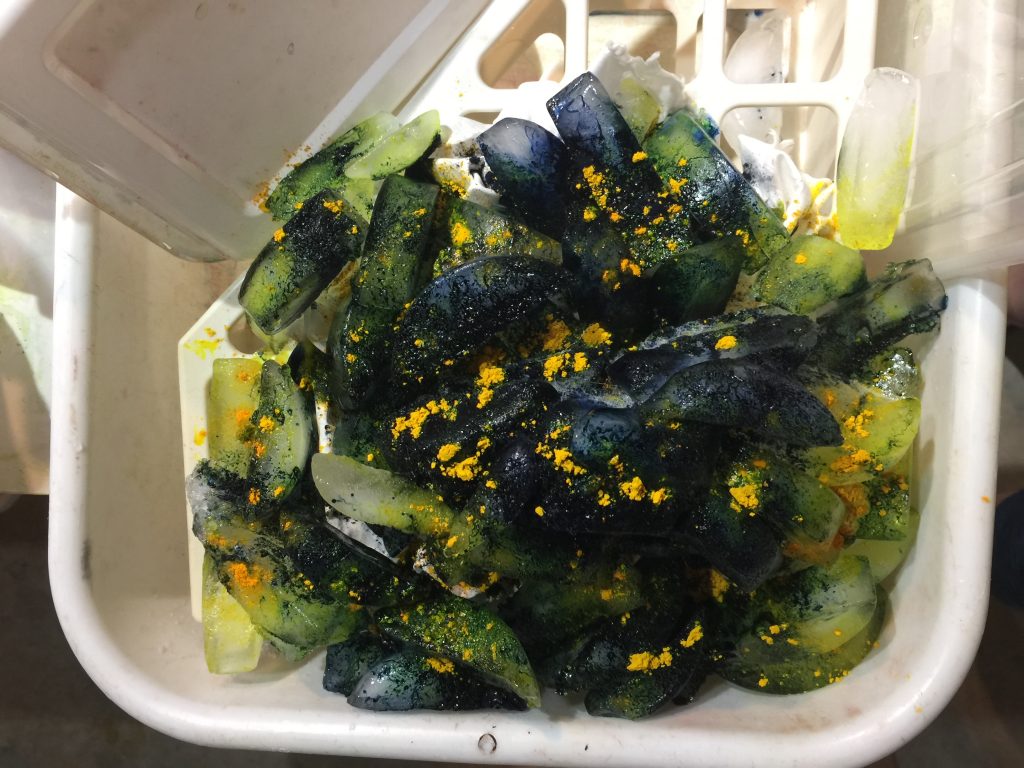
I also decided to try ice dyeing for the first time, inspired by my friend Jim Vander Noot. I used a magazine holder because it was available to keep the fabric up out of the pooling, dripping dye (instead of a screen). Put another piece of cloth in the bottom of the tub to soak up the drips. I use pure dyes, not mixes which is more typical for ice dyeing, so I kinda winged it on this one. I sprinkled the dyes in the picture below on, then dribbled some yellow dye solution I had already mixed up as well.

Dyes sprinkled on.

Today I washed out….stuff in the washer now.  OH MY I am SOOOOOOO gonna do more ice dyeing…totally hooked!   Hope they look as spectacular washed and dried as they did rinsed out!

Stay tuned for an update.

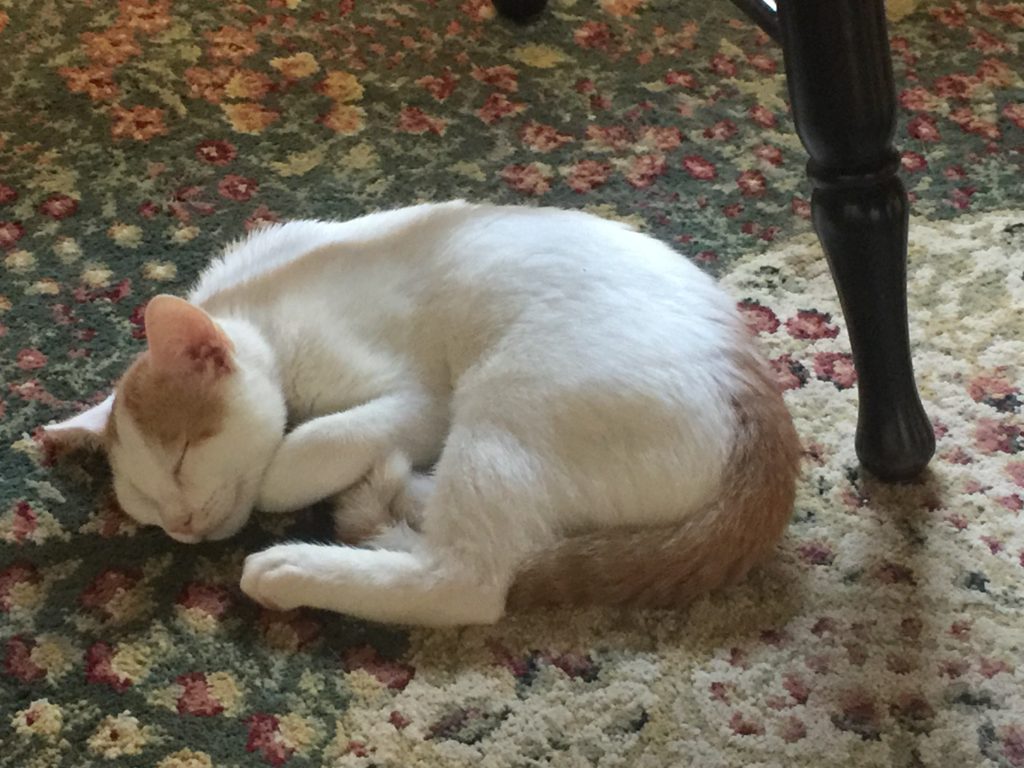
And…gratuitous cat pic of the new kitten, Zabu (named after the Leapin’ lemur on Zoboomafu which the boys watched when they were little)

Sweetness, to be followed when awake by zooming and cavorting and wreaking kitty havoc.

#saqa, #fabriccollage, #artquilt,#artistsoninstagram, #fusedfabric

#saqaexplorations, #neqmexplorations, #saqa, #neqm, #saqamari

SaveSave