When to pre-shrink!
Over the past week to two weeks, I have been working on ….sit down and prepare yourselves for this… a **pieced** quilt. Yes, me. A very simple pieced quilt, but nonetheless.
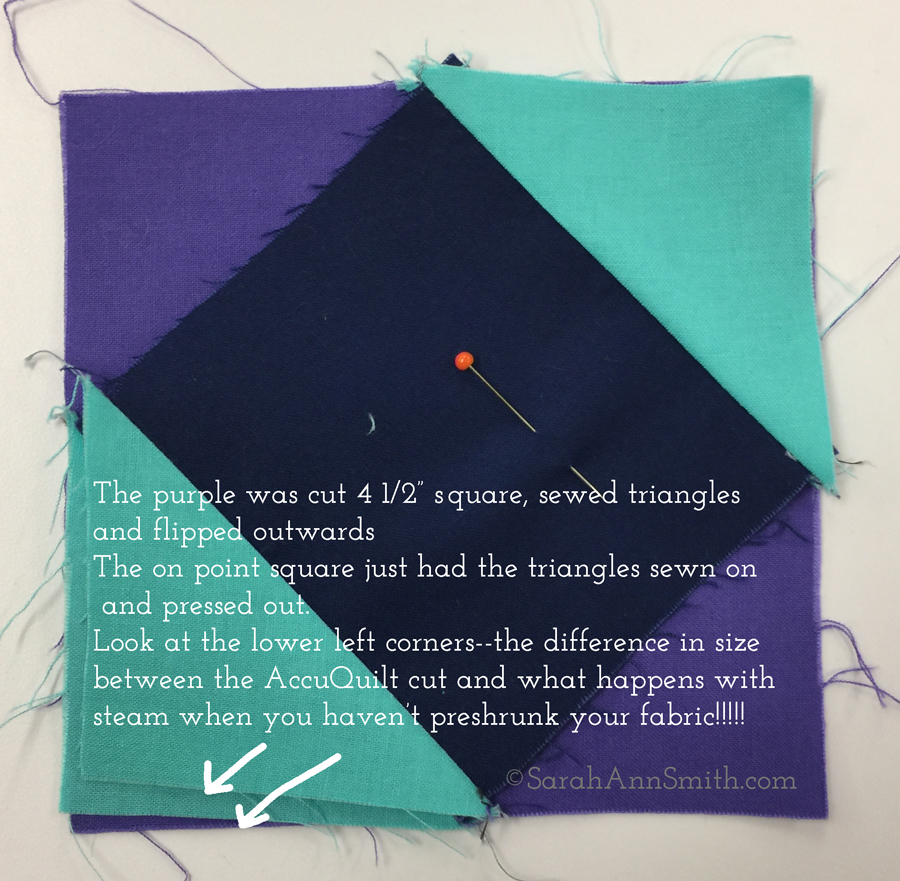
I’ve also been experimenting with the AccuQuiltGO! that was given to this year’s crop of Michael Miller Fabrics Brand Ambassadors. To my distress my block was not perfect–too small! I KNEW it had to be something on my end (it was), so I triple checked my seams (perfect to scant). I checked the size of the fabric cut on the dies: perfect. I checked that I used the correct dies: I did. Then I noticed something. After ironing, the block seemed off. Look at what I discovered:
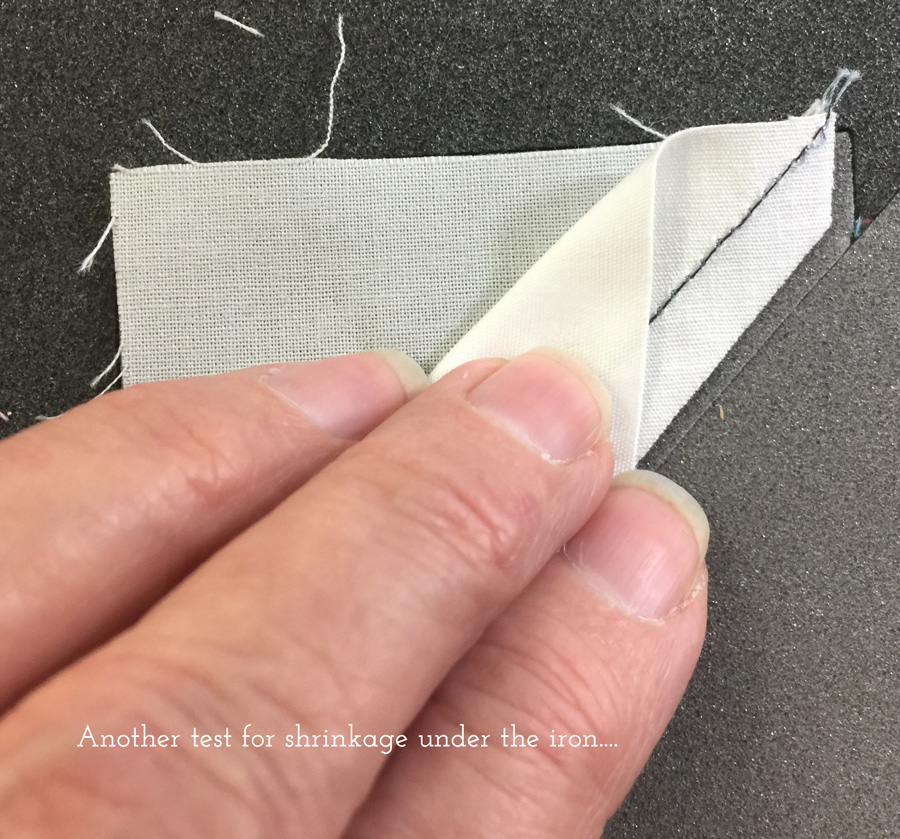
First I placed my half square triangles on the dies, and look how much smaller the pieces are after sewing and ironing! So then I checked the start of the square-in-a-square center of the block. Same thing: after steam ironing/pressing, a unit that finishes at 2″ and one that finishes at 3 1/4″ are each 1/16-1/8″ smaller!
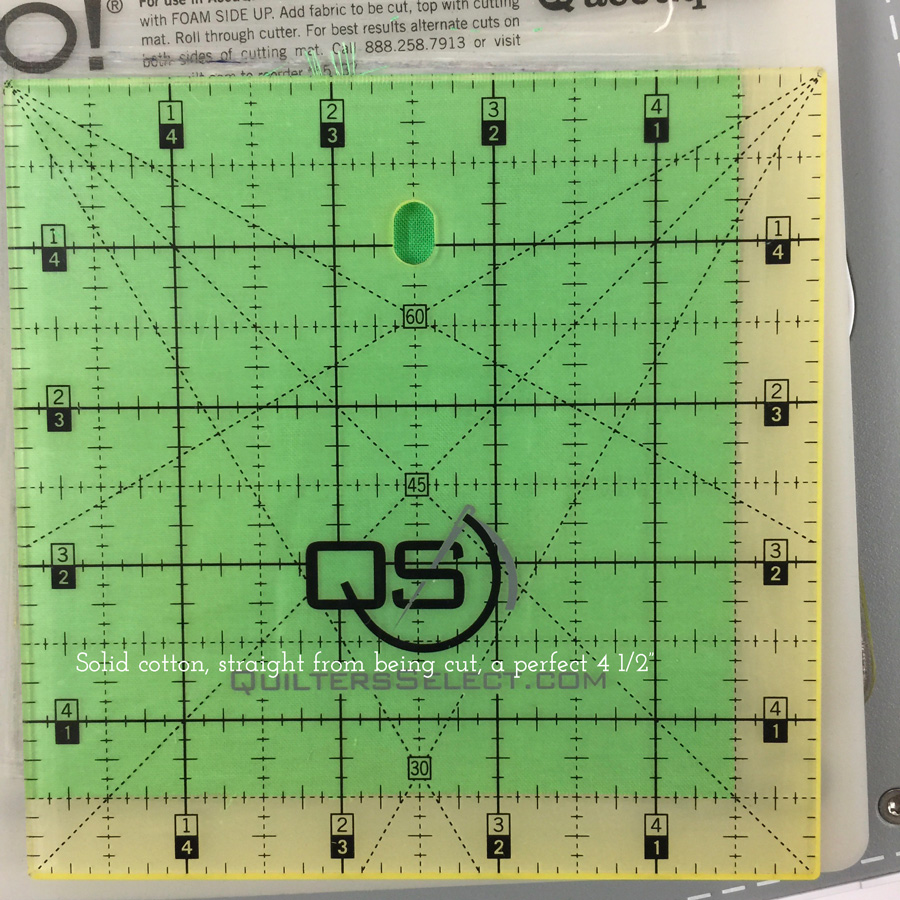
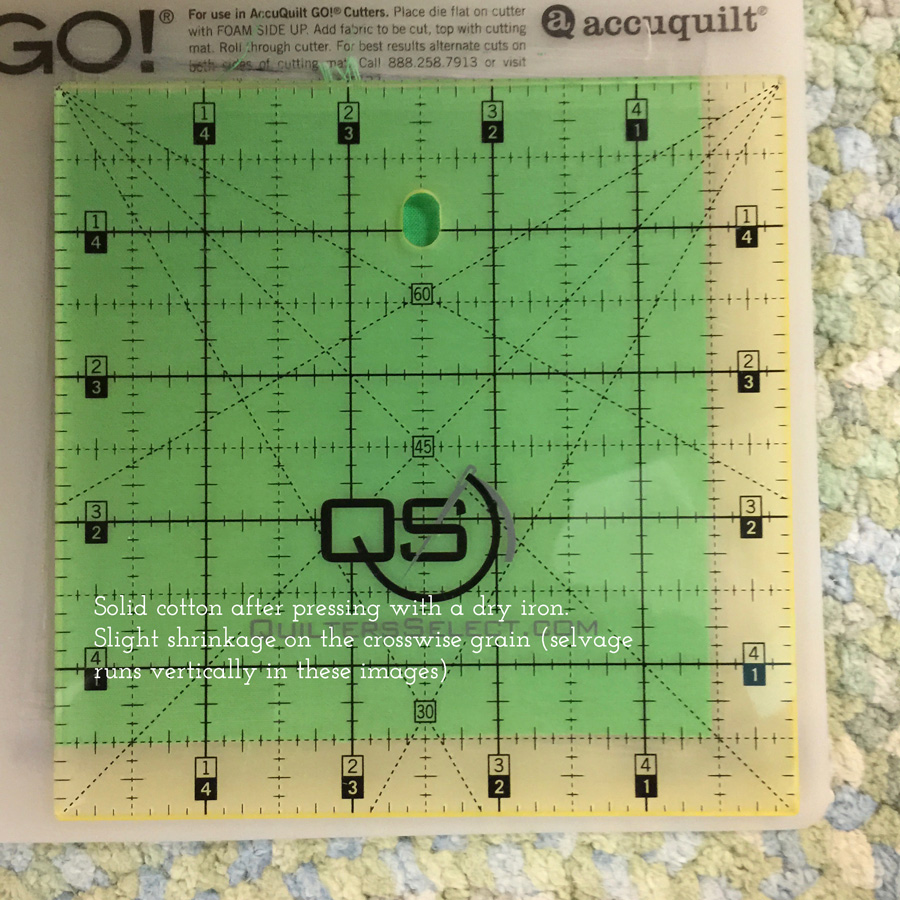
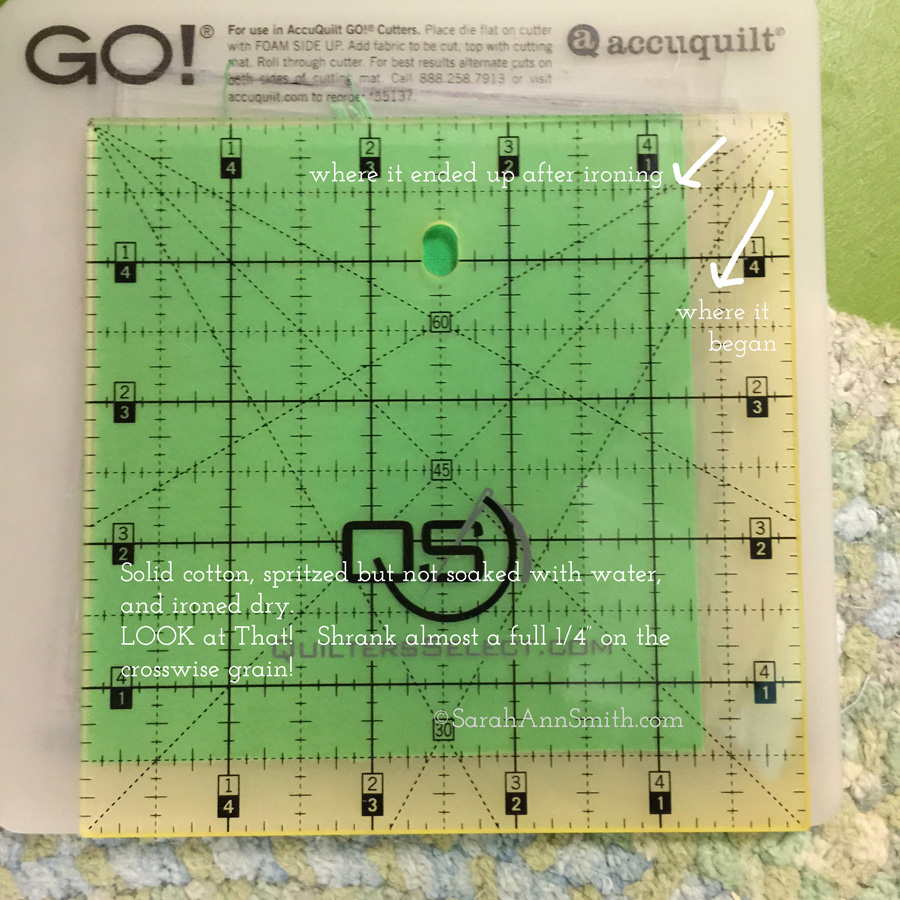
I decided to get a bit more scientific about it: Cut, measure, dry iron, measure, steam iron, measure. Here is what happened with the Cotton Couture, a delightful solid with a glorious feel in the hand:
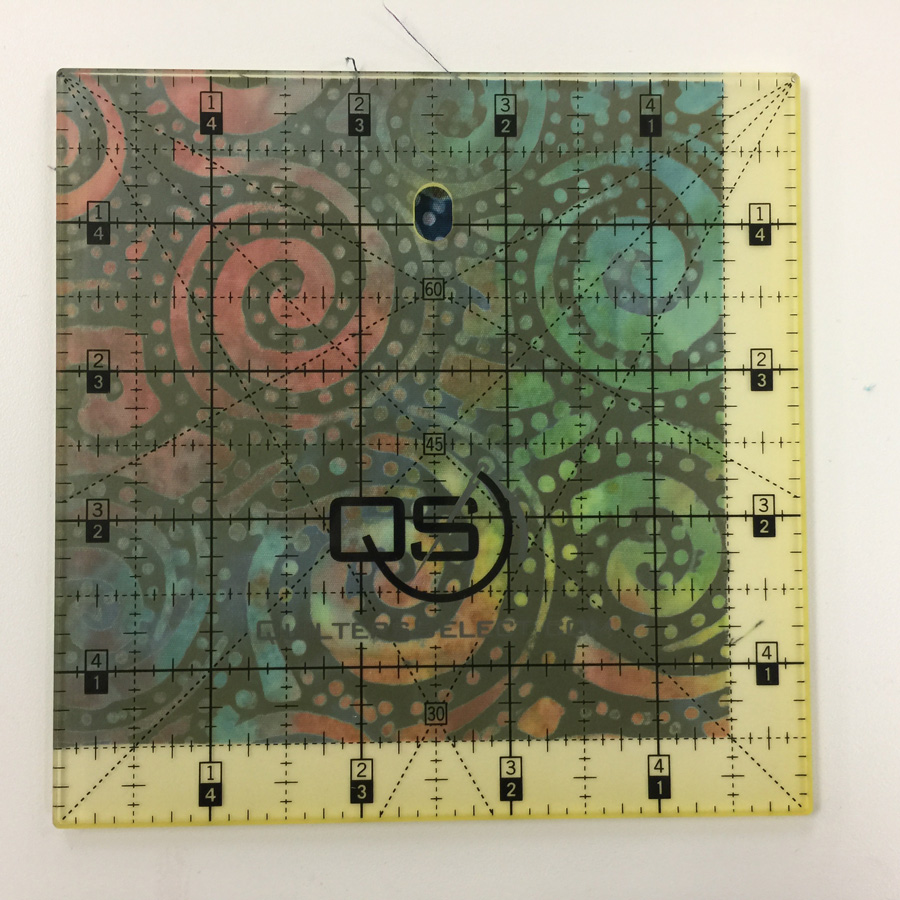
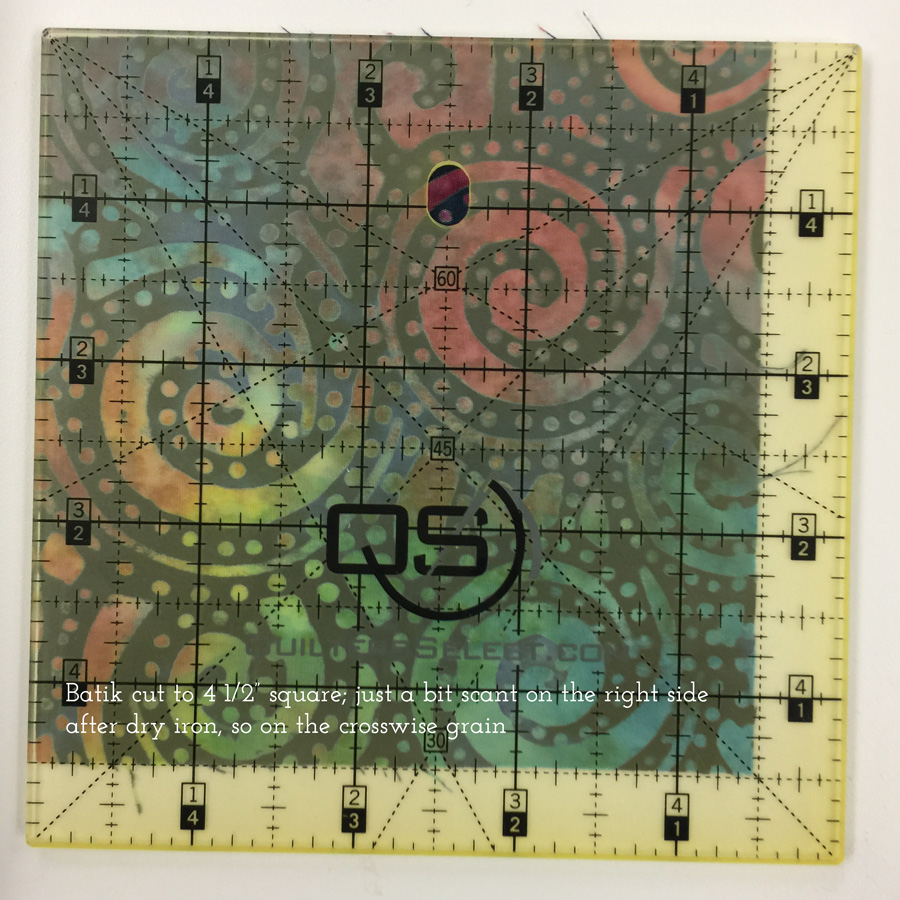
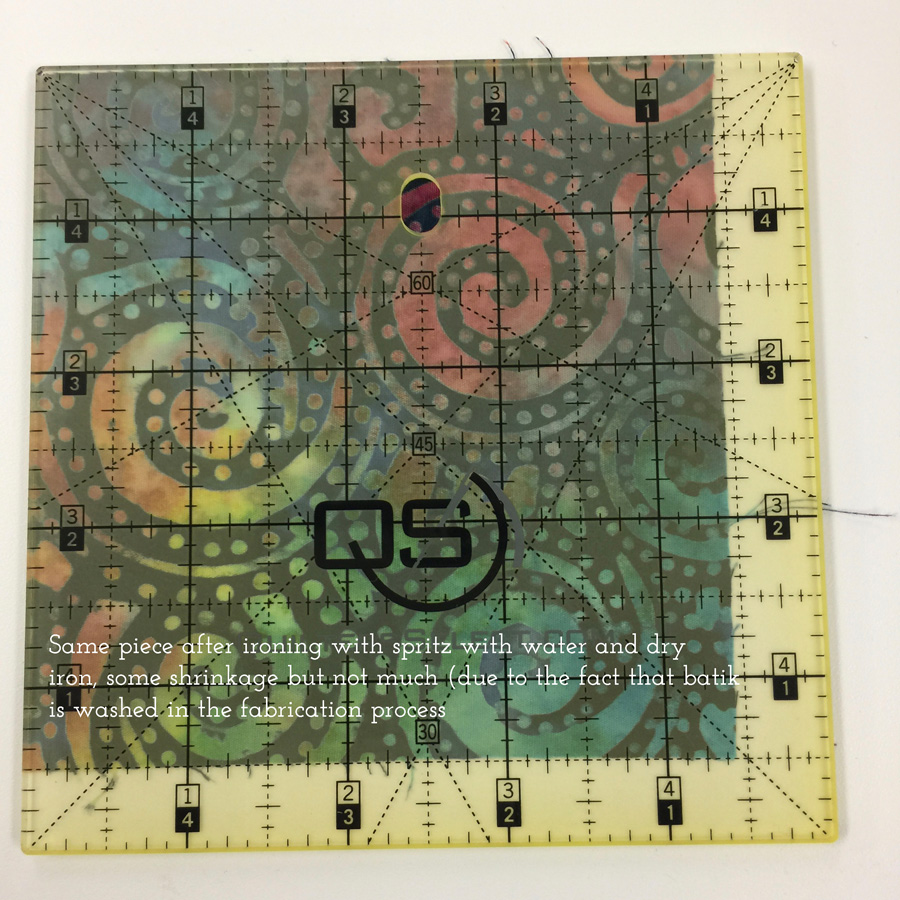
Batiks are made using hand-dyeing processes that include a resist being applied (usually wax of some sort), then the wax is washed out, more dye applied, and so on. This means some of the shrinkage should already have happened.
So my lesson is, when I am not fusing things up, I really need to either pre-steam-iron everything, or prewash and mostly-dry it and then iron dry and smooth. I can now use the perfection of the AccuquiltGO and actually achieve as close to perfect as I will ever get! Now, off to order backing fabric for my BIG quilt.
January 23rd, 2020 at 9:01 pm
That’s just one reason that I prewash/presoak every fabric before it comes into the sewing room. No surprises! But, I have to say, this amount of shrinkage surprises me.
January 24th, 2020 at 10:33 am
I decided decades ago that if I pre-shrank everything, I’d never have time to sew….though I DO preshrink anything destined for a garment! I think as dyers you and I are SO used to having the shrinking over and done with in the dyeing processs, that we aren’t used to seeing this happen. It has been a long time since I used this many commercial fabrics, so it has been a real reminder. For more traditional quilts/pieced/etc. I’ve decided to go with the “delightfully rumpled” look LOL! Will have to see what happens with the quilt once basted, finished and washed!
January 24th, 2020 at 9:20 pm
I think the amount of shrinkage is surprising as well. A quarter of an inch is a lot.
I see that you have a Quilter’s Select ruler (Alex Anderson, right?) How do you like it? I have been slowly changing over to Creative Grids since they have such a wide variety of ‘normal’ sized rulers (e.g. not clamshells, etc). They have a ton of different square rulers, for example, and sometimes you need a 9.5″ square.
I am curious about these QS rulers and other products so I’d love to hear your opinion or if you have post on them.
January 25th, 2020 at 8:23 am
There are so many ways that our accuracy is jeopardized! Thread, steam/no steam, cutting, pressing, seam allowance…. that we can only come close and hope it’s big enough or the shrinkage isn’t so uneven as to cause additional problems. Besides perfection is for the Gods!!!!
January 25th, 2020 at 10:46 am
Exactly…but I was determined to figure out WHY I was a half inch off on an 8″ block! Now I know. Here’s to learning!
January 25th, 2020 at 10:52 am
Jaye, I was surprised, too, but now I know. And if one always washes in advance, you’d never know so it is all good! The fabric starts quite wide 44-45″, so it ends up where you want it to be anyway for yardage purposes. Plus it feels so good!
Quilter’s Select Rulers: I really like them! There are times when I’ll pick up my Creative Grids because I want the white markings, but I LOVE the slightly grippy back, especially when combined with the slippy mat. It makes it super easy to put the ruler down, trim one edge, swivel it around without the ruler moving on the fabric, trim another edge, etc. I’ve been thinking I need to do some videos, so I’ll add this to my to-do list! I’ll ping you somehow when I do it. Two years ago we got a 6″ one as a teacher gift in Houston. I decided to try a 12″ square and the small mat as they were discounted at Market that year. Eventually I got the large mat and 6×24 and have added a 6×12 and another teacher-bag-gift of a 5″.
As we’ve seen, I am accuracy challenged, and anything I can use that helps is a Good Thing. Definitely needs a video to show! Also, when taping at The Quilt Show in April last year, I saw Alex using a pop-socket, those things for the back of cell phones, on a ruler. They aren’t like the suction-cup ones sold to quilters, and basically you put it on one ruler and it lives there. I LOVE IT on my 6×24 ruler. Because Alex’s rulers are grippy, it makes it so easy to pick them up and move them. Brilliant!