email Youtube

Home
Galleries
Blog
Workshops & Calendar
Store
Resources
About
Contact

Photo EZ, an alternative to a Thermofax

December 2nd, 2010

OH WOW am I in love with a new product and process! 
The product is called PhotoEZ and it allows you to make detailed screens for printing (on paper or fabric), such as the treetops in the fabric postcards in the picture above.   The best place to get PhotoEZ  is directly from art quilter Ginny Eckley at http://www.photoezsilkscreen.com/about.htm .  Wonder how many requests Santa is gonna get now……

Many quilt artists now use Thermofax machines to make their own highly detailed screens for surface design printing.  These machines were on their way to becoming dinosaurs and land fill when they were discovered by art quilters and tattoo artists.   In both cases, the artists involved create intricate designs which are then “burned” into an emulsion-coated screen (or for the tattoo guys spirit masters).  The process removes the image, leaving a screen to use for printing or, in the case of tattoo artists, for transferring the design to the skin to use as the guide for inking the tattoo.  As the machines become more and more scarce, the price has   gone through the roof:  reconditioned machines now cost nearly $1000.  Yes, one THOUSAND dollars.  Plus supplies! My budget doesn’t stretch that far.

Well, a year ago at Quilt Festival in Houston, I visited Ginny Eckley’s booth where she sold (among other things) the PhotoEZ screen kits — a starter kit is $37 — and materials.  Here is a picture of my kit and the photo I used:
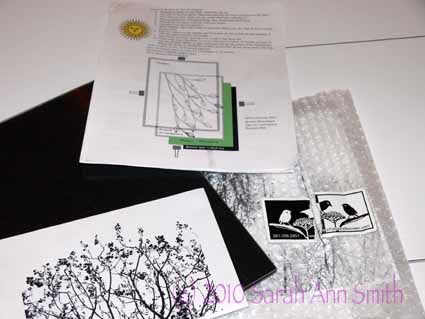
PhotoEZ kit, instructions and on the bottom left my image

Ginny told me she likes PhotoEZ so much she actually SOLD her Thermofax machines because she no longer used them.  Rather than carry the stuff home, I opted to order the supplies from Ginny (here) and have them shipped to my home.  One key thing:  You need to refrigerate the screen material to keep it fresh!  I have a flat baggie on the back wall of my fridge, behind the shelves, to keep mine fine.

After a year, I FINALLY got around to trying it out.  I was concerned because I don’t have strong sunlight up here in Maine most of the year the way Ginny does in Texas!  But I used my tulip-lights that I use for photography and they worked fine.  When I asked Ginny a couple of “how to” questions this year at Festival, she said she uses a light box most of the time, so this makes the process accessible for everyone (not just those of us in sunny spots).  In addition to the detailed info in the kit, you can find even more instruction on her website.

I had forgotten that the kit included an inkjet transparency sheet, so I fiddled with my photo of treetops in spring in Photoshop Elements (to turn it into a crisp black and white image) and printed it on paper.  The trick was to figure out the correct time under the lights to get the screen to burn.  I thought I had messed it up, but was elated when I did as instructed and popped the screen into the sink:
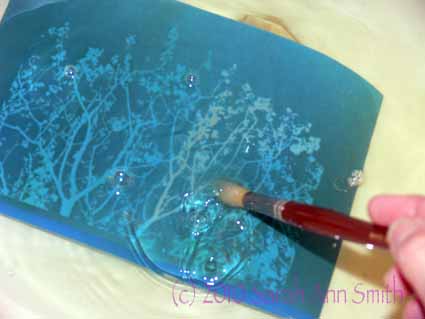
The image began to materialize; I used a soft paintbrush to swooosh away the area that had "burned" where the black ink reacted with the emulsion

Anyway, here’s another view:
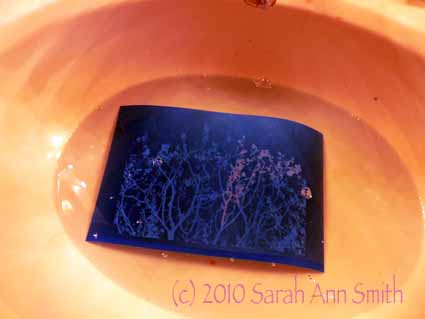
Part of the burned emulsion removed (lighter area), the rest to be removed

And here are the fabric postcards, for a “circles” swap I recently did, in process:
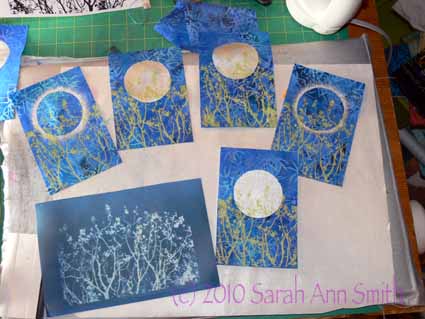
five of the postcards screened, with the full screen on the lower left

The moons and eclipse glow were done with freezer paper stencils using Lumiere paints, and the treetops were screened with Jacquard Lumiere Citrine (the lime green color).  I REALLY like the squeegee that comes with the kit…it was JUST the right balance between firm and soft for me.

What I learned:

  • I LOVE THIS PROCESS!
  • And it costs a fortune less than a Thermofax.  It isn’t, however, cheap per screen, but it will work and cost less per screen I think than a Thermofax.
  • Spring for the extra cost for transparencies for your images.  Then you don’t have to guesstimate the exposure time for your screen.  With a clear sheet, exposure time will be consistent.  If you print on paper you have to think about how heavy the paper is and how much it impedes the light working on the emulsion-ink reaction.
  • Play with your image and print it in black and white (to make sure you like how it turned out) before printing it onto the not-as-cheap-as-paper transparency.
  • Think about your images; in my case, I deliberately took the photo with only sky behind the treetops to make the photo editing process easier.
  • Clean your screens promptly so the paint doesn’t clog the screen permanently.
  • There is a learning curve about how much paint is enough but not too much; like most things, it takes a bit of practice and testing the various consistencies of paint
  • I’m gonna do more of this!

PS–I am not affiliated with Ginny in any way.  I just really liked the product and process!  I surfed around online and Ginny’s prices seem to be the best out there.  Plus she’s a quilter! While you’re at her site, check out her artwork, here.  Her newest work uses the screens and is amazing (click on the New Work button).

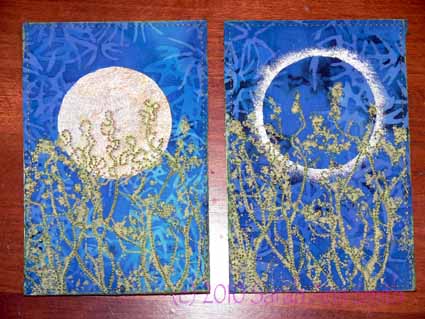
And a last look at all the “circles” postcards:
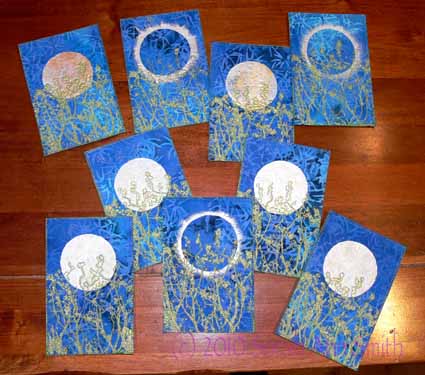
Spring Moonrise and Spring Eclipse postcards
Needle Keeper

November 29th, 2010

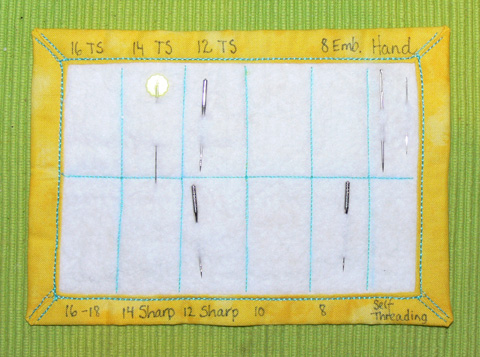
Oh what fun!  I just love it when someone takes one of my classes or reads my book or an article, makes something, then shares it with me!  In this case, Janet from my Janome yahoo group shared with me a fantastic variation on the needlekeeper pattern in ThreadWork Unraveled.  In the pattern in the book, I use a couple pieces of fabric (flannel in one instance) and maybe some batting to make a “needle keeper”–one of those things to help you keep track of what needles have been used but not used up, and what needle is IN the machine:

My version of the needlekeeper, with sections labelled by type of needle

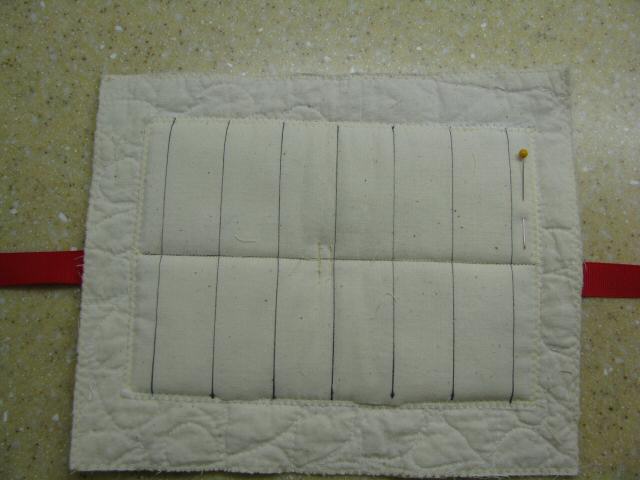
Well, Janet’s fantabuloso twist is to use her practice free-motion quilting samples to make a lovely roll-up needle-keeper! Janet cut her sample into suitable sizes, zigzagged the outside edge, then added muslin and batting to the center for the storage part of the needlekeeper.  This is the business side of Janet’s version:

Janet's needlekeeper using her practice Free-Motion-Quilting bits for the outside

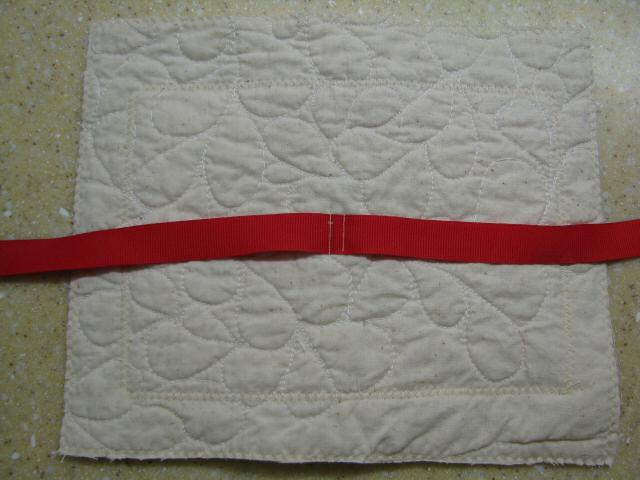
And the lovely quilting on the back:

The back side showing the lovely quilting and how Janet attached a ribbon

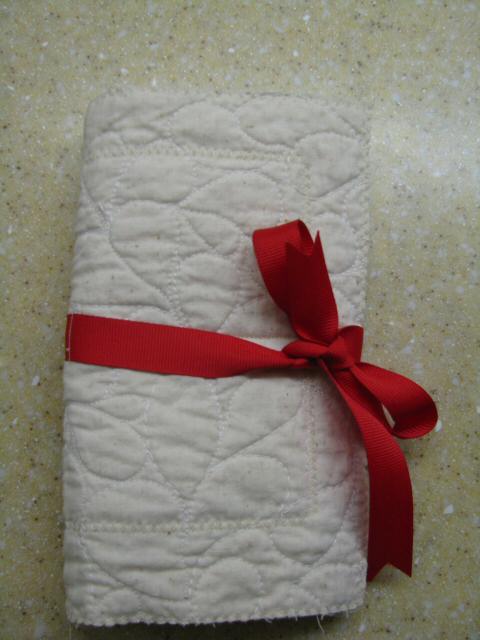
And how it looks rolled up (perfect for travel!)–this would be a great variation to use for handwork needles, especially if you work in different parts of the house or on the road:

Janet's needlekeeper rolled up with a red ribbon (sewn to outside)

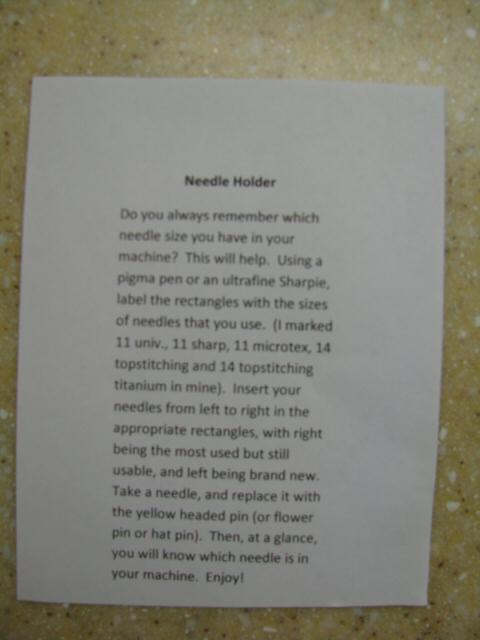
What a great gift!  Janet even typed up information for the recipient:

Information for the recipient

Now…do I have time to MAKE any before Christmas…what a great gift idea!  Thanks so much Janet for sharing with me and, in turn, letting me share with those of you who read my blog!  OK…everyone to their sewing machines!

Blessings be

November 25th, 2010

A while back I learned something from Lisa W. (then at Curves, now at Quarry Hill where mom lives, first in assisted living and now in the memory loss unit…mom lives there that is, not Lisa…she works there!):  every day say what was a good thing or the best thing that happened to you that day.  And nothing backhanded (saying that the best thing was that the day wasn’t any worse than it was doesn’t quite cut it).  So I try (but don’t always remember) to give thanks daily.

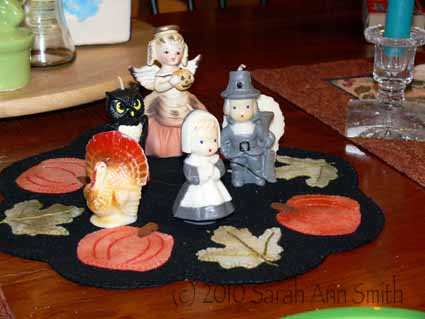
At our local quilt chapter auction this past month I bought the adorable felted wool mat and --for the first time in memory-- remembered to bring out my Thanksgiving candles, which I have had since I was about 6! I believe these are now beyond "vintage" and headed towards "antique." And that is my October Angel (my birth month) in the background, a gift from gramma about 50 years ago!

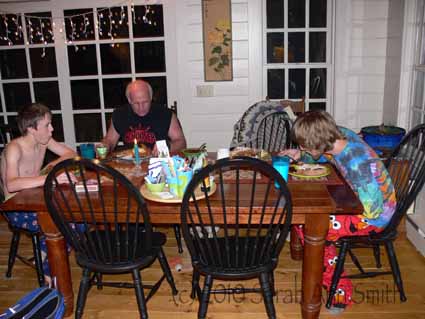
But today is the annual U.S. feast and giving of thanks.  This year, I am so glad that despite our very small numbers, the four of us are here, happy, healthy and together.  As you can see from the photo, my pleas to “wait for the Thanksgiving photo” were this year greeted with “heck no I’m eating!” <grin!>

Wait for the photo? Apparently not this year LOL! PS--notice Joshua, on the right, wearing Elmo pants! Love 'em!

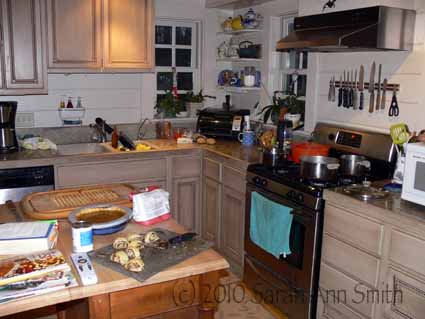
Here’s the repast in preparation….I try to clean as I go, otherwise it would be impossible in our no-counter-space kitchen!  After breakfast I started with the pie crust, then the cranberry sauce, then the pie filling, then the stuffing, then putting the hot pie filling into the just-baked crust (A recipe from The Cook’s Bible, where you bake the crust separately as if making a banana cream pie, cook the pumpkin pie filling on the stovetop, then combine and finish in the over for about 25 minutes.  Helps avoid soggy crust.) Anyway, once I get that done, I clear out and hubby does the turkey. I do NOT “do” raw birds or large meat…they need to be mostly cooked before I get near them!  Then I do the potatoes, veggies and gravy.

In progress...pie made, Turkey in the oven......

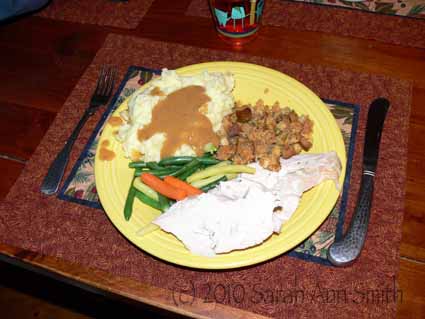
As far as I am concerned, the best reason for roasting a turkey is to make the gravy that goes on the potatoes.  Half the pan of potatoes is for me (ditto with the gravy, tho I usually get a fight on that one) and half for everyone else.  Can you tell I’m Irish?  Life is GOOD!

I hope whether you are in the United States celebrating also or elsewhere in the world that your lives are filled with goodness, love and light.  And thread and fabric and time to create!  Blessings be, Sarah

Briefly interrupted by life

November 22nd, 2010

OK…no pictures today (sob, I’m sorry!).  It has been, as usual, chaos, and more chaos than usual!   I am happy to report, however, there are lots of pictures and things to share….I just need to find a few extra hours in the day to process and re-size the photos, then write and blog!

The biggest interrupted by life was going to the International Quilt Festival in Houston, where I demo’d, met friends, ate Mexican (HEAVENLY!), met new friends, had fun, spent some money on fabric and paints, tried a new product that I think is gonna be awesome, and generally got exhausted and happy.

Then there are the teenager and kid and aging mom things that tend to interrupt life.  And filling out insurance claims.  And selling our house (going like a dream) and buying our new house (not so much…I’ll dish AFTER the closing is done and we own the house, but it has been unnecessarily difficult because of one person…more in maybe February or March on that one).  It looks like, at long last, that all WILL come off without a hitch (I’m an optimist), and in late January we’ll be moving to a new house about 4 miles away (same school district).

Then, on the way home from Houston, I was too tired for the level of attention required by the book I had.  So while changing planes in Dallas (which by the way is like a big city shopping mall with airplane gates added!) I went into the Barnes and Noble (complete with Starbucks) and bought The Girl with the Dragon Tattoo.   Ooops.  That means I have been DEVOURING that book and the two sequels.  I am halfway through the last book, and will surface when done LOL!
Thanks for checking in, and I promise good pictures and fun stuff SOON, Cheers, Sarah

Miss September

November 16th, 2010

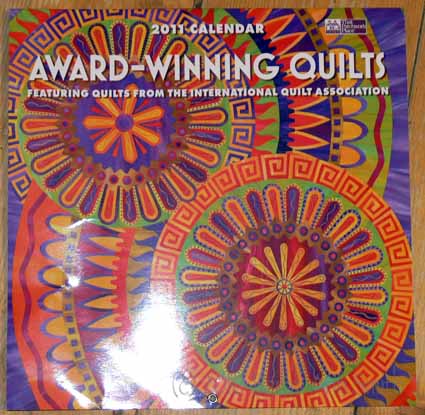
Yes, I am a calendar girl!!!!! Can you believe it?  I STILL, even though the quilt is home, I have the ribbon (now a year old), and saw the quilt with the ribbon in Houston this time last year, cannot believe that *I* really won a ribbon, and then of the 110 or so winning quilts was one of 13 selected to be in this calendar:

Robbi Eklow's eye-cathing gears quilt is on the cover

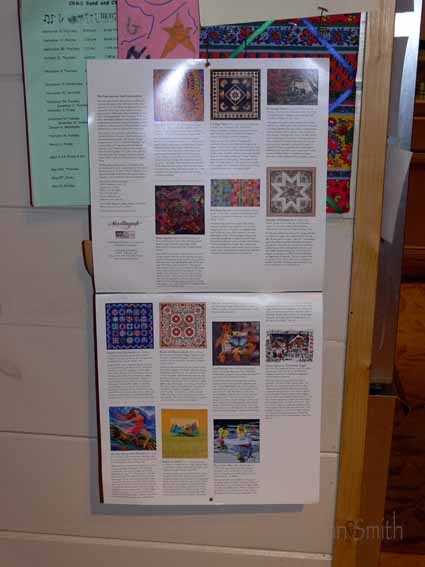
The inside cover tells a bit about each quilt:

Inside the front cover, a bit about the 13 quilts

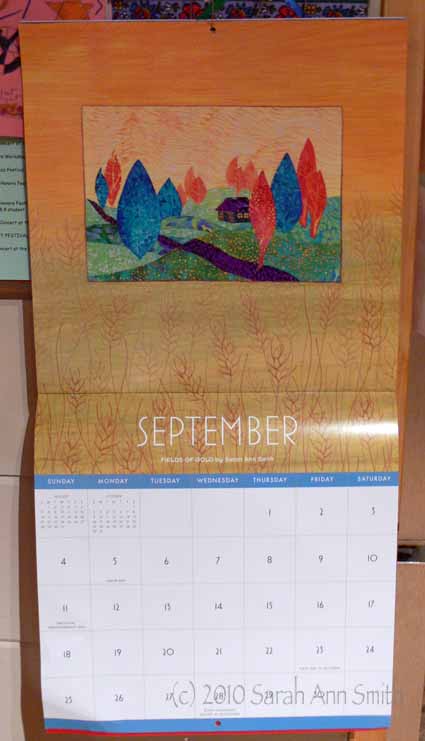
And, drum roll please, here is Fields of Gold, a.k.a. Miss September.  I like how they brought the quilt down over the staples onto the lower page, rather than reduce the size to fit on the top half:

Fields of Gold

I swear, if someone had told me when we left Friday Harbor 6 years ago that I’d have a book, be a Houston award winner, and be in this calendar, I wouldn’t have believed a word of it…absolutely astonishing!  It just goes to prove that if you work hard, are really passionate about something, and are willing to devote the time and effort it takes to do something, you CAN!