Plaid Top Tutorial: Lesson 4- Overcast Seams, just like Serged Seams
Nothing beats a beautifully finished garment, one that is so pretty on the inside that you enjoy it every time you put it on. Though you might be tempted to wear it inside out it’s so pretty, it remains a secret just for you! Top technique for a beautiful inside is using a seam finish to hide the raw edges. Not only does it look nice, it also protects the edges of the fabric, prevents fraying, can improve the way the seam functions, and contributes to a garment that will last longer. After all, you’ve spent money and, more dearly, time creating so enjoy it longer!
Please note: I am affiliated with Janome as a Janome Artisan and am compensated. However, my reviews are honest and I would say what I say whether affiliated or not. I’ve also chosen to be affiliated with Janome since 2003 (!!!) because their machines are so good and they are so responsive to the interests and needs of their customers.
The next several lessons/posts will be about all these seam finishes. We’ll start today with the fastest and simplest, the overcast seam.
There are many ways to finish seams. Today I’ll review one of four methods and suggest why you might choose one over the other. I’ll do the other finishes in subsequent posts so this doesn’t get too long!
- Serged or overcast edges
- French seams
- Flat-felled or lapped seams
- Hong Kong finish seams
Overcast:
The first seam finish we’ll talk about is perhaps the most well known because it is fast and is used on the majority of commercially made garments: serged seams. These are made with a serger machine, which you might not own. But if you have even a very basic sewing machine (more than straight-stitch-only), you will likely have at least one utility stitch that is called an overcast stitch. On my machine, here are some of the choices:
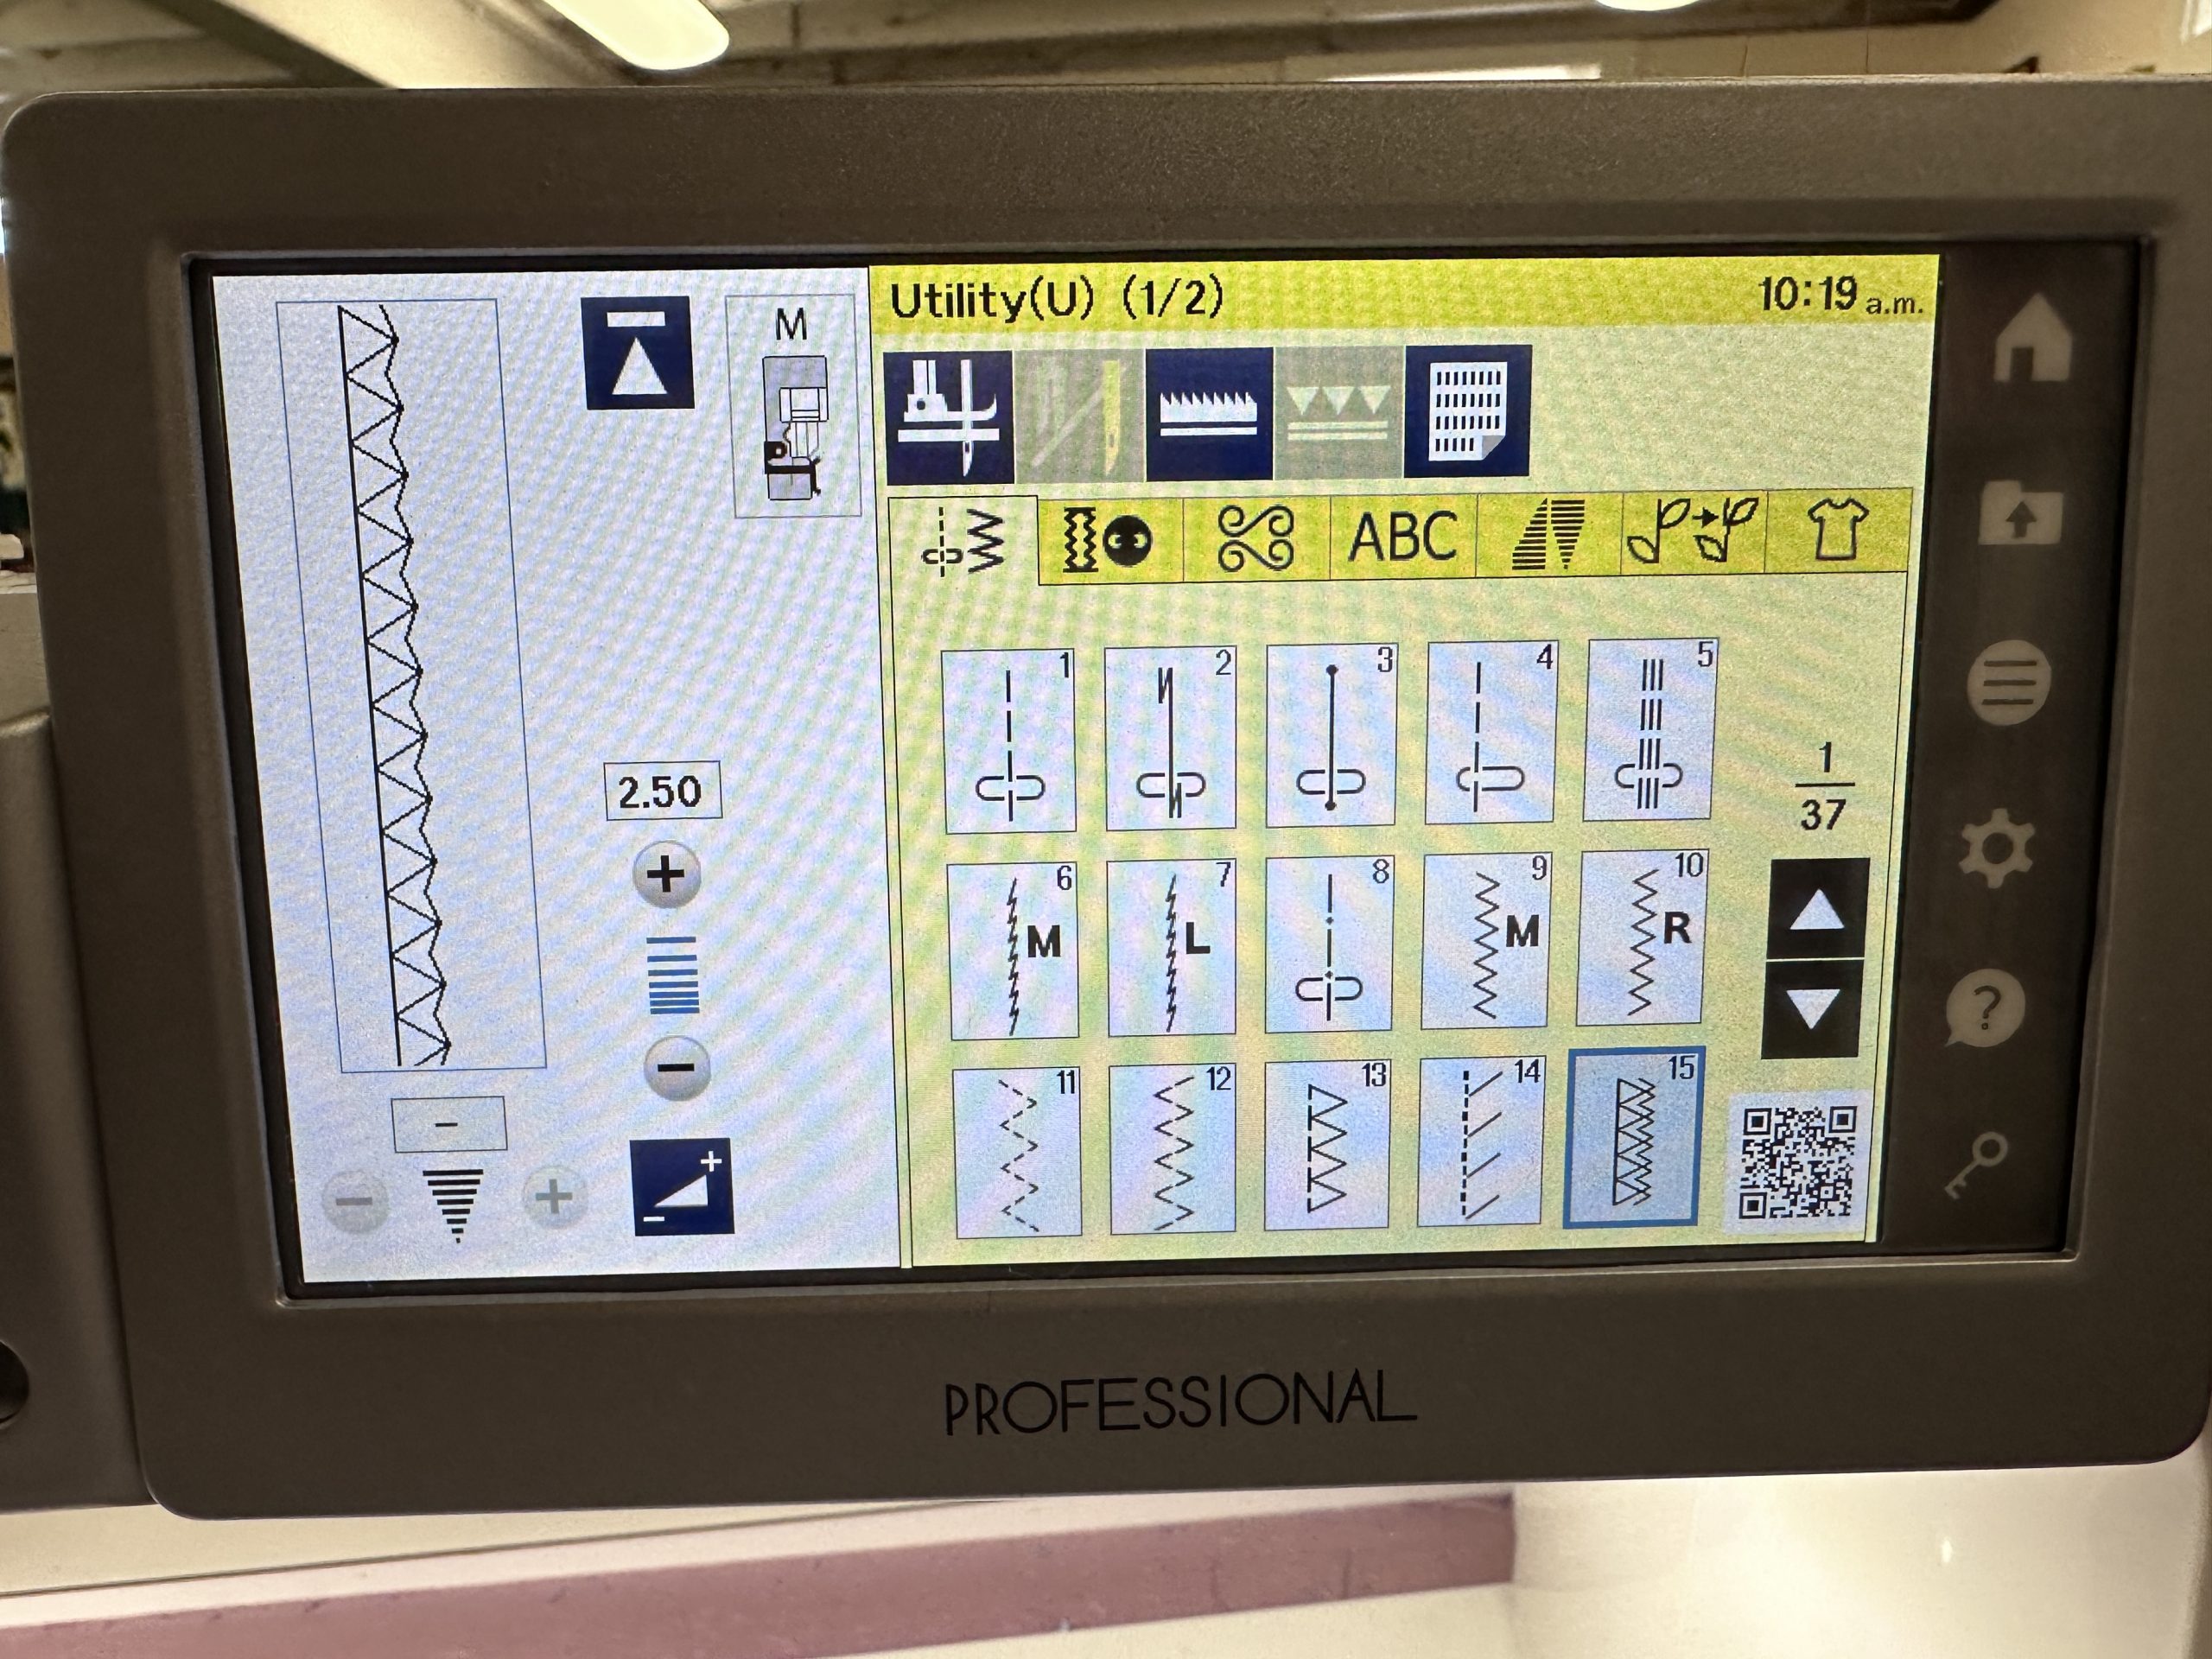
My Janome M7 Continental has a wealth of stitch choices, but even the most basic machines have stitches similar to 13, 14 and 15 (and see next photo for more choices). I particularly like stitch 15 which has an extra narrow zigzag on the raw edge. You can see that you can (within a range) adjust length and width. At the top right of the white portion of the screen, the machine tells you which presser foot to use, and the bottom right of the yellow portion has a QR code you can scan with Janome’s exclusive AcuSPARK app (free in the app store for your device) which works with select higher end Janomes.
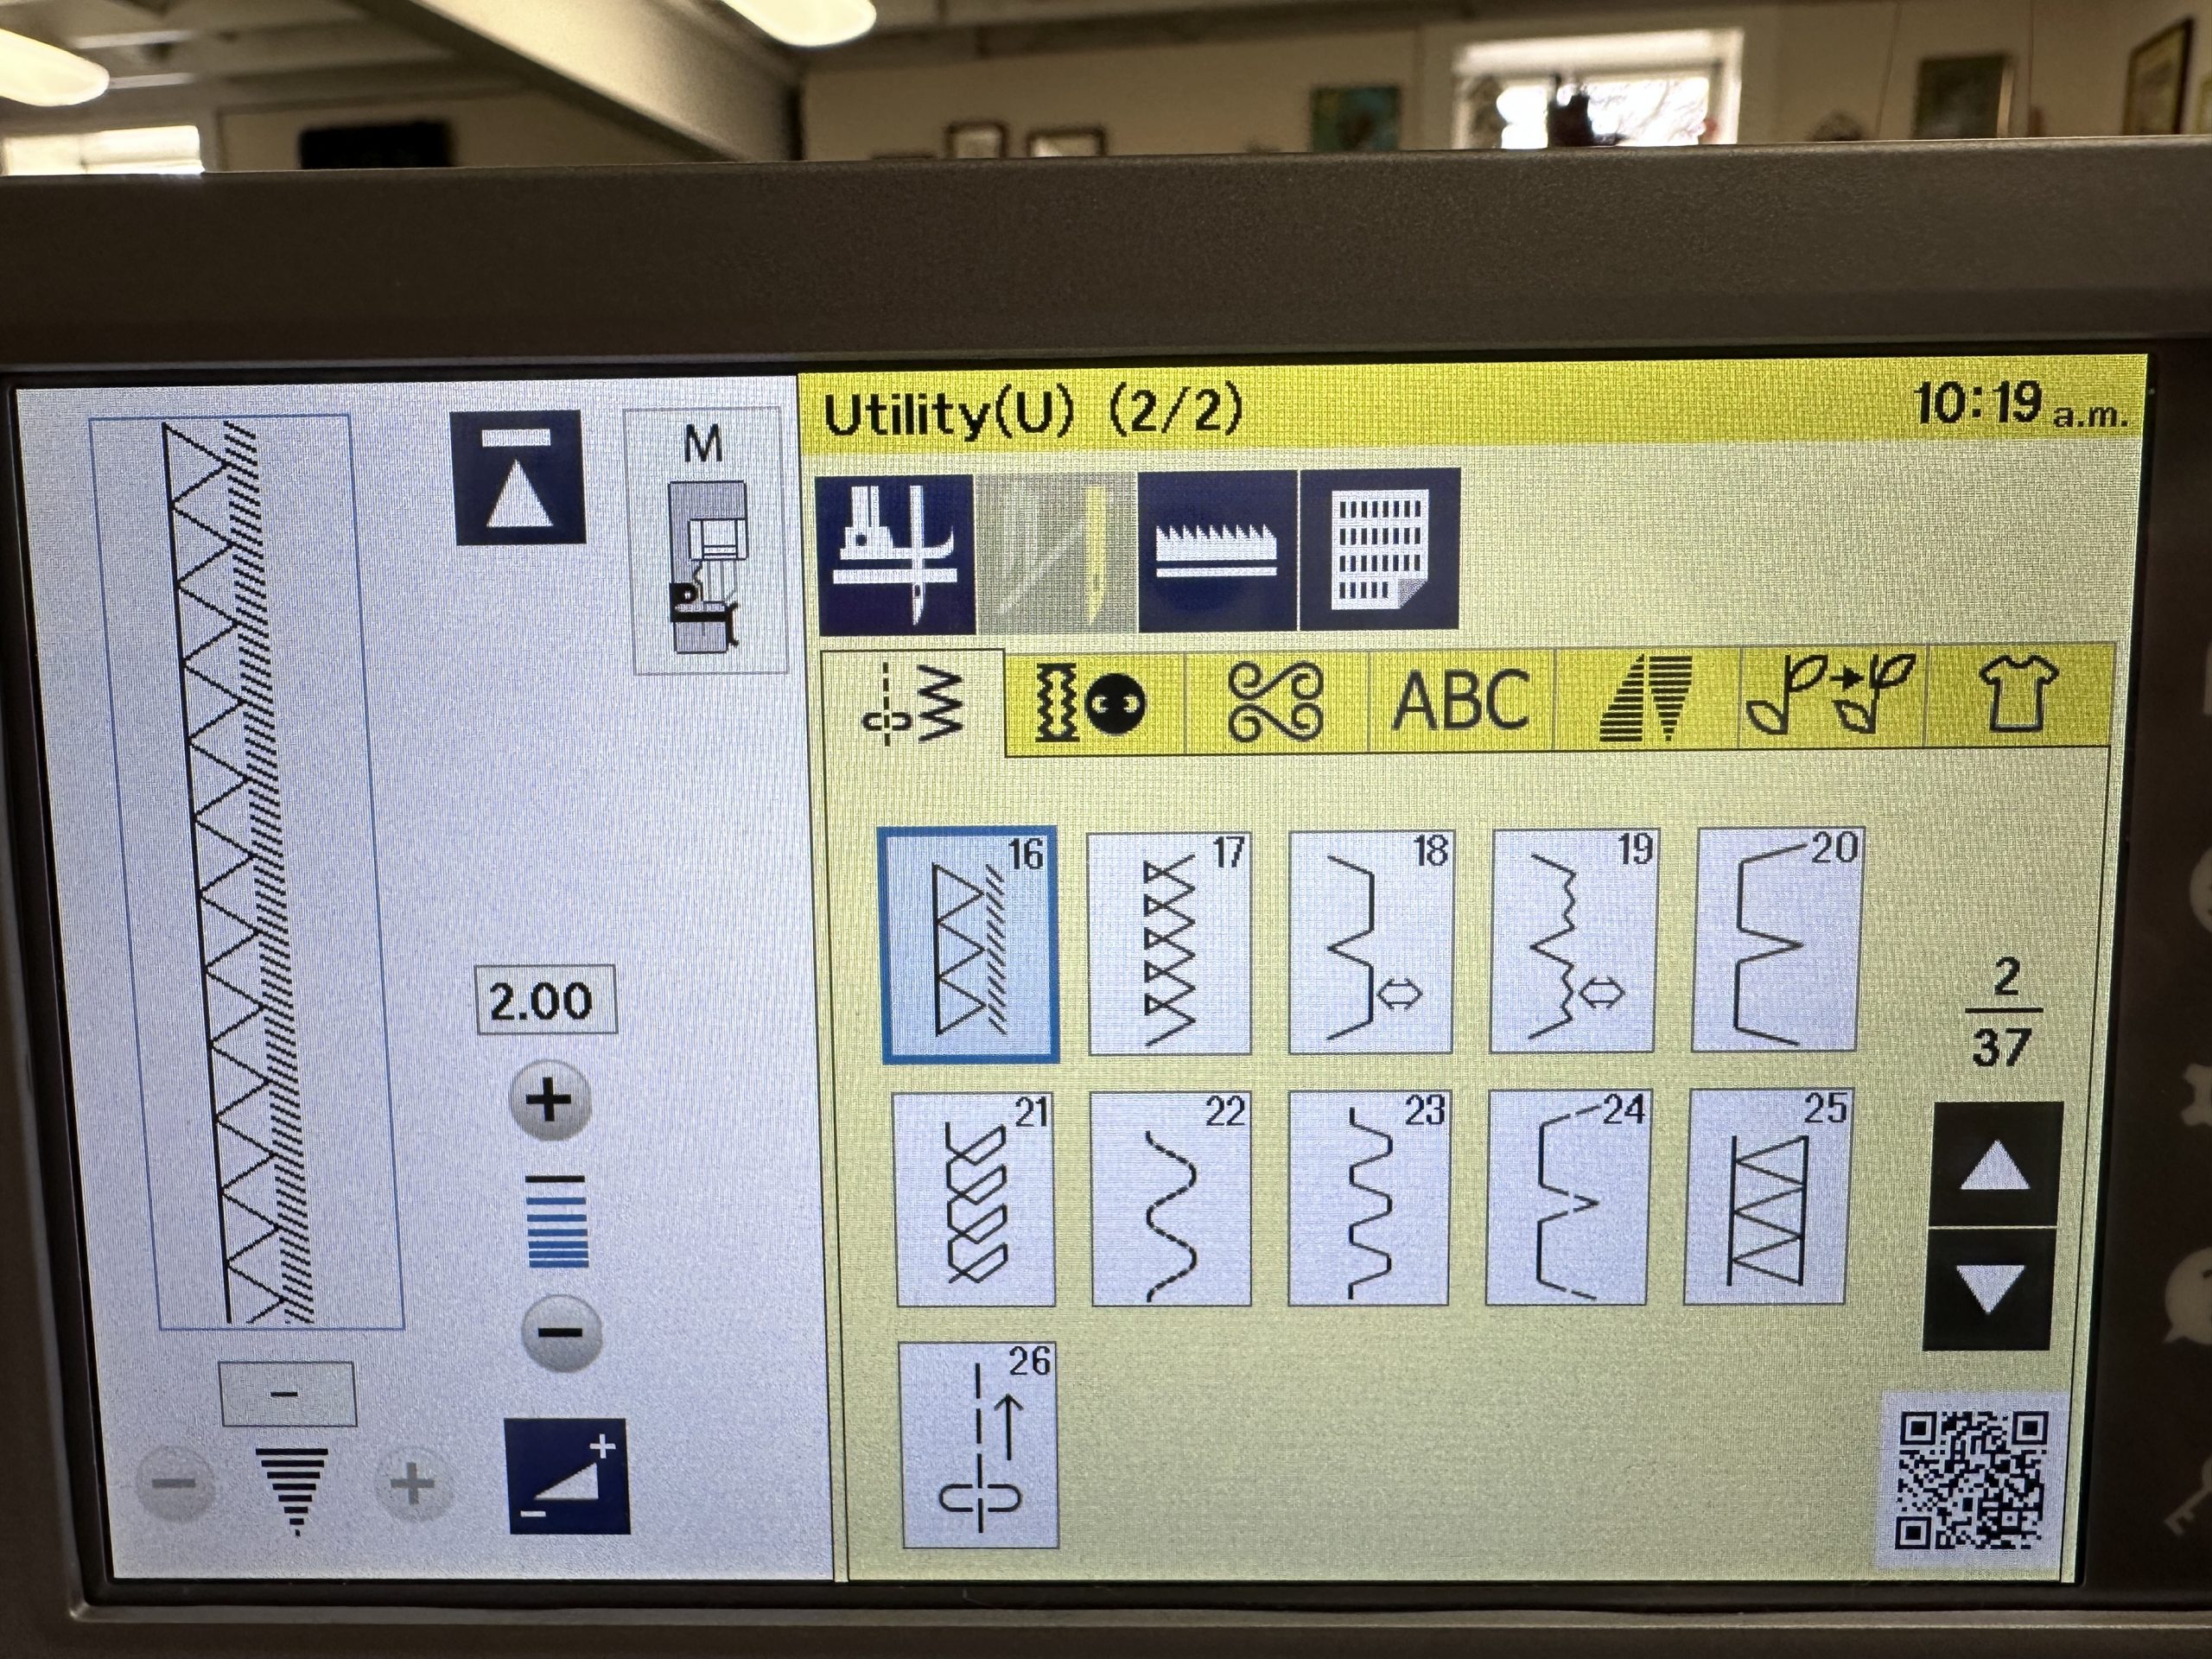
This screen, the next one in the sequence on my Janome M7, has additional overcast and hem stitches.
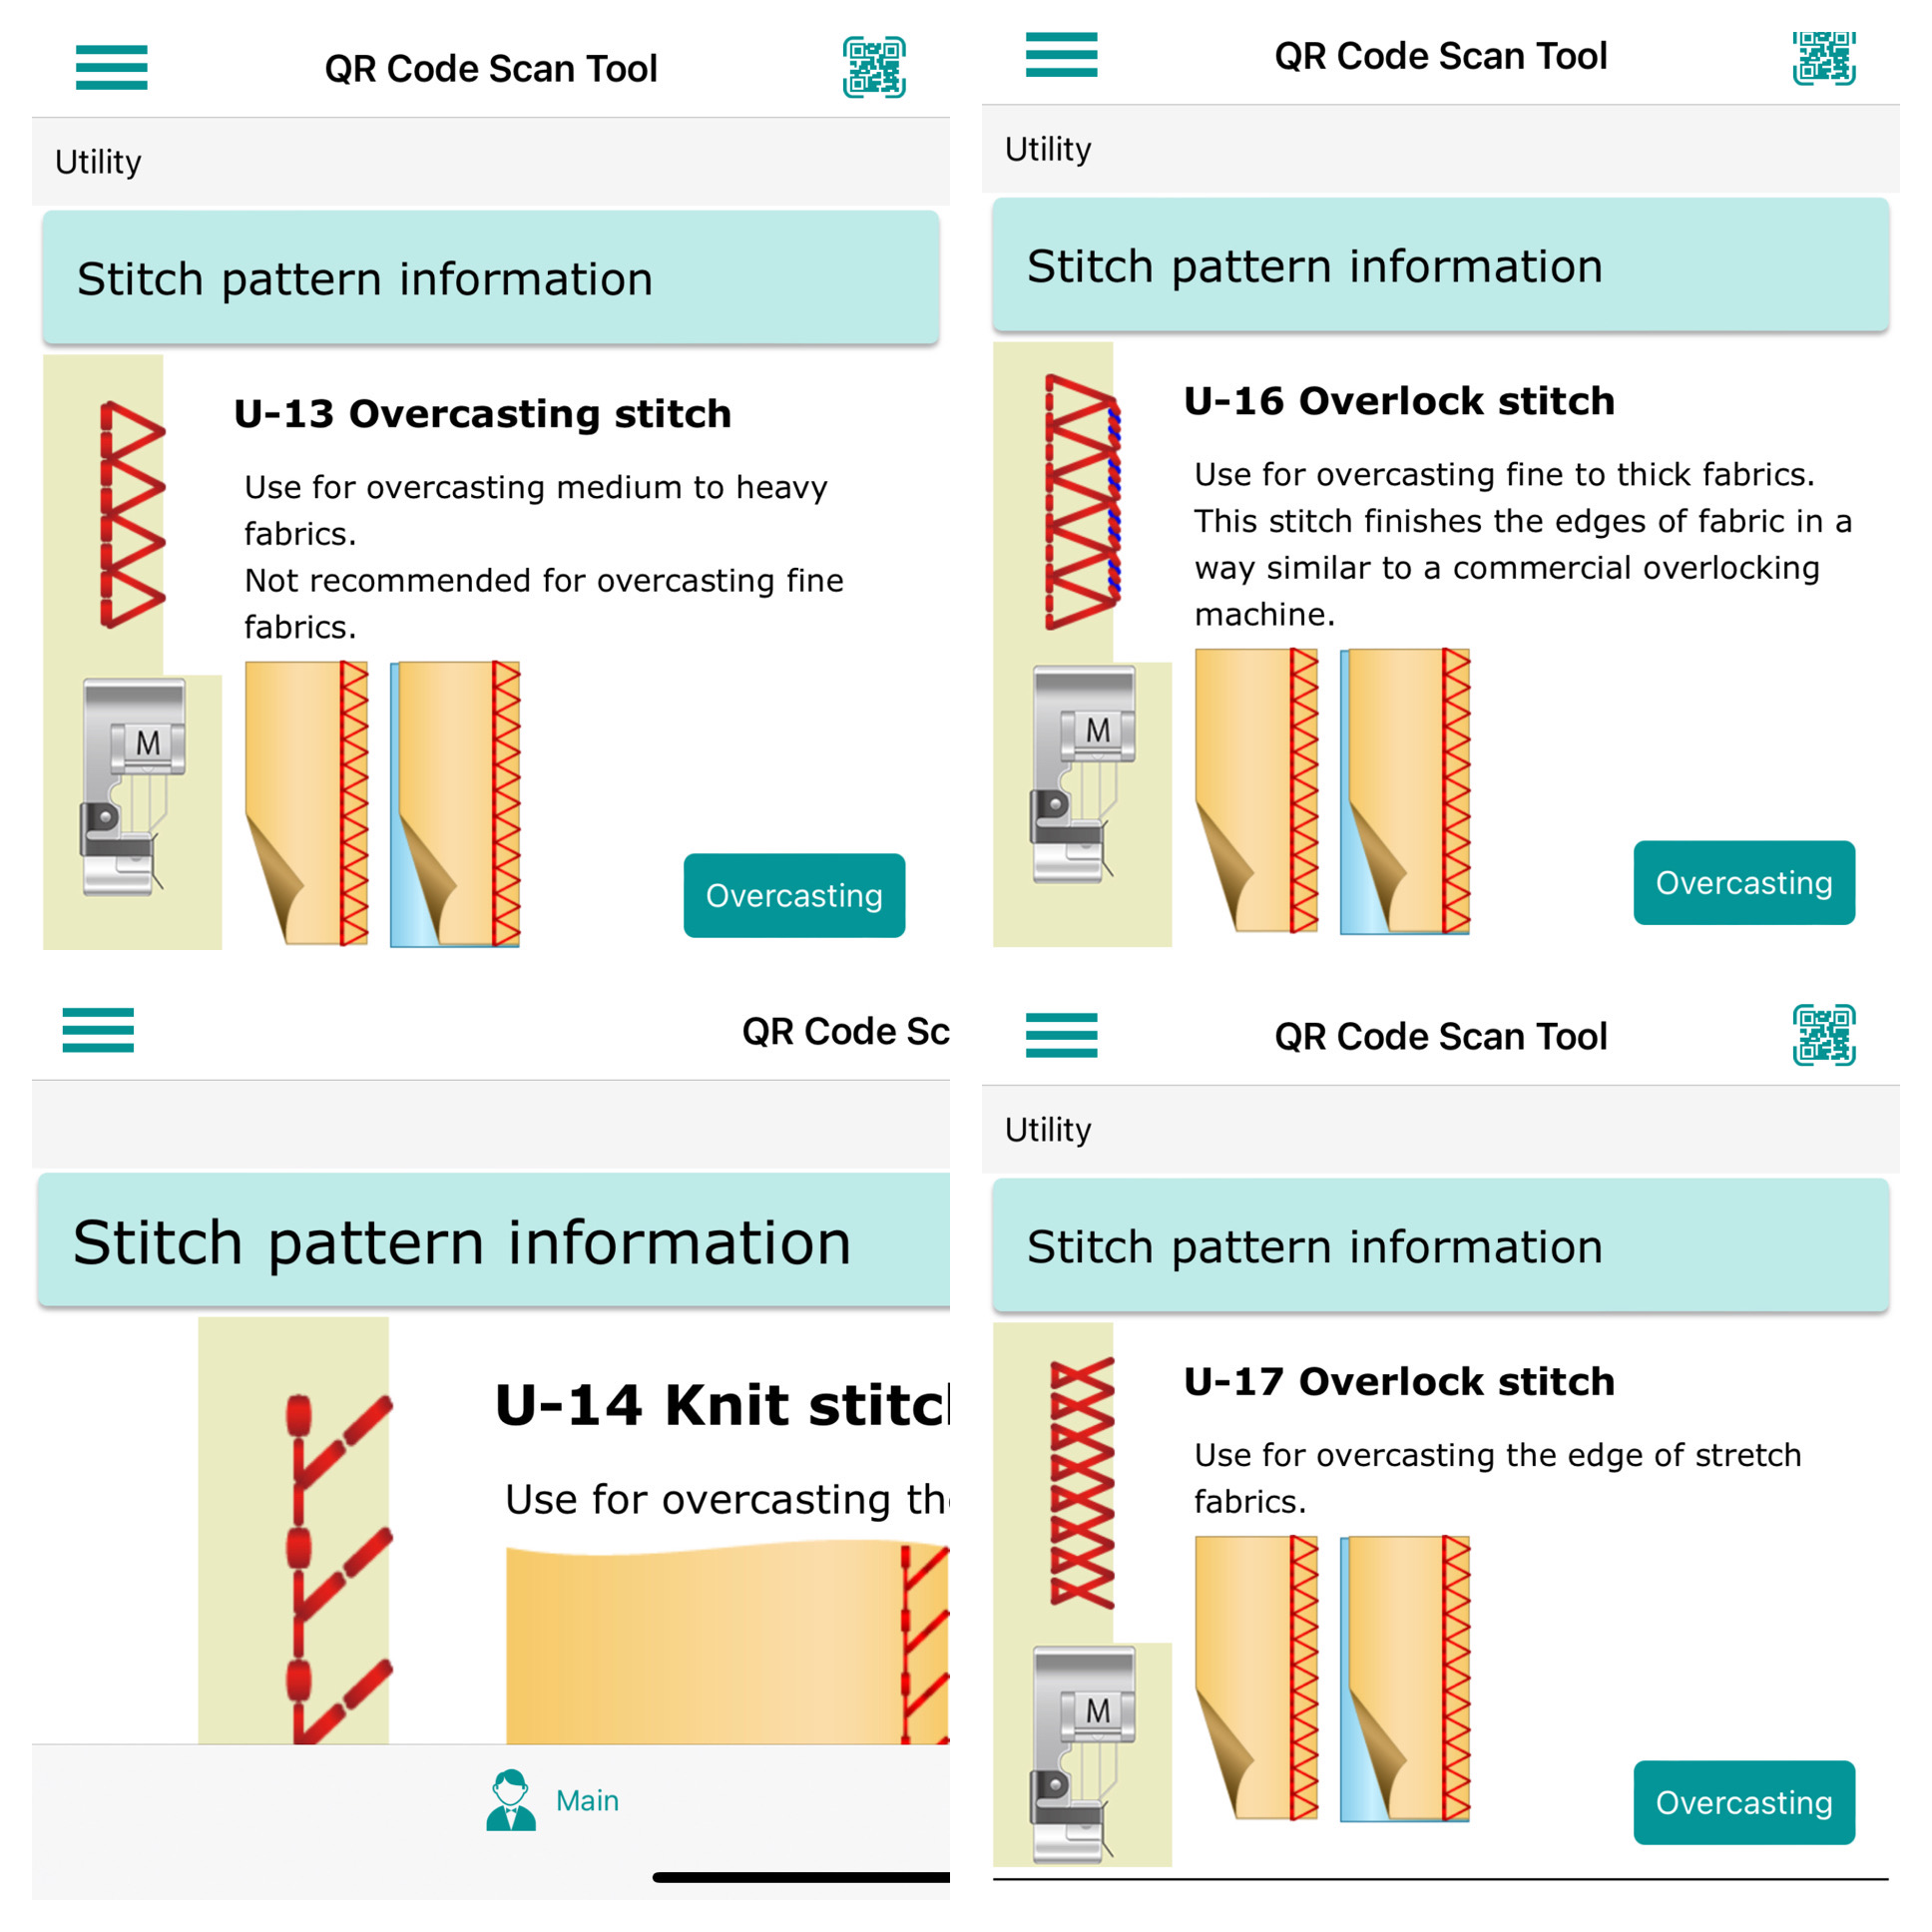
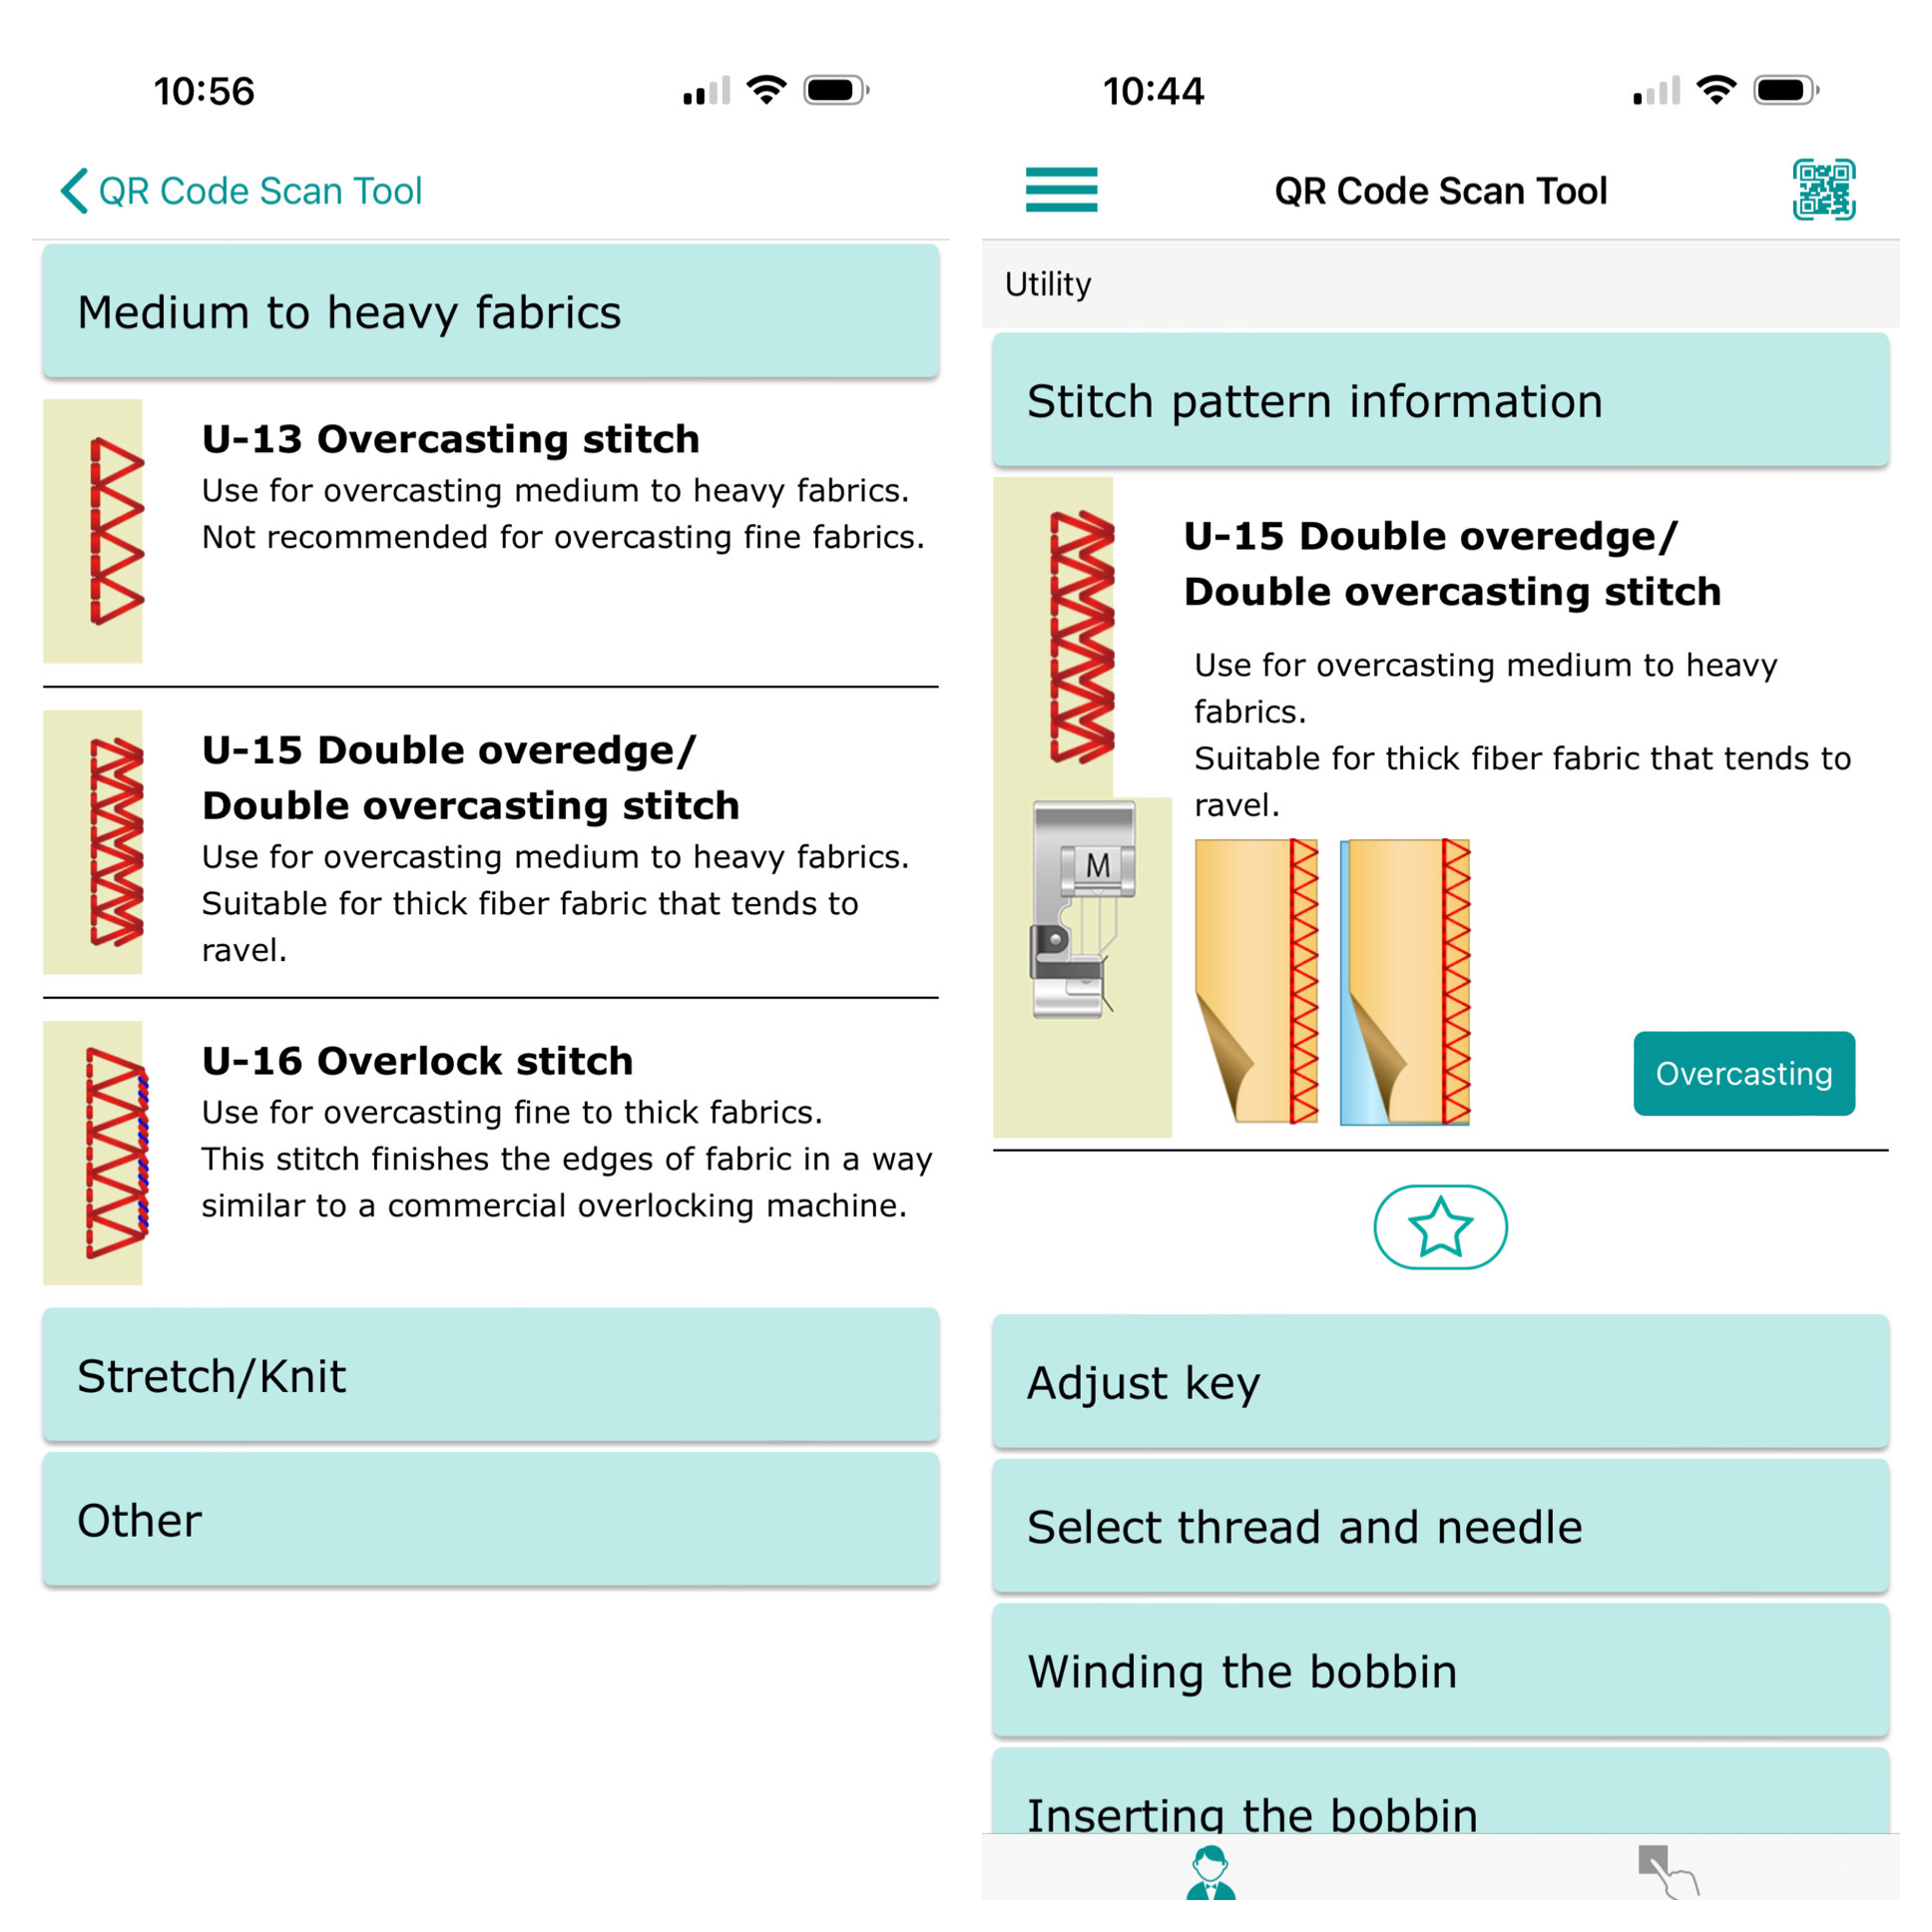
If you want help understanding when and how to use a given stitch, open the AcuSpark app and scan the QR code. It then opens up a screen in the app with all sorts of nifty information on how to use the stitch. Below, I’ve opened the app to the Scan tool and took screen shots of these four overcast or overlock stitches.
There is also a tab to look at various options, on left side of photo below and, on the right, the stitch I like.
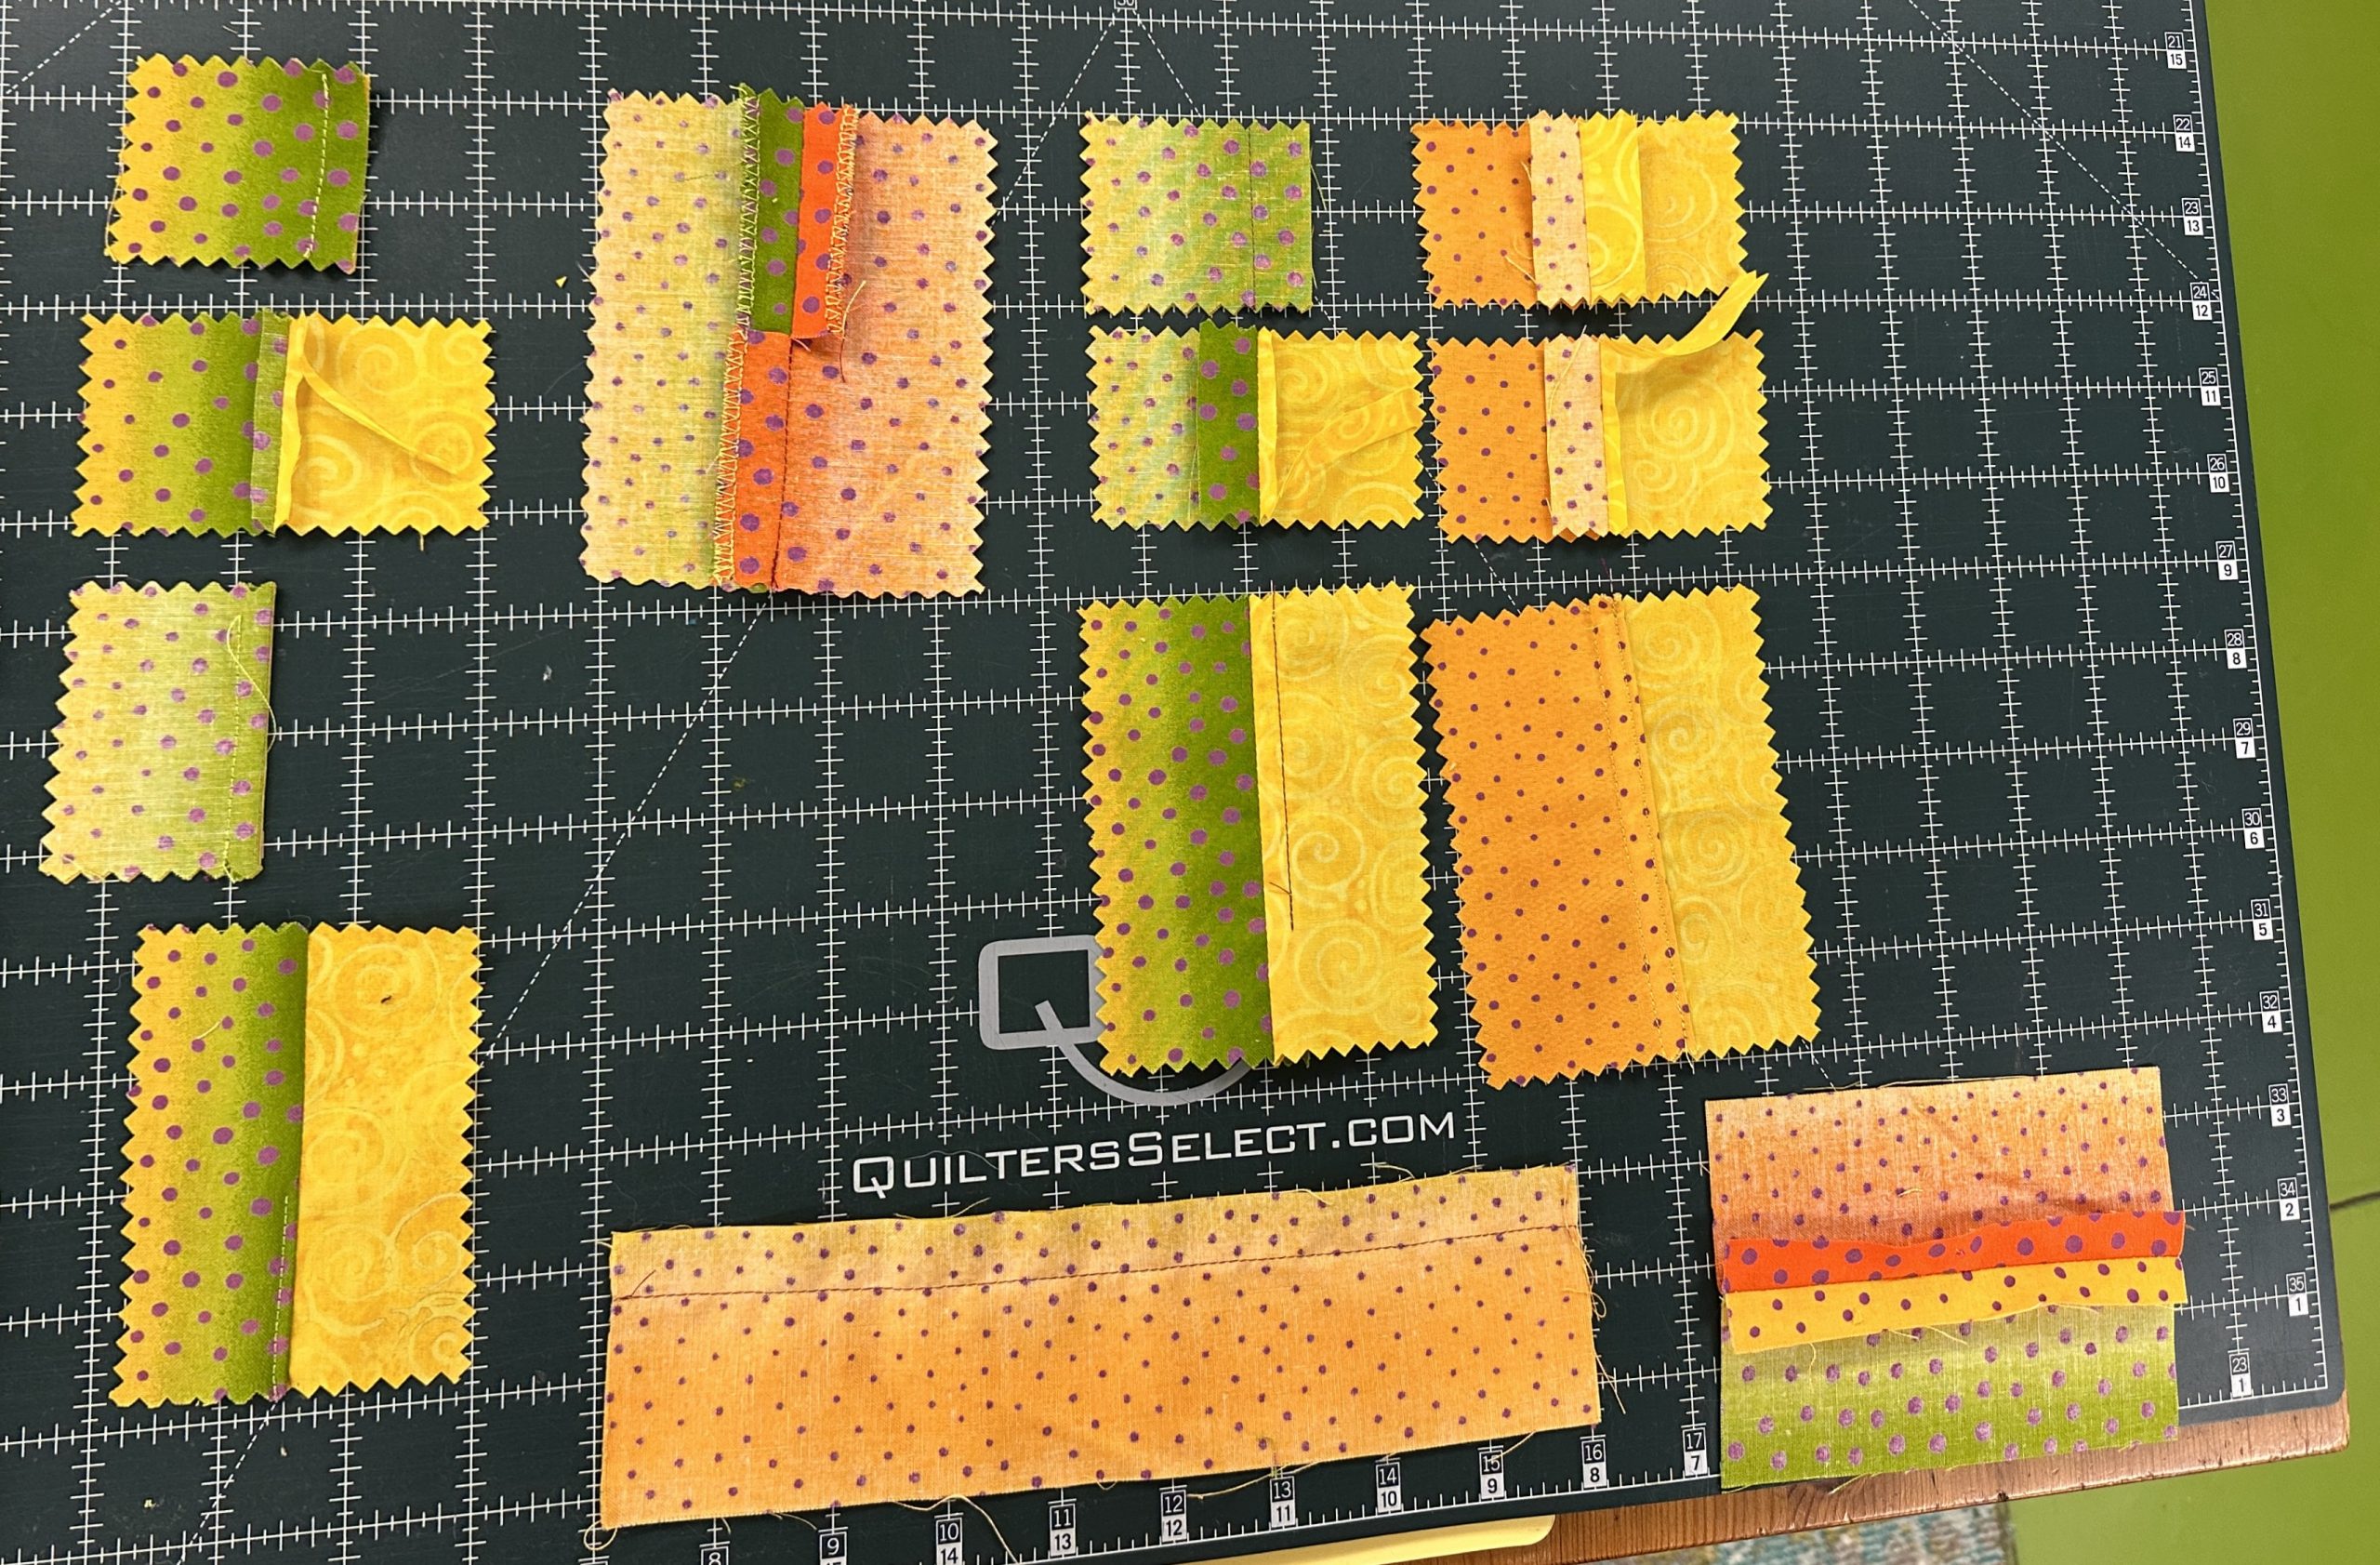
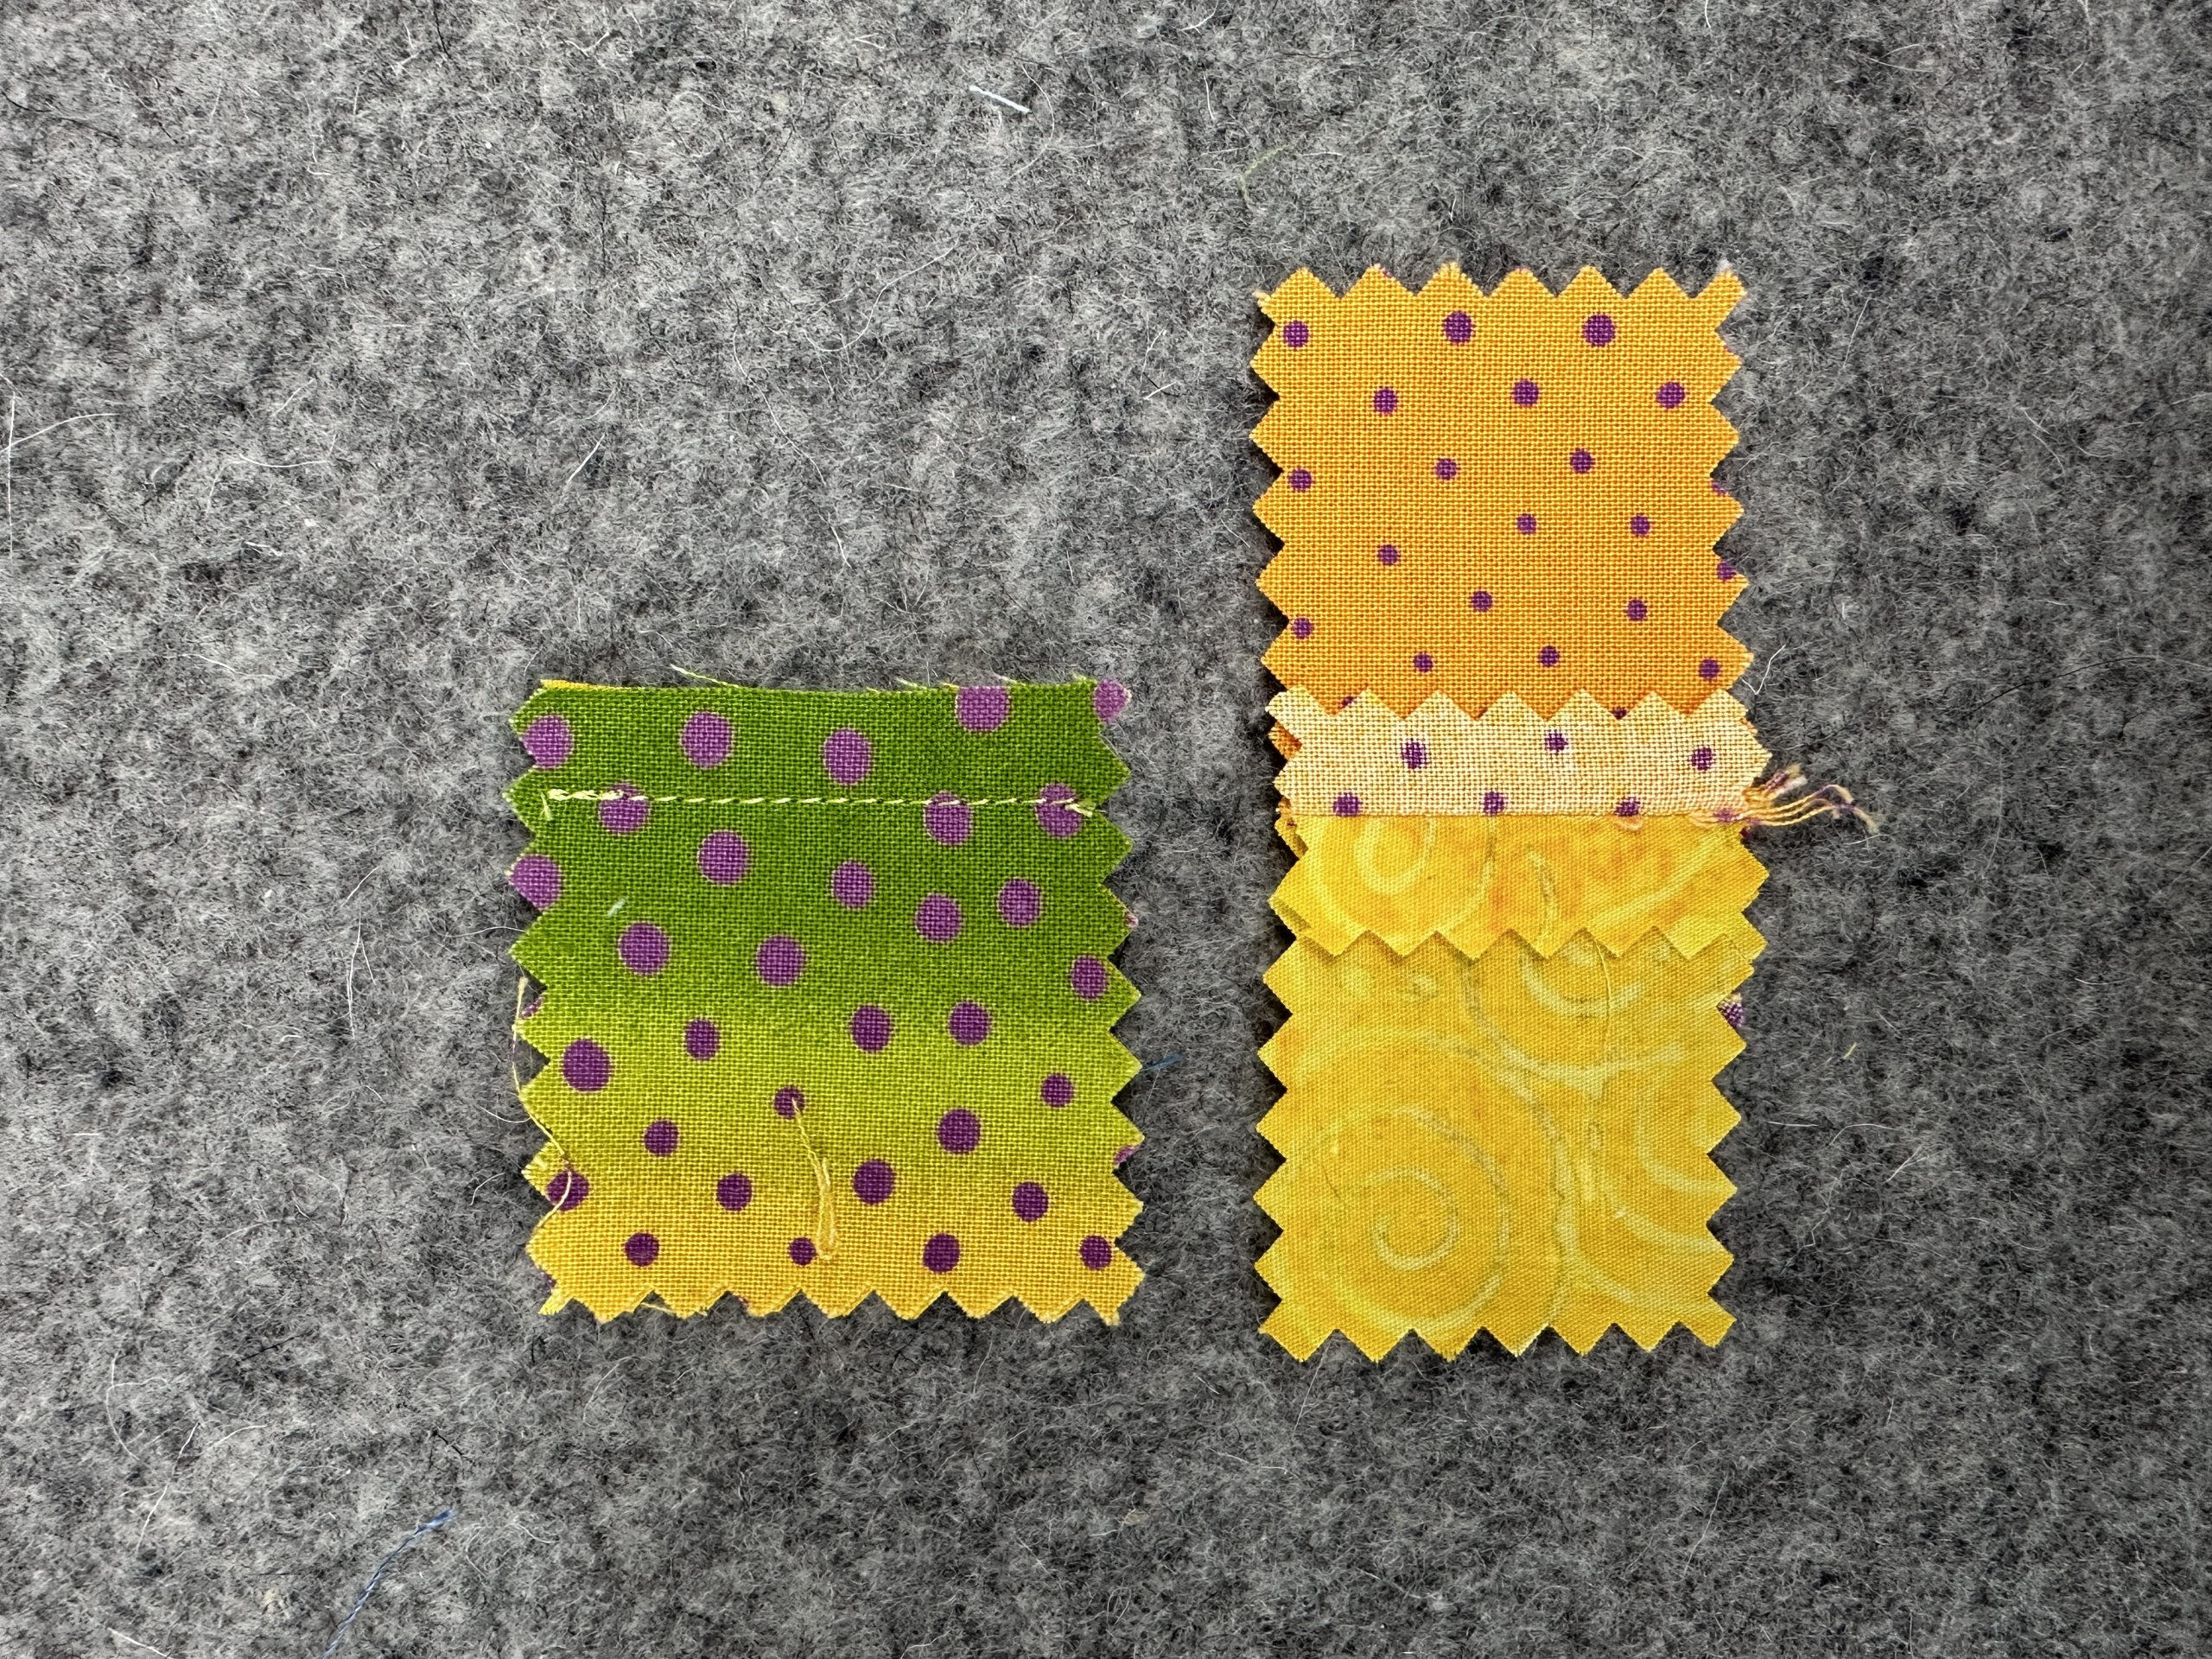
And let’s look at what a difference using the correct presser foot makes! Be sure to watch the video at the end of the post to see this foot in action!
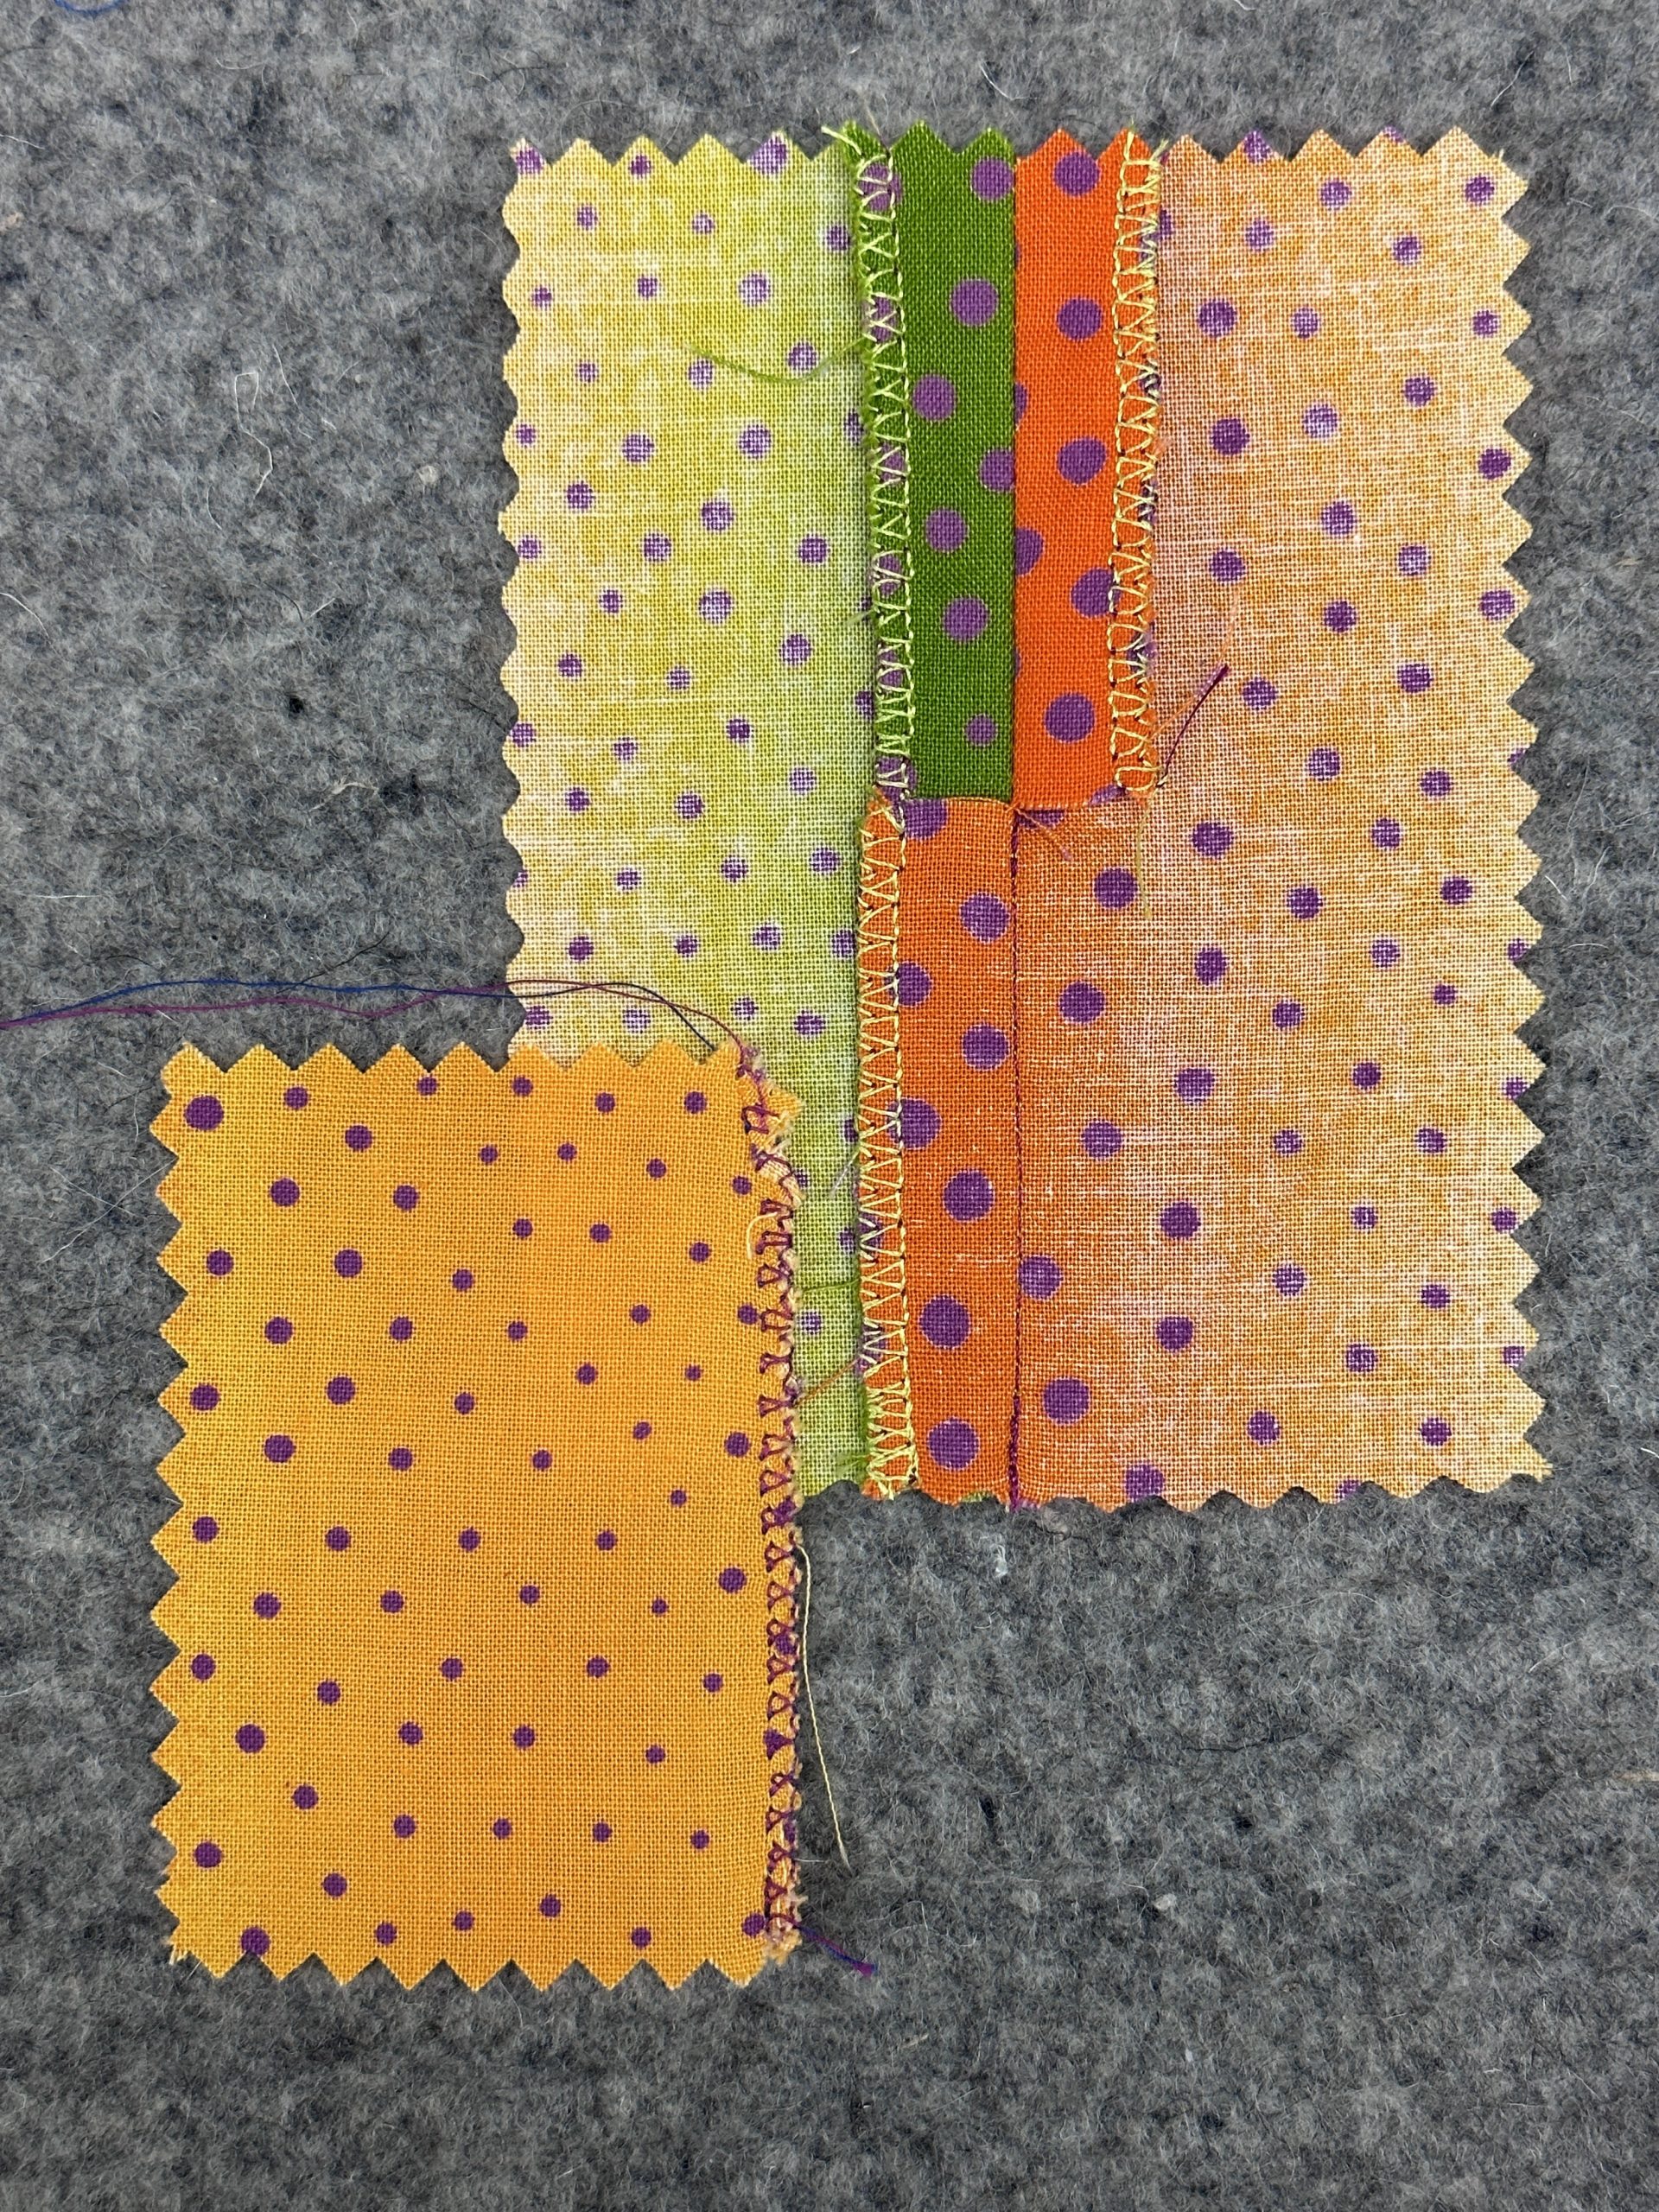
The small sample, lower left, shows using the overcast stitch with the regular presser foot. Messy! The larger sample shows overcasting each side of the seam with the “M” foot, with the seam pressed open at the top AND overcasting both sides together and pressing to one side on the bottom.
Most machines that offer these stitches also come with (or you can buy separately depending on brand and model); buy one made by the company that made your machine for best results) a foot that has a wire on the right. This allows the stitch to form properly and not pull or curl the edge; those distorted edges aren’t as comfortable! On the Janome, it is the “M” foot. Look at the difference between the samples above.
Check the feel of the seam on a scrap. Adding too much thread can make a seam stiff and uncomfortable. If you have/can find a lighter weight thread, that finer thread will make the seam softer, as will using a longer stitch length IF your machine allows any adjustments to stitch width and length. If so, and your fabric ravels a lot, you may choose to use a wider stitch setting to better encase the tendency to ravel and wiggle.
USAGE: pretty much any seam, especially where seams intersect and you’d end up with a lot of bulk.
When I was doing custom home dec sewing for an interior designer, I also used a serger (but you can use the overcast stitches) to secure each cut piece of fabric before constructing the pillows, duvets, curtains, bedskirts, seat cushions and such. Upholstery fabric is VERY ravelly, and expensive, so I secured the edges immediately after cutting and before assembly to prevent an expensive disaster.
Cons: not the classiest finish, but fast and functional.
Here’s a video!
On the Plaid top I used serged together seam allowances for both the underarm and sleeve-to-body seams. This choice is especially useful where the sleeve joins the body because it stiffens the seam just a bit. When you press the seam towards the sleeve it actually helps support the top of the sleeve itself and helps it to hang well on the body.
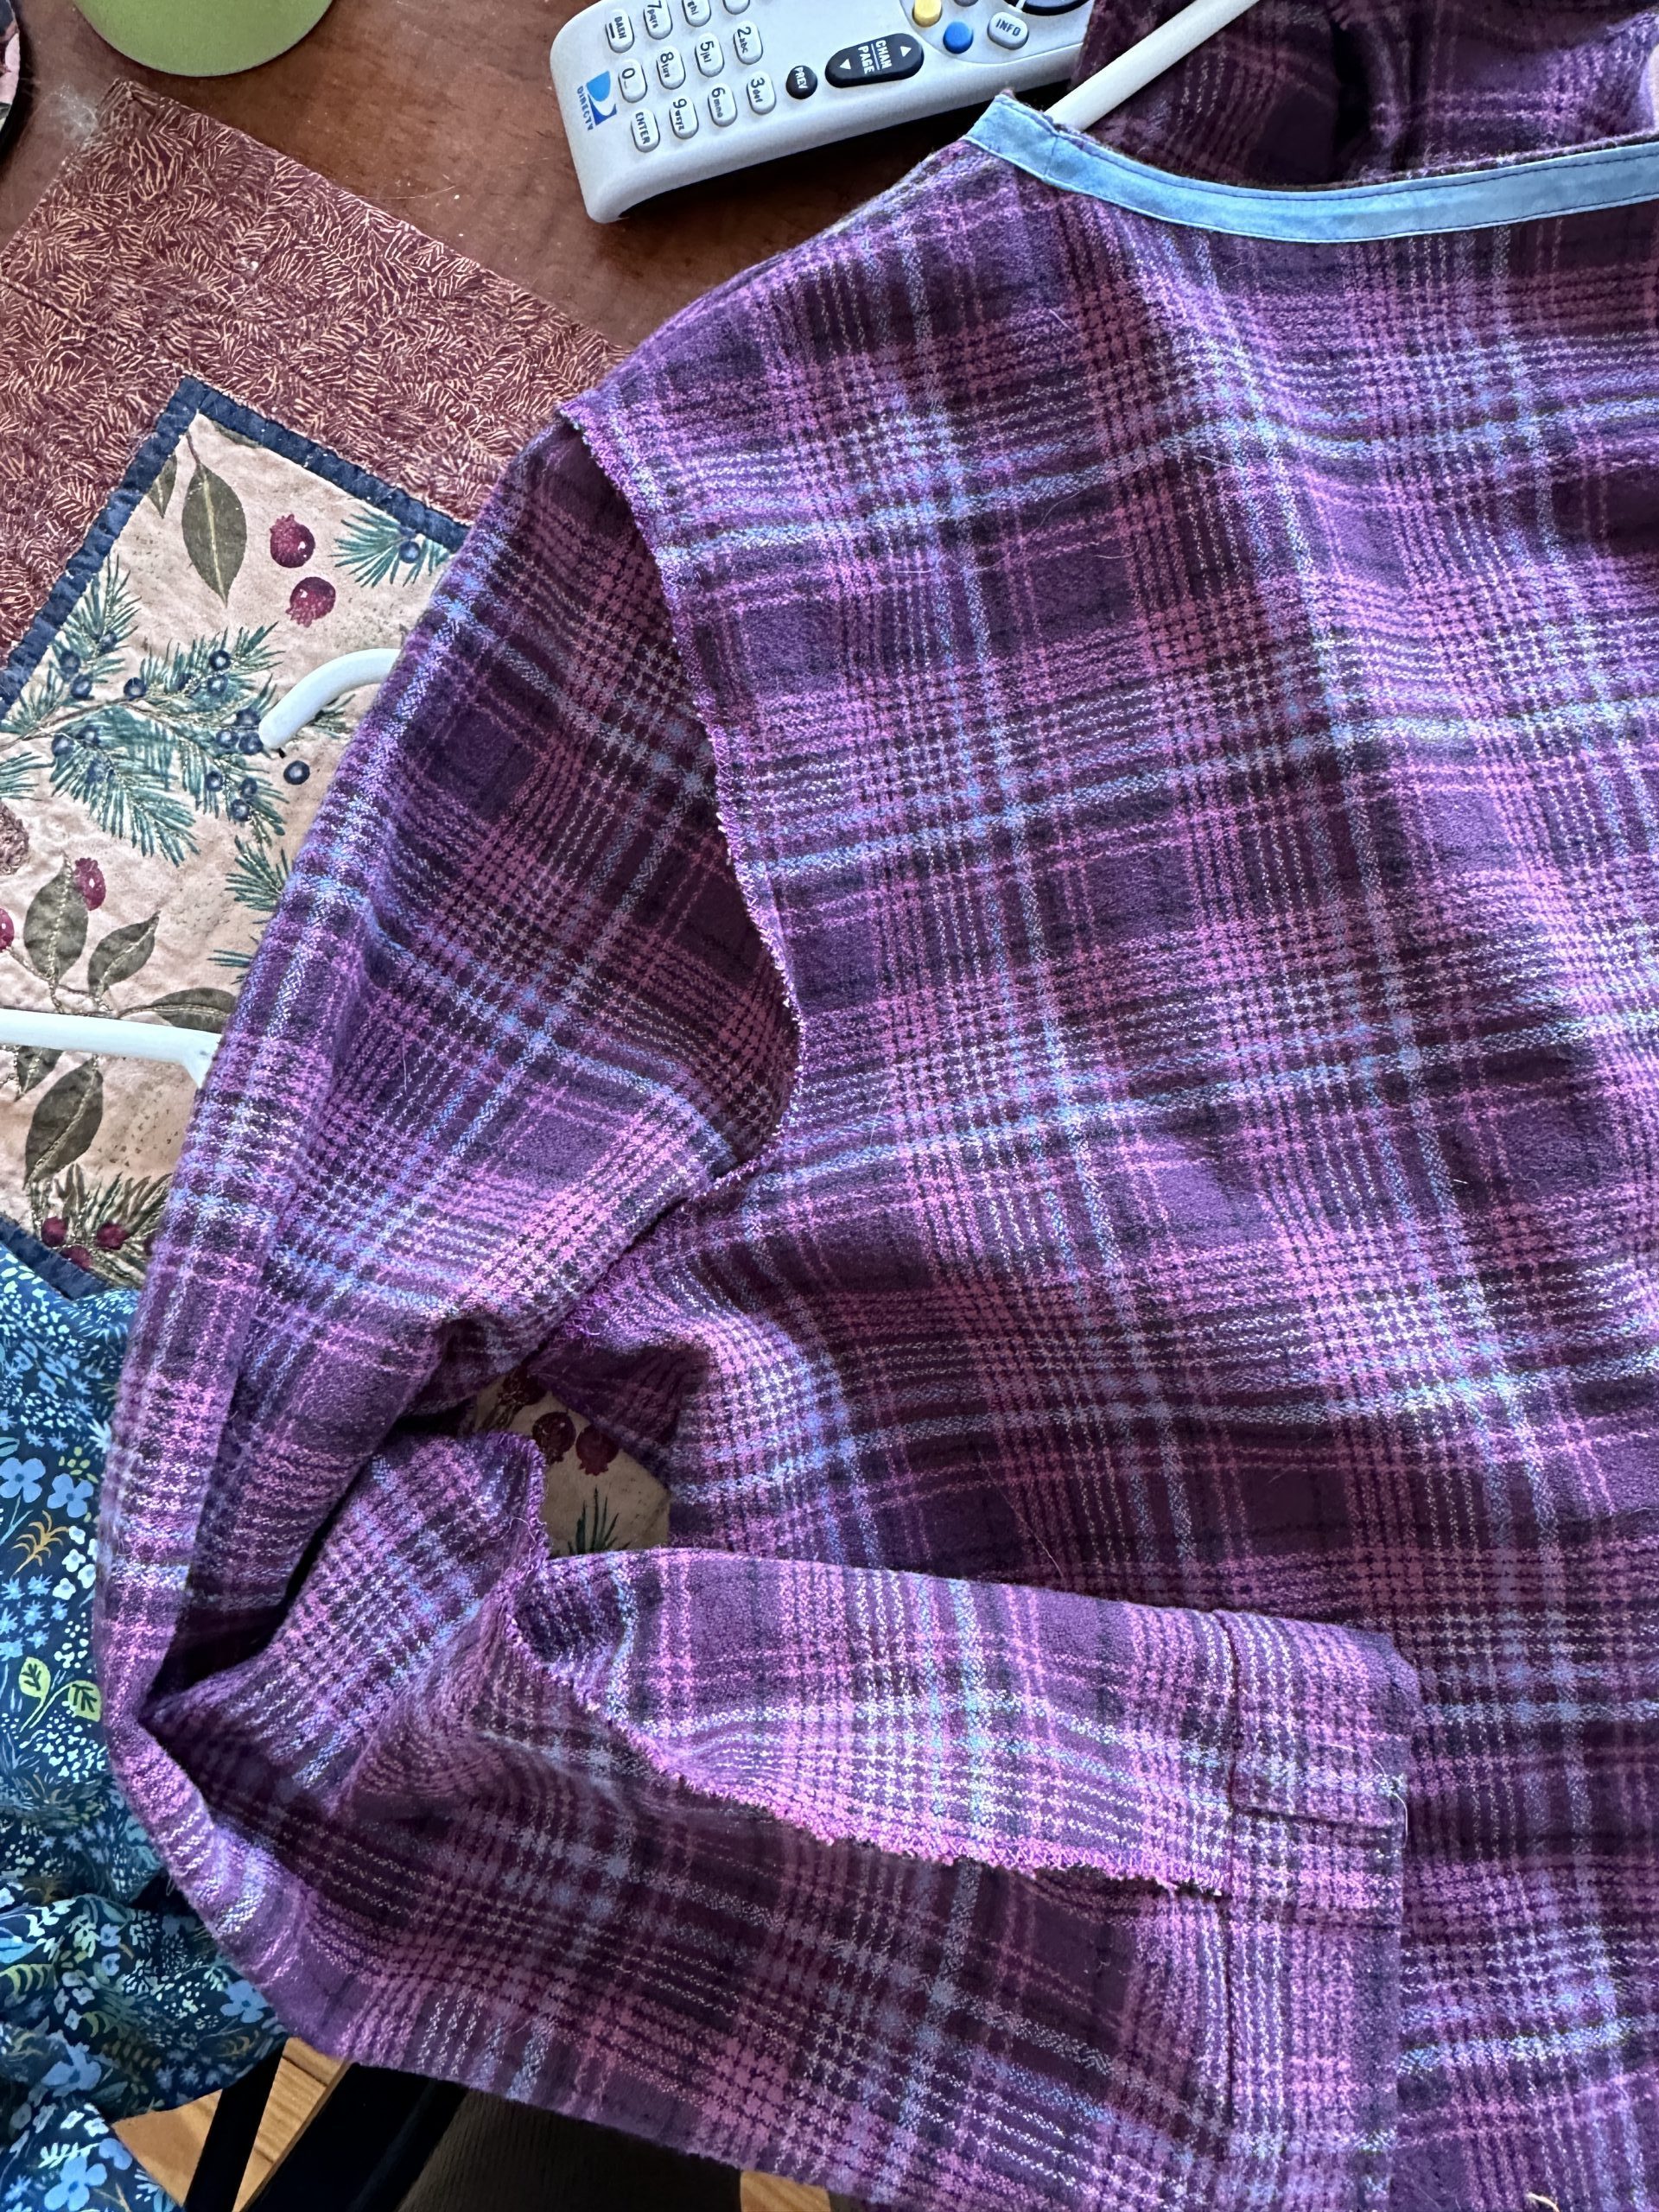
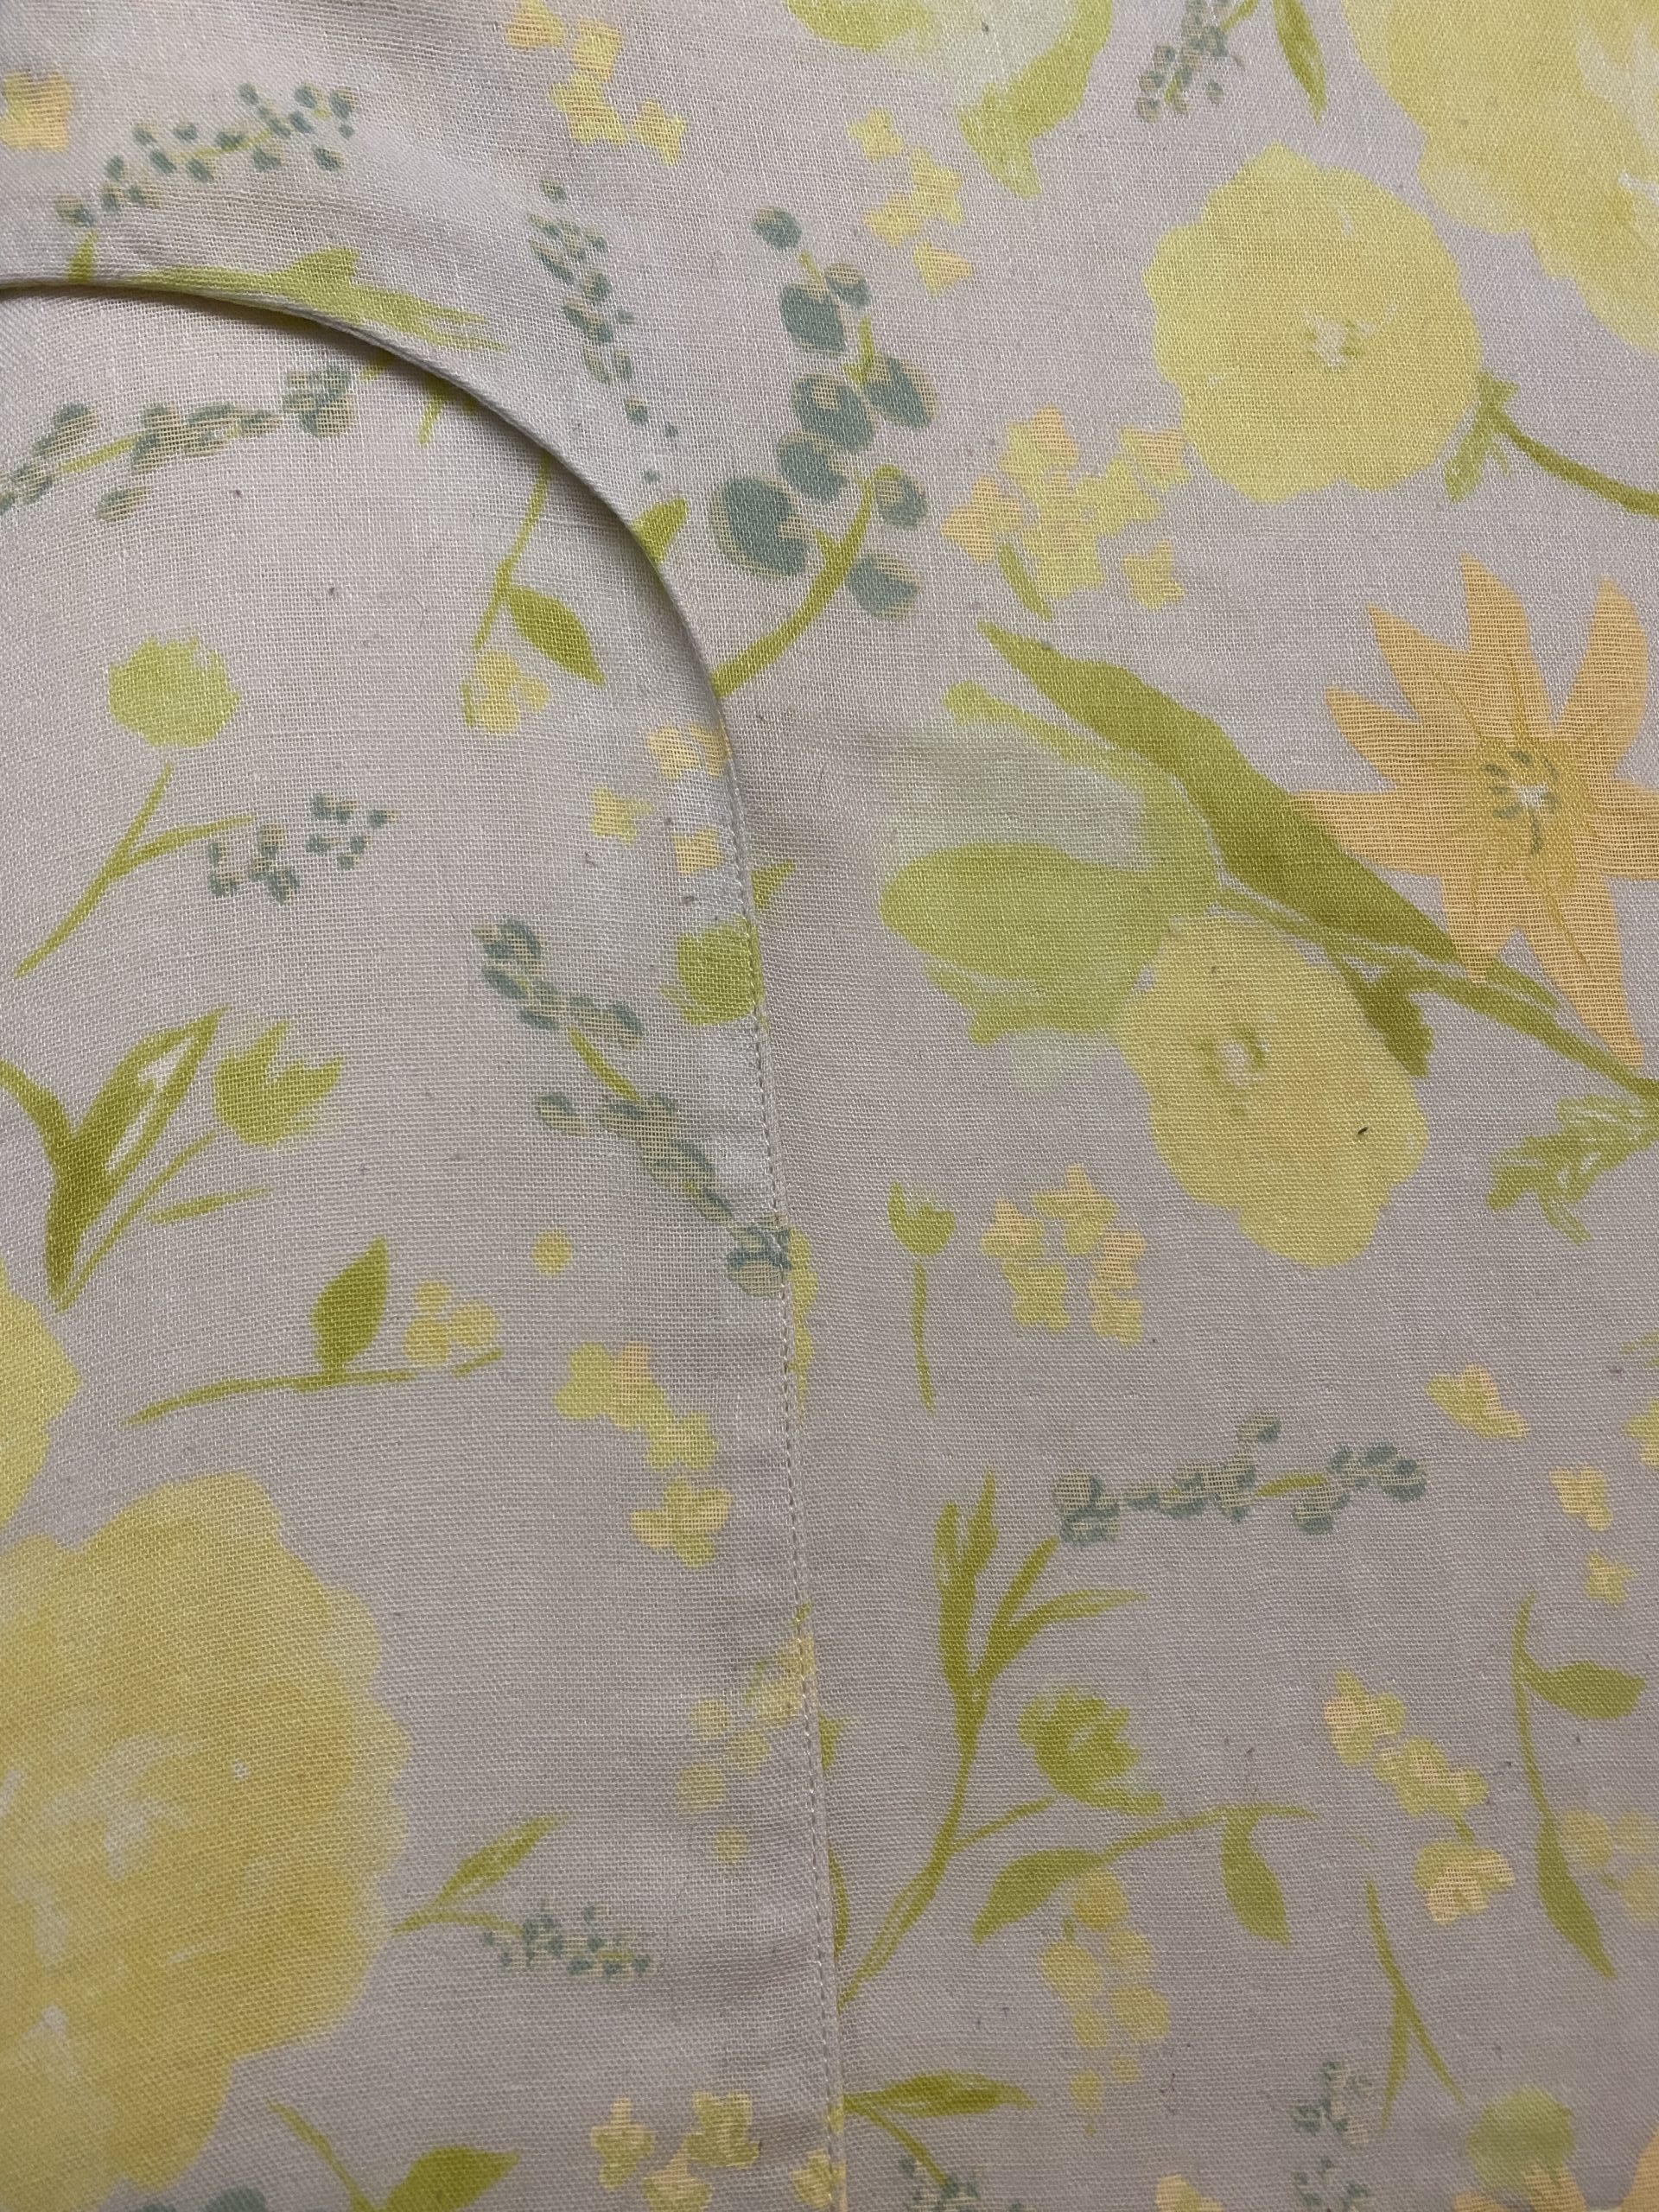
Inside of the Plaid top: I used the overcast-both-seam-allowances-together method.
Another nice touch is to edgestitch the seam. Last summer I asked Philippa Naylor in GMQT (see previous post for additional discussion of GMQT) about how best to handle a side seam with a curved bit under the arm to the extended part for the sleeves. The top is literally two “T” shaped pieces of fabric with a neck facing and turned up hems (see photo from the back, below). Any curved seam will tend to pull at the curve. She suggested finishing the seam with an overlock (I used my Janome AirThread2000D serger, but the overcast stitch would do exactly the same), then pressing to the back of the garment and edge stitching. So I did…worked perfectly (and surprisingly well to me) and kept the curve under the arm from wanting to “wonk” on me.

Here’s the finished blouse.
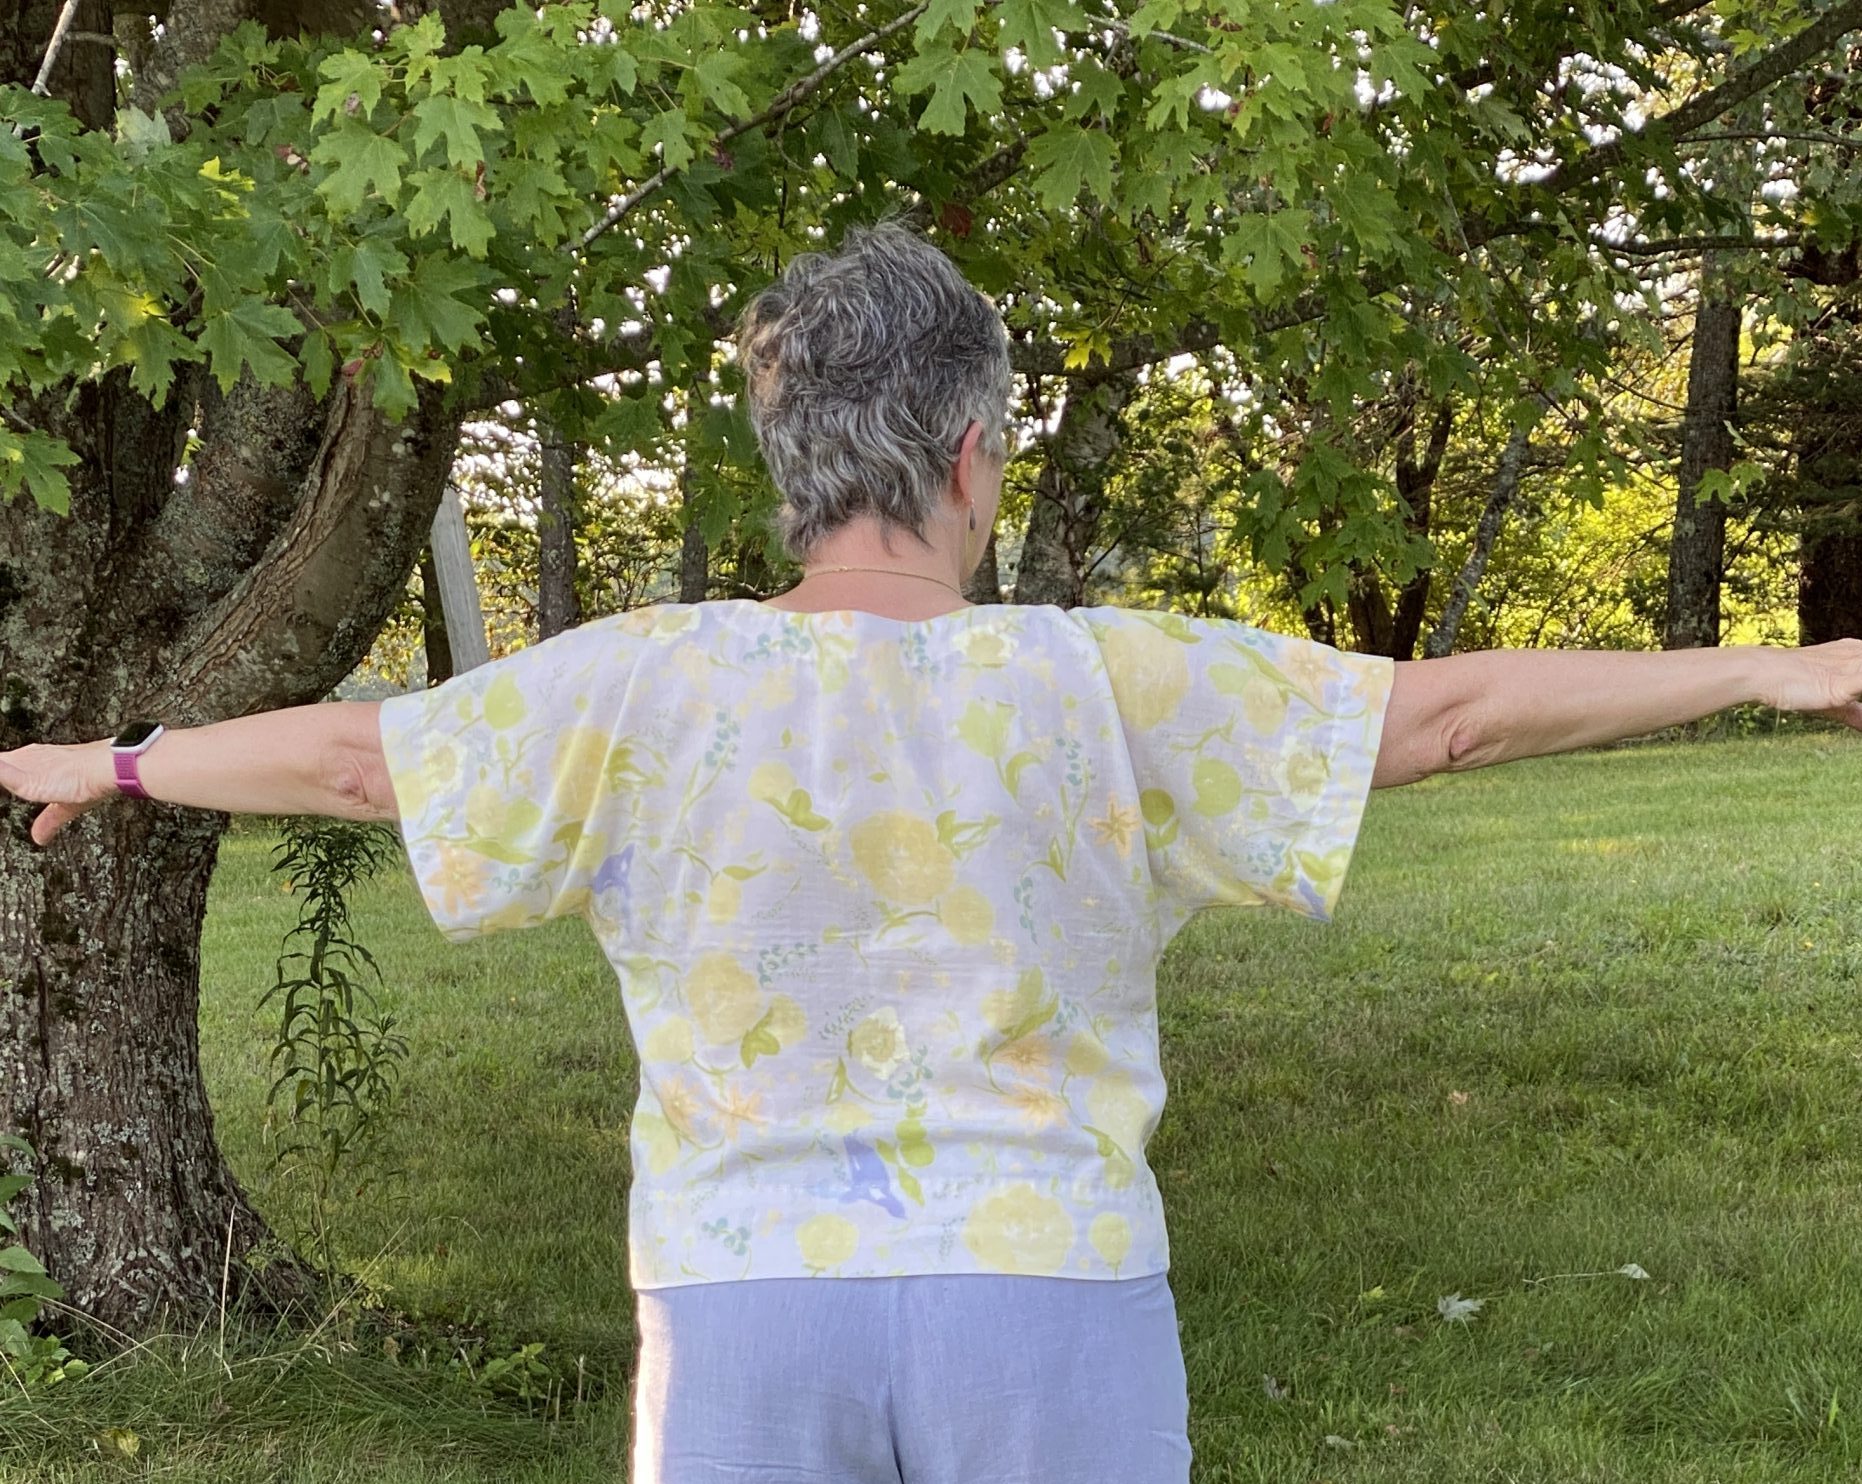
As you can see, this is the simplest of all shapes. The fabric is Nani Iro double gauze, a lightweight cotton that is two layers woven together.
And this is Philippa’s brilliant solution to controlling the tendency of the seam to ripple and buckle at the curve. Worked a charm! And in case you’re wanting that link to sign up for the Garment Makers Question Time classes with Philippa Naylor, here it is.
And a tiny PS: back in the days when dinosaurs walked the earth and my age was in single digits, home ec classes suggested using pinking shears to finish a seam. It would look like this. Problem is that with use and washing, it frays. So here’s a pic, but really, don’t! You put too much effort and money into not doing your best work!
 Left, seam as stitched, and pressed open. Bleah. It’s gonna ravel! Just don’t. See you next time!
Here are the links to all the posts in this series of lessons, techniques that can be applied to virtually any garment and many home dec projects. Let me know what you’d like to learn and see here on the blog. Cheers and thanks, Sarah
Lesson 1: Choosing a Pattern and Starting Tips
Lesson 2: Making a Muslin, Fitting and Sleeves
Lesson 3: Matching Plaids, Cutting out Your Garment Pieces
Lesson 4: Overcast Seams, just like Serged Seams
Lesson 6: Lapped and Flat-felled Seams
Lesson 7: Hong Kong Finish for Seams
March 16th, 2023 at 8:47 am
[…] Lesson 4: Overcast Seams, just like Serged Seams […]
March 16th, 2023 at 8:50 am
[…] Lesson 4: Overcast Seams, just like Serged Seams […]