email Youtube

Home
Galleries
Blog
Workshops & Calendar
Store
Resources
About
Contact

Author Archive

IQA: Quilt Festival Traditional Quilts

Thursday, November 19th, 2009

As an ardent art quilter, you might not guess that I began my quilting journey with traditional quilts (my first is a Wild Goose Chase variation from McClun and Knownes Quilts! Quilts!! Quilts!!! book, my second a Mariner’s Compass from a pattern by Mary K. Ryan of Vermont), and still absolutely adore them even if I don’t find the time to make them.  There was a wonderful exhibit of quilts from Texas, and I was able to take pictures.

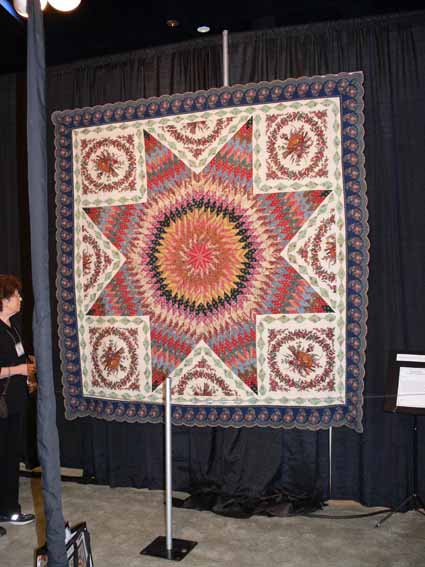
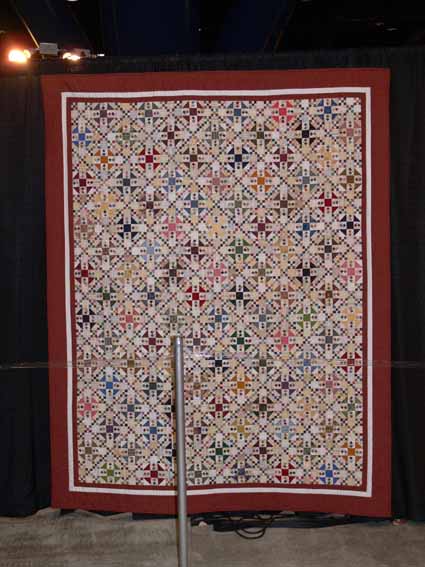
Star of Stars, c. 1845, Unknown maker

Star of Stars, circa 1845, by an Unknown Maker, was on this year’s totebag (which you can see in the last picture on this post) and is simply spectacular in  color, design and workmanship.  It is a large quilt…101 by 101 inches, which is plenty big for a king sized bed!

2009.10.blog.IQAFall2009Trad'lTx006

Oh My Gosh, by Diane Tenney, is a contemporary quilt.   The small flying geese triangles that make the diagonal lines on the quilt look like they are about 1.5 inches on the LONG side of the triangle!!! EEEK!

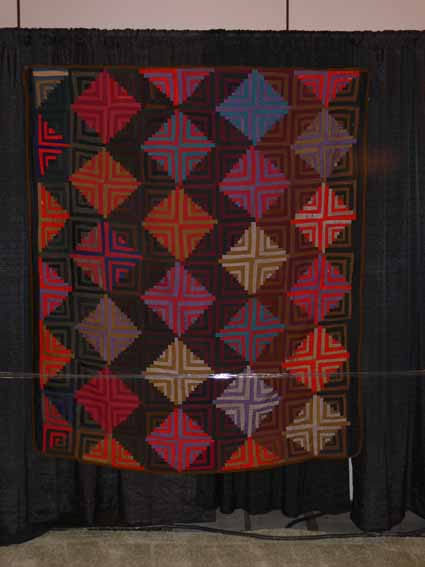
Log Cabin, Streak of Lighting setting, 65 1/2 x 77 inches; no date estimated; unknown maker.  I’m not usually wild about streak of lightning settings, but I really liked the use of value (light versus dark) in this one:

2009.10.blog.IQAFall2009Trad'lTx004

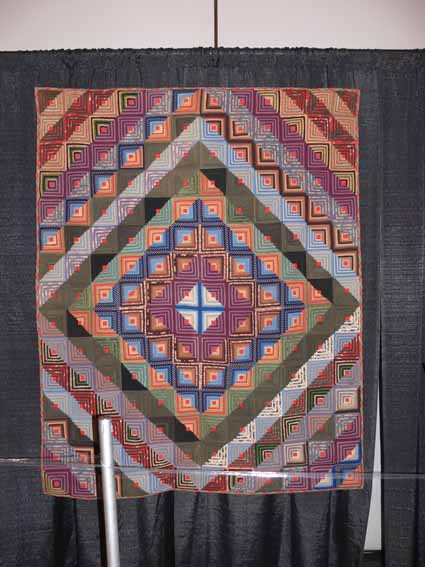
I love log cabin quilts, tho, and this one with plaids was no exception.  It is 53 x 66 inches, dates to circa 1875-1885, by an unknown maker  The logs are barely a half-inch wide finished size!

2009.10.blog.IQAFall2009Trad'lTx003

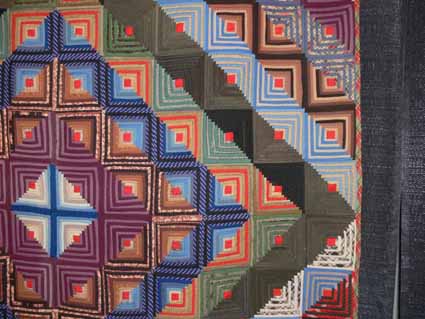
And here’s a detail..oh my!

2009.10.blog.IQAFall2009Trad'lTx002

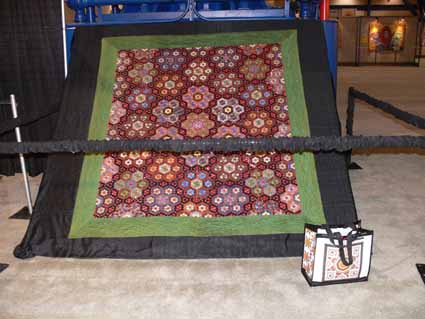
The final quilt I’ll share is a Grandmother’s Flower Garden with silk green border.  You can tell that Quilts, Inc., does things right…this delicate quilt even had a special display podium to prevent undue stress on the quilt.  The hexgons are about 1/2 inch across!!!!:

2009.10.blog.IQAFall2009Trad'lTx001

If I recall correctly, all these quilts are in the International Quilt Festival collection…. I wonder how large that collection is… I’d love to see them ALL displayed some year but I expect it would take over the entire convention center, or nearly!

Next:  The Frayed Edges in October….Deborah came from Texas for a FUNDERFUL visit, then more on Festival.  Cheers, Sarah

Quilt Festival: Fabric Postcards/Chunk and Jigsaw

Tuesday, November 17th, 2009

One of the lessons learned is to  get your class a good title AND a good class description.  I clearly failed on the Chunk and Jigsaw Fusible applique!  The class had only 7 students, but I opted not to cancel (I was given the choice), figuring getting paid for seven students is better than none, and they had already planned and prepped, and I had spent more money and time on kits and materials for this class than any other, so I might as well.  In reality, the class is using fusing and other art techniques to make fabric postcards (or slightly larger) pieces in the class.

2009.10.blog.TeachingThurs012

Well, it turned out we had a ball!   I decided the best way to organize things was to demo the fusing first, have students fuse up a stash of fabrics (thanks to IQA for providing extra ironing stations in the hallways….due to electricity charges and wiring you can only have two irons in a classroom, clearly not enough for full classes!), then move to art techniques in the late morning and afternoon.  I set up an “Art Smorgasbord” in the back of the room, with materials and supplies for various techniques at three tables / workstations.

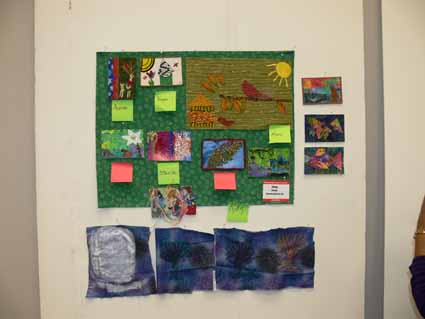
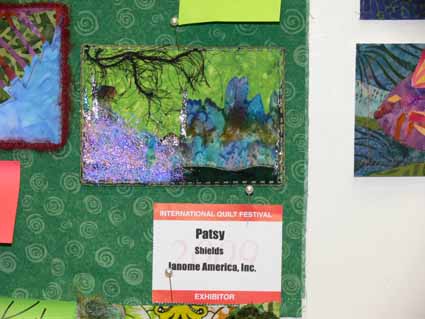
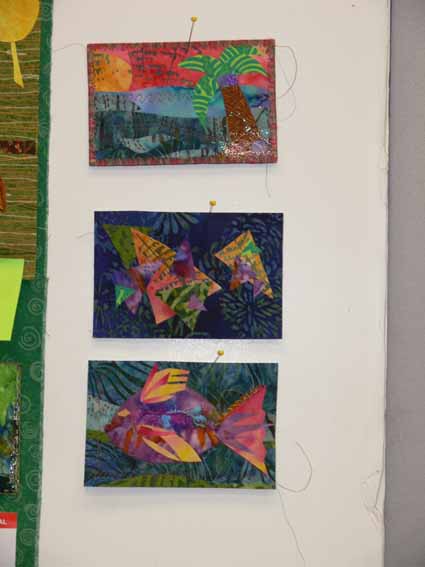
At the end of the day everyone put their stuff up on one of the foam core sheets and we all took pictures (photo above).  Among the techniques we tried were angelina (a hairy fiber that is sparkly which you can emboss with a stamp), making your own stamps from rope, glue, “stuff” (such as metal washers), foam sheets (I used Darice Foamies from Wal-mart…an adhesive backed foam that you can cut with scissors), painting on fabric, freezer paper stencils to stencil, couched yarns and other stuff, making your own cording from yarn, strips of fabric and whatnot, scrunching/texturing fabric…. and finally, my favorite finish for postcards:  the couched-yarn edge.  I made sure everyone tried every technique or had some of the materials to take home and try.

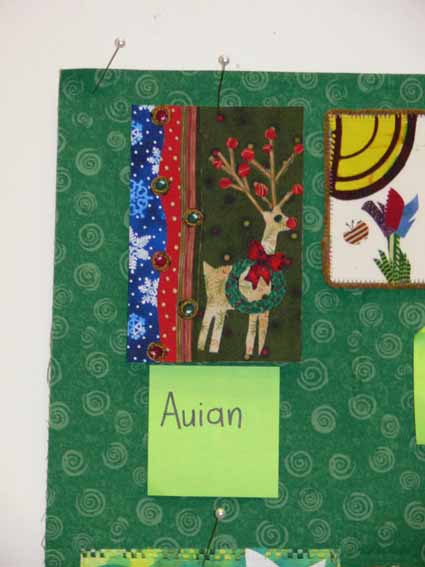
Here Auian made the most adorable reindeer…she had brought many Christmas fabrics, and I am totally in love with this guy!:

2009.10.blog.TeachingThurs011

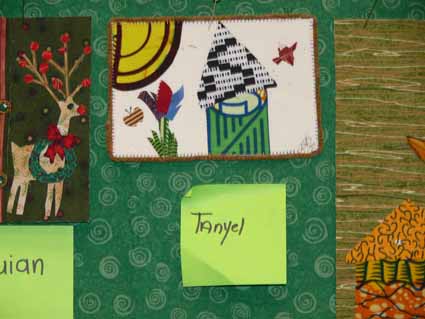
and her friend Tanyel made some wonderful postcards with her to-die-for selection of African fabrics:

2009.10.blog.TeachingThurs010

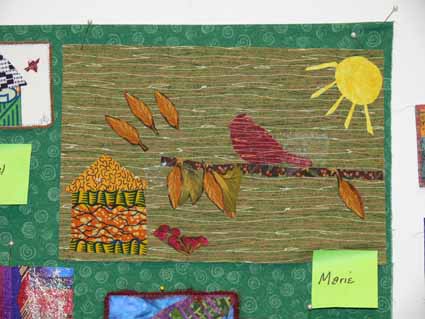
Marie used both African and regular quilting fabrics and my Little Brown Bird pattern to make her own, slightly larger quiltlet… wish I could see this one when it is done! I was SO excited… early in the day I did a small exercise that helps folks understand that drawing really can be easy if you just break it down into basic steps and concepts…and Marie said she actually thought that now she might really be able to draw, and she never had before…WOOOOHOOO!!!!!  I think what I love best about teaching is when I can help a student realize that the really CAN do it!

2009.10.blog.TeachingThurs009

and

2009.10.blog.TeachingThurs008Our fantabuloso Janome rep (who helped with the machines, and tips and all sorts of fun stuff) got to join in the fun on Thursday since we were so few– it was truly a pleasure to have her in the classroom helping, she was everything you  hope a classroom company rep will be!

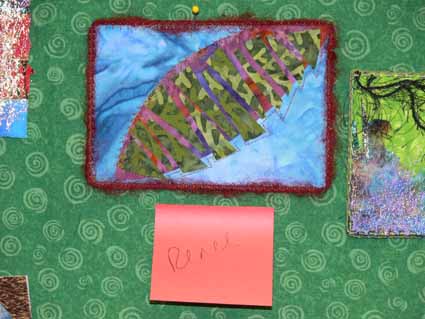
Renee worked quietly over on the side of the room and boy did she cut loose!  Her mom and dad are both artists, and you can tell she is comfortable in a creative, free-form environment.  Plus, her taste in colors and fabrics and mine overlap a lot… I loved what she has done in these cards:

2009.10.blog.TeachingThurs007

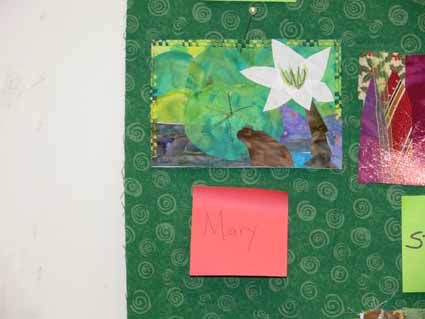
Mary’s frog and lily make me think of spring.  I also shared in the class how to use some funky tape-yarn to “bind” or edge-finish a postcard.. that’s what Mary has done on the top edges here:

2009.10.blog.TeachingThurs006

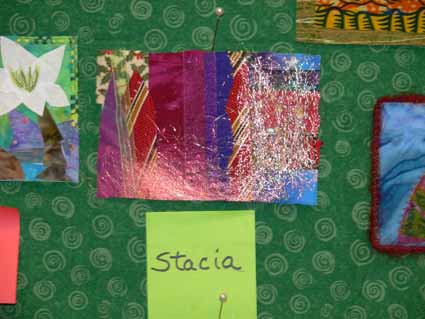
Stacia had fun with abstract design and Angelina:

2009.10.blog.TeachingThurs005

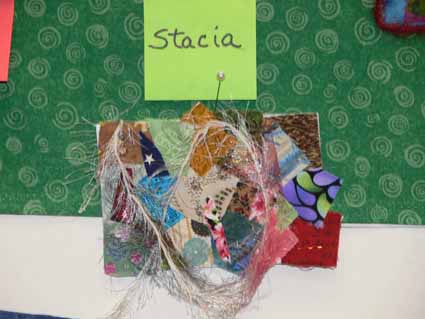
I’m not positive, but think this one may be Stacia’s also:

2009.10.blog.TeachingThurs004

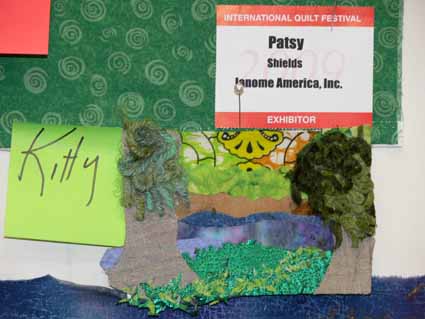
Kitty said she likes to work in series, and this is part of her seasons series:

2009.10.blog.TeachingThurs003

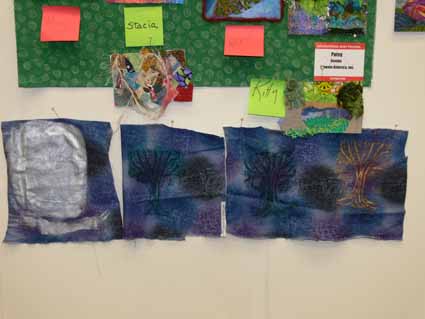
She also used the paintsticks and a stamp I had made of cardboard and glued twine (done in the shape of a tree)  with the Shivas to color this cloth for future use:

2009.10.blog.TeachingThurs001

Last but not least,one more beauty from Renee:

2009.10.blog.TeachingThurs002

It was a great class to end my first teaching stint in Houston.  Because the class was so small, it was very informal and we got to sit close and work together to do some truly fun stuff!

I’ve just sent in my application to teach again next year in Houston…here’s to hoping!   Thanks to ALL my students, it was truly a privelege to be able to come teach and to have you in my classes.

Pretty Little Mini-Quilts

Sunday, November 15th, 2009

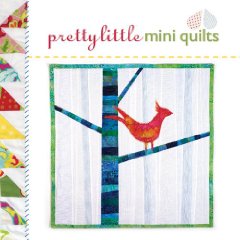
OK, so I surfed over to see my friend Susan Brubaker Knapp’s blog this Sunday morning, and she had a post mentioning the new Lark Books contest and hotlinks to the books the winners would receive.  One of those books is Pretty Little Mini Quilts. Well, about a thousand years ago I sent in a couple proposals, and one was accepted for the book (it must be at least a year since I sent in the quilt).

So I clicked on the hotlink, and LOOKIT what is there:

PrettyLittleMiniQs

Yes folks…. I (somewhere up above the clouds at the moment) found MY Amazing Crested Batiki Bird ON THE COVER!

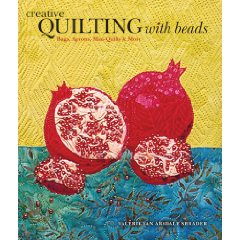
That makes two for two…. my pomegranate notebook cover made it onto the cover of Creative Quilting with Beads, too!

CreativeQuiltingBeads

WOW…. THANKS LARK!

Quilt Festival: Tame Fussy Fiddly Threads

Sunday, November 15th, 2009

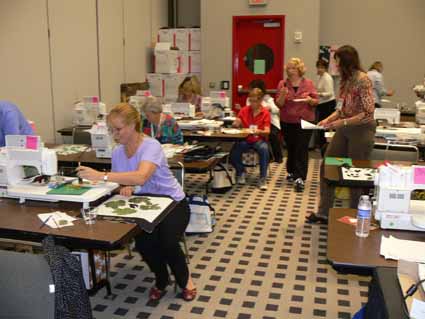
Despite being a relatively unknown teacher, I was thrilled that my Wednesday class was FULL!  It is called Tame Fussy Fiddly Threads for Machine Quilting, which is really my “More Machine Quilting” class but with a better name.  It is for folks who are comfortable with free-motion quilting.  You don’t have to think you are good at it, just willing to try it!

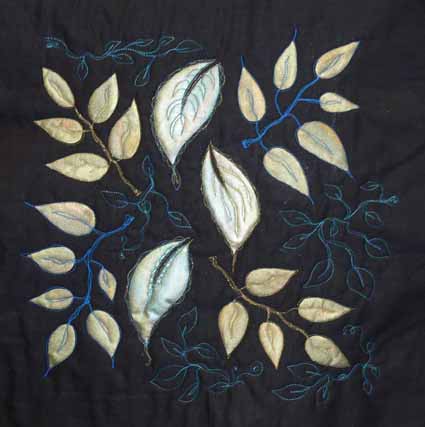
2009.11.Blog.Houstonx001

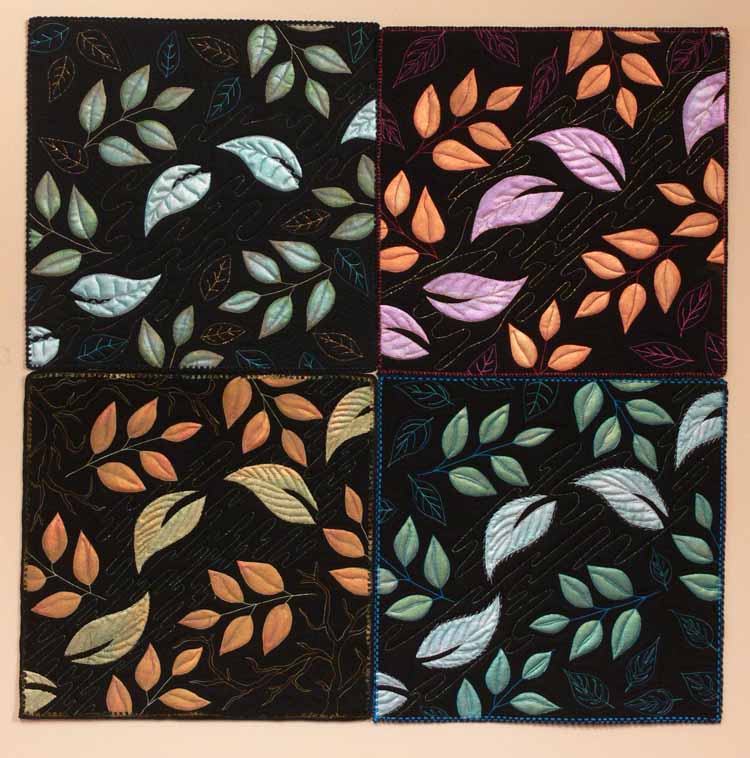
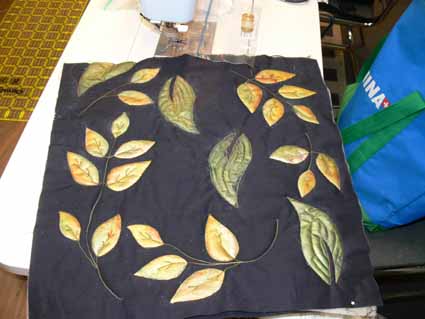
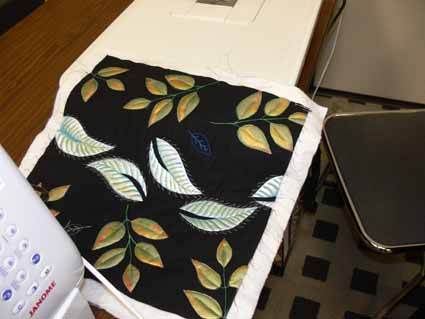
The photo above shows the four 15″ square samples I made for the class.  (Click on the photo for a larger view.) The one on the top left is on the cover of my book.  Since I kit up the threads, and the ones I used in that sample didn’t match the kits, I decided I needed to make up three new samples to match what was in the kits because many students want to “make it just like that.”  I always encourage students to make it their way, but many will follow the class sample for practice.

When I teach this class locally and for guilds where students have their own machines, we work on a thread tension sampler (the pattern/instructions are in my book) so folks can learn how to achieve a balanced tension no matter which combination of thread, needles, fabric and batting (well, there may be impossible combinations, but we talk about that, too).  However, I learned the hard way in Paducah in Spring 2008, that doing a tension sampler on a borrowed classroom machine isn’t the best idea.  SO, I developed the leaf sampler so students can actually make a small item in class while testing different threads and tension settings.  I also hand out the instructions for the tension sampler so they can start on it when they get home to have their own personalized ready-reference quilting tension guide.

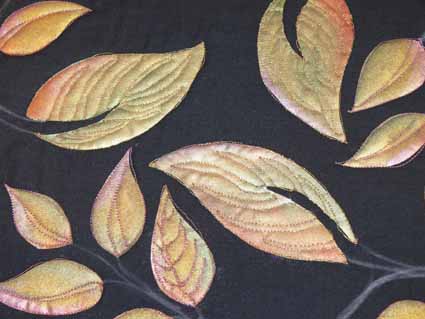
Anyway, the morning was spent making the freezer paper stencil template and painting:

2009.11.Blog.Houstonx002

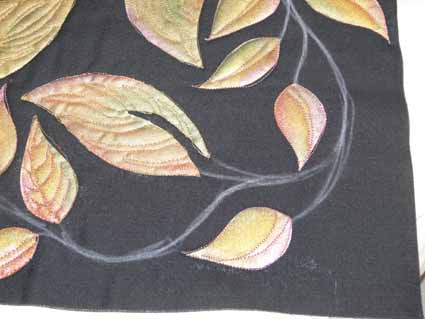
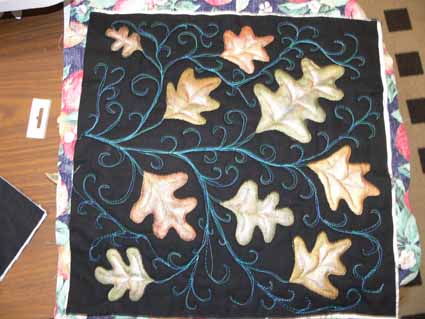
The colors the students combined were GREAT!  I loved the pink and green tinges to the copper and gold:

2009.10.blog.TeachingWeds003

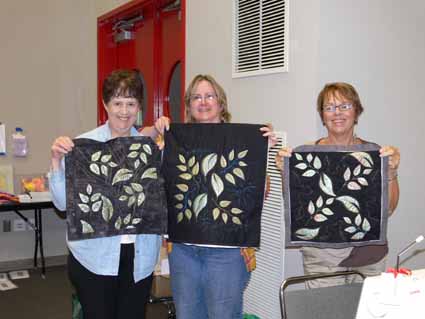
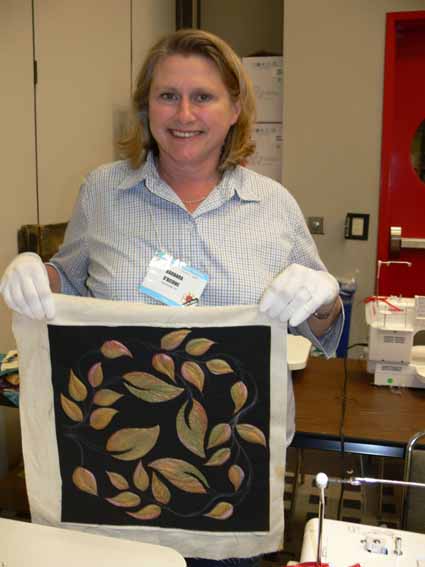
Here are three happy students….the lady (my classroom helper…thank you!) on the left used a gray/black print that looked great in the real… it didn’t photograph as well, but is really cool:

2009.10.blog.TeachingWeds007

The one in the middle used the Brytes thread, a heavy poly from Superior Threads, for the stems very effectively:

2009.10.blog.TeachingTuesWeds007

Lynn was one of the few who totally wanted to go her own way…yippee!  Instead of using my leaf, she drew and stencilled an oak leaf:

2009.10.blog.TeachingWeds009

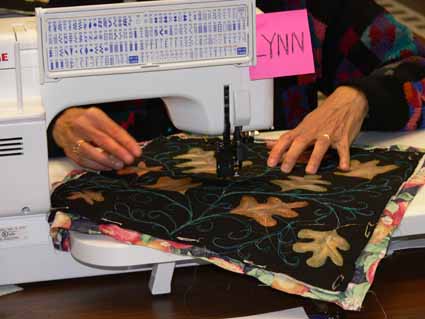
And here is Lynn  in the middle of quilting—thanks to Janome America for sponsoring several classrooms of machines!

2009.10.blog.TeachingWeds011

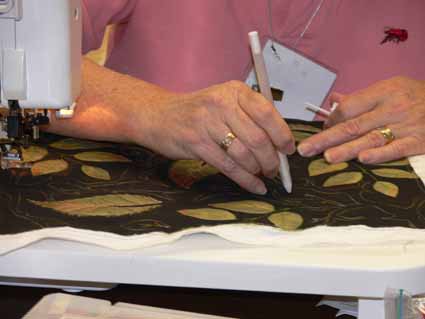
And of course, a whole bunch more of fun quilting and stencilling and quilting.  Some students preferred to mark guidelines for their stems and vines:

2009.10.blog.TeachingWeds010

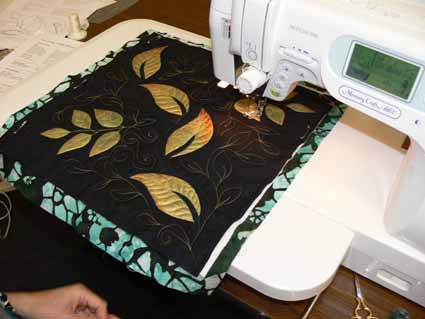
and even more pictures:

2009.10.blog.TeachingWeds0082009.10.blog.TeachingWeds0062009.10.blog.TeachingWeds0052009.10.blog.TeachingWeds001

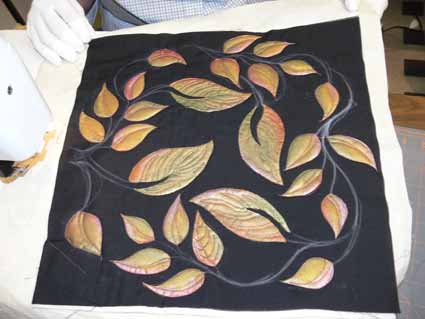
I really like Barbara’s composition, colors and that swirly vine:

2009.10.blog.TeachingWeds004 and here’s a detail:

2009.10.blog.TeachingWeds002

Next post about classes, I’ll share the Fun Fabric Postcards class!

Quilt Festival…the early Classes….

Friday, November 13th, 2009

2009.10.blog.TeachingTuesWeds014Well, I’m a bit of a dolt… here I get to teach in Houston at Quilt Festival, which frankly is a GINORMOUS career leap, and I forget to take the camera to take pictures of my classes not just Monday, but Tuesday as well!  So, I only have a couple pictures from Fine Finishes (the bindings class) and Machine Applique 3 Ways.  Sigh….   This picture is of the front of the room.  I was lucky to be in the Janome classroom, the same one, all four days, so I could just lock up my stuff at night and didn’t have to pack and move.  The IQA staff are the ONLY ones with the keys–not even the convention center has them for the duration–so your stuff is safe!

Of course, I took home the laptop, videocam (for live demos projected up on the foam-core in lieu of screen) and digital projector.  Have I mentioned that a prime requirement to being a quilt teacher is a strong back and wheeled everything?  I think the worst thing about traveling to teach quilting is airports and air travel; the second worst thing is schlepping stuff everywhere…being a human pack mule!  Anyway, I did something fun (inspired by Jan Krentz‘s classroom intro), and did up a pre-class slide show set on autoplay of Where I Live… how many miles from Camden, ME to Houston, TX, what our neighborhood looks like, and our lovely town and, since everyone is always curious, my studio/workspace (with the requisite  pics of the adorable pug).  I’m happy to say it went over well.  As soon as class began at 8, that show went off and class began.  FUN!

This is the “store” area with my book, patterns and assorted stuff folks might need (but forgot to bring) in class. I ONLY sell things I will use, so if they don’t sell, I have a goodly supply of stuff I like!

2009.10.blog.TeachingTuesWeds015

The ironing station, as you can see, is just to the left.

Here’s a view of the classroom from behind my table, at the front:

2009.10.blog.TeachingTuesWeds013

Since I have a TON of pictures from the Wednesday class, Tame Fussy Fiddly Threads, I think I’ll do a separate post tomorrow with those, then later in the weekend the Thursday postcards class.  The latter was small but boy did those ladies have fun! So did I!