email Youtube

Home
Galleries
Blog
Workshops & Calendar
Store
Resources
About
Contact

Archive for the ‘art quilting’ Category

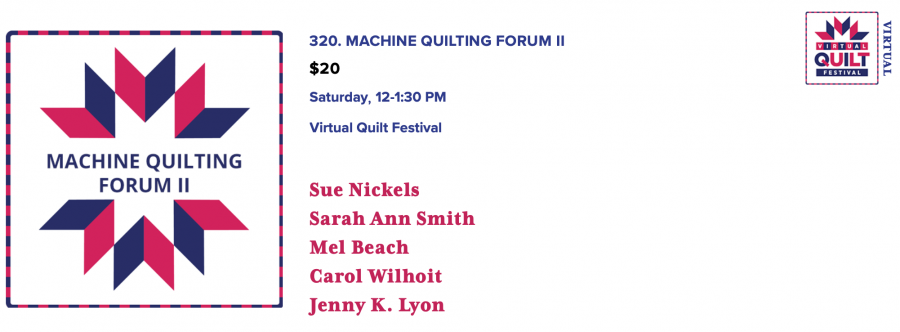
Sarah’s Machine Quilting Forum II video–ends Dec. 12

Sunday, December 6th, 2020

Now Registered participants ONLY can SEE it … CLEARLY!

If you were enrolled in the Virtual Quilt Festival’s second Machine Quilting Forum on Saturday, you know there were serious transmission issues with my presentation that made the video just yucky. TOTAL BUMMERS, but now TOTAL JOY! Thanks to the hard working folks in the Education Department (who should have been taking today off) you can SEE the video through December 12th. After that, like Cinderella’s pumpkin, it disappears. To access it, follow the following steps:

Registered participants ONLY can follow these instructions – 

—Go to My Schedule (be sure to select the Saturday, Dec 5 schedule)

—Click on the class – 320 Machine Quilting Forum II

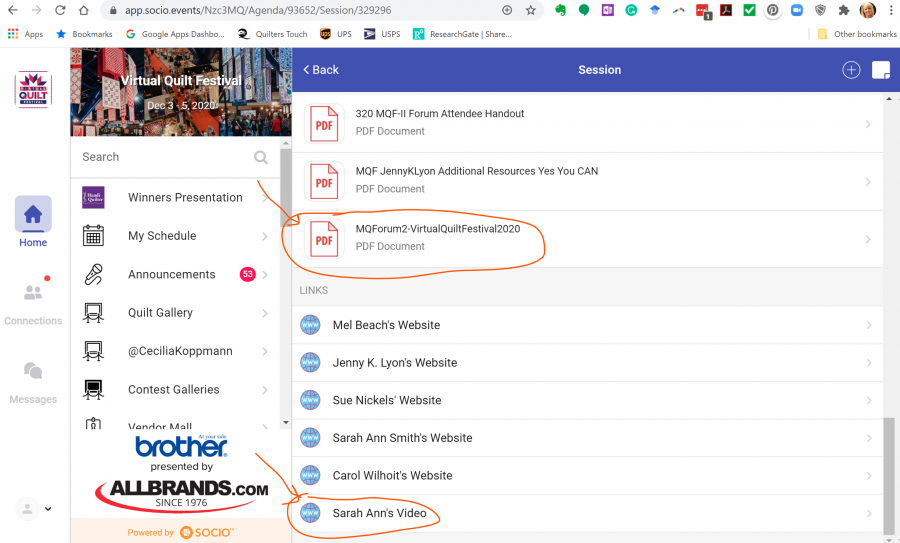
—A new page will open with the description of the class, recording link, faculty links, and attachments

—Scroll down to the bottom of the page to find the PDF attachment and the link to “Sarah Ann’s Video” to watch the YouTube video

Here are some screen shots. They drew attention to the video by adding a text message in RED font in the class description.

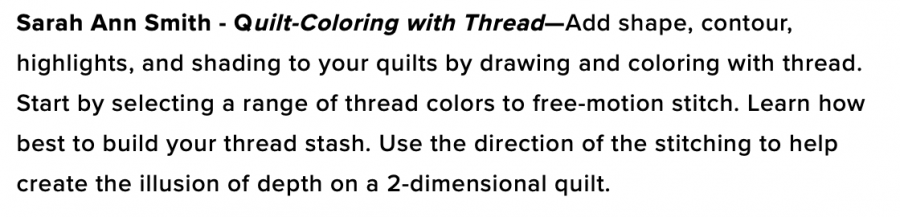
Then this will open up on the next page. My friend Jenny K. Lyon prepared a PDF with links to her stuff, I prepared one for my stuff and the questions I received, and I was able to upload my presentation as an “Unlisted” video on my YouTube channel. The only way to access it is through your “My Schedule” portal. I promise, the video quality is VASTLY better!

Special thanks to Suzanne Hyland, head of the Education Department, who checked email on Sunday when she should have been taking a nap to recover from the frenetic pace she kept up for weeks to direct and pull off this debut event. MASSIVE THANKS to everyone at Quilts Inc. and, for me particularly, in the Education Department. I took three classes, attended three lectures, and would do it again–both present and attend–in a nano-second! Please let Quilts, Inc., the people who bring you International Quilt Festival Houston (and more) that you want MORE!

Teaching at Virtual Quilt Festival, the IQF answer to COVID!!!!

Wednesday, November 25th, 2020

I’ll be one of the five panelists in the Machine Quilting Forum on Saturday, December 5. You can still sign up! Here’s a link to the “Saturday” page. If we weren’t able to go to Houston this year, this is a spiffy alternative! There is a link at the top of the page to enroll. The price for forums, lectures and classes is astonishingly reasonable…. I’ve signed up to be a student too!

I do believe Quilts Inc, the folks that bring you the International Quilt Festival every year (except this one due to COVID) have come up with a better version of the online quilt festival: forums, lectures and Master Classes. The longest are 2 hours, a length of time that gives you TONS of content at a reasonable price in a time length that is manageable online.

I’m actually taking FIVE things: three lectures and two classes. Even better, TWO of them are at the same time … but it’s not a conflict! You don’t even need Hermione Granger’s Time Turner (Harry Potter geek reference), because most of the events are recorded and available for one week! So I can take a class and a lecture that overlap, yet be able to watch BOTH! I’m so stoked… things I’ve never been able to do because in Houston there are classes to teach all day and exhibits and people to see during each and every break.

Anyway, I’d love for you to join me for the Machine Quilting Forum–I’m also excited because for the first time I’ll be able to hear the OTHER teachers just like all the participants! See you in “Virtual Houston”!

Learn with Sarah, online and in person

Wednesday, September 2nd, 2020

My video about my online and in person teaching debuted this evening at Global Quilt Connection, an amazing resource that allows you to meet the teachers. I hope you’ll enjoy it and think of having me teach for you, online and in person. There are five sessions, and the day following each of the five, ALL of the presentations are available to view at your convenience. Find the links here.

Full details on my workshops are available here, and a sample contract with price info is there too.

I am in awe of the teachers who presented tonight at Global Quilt Connection. I’m thrilled that so many teachers have moved online because now *I* can take classes that have heretofore not been available to me. Hope you enjoy my video! Do write if you are interested… I can customize classes, break a full day into to half-day sessions and more.

Screen Printed Garments!

Monday, July 20th, 2020
My new Queen Anne’s Lace top. I screen printed my custom designs onto Cotton Couture solids (courtesy of Michael Miller Fabrics), this color is “Luna.”
In the summer of 2020 I saw Print Pattern Sew by Jen Hewitt somewhere online and ordered it immediately. It’s FAB! is available many places including Amazon . DO check out Jen’s site, here. Of course it took until April to start playing and until now to post. For the workshop and this post I wanted to use a pattern currently available that is similar to two vintage (circa mid 1980s) patterns that I still make over and over because I love them so much.
There are LOTS of great photos and step outs in the book.
Table of Contents
Since my favorite patterns are decades out of print, I selected this one for this project in case anyone wants to buy the book for further instruction. It comes with the pattern included.

I’ve been developing some new classes using paint on cloth and I thought as part of being a Michael Miller Brand Ambassador and a Janome Artisan what better thing to do than combine all these things I love in one! Some of you may remember this post from when I did a DIY improvement to my hall sconces; one of the lampshades was Queen Anne’s Lace screen printed on linen. I used the thermofax screens I made for that again for this top.

Step one is testing various mixes of color to get just what I wanted. You can see a colorful little plastic “flat not-a-spoon”–that is a make-up paddle, available in packages on Amazon for about $5 for 100 (more than a lifetime supply). They are great for getting into small paint jars. I used to use some Gelato spoons a shop gave me, but the flat paddles are better for scraping off (and not wasting) excess paint).
The paints I used are ProFAB Transparent paints from ProChemical and Dye, but most textile paints will work. These have a particularly soft hand to them. Starter kits are a great and cost-effective way to try them out (I have a pair of kits available here; also available in just one or the other types of paint).
LABEL what you use, what base paints are in the mix. I can promise you, with three yellows and three blues in 15 minutes I will forget which one is which! I keep these test-scraps for future reference.
I used freezer paper to make stencils for the stems. I could have made a thermofax screen, but the mesh is expensive and Freezer Paper is cheap.
I used a thermofax screen of grasses I had used for my lampshade for the bottom of the garment. I cut oversized pike for the front, back, and what I thought would be a trim for the sleeves. I later decided to leave the cuff/bottom of the sleeves plain.
I used the grass screen to decorate the “facing” piece. Instead of putting the facing on the inside of the garment, I turned it to the outside as a decorative element.
Ooops! Sometimes goobers happen. Any unwanted random little smudges of paint are quickly wet and scraped away. Or you just live with them.
The printing was done in four steps: 1. Print stems over freezer paper stencil and let dry. I ended up adding another flower later on, so had to add another stem as seen here. 2. Print grass with thermofax screen. Let dry. 3. The thermofax screen for the Queen Anne’s Lace was made from my pen and ink drawing. My lampshades were all green on white linen. For this blouse, I wanted the flowers to be white, so I **carefully** screen printed the stems through the screen (seen above left) and let them dry. 4. Then I went back in with a creamy white (mixed from white with a dab of yellow) to do the flowers. This is the point where you pray you don’t mess up!
When mixing light colors, start with a larger amount of the lightest color and put in just the TINY-est touch of color…it takes surprisingly little yellow to turn that glob of white into a softer white or barely-green. After purchasing the multicolored make up paddles, I discovered these square cornered white ones. They are great for applying small amounts of paint carefully through a thermofax screen and for getting into the bottom edges of the ProChem jars.
Once I had the front and back printed, I pinned them together and tried them on. The grasses on the bottom looked sparse, wimpy. And I wanted the shirt a bit shorter. So I went back in with the same screen, offsetting it so the same shapes weren’t repeated too closely, and did a second layer higher up. I didn’t care if the printing didn’t follow all the way up what would become the hem on the inside. And that way I could just use the same screen instead of making another one.
For the “facing” on the outside, I cut the outer edge of the interfacing very carefully so I could iron the seam allowance over it and create a lovely, smooth outside curve.
If you are new to garment making, be SURE to clip your curves well so that the facing turns and lies nice and flat.
My favorite way to get a perfect edge stitch is old school: using the zipper foot!
Place the edge of the zipper foot against the edge where you want to stitch. In this case I need to use the left side of the foot. Move the needle so that it drops a few threads away from the folded edge. I use a fingernail or thumbnail as an edge guide and don’t sew too quickly. There are indeed “edge feet” for this purpose, but I find that the blades can bend or not be as precise as I want them to be (not to mention visibility isn’t as good as doing it this way). I’d already completed the top when I took this shot, so you can see how perfectly my Janome M7 stitched!
For the hem, I decided I would use a blind hem stitch instead of hand-sewing it. The blind hem stitch I selected is for woven cloth, with straight stitches in between the zigs (#18…on the yellow part of the screen you can see that stitch 19 is a blind hem stitch for knits). Over on the white, it shows the settings and to use the G foot which I am holding up It has an “ice skating blade” (i.e. guide) in the middle.
You can see the metal guide in the center of the foot. As above, I set up this photo after the garment is complete, which is why you see stitching at th bottom of the image. To prepare for blind hem stitching, you fold the hem up with the raw edge pressed to it will be inside the hem. You then fold back the outside of the garment so that the soon-to-be-hidden part of the hem is barely visible, about 1/8″. The body of the garment folds away to the left. The straight stitching on the hem is done with the needle in the curvy part of the “blade” where it stitches on the inside of the hem. The flat part of the blade snugs up against the folded back fabric, and the “Zig” part of the stitch takes a little nibble of the outside of the garment.
My thread matched the Luna Cotton Couture perfectly. It is challenging to see those tiny hem stitches on the right side of the garment.
Back view
Side view–I love how the design goes all the way around. I hope you’ve enjoyed this mini tutorial! Thanks again to Janome for their 16+ years of sponsorship and to Michael Miller for having me as a Brand Ambassador this year!

August online class offerings!

Friday, July 17th, 2020
Sign up here!

I’m thrilled to share that I will be teaching online again in mid August, and for the first time ever you can take my most popular class, Collage the Garden, LIVE ONLINE! Sign ups are open NOW and are here. One of the best things is you will be home, so you can get whatever it is you wish you had brought to class, because you are at home and sewing on your machine!

I’ll be offering:
Wednesday, August 12, 2020: Collage the Garden: From Photo to Flower (6 hours) from 10-4 Eastern daylight (there will be a lunch break)
Thursday, August 13, 2020: Mastering Metallics (3 hours) from 2-5 Eastern daylight. Kit is optional.
Saturday, August 15, 2020: Easy-Peasy Inside-Out Bags and spin off projects from 2-5 Eastern daylight.

You can find complete class descriptions and PDF supply lists on my Workshops page (classes are listed in alphabetical order). When available, there are also hotlines to blogposts so you can see previous student work. If you have ANY questions, please don’t hesitate to write to me! I’ve done a recap of each of the workshops below as well.

The two images are this orange lily which grows wild along the roadsides in Maine this time of year and the following small quilt.
Pink water lily

Collage the Garden is all about my process. I teach you how to interpret a photo in class, then you will know how to use YOUR photos to create your own original artwork. We talk about selecting a good image, selecting fabric, fusing, tricks for working with cloth and, time permitting, introduce how to quilt (this is a who second follow-on workshop).

Mastering Metallics half day workshop will teach students to use metallic in both the needle and the bobbin. The workshop will debut at the Mancuso Online QuiltFest in August!, and is the half-day version of my Tame Fussy Fiddly Threads class. A kit with my original snowflake fabric, a 12×42 strip to make a table runner (custom printed at Spoonflower) and 2/3 yard coordinating blue for backing and binding is available when you sign up–only 15 kits available. BUT you don’t have to do this exact project if you prefer to do your own thing. (PS–if I have leftover kits they will be for sale on my website after August 15, or I’m making placemats to match my table runner!)
Pennants in the wind is a new class sample. You can paint as I did, piece a similar sample (I’m thinking of doing a landscape…same idea, rotate 90 degrees, with one line of trees), or use solid or semi-solid and draw shapes and quilting zones on your cloth to practice and learn.
Easy Peasy Inside Out bags is one of my favorite classes to teach…in a half day in person class students go home with a nearly-finished bag or even one or two finished bags depending on their experience. These are SO FAST and easy, and there are a ton of variations.
I’ve used this notebook cover for years and just love it!
You can customize many ways, and you’ll LOVE my rick for perfect pockets for pens and pencils. I’m going to make myself a double-pointed knitting needle holder using this process between now and the workshop. You can adapt the techniques to all sorts of goodies!

I’d love to have you in one of my workshops at the Mancuso Online Quiltfest here. If something you want to take isn’t offered, let me know what and I’d be happy to schedule an online class offered directly from me later in the year.