email Youtube

Home
Galleries
Blog
Workshops & Calendar
Store
Resources
About
Contact

Archive for the ‘Machine Quilting’ Category

Birch Pond Class

Monday, March 16th, 2009

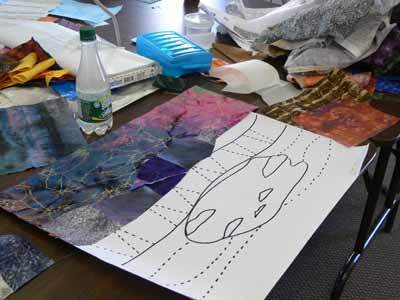
200903blogbirchtreesclass001

Today’s post is about a new pattern I’ve designed to help folks who want to start art quilting or for folks who are experienced art quilters but want an appealing yet fairly easy pattern.  The class to teach Birch Pond Seasons (when I get winter and spring made, I’ll have four views of the same pond across the four seasons) for the first time went swimmingly well as you’ll see by the photos!  The pattern itself will be available in about two months (guessing…have to send it away for printing the large sheet this time).

As you might guess by that rather extended absence from the blog, I’ve been busy! Between the first draft of my next article for Machine Quilting Unlimited magazine, getting together the stuff for taxes (not only ours but mom’s, too…bleah), attepting to get some sleep, going to wrestling meets, the usual family and household stuff, making a new small quilt for the article, and teaching, I’ve been rather behind the curve.  A while back, I got to teach my Birch Pond landscapes pattern for the first time at Maine-ly Sewing, and it was a gas!  I will definitely be polishing up the instructions, sending the pattern off for printing (it’s oversized, and copies at Staples are about 6 times more expensive than shipping it away and getting it professionally printed).

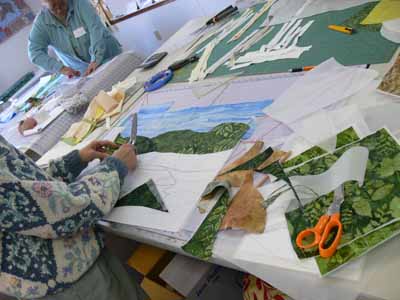
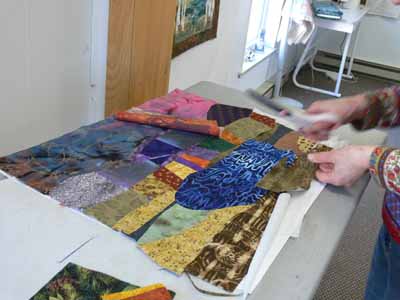
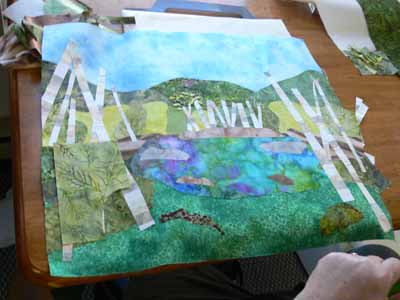
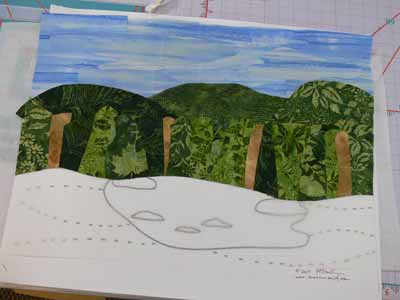
After showing the students how to fuse up fabric (both large chunks and smaller bits) they began composing their quilts.  The easiest way proved to be setting out the large pattern (the piece of paper is about 18×22), placing parchment paper on top of the pattern, then the pre-fused fabrics on top of the parchment.  Here you can see the pattern through the parchment on the lower half of this quilt.  This student did a fabulous job with her sky; she had one piece of fabric that was perfect, but WAY too narrow, so we cut, spliced and overlapped for it to look like a summer’s cloud-dotted sky.

Another student chose a dramatic lightning-streaked sky and dark mountains for her quilt:

200903blogbirchtreesclass009

200903blogbirchtreesclass012

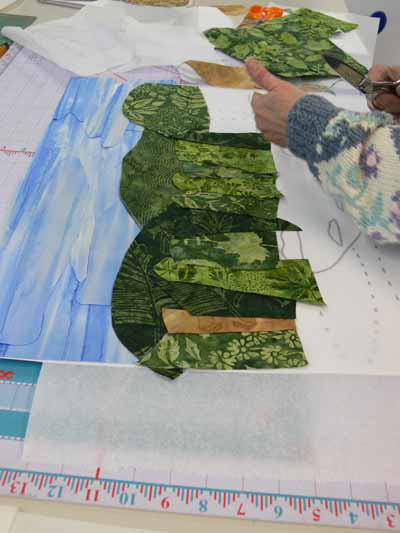
Working from farthest away (sky) to the front (foreground), we began with the sky, then the distant hills, then what I have called “the woods behind the pond.” You could cut a single swath of fabric to go across the entire quilt, but I think by cutting chunks and “piecing/fusing” a band, you get greater depth in the piece:

Creating the woods behind the pond

Creating the woods behind the pond

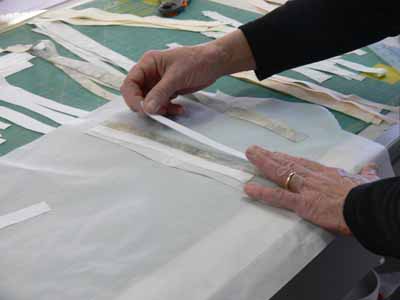
To make the tree trunks, we created “new fabric” by cutting strips of white, cream and gray, then cross-cutting into tree trunks:

Using strips to create new "fabric"

Using strips to create new "fabric"

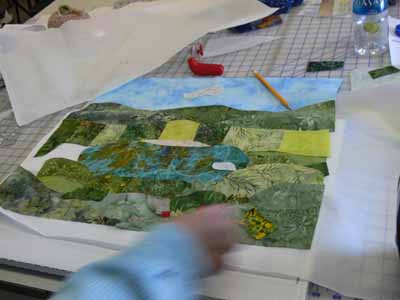
One student decided to go for wild and funky colors… I’d love to see how this one turns out after she adds the birch trees, foreground plants and quilting.  Here is her quilt at the adding the pond stage:

Adding the foreground in the wild and funky one

Adding the foreground in the wild and funky one

After the pond, we added the foreground and rocks:

Adding the foreground and rocks

Adding the foreground and rocks

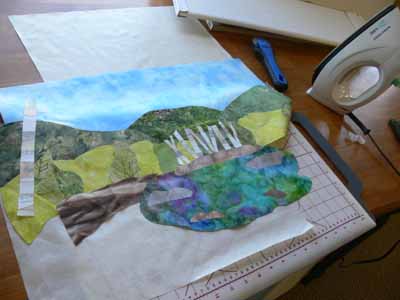
Or, you could add the birch trees behind the pond first:

Adding the birch trees behind the pond

Adding the birch trees behind the pond

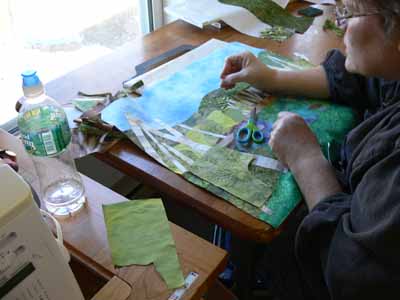
Two sisters took the class together, and decided to combine forces.  Rather than both of them working separately, they decided by late morning to create one quilt together and get it to nearly-done stage, then make another at home.  Here is one of them “building” the scene and adding the birch tree trunks first:

Building the scene

Building the scene

Finally, a nearly complete top (minus borders):

Birch trunks added...next, foliage!

Birch trunks added...next, foliage!

At the end of the day we discussed border selection, quilting designs (the ones on my quilts, which you can see here, are designed to be do-able by newbie machine quilters), and  using a facing to finish the edges.

And thanks to one student who went home and finished up, a finished student quilt…hoooray!  I REALLY like how she added red flowers going back to the sides of the pond…really helps lead the eye to the pond and the birch trees behind it:

Finished student quilt (thanks Martha!)

Finished student quilt (thanks Martha!)

Birch Pond Landscapes class

Saturday, February 14th, 2009

After years of hinting to me that her customers would love a landscape class, I finally agreed to teach one at Maine-ly Sewing (www.mainelysewing.com) in Nobleboro, Maine.  (Contact the store to sign up, etc.)   The class will be Saturday, Feb. 28th, from 10-4 !

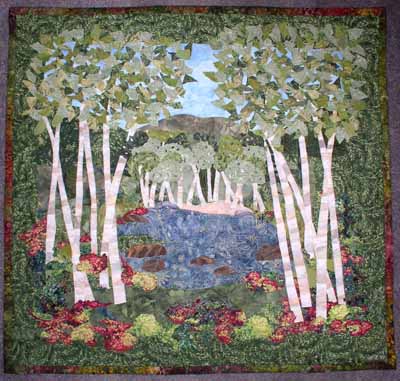
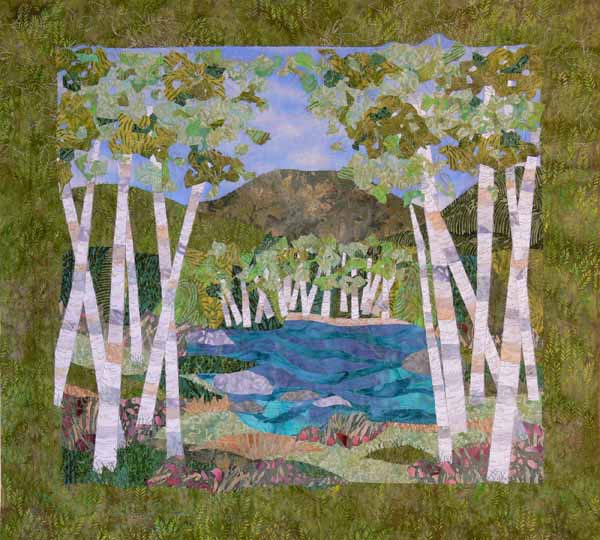
Birch Pond, Summer

Birch Pond, Summer

As usual, I figured why make one quilt when you can make two…. So I made the fusible applique quilt two ways, autumn and summer.  I am so pleased with the results that I think I’ll do the four seasons, write it up as a pattern and sell it…let me know what you think?   The pattern is actually quite easy, finishes about 22×25 inches (depending on your border and your final composition of the scene…there is definitely fudge-room here!).  PS–photos are clickable for a slightly larger view.

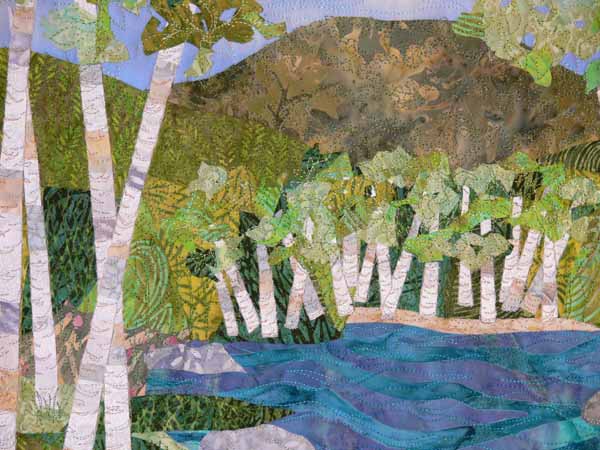
I did easy quilting so that beginning quilters and machine quilters won’t feel intimidated…I PROMISE, it really is easy to do the quilting on these patterns even when you are new to it!  Here is a detail photo:

Birch Pond, Summer, Detail

Birch Pond, Summer, Detail

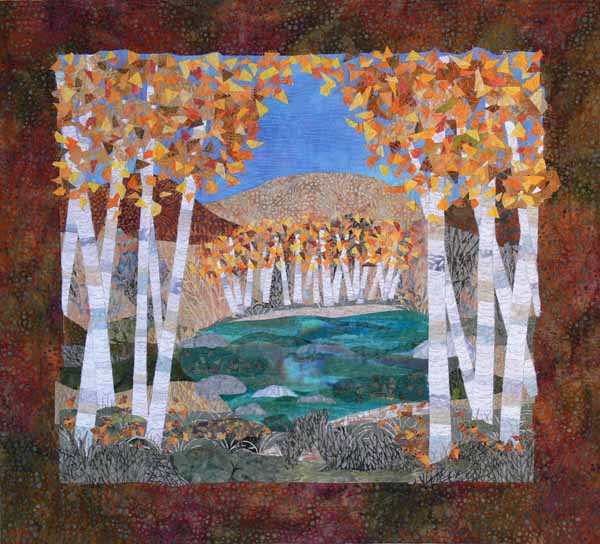
Initially I did the autumn version… I just love the glorious colors of Maine in Fall.  However, given that Fall is behind us, and it has been winter for quite a while, Marge and I decided to use the Summer version (hope is eternal!  It WILL come again!) to advertise the class.  But, I wanted students to see that they can make the quilt in many ways.  Frankly, I kinda think it would be fun to do it another time in totally wild colors, like plum and turquoise and mango and lime…. wouldn’t that be a hoot?  Anyway, here is a more realistic, autumnal version:

birchpondclass004

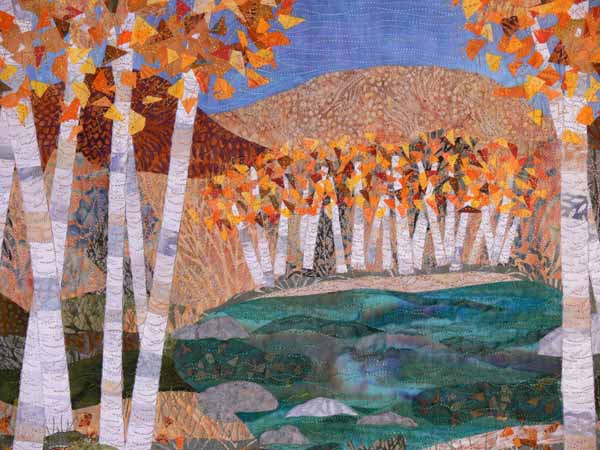
And a detail of the Autumn version; note that I did the leaf canopy two different ways… in summer I used the twist-and-chop way to cut chunks, for autumn I used the slice it into confetti method!

Hope you like the quilts, and hope to see some of you in class!

Birch Pond, Autumn, detail

Birch Pond, Autumn, detail

Teaching in Houston!!!

Tuesday, February 10th, 2009

A large envelope arrived from the International Quilt Festival folks in Houston yesterday; despite its size, I figured it had to be a sorry, no thanks.  WRONG!   I am teaching in Houston this coming Fall!!!!!!!!  I am elated beyond belief… it has been quite the effort to float down to be able to reach the keyboard LOL!

After I met yet another deadline I checked to see when applications were due…it was in six days!  So I quickly put together everything (I had last year asked on my blog for letters of recommendation and received several…thanks Betty, Jan, Mathea and Rebecca for your help!) and overnighted it ($16 well spent!) to Houston to make the deadline for certain.  Well, yesterday I received the results, and will have four days of teaching (I wanted 3 or 4):

Monday, October 12,
Fine Finishes (bindings and edge finishes)

Tuesday, October 13,
Machine Applique Three Ways
(the Blue Gingko pattern)

Wednesday, October 14
Tame Fiddly, Fussy Threads for Machine Quilting
(the More Machine Quilting class)

Thursday, October 15
Chunk and Jigsaw Fusible Applique–
total fun!  fabric postcards plus

    The classes will be in the Janome machine classroom (yeah!) except for the Wednesday class, which will be in the BabyLock classroom…better go find a BabyLock dealer and see how their machines are set up!

    I’ve set it up to do small kits for the classes, as that makes it a lot easier for both the students and teachers.  They get what they need that is unusual (they are asked to b ring their own fabric, batting, etc….usual items) like crisp interfacing, water soluble paper, fancy threads, that sort of thing.

    So, now I’m going to go eat breakfast (Irish oats and a banana) and float again!  THEN, after I finish a project to submit for consideration for the 2009 Quilting Arts Gifts issue (comes out before the holidays) and get that mailed off, I need to start getting my set-up done to use the video camera and digital projector in my teaching.  I actually signed up for a Jan Krentz workshop this may tho I pretty much never do traditional piecing any more just so I can watch how she teaches.  She’s coming to Maine in May at the invitation of the Pine Tree Quilt Guild, and I can’t wait!

    Taking the Tension out of Tension, MQU Winter 2008

    Tuesday, December 30th, 2008

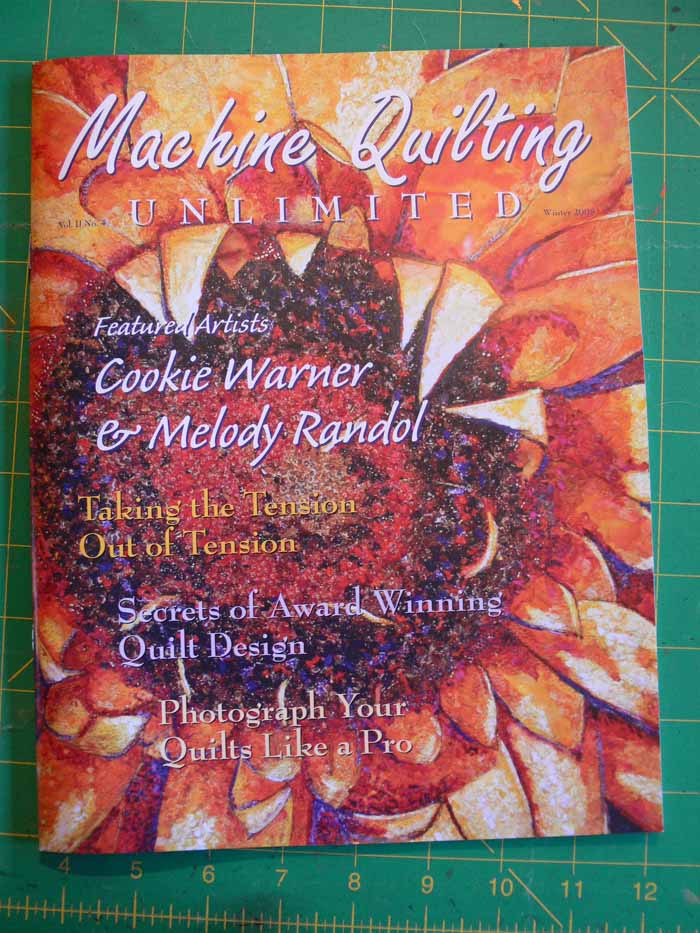
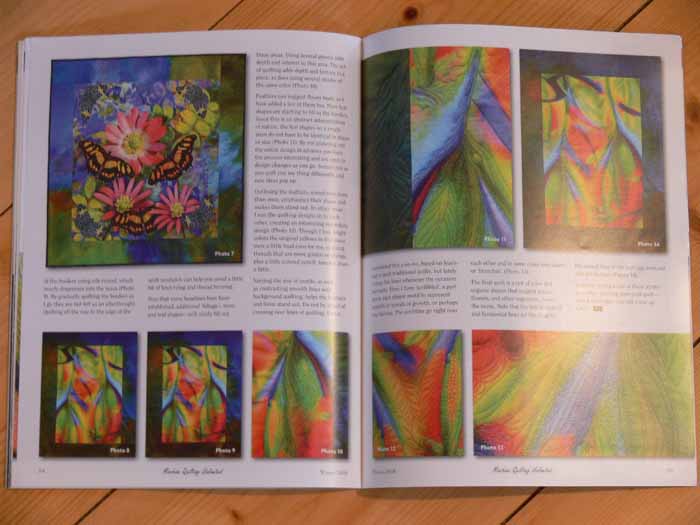
    My second article for Machine Quilting Unlimited magazine is now out, and I’m really thrilled that I’ve been able to help folks.  Rayna Gillman (blog and website) was so kind in sharing on the QuiltArt list that I’d helped solve a tension problem she’d been having, and Gloria (my /designer and art quilter extraordinaire) actually said she made a copy to tuck into her sewing machine manual…Wowie Zowie!  Here’s the cover of this issue:

    MQU Winter 08 cover

    My article made the cover:  Taking the Tension out of Tension (I can’t take credit for the title, but I love it! thanks Kit and Vicki)

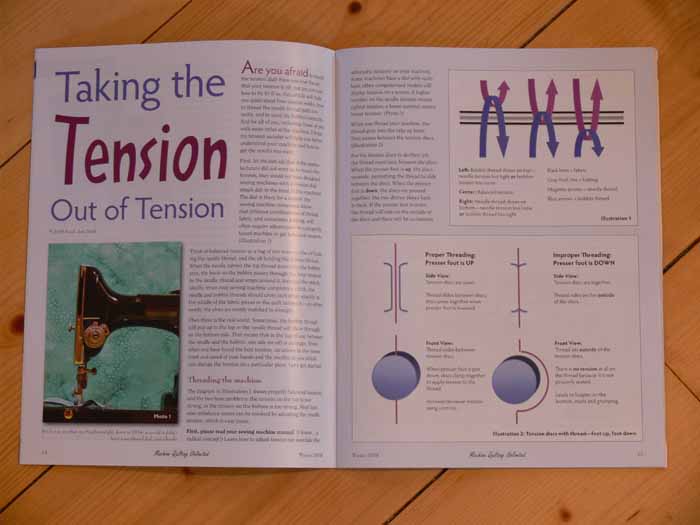
    Here’s the opening pages (clickable for a larger view):

    Beginning of article on tension

    There were a number of good articles, including two on Colorado art quilters, both of whom were awesome… Here is the opening to one of those two articles:

    *****oooops…I can’t share the pictures of these articles…sorry….. due to copyright laws

    Oh how those quilts make me want to get into the studio and play and create!   There are lots more pics in the magazine (hint hint).

    And Diane Doran from the QuiltArt list (among other places) did a great article on design, specifically how she develops a design.  I really liked the sequence of photos in her article showing how she begins with a digital image, then builds on it one step at a time:

    Diane Doran

    *****Photo included with Diane Doran’s permission

    For subscription information go to www.mqumag.com.

    I just finished the draft of my next article for them, on the use of contrast in line.  I’m going to do a series of articles on how various elements and principles of design apply to machine quilting.   I’m on a mission I think to convince folks that art isn’t impossible to learn, and that it’s really actually easy and fun to learn and apply.   So the article for the next issue talks summarizes the elements and principles, then talks about line (since of course machine quilting is about creating lines) and how contrast helps lines stand out (or not).  What fun… getting to write about quilting!  Now…kids on vacation, time for quilting evaporated…ditto for time for blogging!  Talk to ya later!

    Buoys 1 and 2… new work!

    Monday, November 24th, 2008

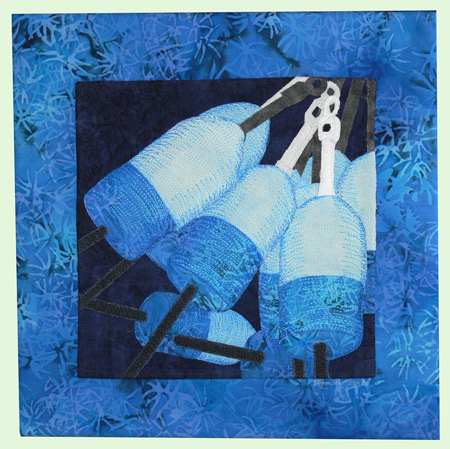
    Amazing… I actually got something done!  The quilted portions of these two pieces, Buoys 1 (Blue) and Buoys 2 (Pink-purple) were made for my local quilt chapter’s 10×10″ challenge.  The challenge was to make a piece based on guild-member Jan P’s husband’s photo.  Dwight’s photo is called Ropes and Buoys, and it was a delight to see the wide range of pieces.  (To see the challenge pieces as displayed at Maine Quilts this past July, click here then scroll nearly halfway down.)  I recently mounted my pieces on batik stretched over stretcher bars (with a base support and batting to make it look good).  They are for sale… directly from me until Wednesday morning then via Ducktrap Bay Trading Company, the local gallery that carries my work.

    Here is the Blue Buoys:

    Blue Buoys full

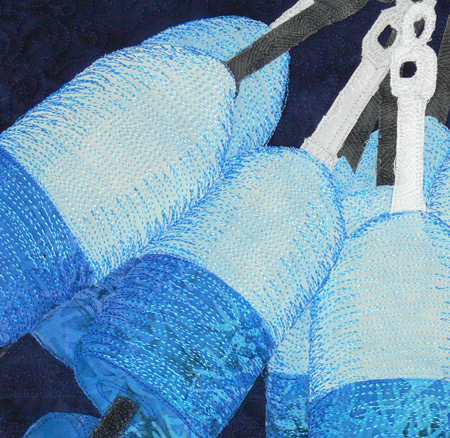
    and a detail shot which shows the intense quilting and shading with thread:

    Blue Buoys detail

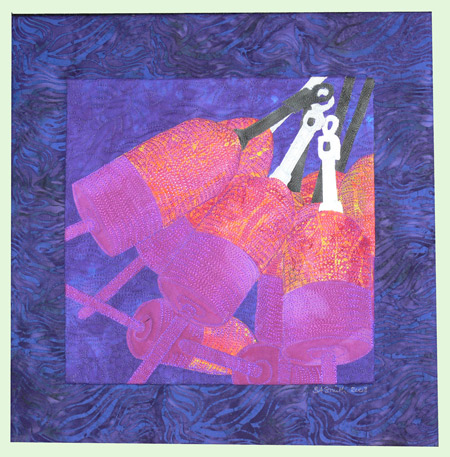
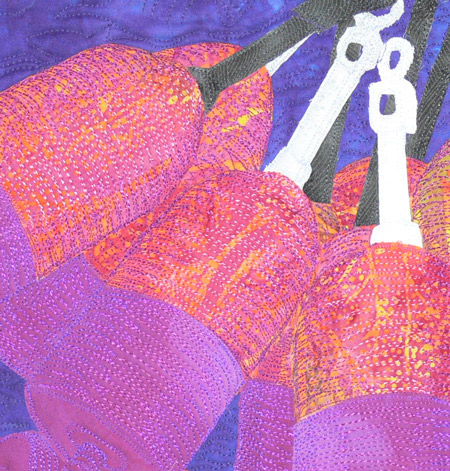
    I wanted to try doing the buoys in totally-not-realistic colors…the ones in the photo were mostly yellow and orange.  While blue and light blue might be a real combination, I can’t imagine I’d ever see any real buoys that are pink and purple (tho there are women lobstermen (???   that sounds weird, but I am pretty sure that they don’t call themselves lobsterers, maybe lobster fishermen, but that has the guy thing too… ???), but decided to try a really wild color combination to play with value and hue.  Here is Buoys #2 (pink – purple):

    Buoys #2 (pink-purple)

    And the detail of the pink one:

    Buoys #2 (pink-purple) detail

    Each piece is 10×10 inches mounted on a 16×16 inch frame (one inch deep); the background fabric  wraps around to the back which is clean finished and ready to hang.  The price for each is $250 plus shipping (if you order from me before Weds., shipping is included, otherwise it will be whatever the gallery charges).